Improve your Azure Multi-Factor Authentication Notifications
Table of Contents
Recently, Uber appeared to be hacked in what is called a MFA Fatigue attack. The attacker continuously sent MFA requests to an end user hoping they would accidentally approve one of them. Microsoft has several items to help prevent MFA fatigue attacks that you can configure and enable for your end users. Traditionally, MFA notifications are push notifications where a user can either accept or deny the request. Some improvements to this have been multiple number options where the end user must select one of four numbers that is presented on the screen they are logging into. The problem with this is that leaves a 1 in 4 chance an accidental selection may result in unauthorized access.
Configure Fraud Alerts
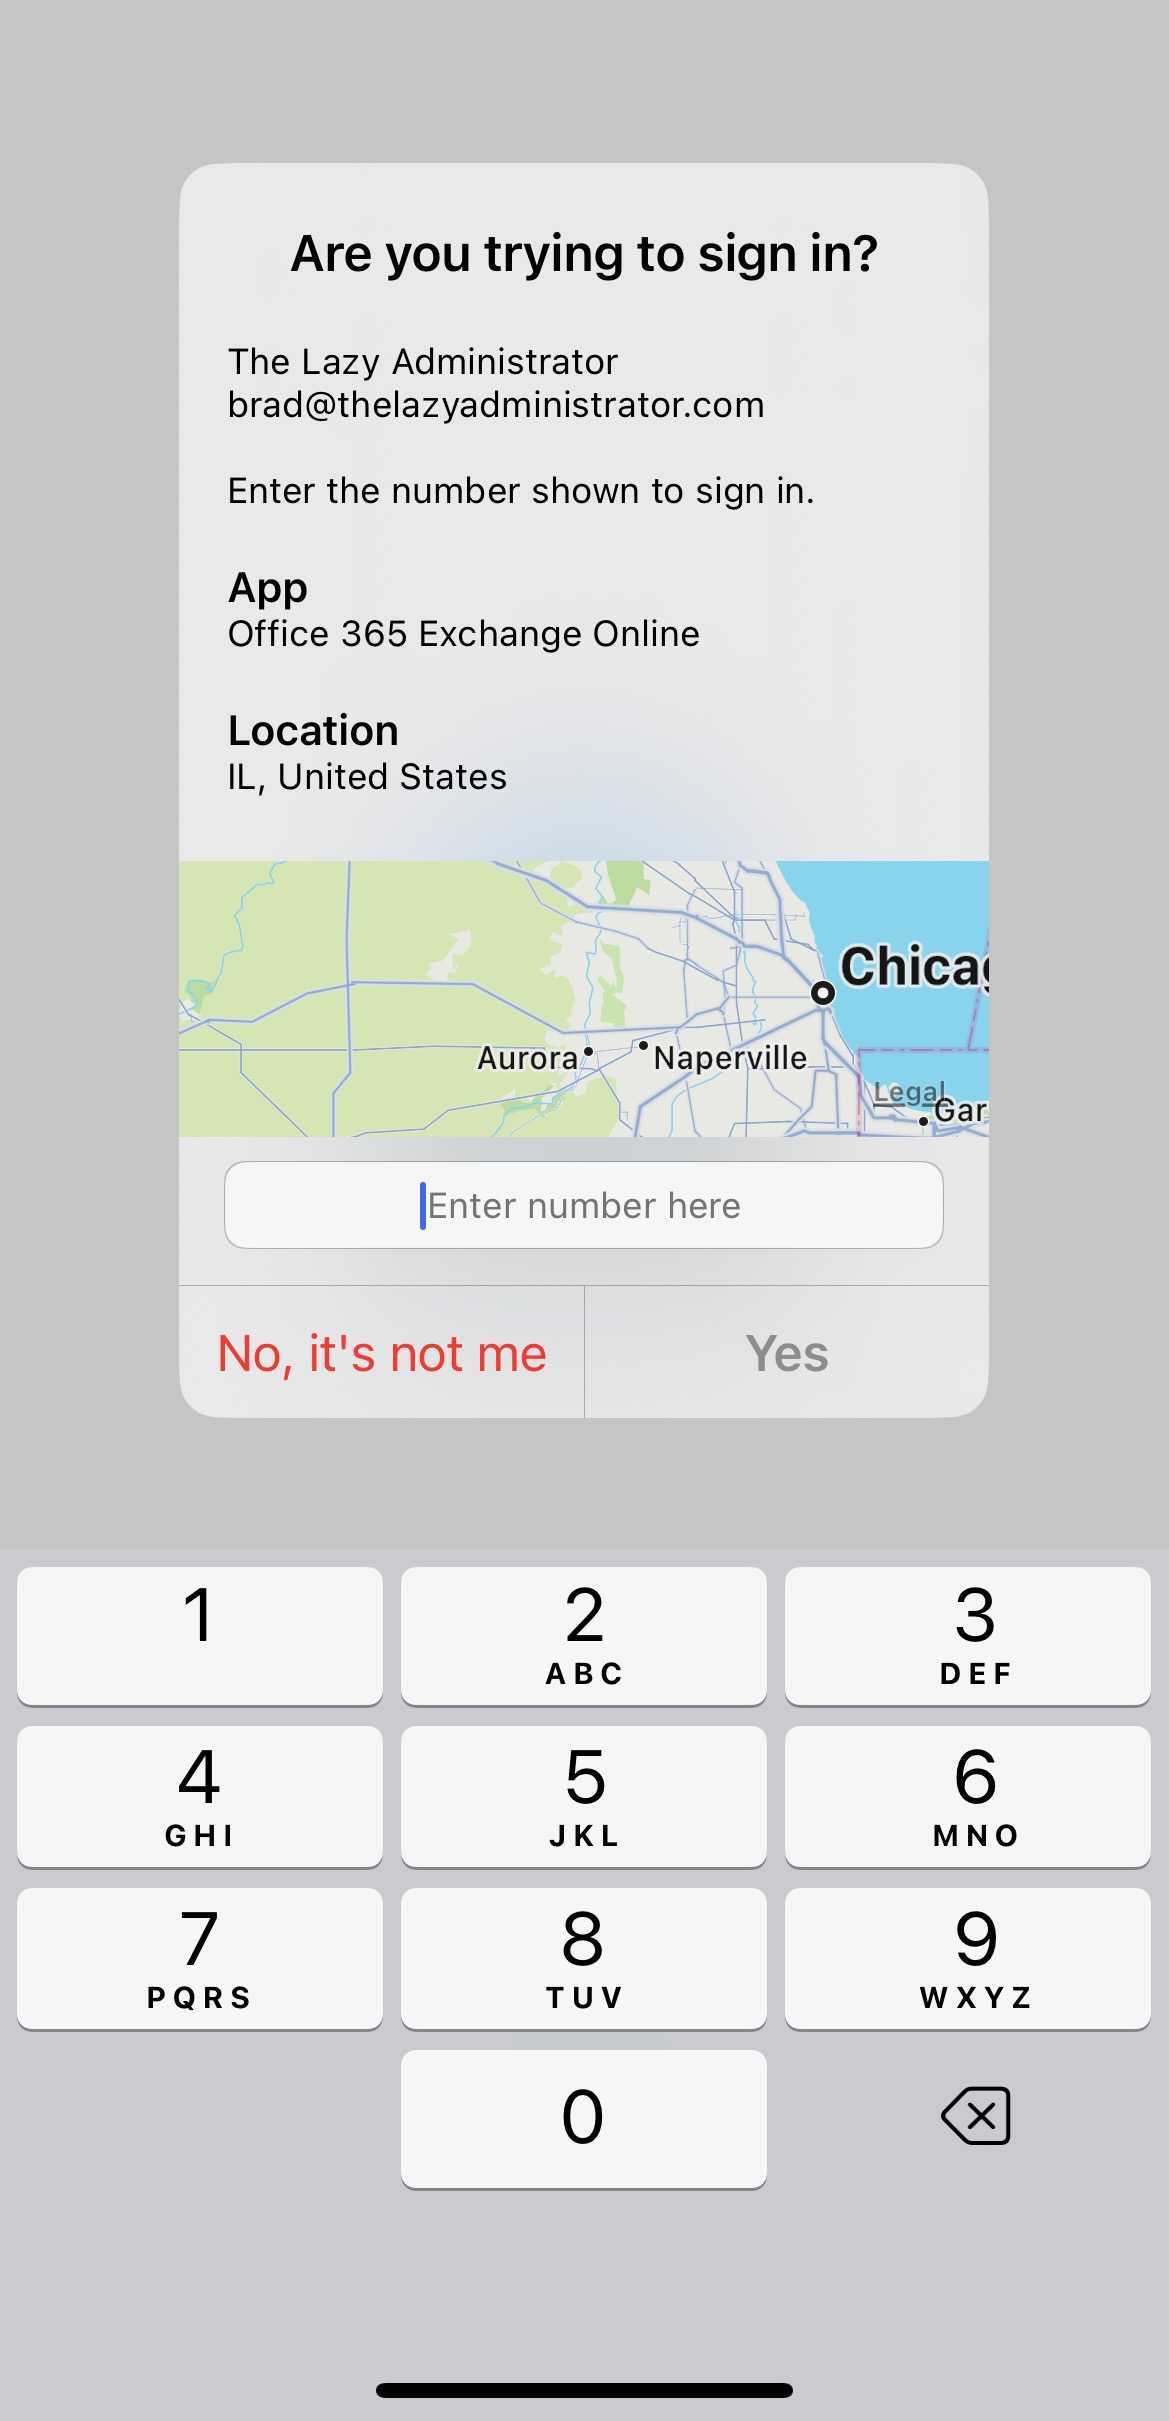
Fraud Alerts allow your users to report fraud if they receive a two-step verification request that they didn’t initiate and automatically block their account from sign-on.
Go to the Azure Portal and launch Azure Active Directory > Security > Multi-Factor Authentication > Fraud Alert. Here you can enable Fraud Alerts, and configure if users will automatically be blocked from signing in if they submit an alert. If a user is blocked, you can unlock them in the Block/unblock users.
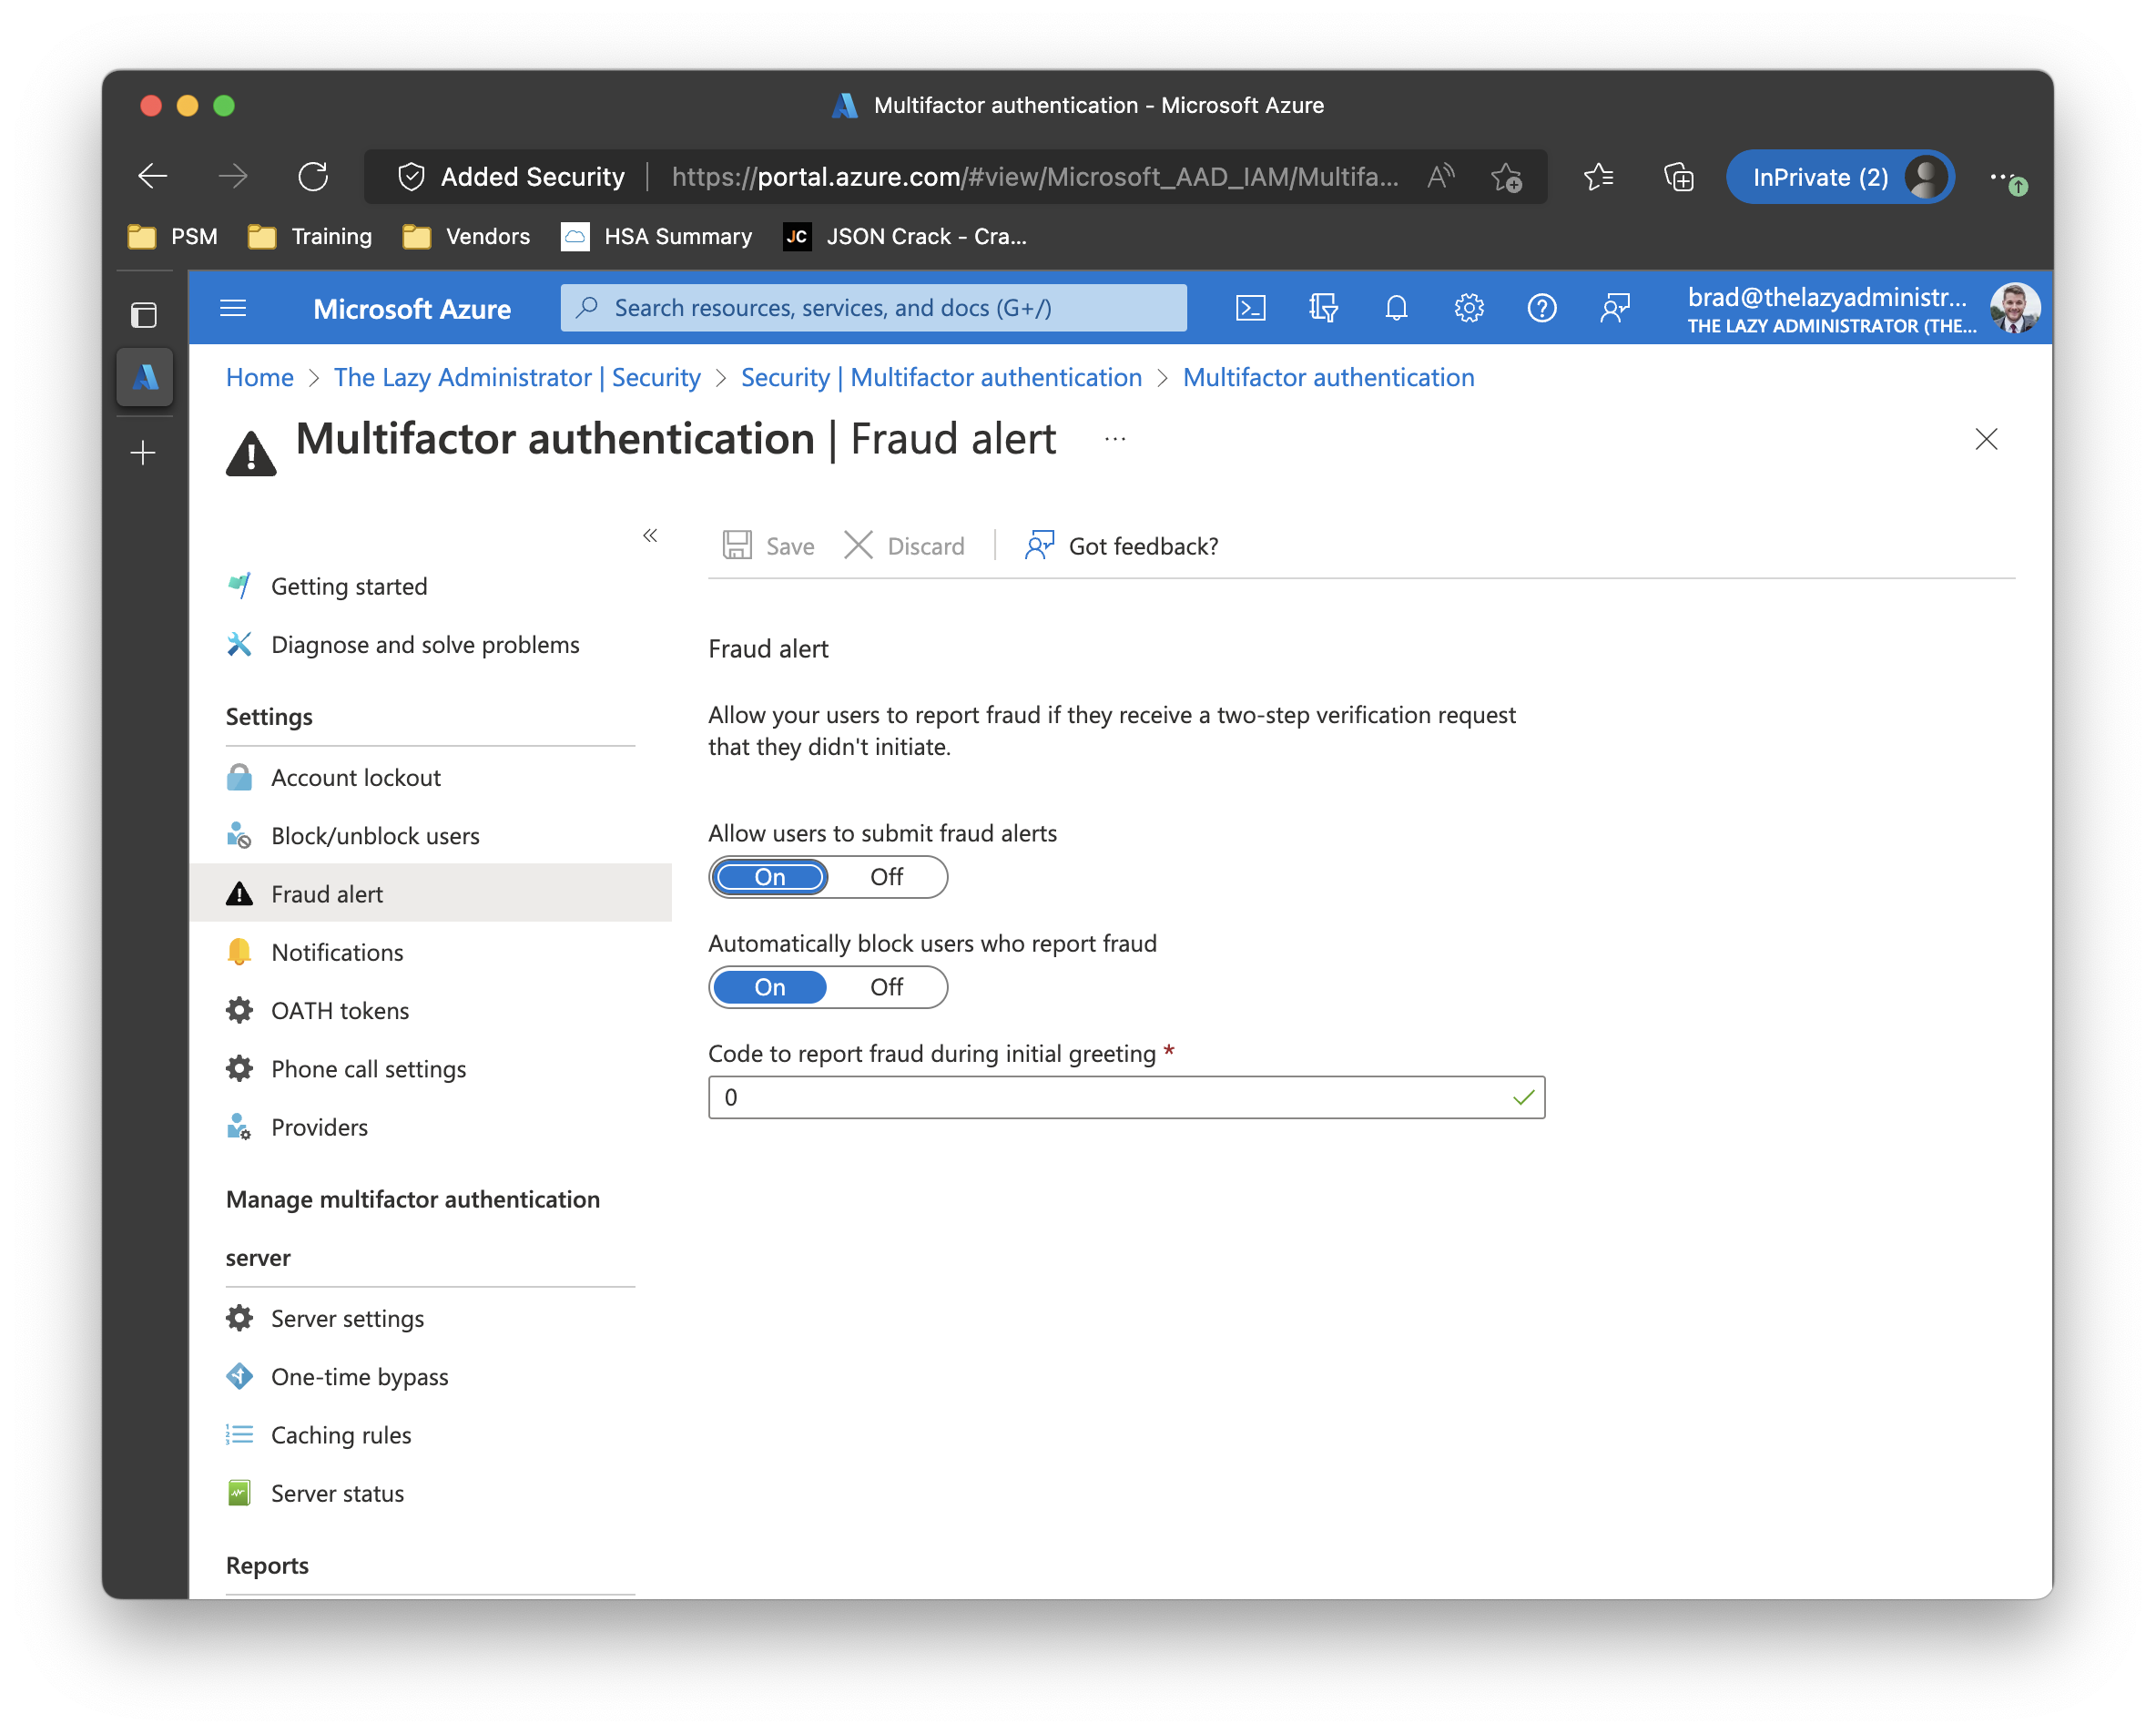
When end-users submit fraud alerts, they will be notified about the account lockout.
Require number matching for push notifications
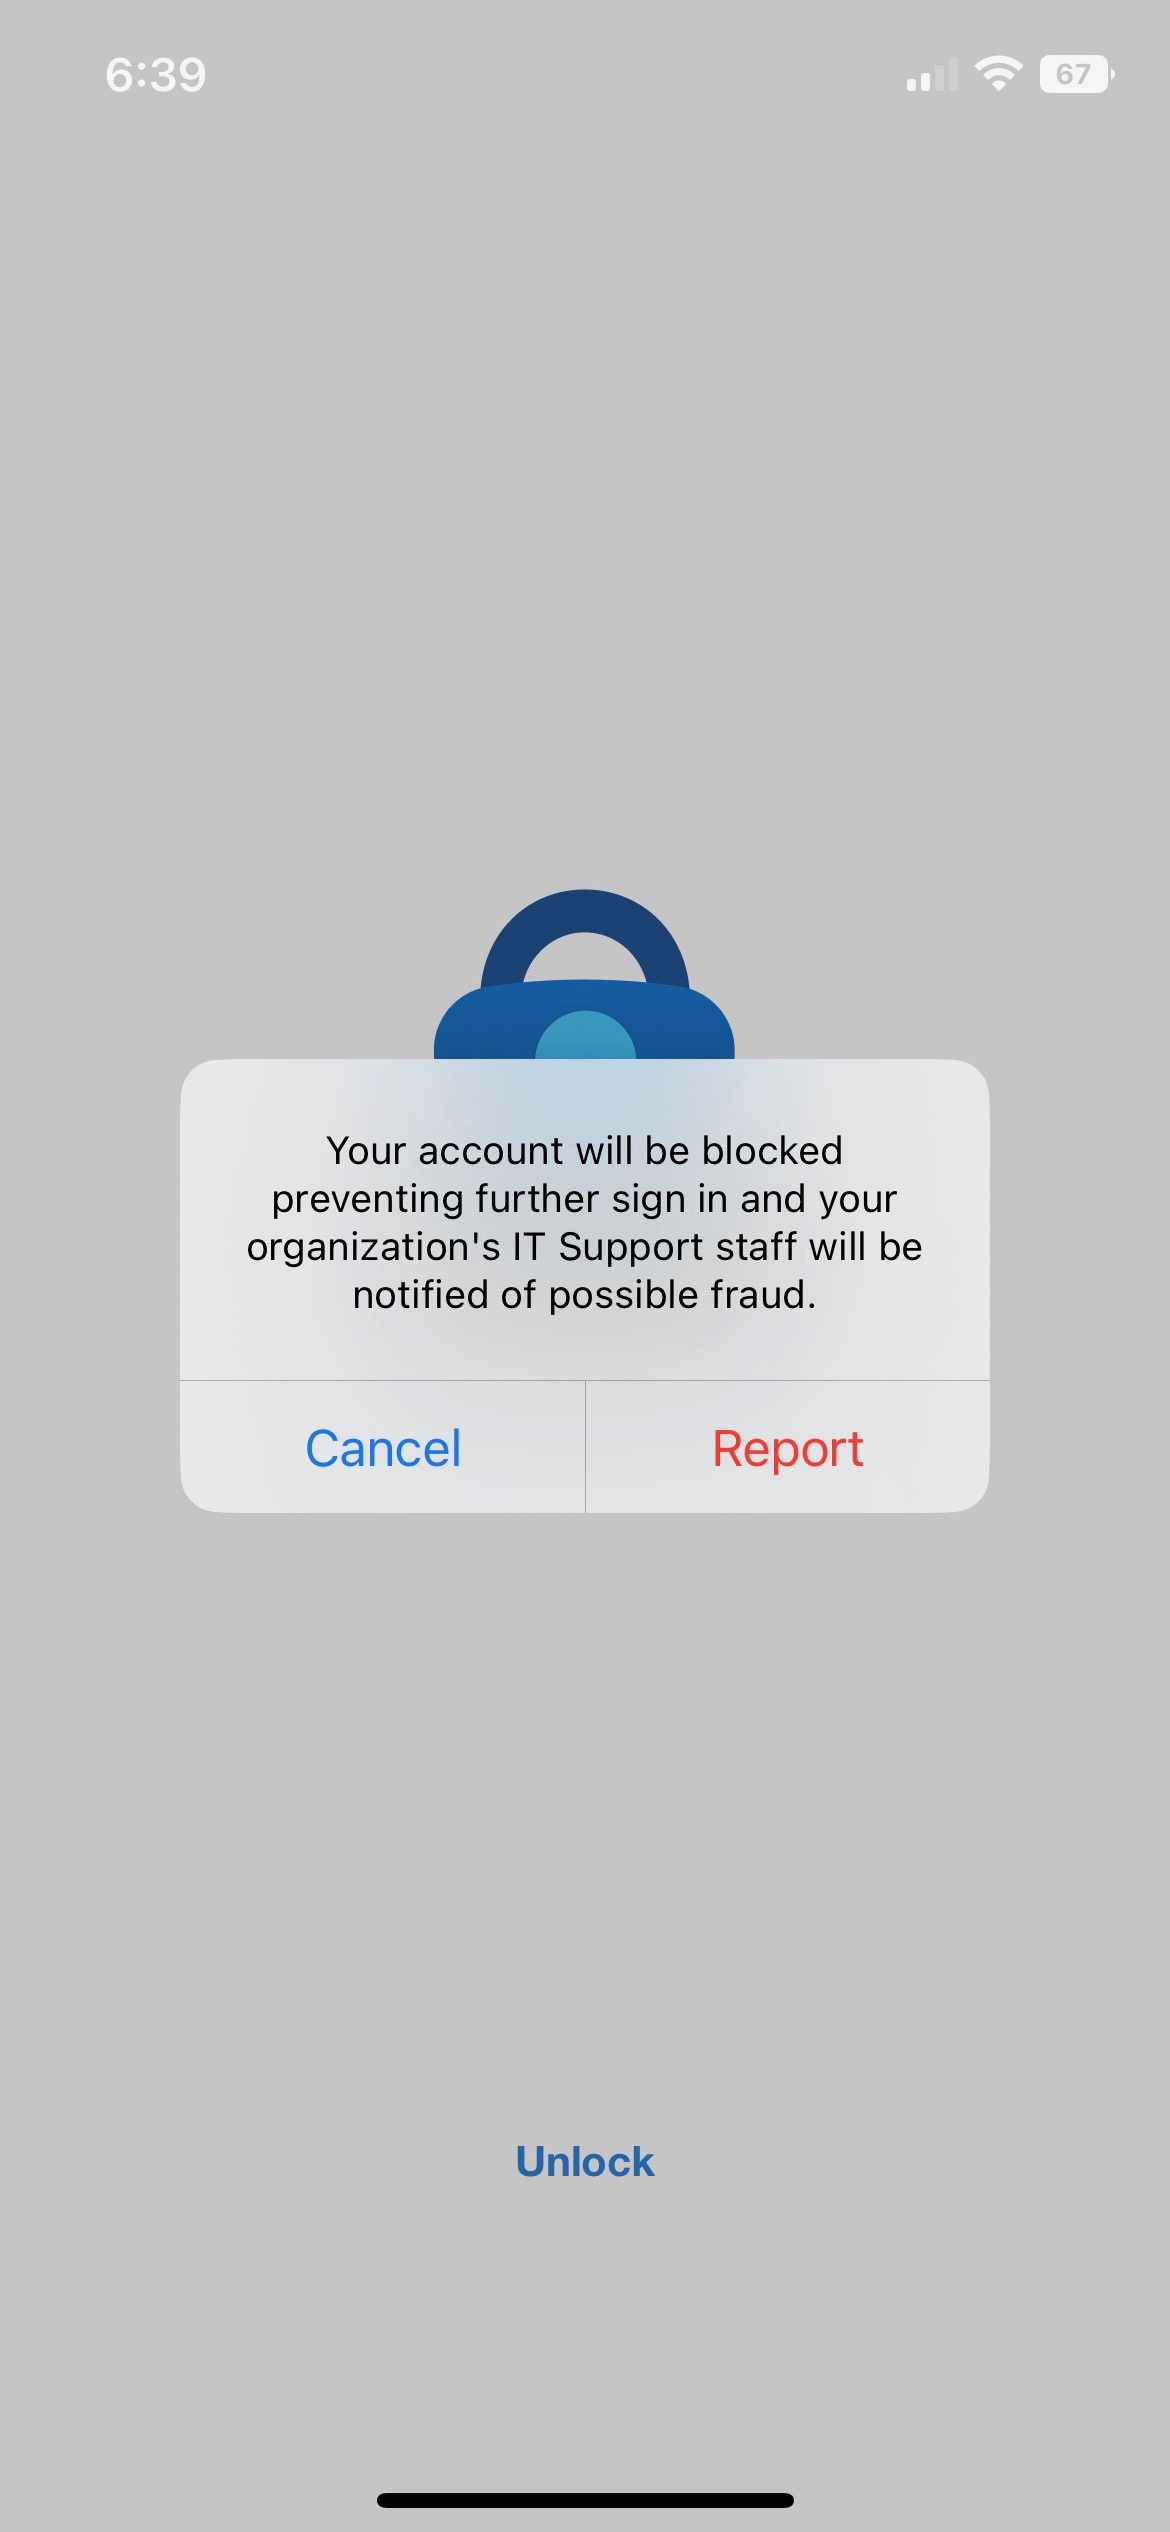
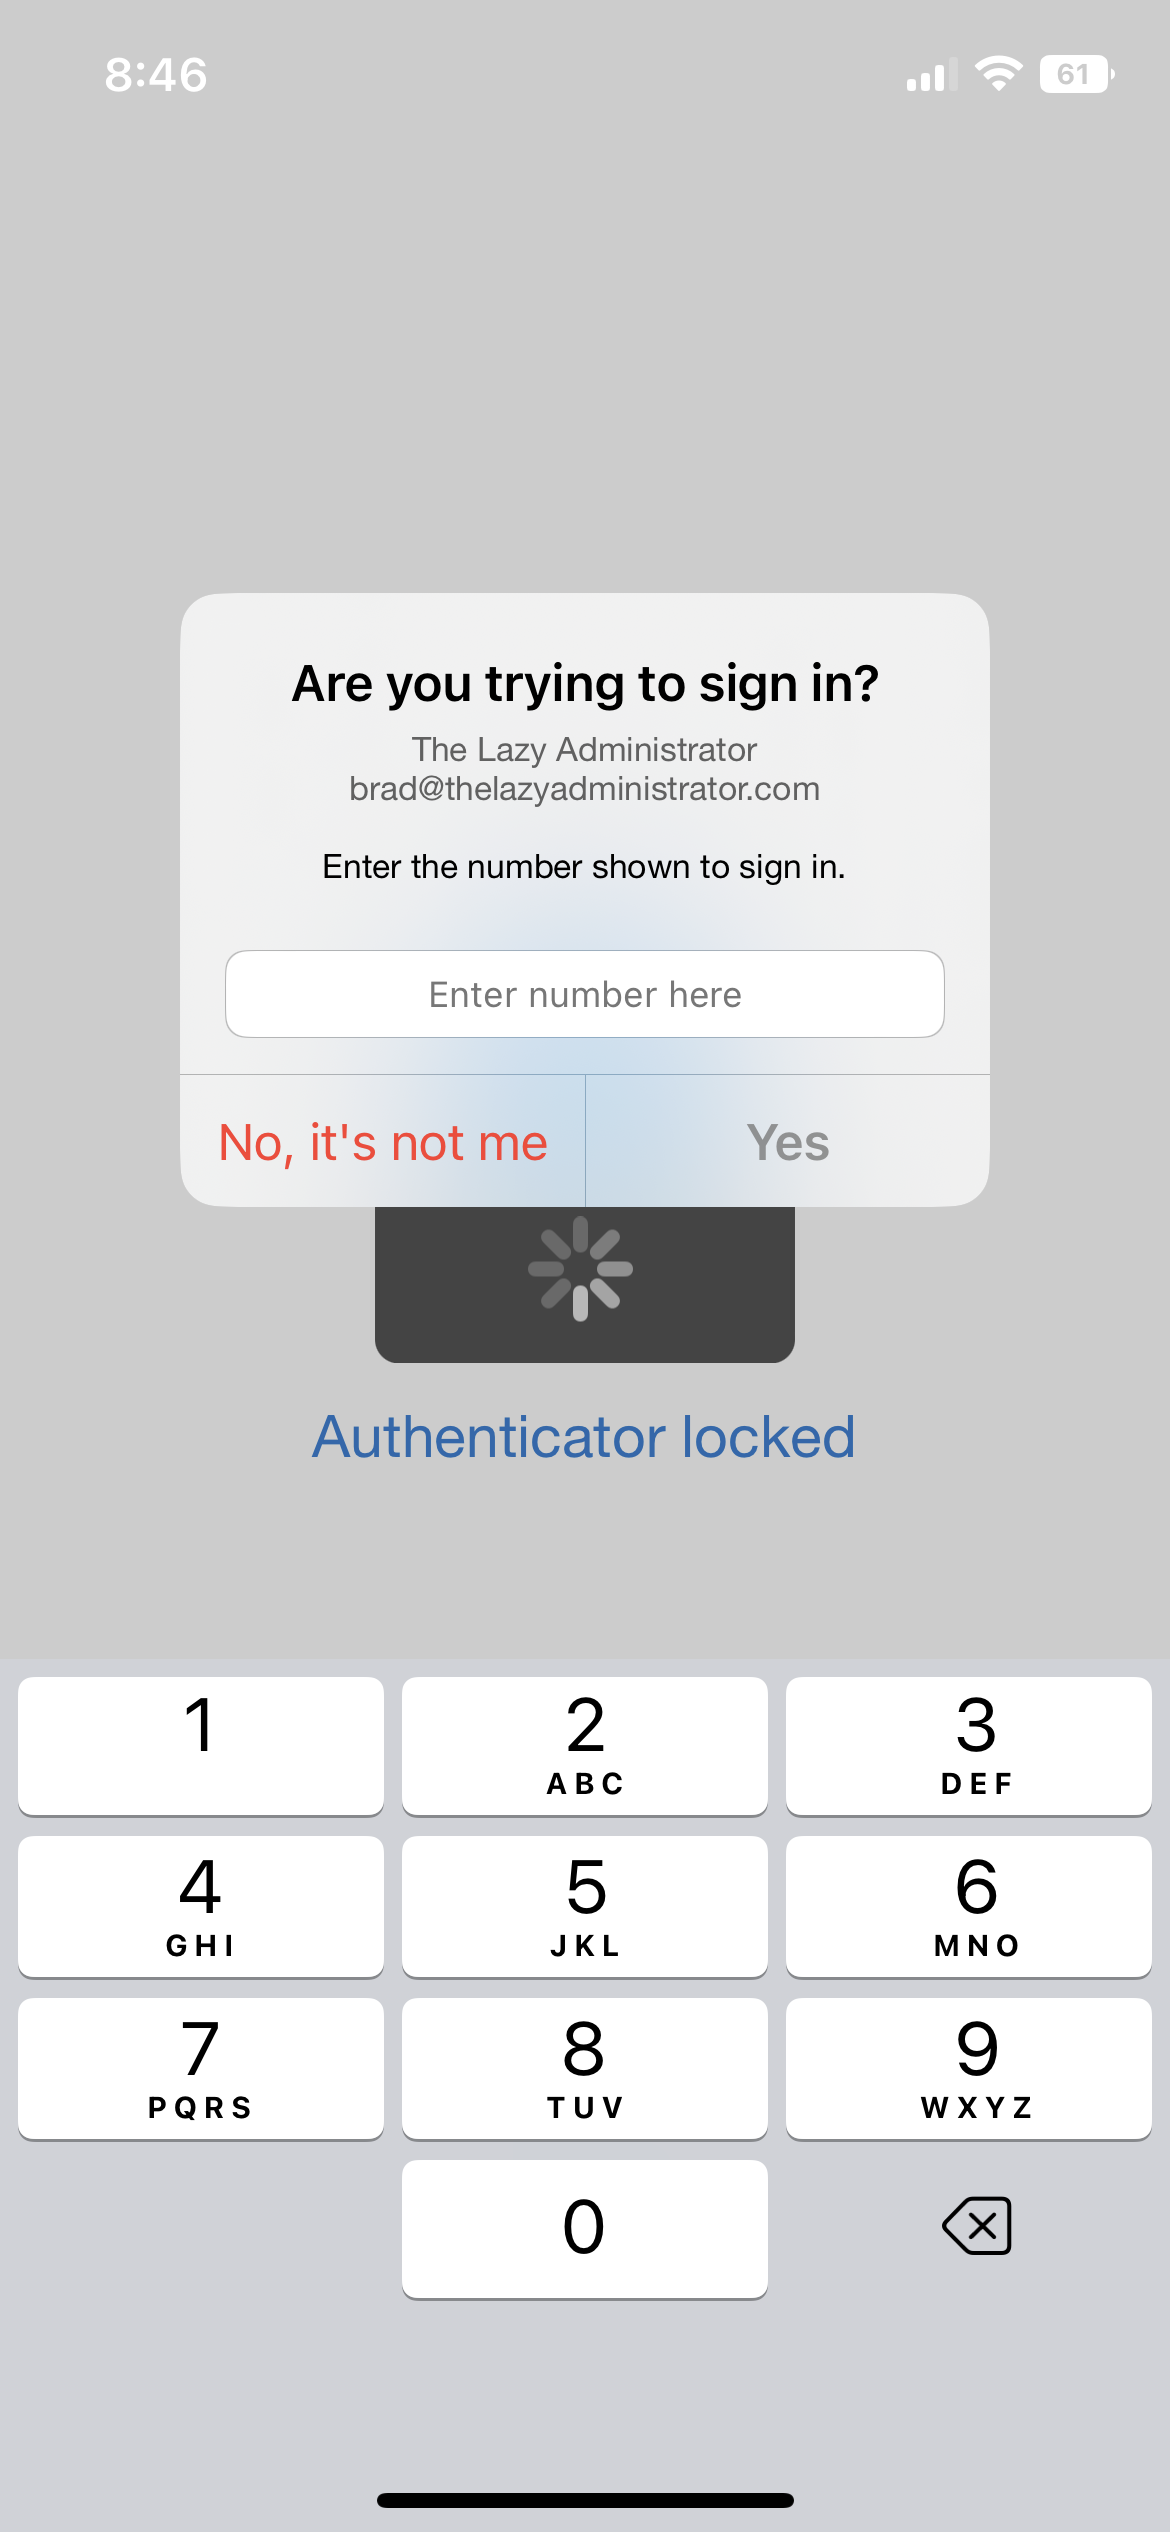
If you enable “Require number matching for push notifications” the user will have to type in the number they see on screen. This is an improvement compared to the legacy number selection option because during a MFA fatigue attack, the probability of typing in the correct number is incredibly slim.
To configure this option, go to Azure Portal > Azure Active Directory > Security > Authentication Methods > click on Microsoft Authenticator > and click on the configure tab. Make sure your user or users are targeted in the Basics tab as well.
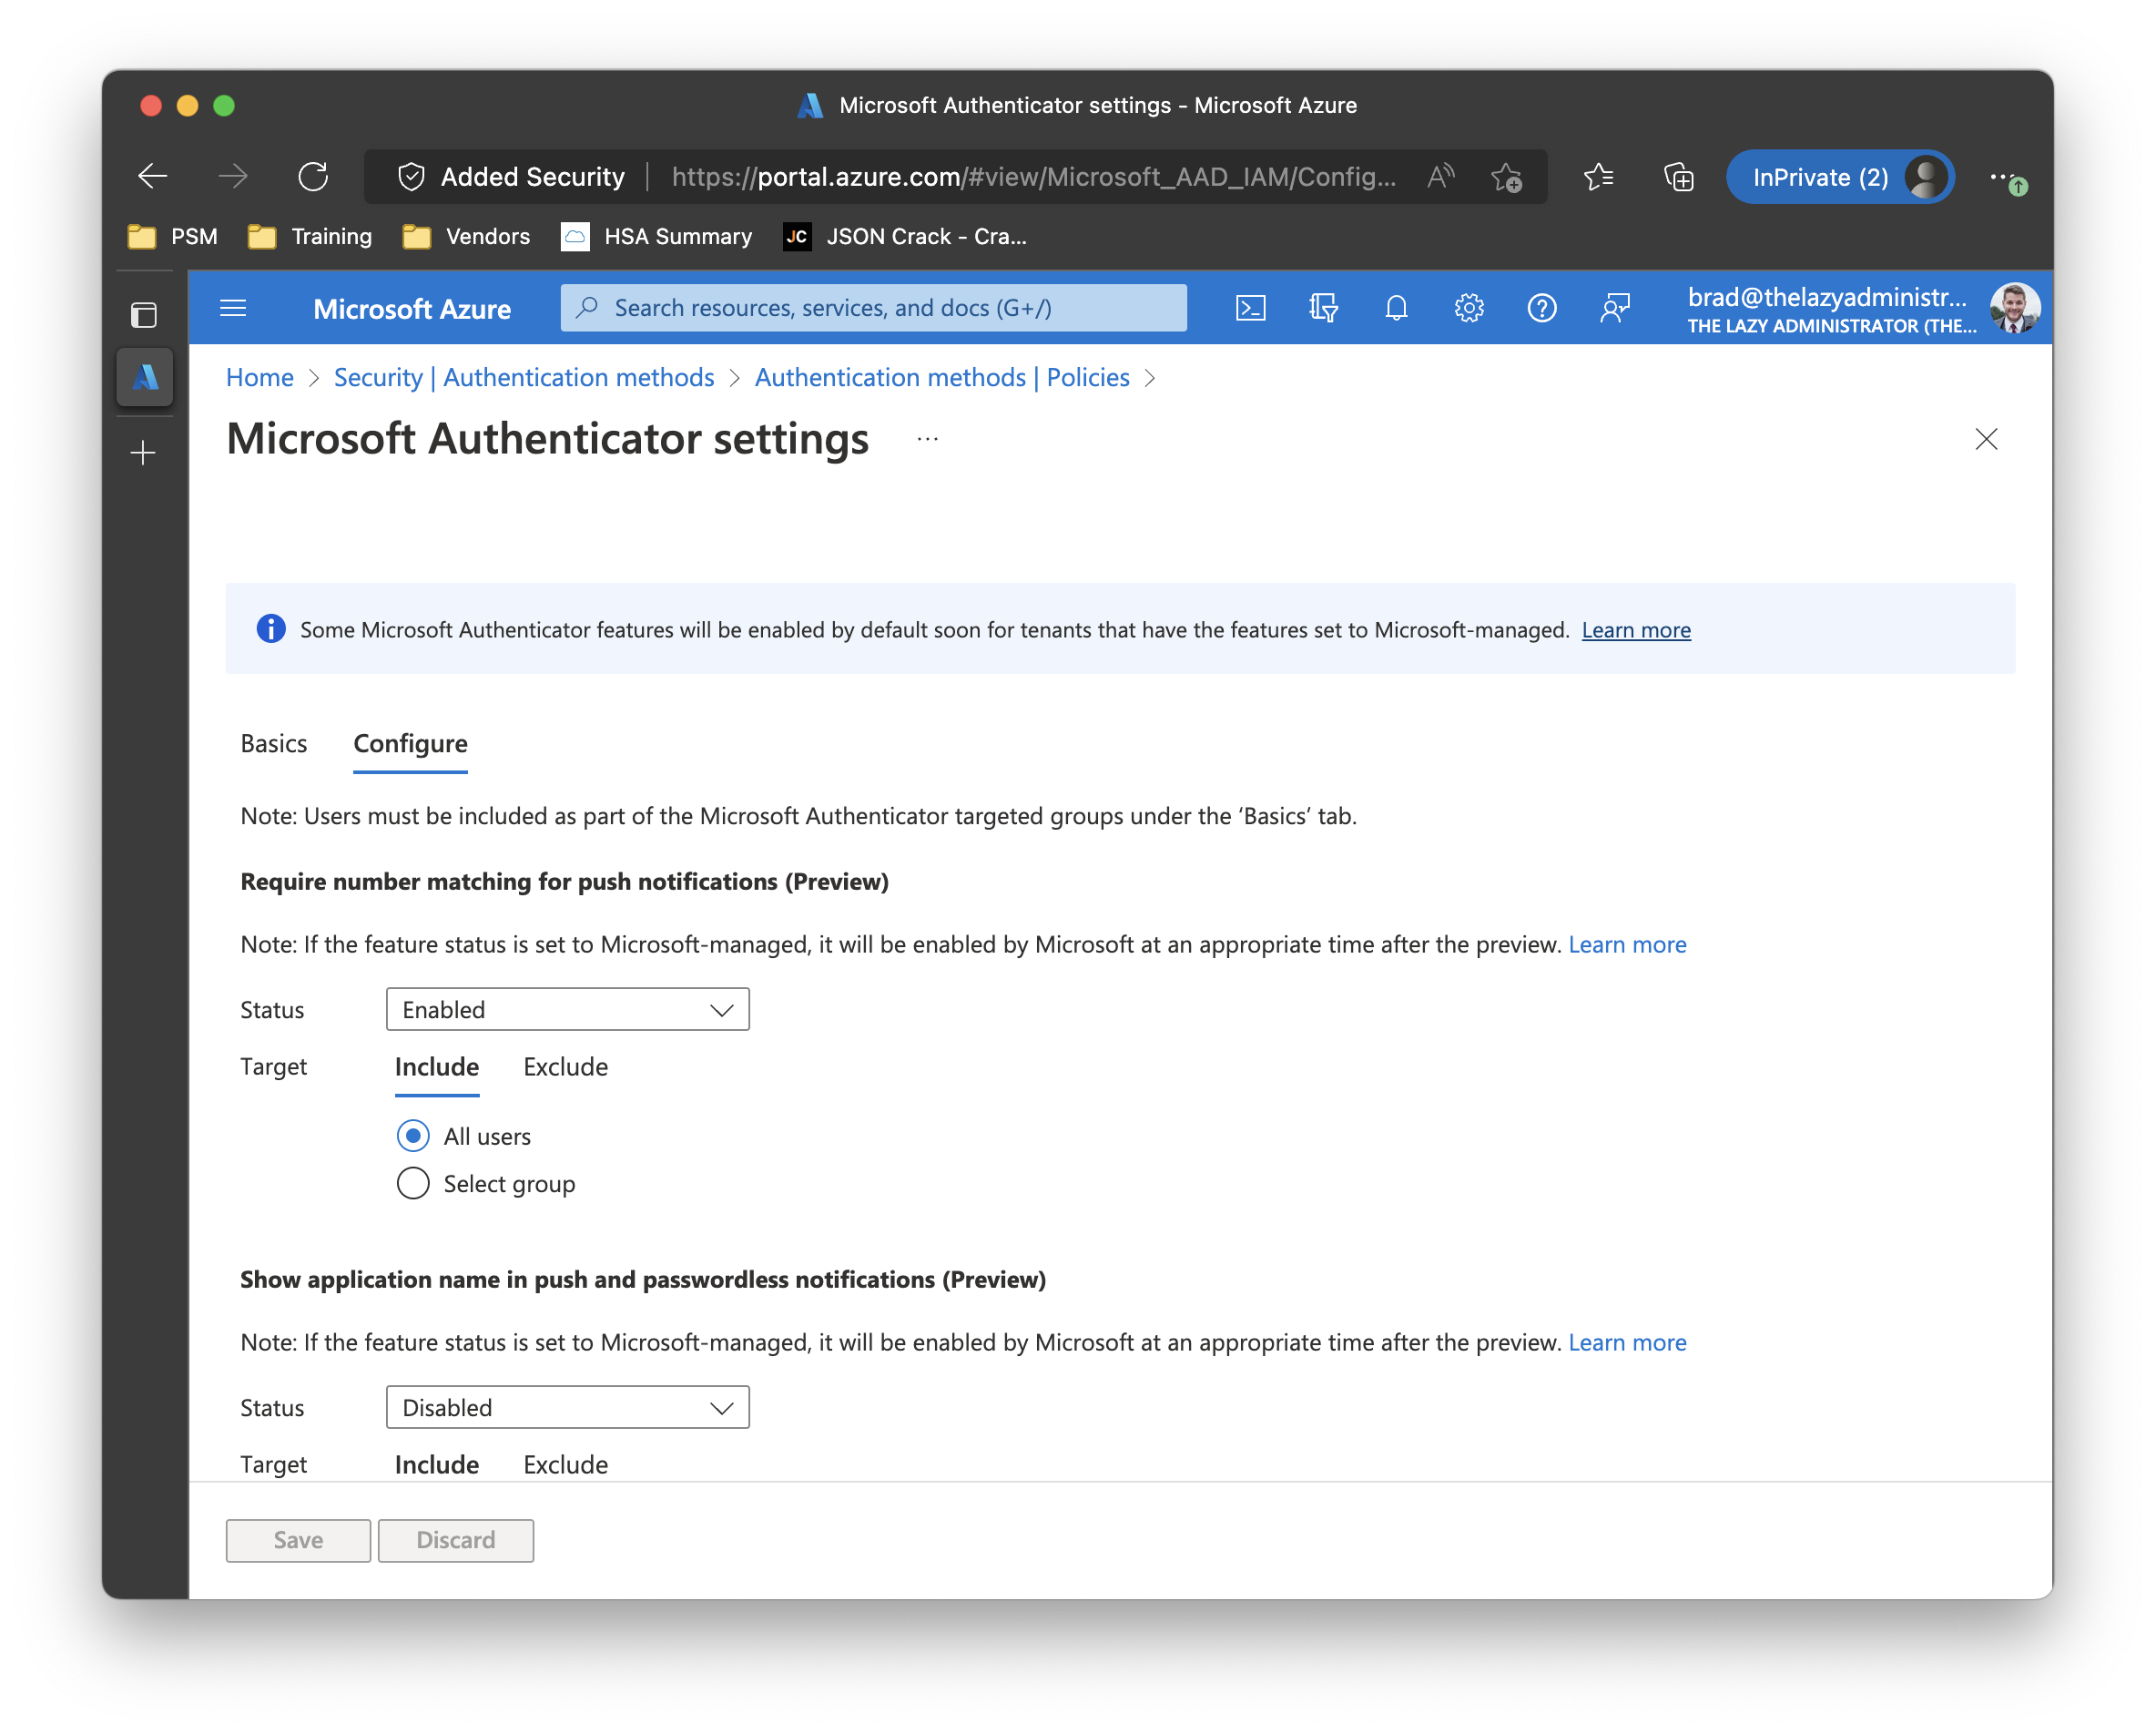
The notification on the mobile device will look like the screenshot below.
Show application name in push and passwordless notifications
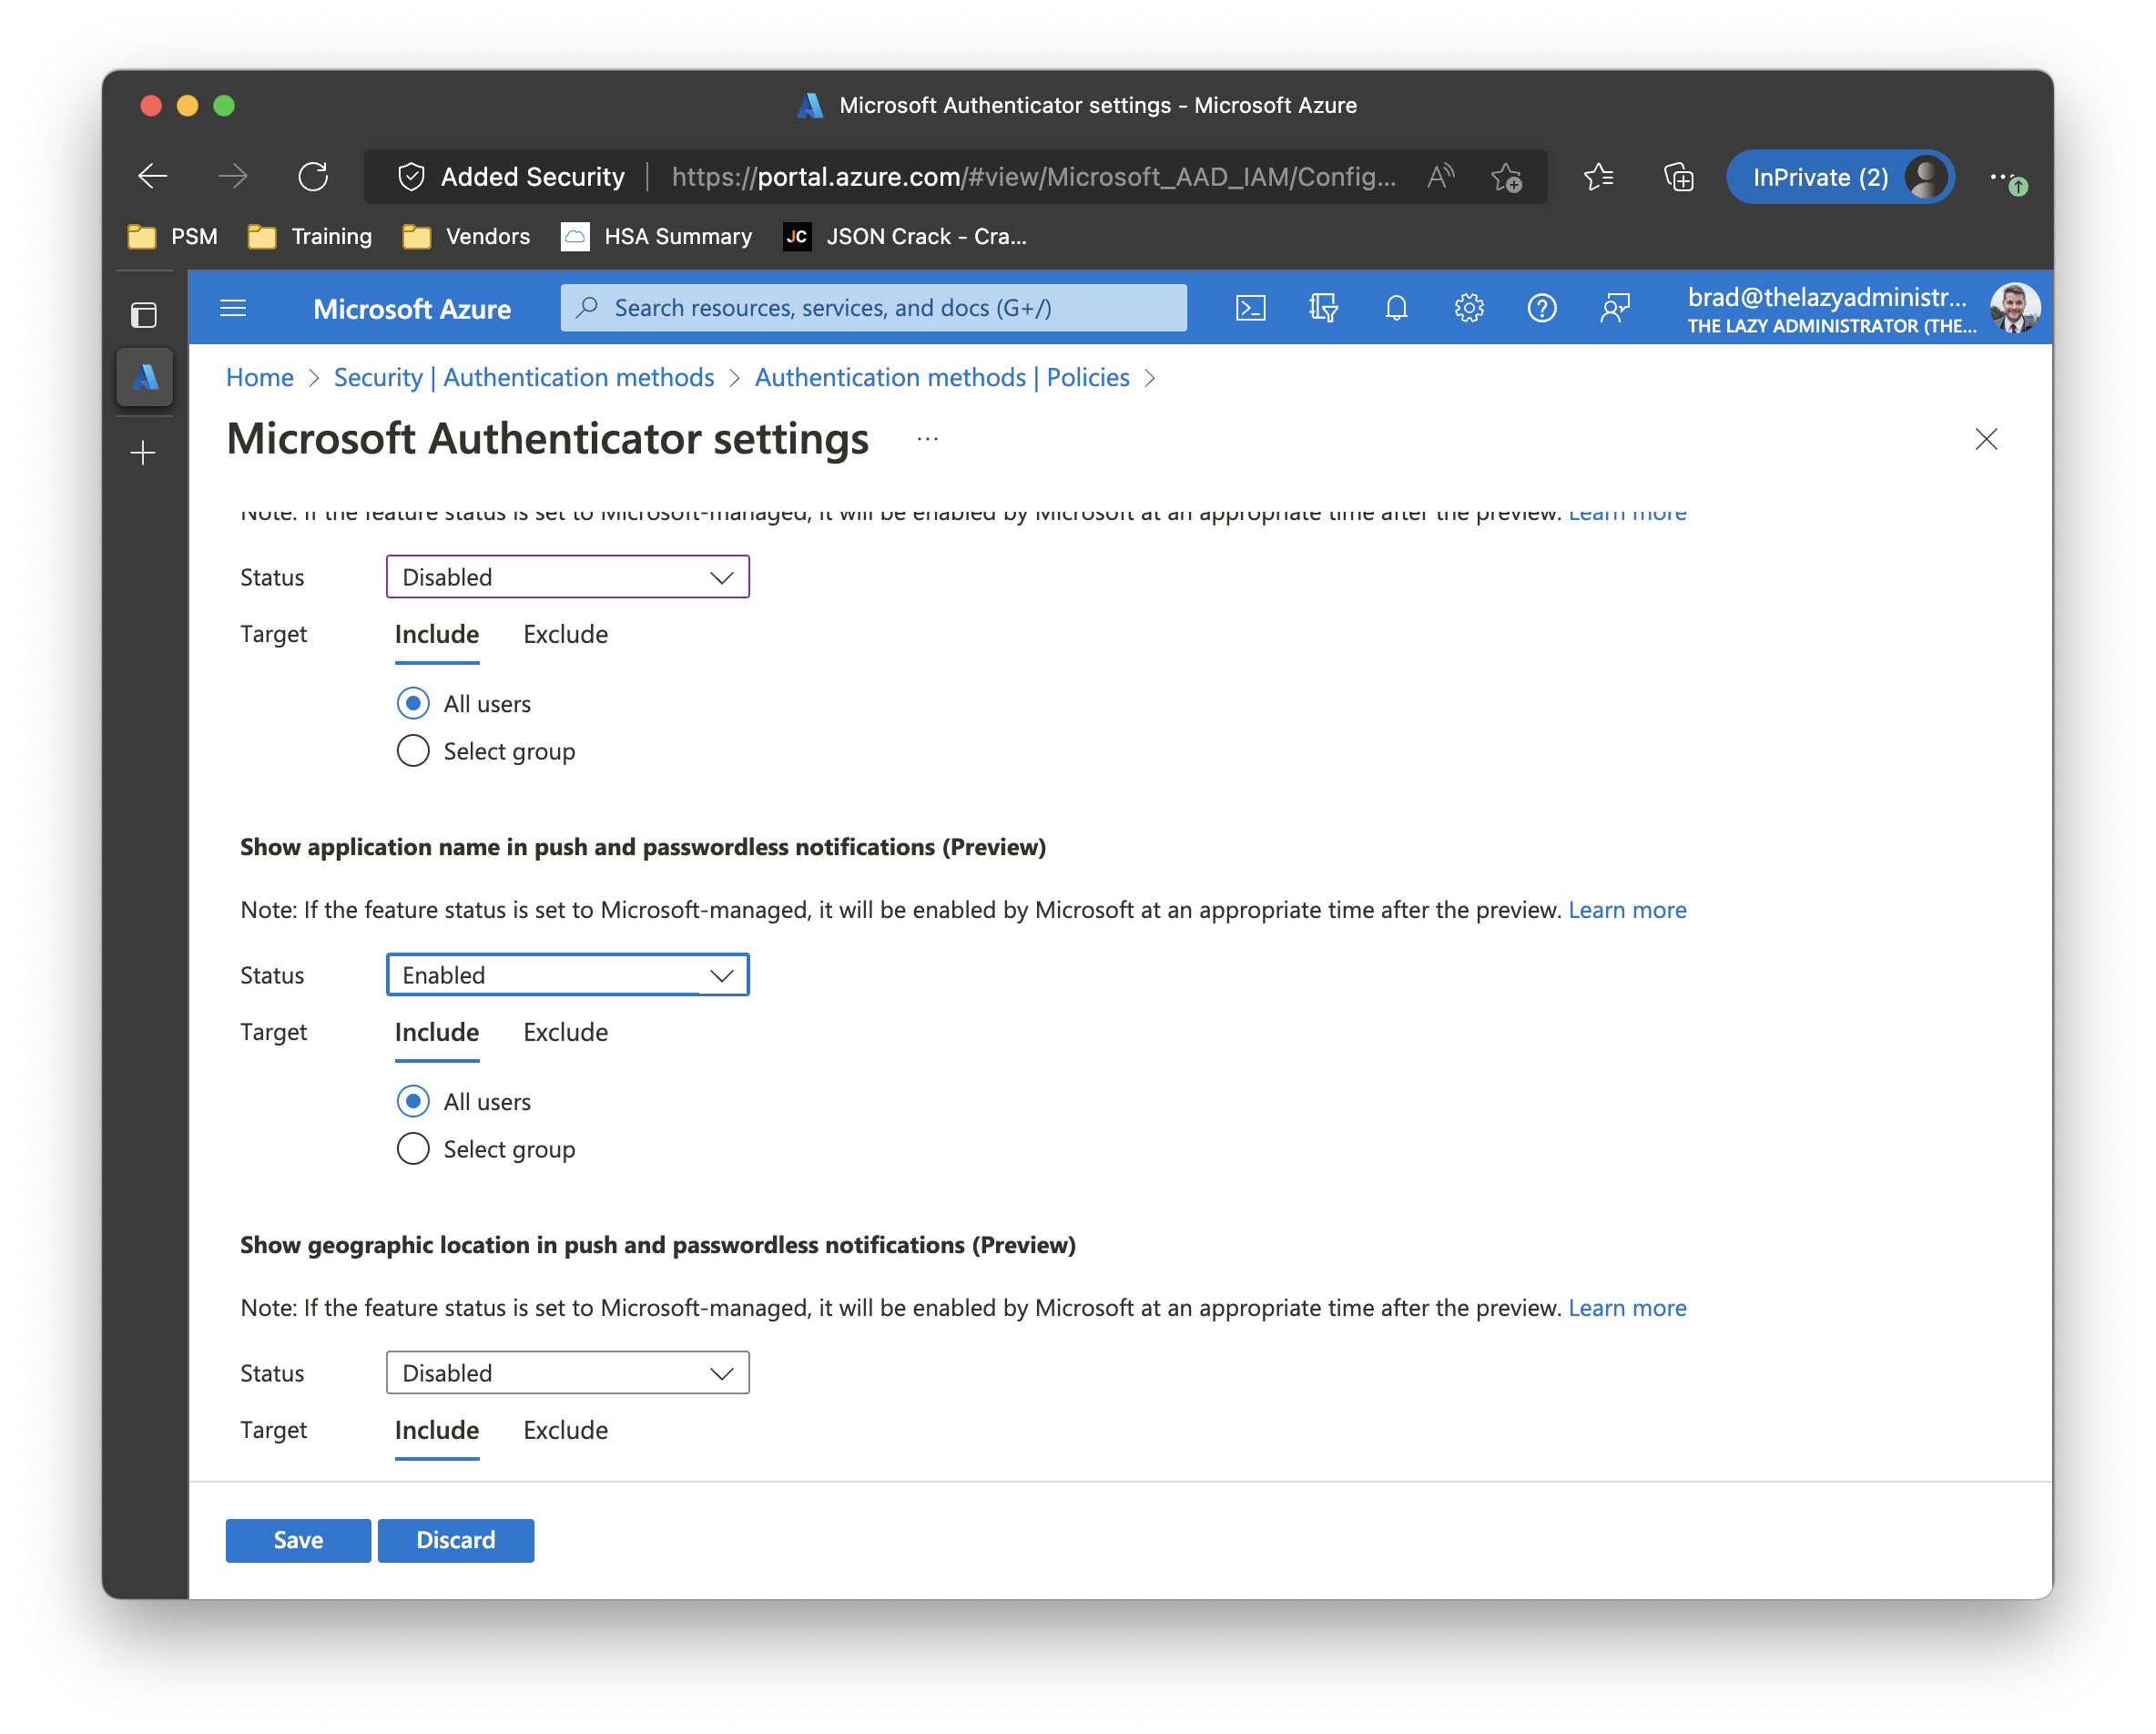
Showing the application name can help users understand where the request is coming from. If a user is signing into Outlook the same time an attacker is trying to modify their security settings, they may get the attackers MFA request first, and thinking its them signing into Outlook, accept it. Afterwards they may get the second, legitimate MFA request and think that it was a fluke accident or just think nothing of it. Meanwhile the attacker has gained access to their account.
To configure this option, go to Azure Portal > Azure Active Directory > Security > Authentication Methods > click on Microsoft Authenticator > and click on the configure tab. Make sure your user or users are targeted in the Basics tab as well.
The notification on the mobile device will look like the screenshot below.
Show geographic location in push and passwordless notifications
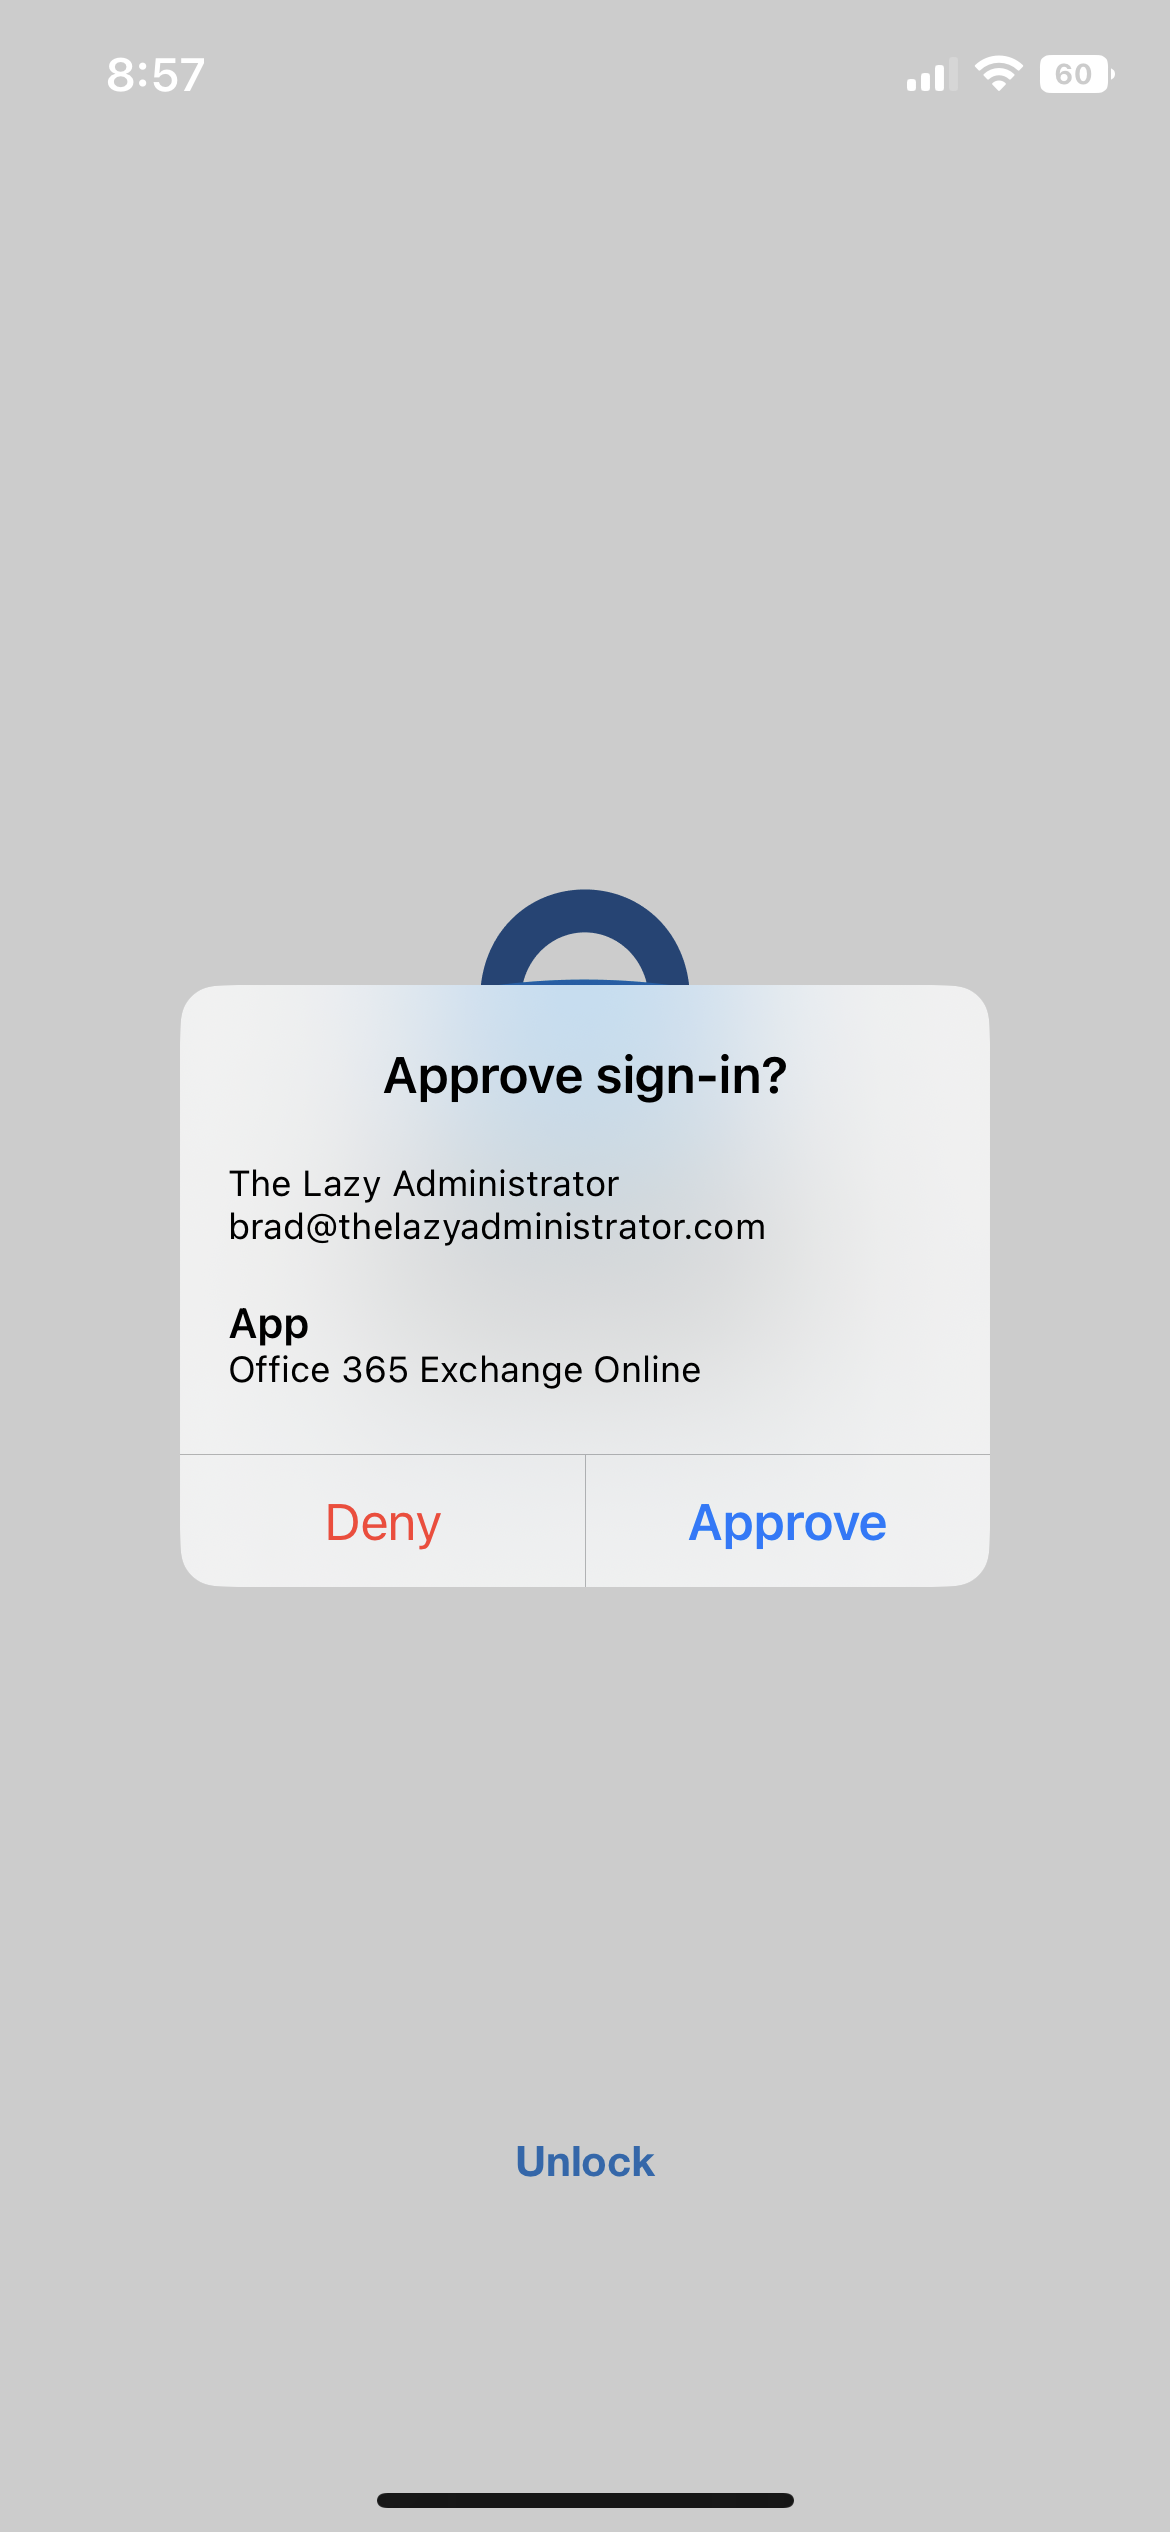
The last option is to include geographic location within the push notification. Keep in mind if users are using VPN’s, Remote Desktop, or AVD, they may be confused as the location could appear from the endpoint and not from where they are physically.
To configure this option, go to Azure Portal > Azure Active Directory > Security > Authentication Methods > click on Microsoft Authenticator > and click on the configure tab. Make sure your user or users are targeted in the Basics tab as well.
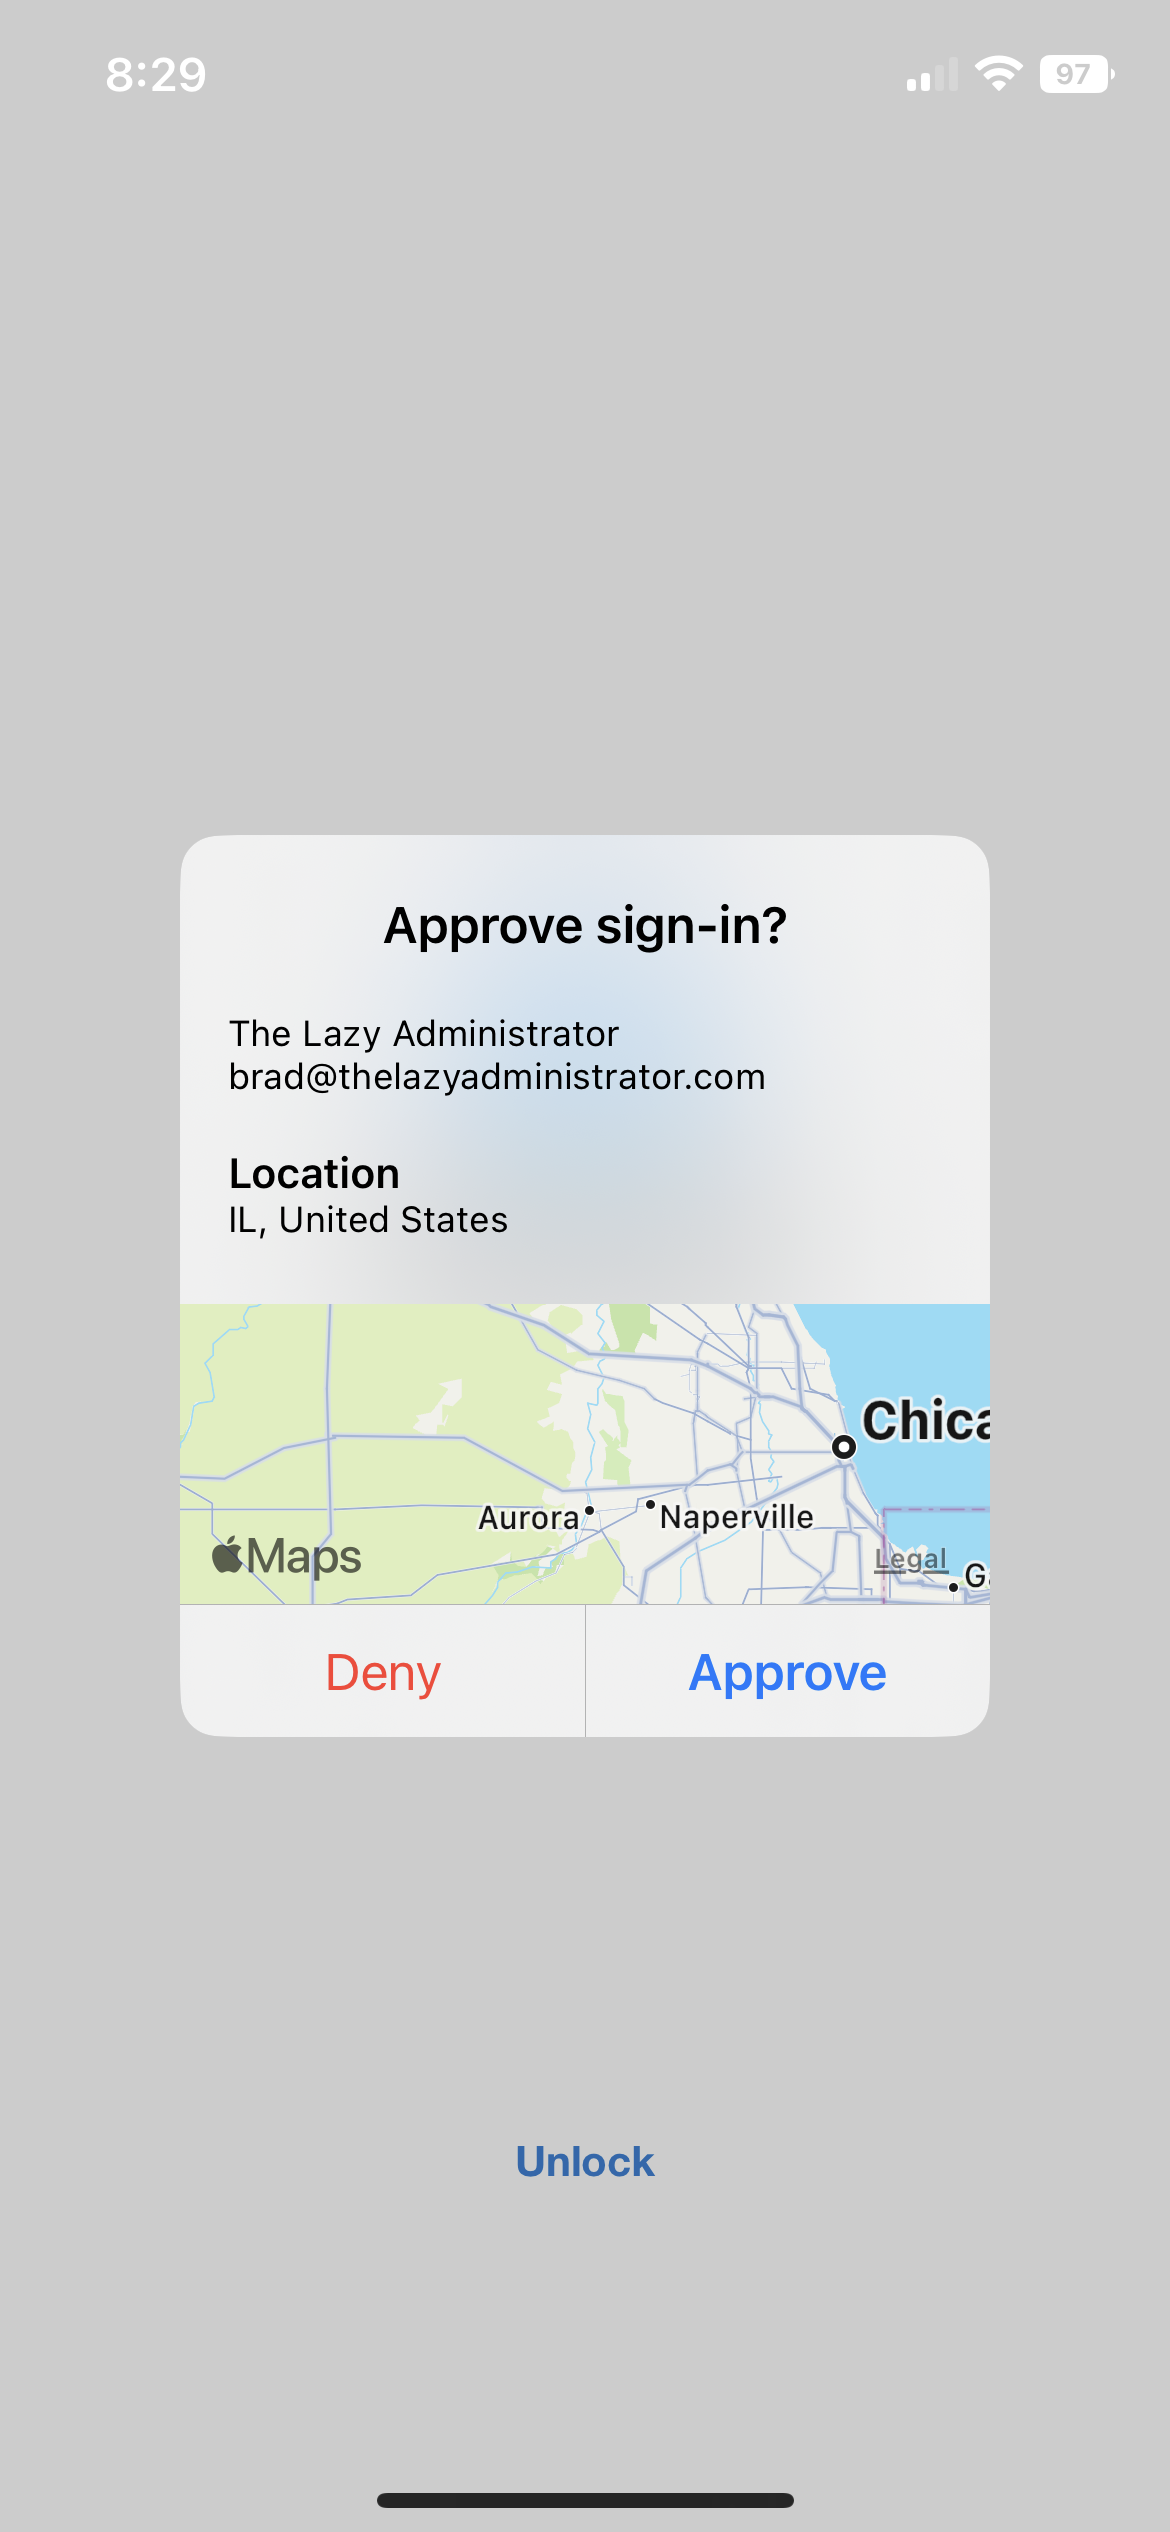
The notification on the mobile device will look like the screenshot below.
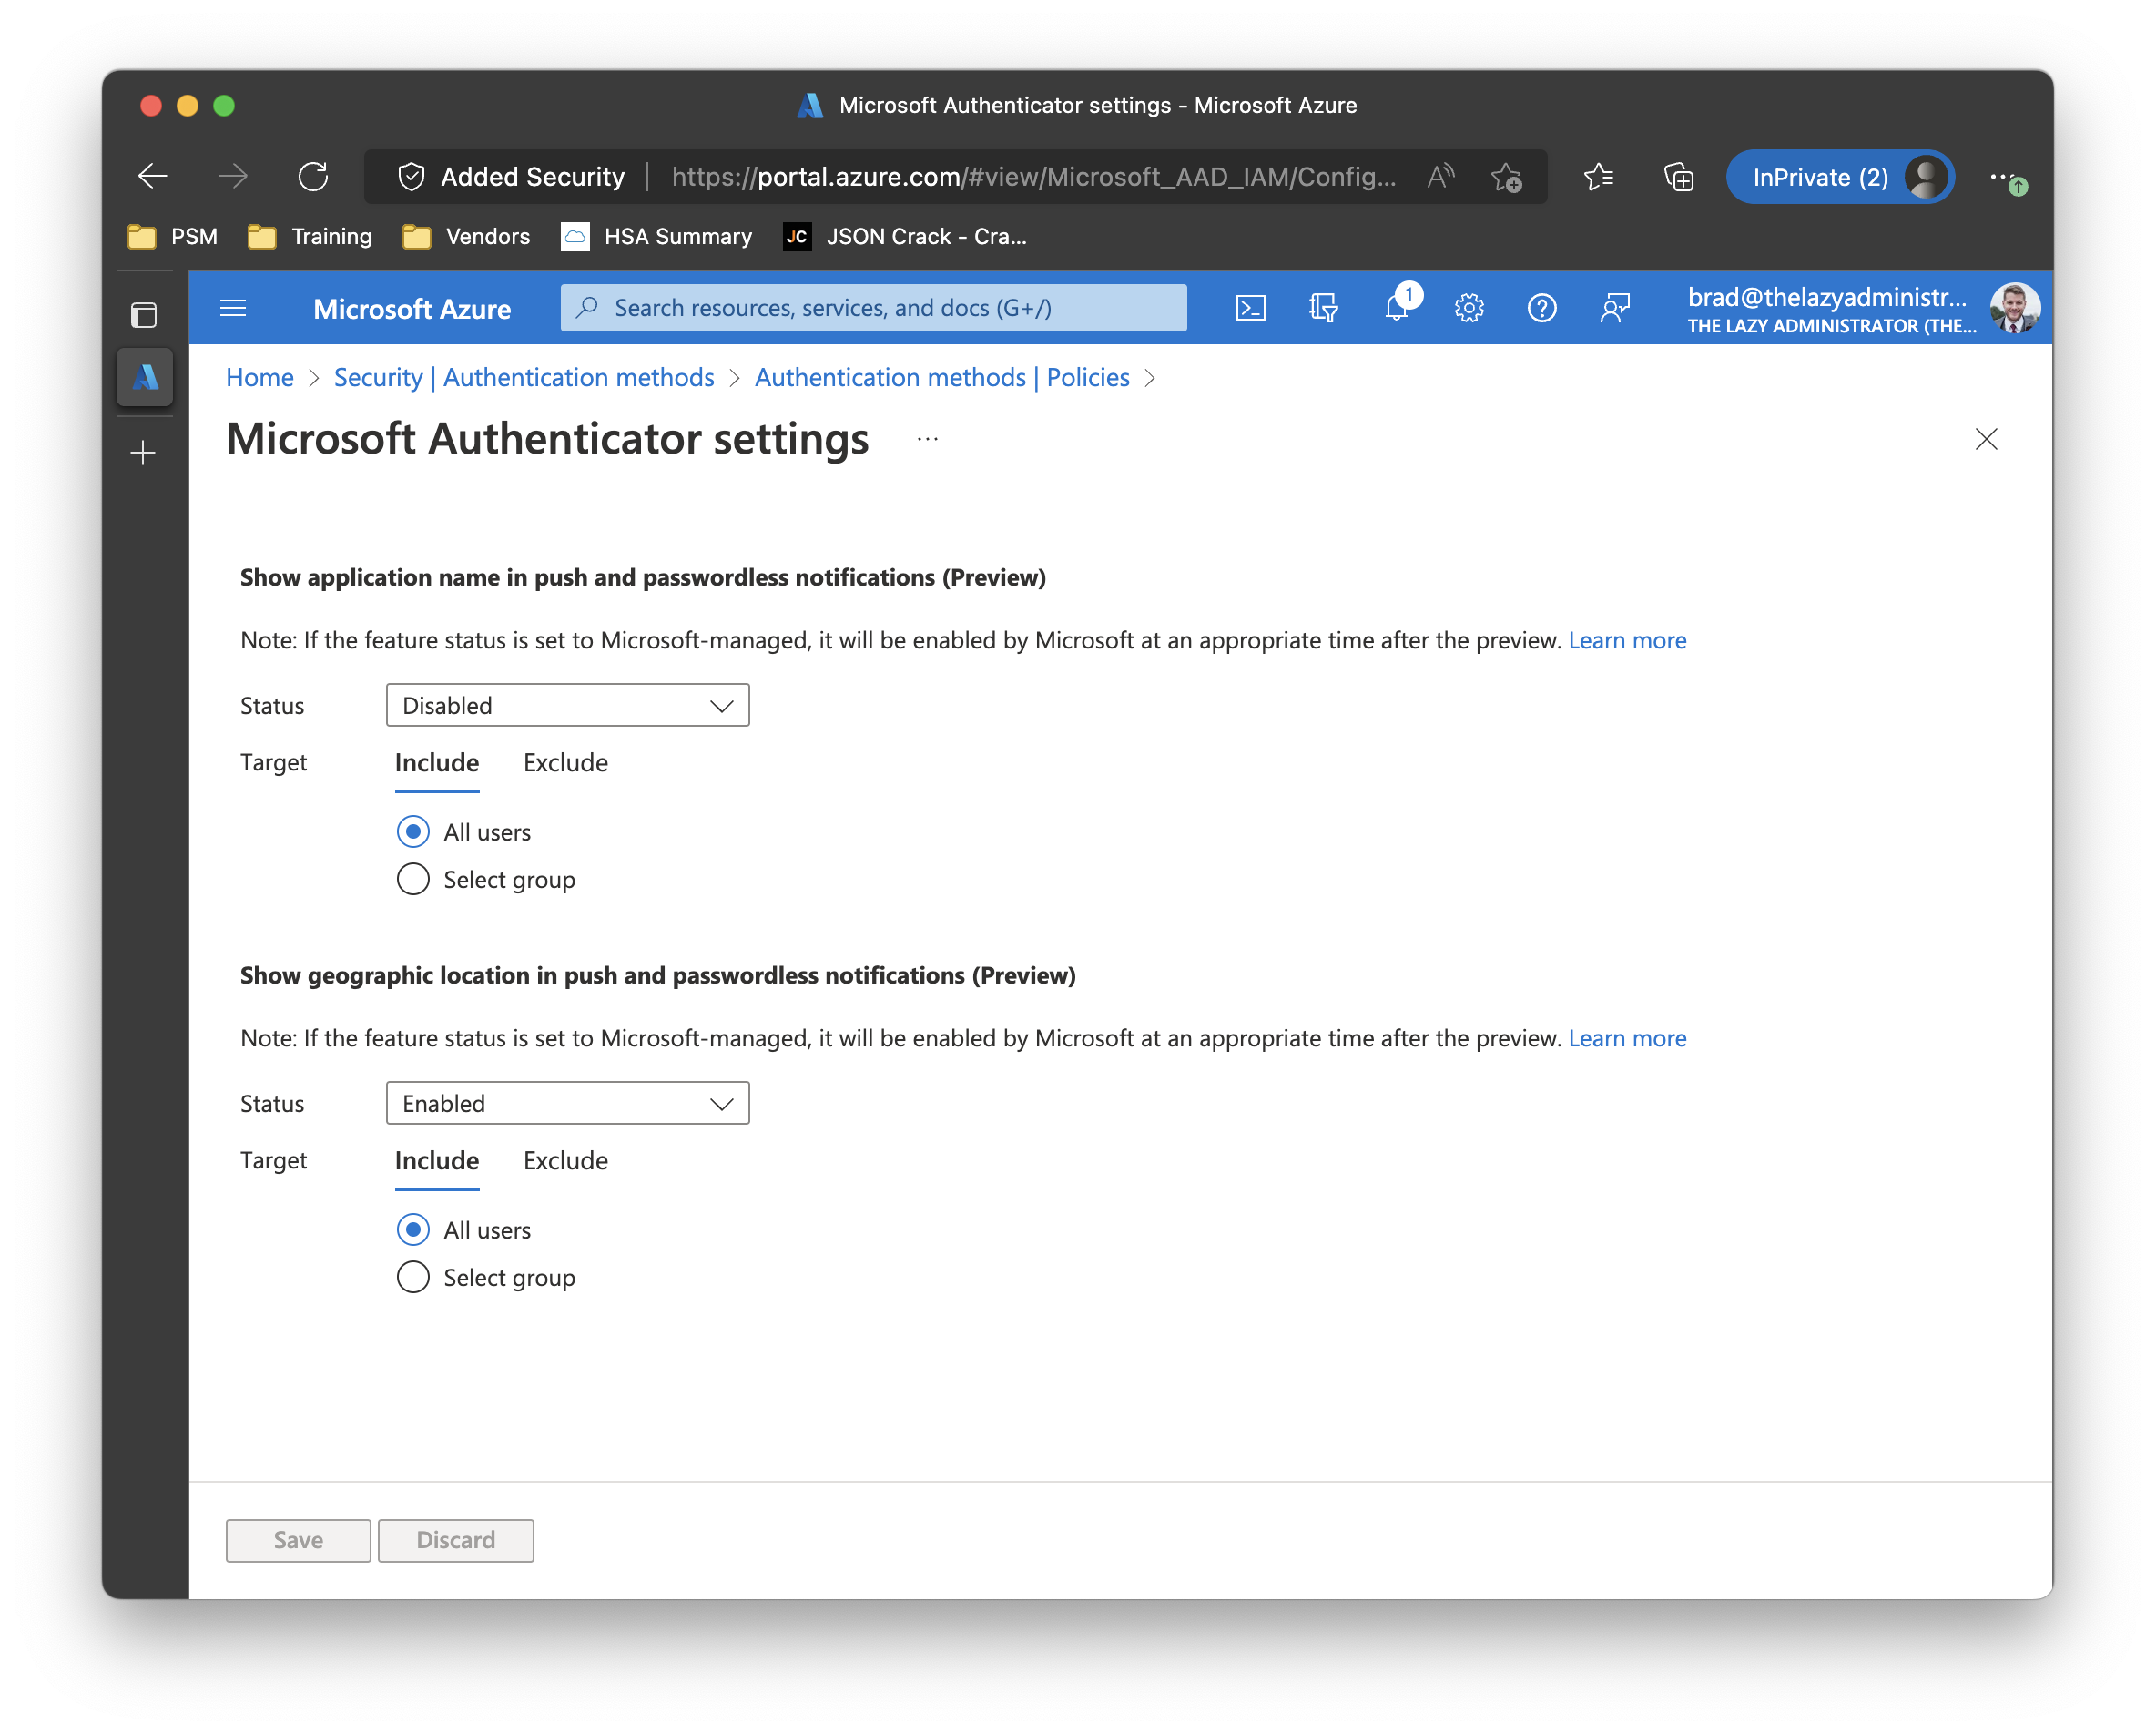
Enabling all the Policies
Lastly, you may want to enable all the policies that are available. The screenshot below shows what that will look like for the end user.


My name is Bradley Wyatt; I am a 5x Microsoft Most Valuable Professional (MVP) in Microsoft Azure and Microsoft 365. I have given talks at many different conferences, user groups, and companies throughout the United States, ranging from PowerShell to DevOps Security best practices, and I am the 2022 North American Outstanding Contribution to the Microsoft Community winner.
2 thoughts on “Improve your Azure Multi-Factor Authentication Notifications”
Brad,
This is great info, thank you.
Do you know to setup an alert when an MFA method is added, changed or deleted in Microsoft account setting security option?
I also would like to know.