Notify Requesters When GitLab Issues Move Through the Development Pipeline
Table of Contents
Objective
I use GitLab’s Customer Relationship Management (CRM) feature to track who requested each item. From there, I wanted a way for requesters to be automatically notified as their item moved through the development pipeline, from Backlog to In Progress, Testing/Review, and finally Done. GitLab supports webhooks that trigger on issue events such as creation, updates, closures, and openings. Using this capability, I built a PowerShell Azure function that receives the webhook payload, identifies when a status label changes, retrieves the CRM contact linked to the issue, and sends them an email notification.
Prerequisites
- Gitlab Account for an access token and to create the webhook
- Gitlab status as scoped Labels (ex: Status::In Progress)
- You can change the logic within the Azure Function but by default is will be looking for the status scoped label to determine old and current status of an item.
- Contacts filled out in Gitlab’s CRM (Plan > Customer Relations)
- Azure permissions to make a Function and Logic App
Resolution
Gitlab Personal Access Token
First, we need to go to Personal access tokens to create a new PAT in Gitlab. Click the “Add new token” button. Give your token a name, description (optional) and expiration date. In the Scope section, select read_api. You can review the scope permissions here.
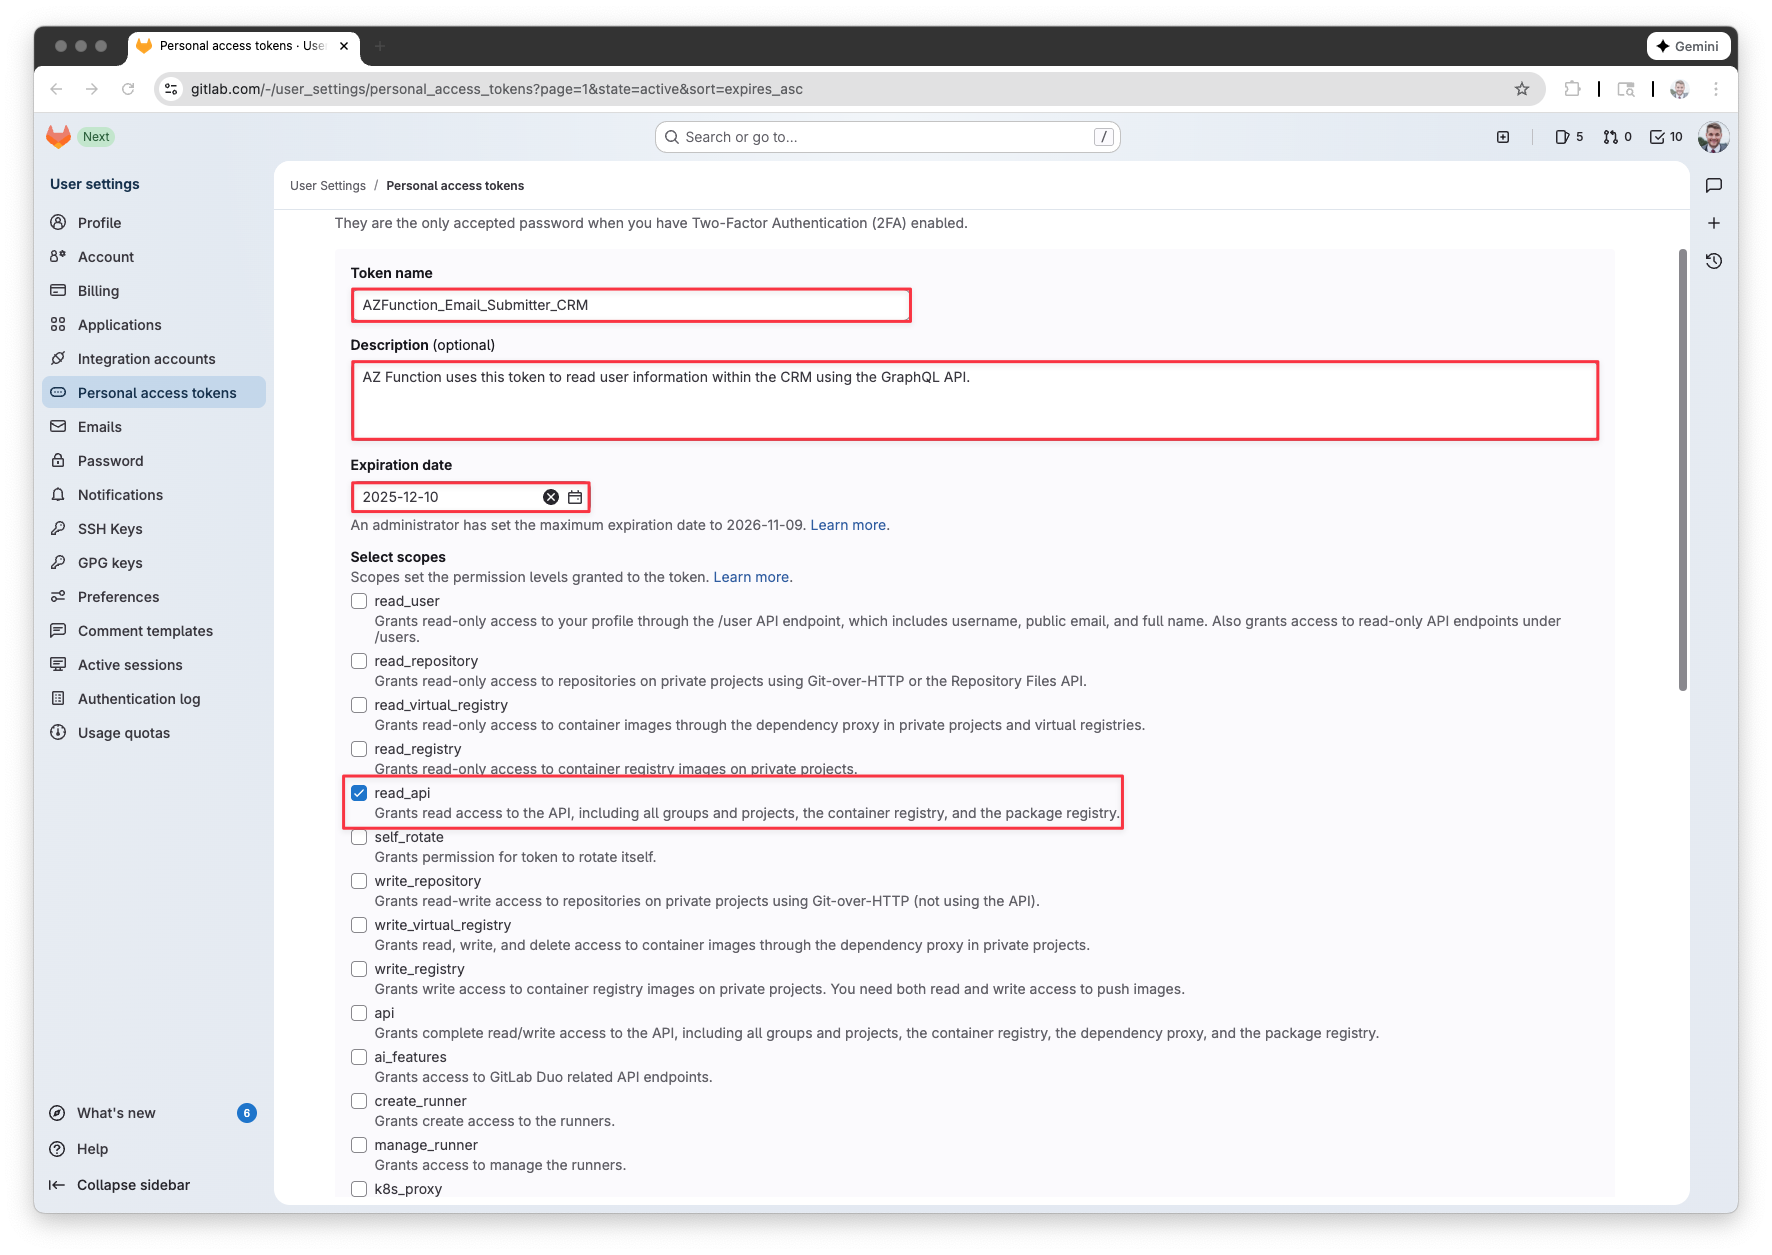
Next, when it shows you your token, copy it down for later.
Azure Function
Now we need to create an Azure Function that will be ingesting our webhook payload, parsing it and then returning the following information:
- Old status
- New Status
- Contact Email
Create or use an existing PowerShell Azure function app. Within the function app we want to create a new Function. If you already have a Function App you can proceed to the next section.
Create Function App
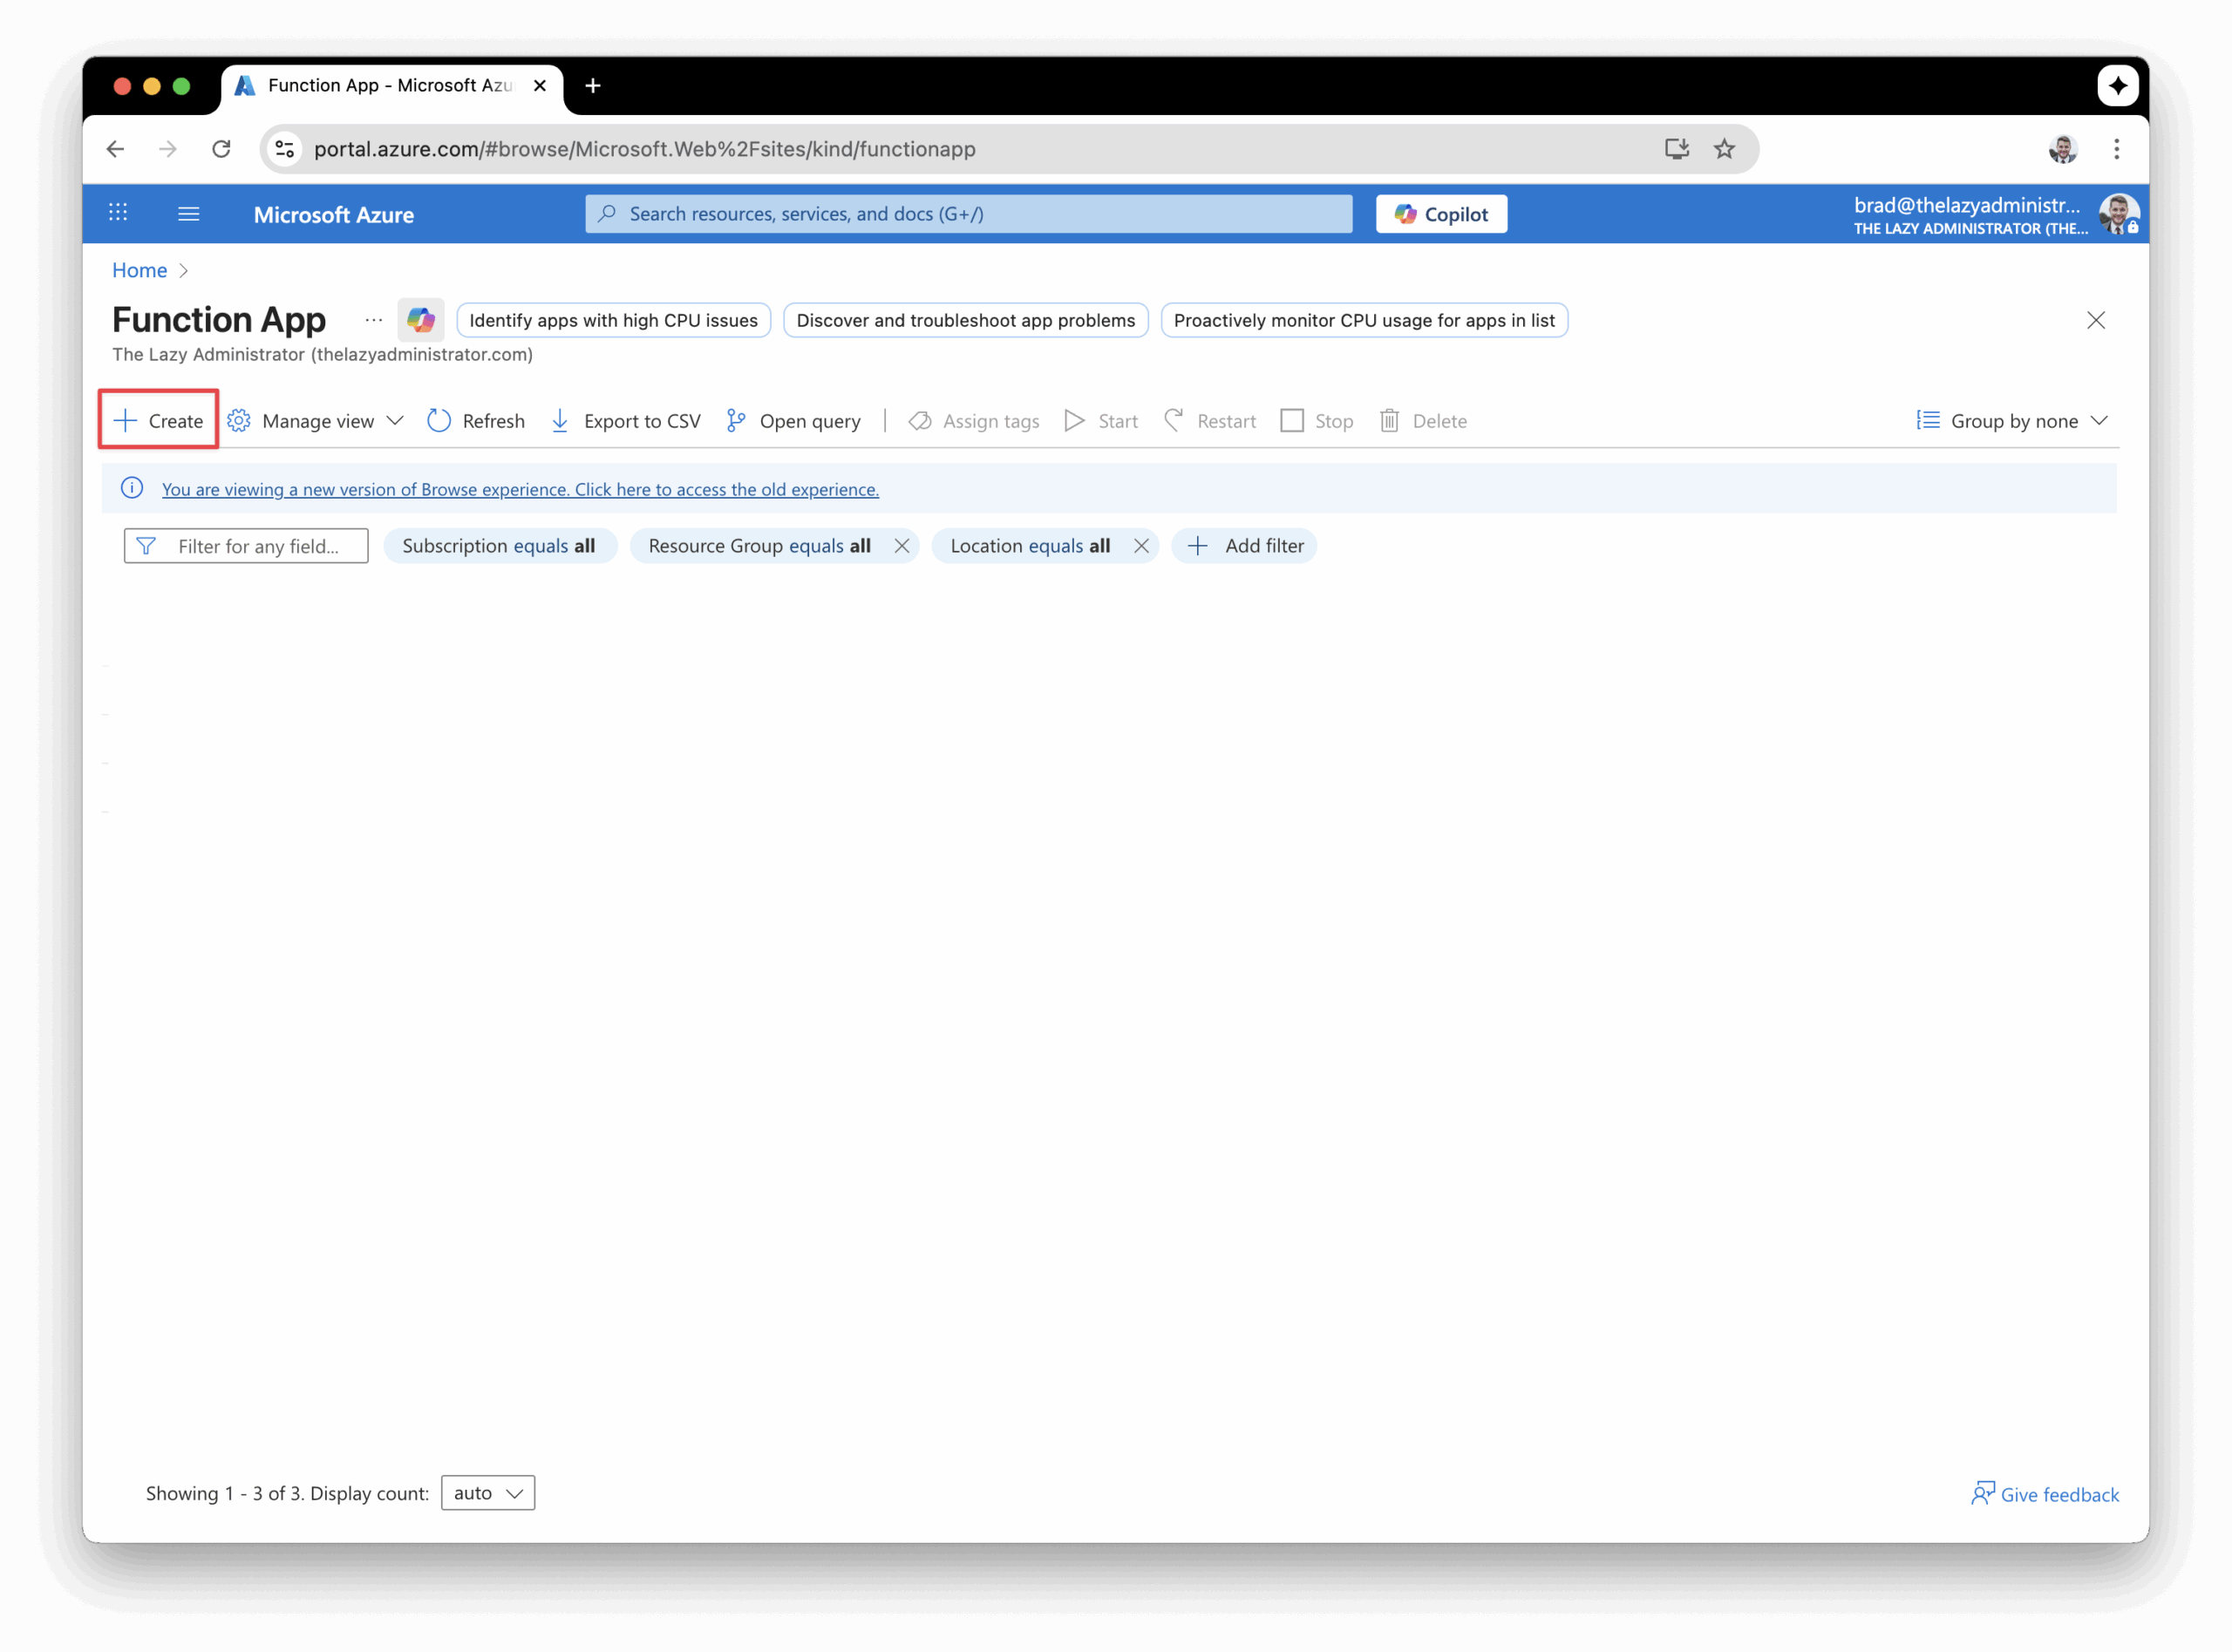
- In the Azure Portal, go to Function App and click “+ Create”.
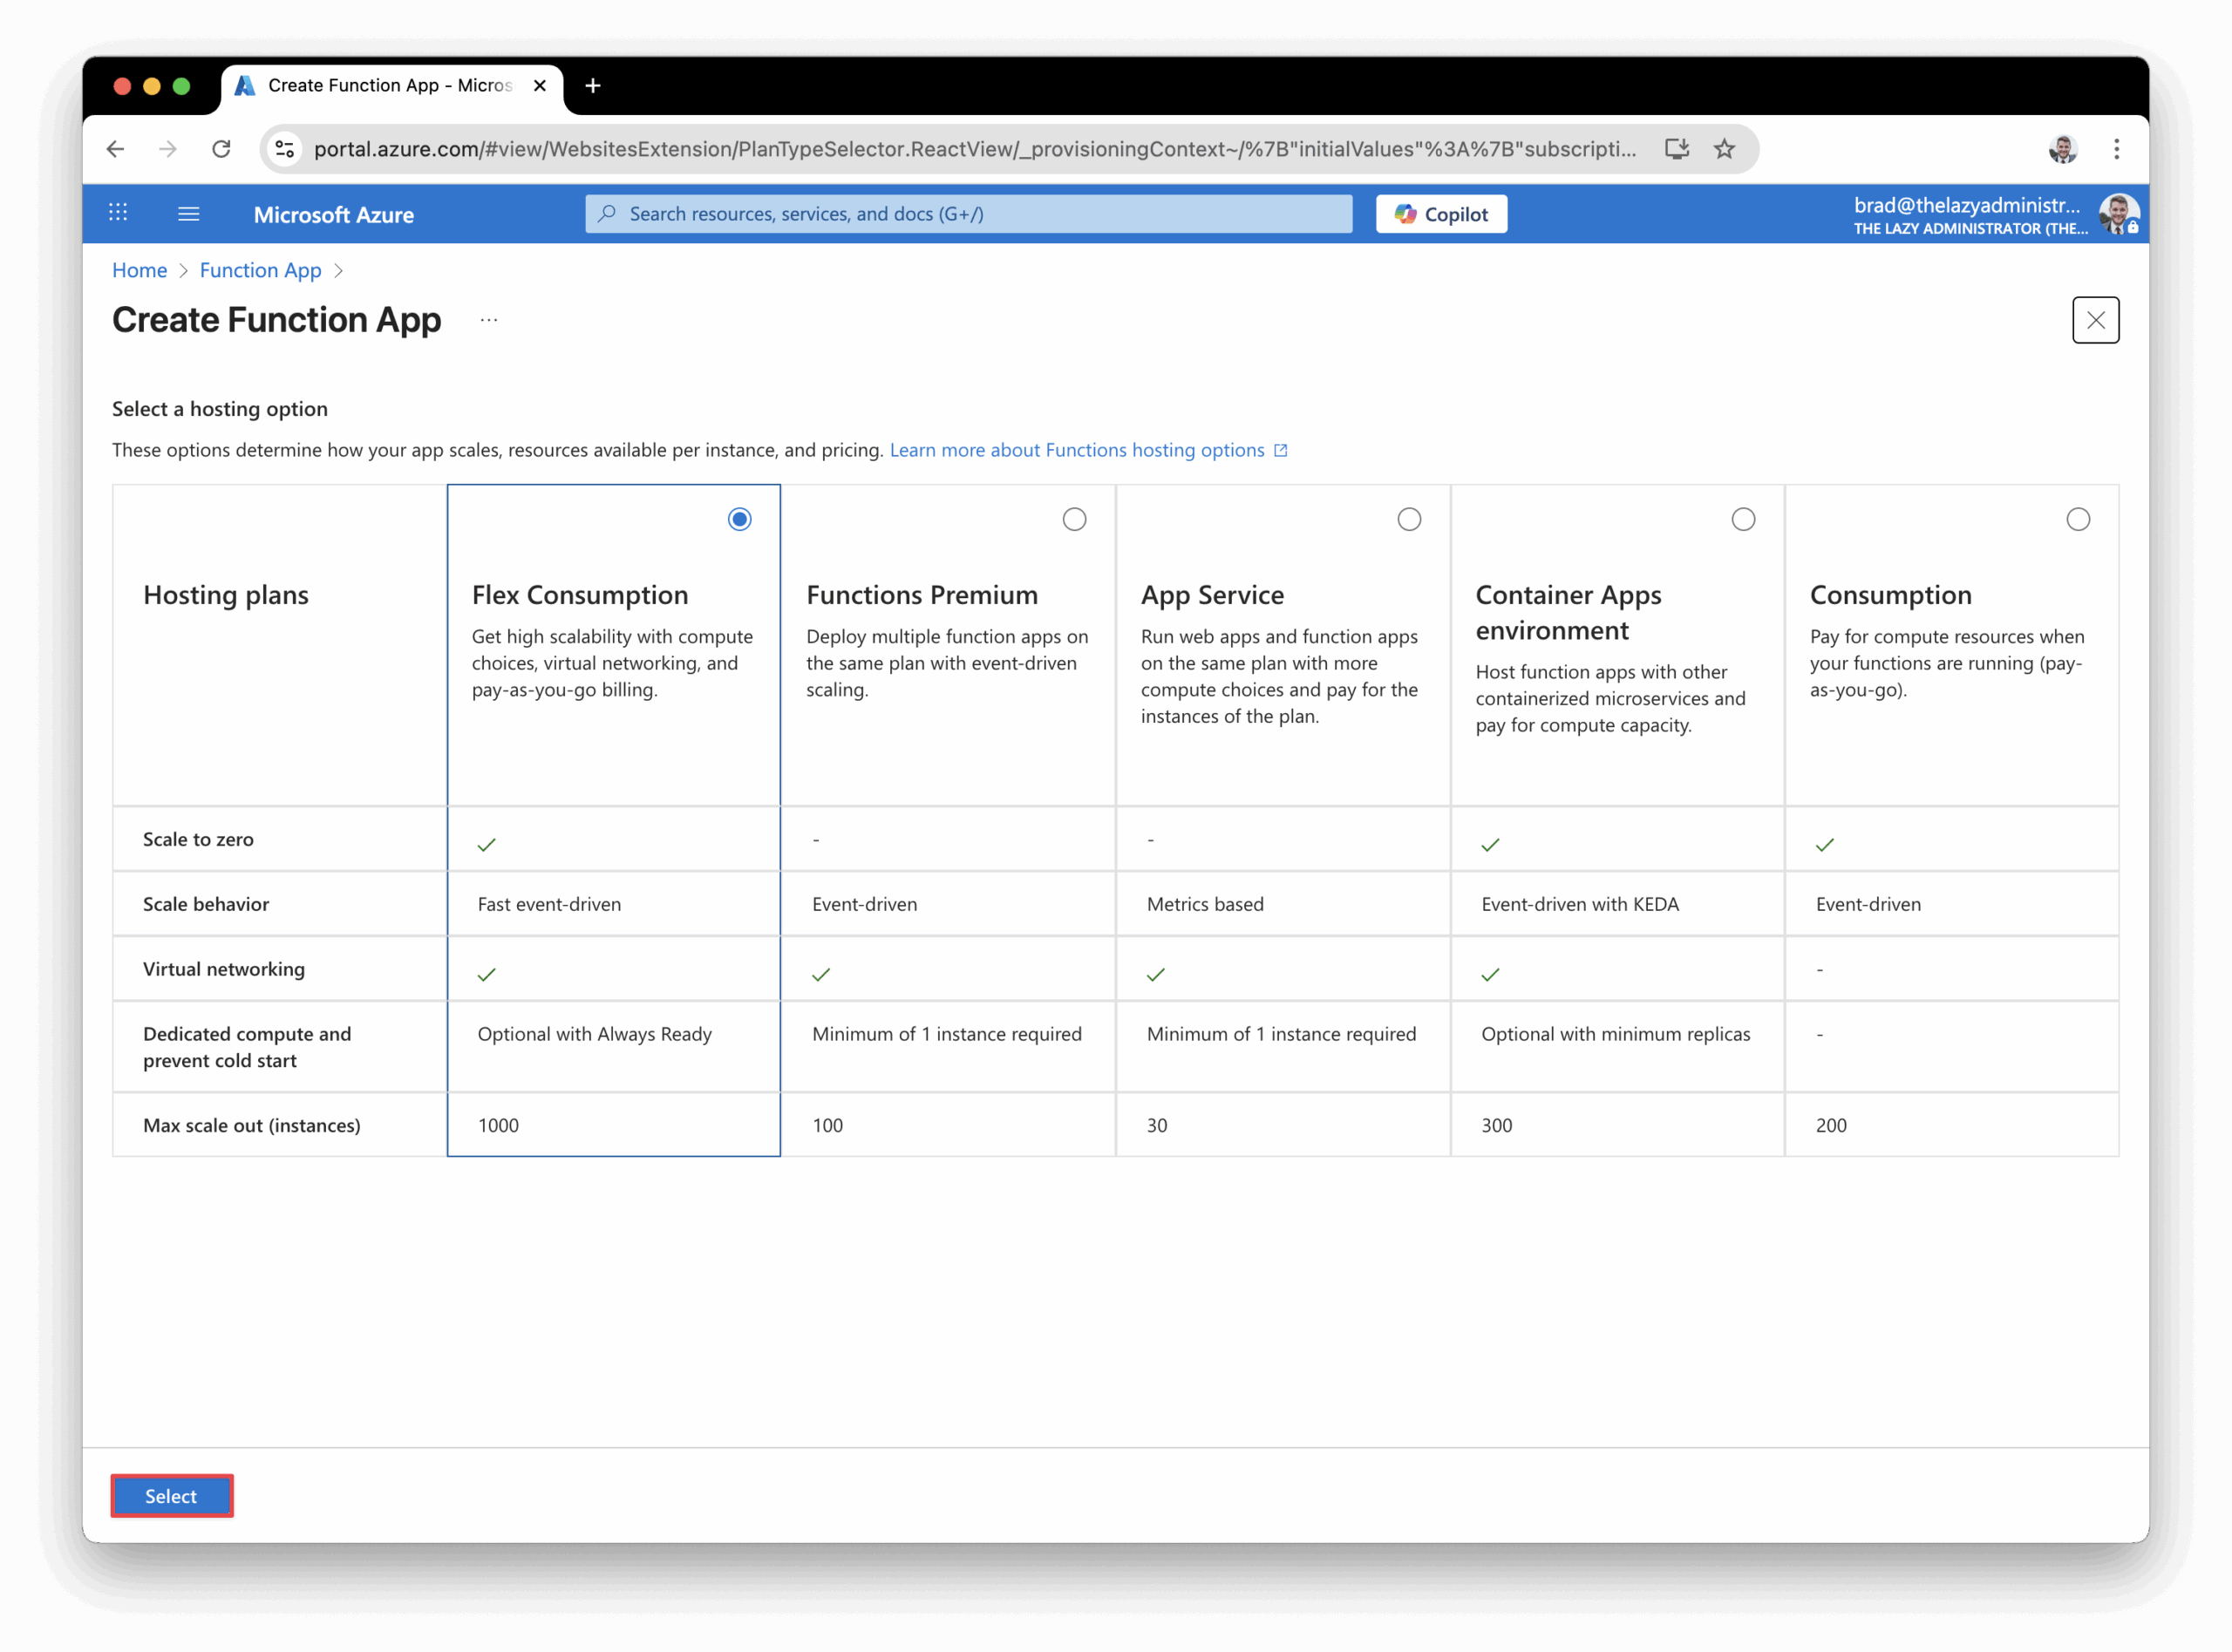
- Select a hosting plan and then click Select
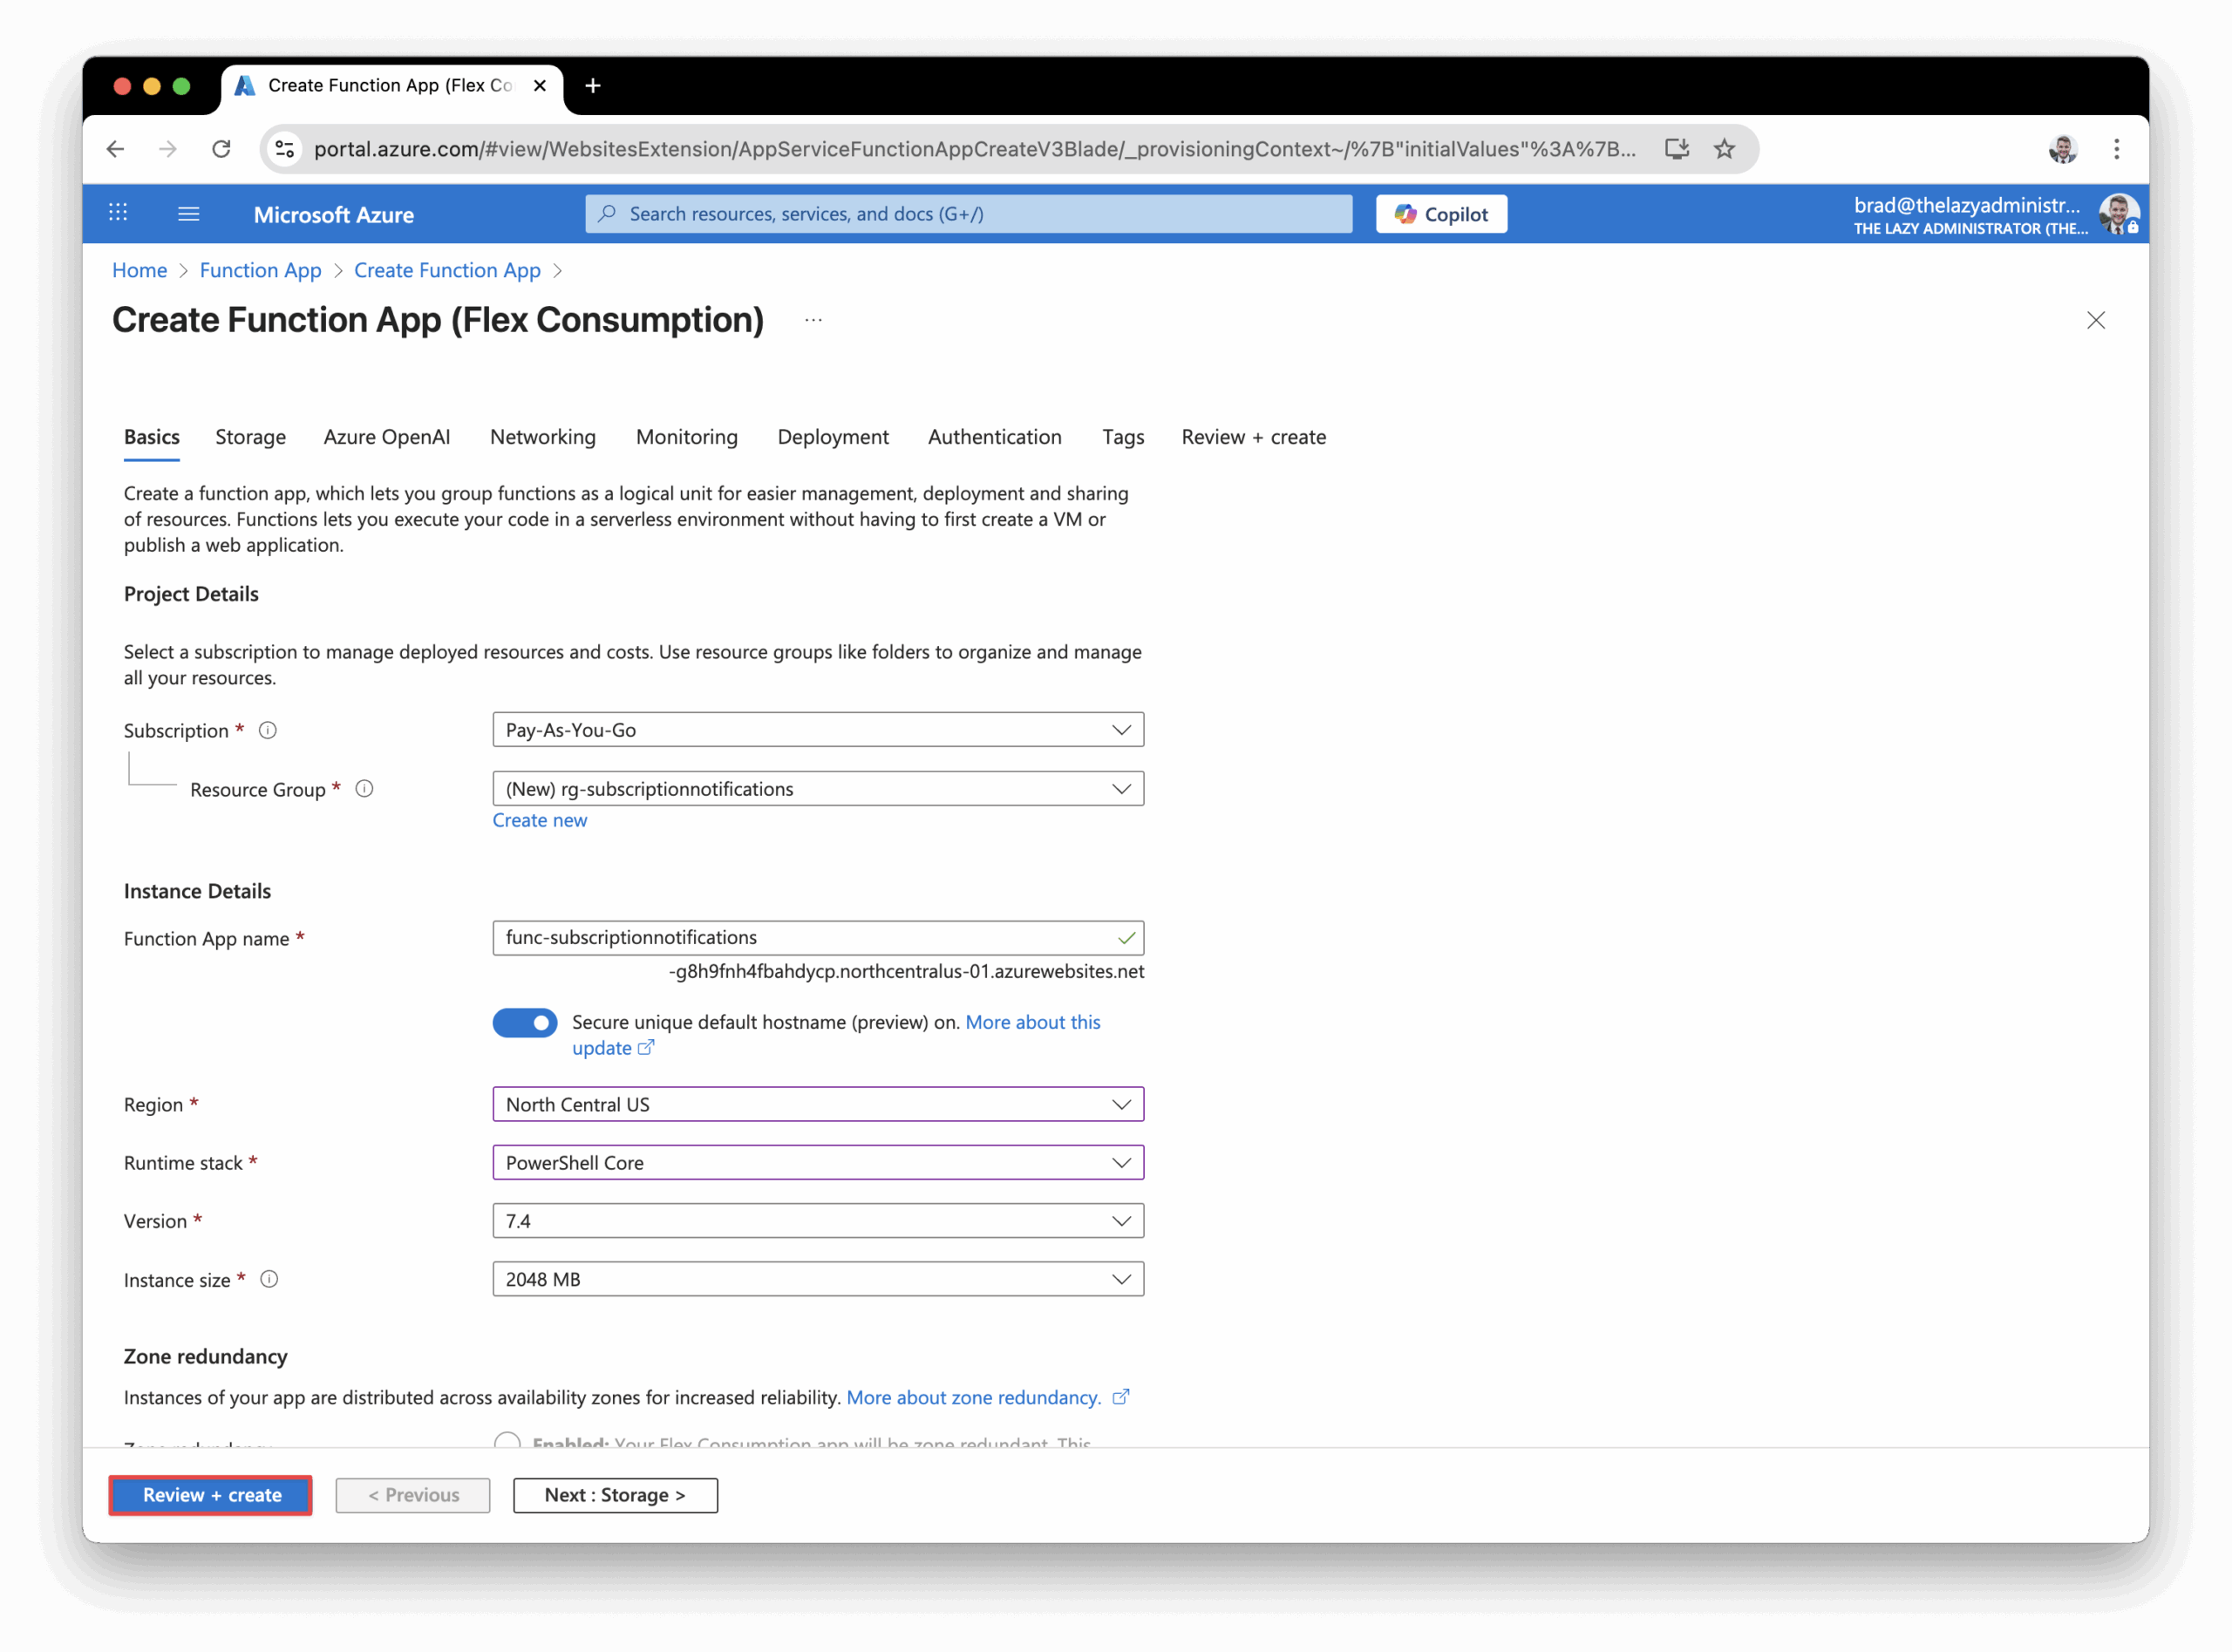
- Configure you function app to your liking. Set the runtime to PowerShell Core and then click Review + Create.
Create Function
Next, we need to create a new HTTP function that will be performing the parsing logic. Click + Create and then for the template select ‘HTTP trigger’. Give your function a name, for my example I called it ‘GitLabEmailSubmitterOnStatusChange’
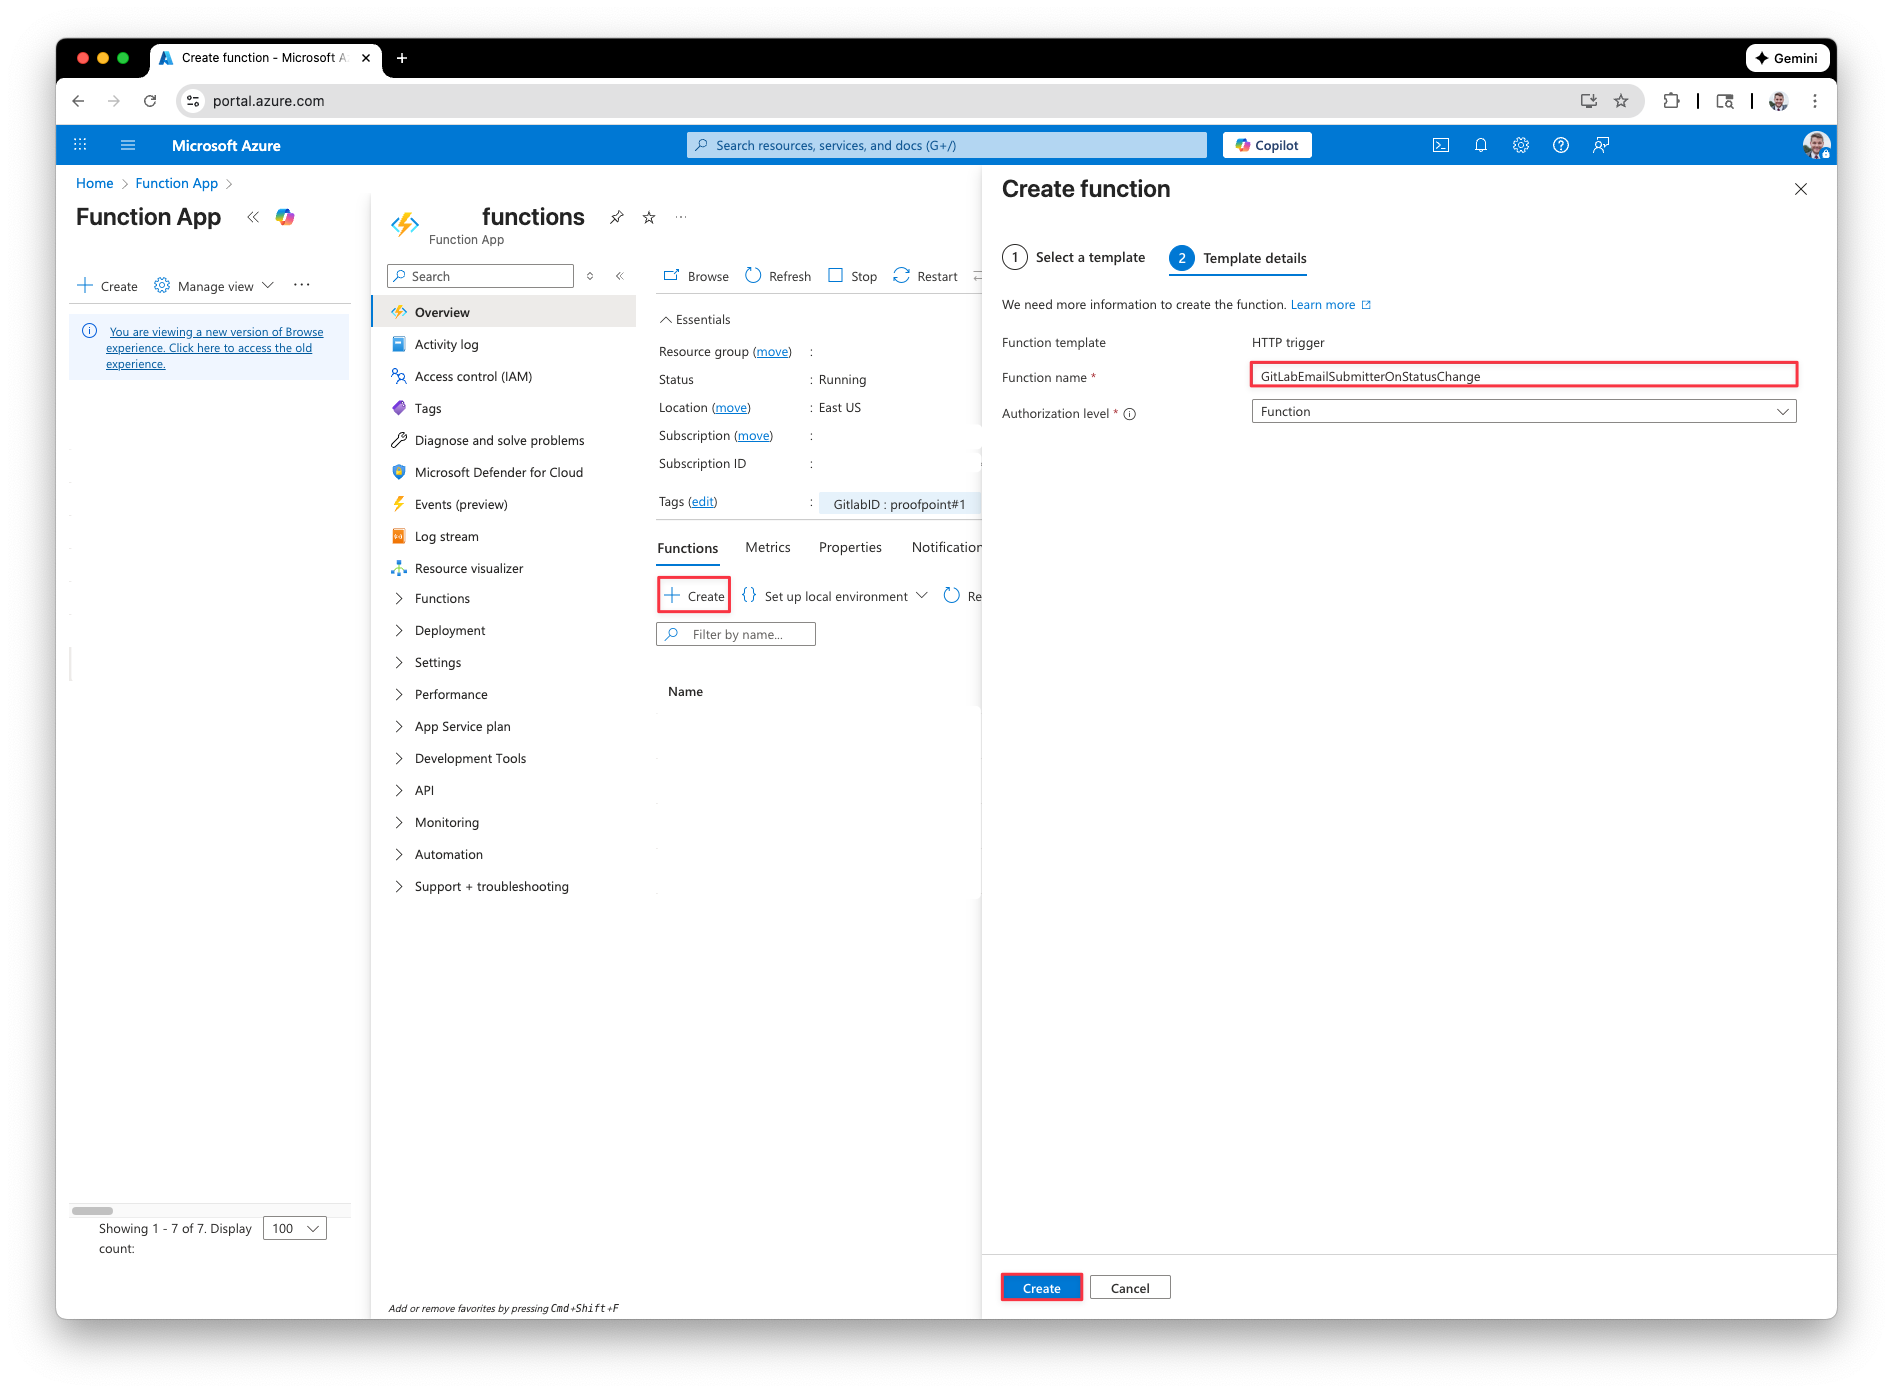
Remove any of the Functions template code and replace it with the code on GitHub here. If you have a self-hosted gitlab instance you may need to change the $gitlabApiUrl value. Do not change the $gitlabAccessToken, we will be creating the environment variable next. Save your changes.

Note: if you are curious on how to get the user details from the CRM, you need to use the GraphQL API endpoint (it is currently not available in the REST endpoint). You can run the following query using the GraphQL explorer:
{
  project(fullPath: "COMPANY/GROUP/PROJECT") {
    issue(iid: "23") {
      iid
      title
      customerRelationsContacts {
        nodes {
          id
          firstName
          lastName
          email
          phone
          active
          description
          organization {
            id
            name
          }
        }
      }
    }
  }
}Get function URL
Next, click “Get function URL” and copy the “default (Function key).” Note this value down for later.
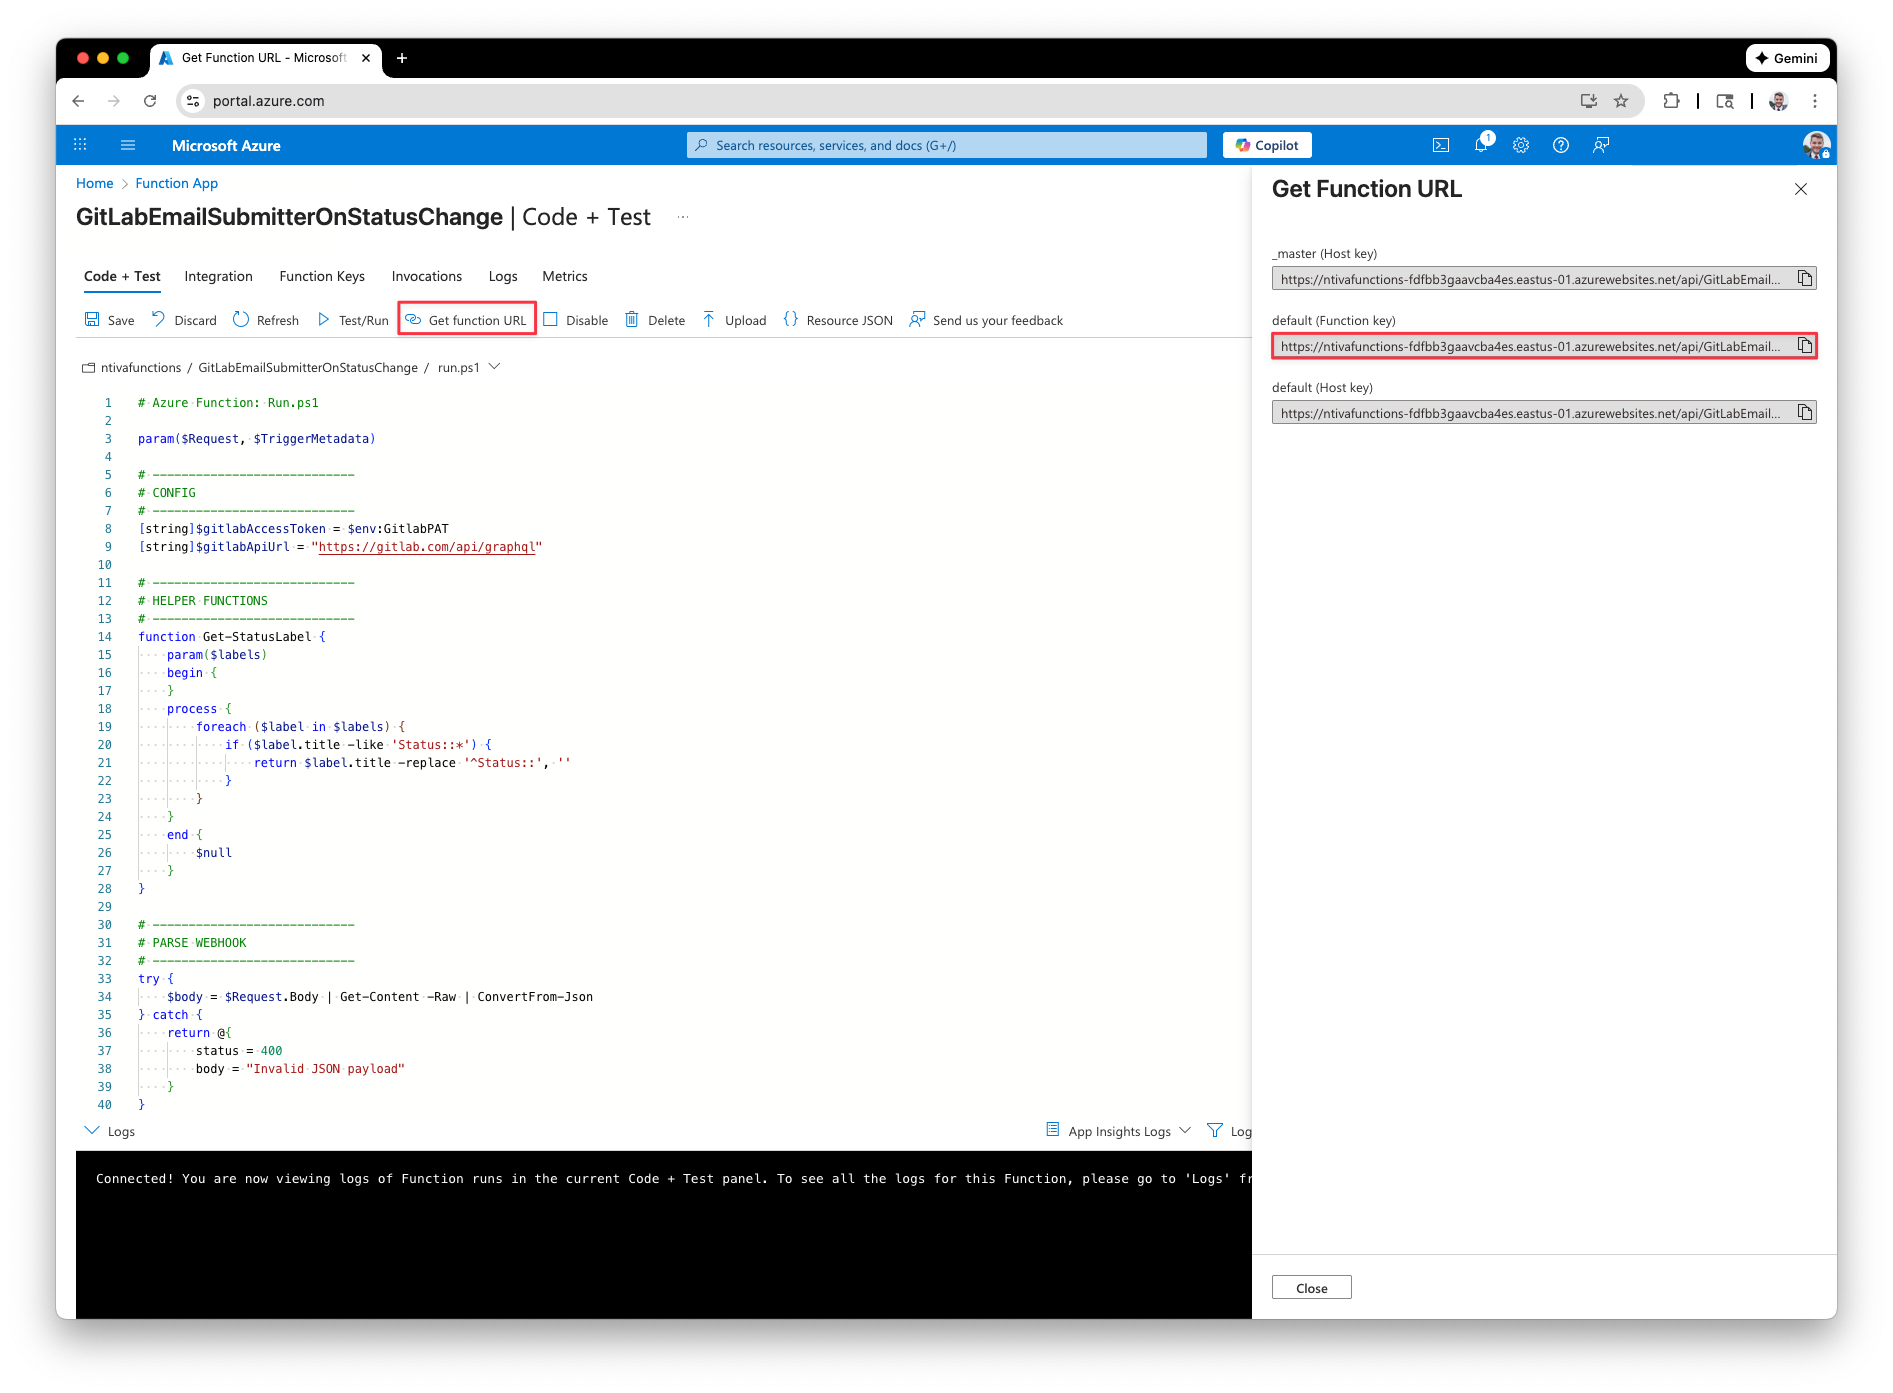
Add Environment Variable
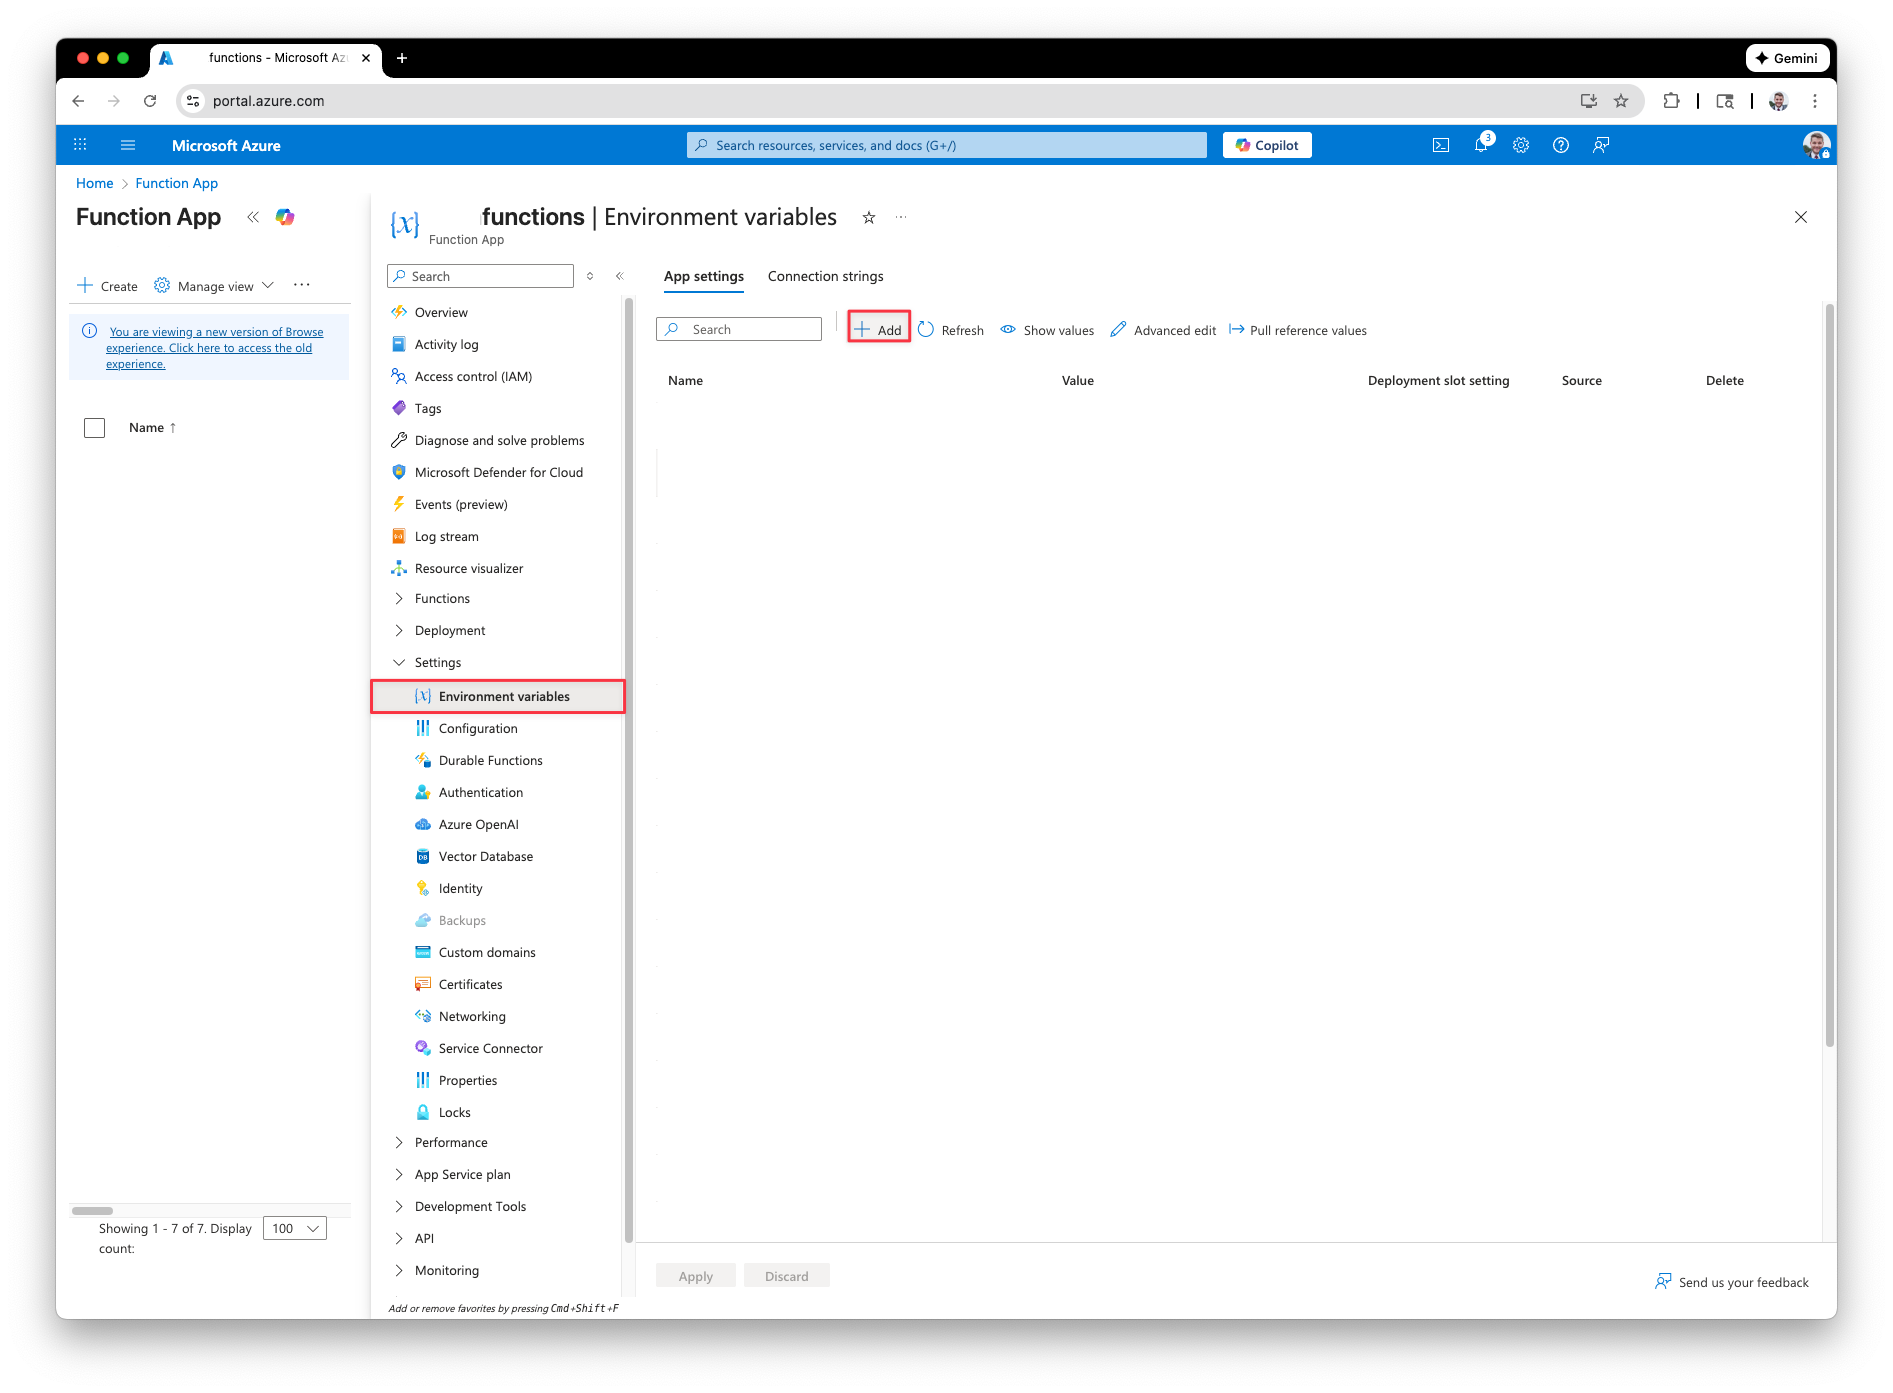
Go back to the Function App and in the left pane expand “Settings” and click “Environment variables.” In the Environment variables screen, click + Add.
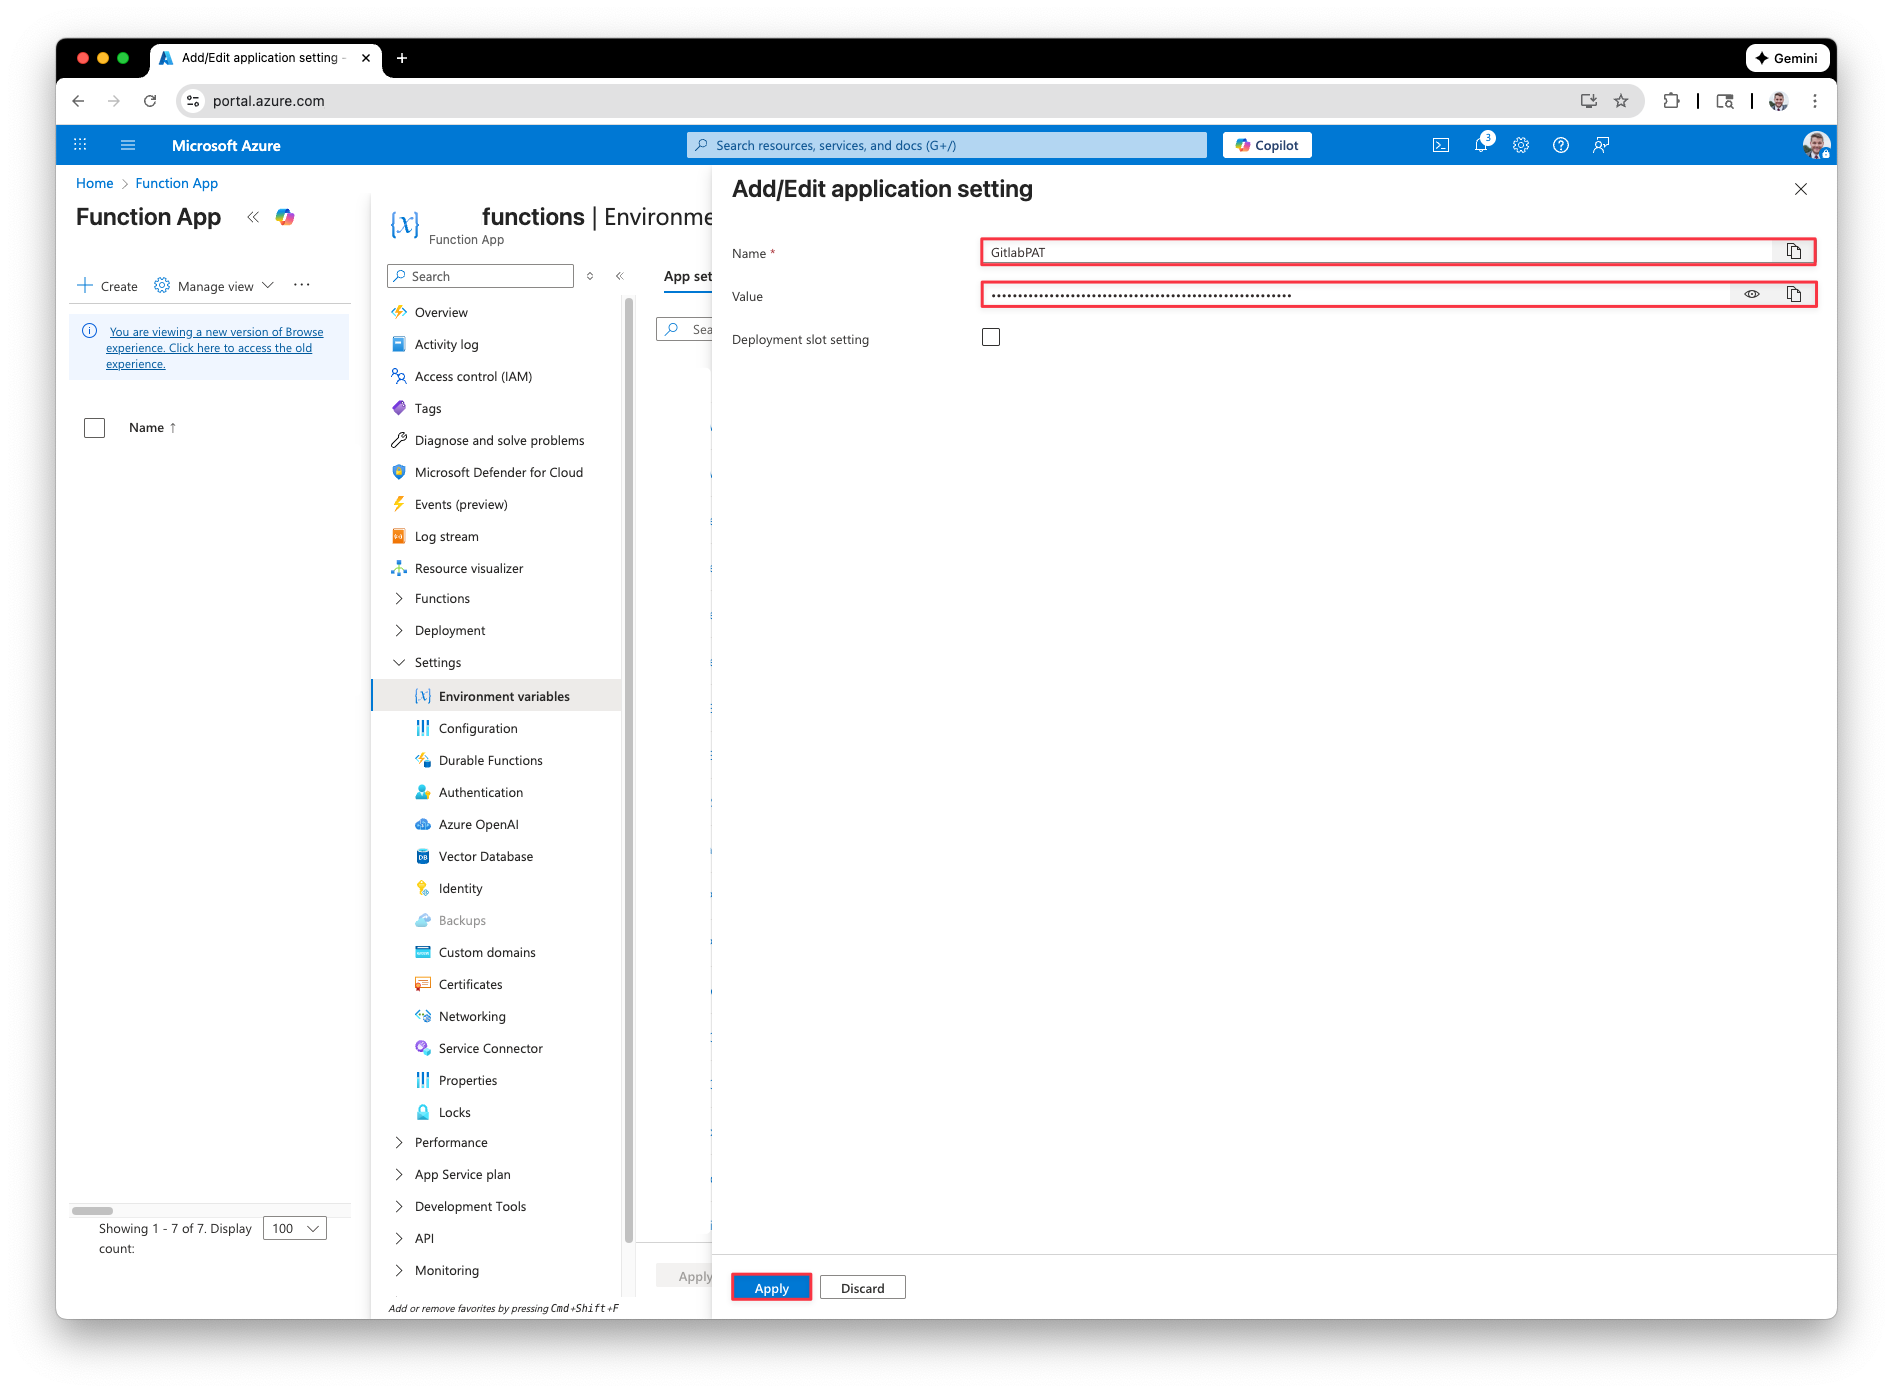
The name of the variable should be, “GitlabPAT” and the value is the Gitlab access token we created earlier. Click Apply.
Create Gitlab Webhook
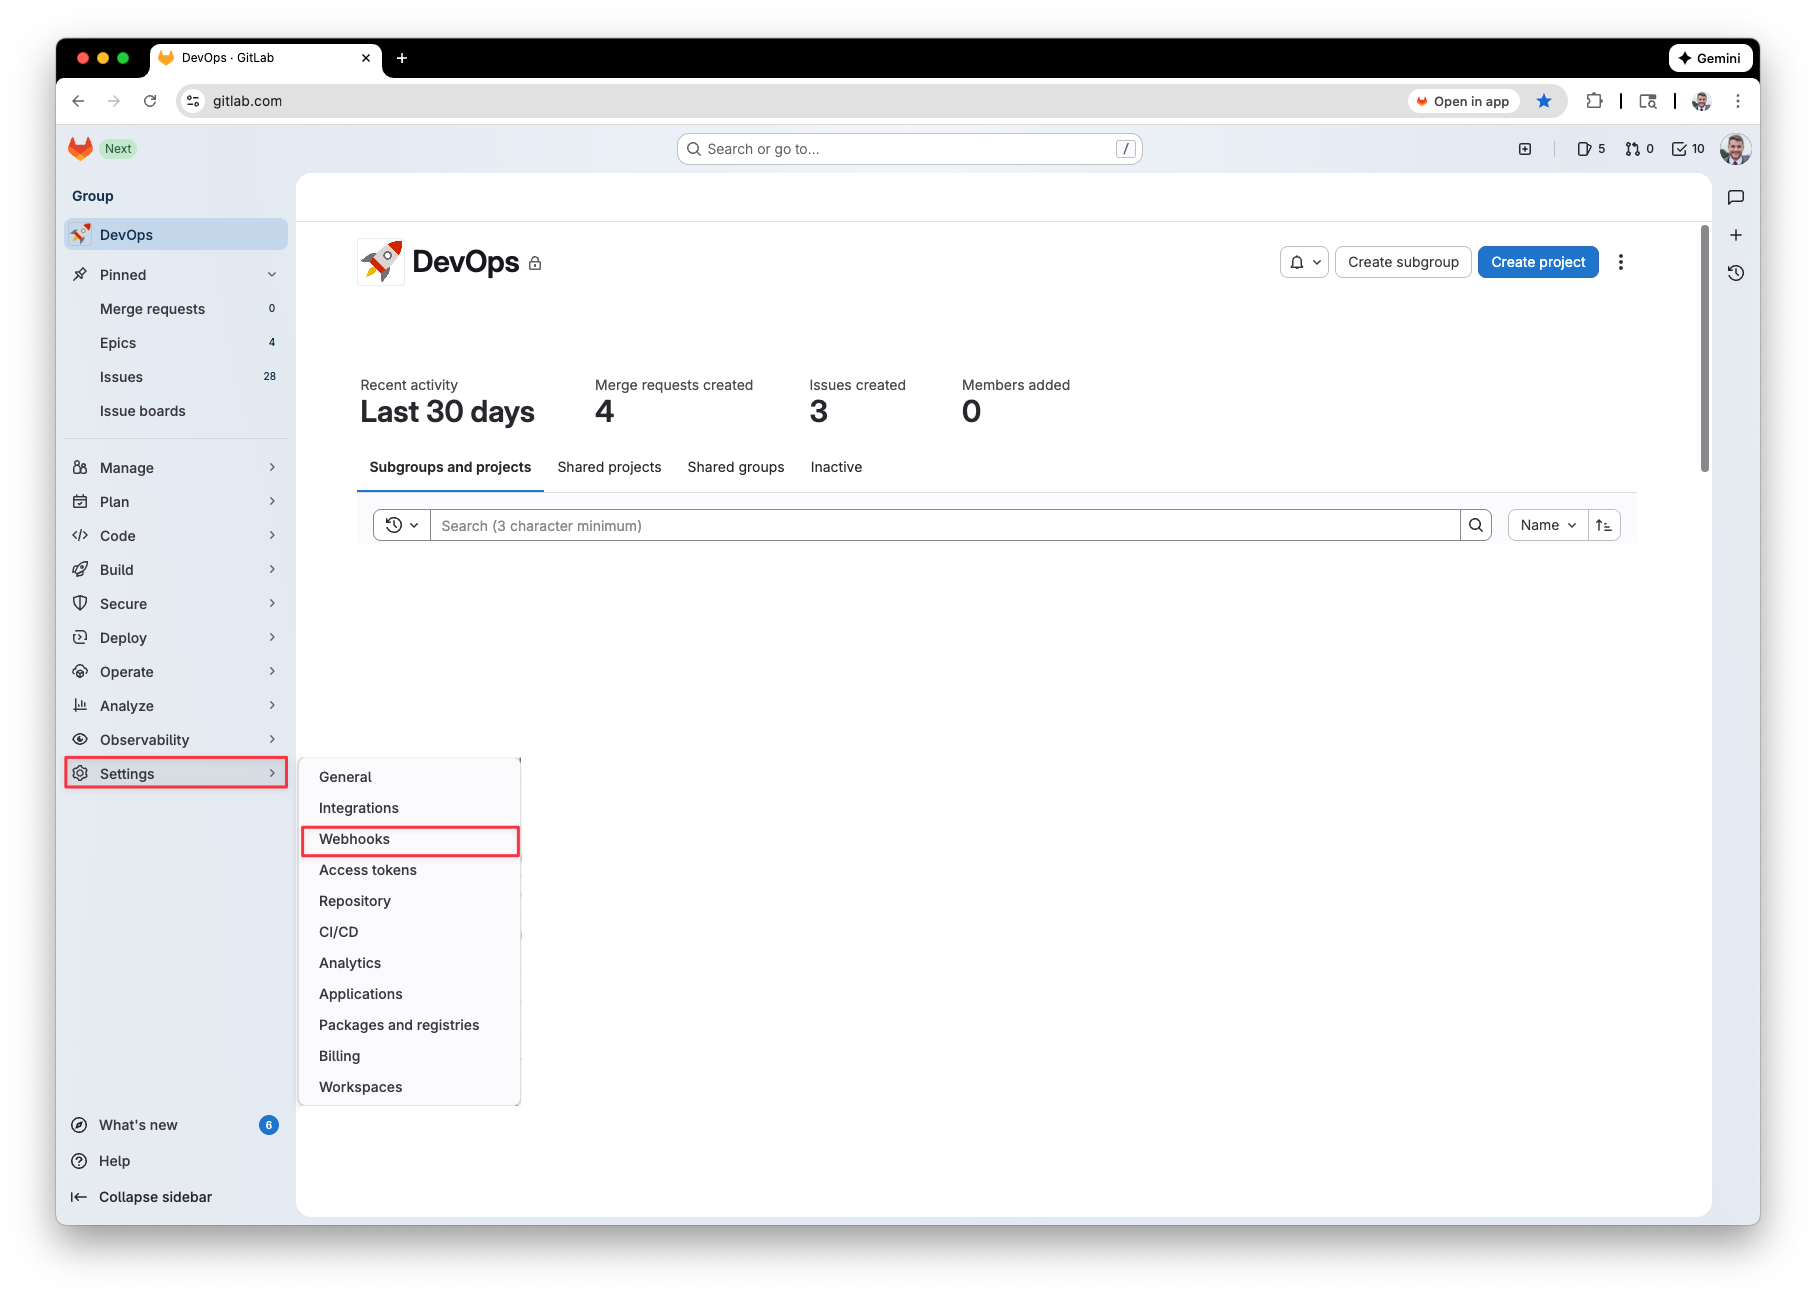
Next, we need to create the webhook that will trigger when an item is created, updated, closed or re-opened. You can make a webhook scoped to a group or project. In my case I want it to be scoped for an entire group that contains multiple projects so its triggered on all items within the project. To do so, go to Gitlab > Groups > (click the group) > Settings > Webhooks.
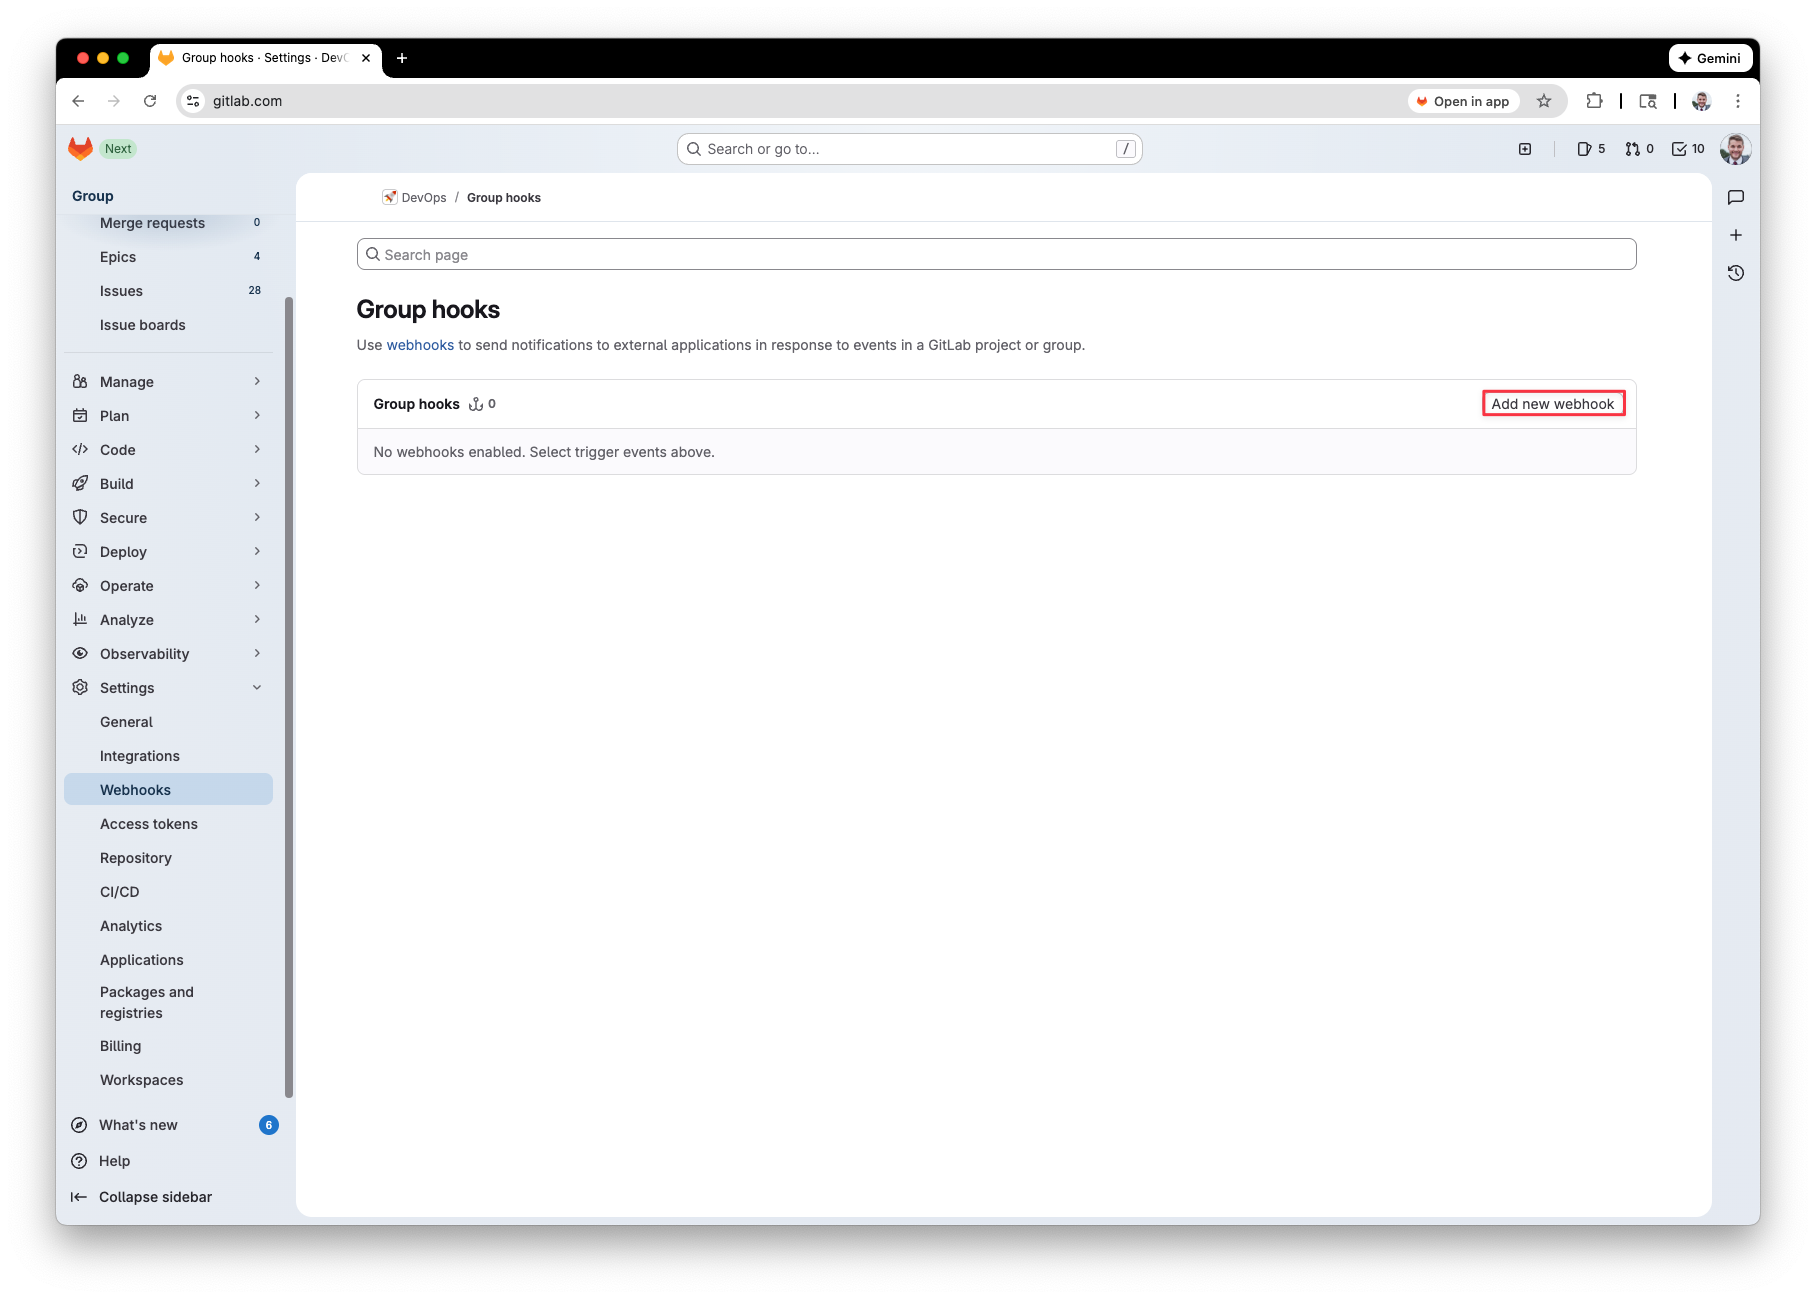
Click the “Add new webhook” button.
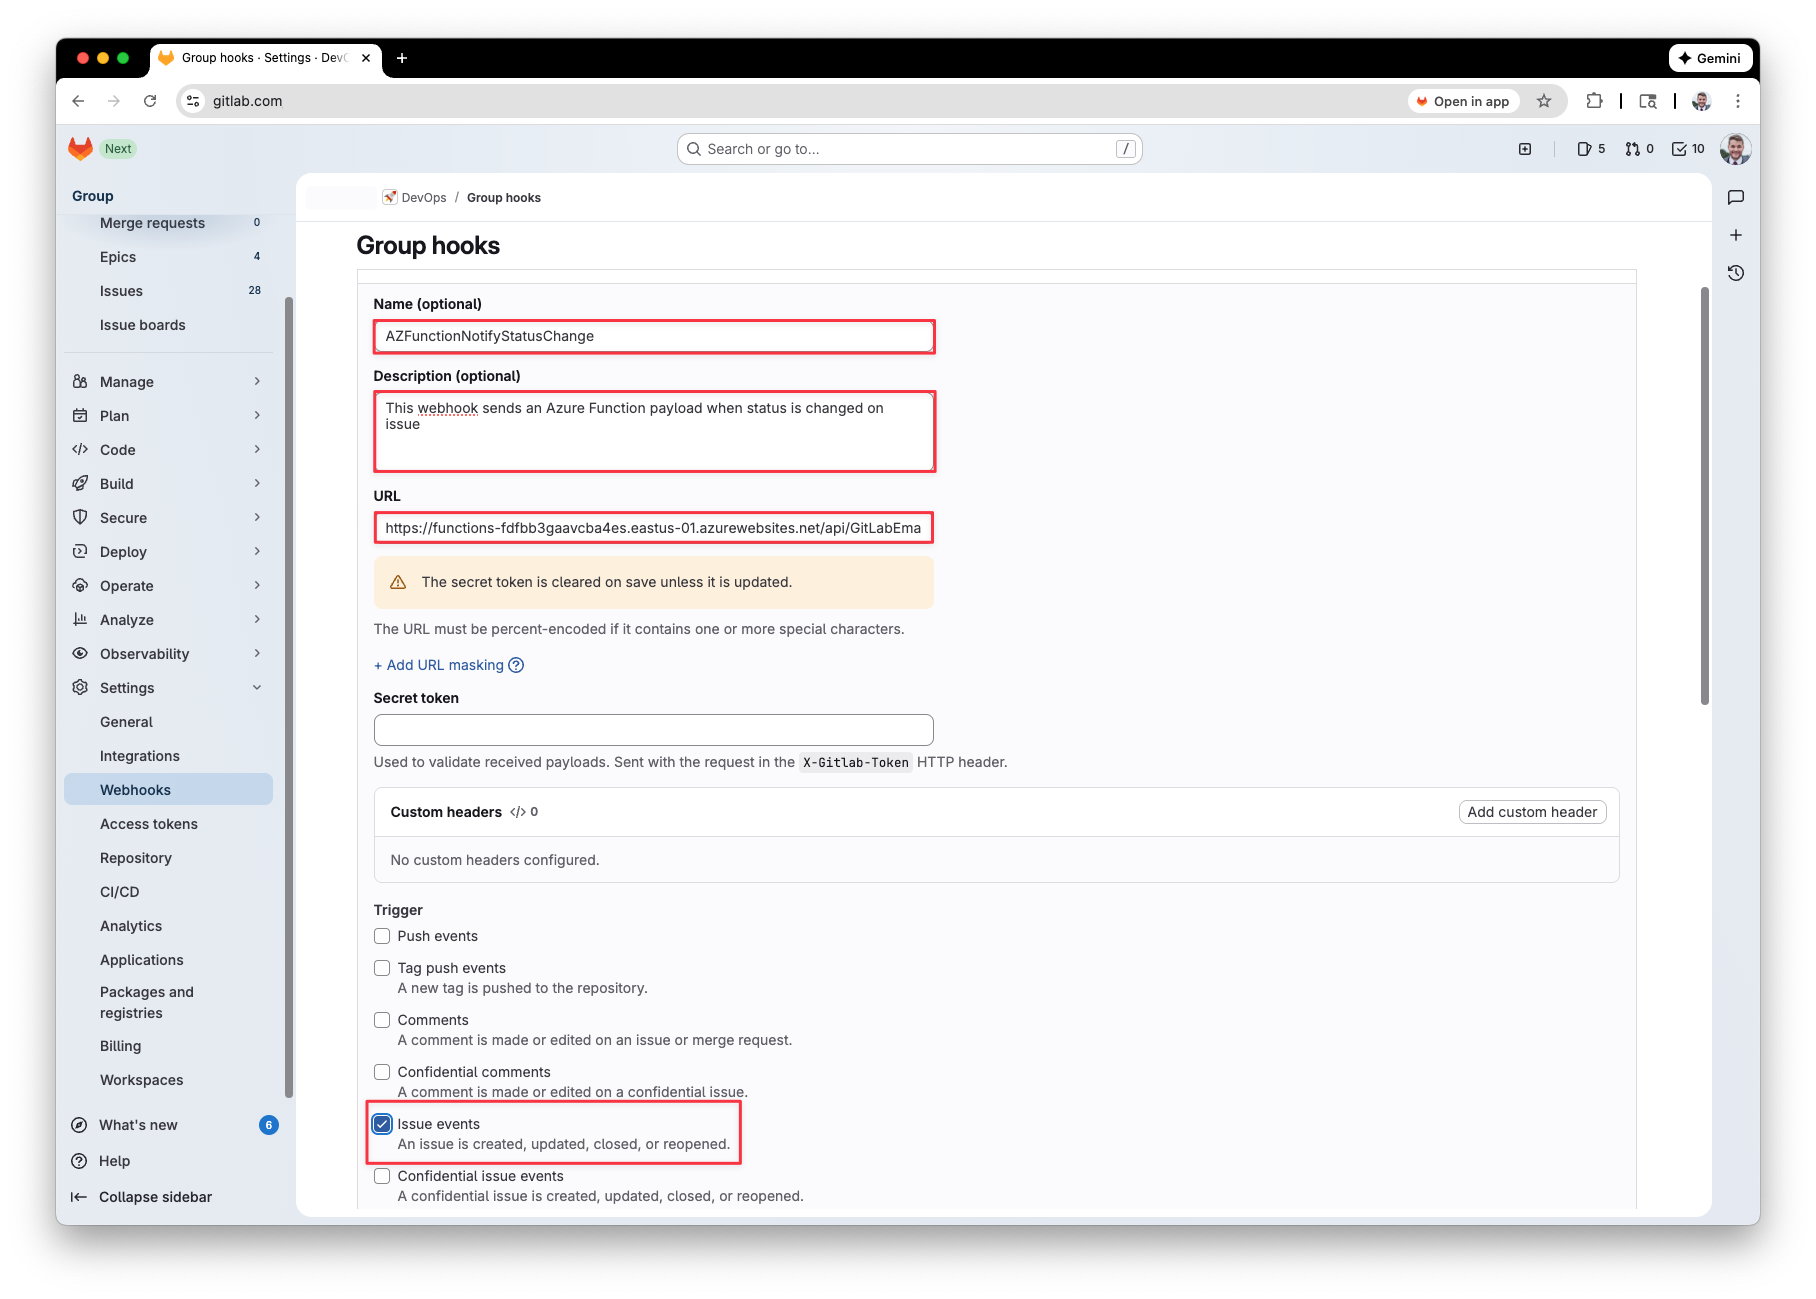
Give your webhook a valid name, description, and for the URL paste the Azure function’s URL from earlier. For the trigger, select ‘Issue Events.’
Create Logic App
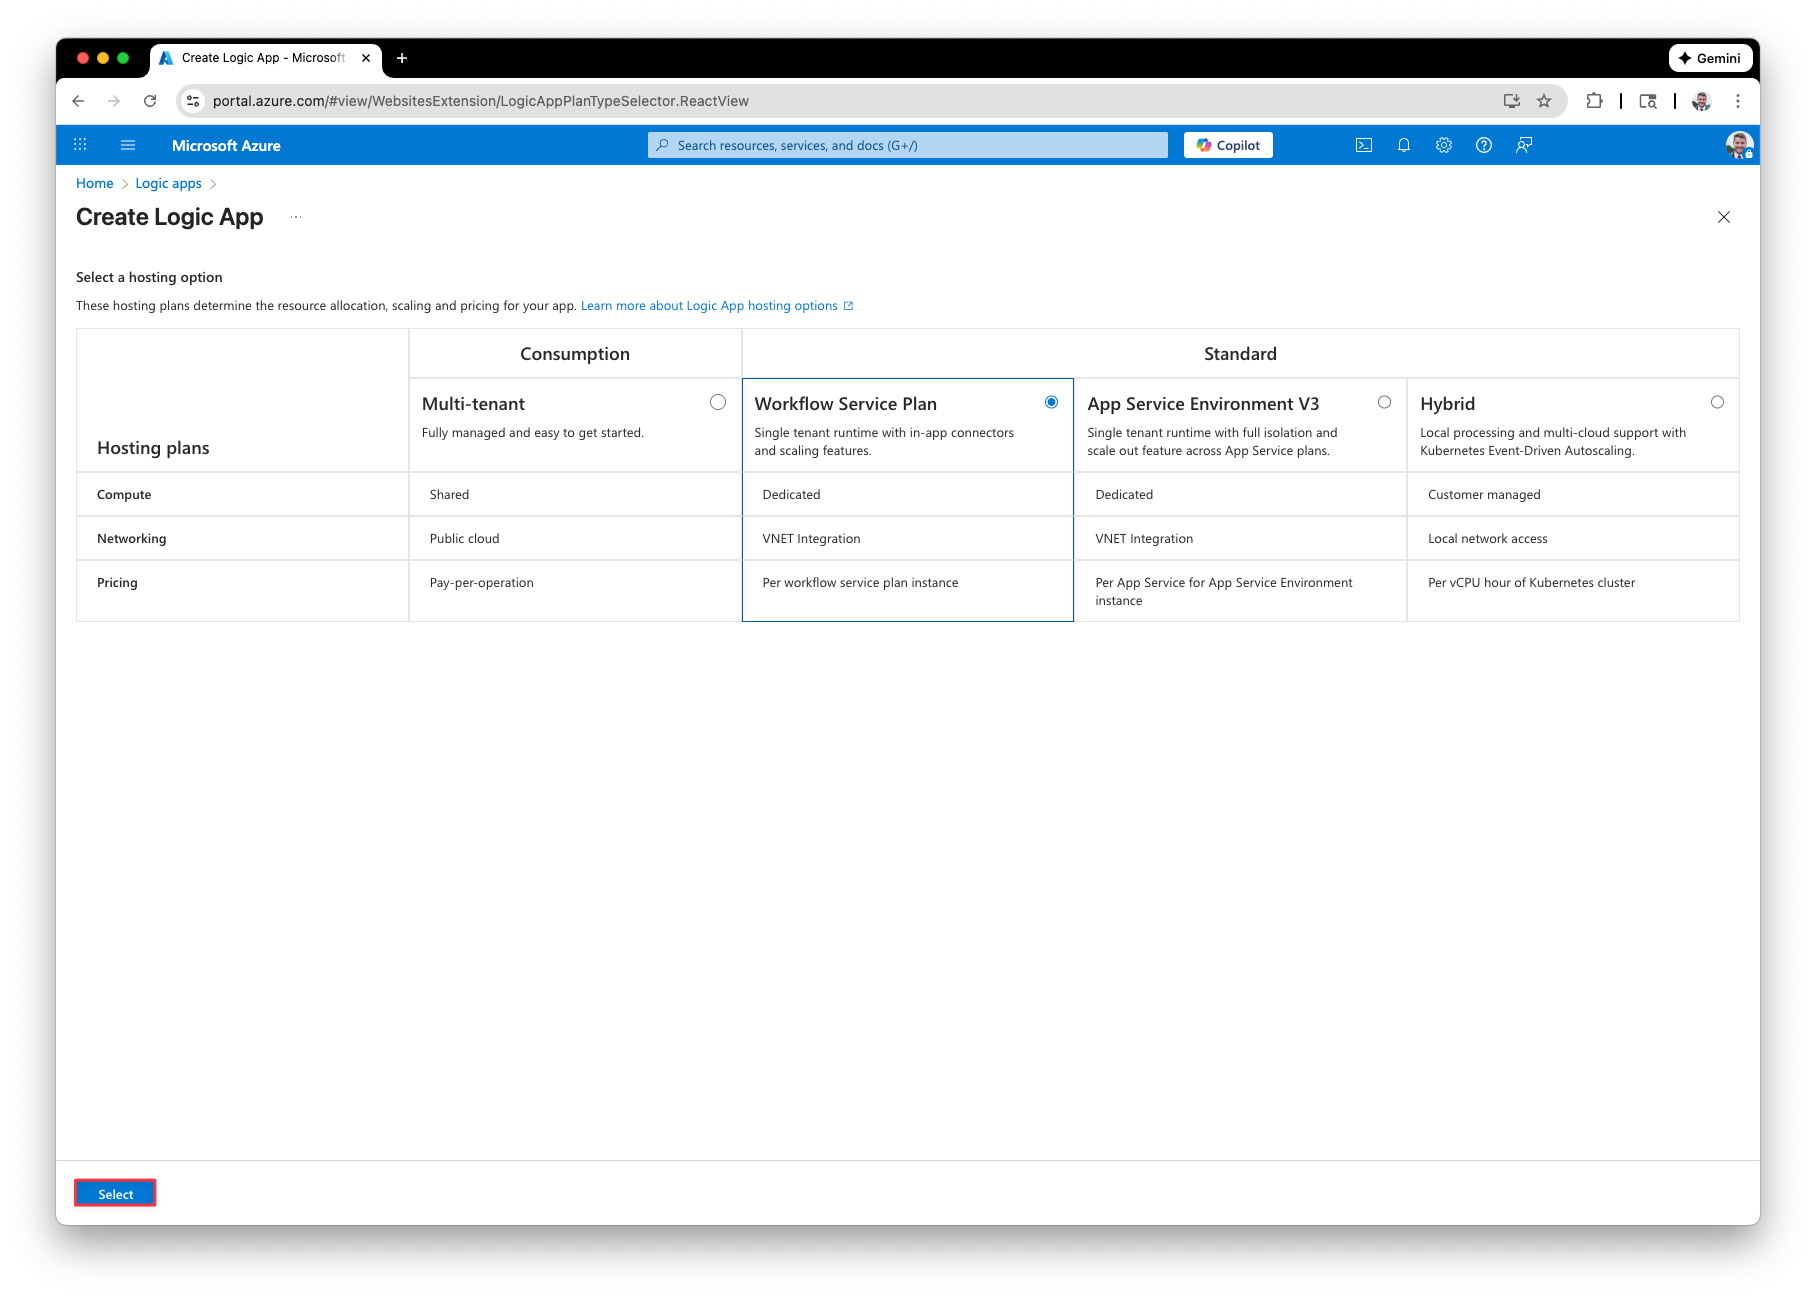
Now that we have the Azure Function created and configured to respond to the webhooks, and the webhook configured to send the Function payload information for issue events, we need to bring it all together. Navigate back to the Azure Portal and create a new Logic App. First, select a hosting option and then click Select.
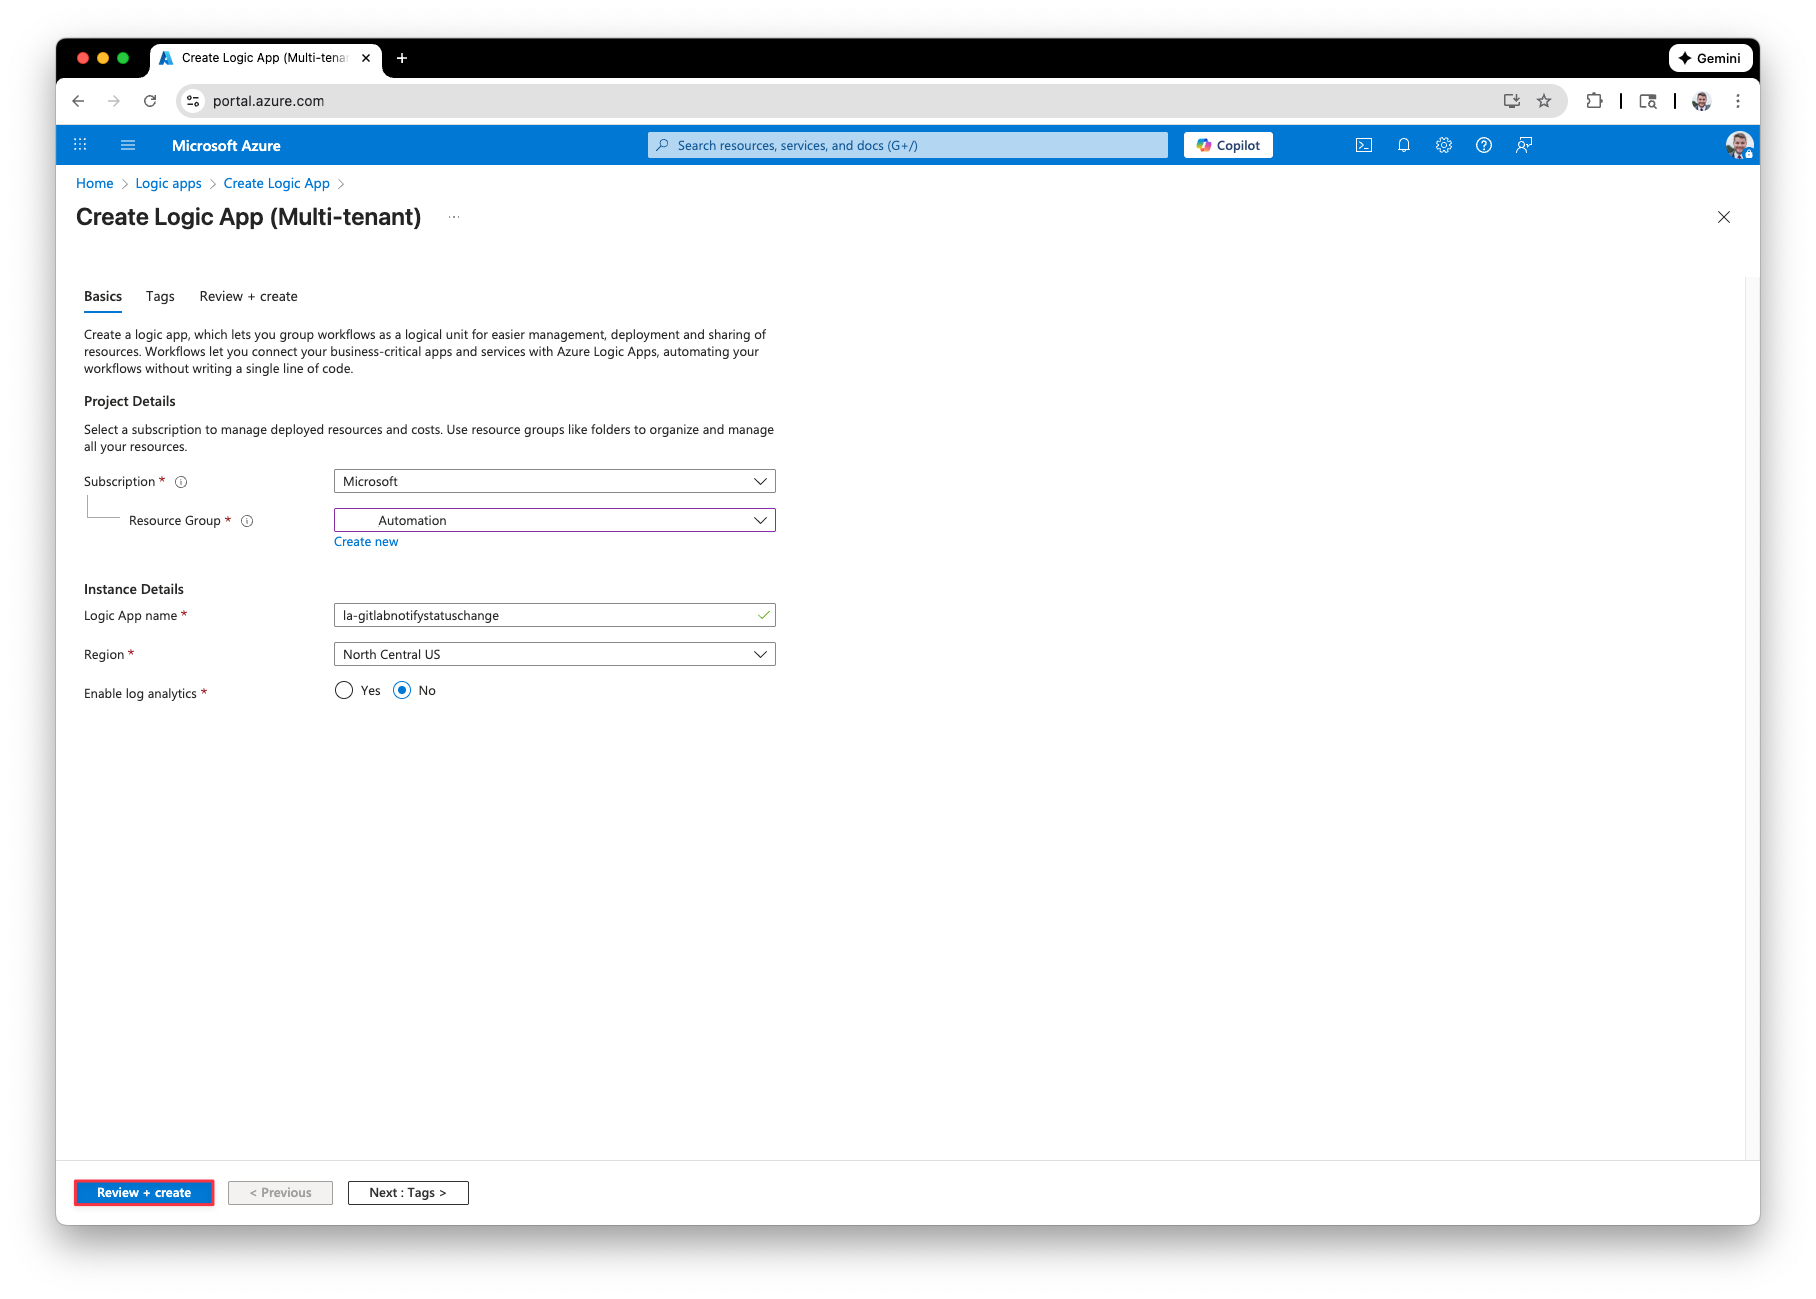
Next, create or select a Resource Group. Provide your logic app with a valid name and select the region information (if applicable). Click Review + Create when finished.
For the trigger, select “When an HTTP request is received” and for the “Request Body JSON Schema” paste the following:
{
    "type": "object",
    "properties": {
        "OldStatus": {
            "type": "string"
        },
        "NewStatus": {
            "type": "string"
        },
        "ContactEmail": {
            "type": "string"
        },
        "FirstName": {
            "type": "string"
        },
        "IssueId": {
            "type": "string"
        },
        "IssueTitle": {
            "type": "string"
        },
        "ProjectPath": {
            "type": "string"
        }
    }
}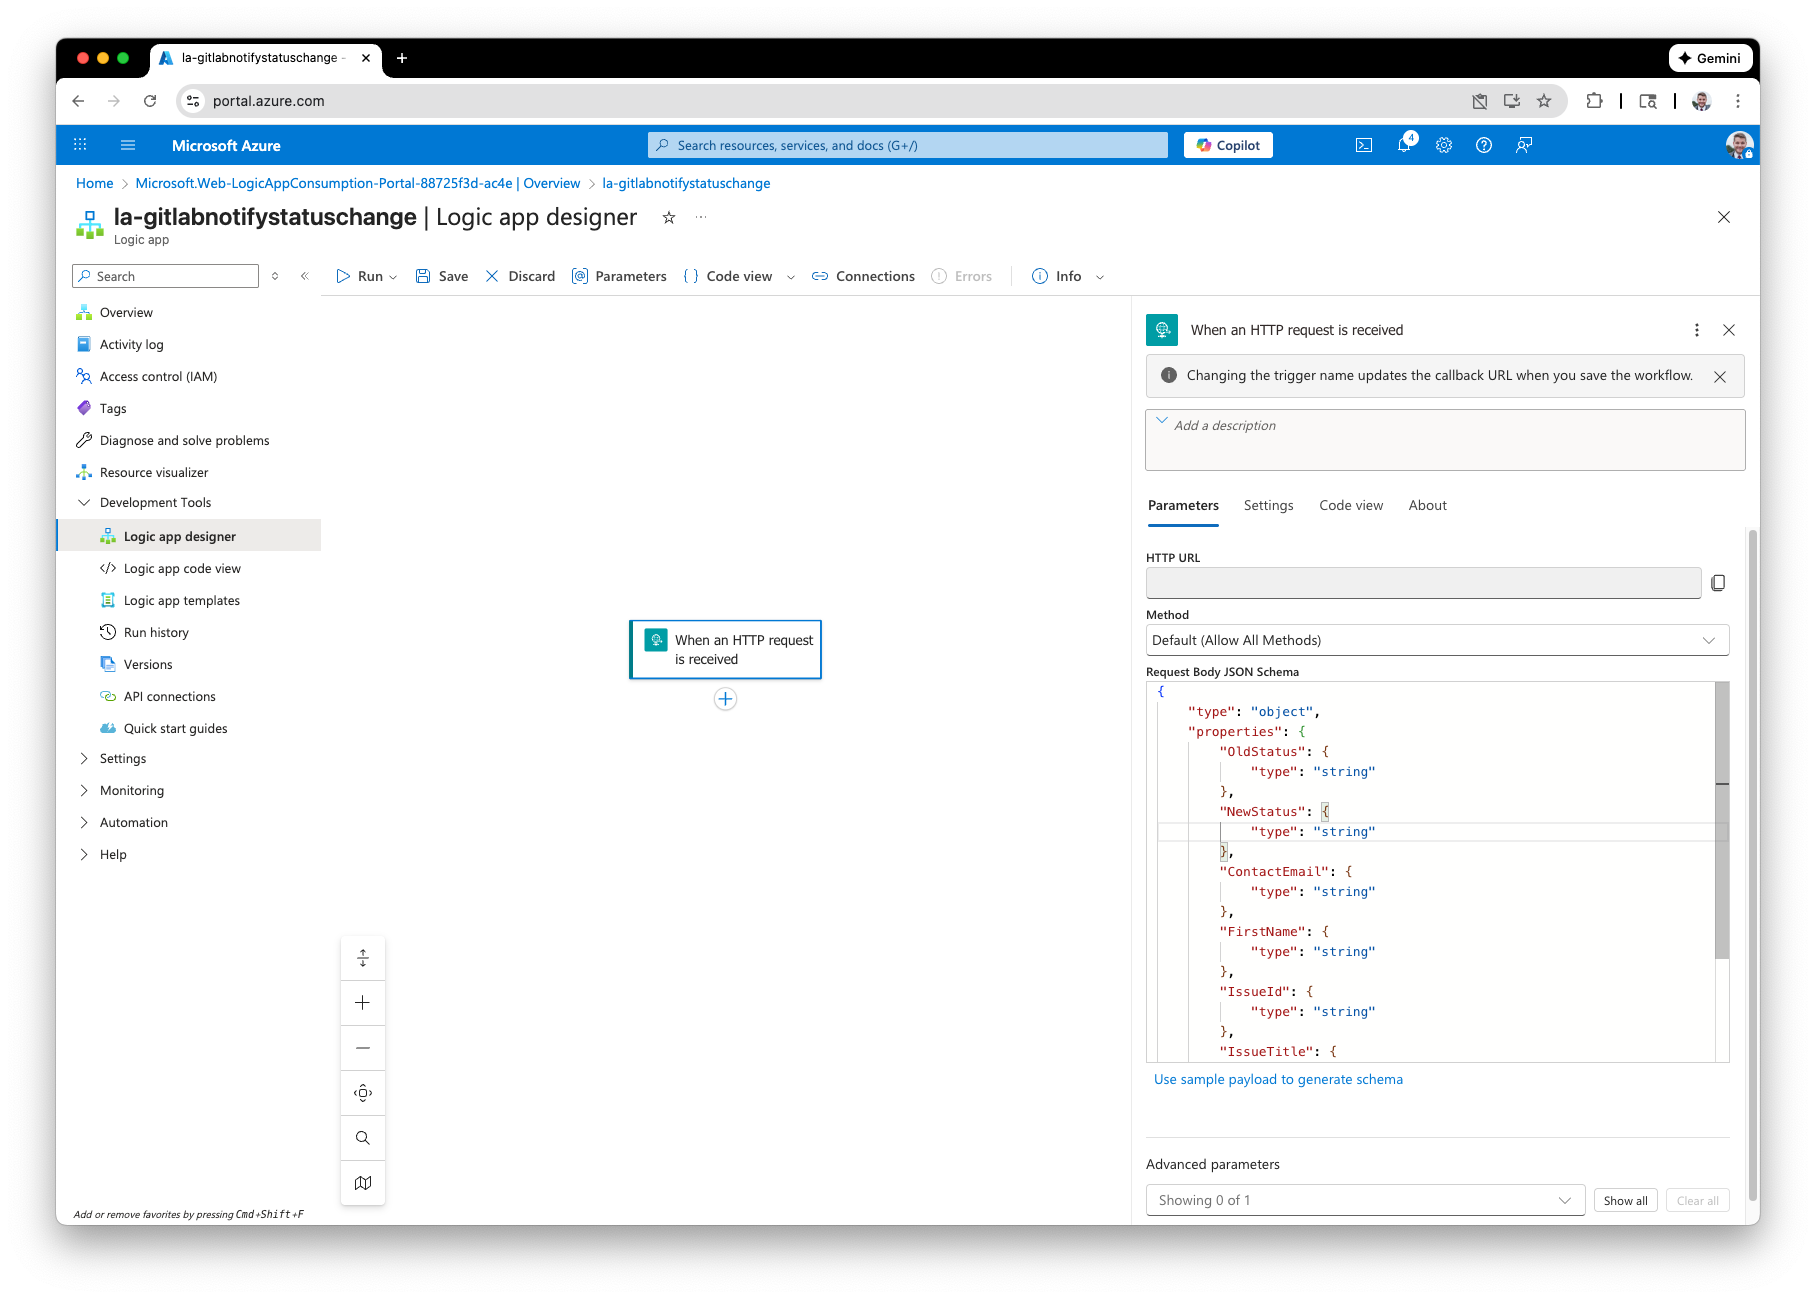
Click Save and then copy the HTTP URL for the trigger.
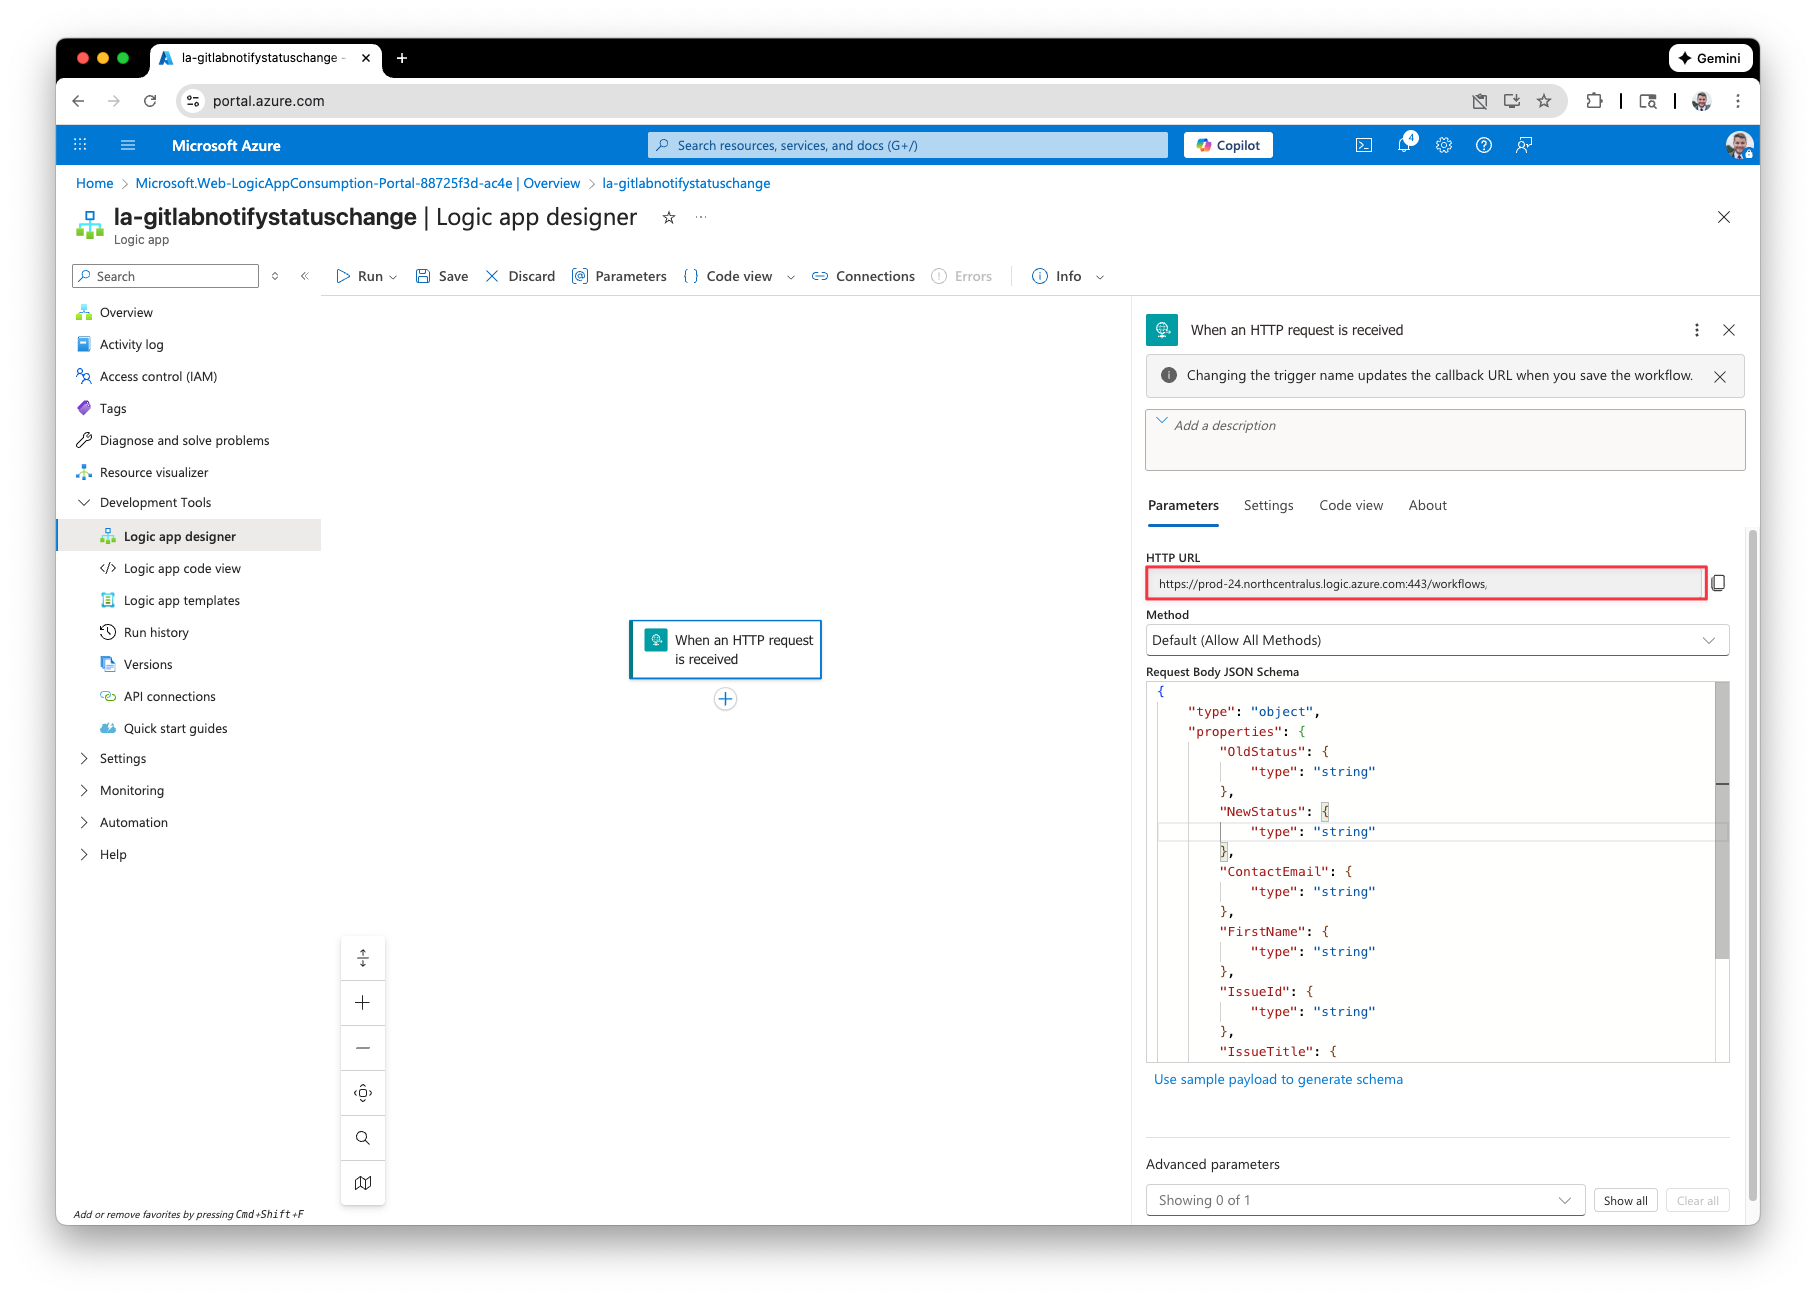
Next, for the action we want to select “Send an email (V2)”. (Note: make sure you are choosing the Office 365 Outlook action and not Outlook.com).
When crafting the email settings, you can now bring in the properties from the earlier step.
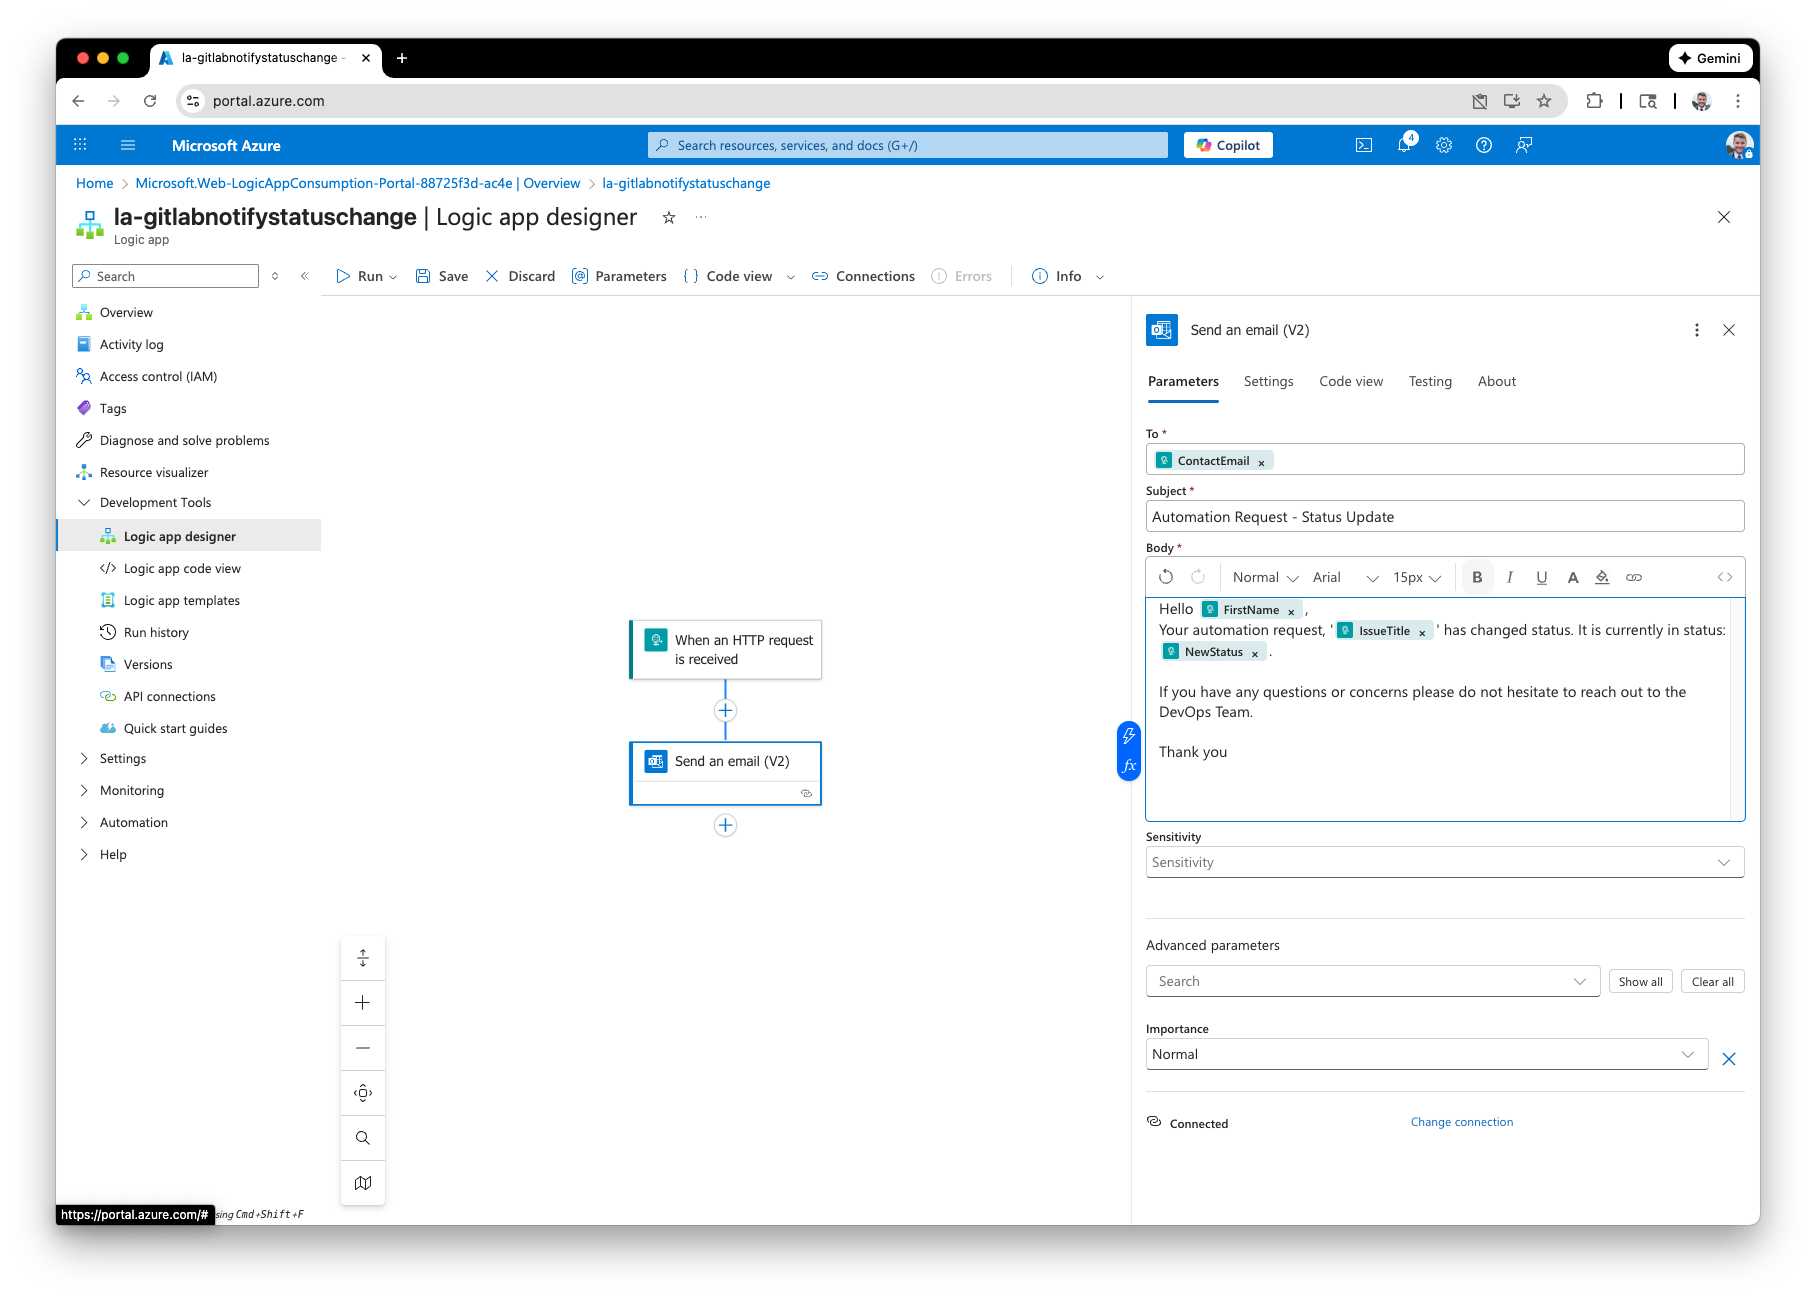
Add Logic App URL as Function Environment Variable
The last thing we need to do is to create a new environment variable for our Azure Function called logicAppEndpoint which is the URL for our Logic App’s trigger, ‘When an HTTP request is received’ that we copied earlier.
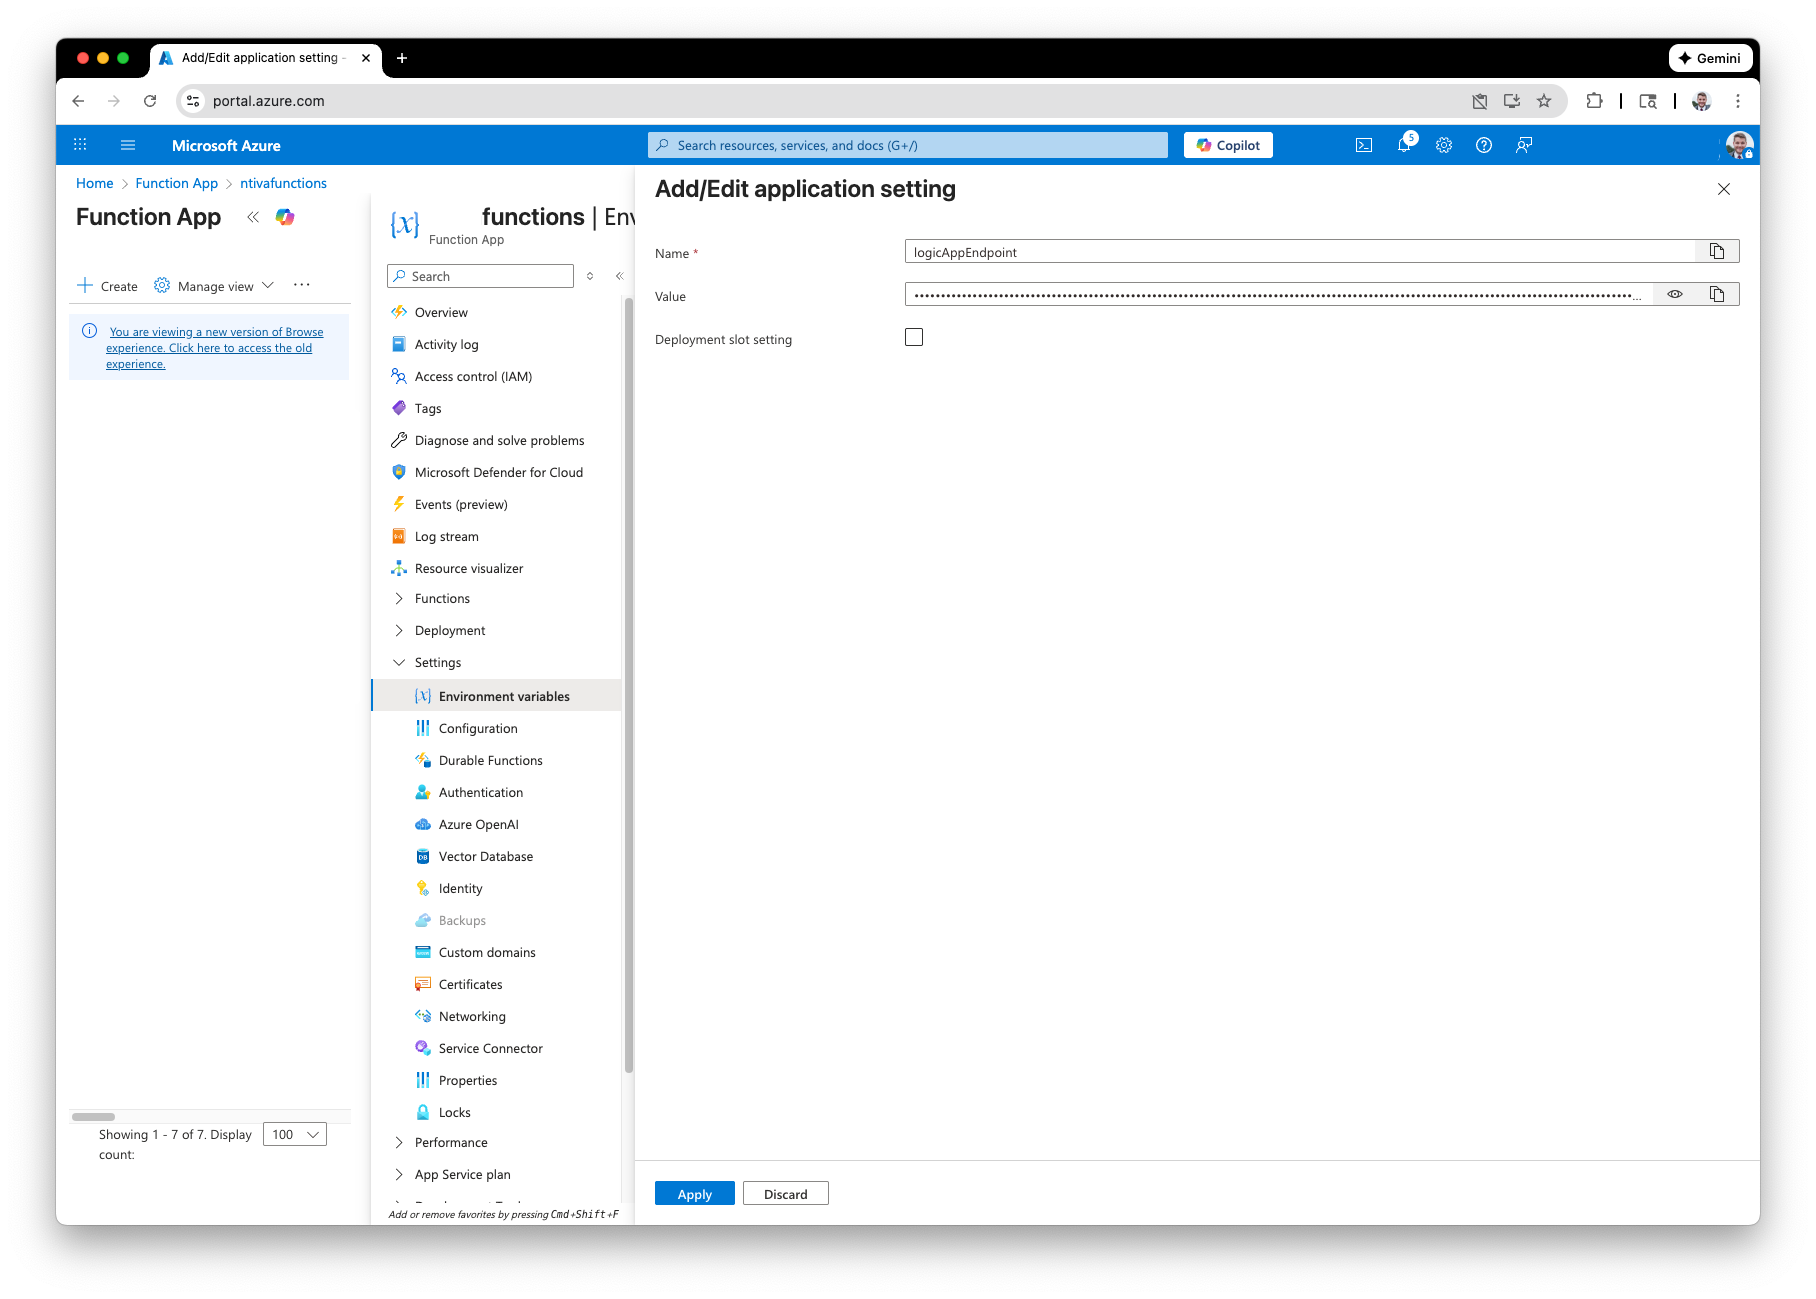
Testing
Now that we have everything in place and live, we can test by changing an items status label. I set up boards with the different statuses so just by dragging and dropping an item to a new column will invoke the automation to run.
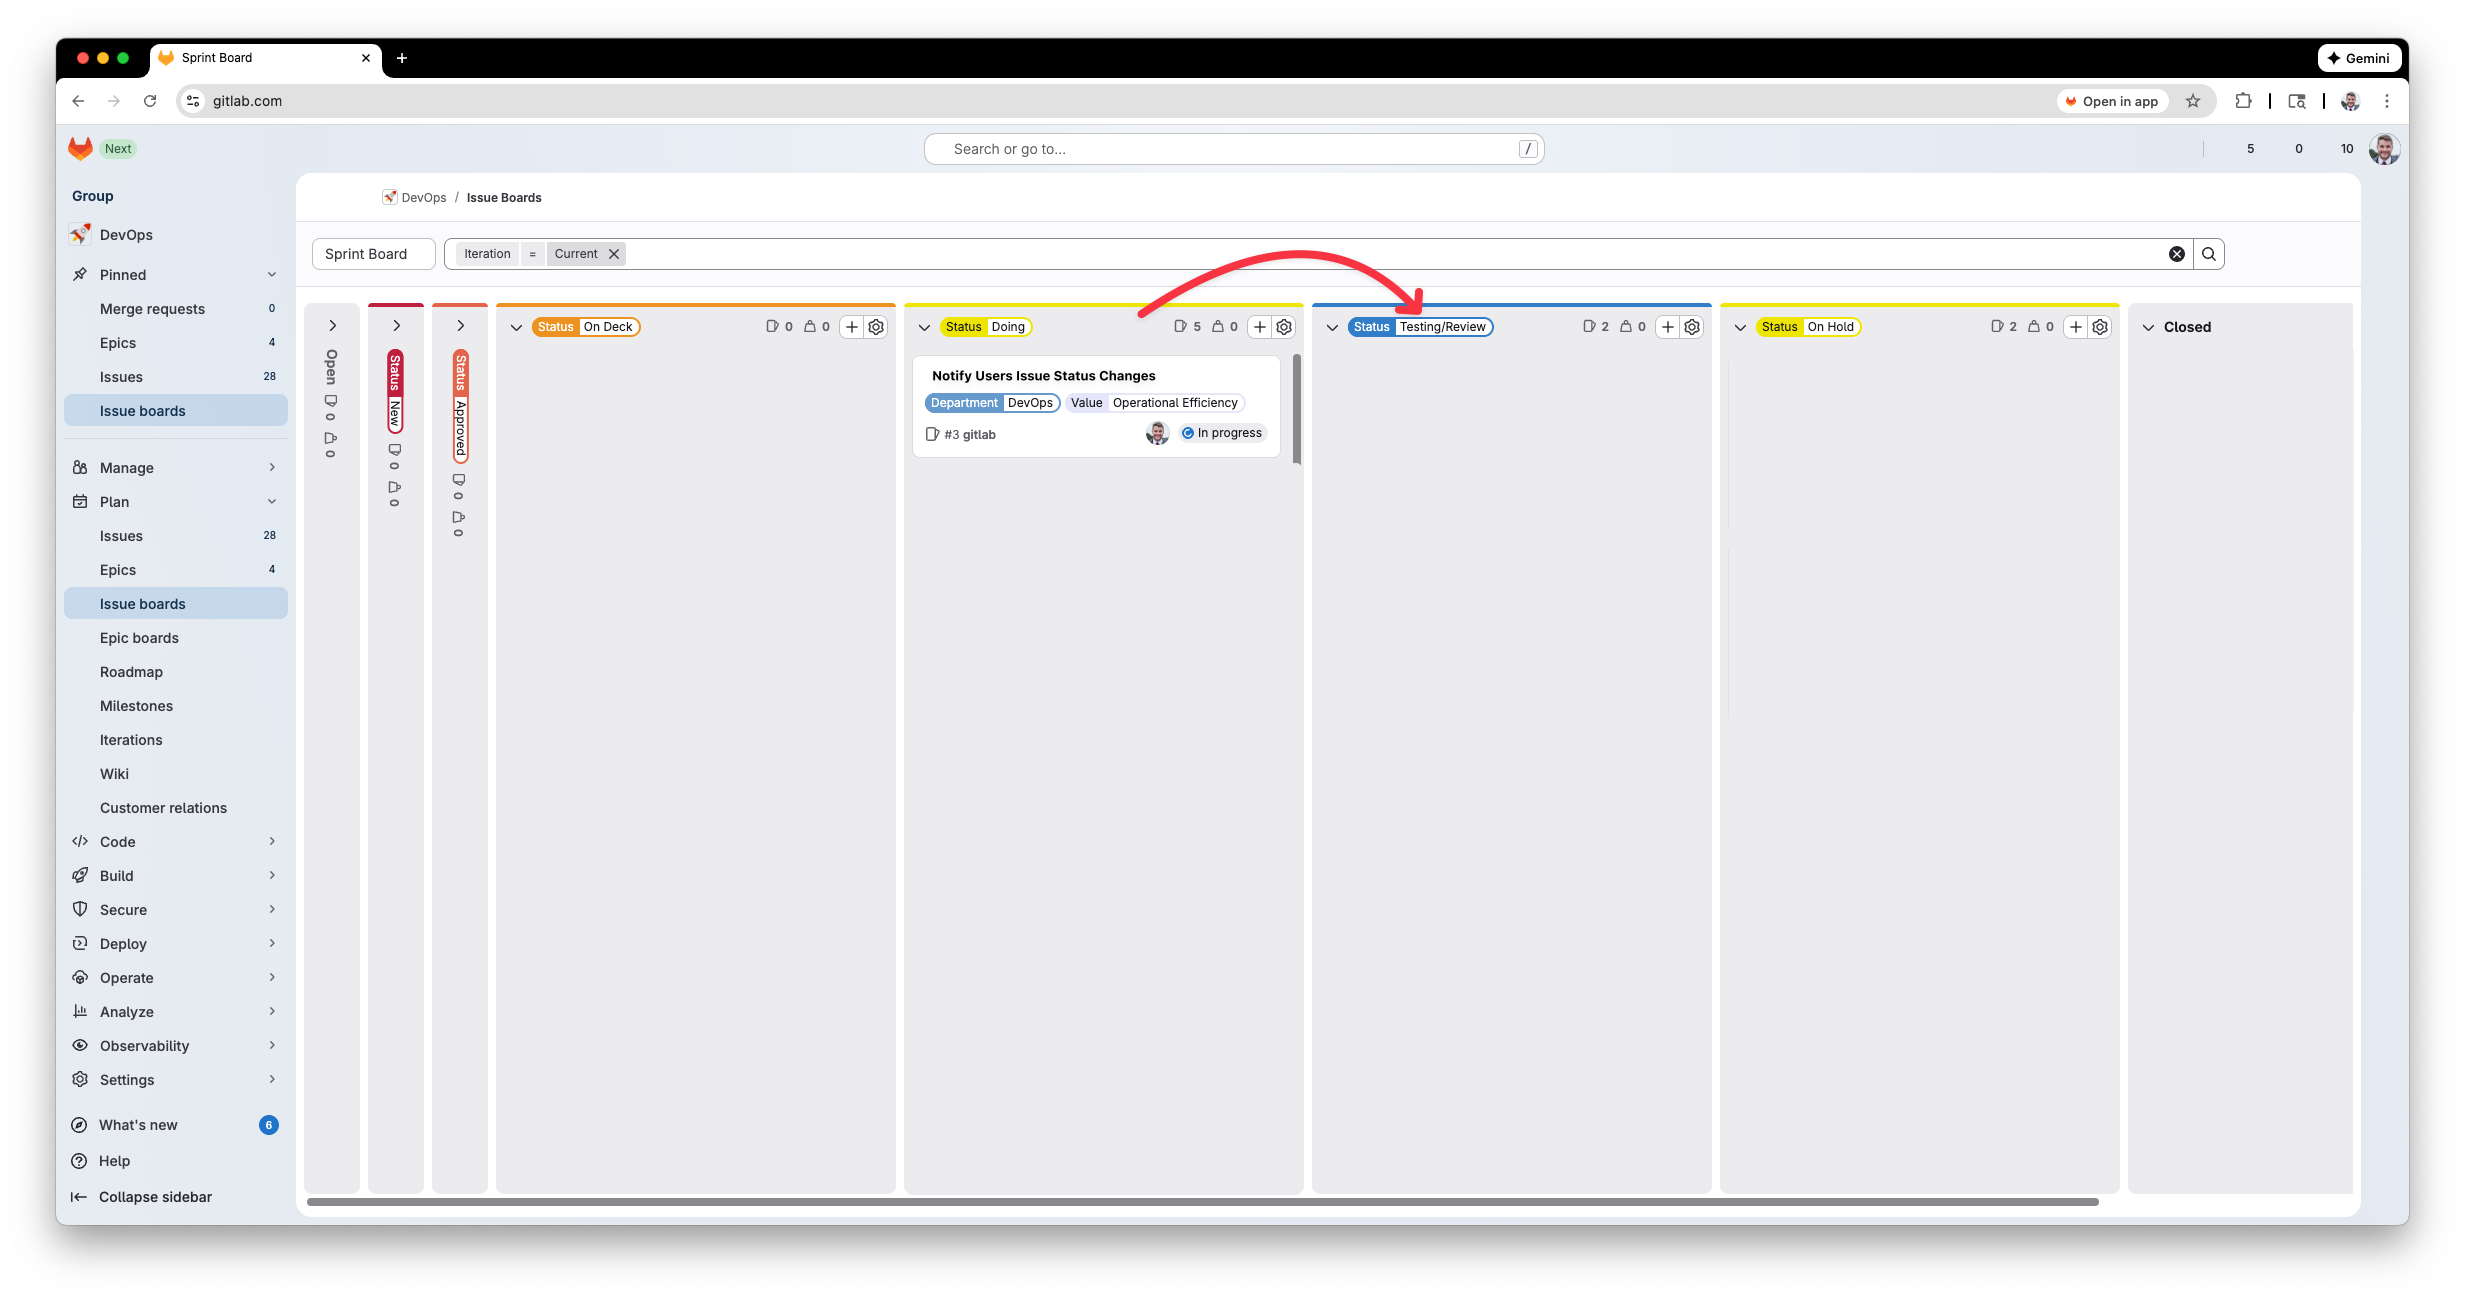
I can see that I am added to this issue:
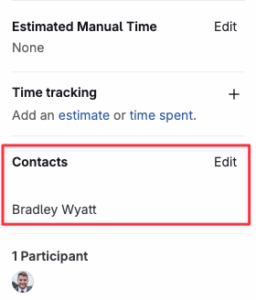
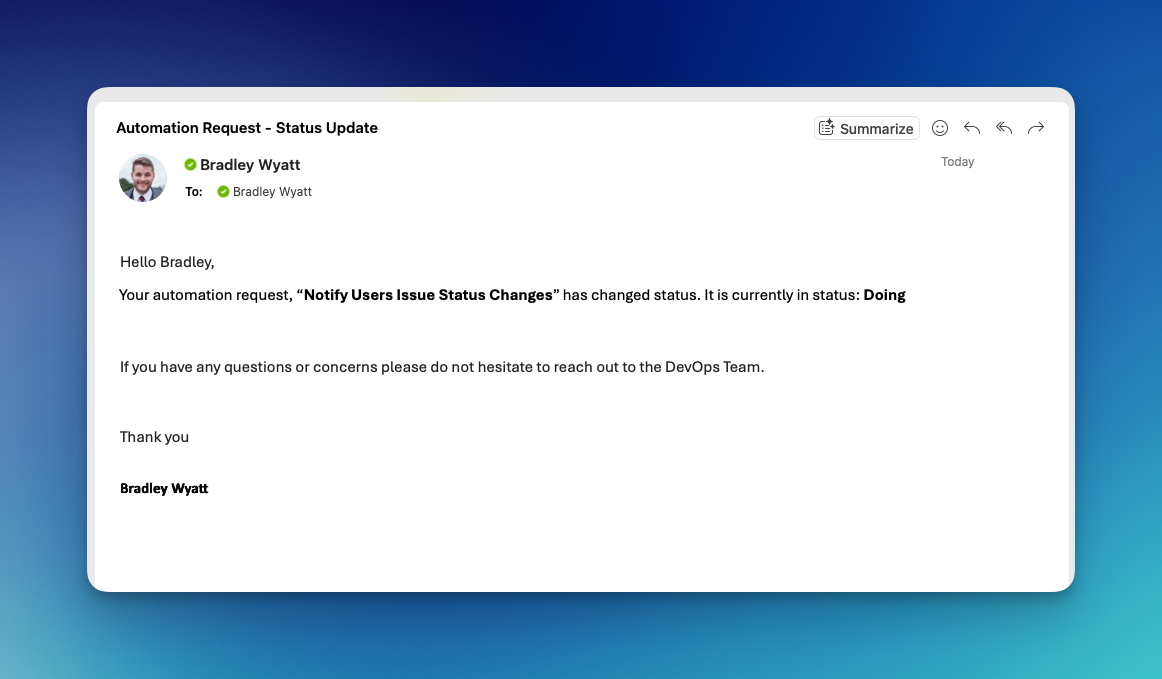
And in a couple seconds I get the following email:

My name is Bradley Wyatt; I am a 6x Dual-Microsoft Most Valuable Professional (MVP) in Microsoft Azure and Microsoft 365. I have given talks at many different conferences, user groups, and companies throughout the United States, ranging from PowerShell to DevOps Security best practices, and I am the 2022 North American Outstanding Contribution to the Microsoft Community winner.