This post demonstrates how to use Microsoft Graph Subscriptions to create event-driven automation in Microsoft 365. Graph Subscriptions allow applications to receive real-time notifications when specific changes occur within Microsoft 365 resources such as users, groups, or mailboxes, without the need for constant polling. By subscribing to these change events, we can build responsive workflows that automatically react to updates like group membership changes and trigger downstream actions in Azure Functions or Automation Accounts.
In this article, I will create a Microsoft Graph Subscription that listens for changes to a specific group’s membership. When a user is added or removed, it triggers an Azure Function that identifies the user, looks them up in Microsoft 365, and then adds or removes them from the Proofpoint portal accordingly.
A subscription lifespan is dependent on the resource with some as short as 1 hour. Refer to the subscription lifetime documentation for more information.
Pre-Requisites
You need to be able to create Application Registrations in the Entra ID Portal and assign them API permissions, some of which may require admin consent. The following table lays out the type of permission you need for each supported resource.
In our example, we will be using the group resource type and will need Group.Read.All
You need to be able to create or have an HTTP trigger Azure Function
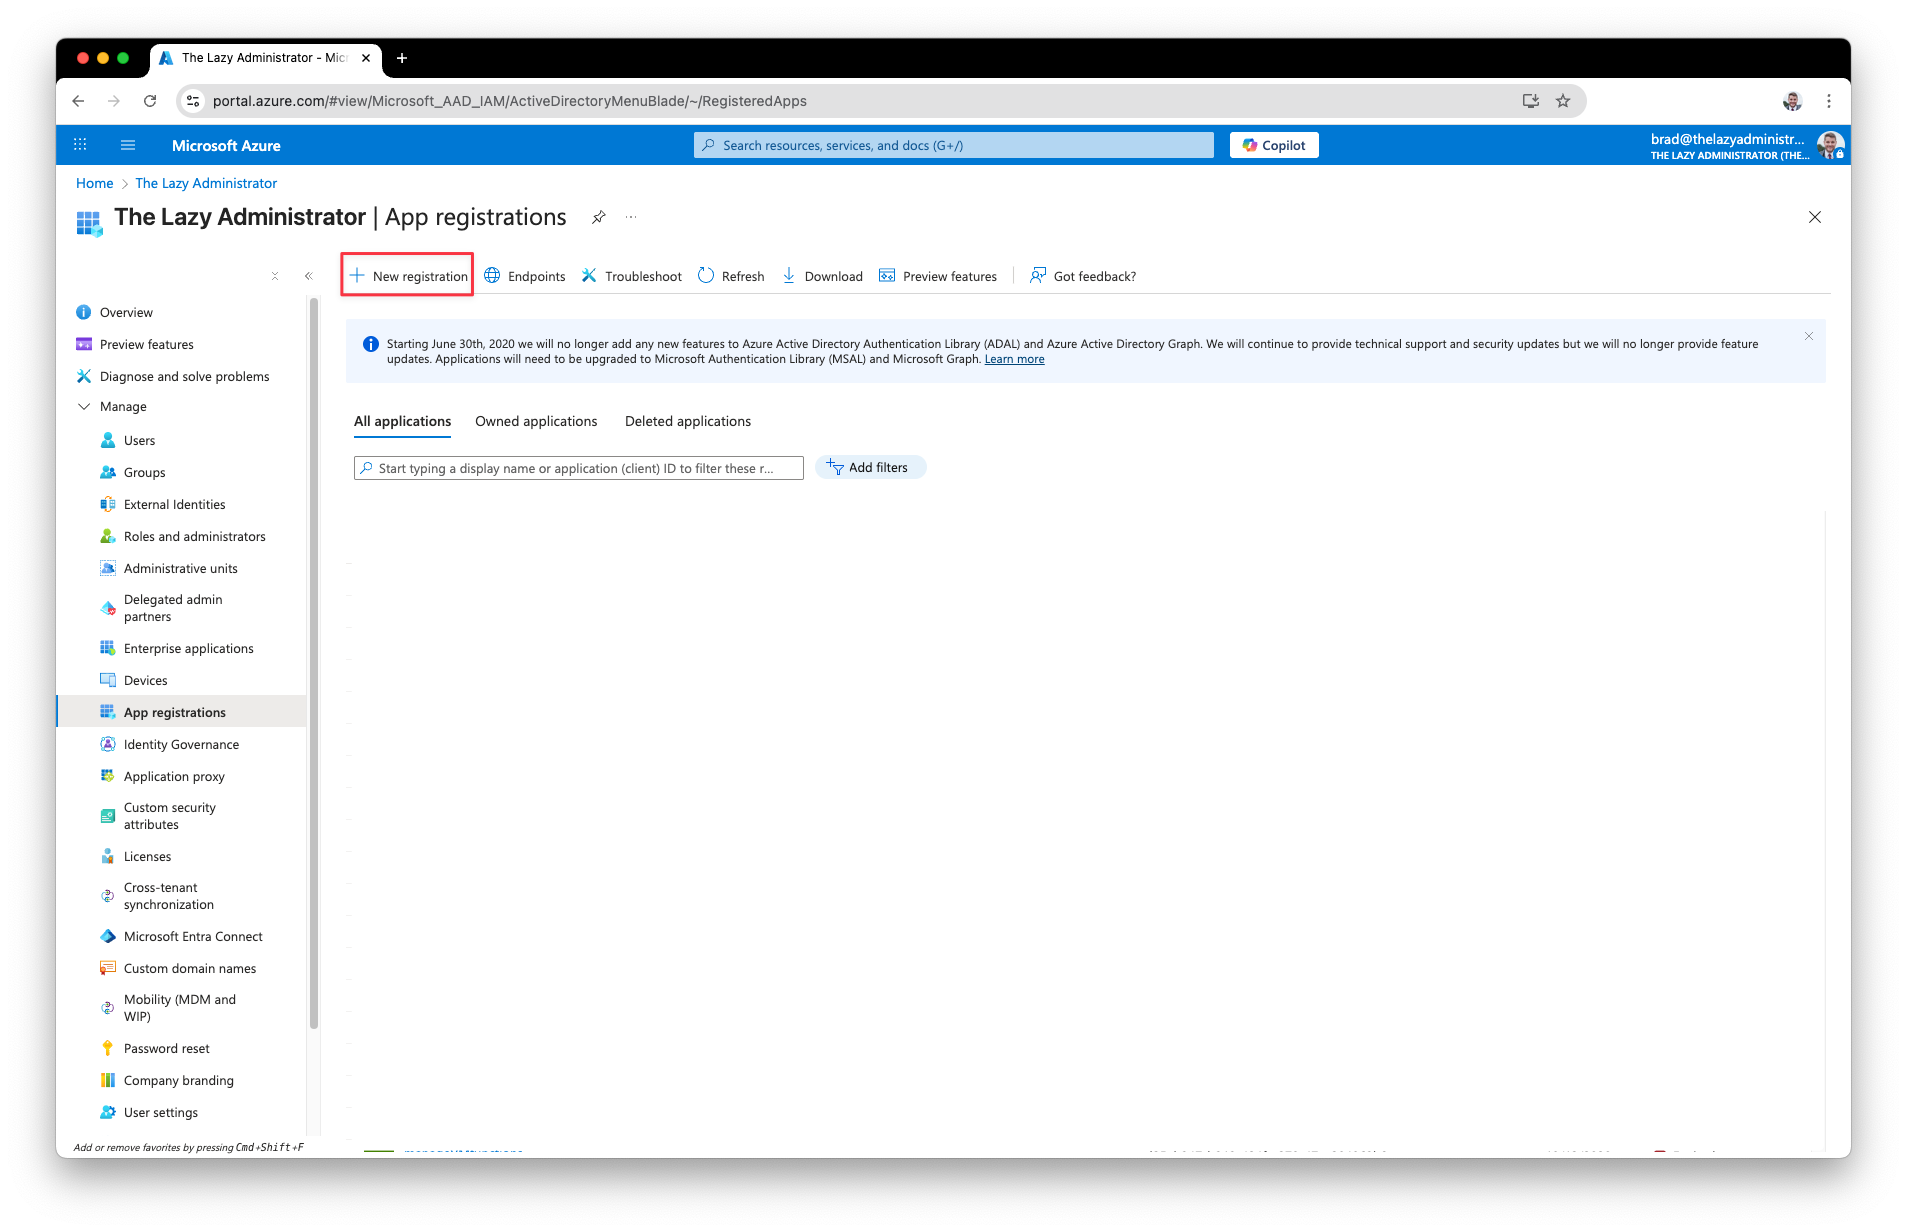
In the left pane, click App registrations and then click “+ New registration”
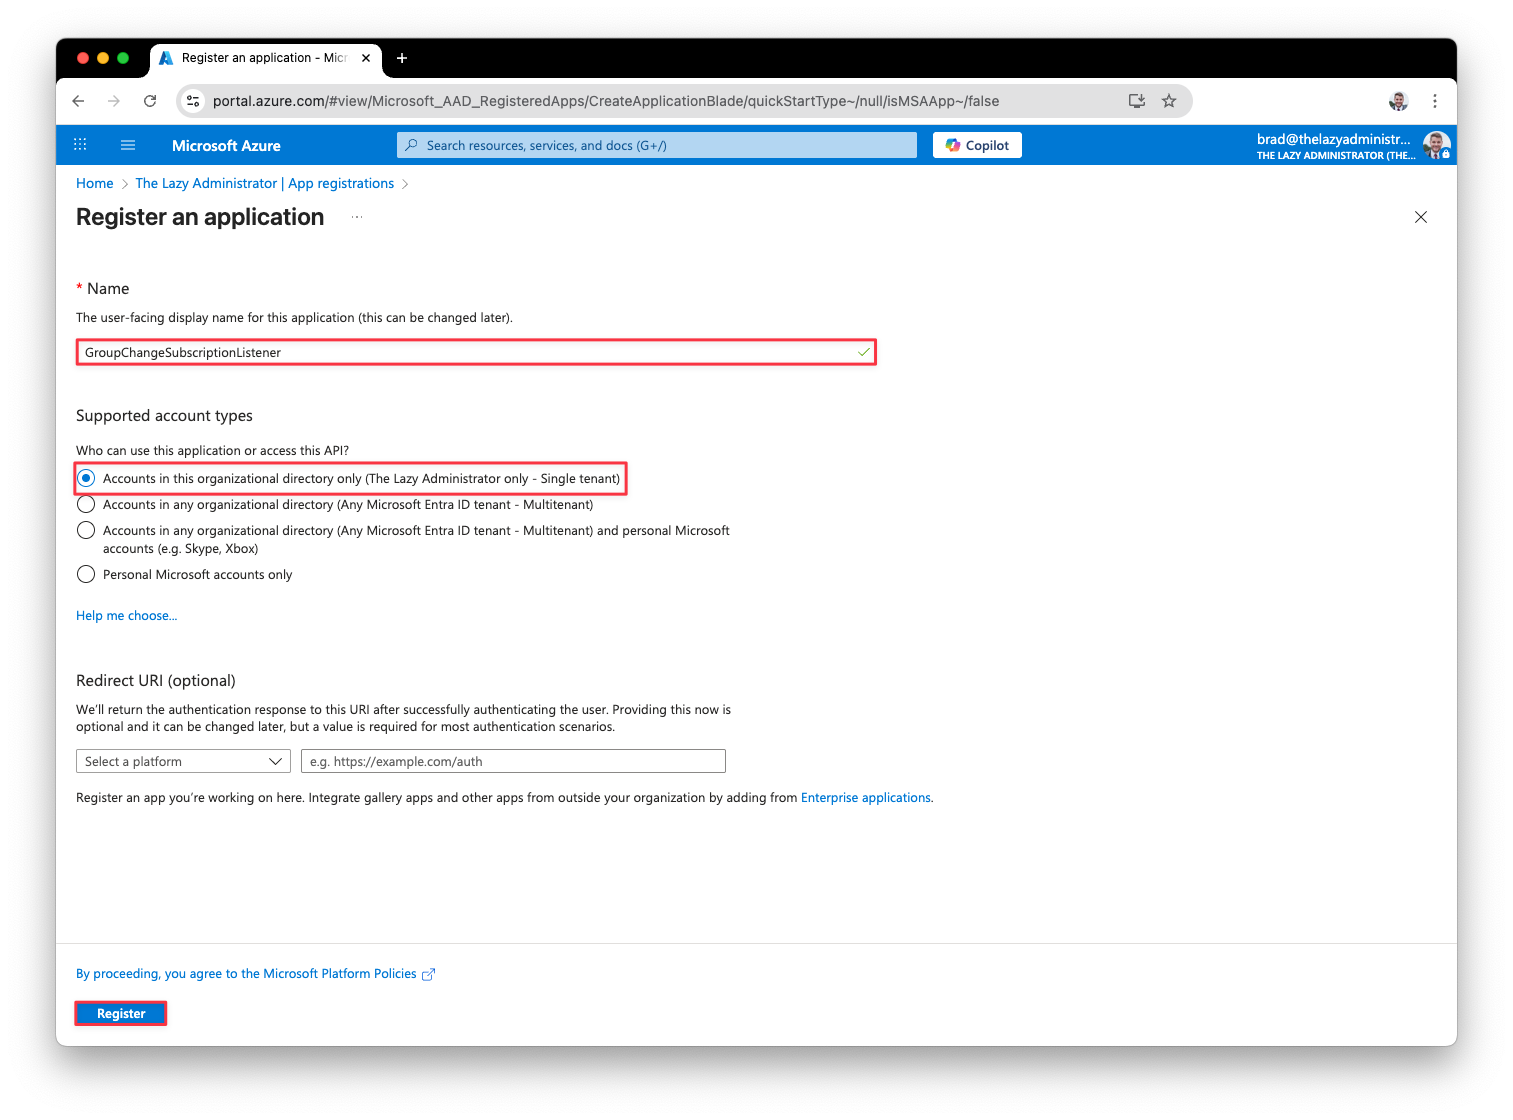
3. Give your app registration a name. For support account types keep it at “Accounts in this organizational directory only” and you can keep the Redirect URI empty. In my example, I named my app GroupChangeSubscriptionListener. When finished, click “Register”.
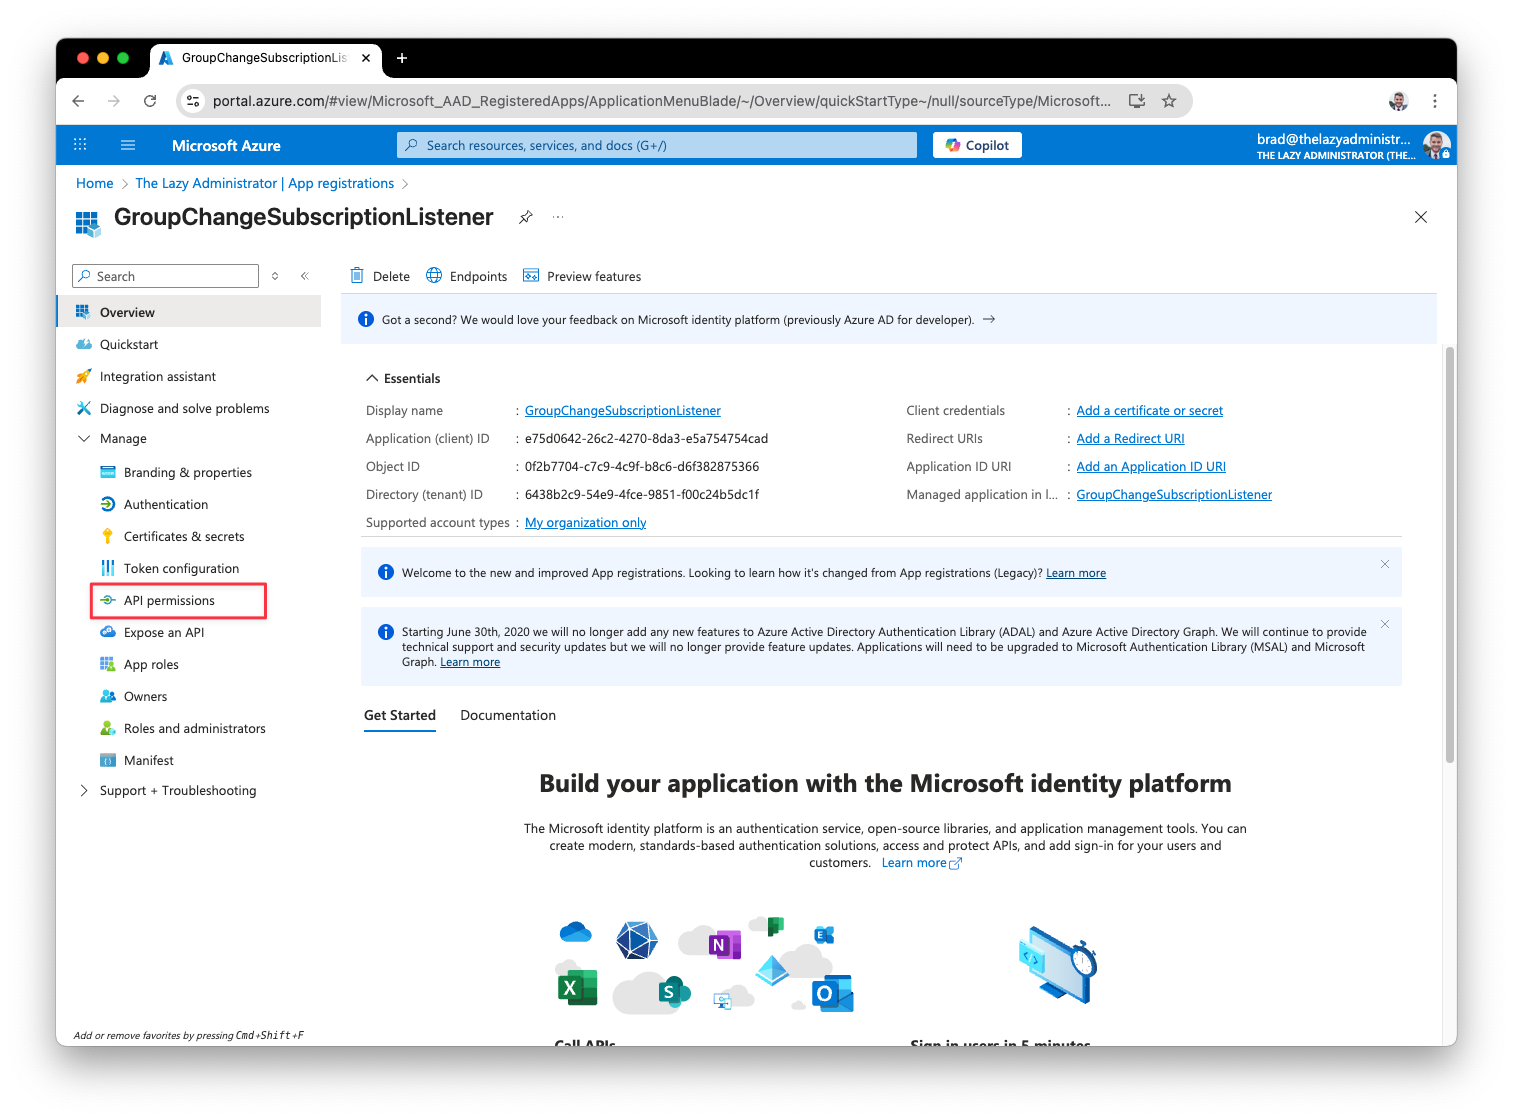
4. When the app registration is complete, note the ”Application (client) ID” and the Directory (tenant) ID for later.
Assign API Permissions
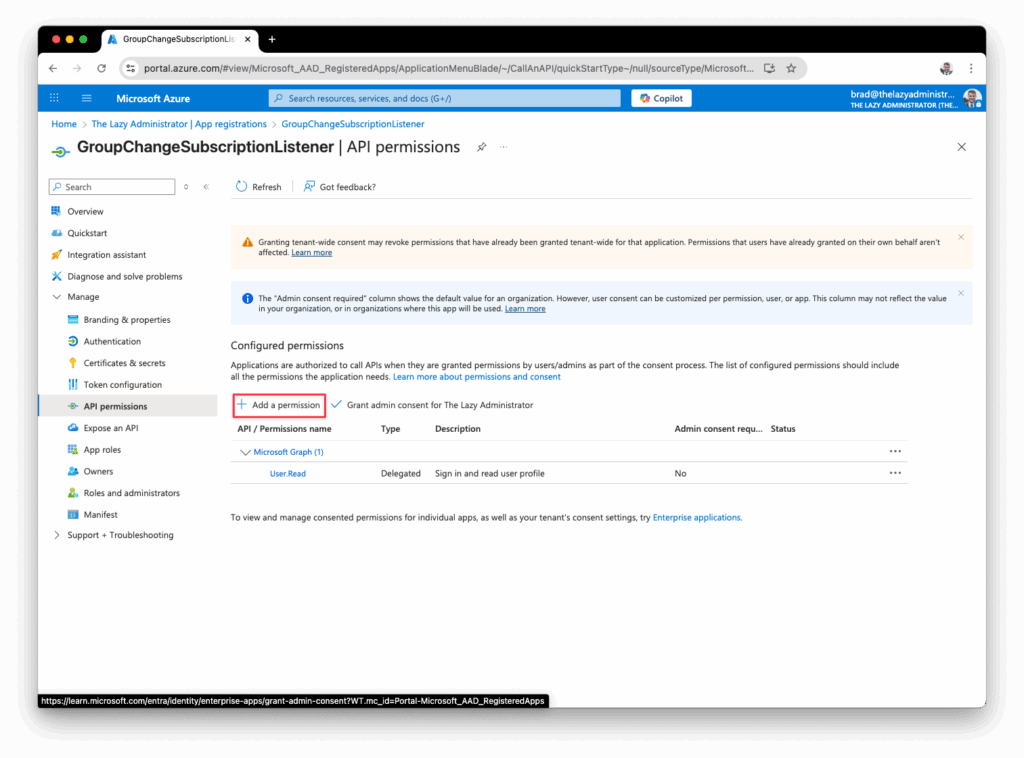
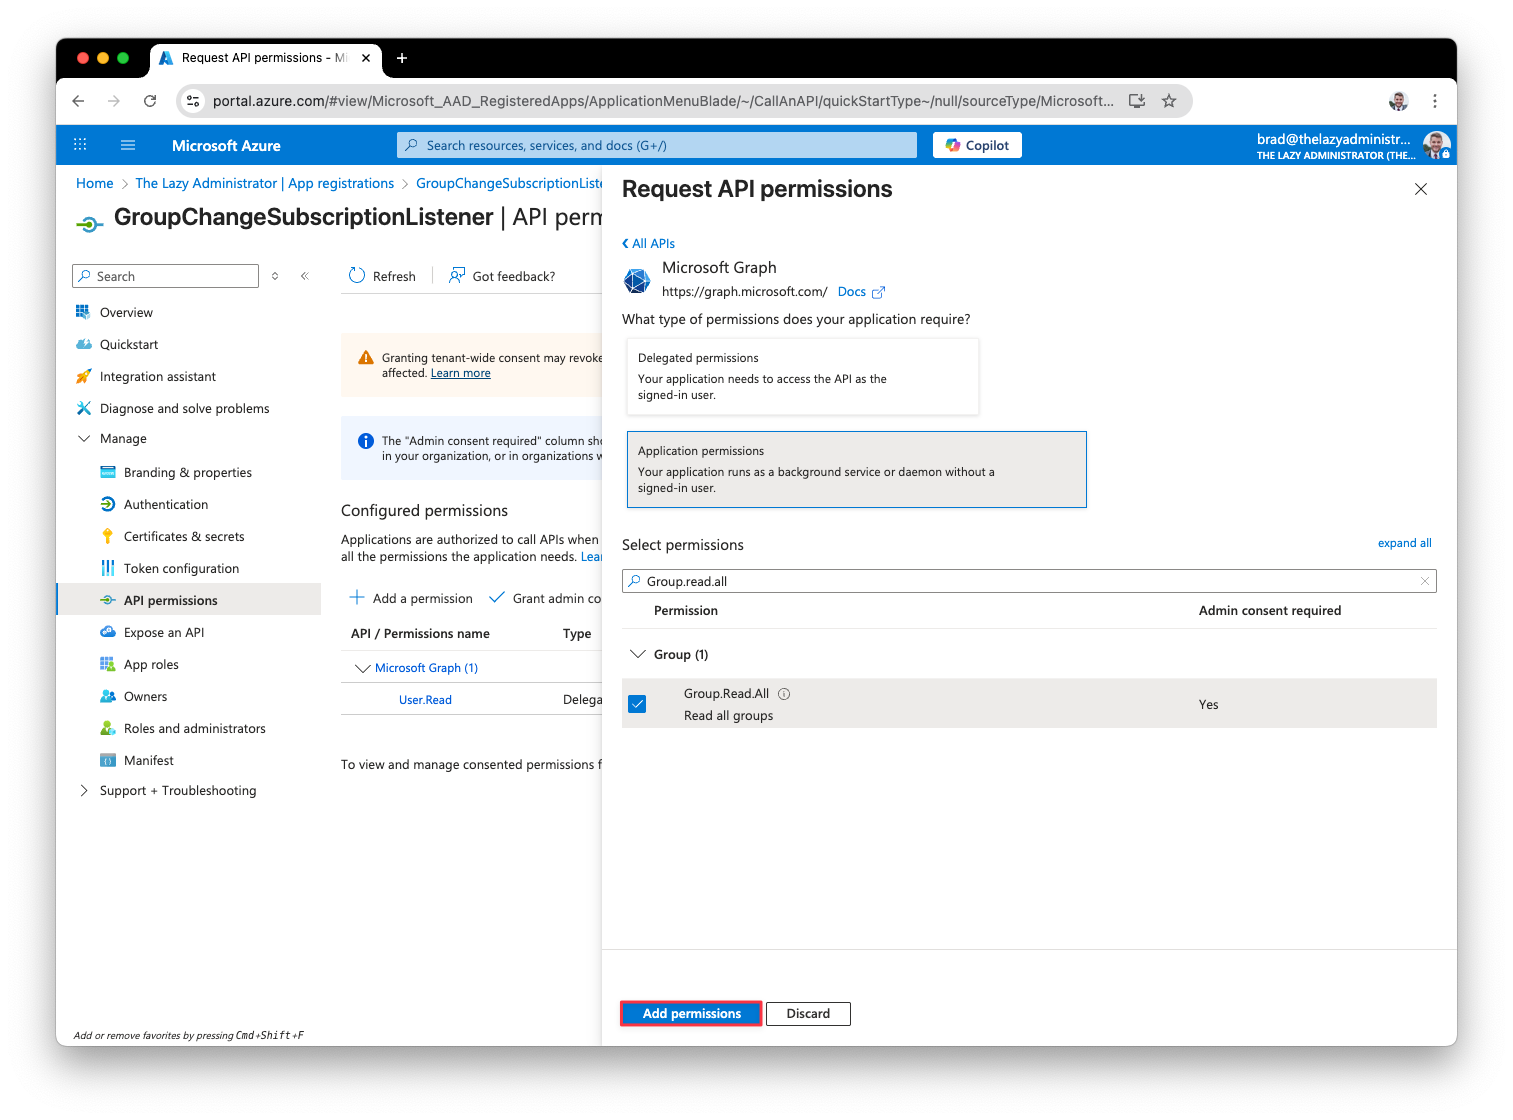
With our newly created app registration, we now need to add API permissions to it. For our example, we need to grant it Group.Read.All. In the left pane, click “API permissions”
2. In the “API permissions” pane, click “+ Add a permission” button
3. Since we need to add Group.Read.All we need to click Microsoft Graph > Application permissions > Group.Read.All and then click “Add permissions”. For my personal automation I also need User.ReadBasic.All to look up the users in Entra ID but you may not need it.
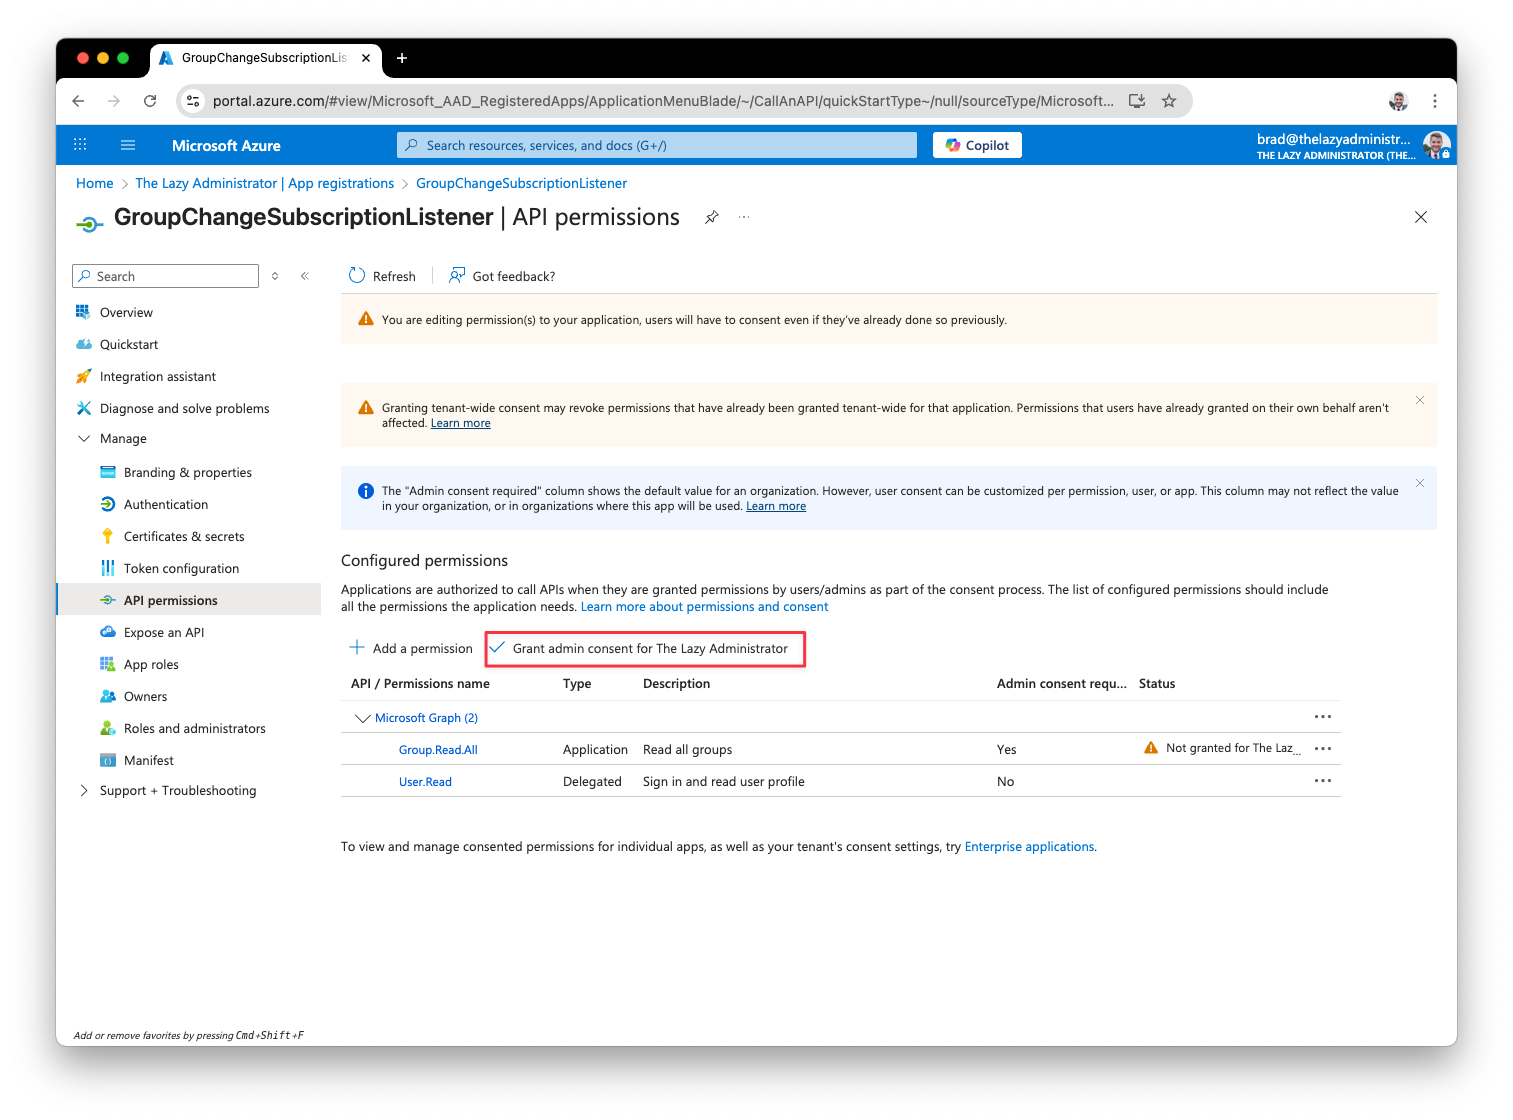
4. Because this permission requires admin consent, we see the the status for the permission is “Not granted”. Click the “Grant admin consent button” and then click “Yes” on the confirmation prompt.
Create Client Secret
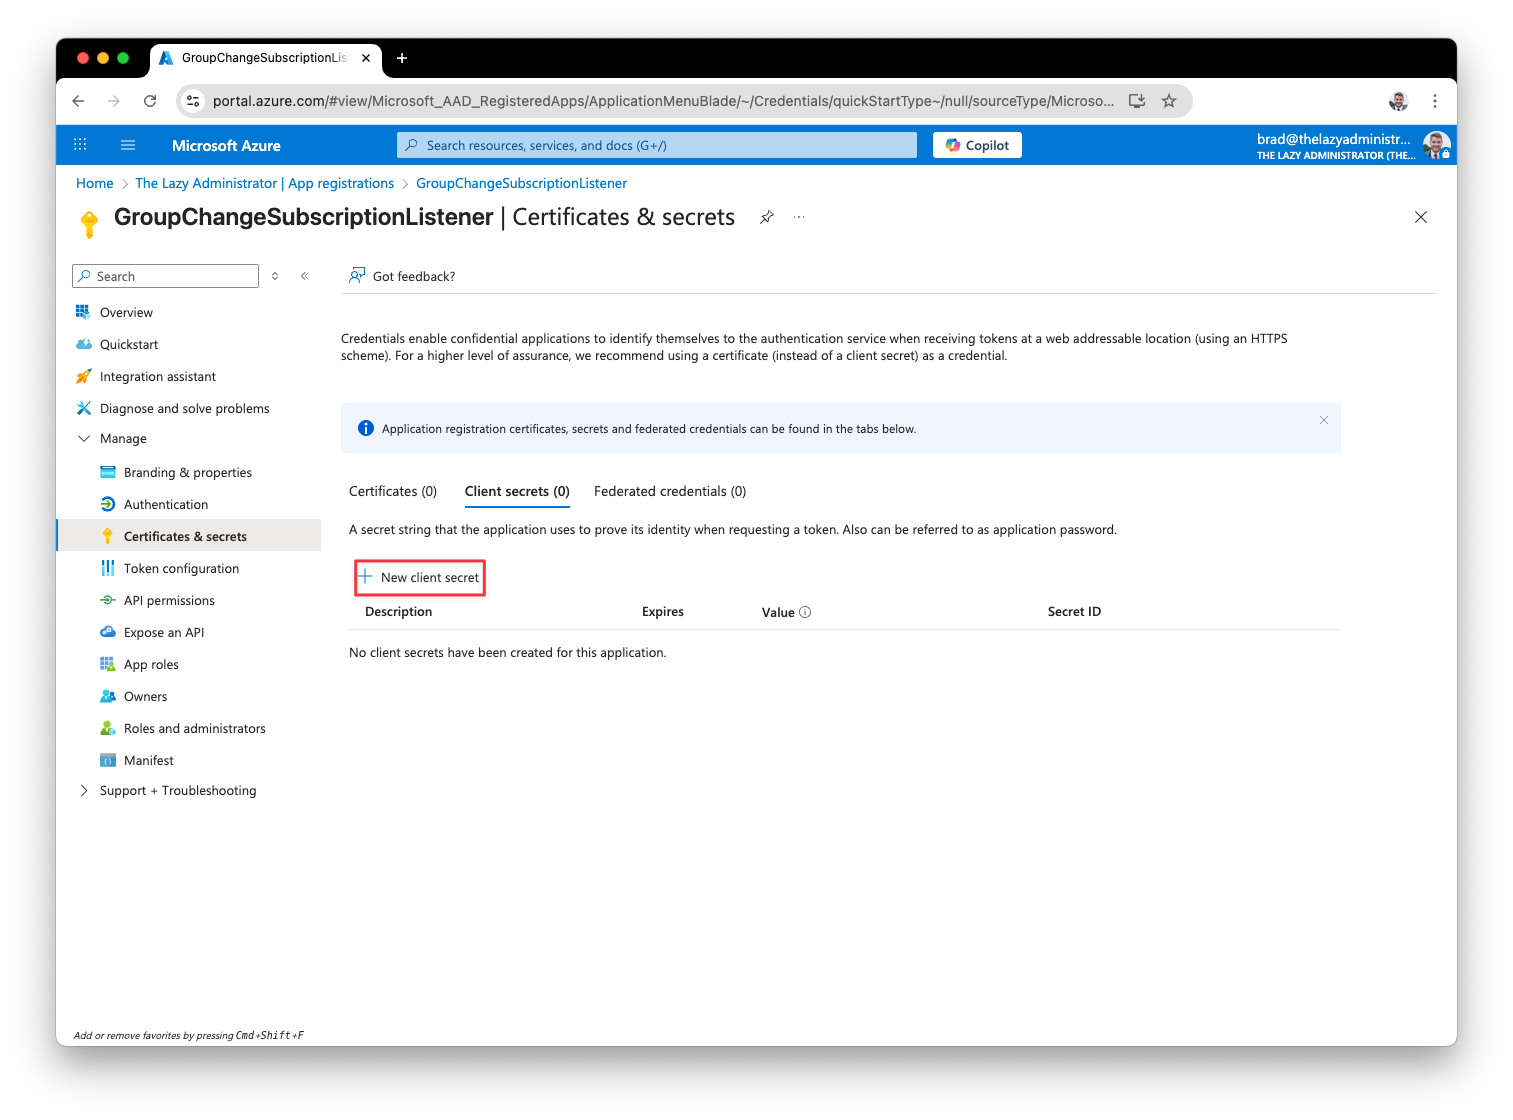
Next, we need to generate a new client secret for our App Registration so we can connect to the Microsoft Graph API with it and create our new subscription. In the left pane click “Certificates & secrets” and then click “+ New client secret”
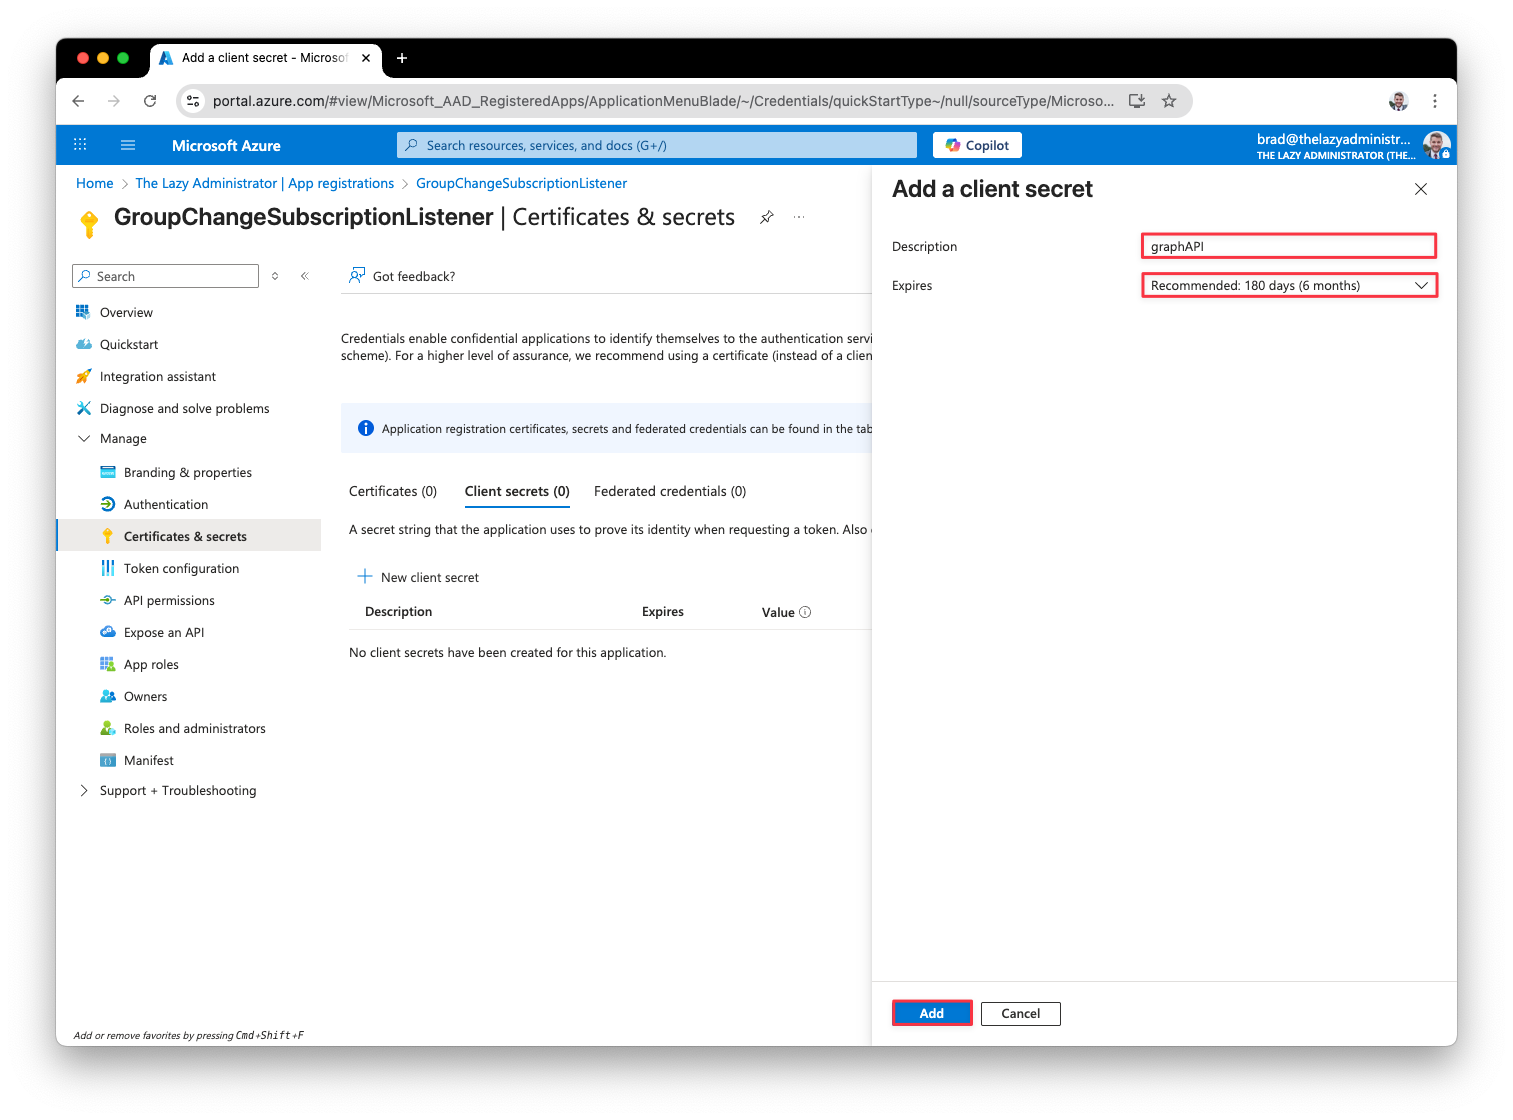
2. Give your client secret a good name and expiration date then click Add.
3. Copy down the secret value for later.
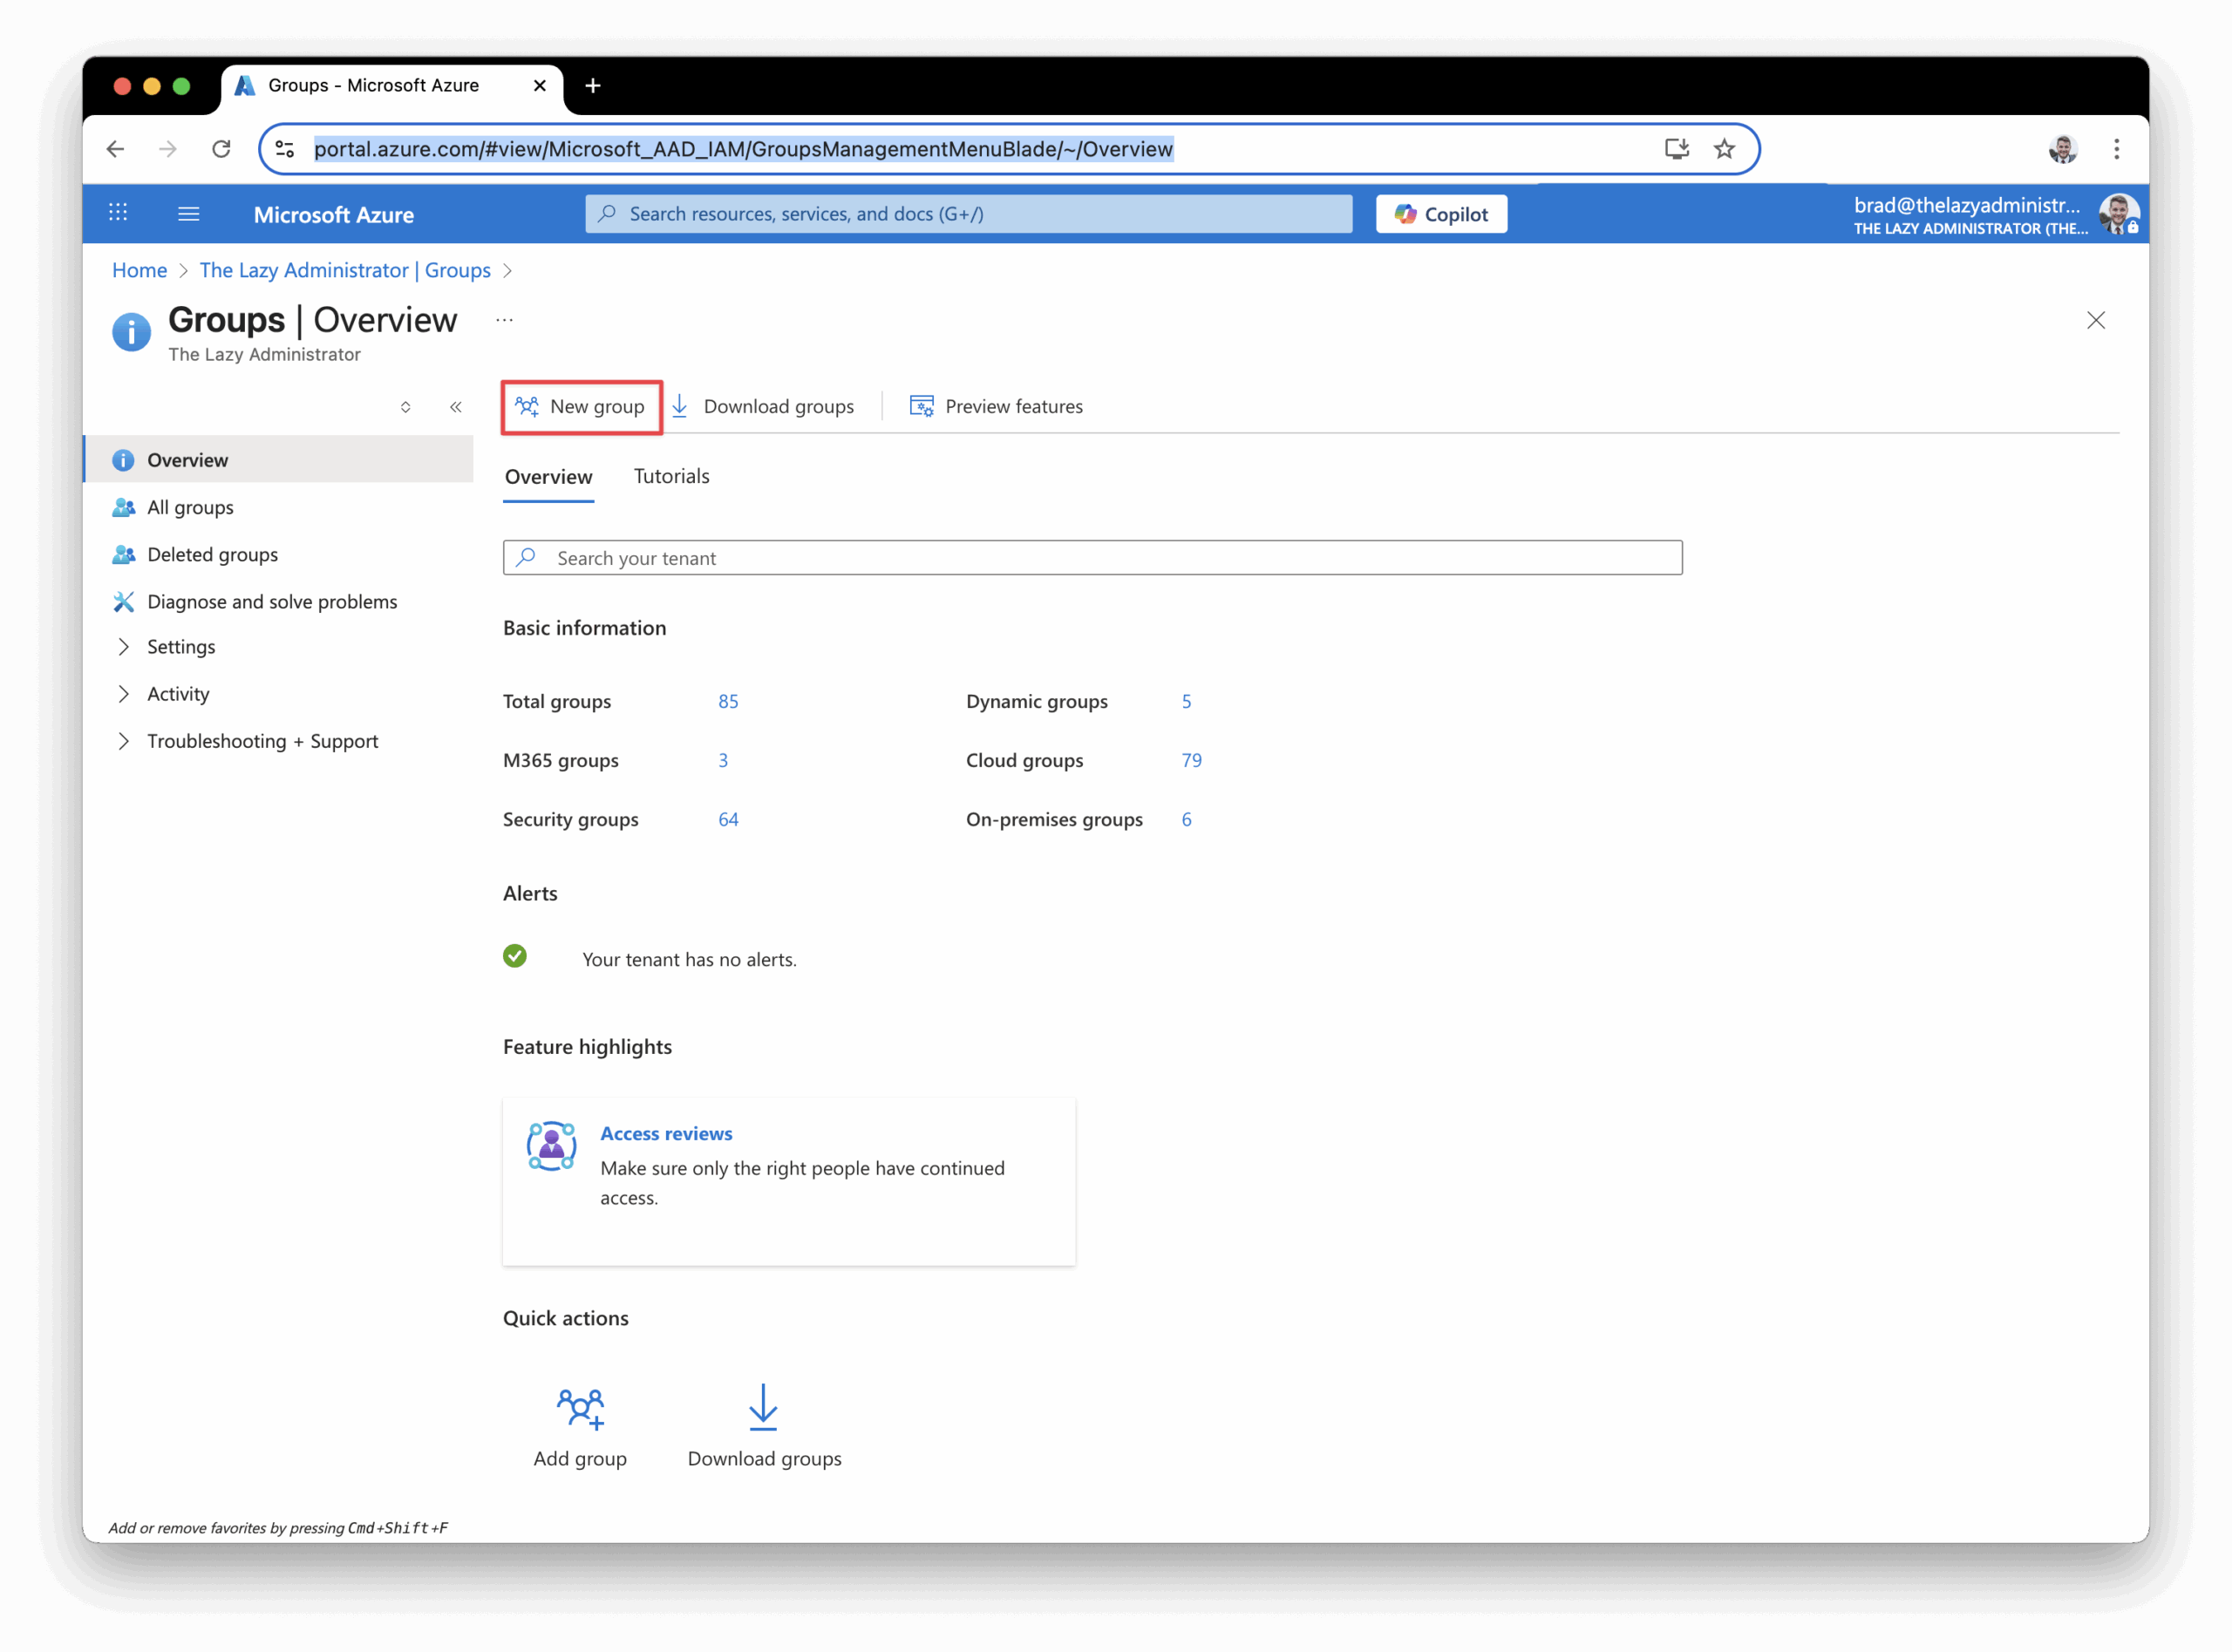
Create Entra ID Group
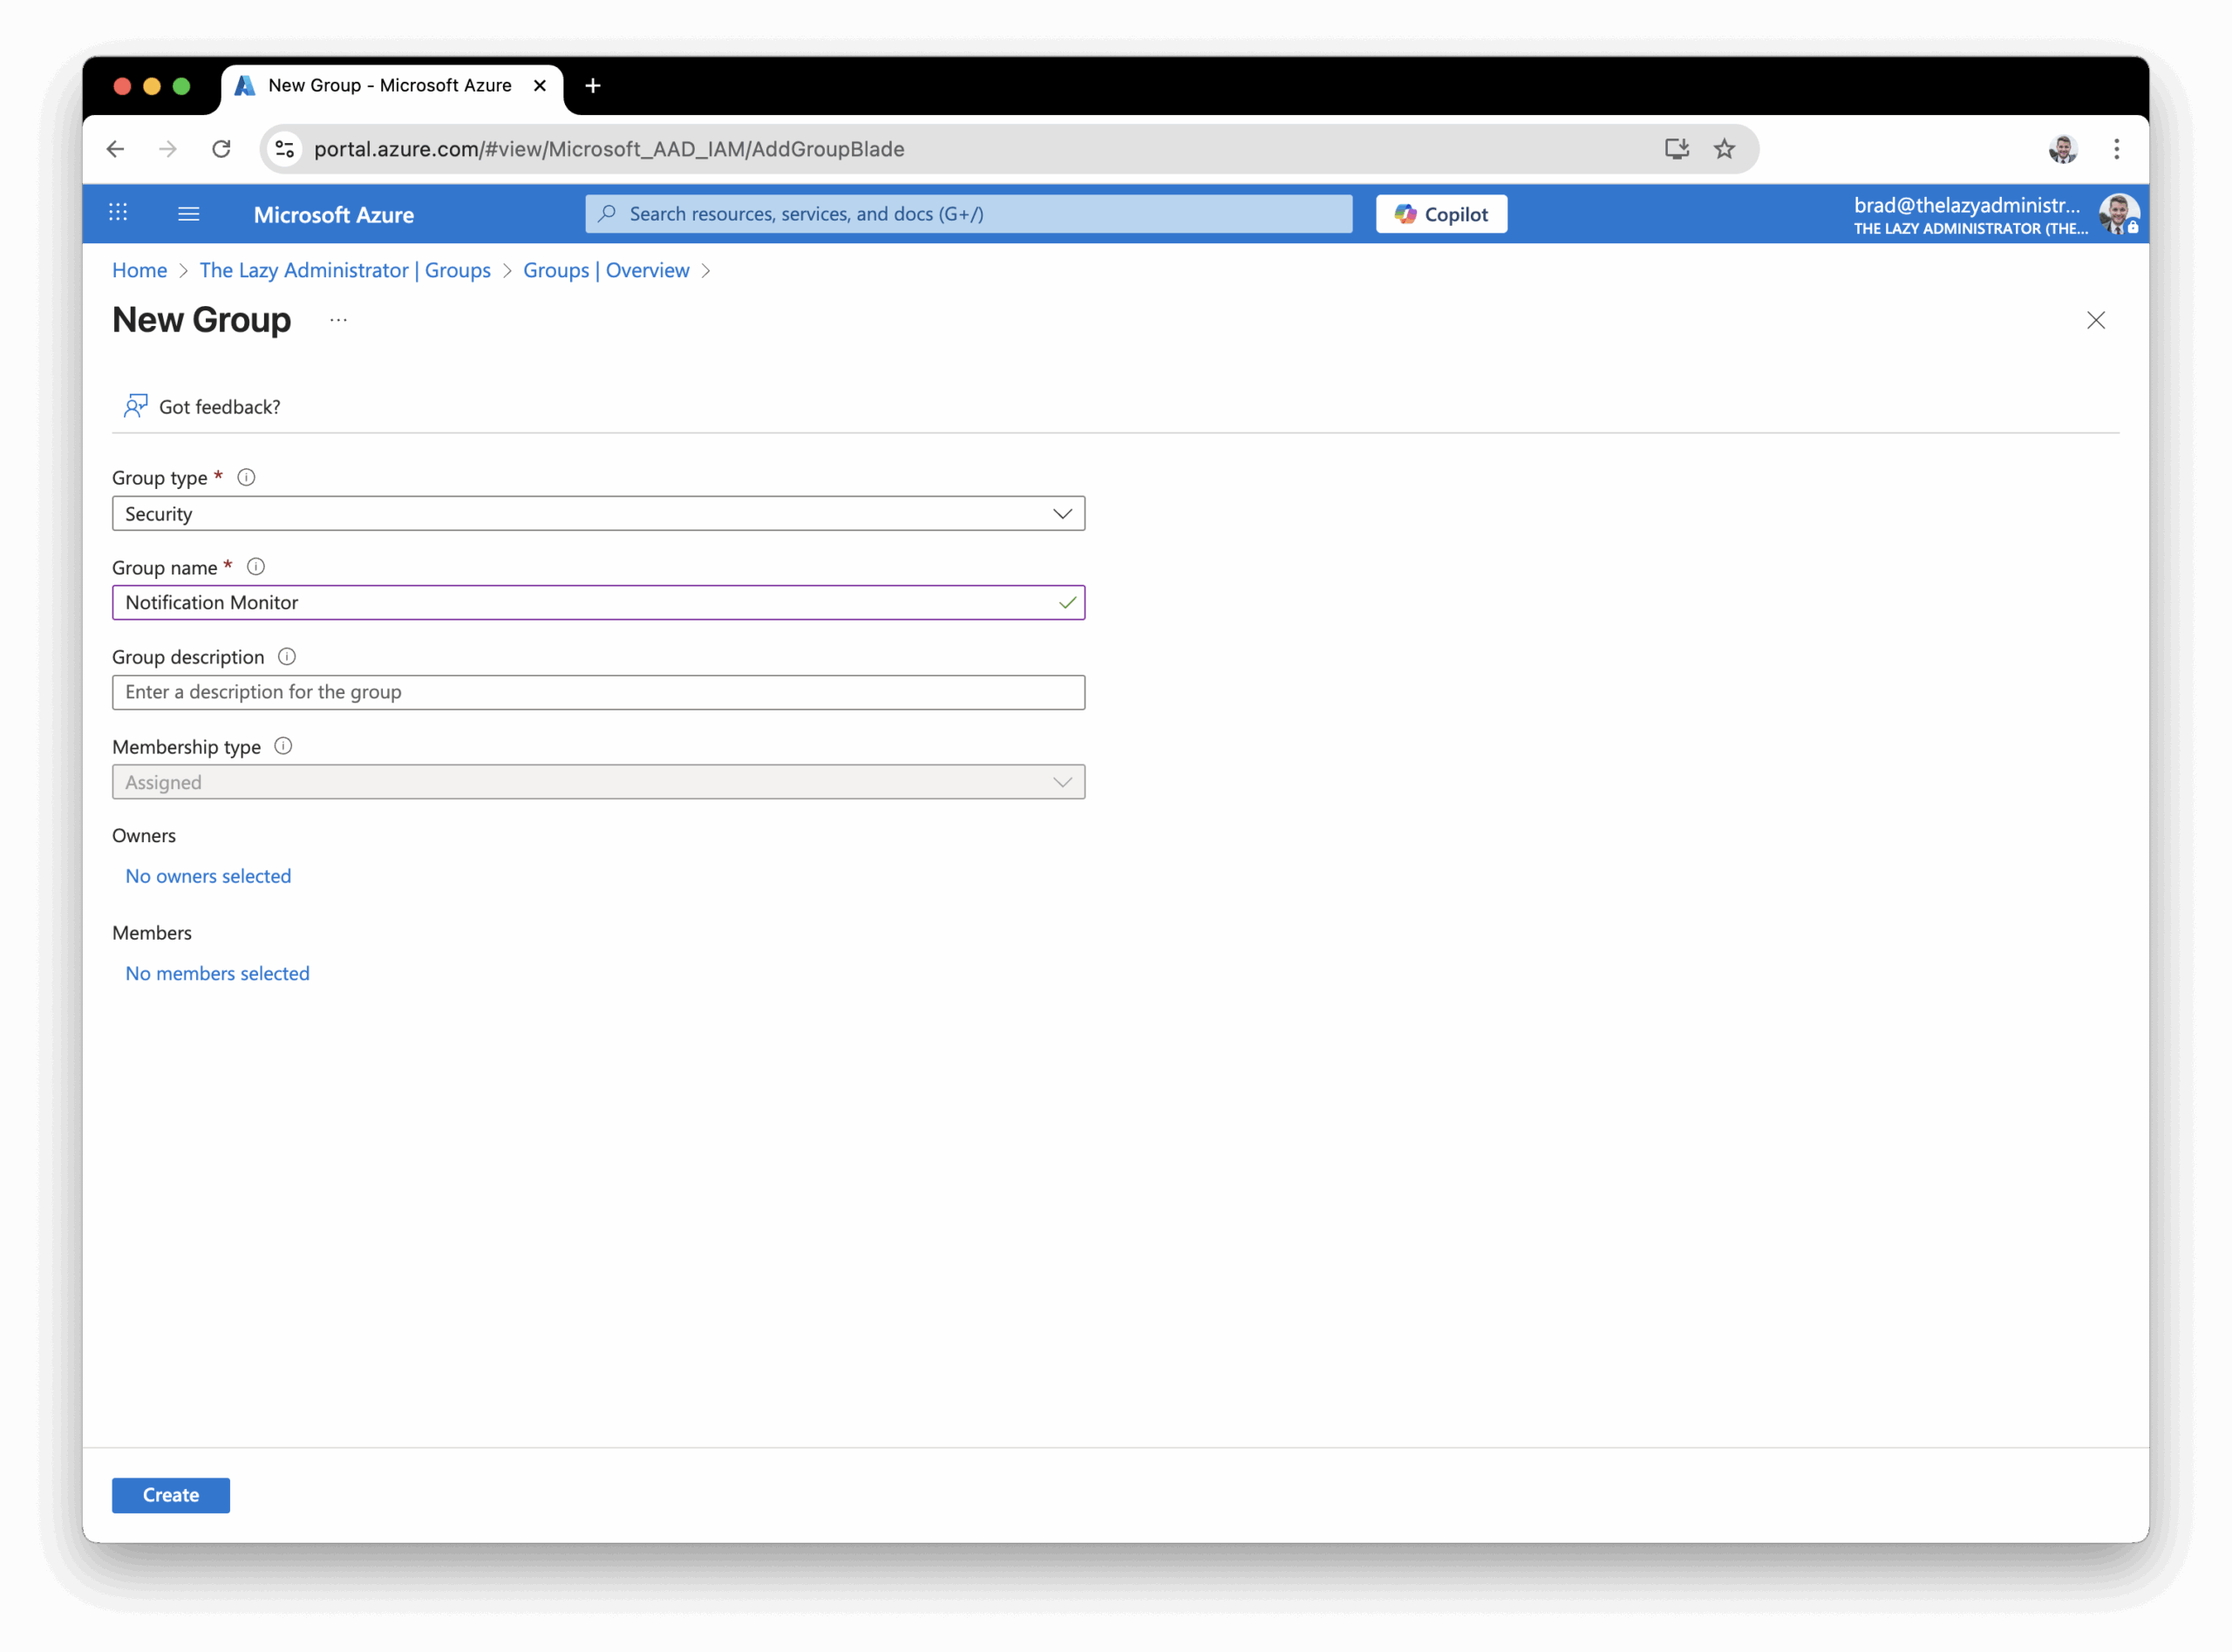
Next, we need to create a new Entra ID group that we will use to monitor membership changes. Note: Subscription notifications will fire for dynamic group membership changes as well as static memberships.
3. Give the group a proper name and then click “Create”
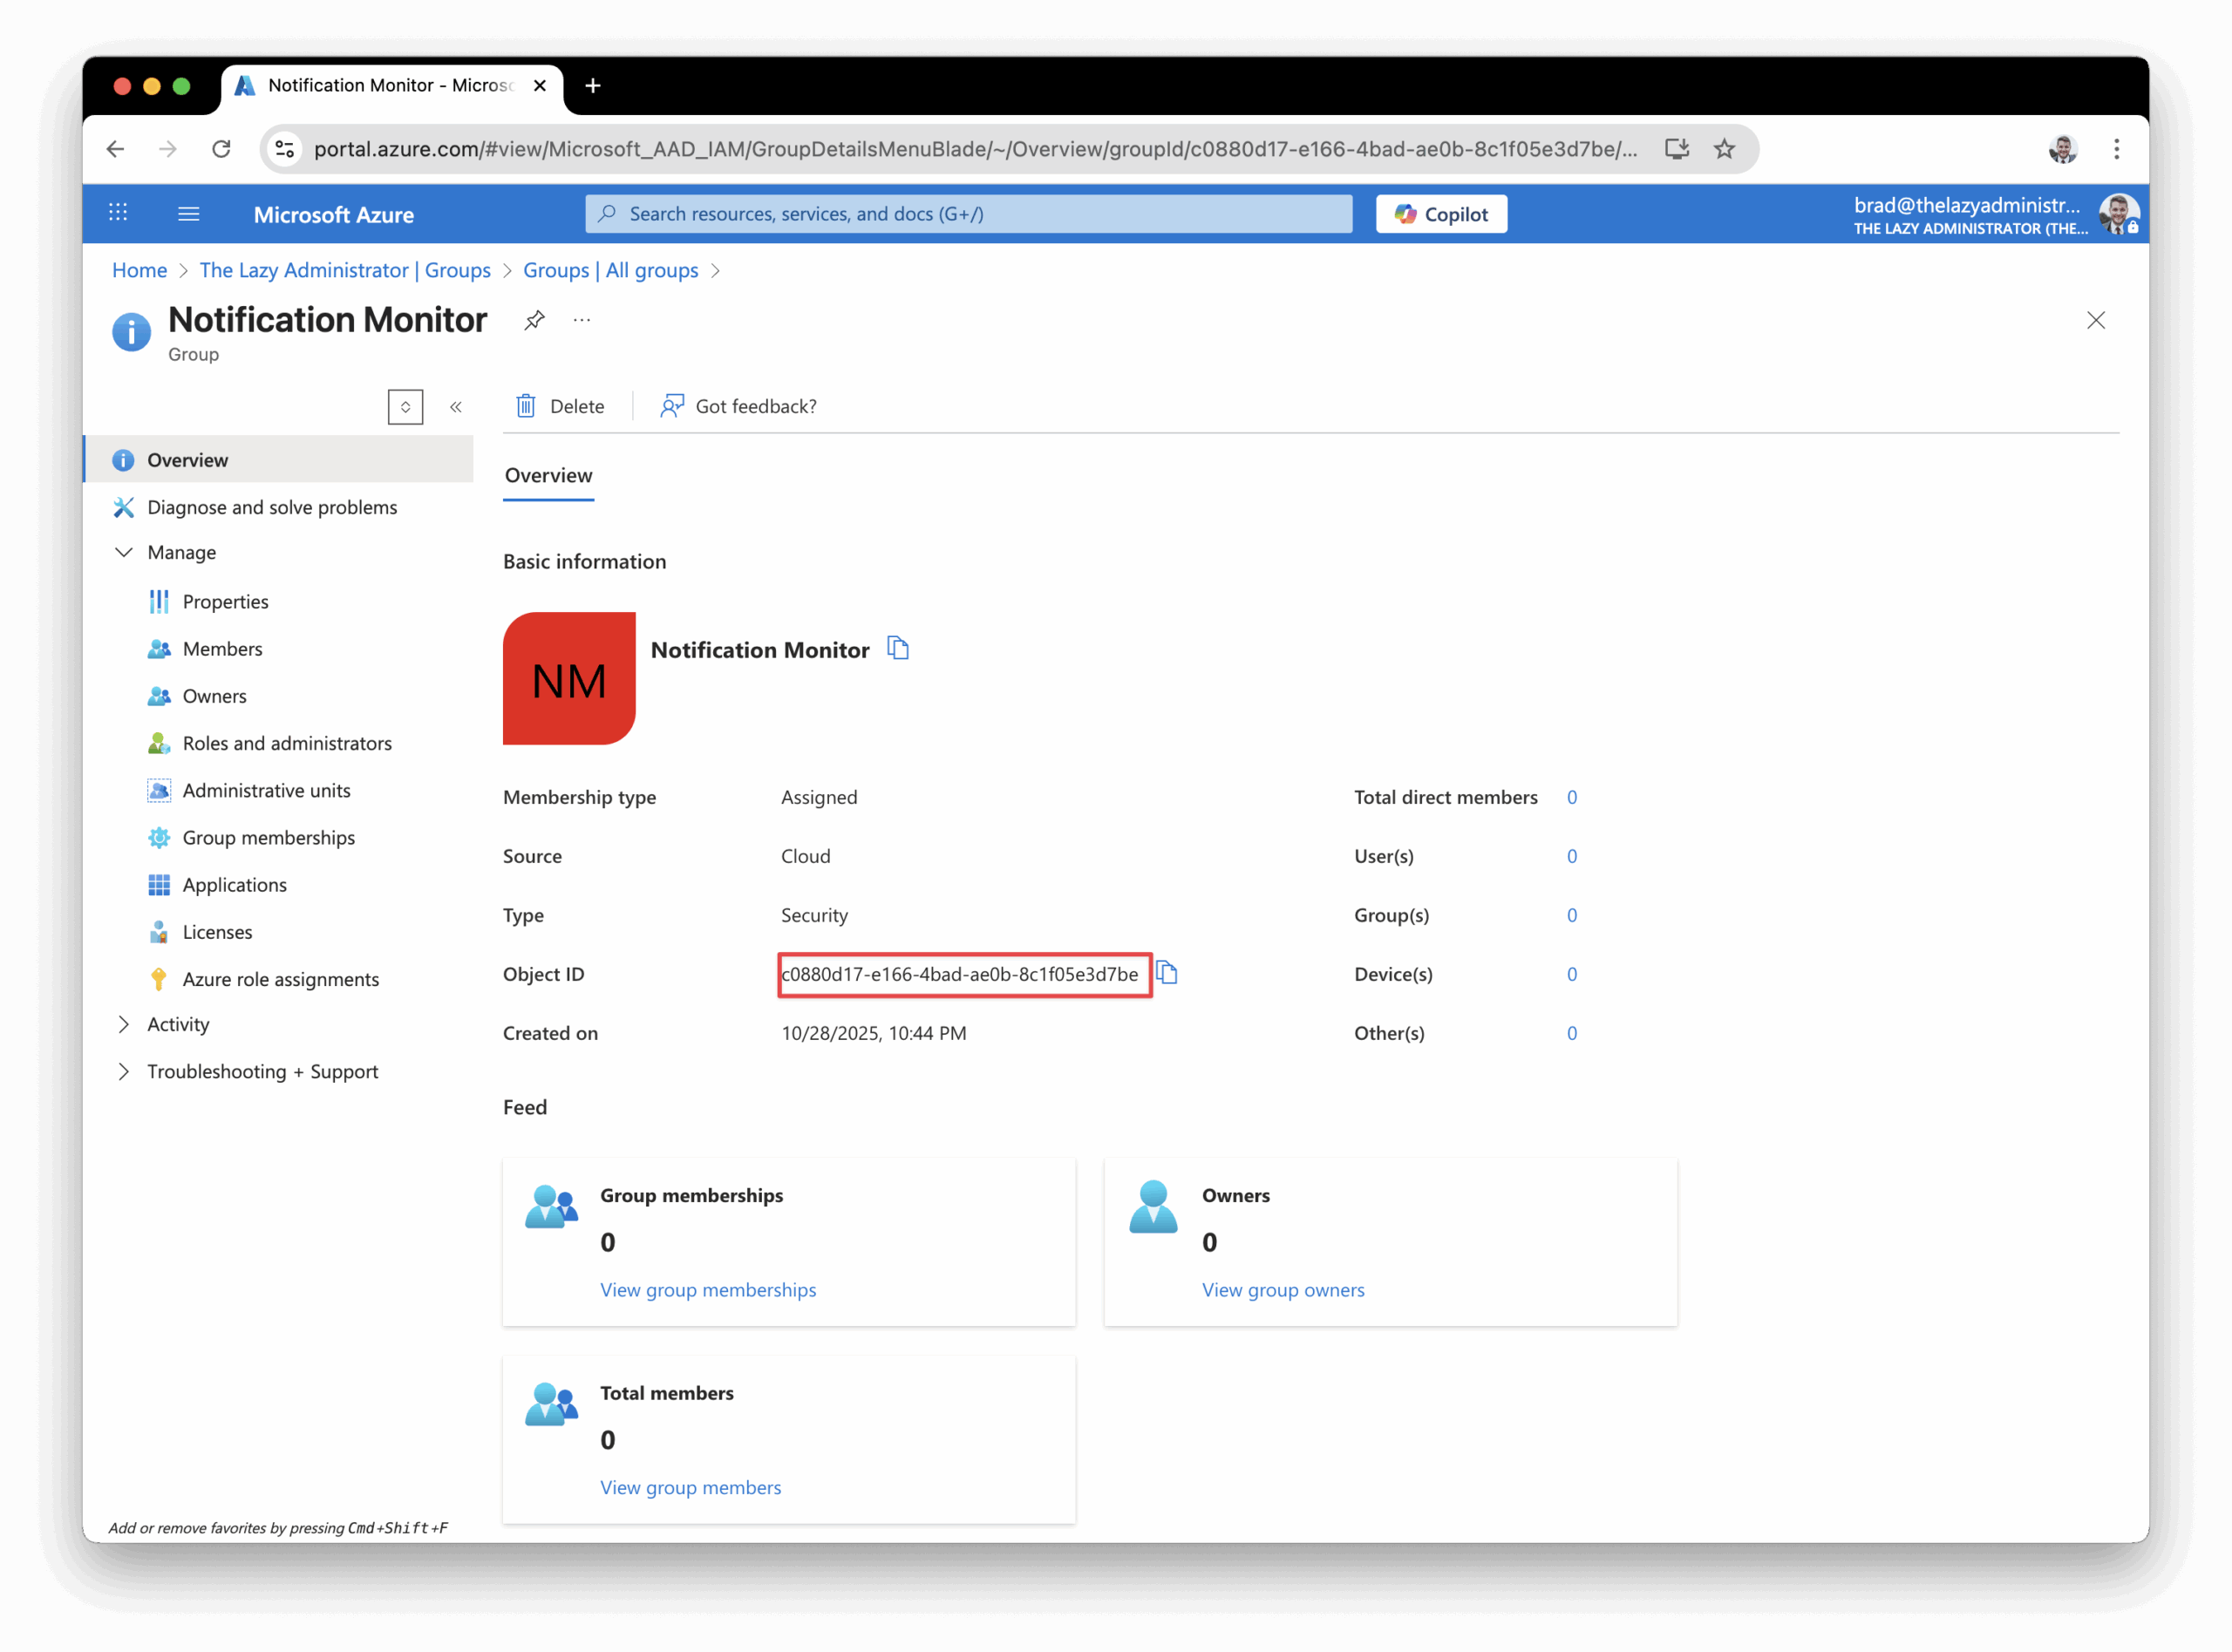
4. Go to the groups detail page and copy the Object Id for later.
Azure Function
Create an Azure Function App
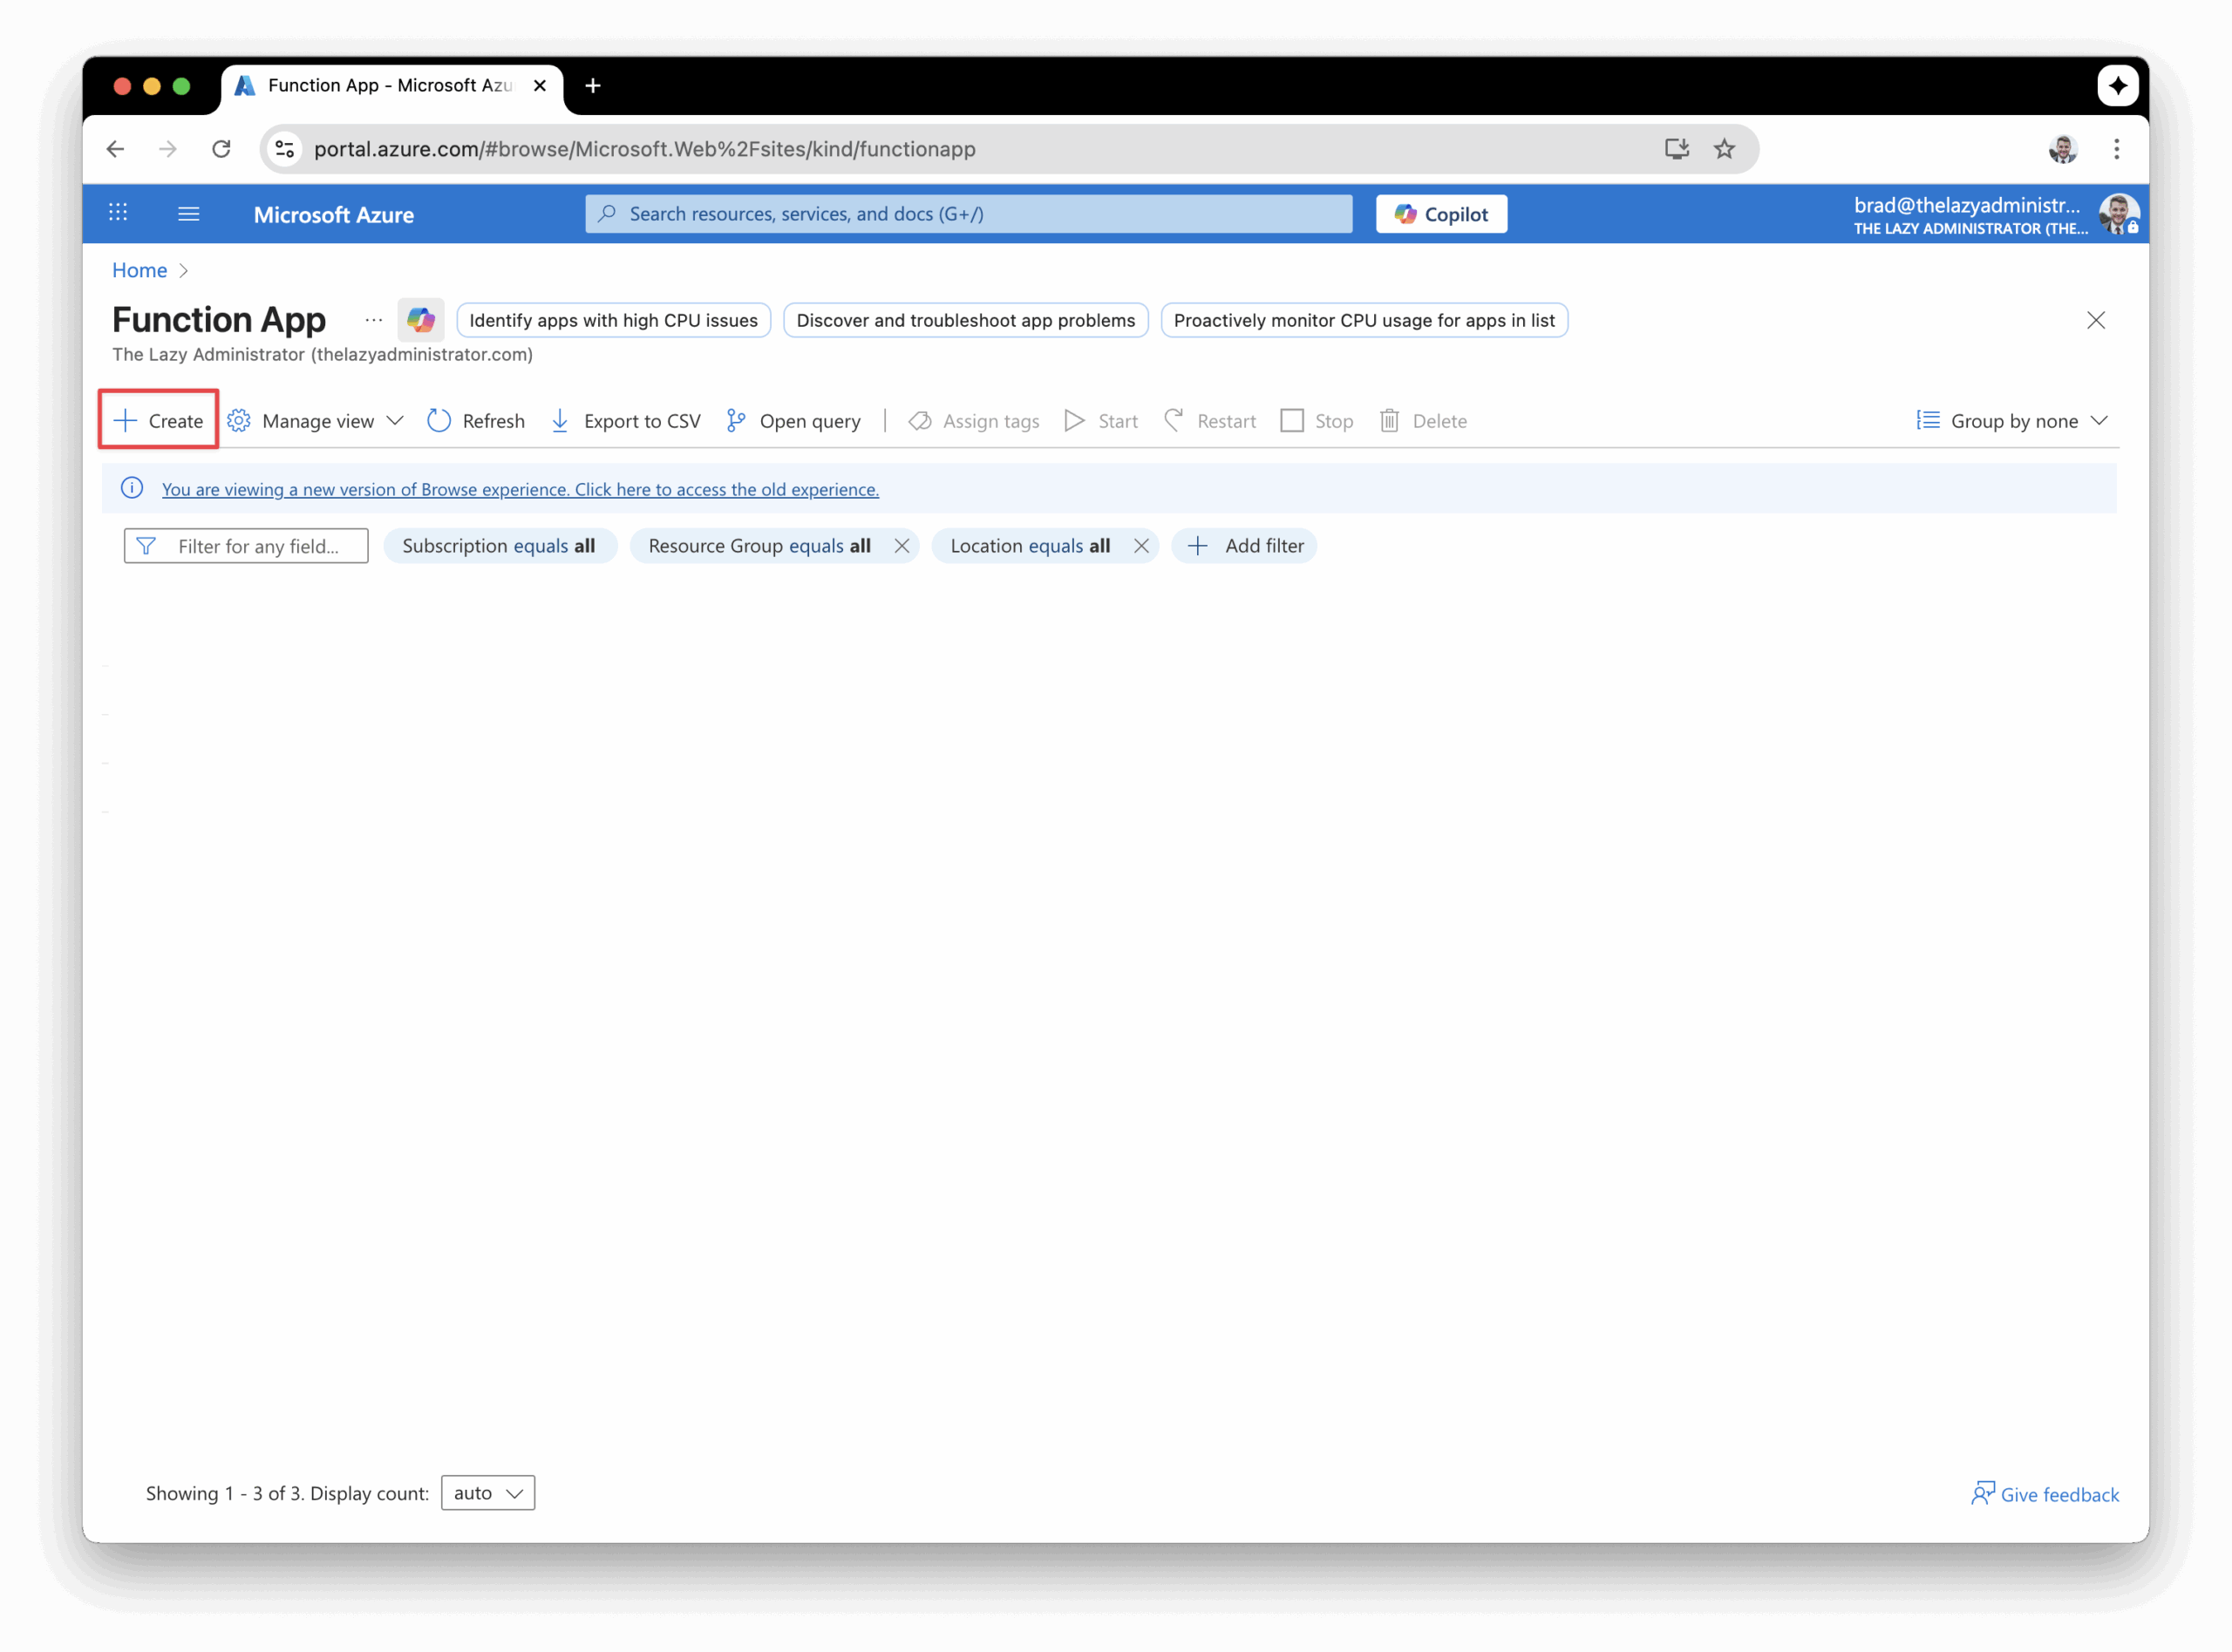
Next, we need to create an Azure Function. The Azure Function is what will be receiving our subscription notification, parsing the information, and performing any further actions that you specify.
In the Azure Portal, go to Function App and click “+ Create”.
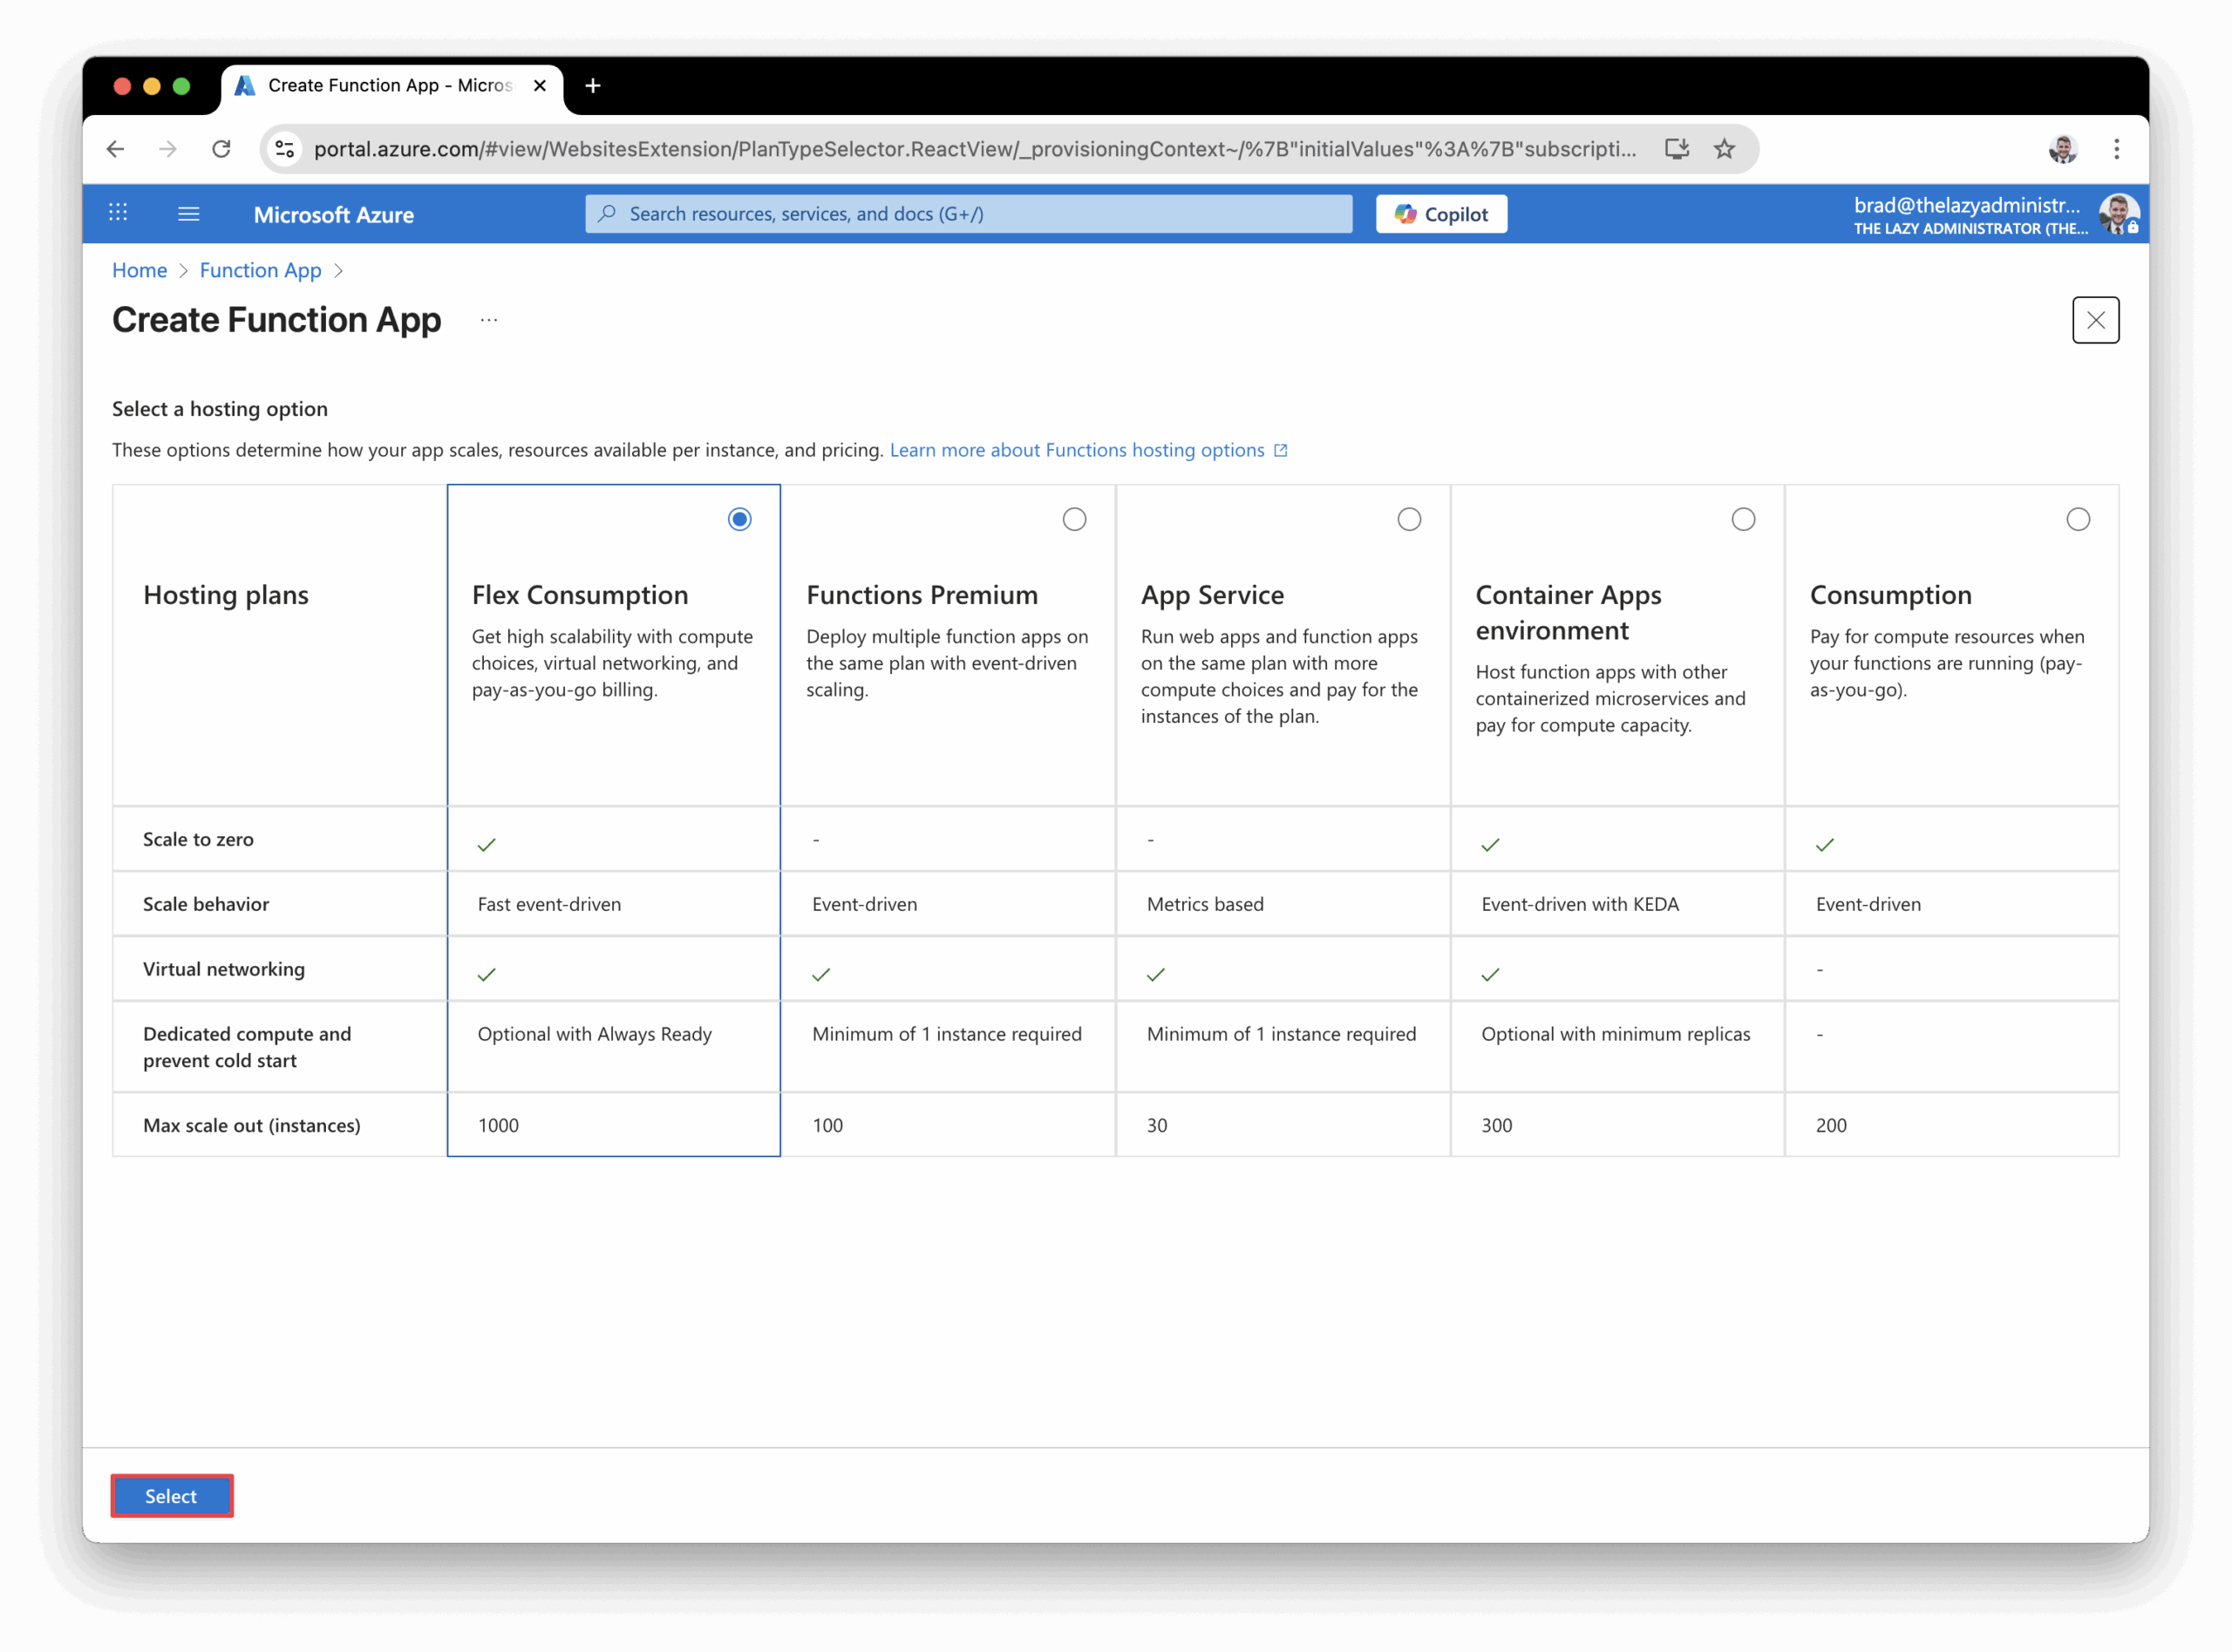
3. Select a hosting plan and then click Select
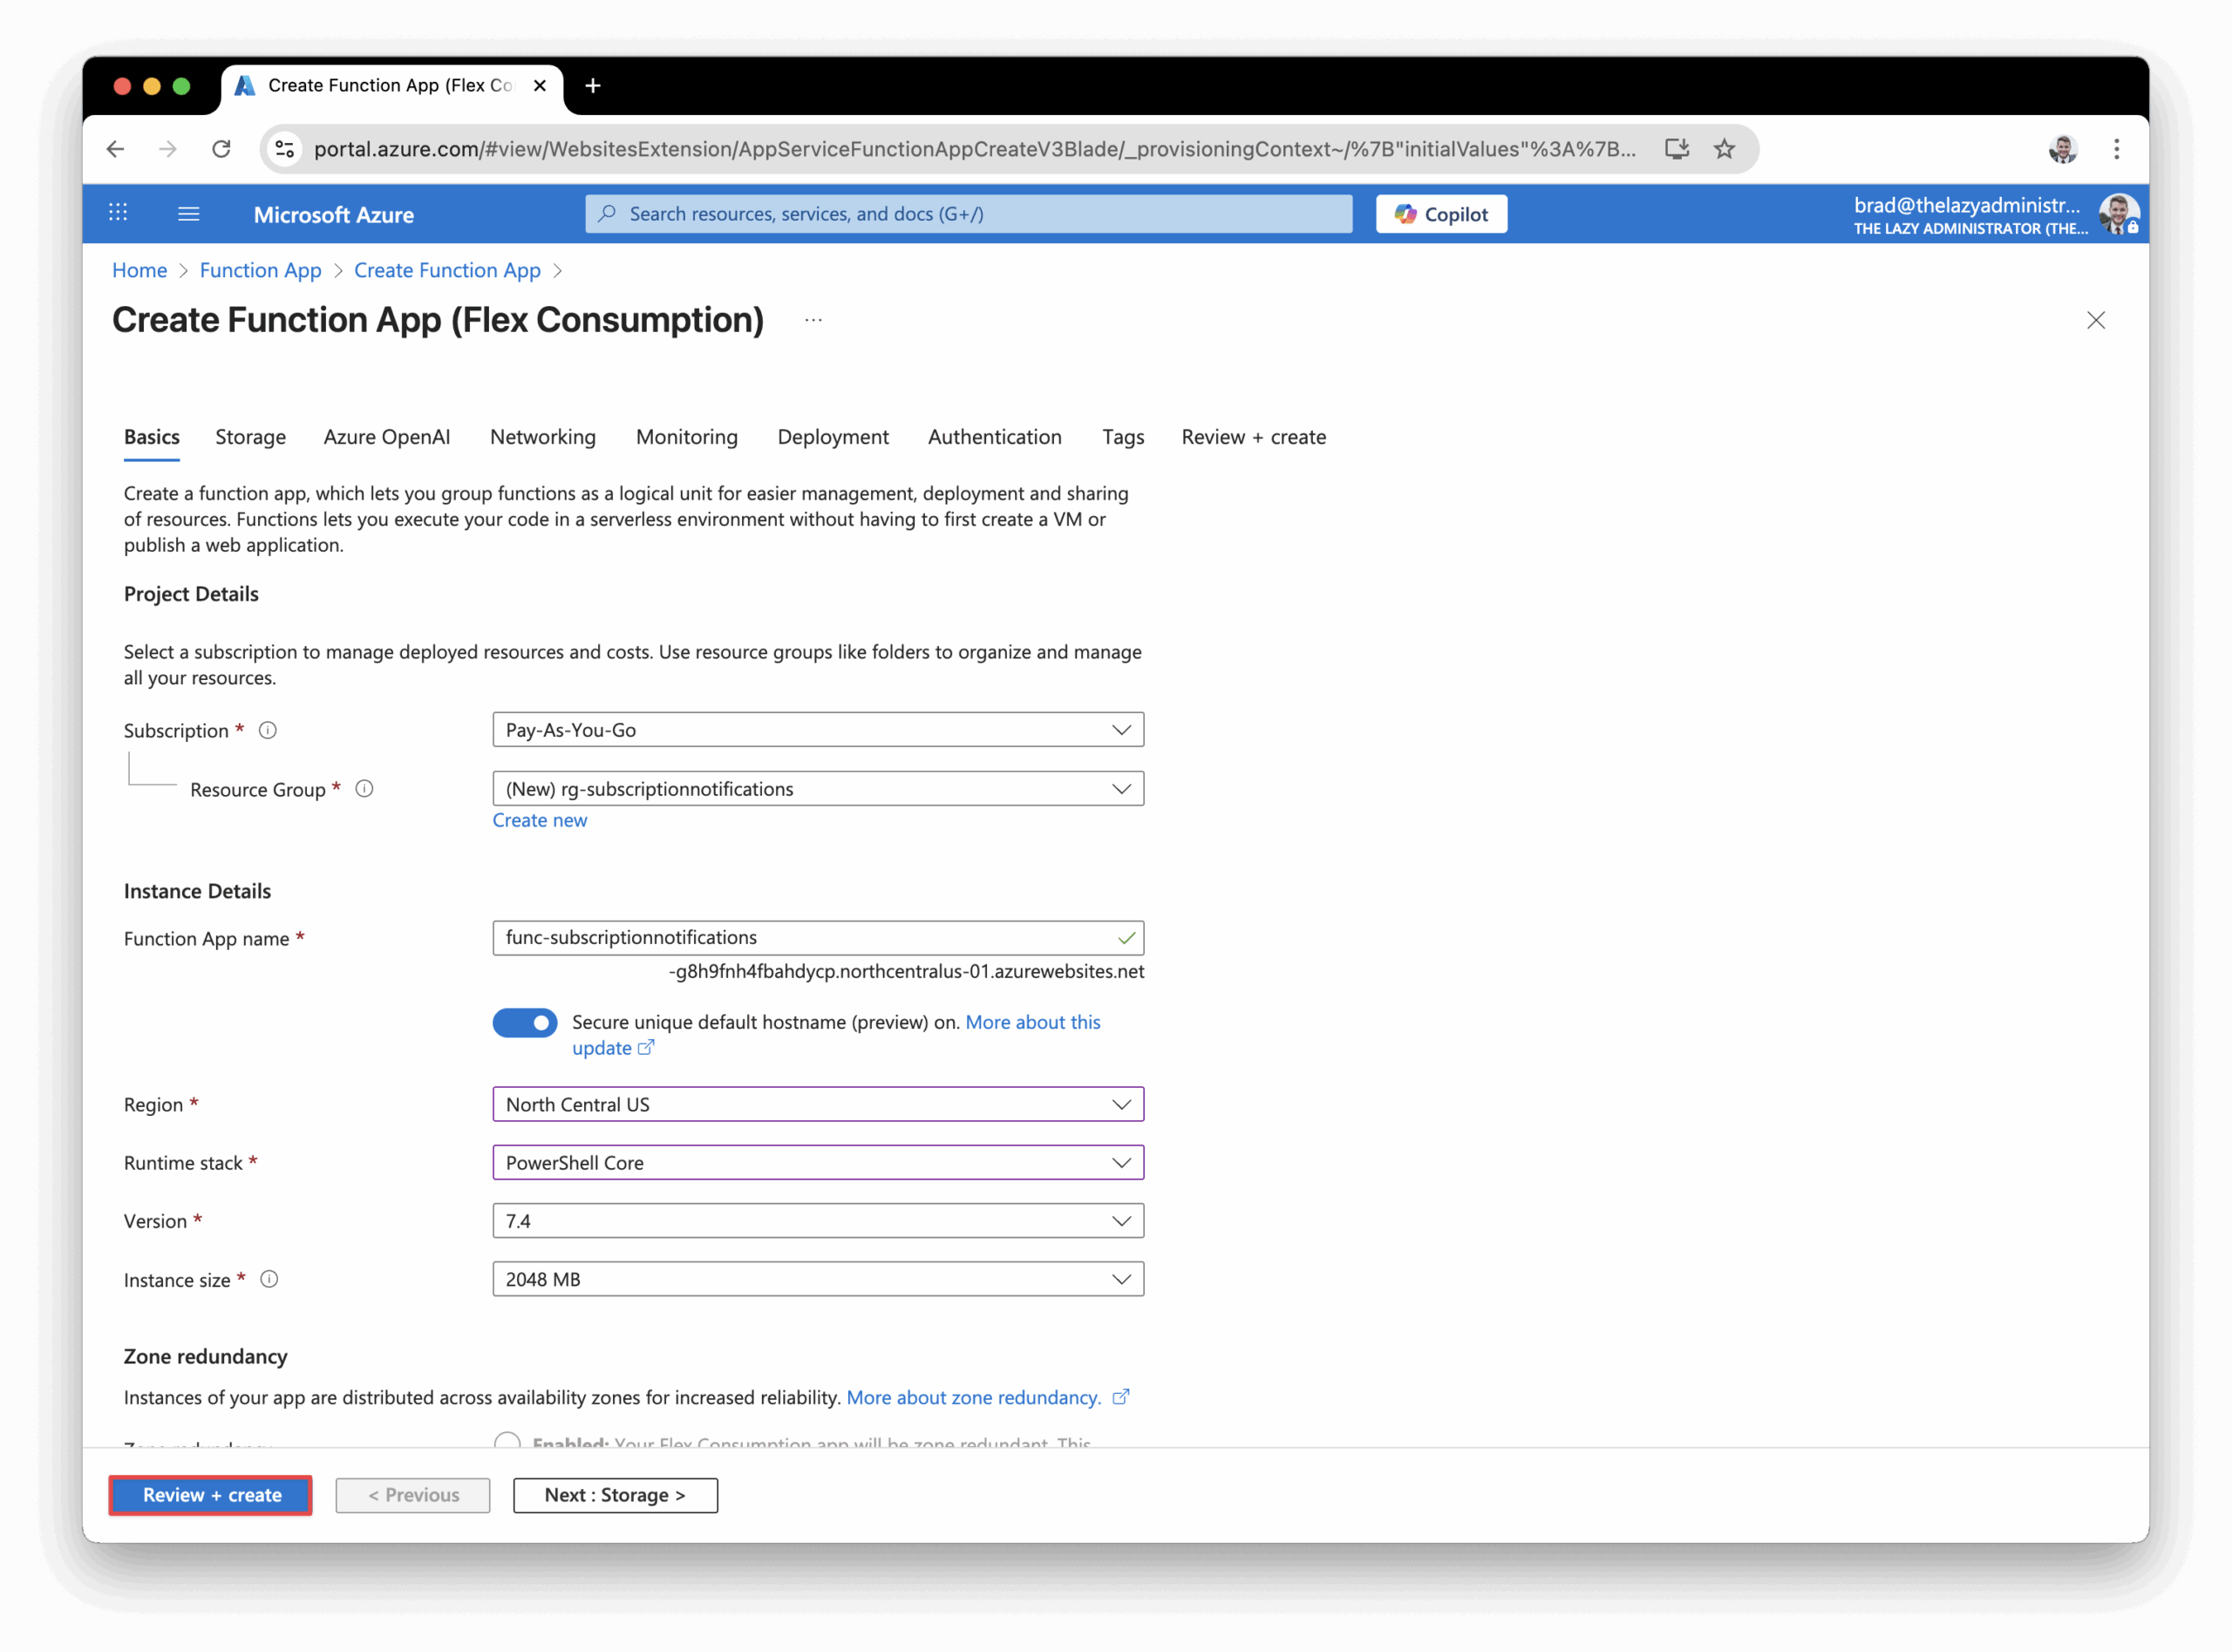
4. Configure you function app to your liking. Set the runtime to PowerShell Core.
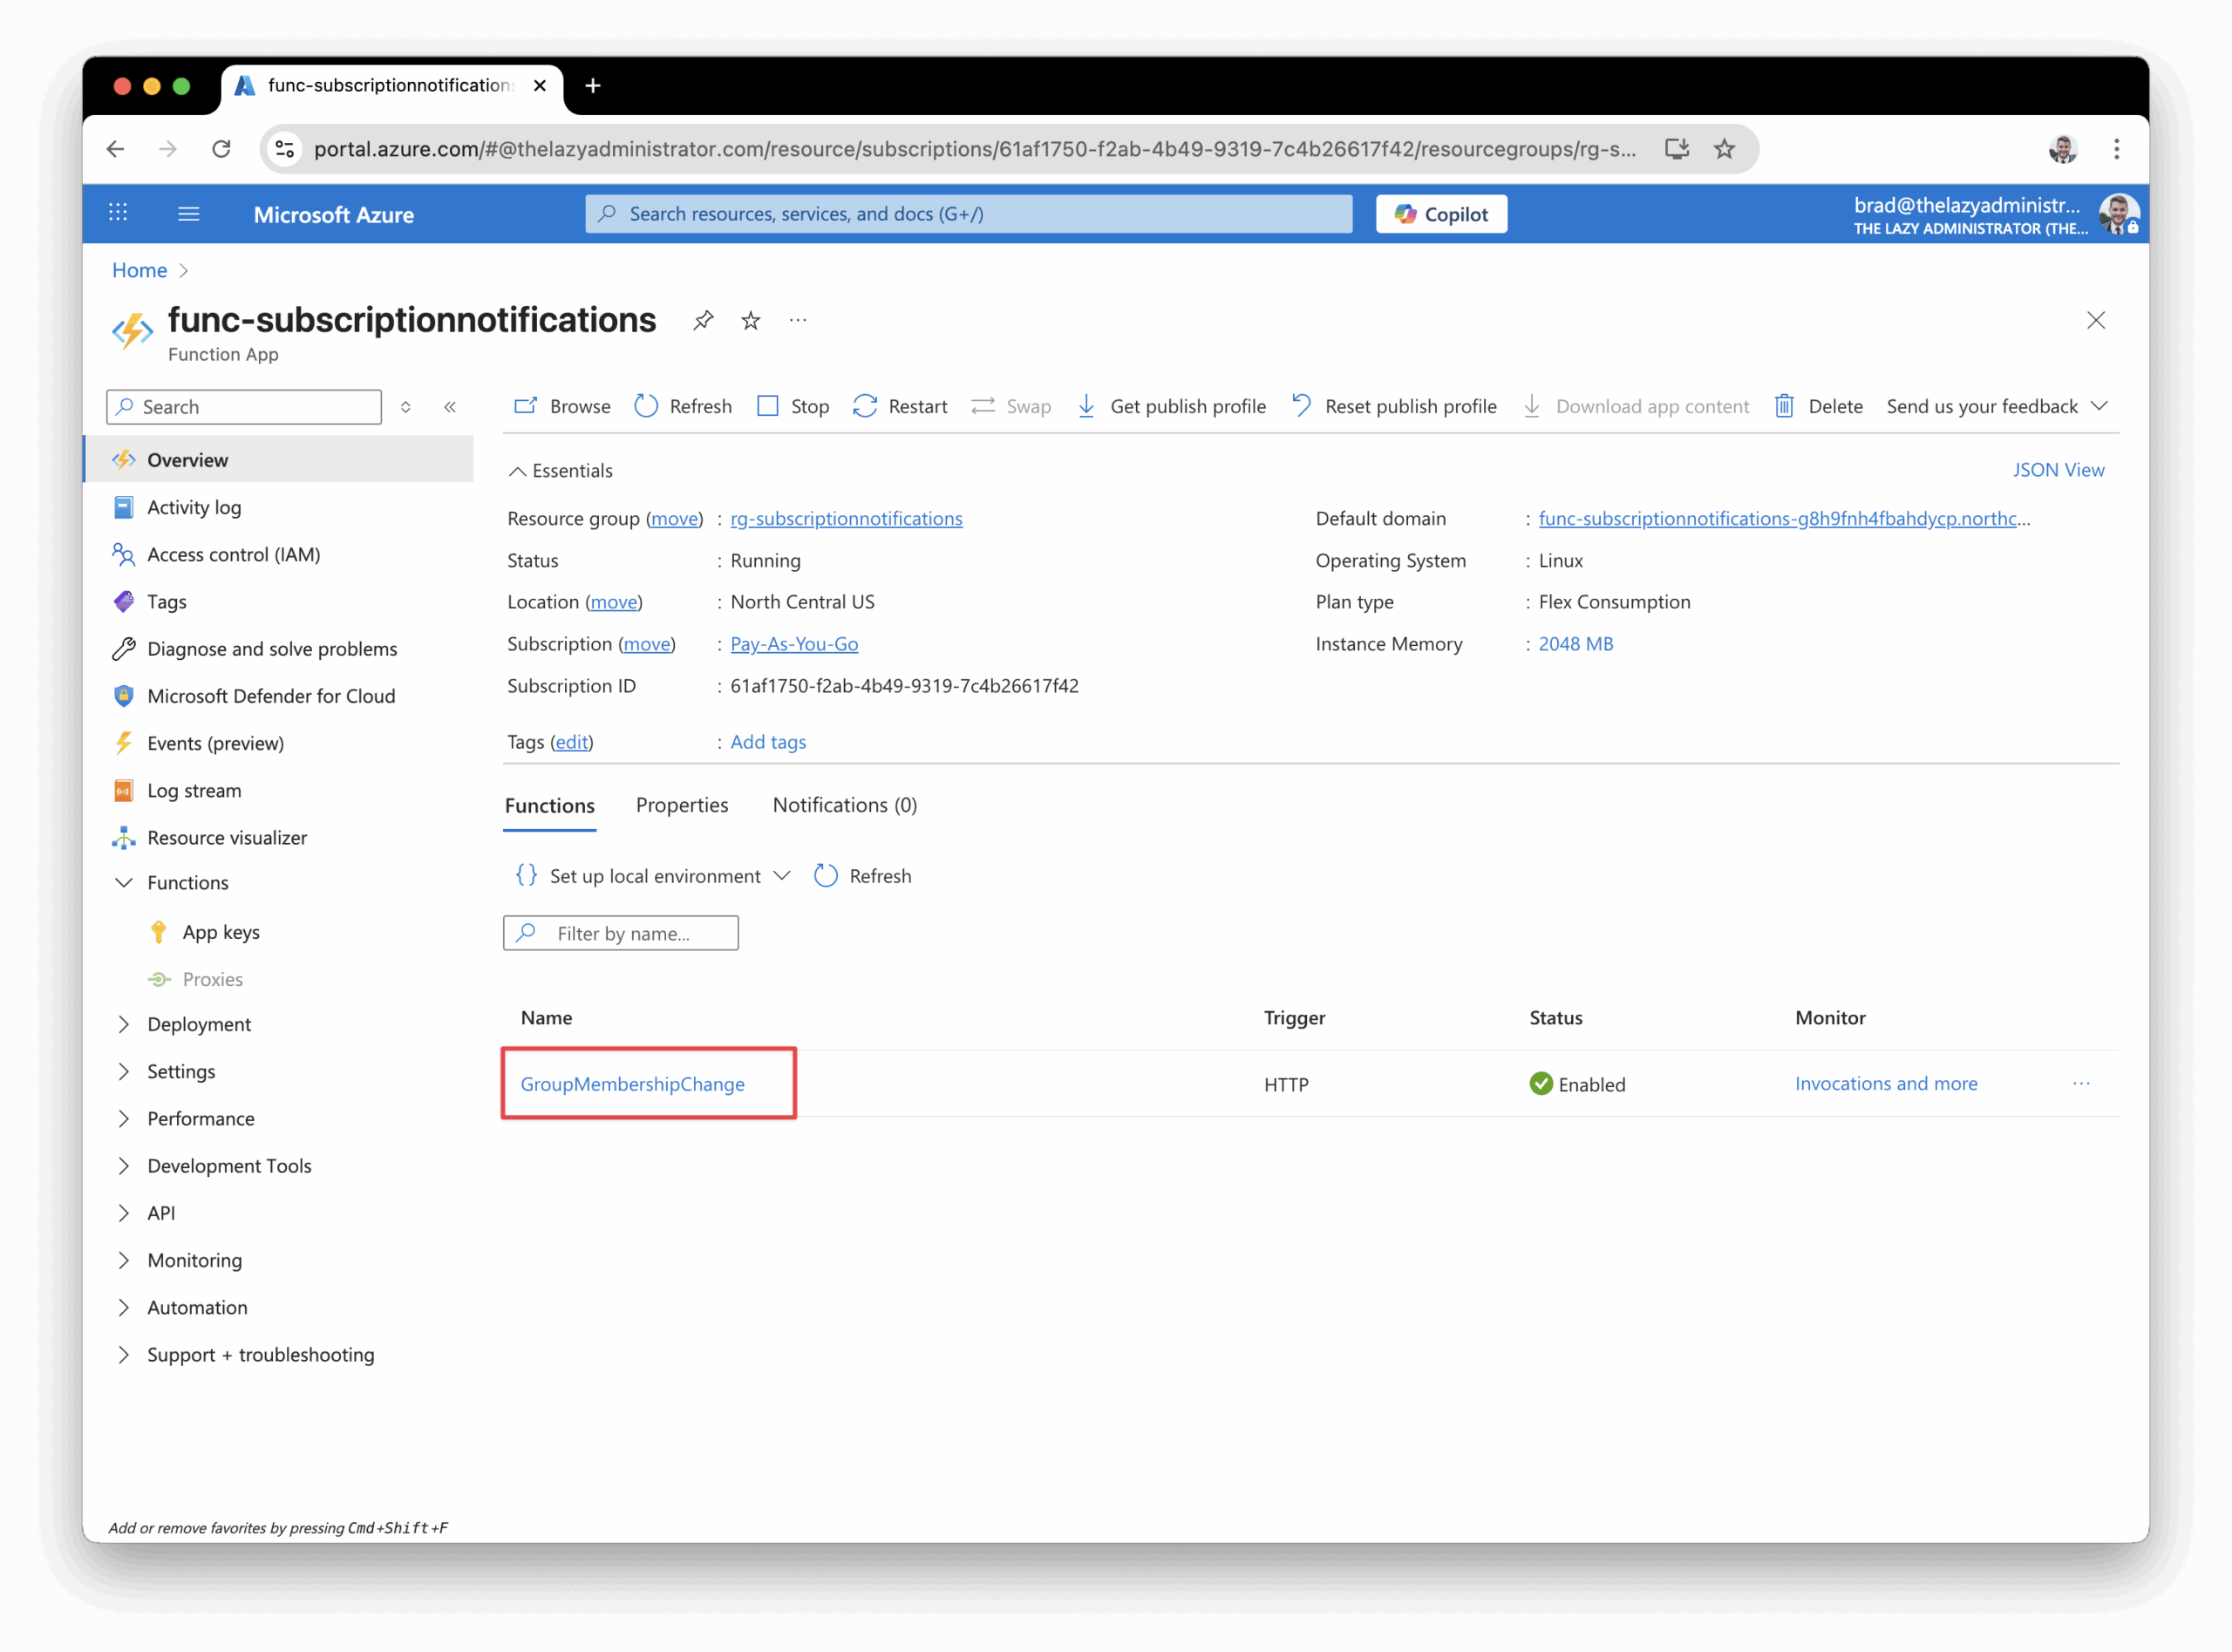
5. Next, create a new Function that is an HTTP trigger. I named my function, “GroupMembershipChange”
Add Environment Variables
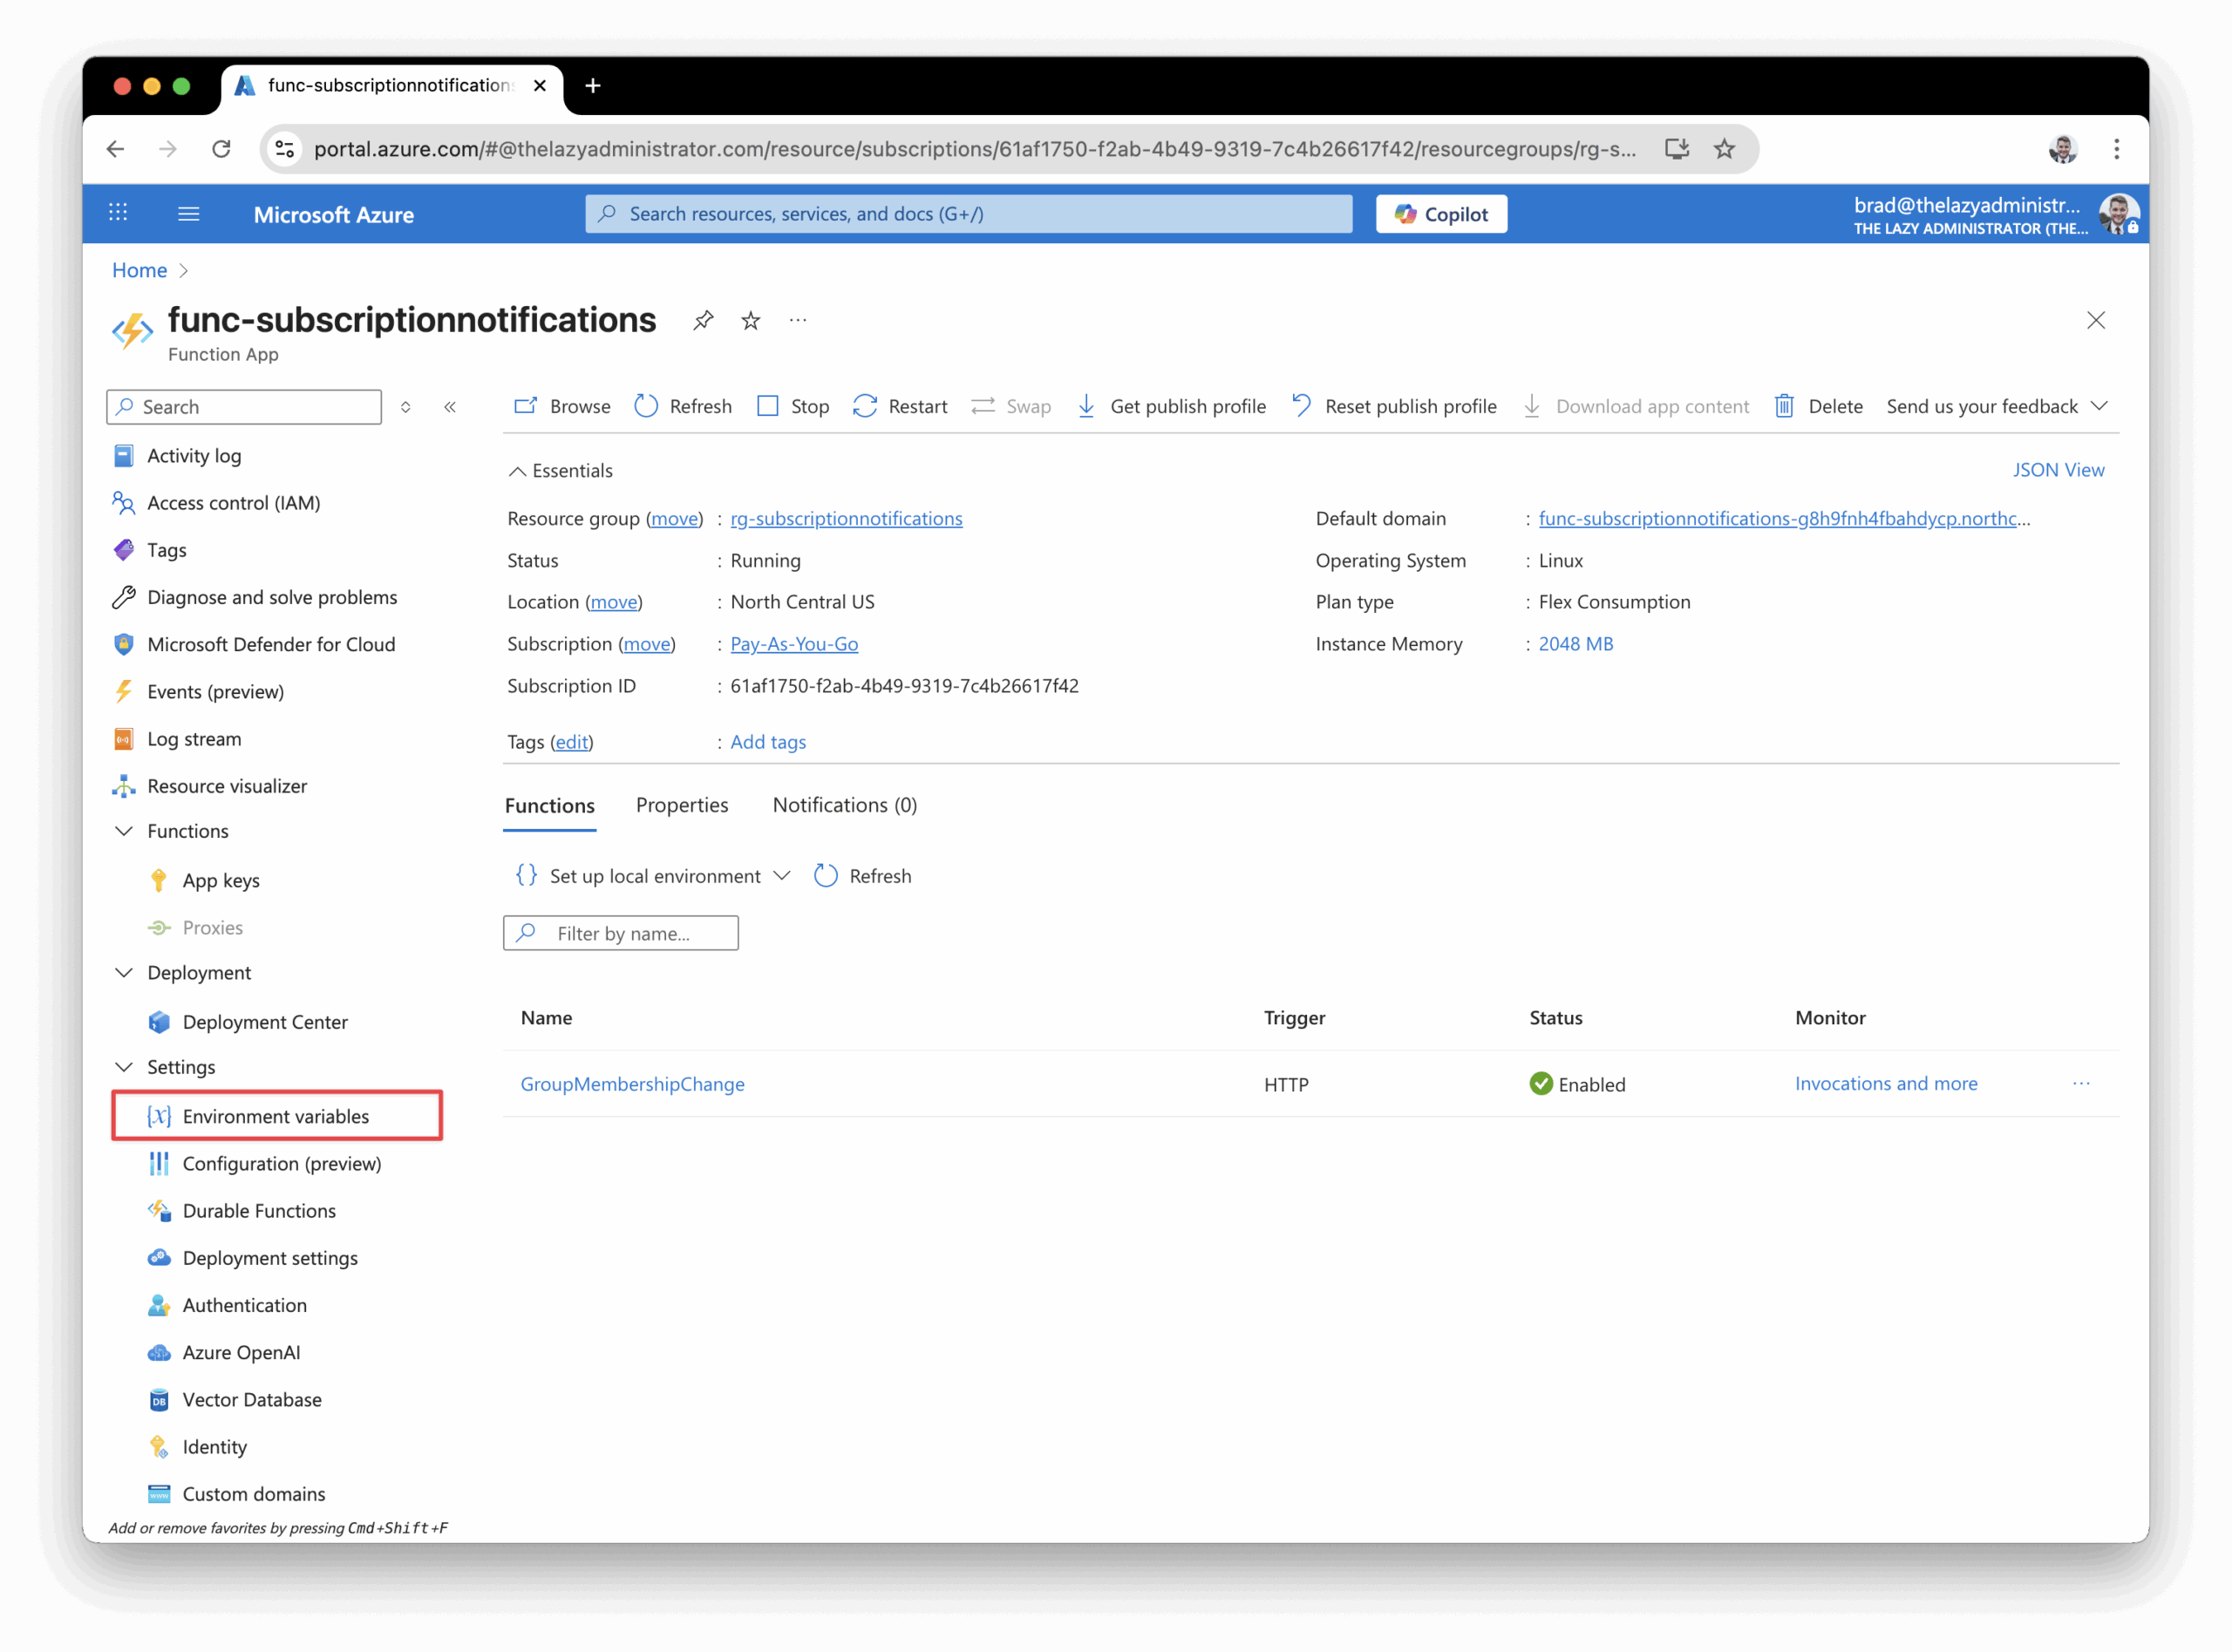
In the left pane, select “Environment variables”
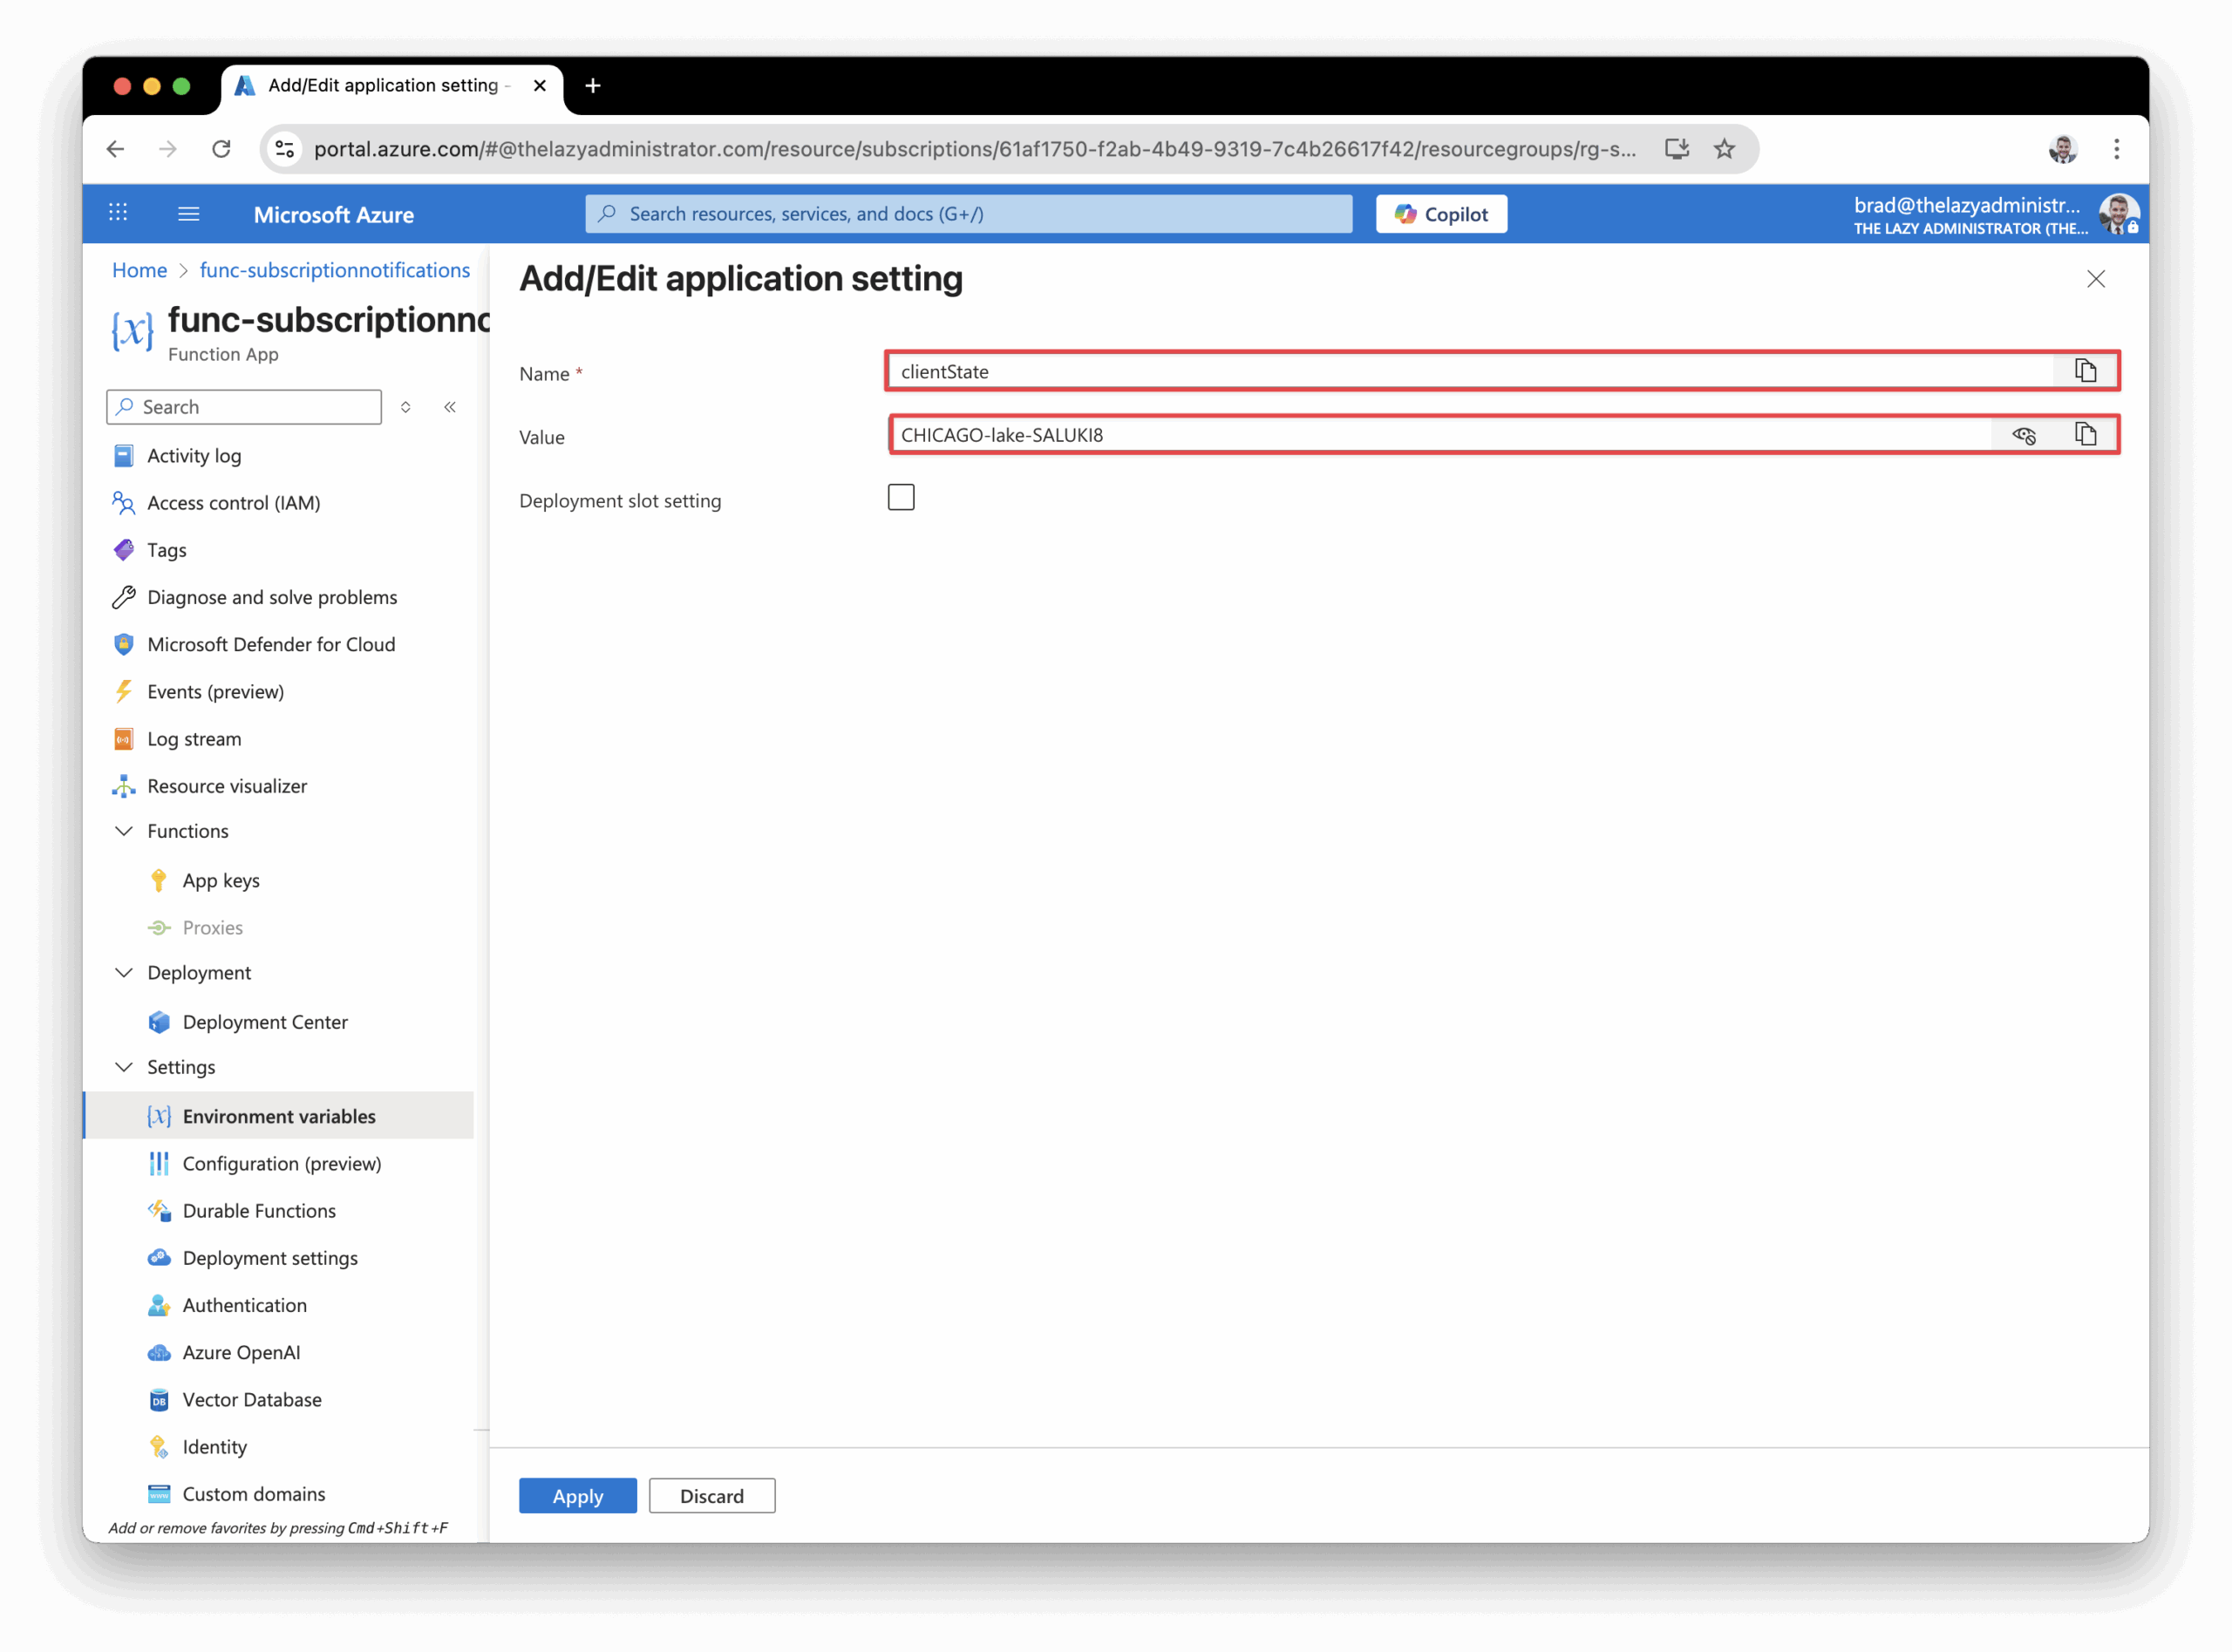
2. The first variable we are going to add is called clientState. For the value, I like to think of a 3 word string with a trailing number. clientState is to confirm that change notifications you receive originate from Microsoft Graph. For this reason, the value of the property should remain secret and known only to your application and the Microsoft Graph service. Note the value for later as well.
Modify the Function
Next, we need to modify the function code itself to properly handle and parse the notification body.
In the run.ps1 file of the function, replace everything with the code below. If you are wanting to perform your own actions, copy the code below and add your code to the TODO line:
If you are also doing the same Proofpoint automation, you can grab my function code below which will look up each user by their ID, then take the users UserPrincipalName and see if the user is already in ProofPoint prior to add or removing them:
2. You may be wondering what the POST looks like from the subscription when users are either added or removed from the group. Below you can view and example body. Disregard the clientState value, we will go over that in a few steps.
3. You may have noticed that the Azure Function contains logic at the top to respond to validation requests. Subscription notification endpoint (or notificationUrl) must be able to properly respond to the validation attempt, otherwise when creating the subscription you will get a 400 Bad Request response. You can read about this here.
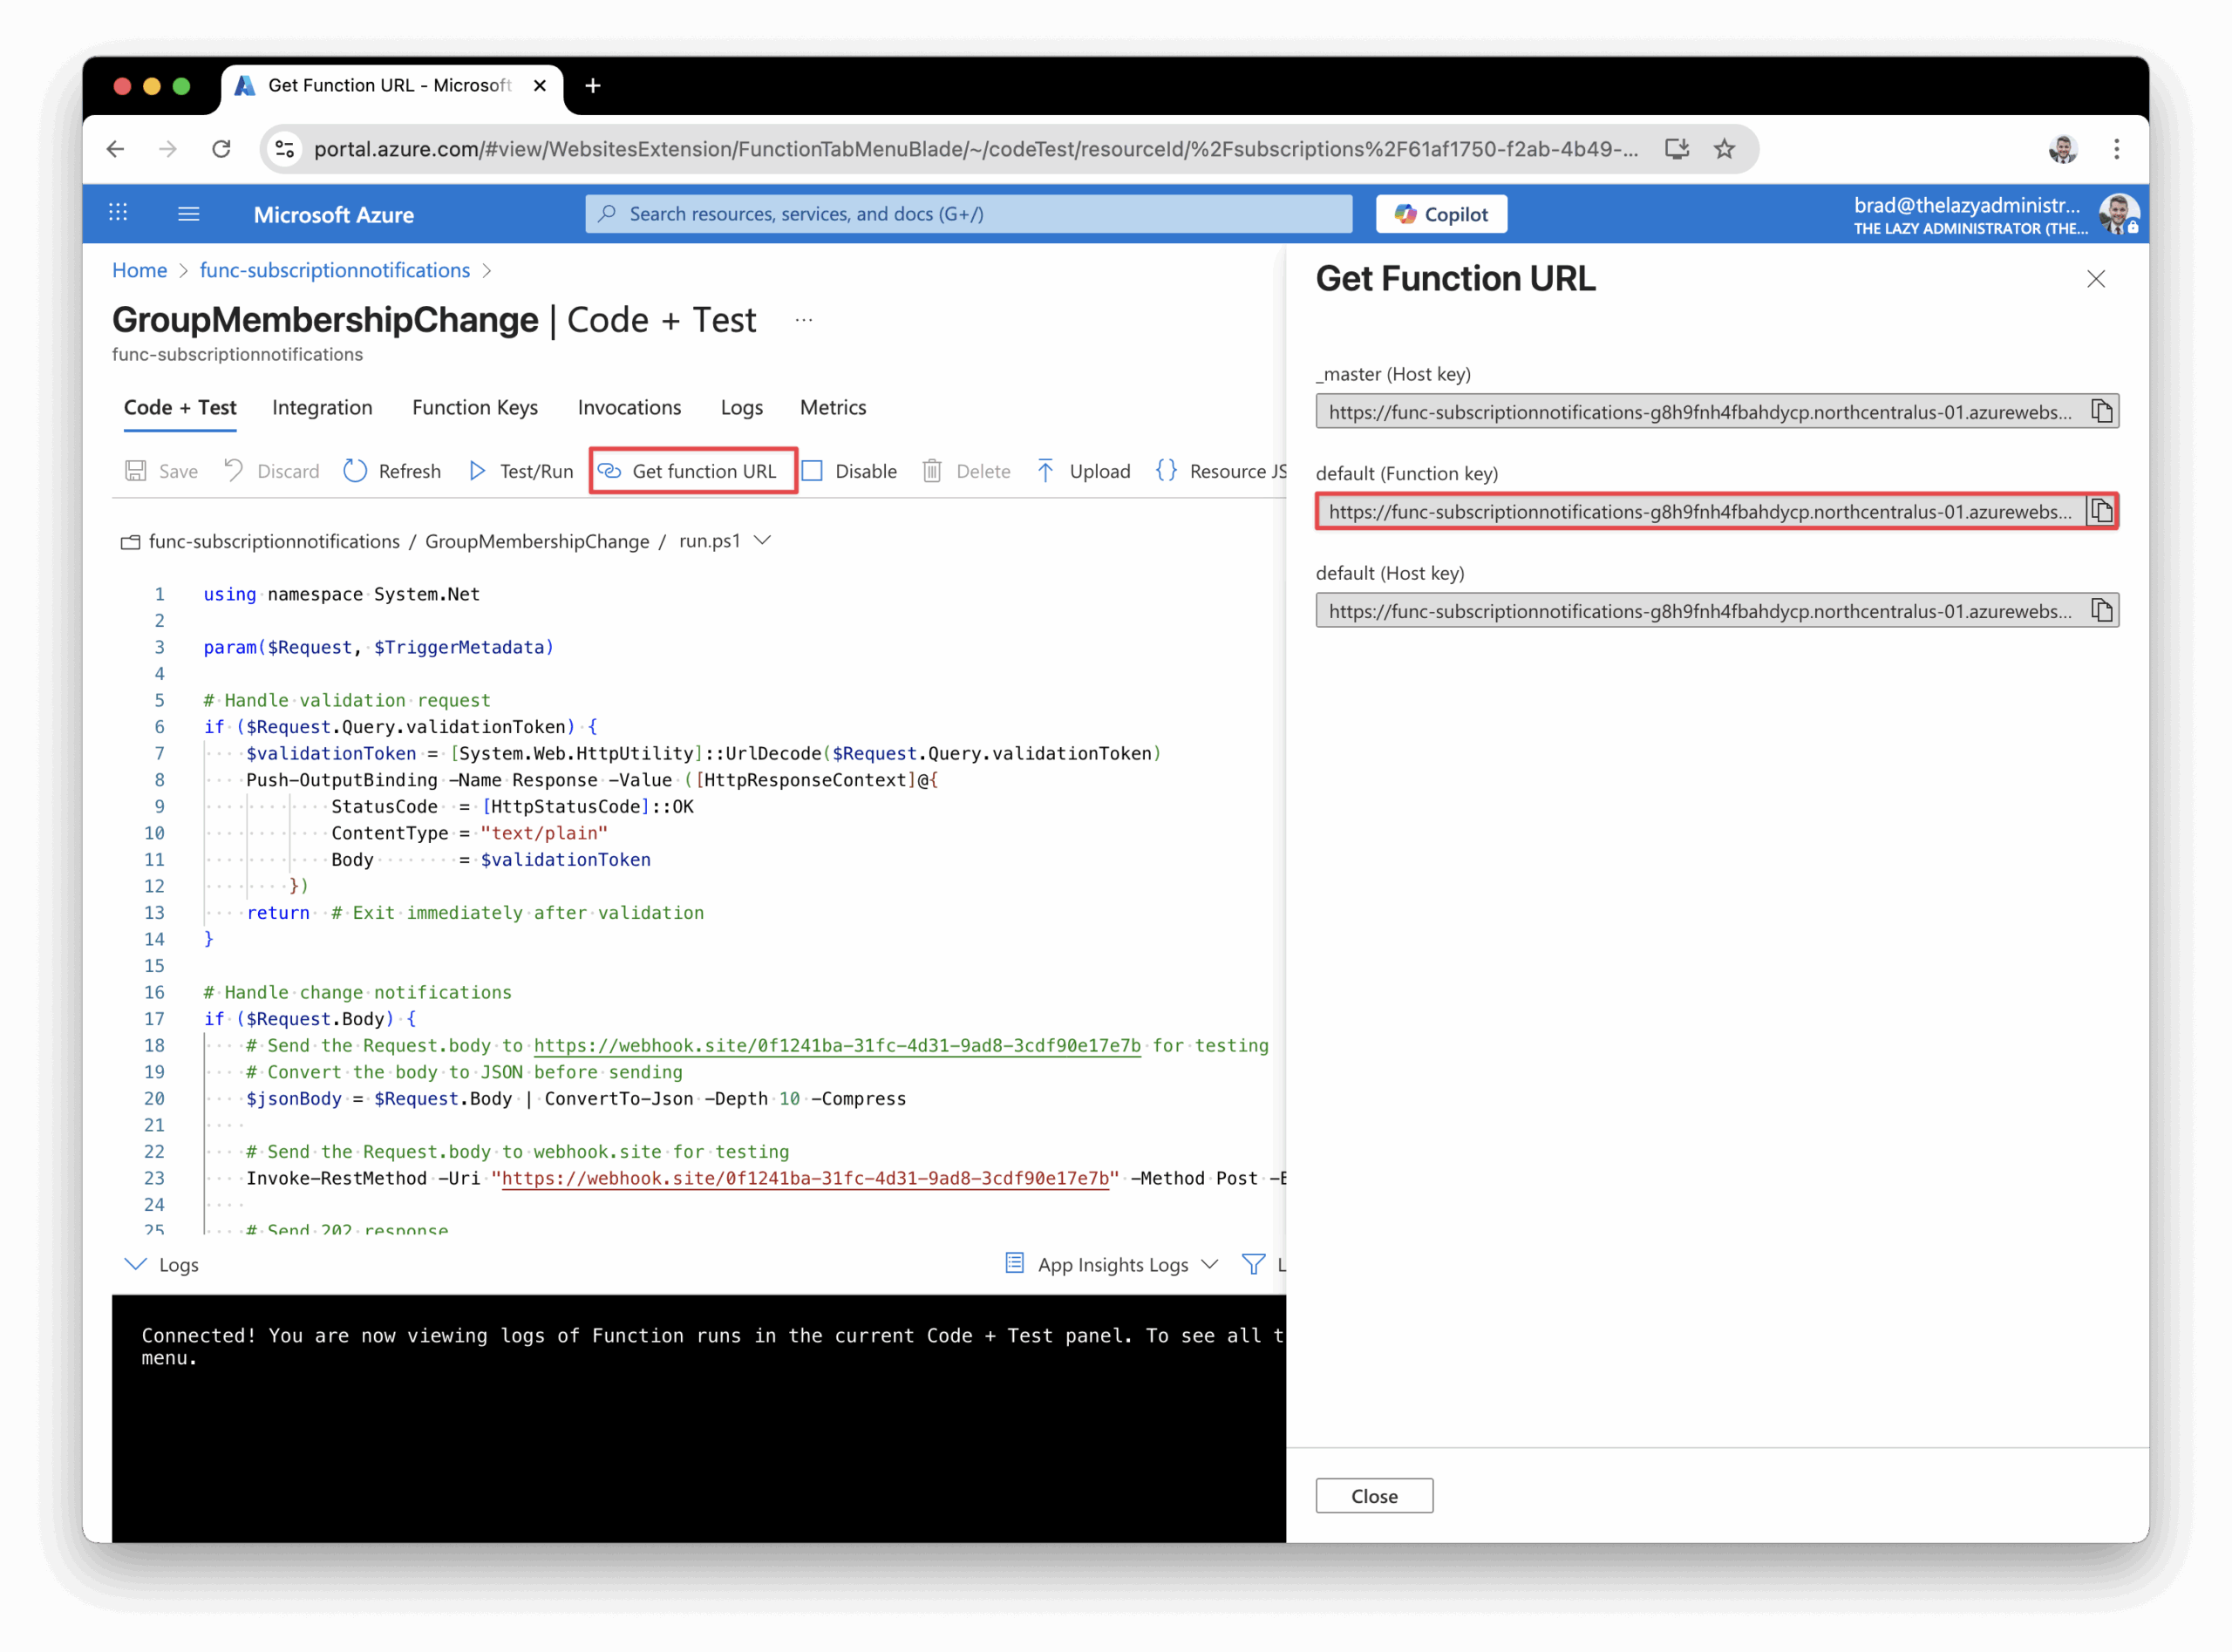
4. Lastly, we need to grab the functions URL. Click “Get function URL” and then copy the default url. Note it for later.
Subscription
Connect to Graph API
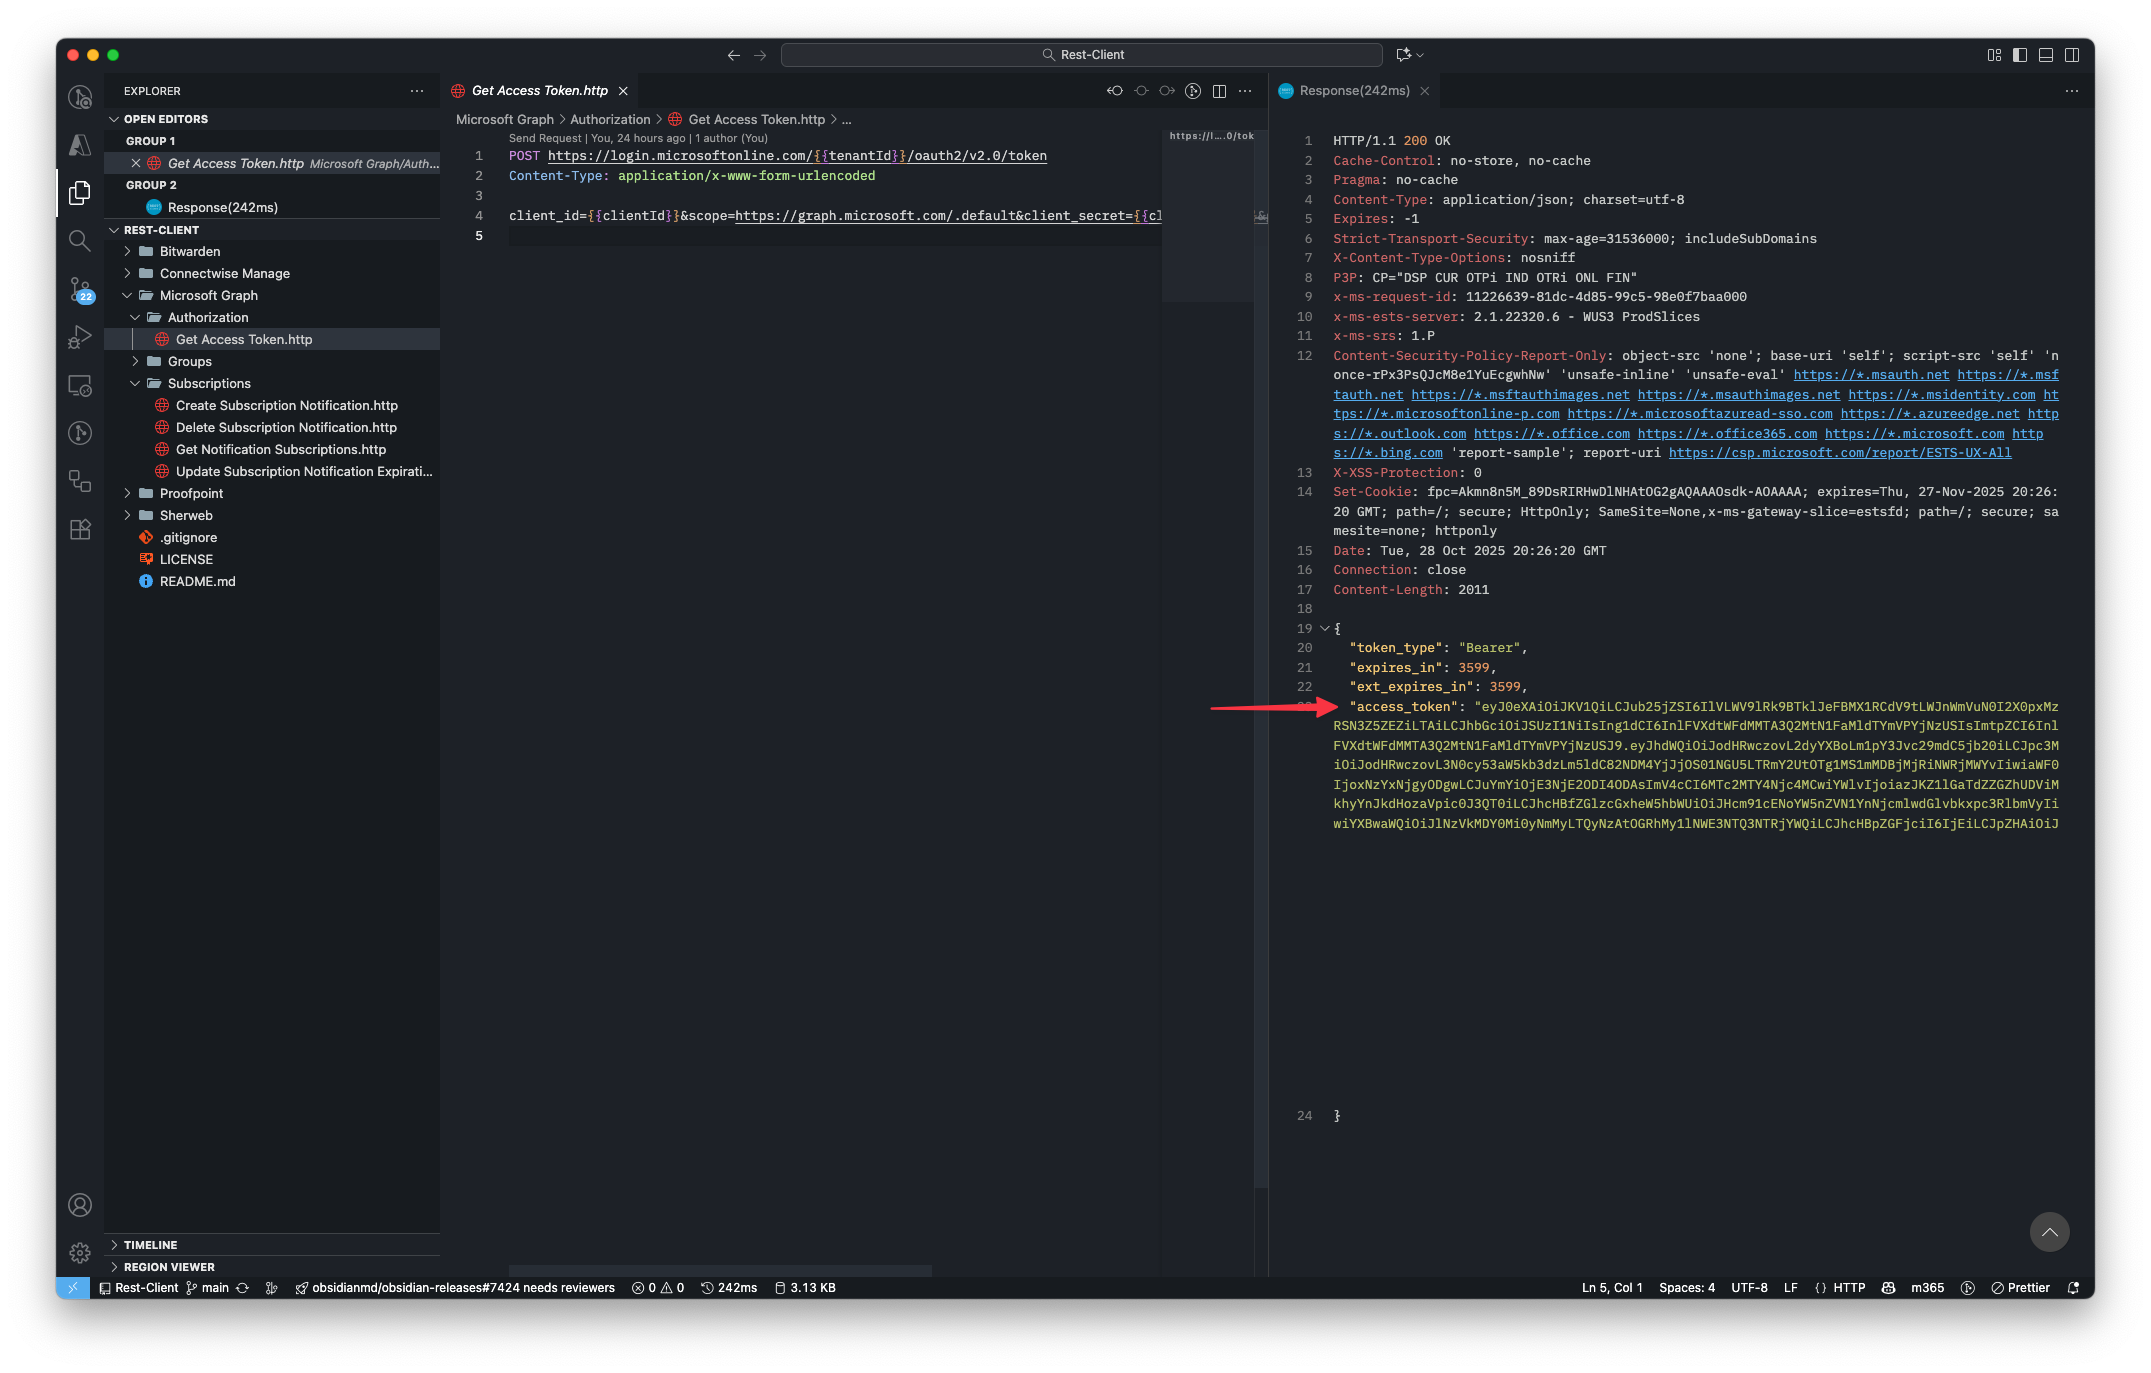
Using any REST client you want, including something like Invoke-RestMethod or curl, we will now connect to the Microsoft Graph API to get an access token. I will be using REST Client VS Code extension in my examples. (You will see variables formatted as {{variable}} and the value has been added to my VS Code’s settings.json file.)
To get an access token we need to know our tenant ID, client ID and client secret. After providing those values we can perform a POST to https://login.microsoftonline.com/{{tenantId}}/oauth2/v2.0/token with the body containing the rest of the information: client_id={{clientId}}&scope=https://graph.microsoft.com/.default&client_secret={{clientSecret}}&grant_type=client_credentials My .http file is as follows:
POST https://login.microsoftonline.com/{{tenantId}}/oauth2/v2.0/tokenContent-Type:application/x-www-form-urlencodedclient_id={{clientId}}&scope=https://graph.microsoft.com/.default&client_secret={{clientSecret}}&grant_type=client_credentials
3. In the response we get an access_token. We will use this to perform our next steps. In my case, I will save this to my settings.json file as a variable called access_token
Create Subscription Notification
Our final step is to create the subscription using the Graph API. Since we have our access token, we will use that to create the new subscription.
Next, we will make a POST request to /subscriptions to create the subscription but first we need to paste our Functions URL as the notificationUrl, the resource is groups/GROUPID/members replacing “GROUPID” with the objectId of our group, and the clientState is the value we created earlier that we check for to ensure that any requests coming to our function are from this subscription. The expirationDateTime needs to be a date in the future but not exceeding the limits we looked at earlier.
POST {{baseUrl}}/subscriptionsContent-type:application/jsonAuthorization:Bearer {{access_token}}{"changeType":"updated","notificationUrl":"https://func-subscriptionnotifications-g8h9fnh4fbahdycp.northcentralus-01.azurewebsites.net/api/GroupMembershipChange?code=zpzkGlybkK_ntKLliqHFmJr8GvVMpS9196Bbiy_x1aVlAzFu5oBrNw==","resource":"groups/c0880d17-e166-4bad-ae0b-8c1f05e3d7be/members","expirationDateTime":"2025-10-29T18:23:45.9356913Z","latestSupportedTlsVersion":"v1_2","clientState":"CHICAGO-lake-SALUKI8"}
3. Now you may notice that we do not specify the app registration anywhere at all. This is because Microsoft Graph “knows” which app is creating the subscription from the OAuth 2.0 access token you send in the Authorization header. The token contains the app’s client ID, which Graph records as subscription.applicationId.
4. After sending the POST I get the following response:
5. Now if you remember, the subscriptions have a short TTL and will expire rather quickly. The Application that created the subscription must be the one that extends the subscription expiration date out.
My name is Bradley Wyatt; I am a 6x Dual-Microsoft Most Valuable Professional (MVP) in Microsoft Azure and Microsoft 365. I have given talks at many different conferences, user groups, and companies throughout the United States, ranging from PowerShell to DevOps Security best practices, and I am the 2022 North American Outstanding Contribution to the Microsoft Community winner.