Office 365 Anti-Impersonation Email Banner with PowerShell & Azure for Large Enterprises – No More Mailbox Limit
Table of Contents
The Problem
E-mail spoofing/impersonation is a huge threat to many companies today. A very common approach by scammers is to send your users an email using the display name of a real person within your company. Many users will glance at the email and see the display name and be none the wiser. A popular defense against this is to tag all external emails with a banner, letting the user know that the email came from an external source. The biggest problem with this method is that it tags all emails, which over the course of a few months, could be thousands of emails for a single user, causing them to begin to ignore the banner altogether.
So I like to create mail flow rules in Exchange to only append a banner if the email originates from an external source, and the display name of the sender matches a display name of someone internally. This way, there are considerably fewer emails flagged, and the user does not end up ignoring the banner. My favorite article for doing this is from GCITS, and I have been able to set this up and many many clients without issues. However, the one problem I have run across is what to do with larger enterprise clients. If you notice, under the “some things to keep in mind” section, it lists that mail flow rules are limited to 8KB per rule, which is around 300 mailboxes (depending on the length of the display names). So what should you do if your organization (or Office 365 environment) contains more than 300 mailboxes?
The Fix
New Features
Taking what GCITS has created, I expanded on the core idea and created a PowerShell runbook that will do the following
- No mailbox limits! – Create Anti-Impersonation Email Banner mail-flow rules for more than 300 mailboxes. We can set a max mailbox per mail-flow rule value, and when that limit is reached, it will create another rule. So on and so on…
- Automatic rule cleanup – every time it runs, it will go through each rule and verify that the mailbox is still present. If a mailbox is not present anymore, it will remove it from the rule because we don’t want old mailboxes littering our rules and, in turn, having even more rules in our environment!
- Efficient mail flow rules – if during the rule cleanup portion it removes a mailbox from rule 1 of 3, then if it needs to add another mailbox to a rule later, it will add it to mail flow rule 1 until it reaches our max mailbox per rule value and then creates a new rule altogether.
- Pilot Mode – During testing, we can enable pilot mode and specify only pilot users to be in our mail flow rules. This way, we can test and make sure everything is working before rolling it out to everyone.
- Include/Exclude Shared Mailboxes – many organizations convert old user mailboxes to shared mailboxes. You may want to include these in your rules, or some may opt to remove them.
- Full Verbose Logging – Verbose logging every step of the way.
Email Banner
Once the email rule is in place, this is the banner that will be added to the top of the outlook message when there is an impersonation attempt.

Office 365 ATP Anti-Impersonation
Now many of you may be saying, “Doesn’t Office 365 ATP achieve the same thing?” and the answer is…yes! If you have the Office 365 ATP license in your tenant already, you can currently do this. For any of you that do not have that license (or O365 ATP bundled within another license), you can do it as well with no additional cost!
Setting up the Azure Resources
There are several items we must set up in Azure to have everything working properly
- Resource Group for our automation account
- Automation Account
- Automation Credential to connect to Office 365
Resource Group
In the Azure Portal, create a new Resource Group if you don’t already have one for your automation accounts. If you already have a Resource Group for this, you can proceed to the next step.
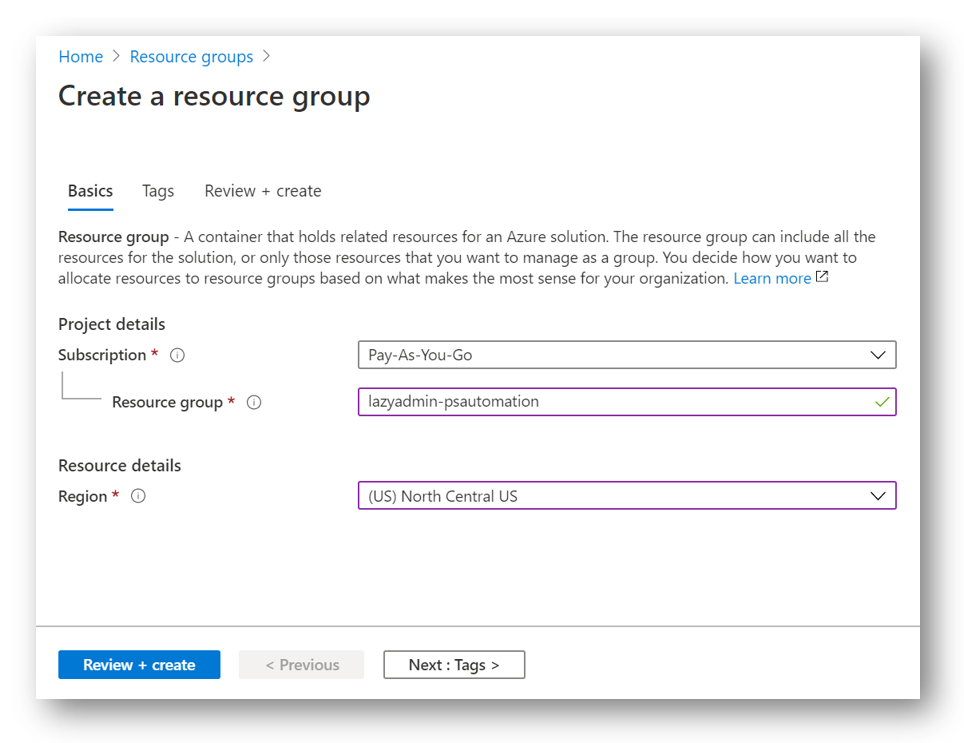
When you have given it a Name, selected a subscription and region, click Review + Create to begin the validation process.
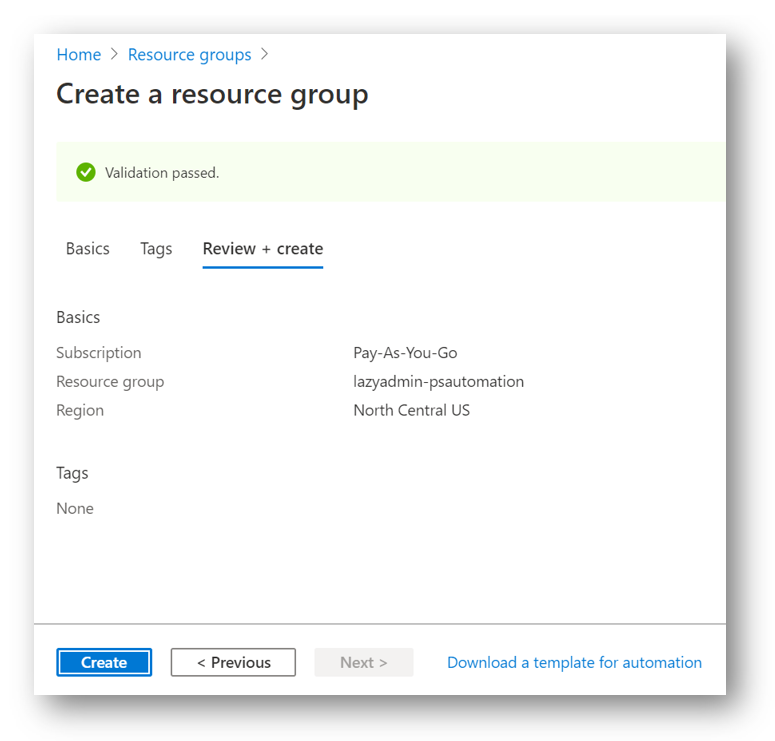
Once all the validation checks have been met, click Create
Automation Account
Next, we will need to create out Automation Account within our newly create Resource Group. Automation accounts are like Azure Storage accounts in that they serve as a container. In Automation, they are a container for all your runbook, runbook executions (jobs), and the assets that your runbooks depend on.
In the New Automation Account blade, provide a name, subscription, location, and for the Resource Group, select the Resource Group you made above.
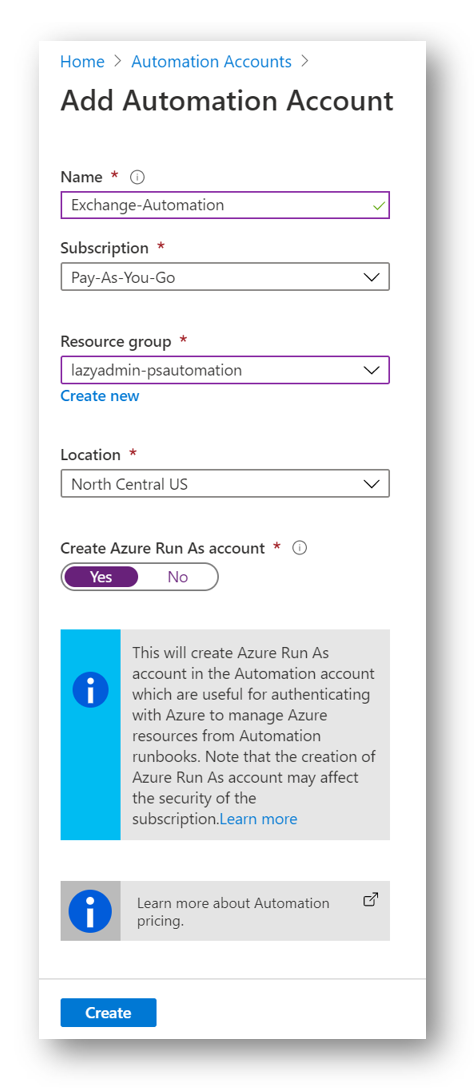
When finished, click Create
Automation Credentials
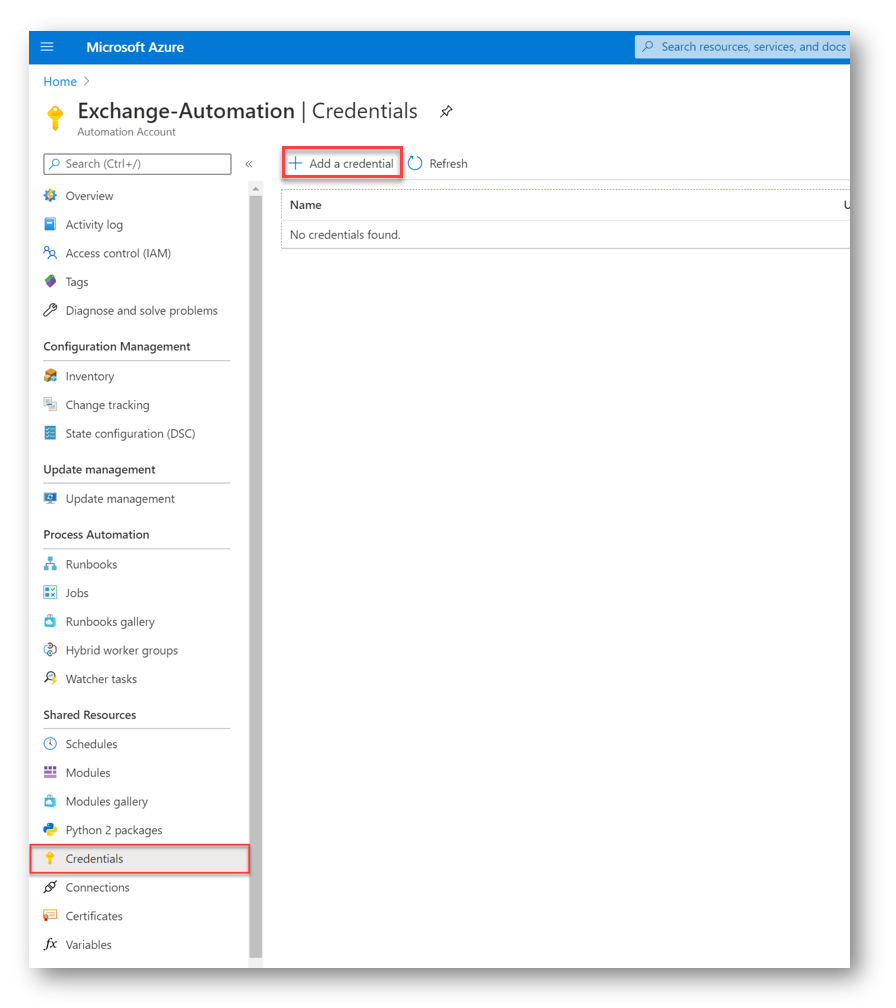
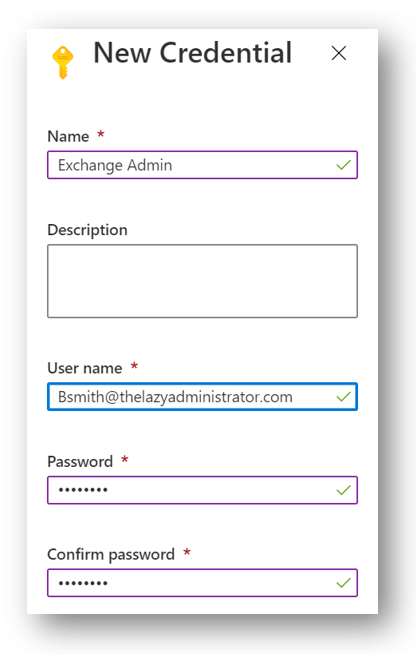
Next, we need to supply the Automation Account with credentials so the runbook can connect to our Exchange Online environment. The account you supply here does not have to be a Global Admin, an Exchange Admin will do just fine. In our newly create Automation Account select Credentials and then click + Add a credential
Supply a Name for your credential and note it for later. Add your user’s username and password.
Runbook
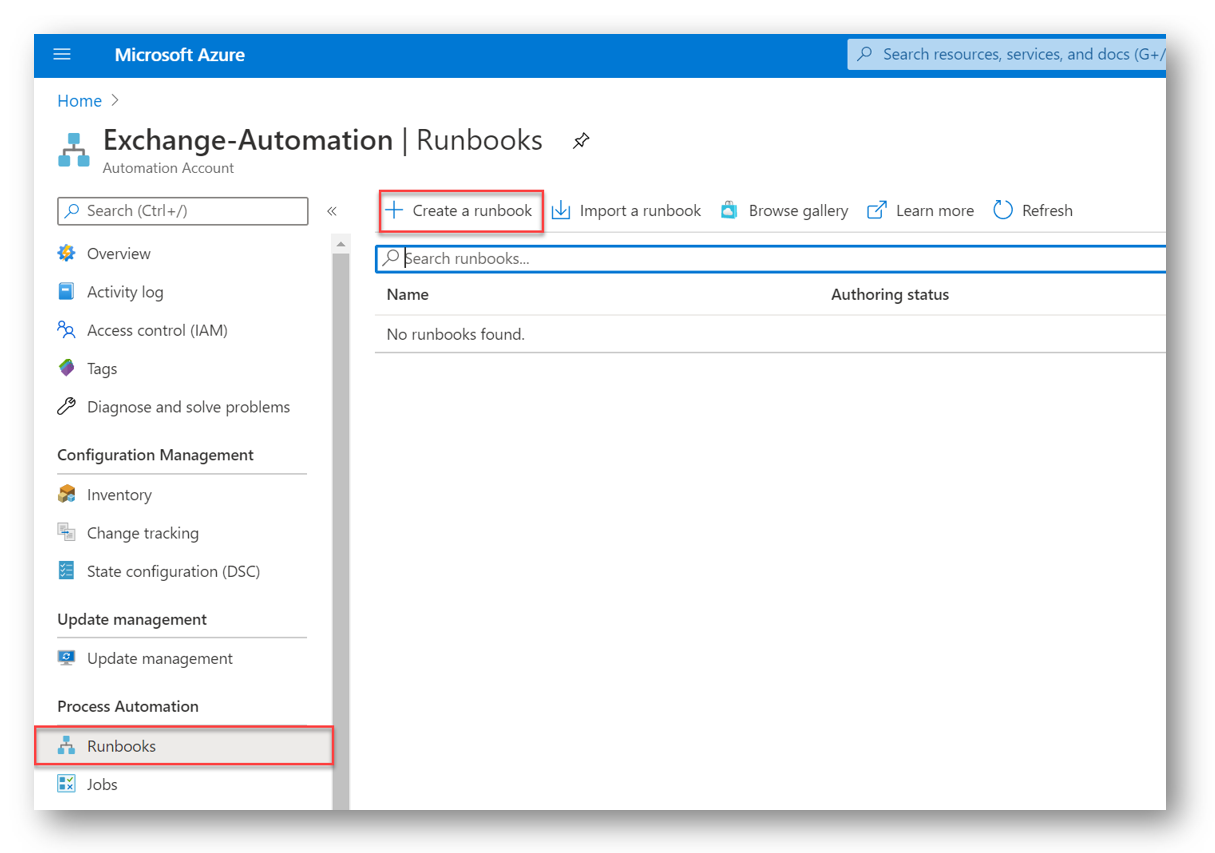
Next, we will need to add the actual PowerShell runbook that will be doing all of the actual work. In the Azure Portal, in our Automation Account, select Runbooks and then click + Create a runbook
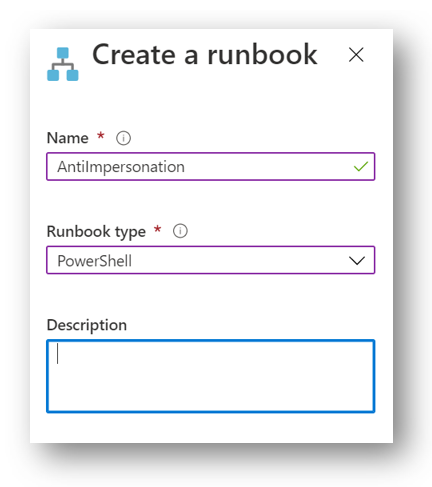
Give your Runbook a Name and for Runbook Type, select PowerShell
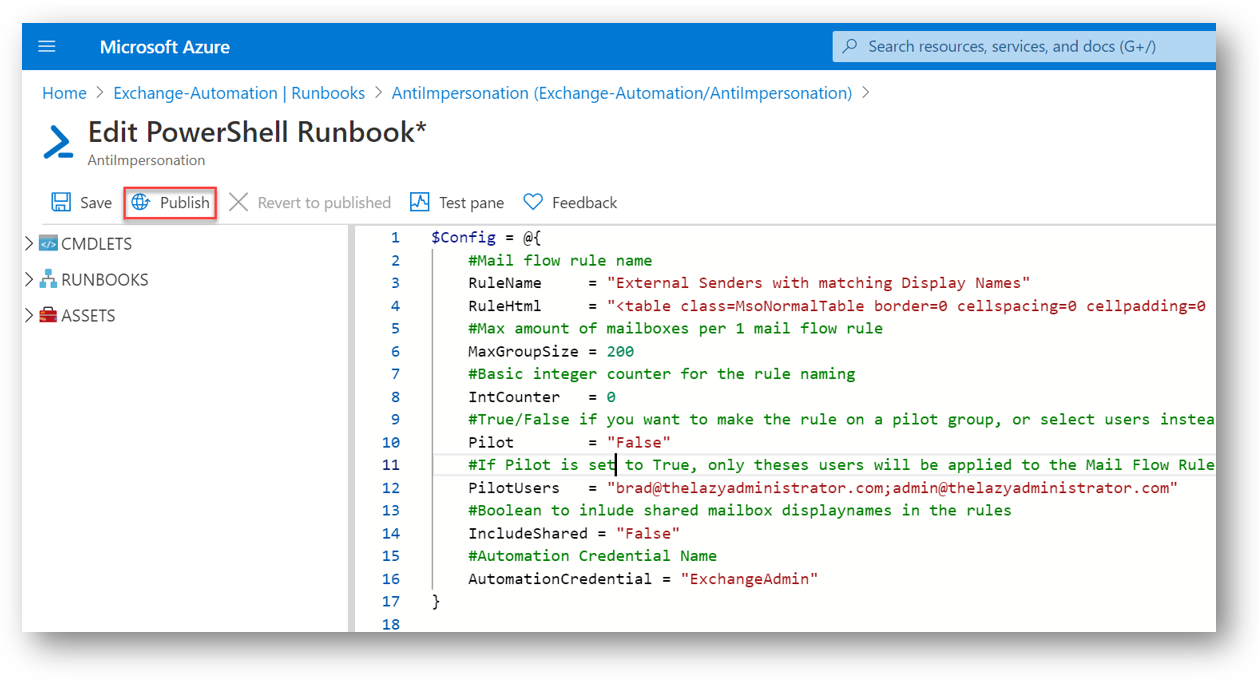
Next, we will need to modify the script below to fit our needs and paste it into the runbook. Several items we may need to change are:
- RuleName: This will be the mail flow rule name. It’s important to note that if there will be a number appended prior to the name so when we hit our max mailboxes per rule value it will just create a new rule without using ant existing name.
- MaxGroupSize: This is the maximum amount of mailboxes per mail flow rule. I used the term ‘Group’ because the script will gather all of the mailboxes and then split them into groups with each group going to a different mail flow rule.
- Pilot: This is a True/False value if you want to enable pilot mode and only make rules containing your PilotUsers
- PilotUsers: If Pilot is set to True, then these will be the mailboxes in your Mail Flow rules.
- IncludeShared: True/False value. If set to True, it will include Shared Mailboxes in your rules. If set to False it will only do User Mailboxes.
- AutomationCredential: This is the NAME of the automation credential to connect to Office 365 that we made earlier.
$Config = @{
	#Mail flow rule name
	RuleName	 = "External Senders with matching Display Names"
	RuleHtml	 = "<table class=MsoNormalTable border=0 cellspacing=0 cellpadding=0 align=left width=`"100%`" style='width:100.0%;mso-cellspacing:0cm;mso-yfti-tbllook:1184; mso-table-lspace:2.25pt;mso-table-rspace:2.25pt;mso-table-anchor-vertical:paragraph;mso-table-anchor-horizontal:column;mso-table-left:left;mso-padding-alt:0cm 0cm 0cm 0cm'>  <tr style='mso-yfti-irow:0;mso-yfti-firstrow:yes;mso-yfti-lastrow:yes'><td style='background:#910A19;padding:5.25pt 1.5pt 5.25pt 1.5pt'></td><td width=`"100%`" style='width:100.0%;background:#FDF2F4;padding:5.25pt 3.75pt 5.25pt 11.25pt; word-wrap:break-word' cellpadding=`"7px 5px 7px 15px`" color=`"#212121`"><div><p class=MsoNormal style='mso-element:frame;mso-element-frame-hspace:2.25pt; mso-element-wrap:around;mso-element-anchor-vertical:paragraph;mso-element-anchor-horizontal: column;mso-height-rule:exactly'><span style='font-size:9.0pt;font-family: `"Segoe UI`",sans-serif;mso-fareast-font-family:`"Times New Roman`";color:#212121'>This message was sent from outside the company by someone with a display name matching a user in your organization. Please do not click links or open attachments unless you recognize the source of this email and know the content is safe. <o:p></o:p></span></p></div></td></tr></table>"
	#Max amount of mailboxes per 1 mail flow rule
	MaxGroupSize = 200
	#Basic integer counter for the rule naming
	IntCounter   = 0
	#True/False if you want to make the rule on a pilot group, or select users instead of all mail users
	Pilot        = "False"
	#If Pilot is set to True, only theses users will be applied to the Mail Flow Rule, seperate users weith a semi-colon (;)
    PilotUsers   = "[email protected];[email protected]"
    #Boolean to inlude shared mailbox displaynames in the rules
    IncludeShared = "False"
    #Automation Credential Name
    AutomationCredential = "ExchangeAdmin"
}

Function New-EXOMailFlowRule
{
	Param (
		[Array]$People,
		[String]$Disclaimer = $Config.RuleHTML,
		[String]$MailFlowRuleName,
		[Int]$Priority = 0

	)
	Process
	{
		New-TransportRule `
		-Name $MailFlowRuleName `
		-Priority $Priority `
		-FromScope "NotInOrganization" `
		-ApplyHtmlDisclaimerLocation "Prepend" `
		-HeaderMatchesMessageHeader From `
		-HeaderMatchesPatterns $People `
		-ApplyHtmlDisclaimerText $Disclaimer
	}
}
Function Set-EXOMailFlowRule
{
	Param (
		[Array]$People,
		[String]$Disclaimer = $Config.RuleHTML,
		[String]$MailFlowRuleName,
		[Int]$Priority = 0

	)
	Process
	{
		Set-TransportRule `
		-Identity $MailFlowRuleName `
		-Priority $Priority `
		-FromScope "NotInOrganization" `
		-ApplyHtmlDisclaimerLocation "Prepend" `
		-HeaderMatchesMessageHeader From `
		-HeaderMatchesPatterns $People `
		-ApplyHtmlDisclaimerText $Disclaimer
	}
}

$VerbosePreference = "Continue"

#Credential and log into o365 using an automation account in runbook
#Using the ExchangeOnlineShell module
[System.Management.Automation.PSCredential]$Credential = Get-AutomationPSCredential -Name $Config.AutomationCredential
$Session = New-PSSession –ConfigurationName Microsoft.Exchange -ConnectionUri https://outlook.office365.com/powershell-liveid -Credential $Credential -Authentication Basic -AllowRedirection
Import-PSSession -Session $Session -DisableNameChecking:$true -AllowClobber:$true | Out-Null

If ($Config.Pilot -like "True")
{
	Write-Verbose "Getting all Pilot Mailboxes in Exchange"
	$PilotList = ($Config.PilotUsers).Split(';')
    [Array]$Mailboxes = @()
	Foreach ($Item in $PilotList) {
        If ($Config.IncludeShared -eq "True")
        {
            $Mailboxes += Get-Mailbox -ResultSize Unlimited | Where-Object {($_.emailaddresses -like "*$Item*") -and ($_.RecipientTypeDetails -like "SharedMailbox") -or ($_.RecipientTypeDetails -like "UserMailbox")}
        }
        Else
        {
            $Mailboxes += Get-Mailbox -RecipientTypeDetails UserMailbox -ResultSize Unlimited | Where-Object {$_.emailaddresses -like "*$Item*"}
        }
	}
}
Else
{
    Write-Verbose "Getting all Mailboxes in Exchange"
    If ($Config.IncludeShared -eq "True")
    {
        $Mailboxes = Get-Mailbox -ResultSize Unlimited | Where-Object {($_.RecipientTypeDetails -like "SharedMailbox") -or ($_.RecipientTypeDetails -like "UserMailbox")}
    }
    Else
    {
        $Mailboxes = Get-Mailbox -RecipientTypeDetails UserMailbox -ResultSize Unlimited
    }
}
Write-Verbose "Getting all Mail Flow (Transport) rules in Exchange"
$MailFlowRules = Get-TransportRule

#If there are already Mail Flow Rules that match our configured Mail Flow rule name (We have ran this before)
If ($MailFlowRules -like "*$($Config.RuleName)*")
{
	Write-Verbose "There are currently one or more rules that match our configured Rule Name"
	$ArrayOfRuleDNs = @()
	Write-Verbose "Getting list of all Mail Flow Rules matching configured Rule Name"
	$MatchRules = $MailFlowRules | Where-Object { $_.Name -like "*$($Config.RuleName)*" }

	#Get a list of all display names in all of the rules
	$MatchRules | Foreach-object {
		Write-Verbose "Getting list of all Header Matches Patterns (Display Names)"
		$ArrayOfRuleDNs += ($_.HeaderMatchesPatterns)
	}
	#If a mail rule Display Name is not present in the array of mailbox display names then the mailbox is no longer present
	Write-Verbose "Checking for Mail Flow rules with mailboxes that are no longer present"
	If ($ArrayOfRuleDNs -notlike $Mailboxes.DisplayName)
	{
		Write-Verbose "There are currently one or more rules with mailboxes that are no longer present"
		#Get list of mailboxes no longer present that are in Mail Flow Rules
		[Array]$NoLongerHere = $ArrayOfRuleDNs | Where-Object { $_ -notin $Mailboxes.DisplayName }
		Write-Verbose "The following mailboxes will be removed from one or more rules: $NoLongerHere"
		Foreach ($Item in $NoLongerHere)
		{
			Write-Verbose "Finding the Mail Flow rule that contains $Item"
			$StaleInfoRule = ($MatchRules | Where-Object { $_.HeaderMatchesPatterns -like "$item" })
			Write-Verbose "The user: $Item, is present in the following Rule: $($StaleInfoRule.Name)"
			$UpdatedDNList = $StaleInfoRule.HeaderMatchesPatterns | Where-Object { $_ -notlike $item }

			Write-Verbose "Removing $Item from the Mail Flow Rule"

			Set-EXOMailFlowRule -MailFlowRuleName $StaleInfoRule.Name -People $UpdatedDNList
			Write-Verbose "Refreshing list of Mail Flow rules"
			$MailFlowRules = Get-TransportRule
			$MatchRules = $MailFlowRules | Where-Object { $_.Name -like "*$($Config.RuleName)*" }
			$MatchRules | Foreach-object {
				Write-Verbose "Getting list of all Header Matches Patterns (Display Names)"
				$ArrayOfRuleDNs += ($_.HeaderMatchesPatterns)
			}
		}
	}
	#Add users that are not in any rules to current roles (if we can) or create a new rule (if we have hit the MaxGroupSize)
	Foreach ($Mailbox in $Mailboxes)
	{
		If ($MailBox.DisplayName -notin $ArrayOfRuleDNs)
		{
			Write-Verbose "$($Mailbox.DisplayName) is not in any Mail Flow Rules"
			$AvailRules = $MatchRules | Where-Object { (($_.HeaderMatchesPatterns -ne $Config.MaxGroupSize)) | Sort-Object Name | Select-Object -First 1 }
			If ($Null -eq $AvailRules)
			{
				Write-Verbose "There are no Mail Flow rules to add the user to that are under our MaxGroupSize value - Creating new rule"

				If ("$($Config.IntCounter) - $($Config.RuleName)" -in $($MailFlowRules.Name))
				{
					Write-Verbose "The possible Mail Flow rule name: '$($Config.IntCounter) - $($Config.RuleName)' is already taken!"
					Do
					{
						$Config.IntCounter++
						Write-Verbose "Retrying with the name: '$($Config.IntCounter) - $($Config.RuleName)'"
					}
					Until ("$($Config.IntCounter) - $($Config.RuleName)" -notin $($MailFlowRules.Name))
					Write-Verbose "The following name is not yet a Mail Flow rule name: '$($Config.IntCounter) - $($Config.RuleName)'"
				}
				Write-Verbose "Creating the following Mail Flow rule: '$($Config.IntCounter) - $($Config.RuleName)'"

				New-EXOMailFlowRule -People $Mailbox.DisplayName -MailFlowRuleName "$($Config.IntCounter) - $($Config.RuleName)"
			}
			Else
			{
				[System.Collections.ArrayList]$CurrentDNs = $AvailRules.HeaderMatchesPatterns
				$DnList = $CurrentDNs += $Mailbox.DisplayName
				Write-Verbose "Adding user to the following Mail Flow Rule: $($AvailRules.Name)"

				Set-EXOMailFlowRule -MailFlowRuleName $AvailRules.Name -People $DnList

			}
			Write-Verbose "Refreshing list of Mail Flow rules"
			$MailFlowRules = Get-TransportRule
			$MatchRules = $MailFlowRules | Where-Object { $_.Name -like "*$($Config.RuleName)*" }
			$MatchRules | Foreach-object {
				Write-Verbose "Getting list of all Header Matches Patterns (Display Names)"
				$ArrayOfRuleDNs += ($_.HeaderMatchesPatterns)
			}
		}
		Else
		{
			Write-Verbose "$($Mailbox.DisplayName) is already in a Mail Flow rule"
		}
	}
}
Else
{
	#If there are more mailboxes than our max ammount allowed
	If (($Mailboxes.count -gt $Config.MaxGroupSize))
	{
        Write-Verbose "The Mailbox count is larger than the configured MaxGroupSize value"
        [int]$RulesAmount = ($Mailboxes.count/$Config.MaxGroupSize)
        Write-Verbose "PowerShell will create $RulesAmount Mail Flow rules in Exchange"
        1 .. $RulesAmount | ForEach-Object {

            If ("$($Config.IntCounter) - $($Config.RuleName)" -in $($MailFlowRules.Name))
            {
                Write-Verbose "The possible Mail Flow rule name: '$($Config.IntCounter) - $($Config.RuleName)' is already taken!"
                Do
                {
                    $Config.IntCounter++
                    Write-Verbose "Retrying with the name: '$($Config.IntCounter) - $($Config.RuleName)'"
                }
                Until ("$($Config.IntCounter) - $($Config.RuleName)" -notin $($MailFlowRules.Name))
                Write-Verbose "The following name is not yet a Mail Flow rule name: '$($Config.IntCounter) - $($Config.RuleName)'"
            }
            Write-Verbose "Creating the following Mail Flow rule: '$($Config.IntCounter) - $($Config.RuleName)'"
            #Get the correct mailbox Display Names for the rules

            $Users = ($Mailboxes).DisplayName | Select-Object -First $Config.MaxGroupSize

            New-EXOMailFlowRule -People $Users -MailFlowRuleName "$($Config.IntCounter) - $($Config.RuleName)"

            $Mailboxes = $Mailboxes | Where-Object { $Users -notcontains $_.DisplayName }
            $Config.IntCounter++
        }
	}
	Else
	{
		If ("$($Config.RuleName)" -in $($MailFlowRules.Name))
		{
			Do
			{
				$Config.IntCounter++
				Write-Verbose "Retrying with the name: '$($Config.IntCounter) - $($Config.RuleName)'"
			}
			Until ("$($Config.IntCounter) - $($Config.RuleName)" -notin $($MailFlowRules.Name))
			Write-Verbose "Creating the following Mail Flow rule: '$($Config.IntCounter) - $($Config.RuleName)'"

			New-EXOMailFlowRule -People $Mailboxes.DisplayName -MailFlowRuleName "$($Config.IntCounter) - $($Config.RuleName)"
		}
		Else
		{
			Write-Verbose "Creating the following Mail Flow rule: '0 - $($Config.RuleName)'"

			New-EXOMailFlowRule -People $Mailboxes.DisplayName -MailFlowRuleName "0 - $($Config.RuleName)"
		}
	}
}
#Remove the PSSession
Remove-PSSession $Session
Once you have made your changes, click Publish to publish the runbook.

After it has been published I will click ‘Run’ to execute it immediately. If you do not want to run it immediately, then you can skip this step and go to setting the schedule next.
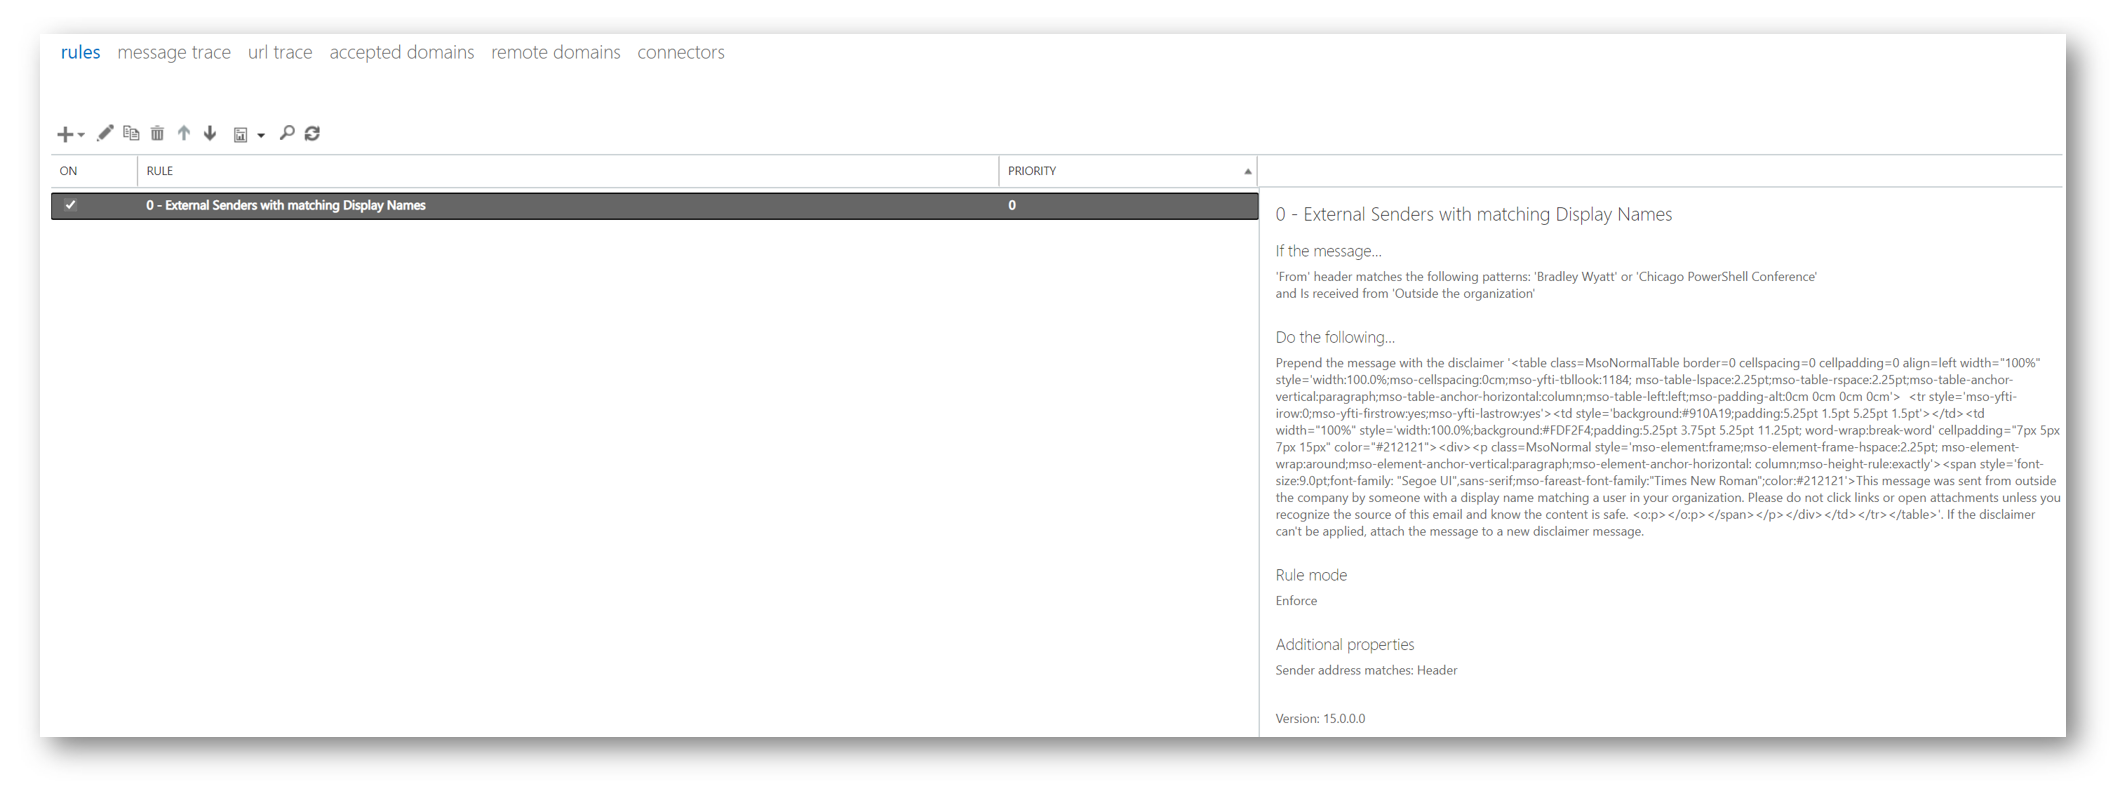
Once it has run successfully I can jump over to my Exchange admin center and see my newly created rule.
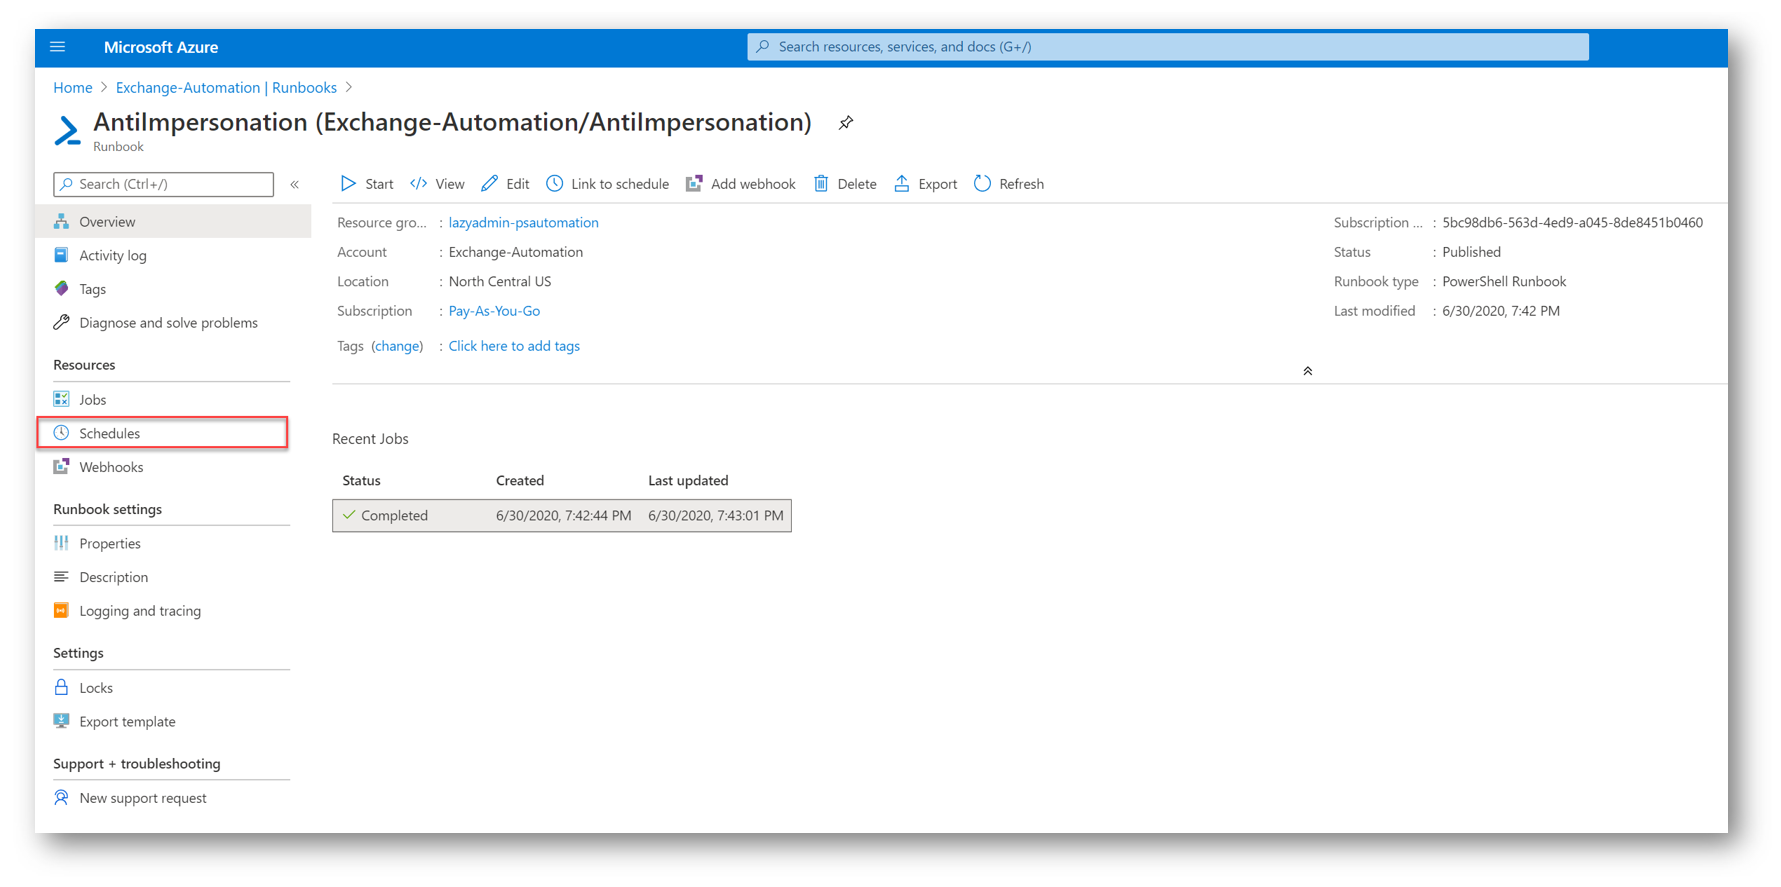
Next, we will set the runbook to run automatically on a schedule. I am going to set mine to run daily after the workday so it can parse any additions or deletions that were done during business hours. To set a schedule go to your runbook and then select Schedules.
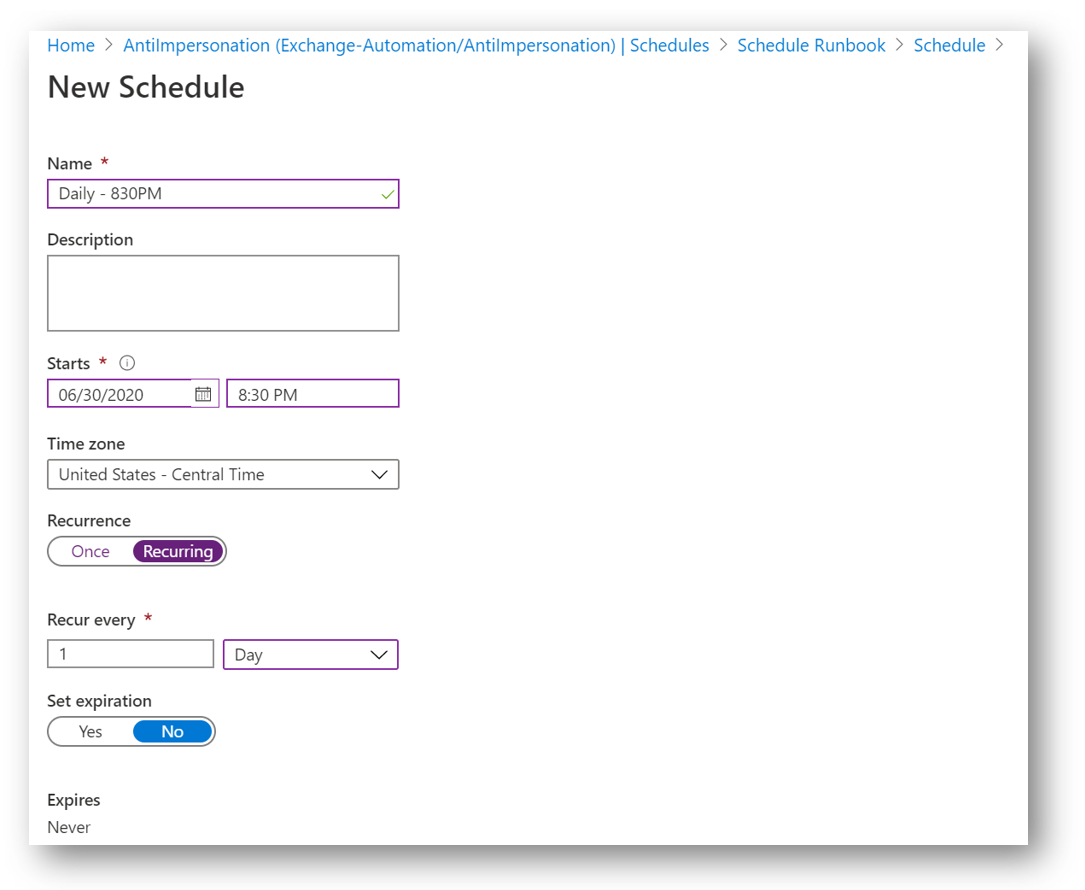
Click Add a Schedule and then select Link a schedule to your runbook and then click Create New Schedule. Give your schedule a Name, start date and time, timezone, recurrence, and expiration. When finished, click Create.
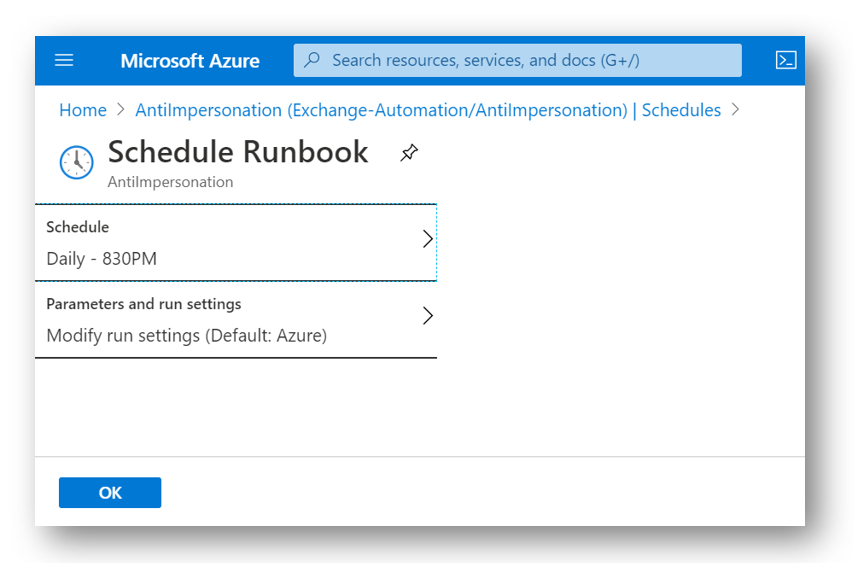
Finally, click OK to finish linking your runbook.
And that’s it! It will run on its schedule and continue making changes as you and your team make changes to the Exchange side of things. As your users leave and you remove the mailboxes, the runbook will automatically see that and remove that specific mailbox from whatever rule it was in. As mailboxes are removed, it will see that there is an available spot in one of your rules and add the next mailbox into that existing mail flow rule before creating another rule. And as your organization grows, and more and more mailboxes are provisioned, the runbook will automatically create additional rules so it will never hit the max rule size of 8kb.

My name is Bradley Wyatt; I am a 6x Dual-Microsoft Most Valuable Professional (MVP) in Microsoft Azure and Microsoft 365. I have given talks at many different conferences, user groups, and companies throughout the United States, ranging from PowerShell to DevOps Security best practices, and I am the 2022 North American Outstanding Contribution to the Microsoft Community winner.
4 thoughts on “Office 365 Anti-Impersonation Email Banner with PowerShell & Azure for Large Enterprises – No More Mailbox Limit”
Dose the script runs with MFA enabled account. If yes then can you please help me on how to do it