ChatOps: Setting up PoshBot for Microsoft Teams
Table of Contents
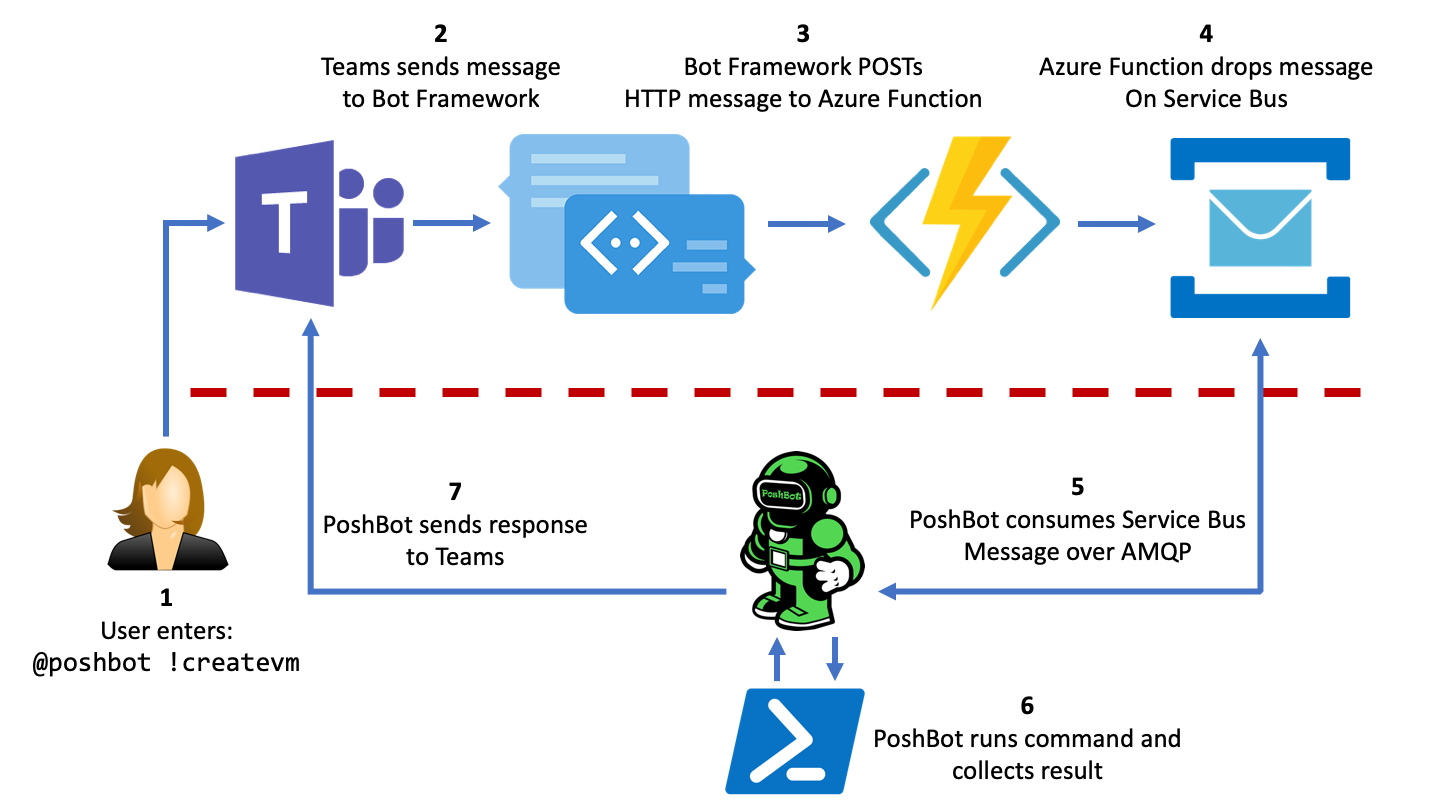
PoshBot is a chat bot written in PowerShell and created by DevBlackOps. ‘It makes extensive use of classes introduced in PowerShell 5.0. PowerShell modules are loaded into PoshBot and instantly become available as bot commands.’1 PoshBot can do pretty much anything you configure it to do. You can have it create Azure servers, reset Active Directory passwords, create and modify help desk tickets, license Office 365 users, etc. ‘If you can write it in PowerShell, PoshBot can execute it.’1
Important: PoshBot has some great documentation, make sure you bookmark and review it.
In this guide I will walk you through setting up PoshBot for Microsoft Teams. It’s a little more tedious than Slack (which is a few commands) but once you get it going it works flawless. Keep an eye out as I will be publishing more articles on different PoshBot plugins that I create which may be beneficial to you or your company.
Install PoshBot Module
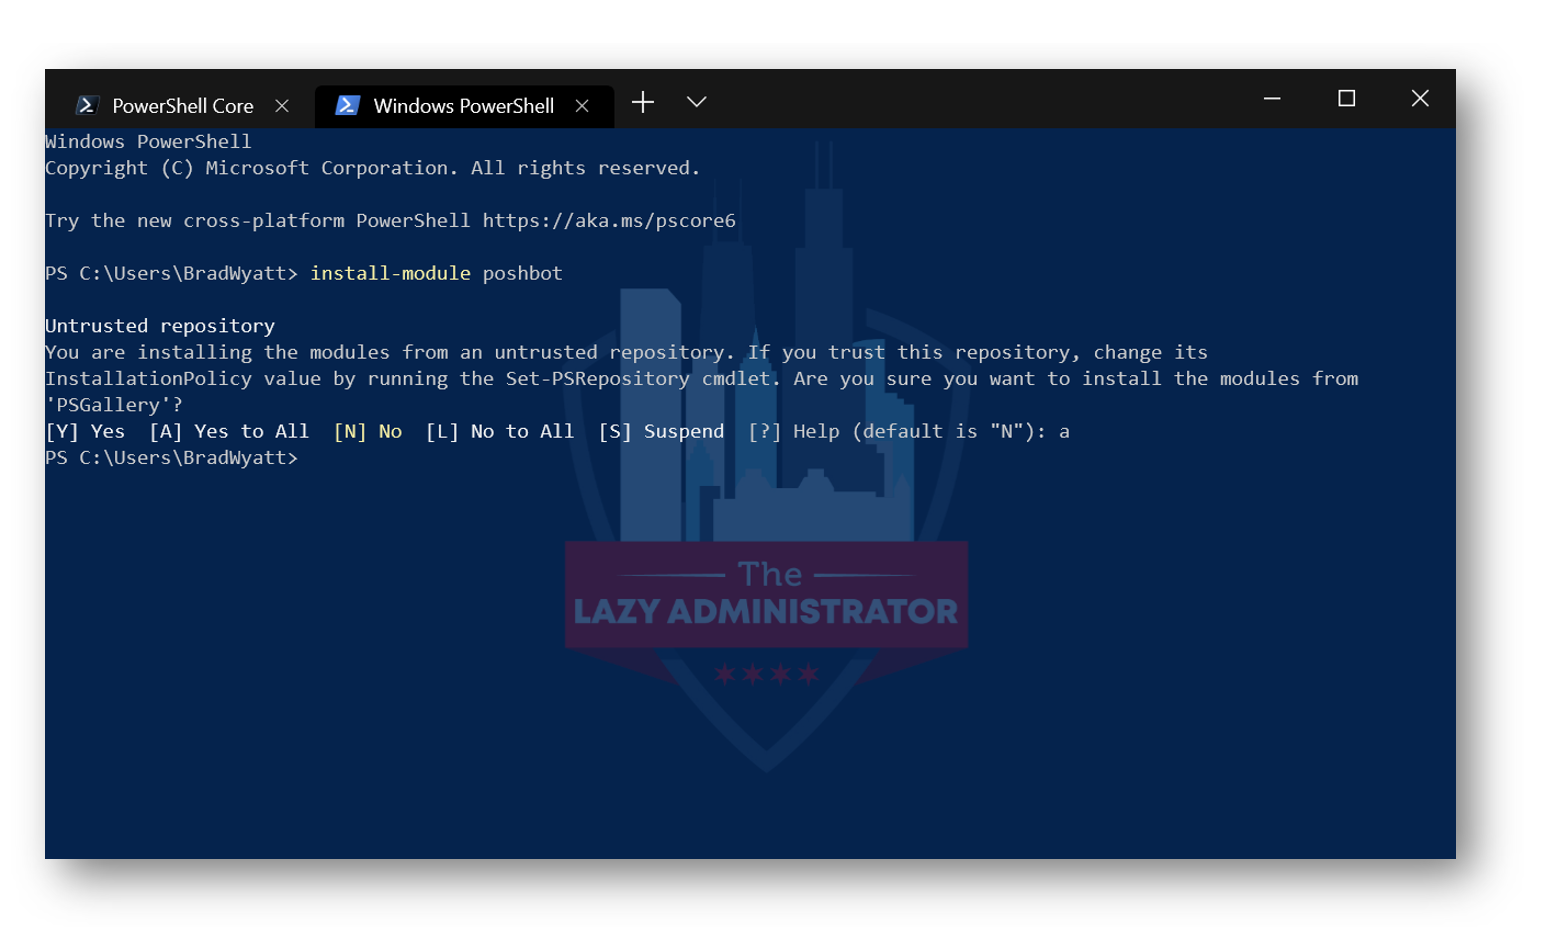
First things first, we must install the PoshBot PowerShell module by running Install-Module PoshBot in an administrative PowerShell session
Setting up Microsoft Teams Back-end
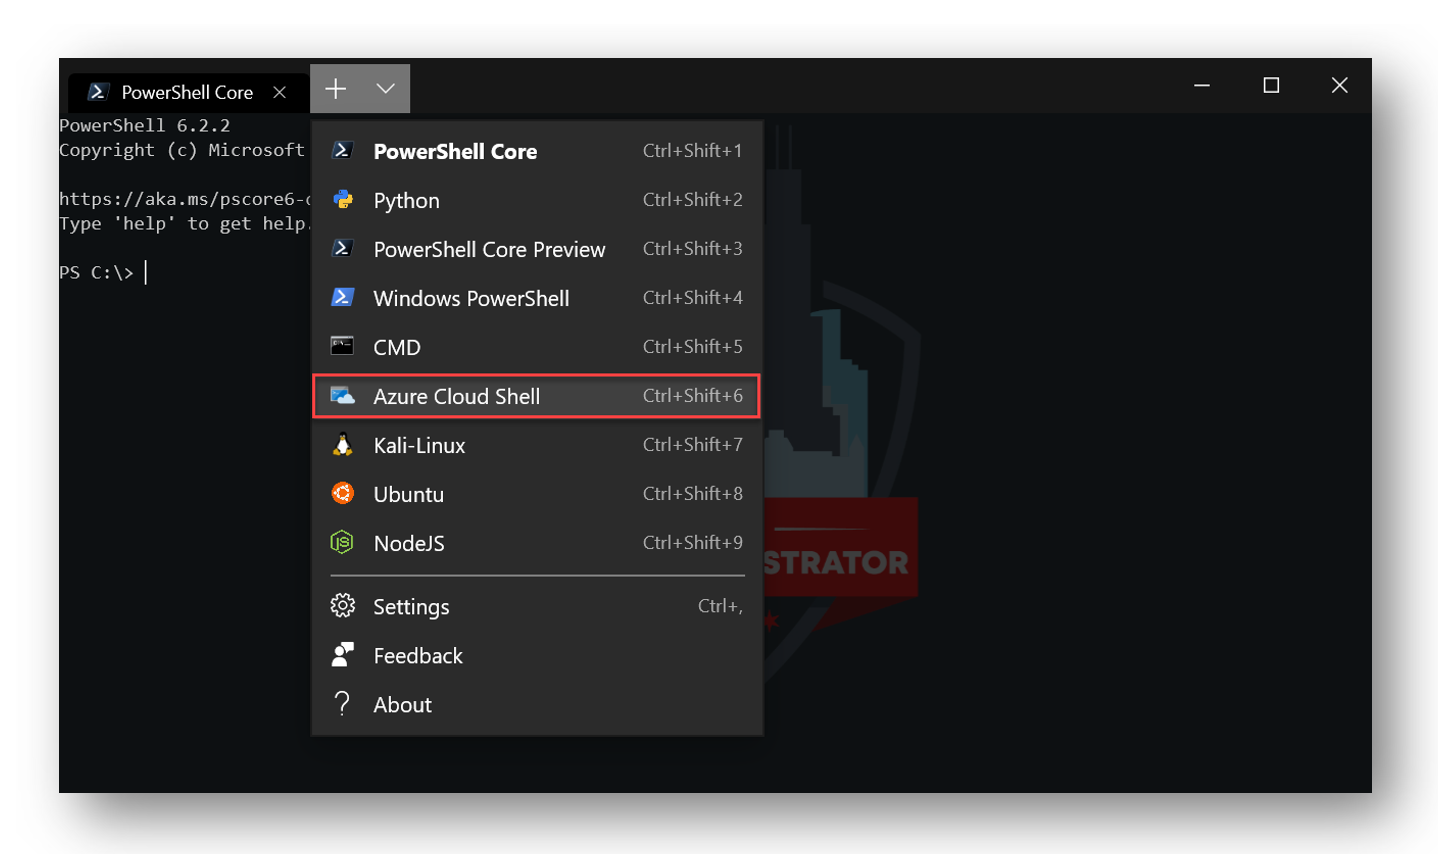
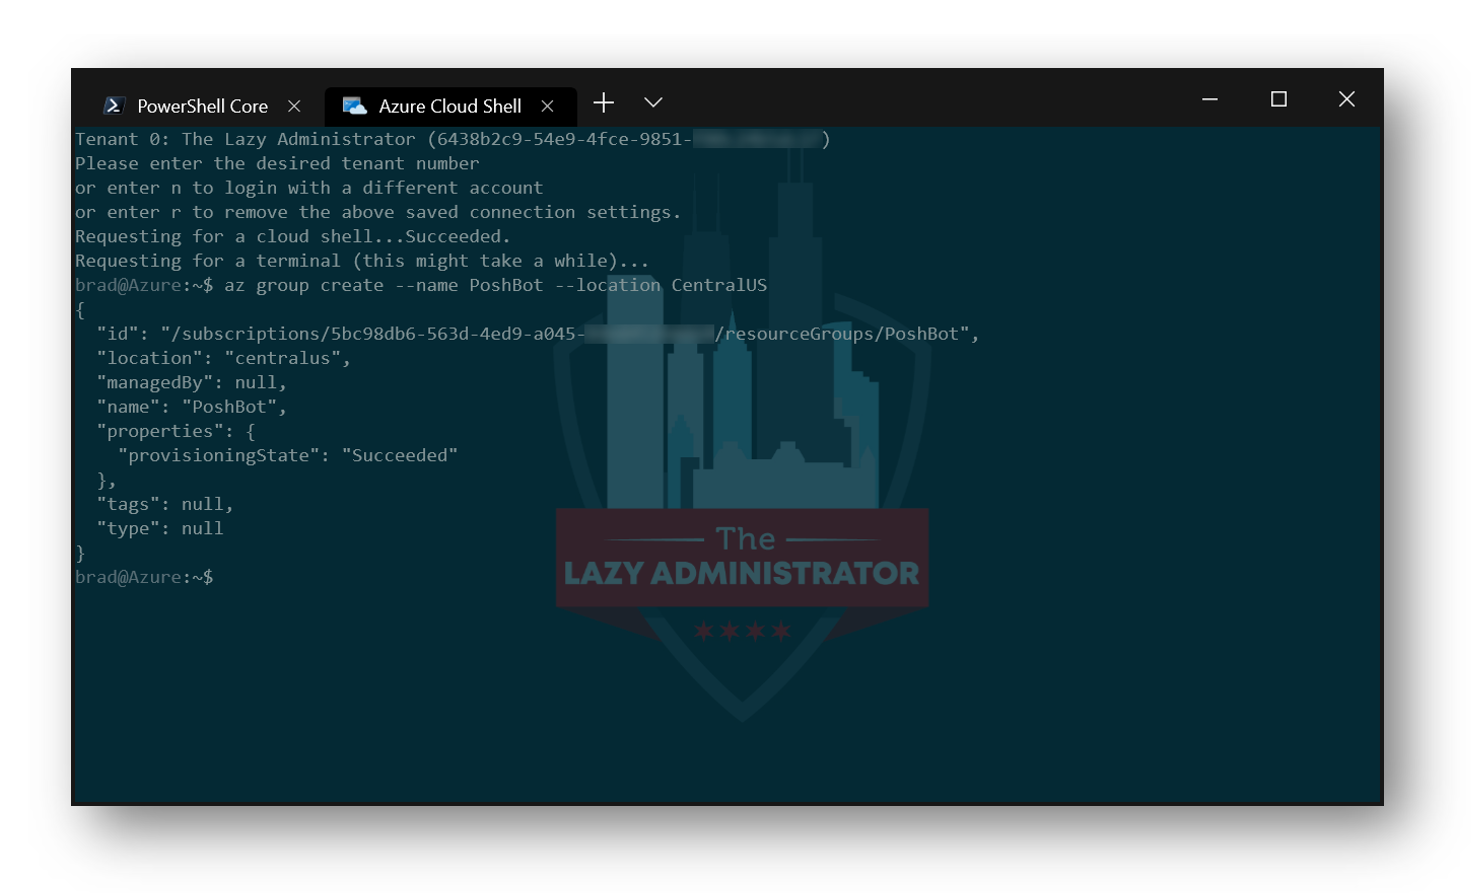
First I must sign into Azure Cloud Shell. I am using the Windows Terminal so I just add a new terminal, and select “Azure Cloud Shell”
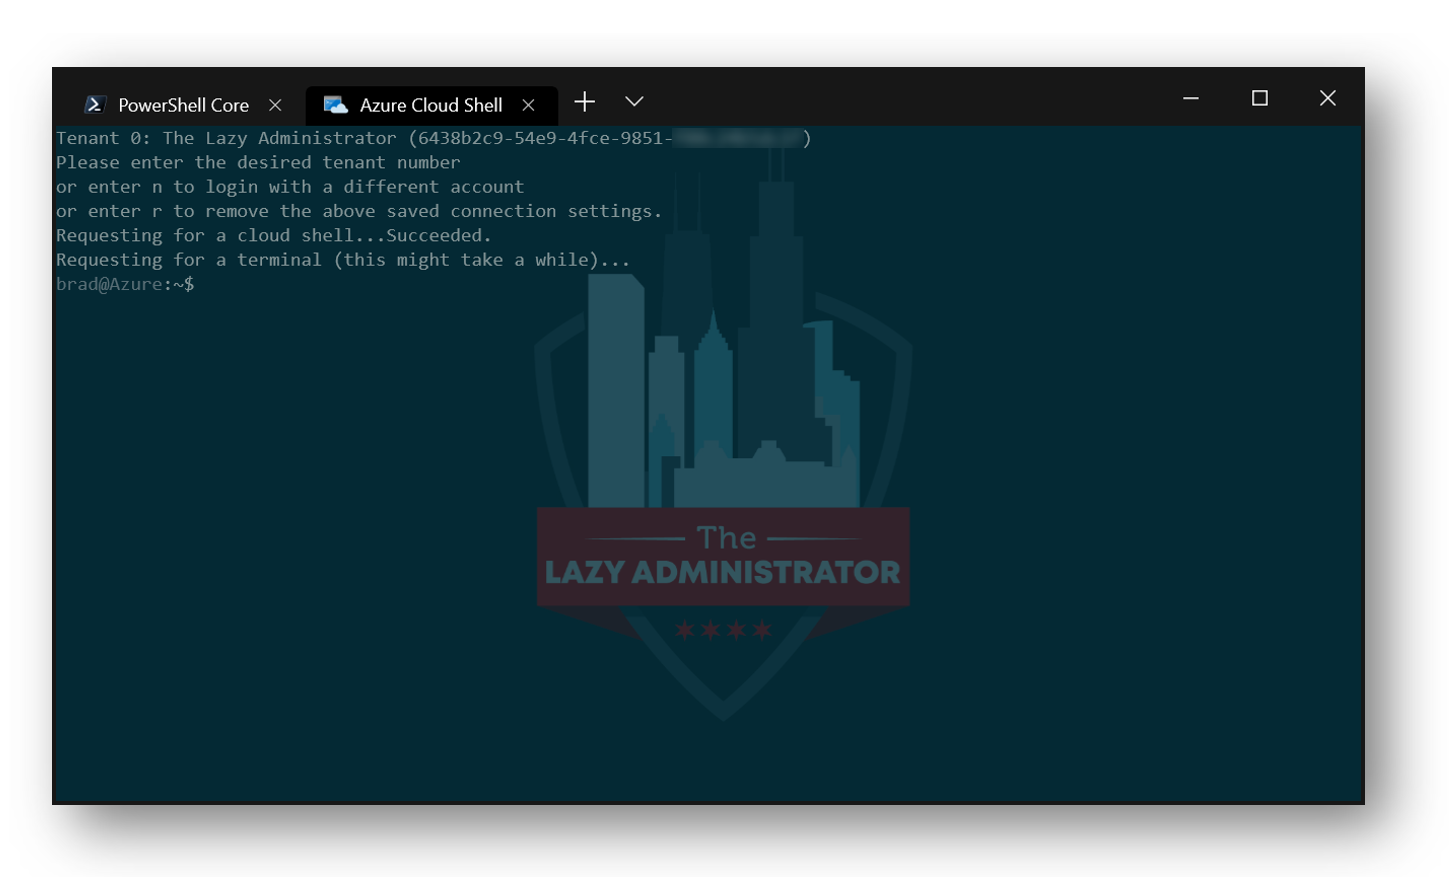
The Windows Terminal uses Device Code Flow to authenticate to Azure, but since I have previously authenticated I just have to select my tenant. If this is your first time connecting to Azure in the Windows Terminal, you may be prompted to authenticate in a web browser.
 Create a Resource Group
Next, create a new Resource Group in your desired region, in my example I am select the CentralUS region. This group will contain both the Azure Function and Service Bus resources. I can achieve this by running the following command:
az group create --name PoshBot --location CentralUS
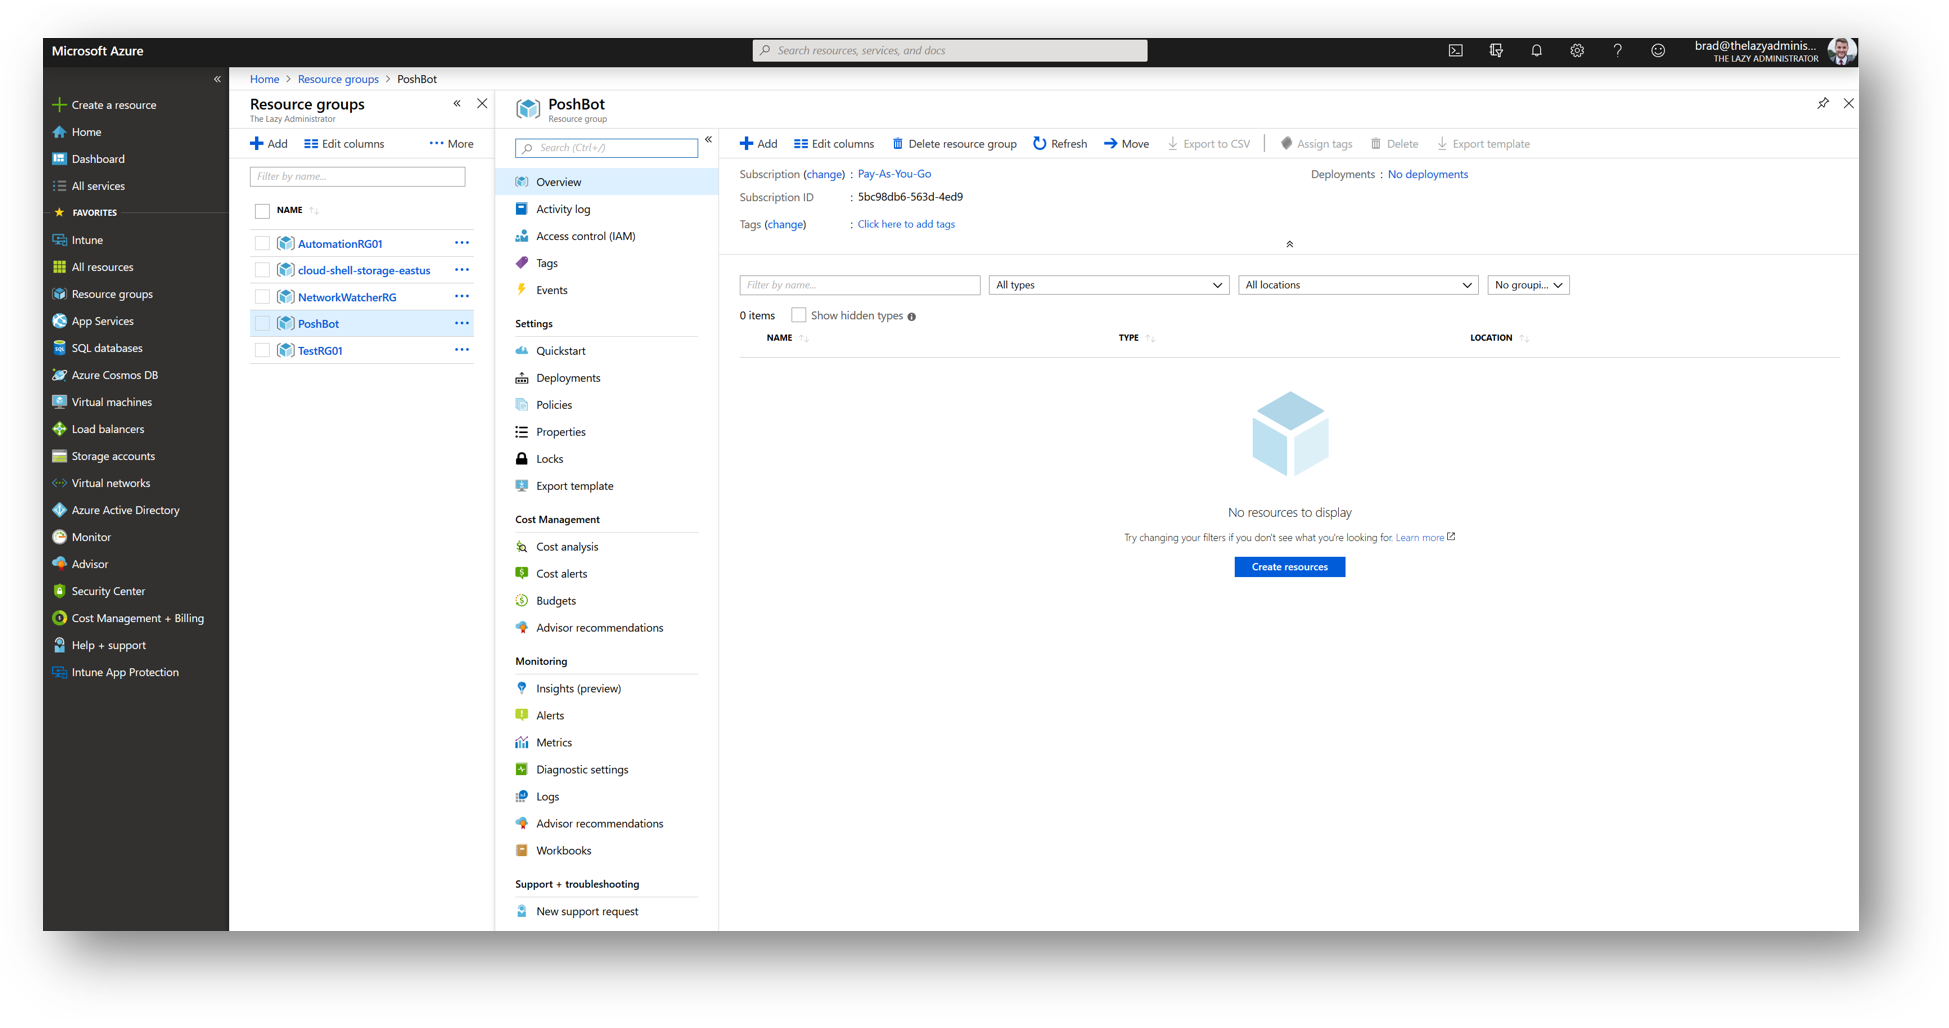
 And in the portal I can double check and see that the Resource Group was properly created
 Create a Service Bus namespace
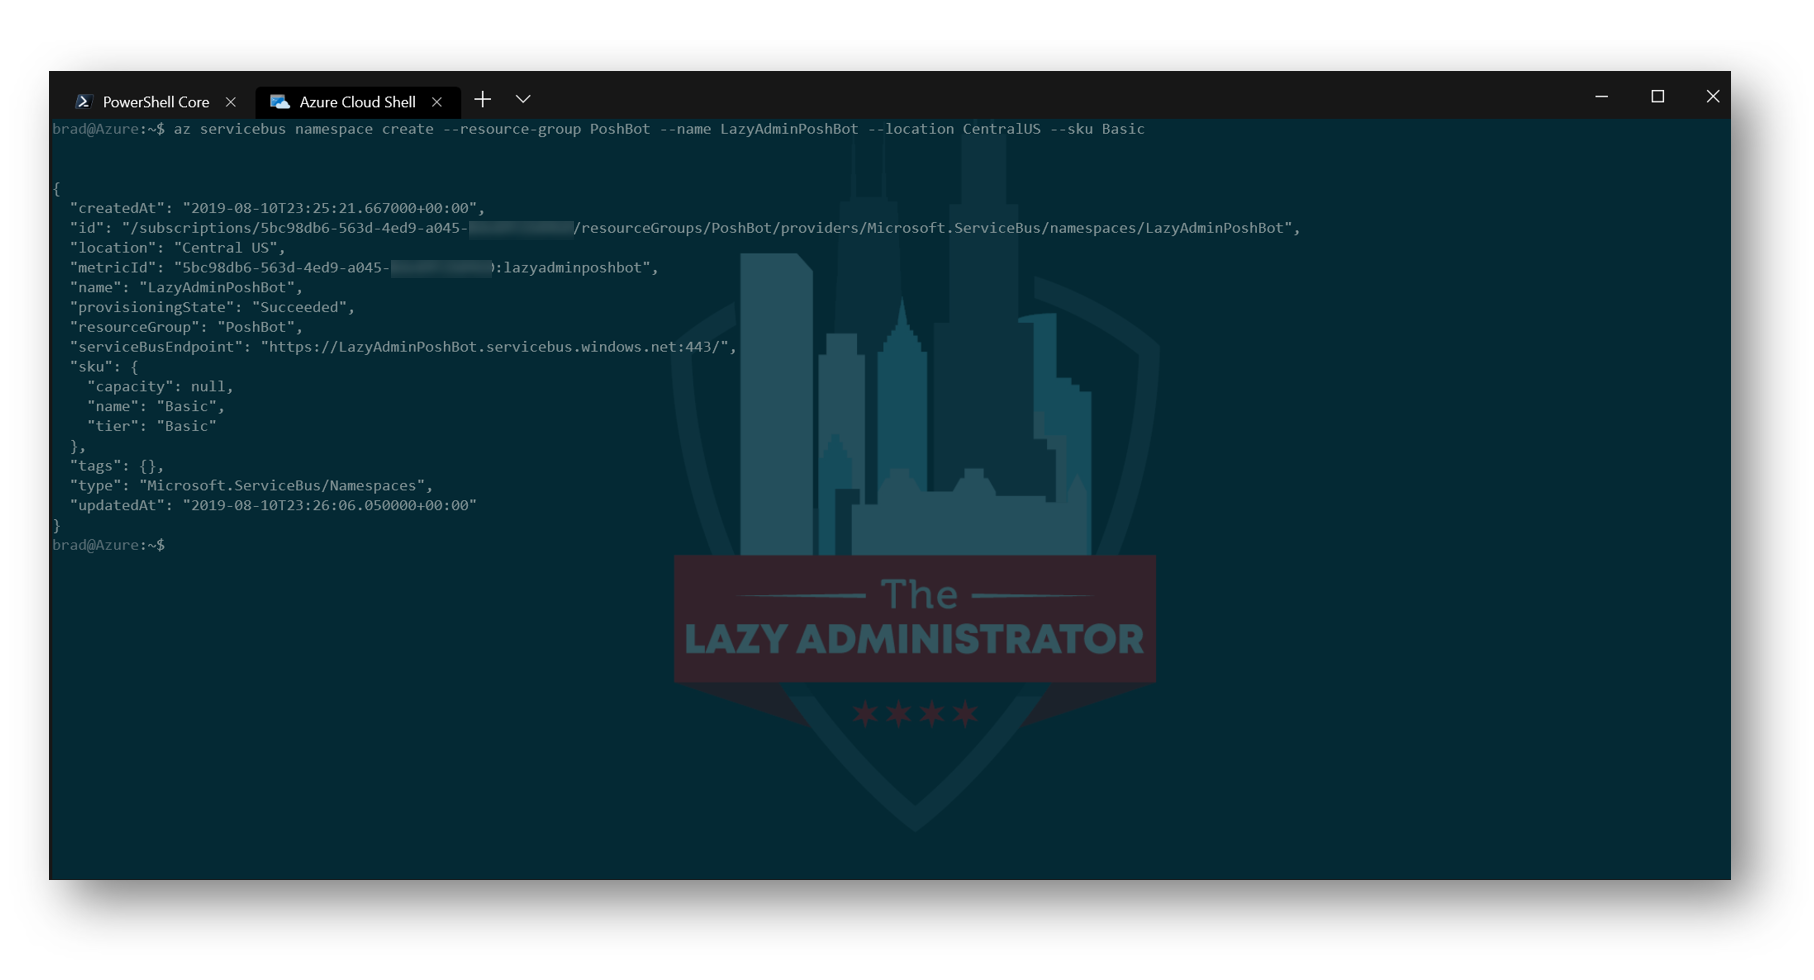
Next, we must create a new Service Bus namespace in the resource group. The Basic SKU is fine for our purposes.
In my example code, the Resource Group will be the one we created earlier, the name of the namespace will be LazyAdminPoshBot and the location will be CentralUS again
az servicebus namespace create --resource-group PoshBot --name LazyAdminPoshBot --location CentralUS --sku Basic
Create and Configure Message Queue
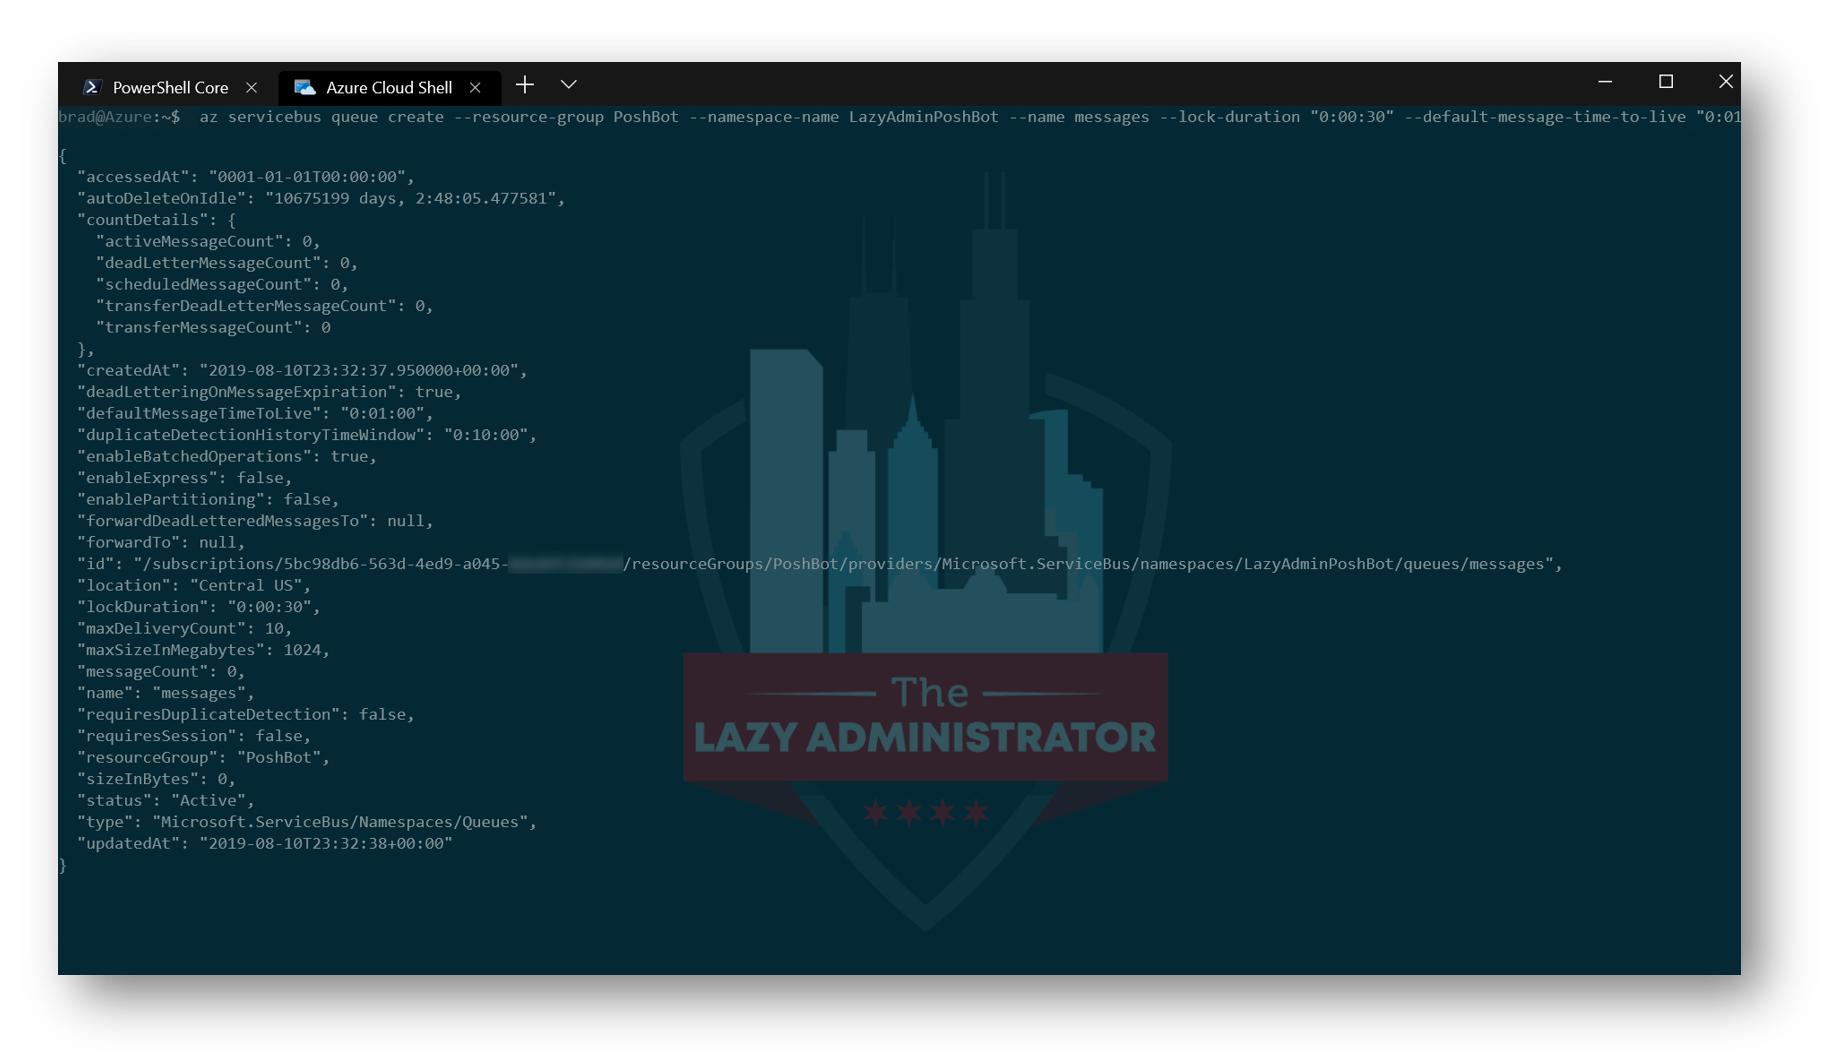
Next, we need to configure a message queue. According to the official set up guide, the new queue should have the following settings:
| Setting | Value |
|---|---|
| Message time to live | 1 minute |
| Lock duration | 30 seconds |
| Maximum delivery count | 10 |
| Maximum Size | 1GB |
| Partitioning | false |
| Move expired messages to dead-letter queue | true |
So my command will be:
az servicebus queue create --resource-group PoshBot --namespace-name LazyAdminPoshBot --name messages --lock-duration "0:00:30" --default-message-time-to-live "0:01:00" --max-delivery-count 10 --max-size 1024 --enable-partitioning false --enable-dead-lettering-on-message-expiration true
NOTE: Notice the Resource group is the PoshBot one I created earlier, and the namespace name is the LazyAdminPoshBot name space I created in the previous step
Create Shared Access Policy
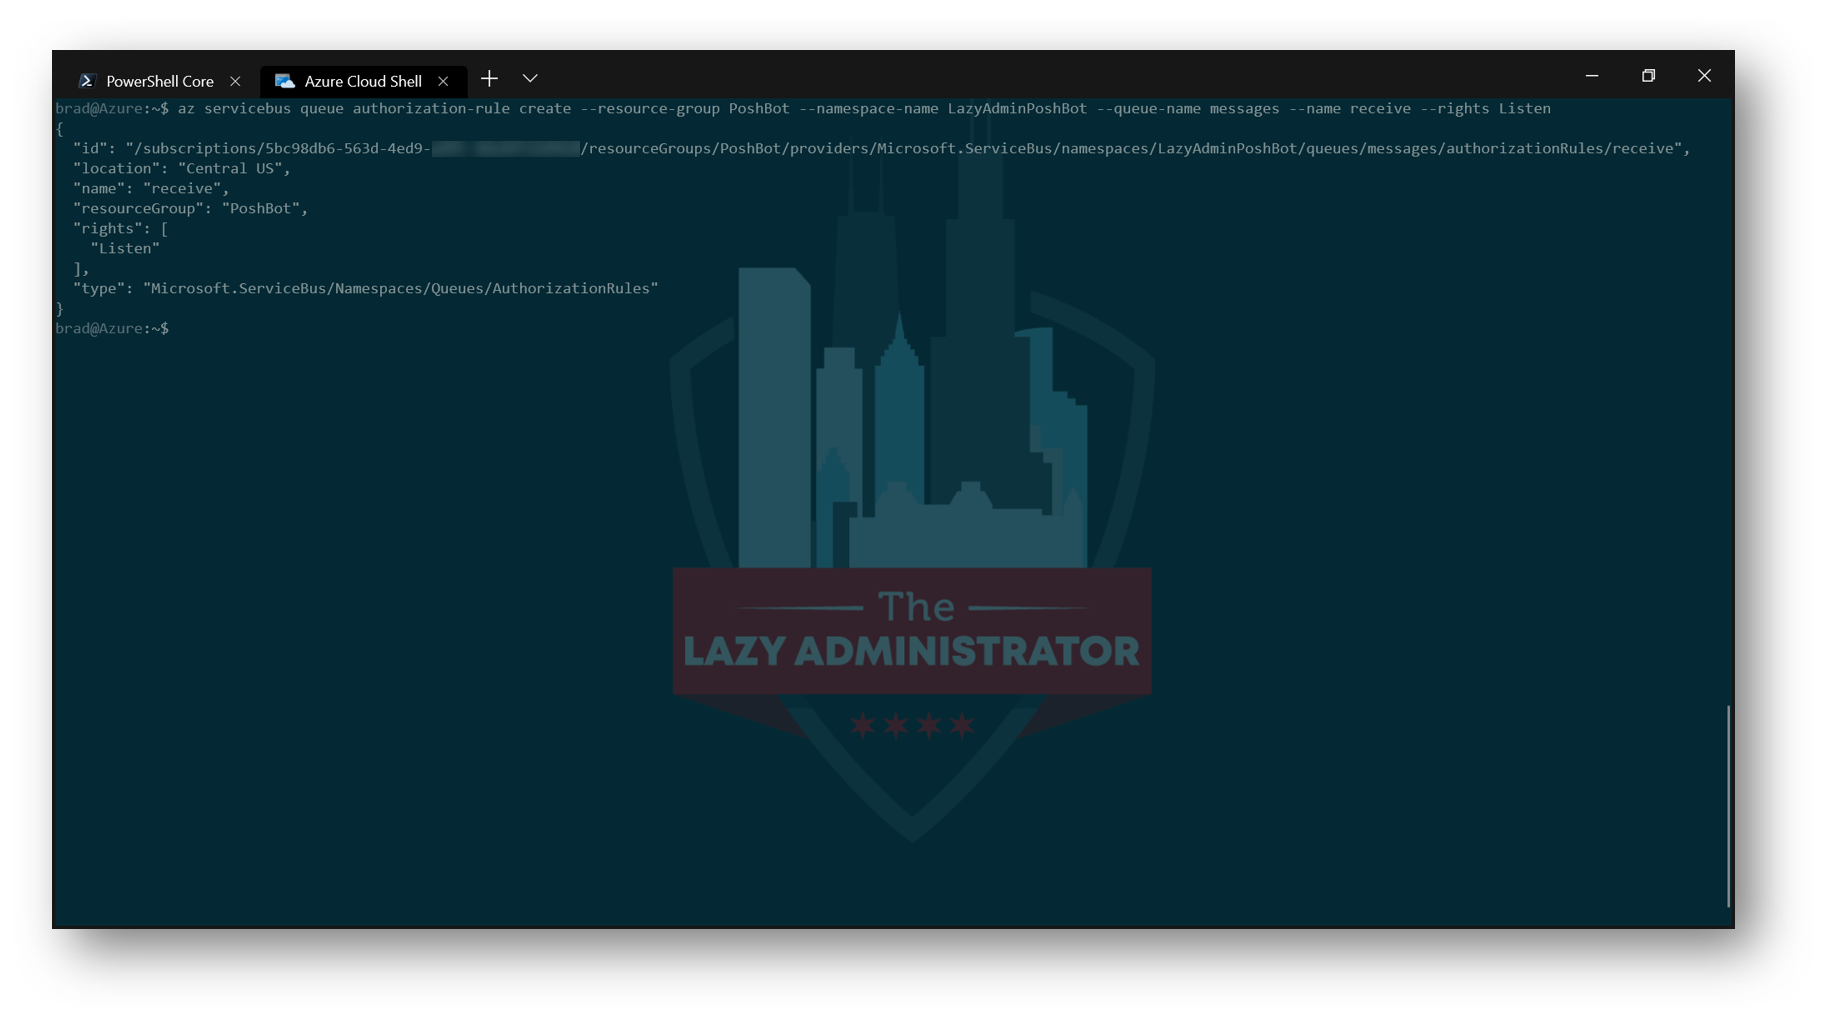
The next item to do is to create a new Shared Access Policy called Receive for the Messages queue with Listen permission.
So my command will be the following:
az servicebus queue authorization-rule create --resource-group PoshBot --namespace-name LazyAdminPoshBot --queue-name messages --name receive --rights Listen
SAS Key & Root Connection String
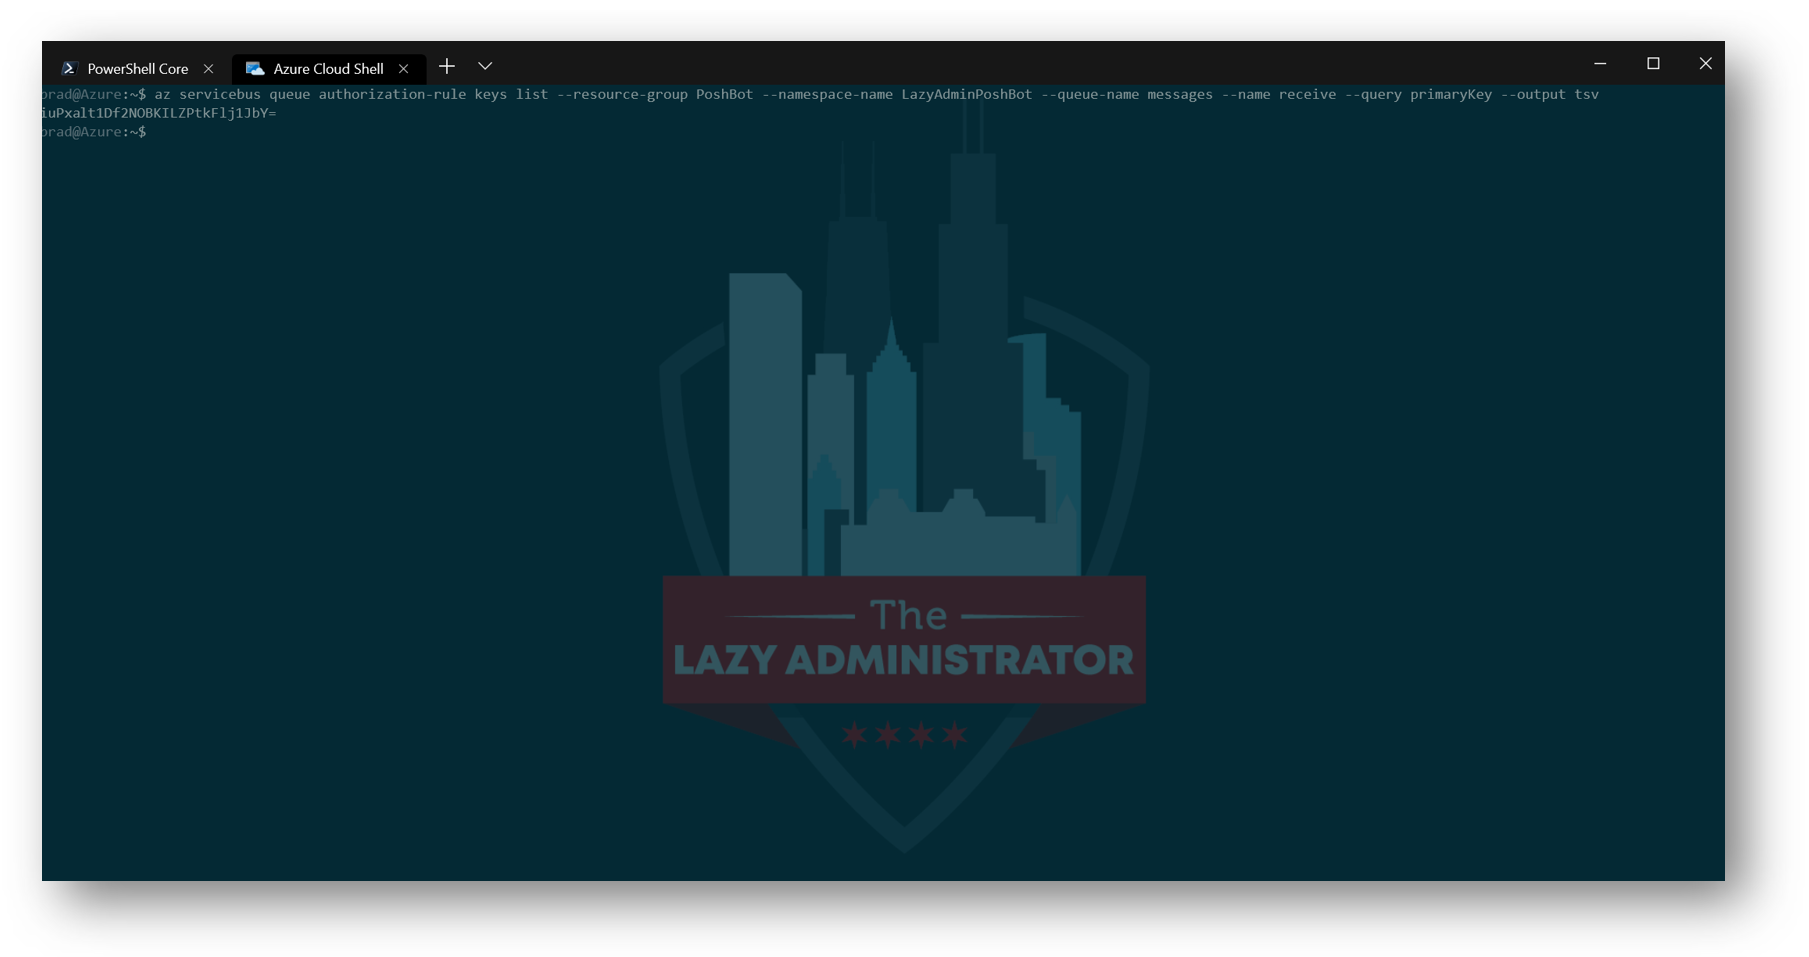
Next we must retrieve the SAS key for the messages queue. This key will be needed in the Teams back-end configuration for PoshBot so it can connect to the queue and receive messages.
My command would look like the following:
az servicebus queue authorization-rule keys list --resource-group PoshBot --namespace-name LazyAdminPoshBot --queue-name messages --name receive --query primaryKey --output tsv
Copy the key that gets displayed and save it for later
NOTE: I have shortened my key displayed, the one you see will be slightly longer
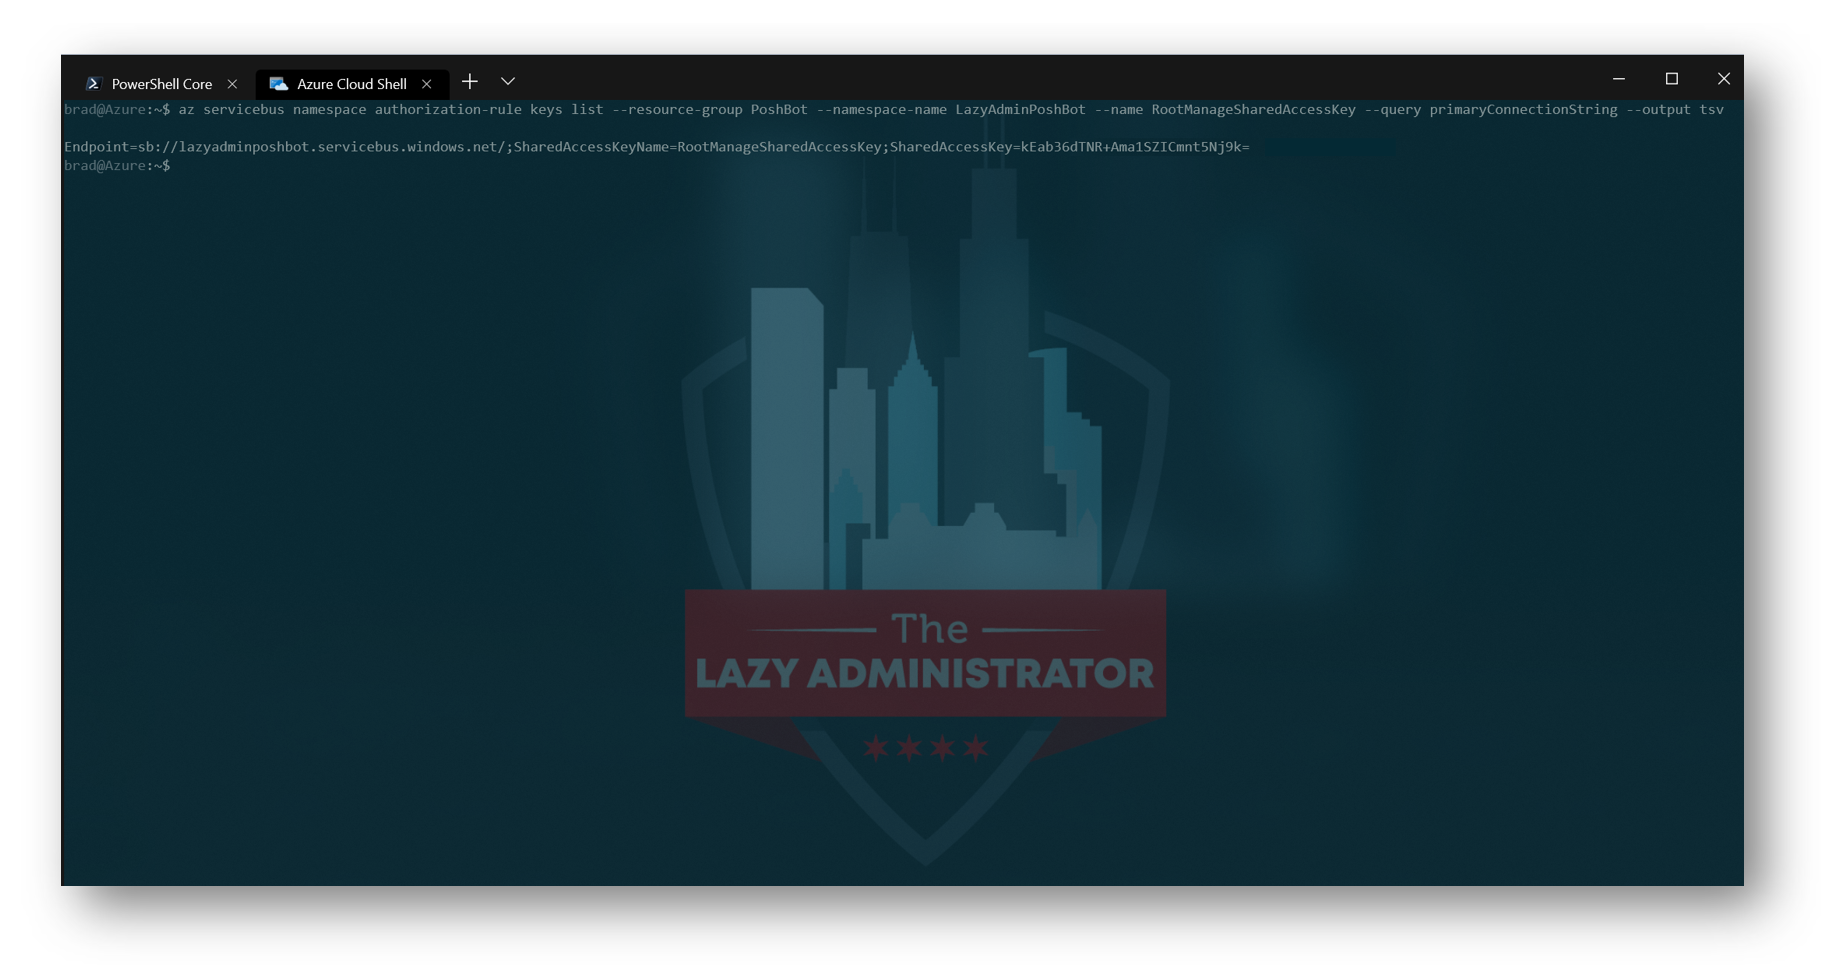
Finally, we need to retrieve the root connection string for the namespace. This will be used by the Azure Function so it can drop messages into the queue when POSTs are received from Bot Framework. Save this for later as well
az servicebus namespace authorization-rule keys list --resource-group PoshBot --namespace-name LazyAdminPoshBot --name RootManageSharedAccessKey --query primaryConnectionString --output tsv
NOTE: I have shortened my key displayed, the one you see will be slightly longer
 Azure Function
Now we must create a new Azure Function in the resource group we made earlier. This Azure Function will receive messages from the Bot Framework and drop the message onto the Service Bus queue.
Create a Storage Account
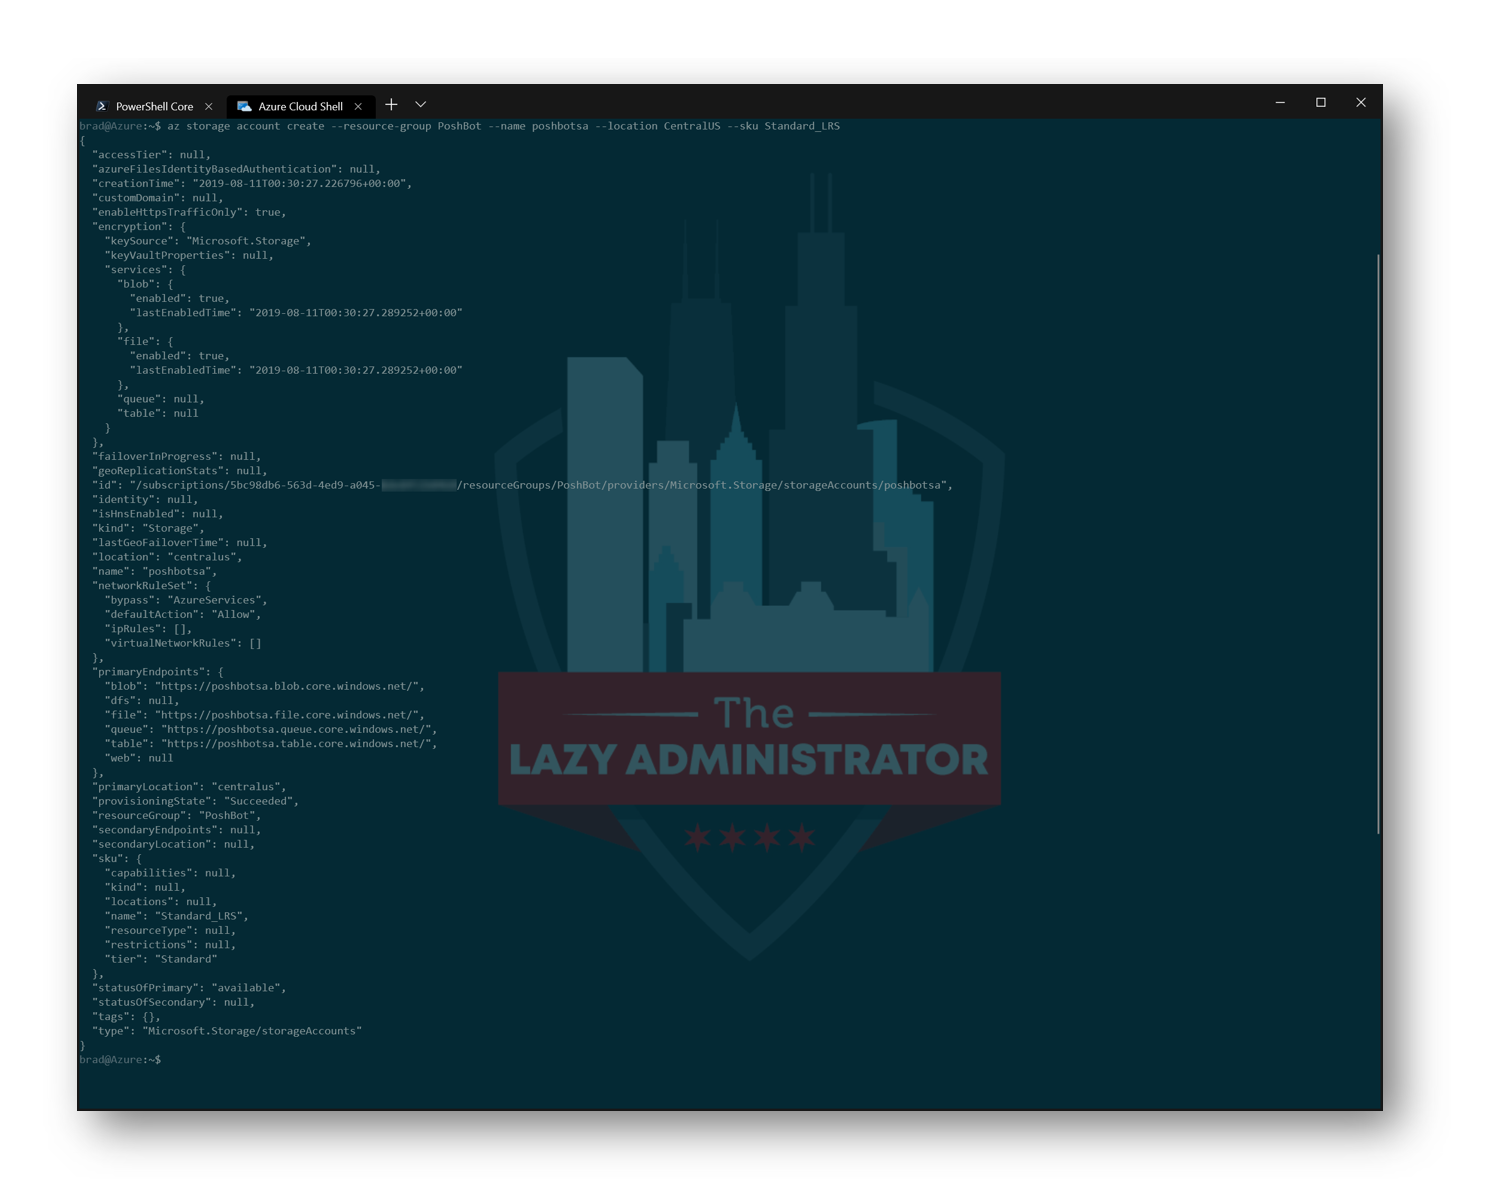
First, we have to create a new Storage Account in our resource group. I am going to name it PoshBotSA and place it in the CentralUS region
My code for this would look like the following:
TIP: Storage Account names cannot contain capital letters
az storage account create --resource-group PoshBot --name poshbotsa --location CentralUS --sku Standard_LRS
 Create and Configure Azure Function
Now we will create a Azure Function that will utilize the Storage Account we created above. In this example I will be creating the Azure Function in the CentralUS region and calling it PoshBotFunc
IMPORTANT: Remember, the storage account name cannot contain capital letters, if you have capital letters you will see the following warning: There was a conflict. The remote server returned an error: (400) Bad Request.
az functionapp create --resource-group PoshBot --name PoshBotFunc --storage-account poshbotsa --consumption-plan-location CentralUS --deployment-source-url "https://github.com/poshbotio/TeamsWebhook/"

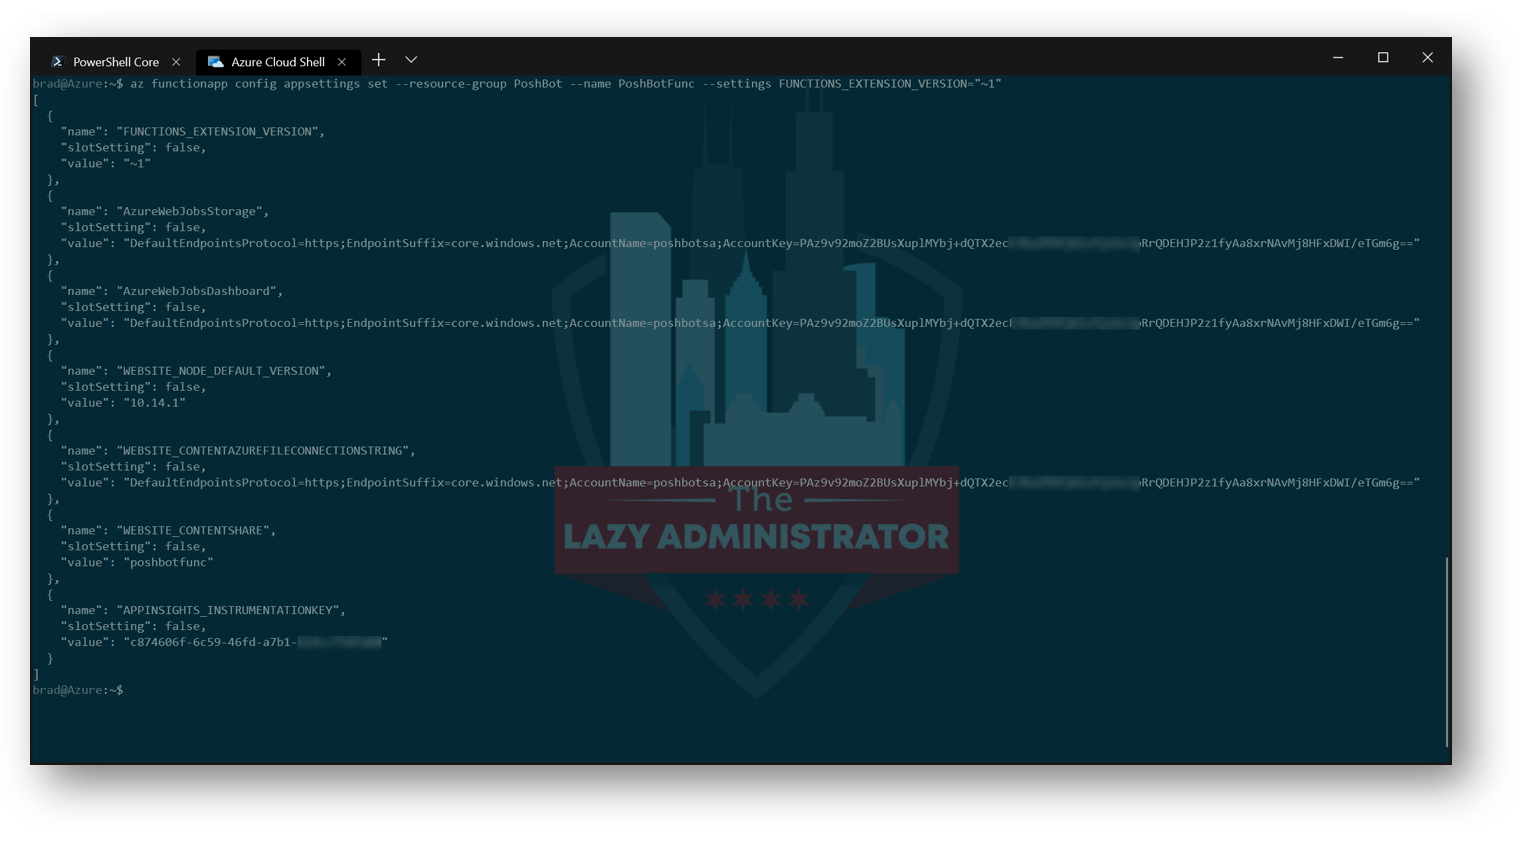
Since we’re deploying a PowerShell-based Azure Function, we need to ensure we’re using v1 Functions and not v2. This will no longer be needed once v2 PowerShell Functions are supported. Make sure to check the current documentation to verify this is still needed.
az functionapp config appsettings set --resource-group PoshBot --name PoshBotFunc --settings FUNCTIONS_EXTENSION_VERSION="~1"
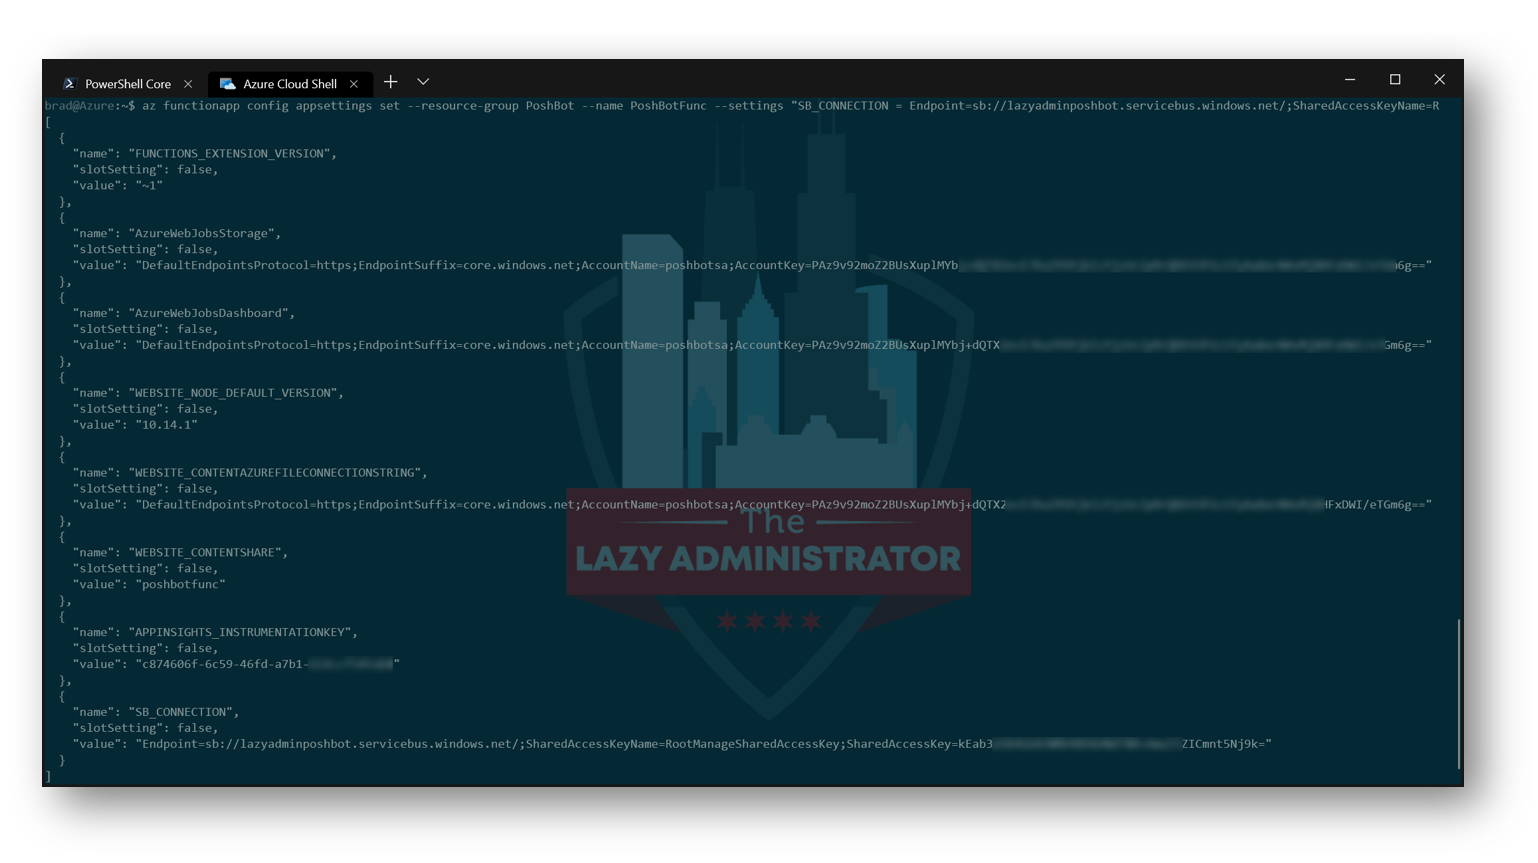
 Next, we need to create an application setting for the Service Bus connection string. We will be setting our Root Connection string that we got earlier. In my example my code block will look like:
NOTE: The Root Connection string looks like this: Endpoint=sb://lazyadminposhbot.servicebus.windows.net/;SharedAccessKeyName=RootManageSharedAccessKey;SharedAccessKey=kEab3MO4BTNR+Ama1t5Nj9k=
az functionapp config appsettings set --resource-group PoshBot --name PoshBotFunc --settings "SB_CONNECTION = Endpoint=sb://lazyadminposhbot.servicebus.windows.net/;SharedAccessKeyName=RootManageSharedAccessKey;SharedAccessKey=kEab36O84GNMR+Ama1Snt5Nj9k="
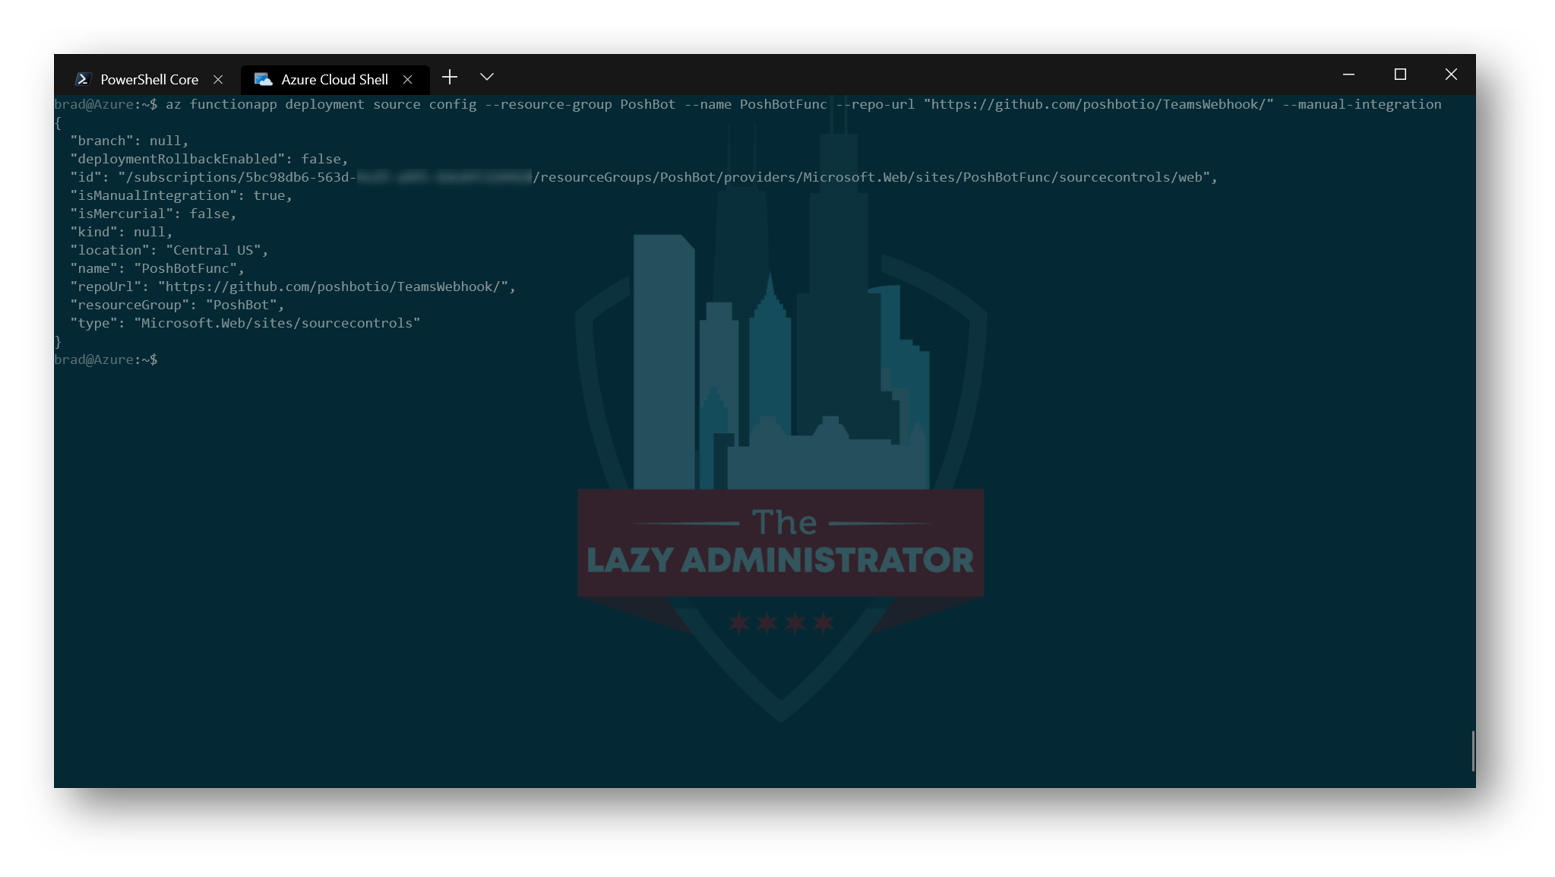
Now we need to disable Git integration
az functionapp deployment source config --resource-group PoshBot --name PoshBotFunc --repo-url "https://github.com/poshbotio/TeamsWebhook/" --manual-integration
 Make note of the function URL. Unfortunately, the Azure CLI does not have a command to retrieve the function URL or token. To do that, log into the Azure portal, go to Function Apps, Select your app, under functions, select TeamsWebhook and then on the right hand side select “Get function URL”
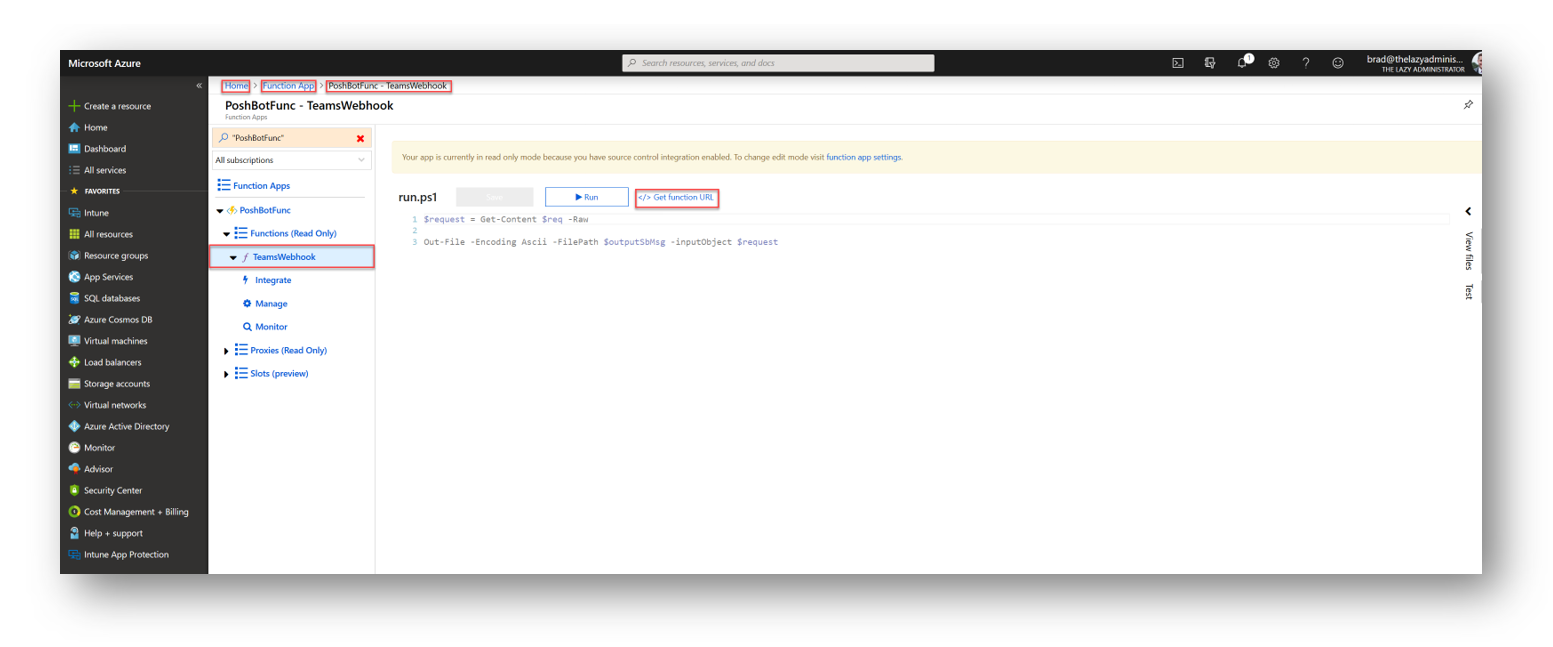
Select “Copy” and save it for later

Create a Bot in Bot Framework
App Registration
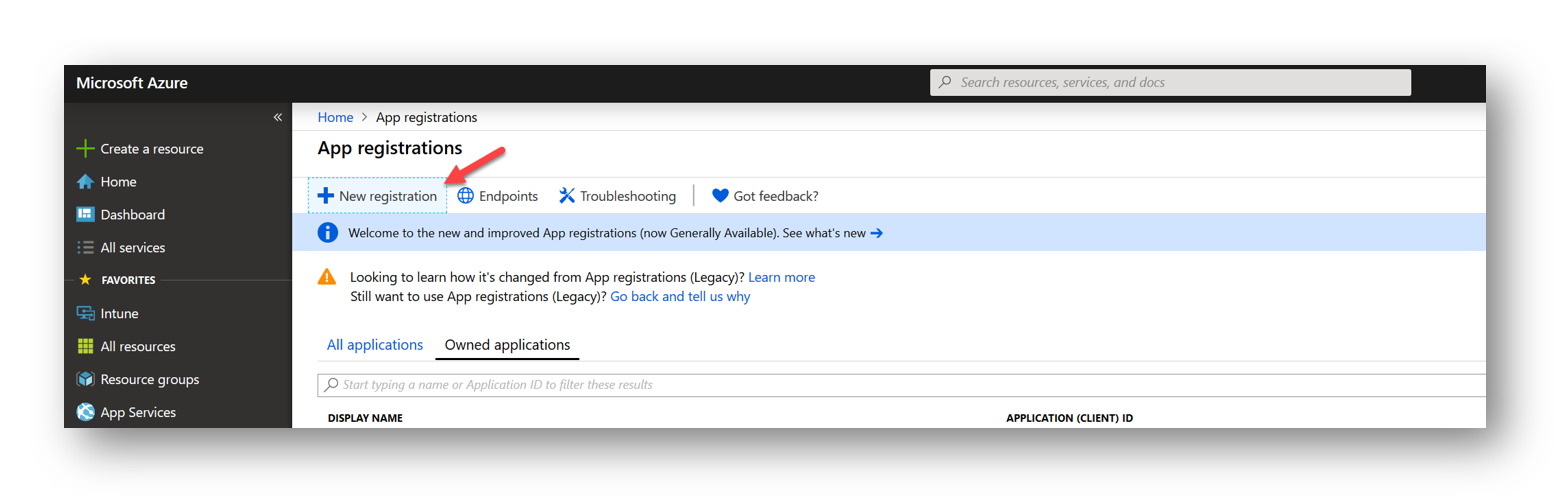
In the Azure Portal navigate to App Registrations and click New Registration
 Give your application a valid name and for redirectURI you can put any valid URL (including https://localhost)
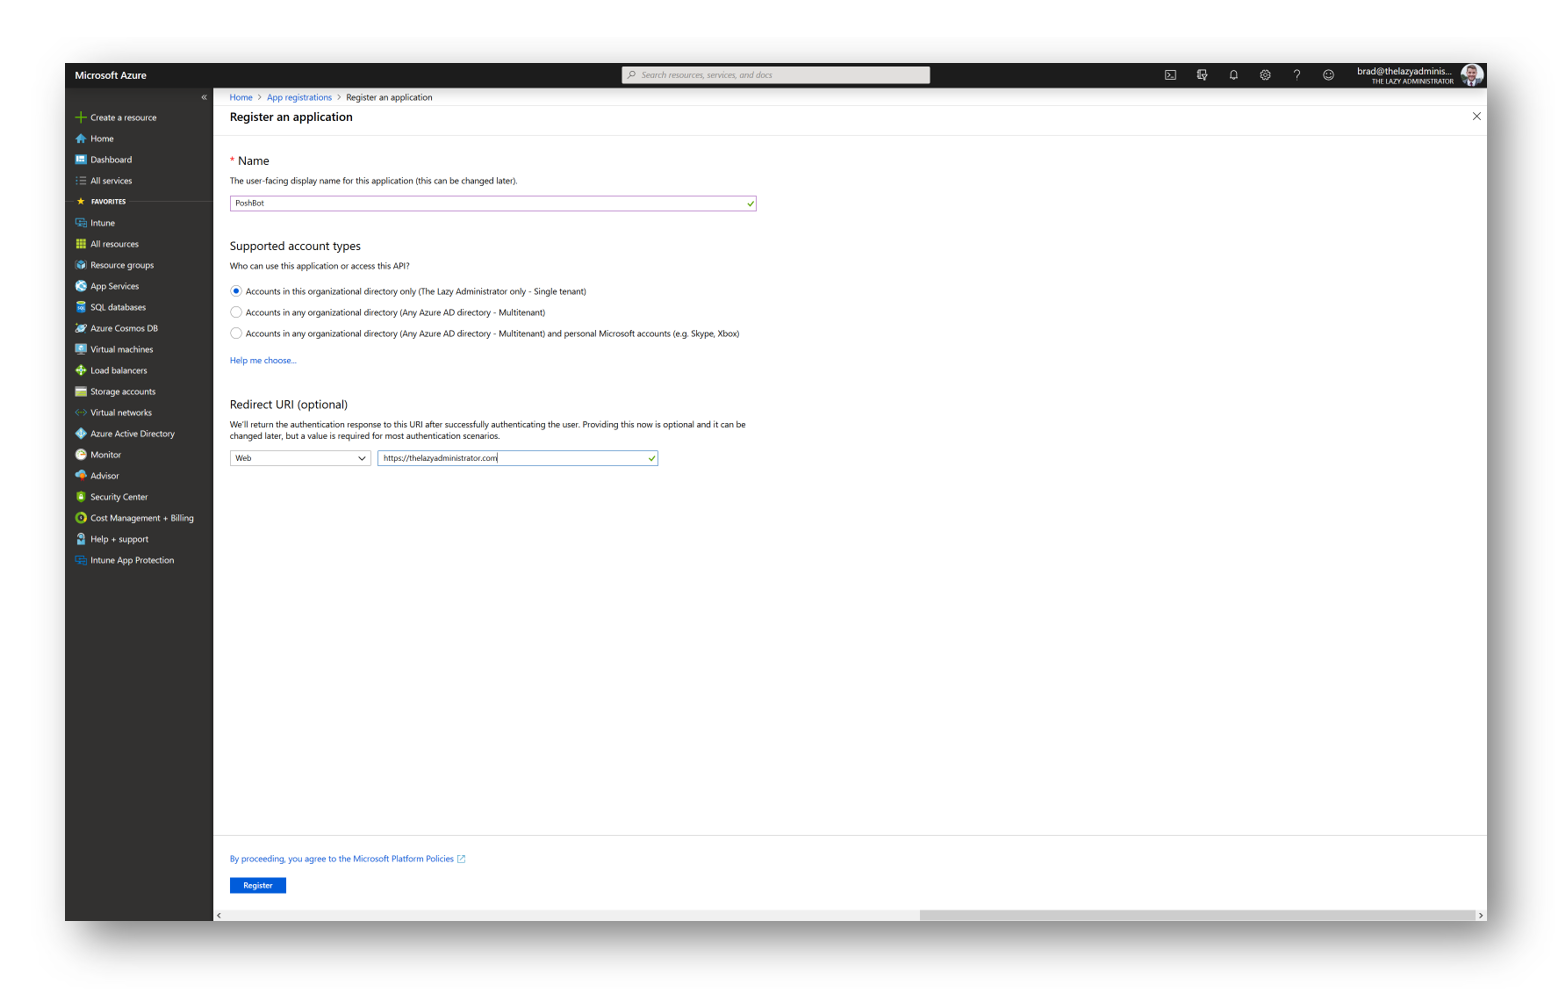 Once the application has been registered, take note of the Application ID as we will need it next

Bot Registration
Navigate to the URL below and sign in to create a new bot in Bot Framework.
https://dev.botframework.com/bots/new
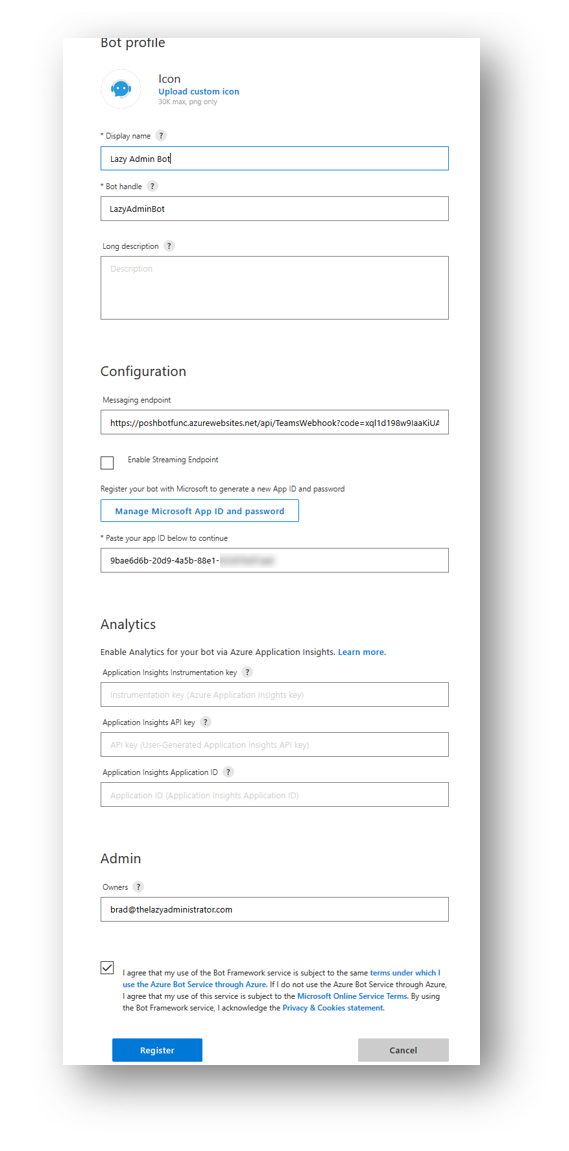
Note that the bot handle is globally unique and can not be changed later. Copy this value down as it will be needed by the Teams back-end in PoshBot.
Messaging Endpoint: Enter the Azure Function URL you got earlier.
App ID: Paste your App ID you got in the previous step
NOTE: If you get an error while trying to set the image about cant finding the ID, try registering the bot, in my case the bot handle was taken so it could not set the picture but it would not tell me any errors until I tried to register the bot.
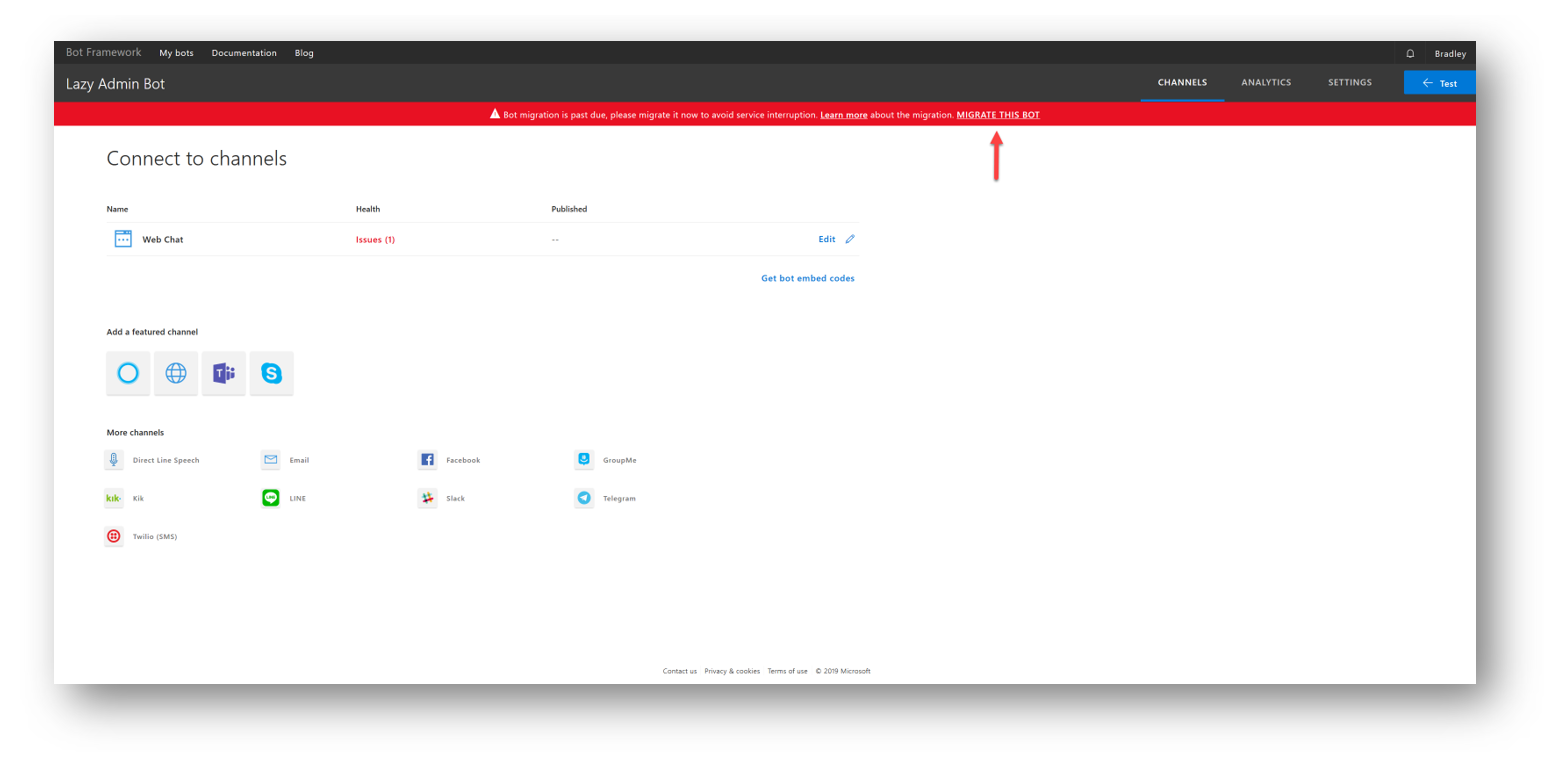
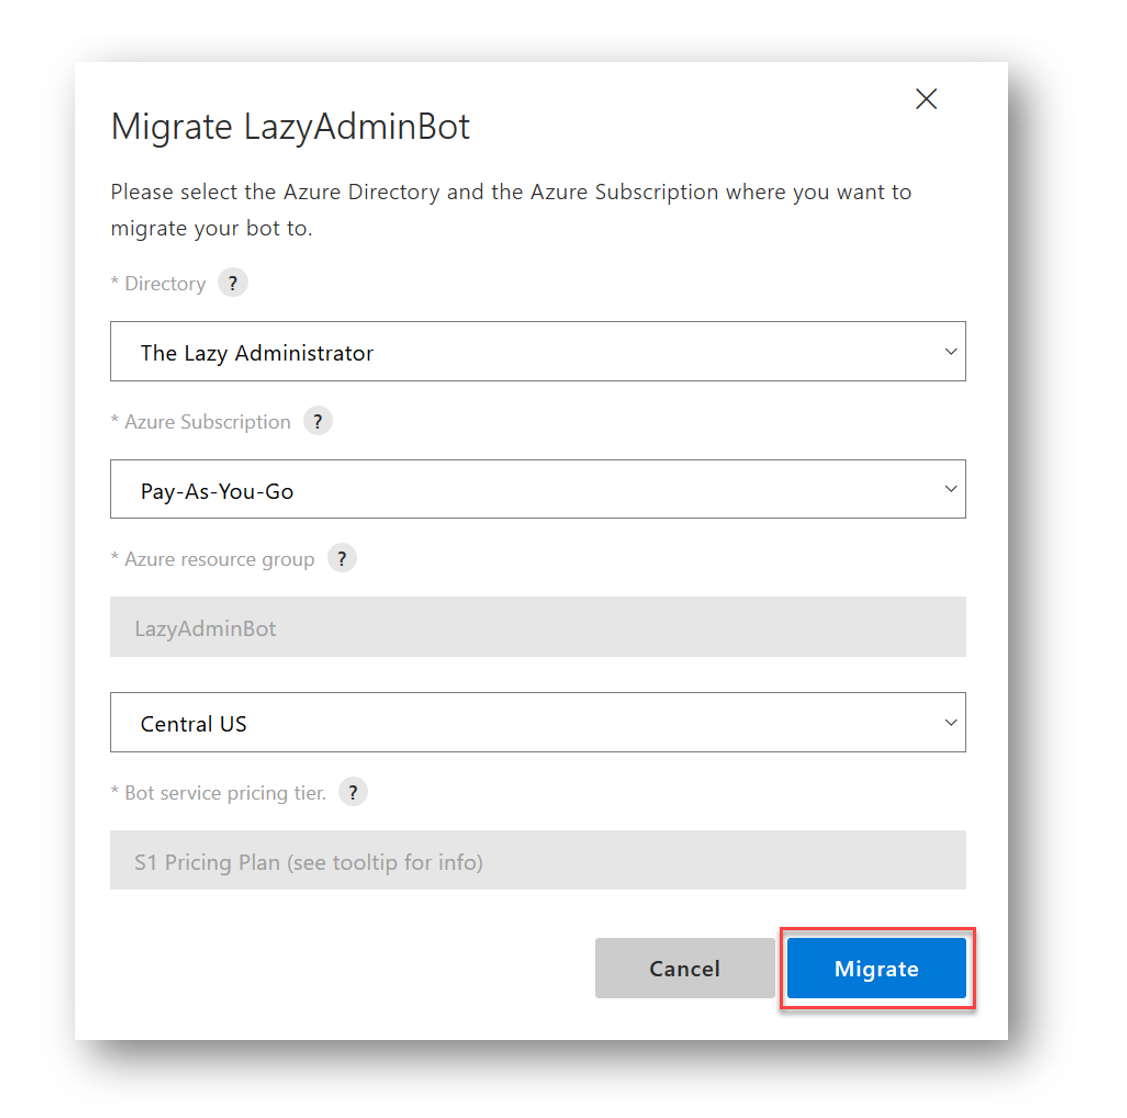
Next, you should get prompted to migrate your new bot to Azure Bot Service. Click MIGRATE THIS BOT
NOTE: Depending on when you are reading this, you may not see this option as it may create in Azure Bot Service automatically. Try proceeding
Select Migrate
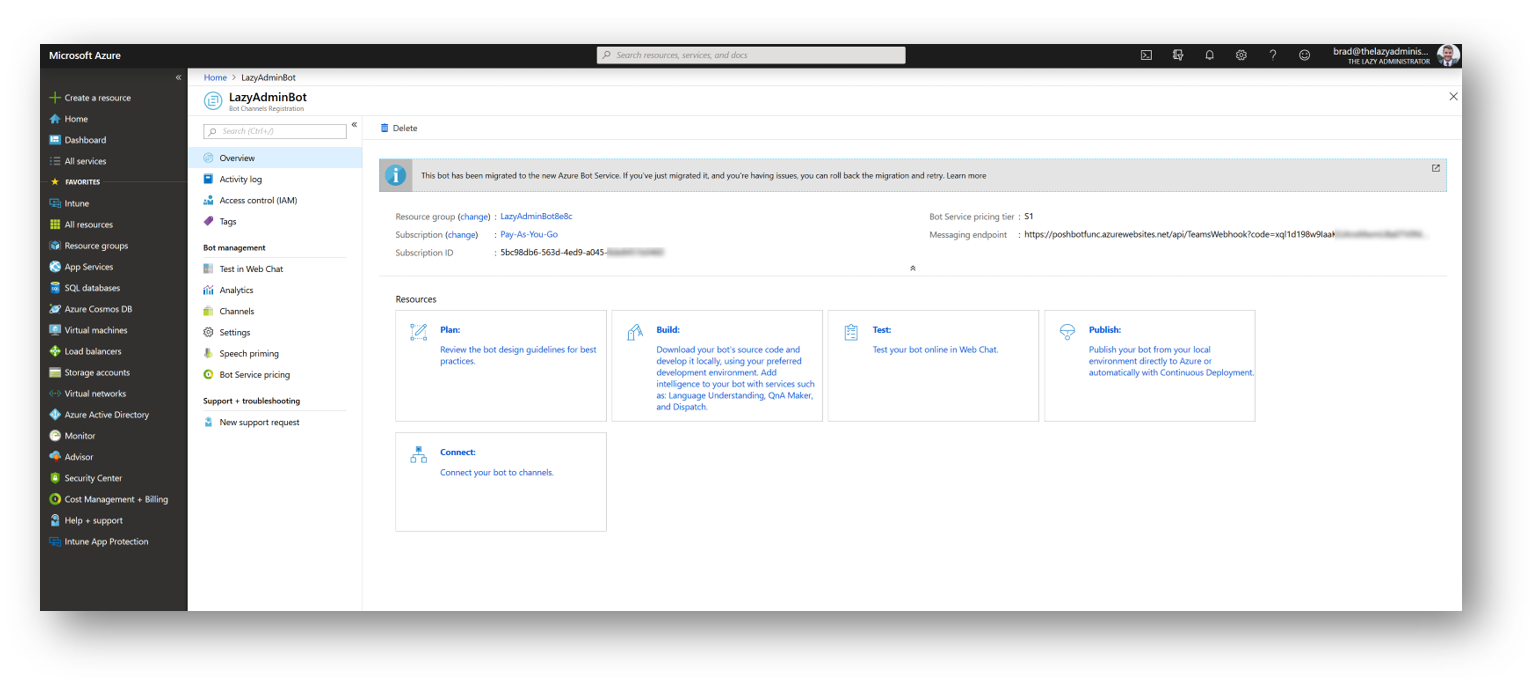
Once its migrated I get prompted to open the new bot which brings me to the Azure Portal
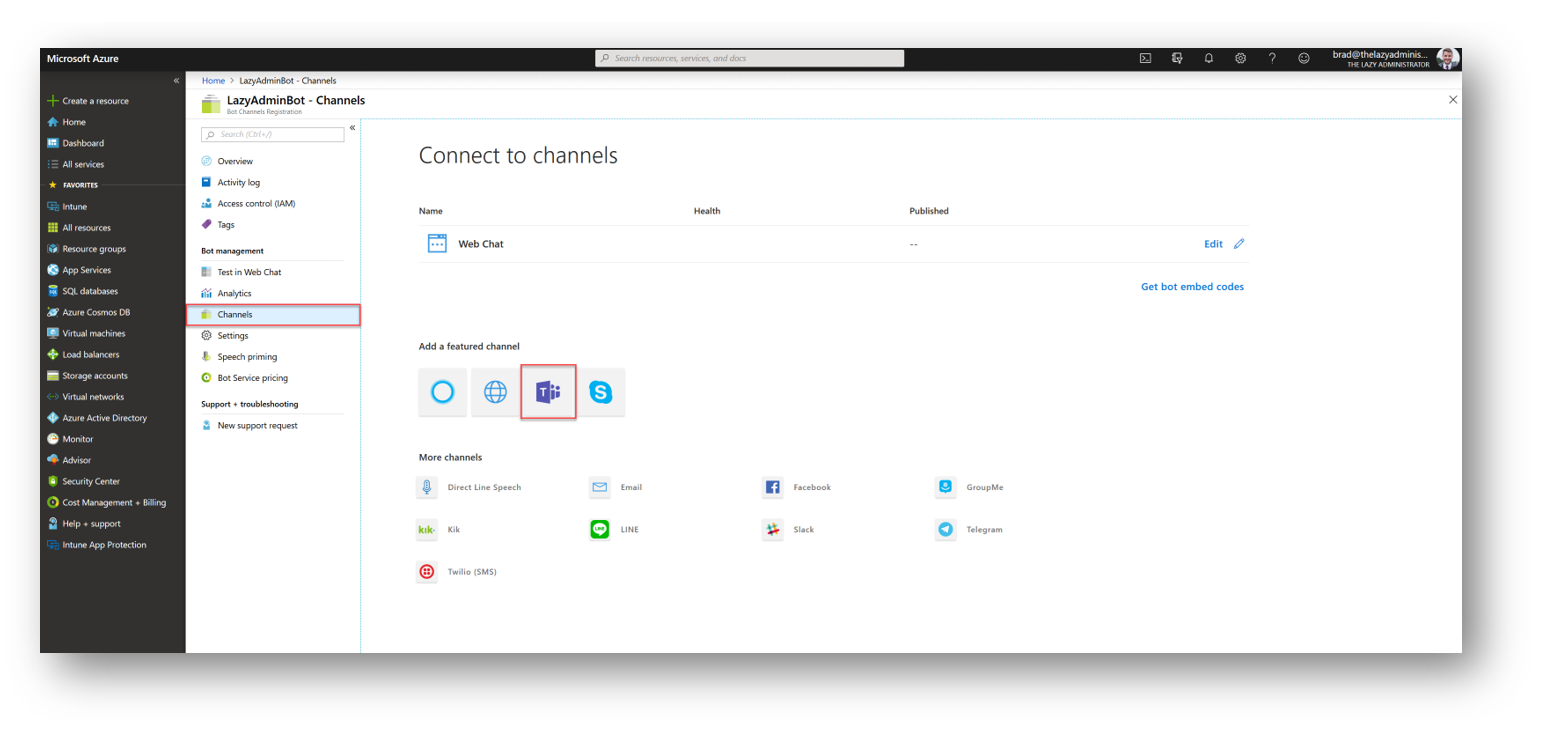
 Next, go to the Channels blade and then select the Teams icon
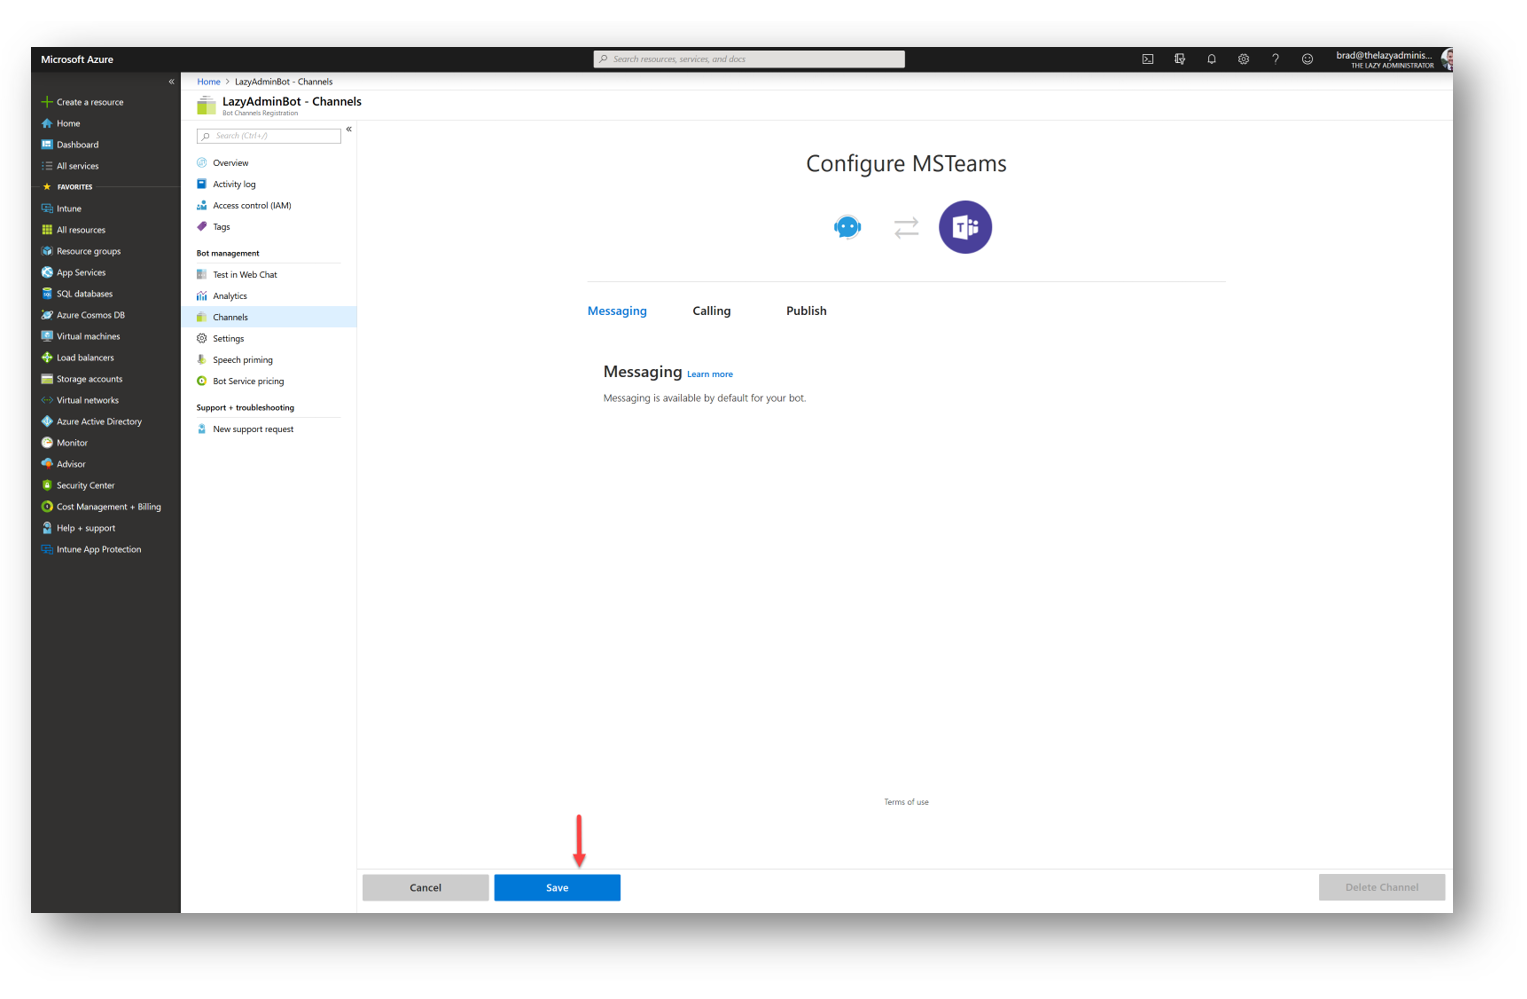
Click Save and then accept the EULA
Add Your Bot to Teams
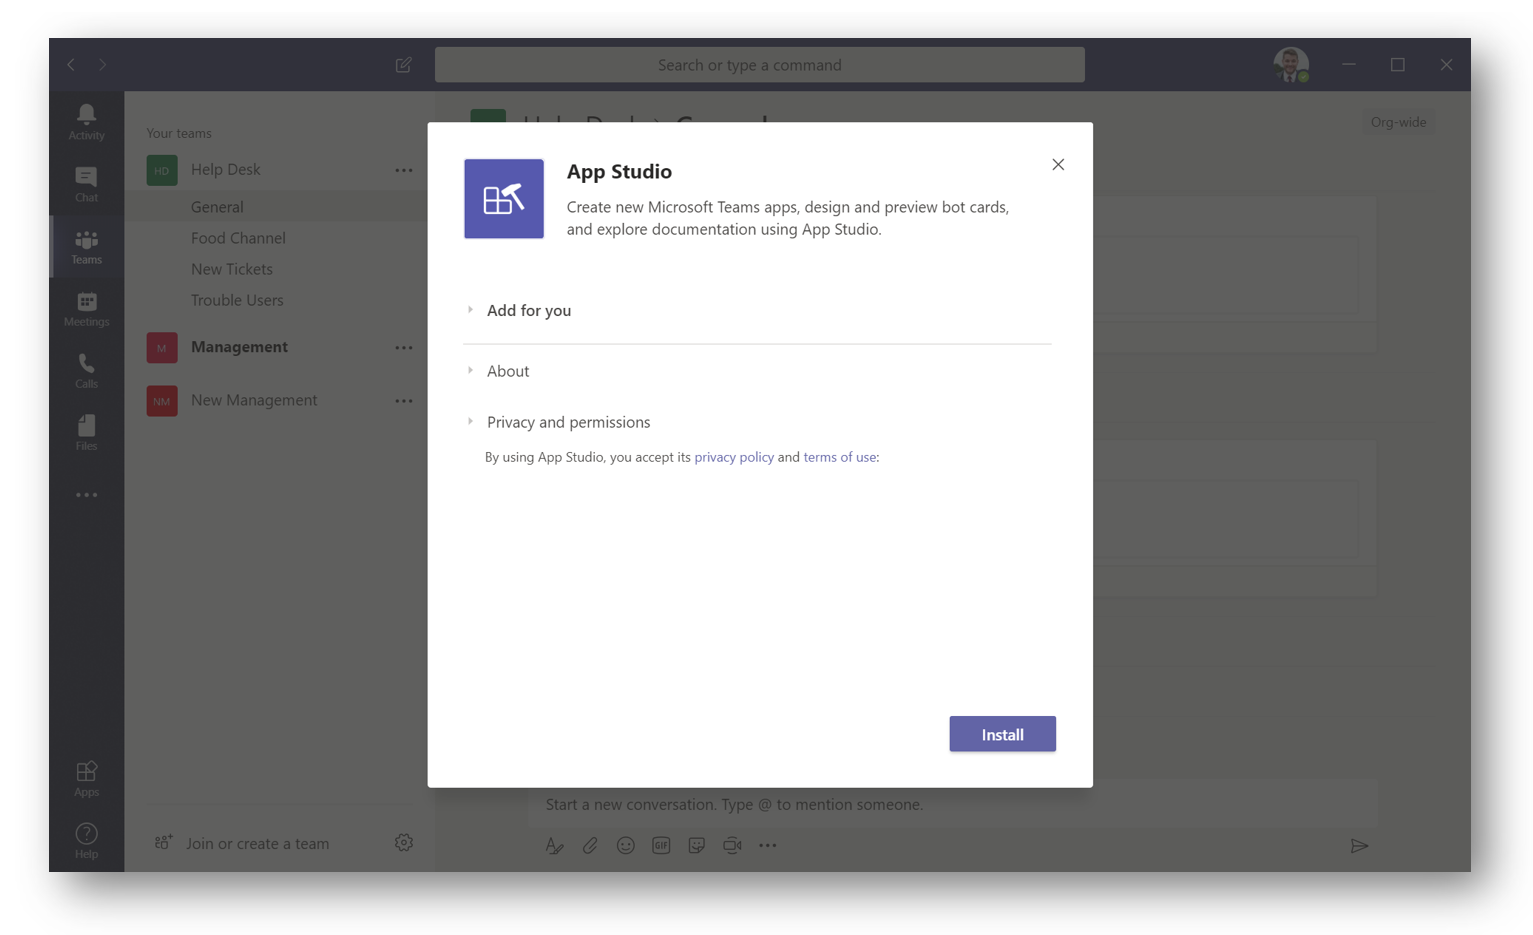
Install App Studio in Teams
Next, click here to download App Studio into your Teams. The link will launch teams and bring you to the install screen
Create a Bot Manifest using App Studio
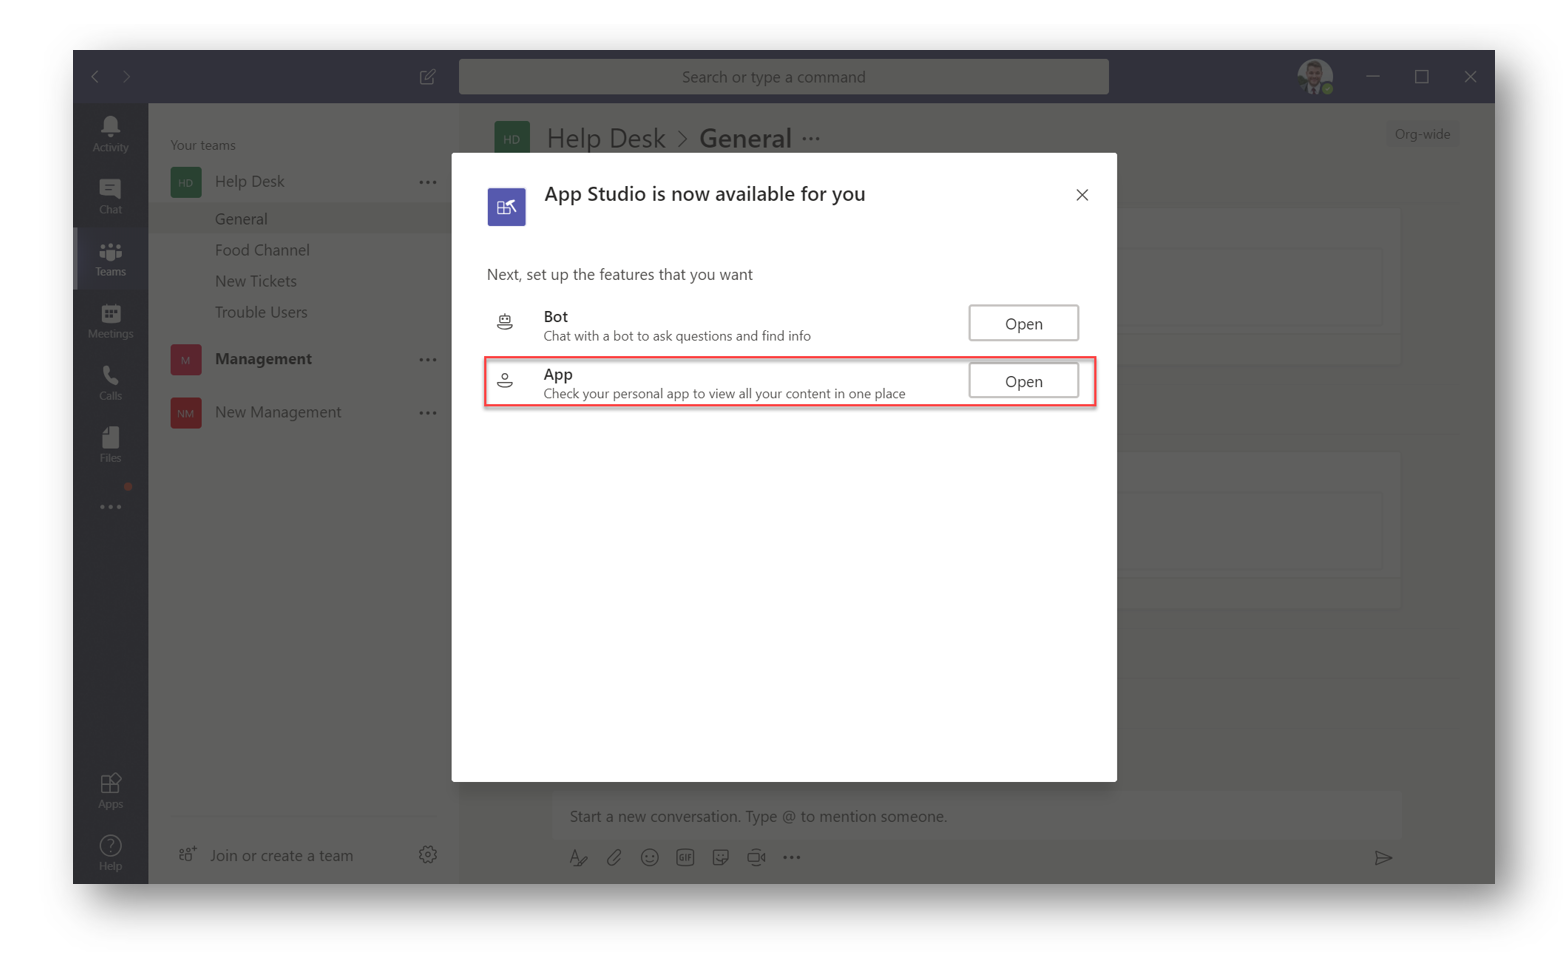
When it finishes installing click App
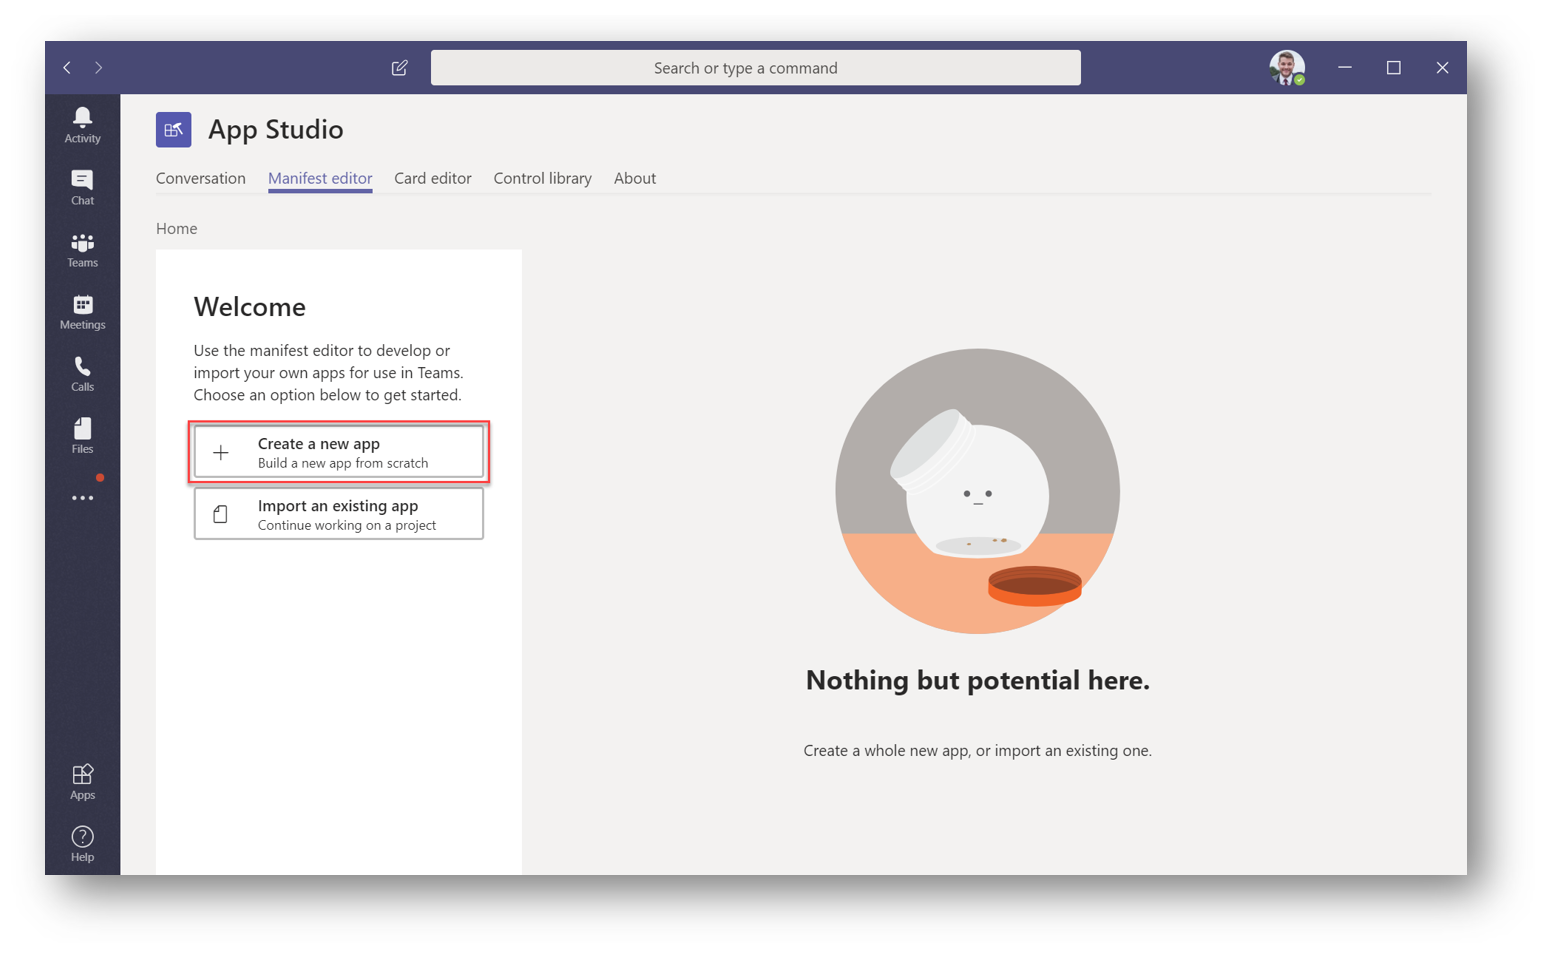
Select Create a new app
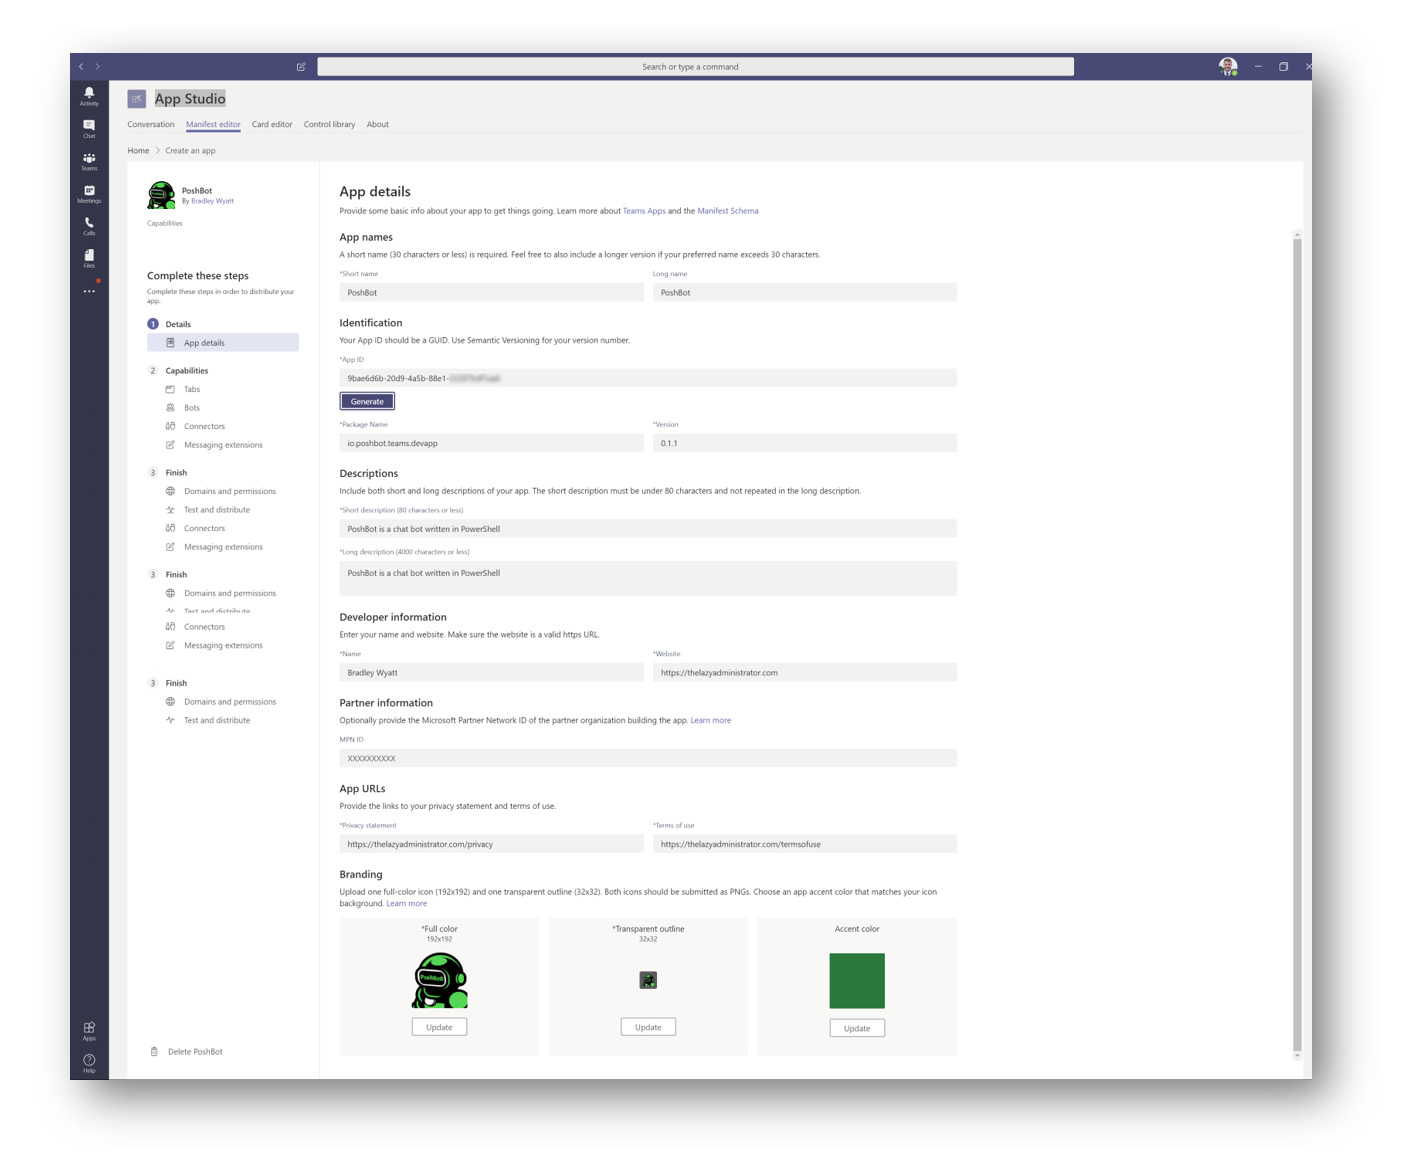
In the App Details page fill out the form
App ID: Paste the App ID we created earlier. This was done in App Registrations
The images I got from the project GitHub here
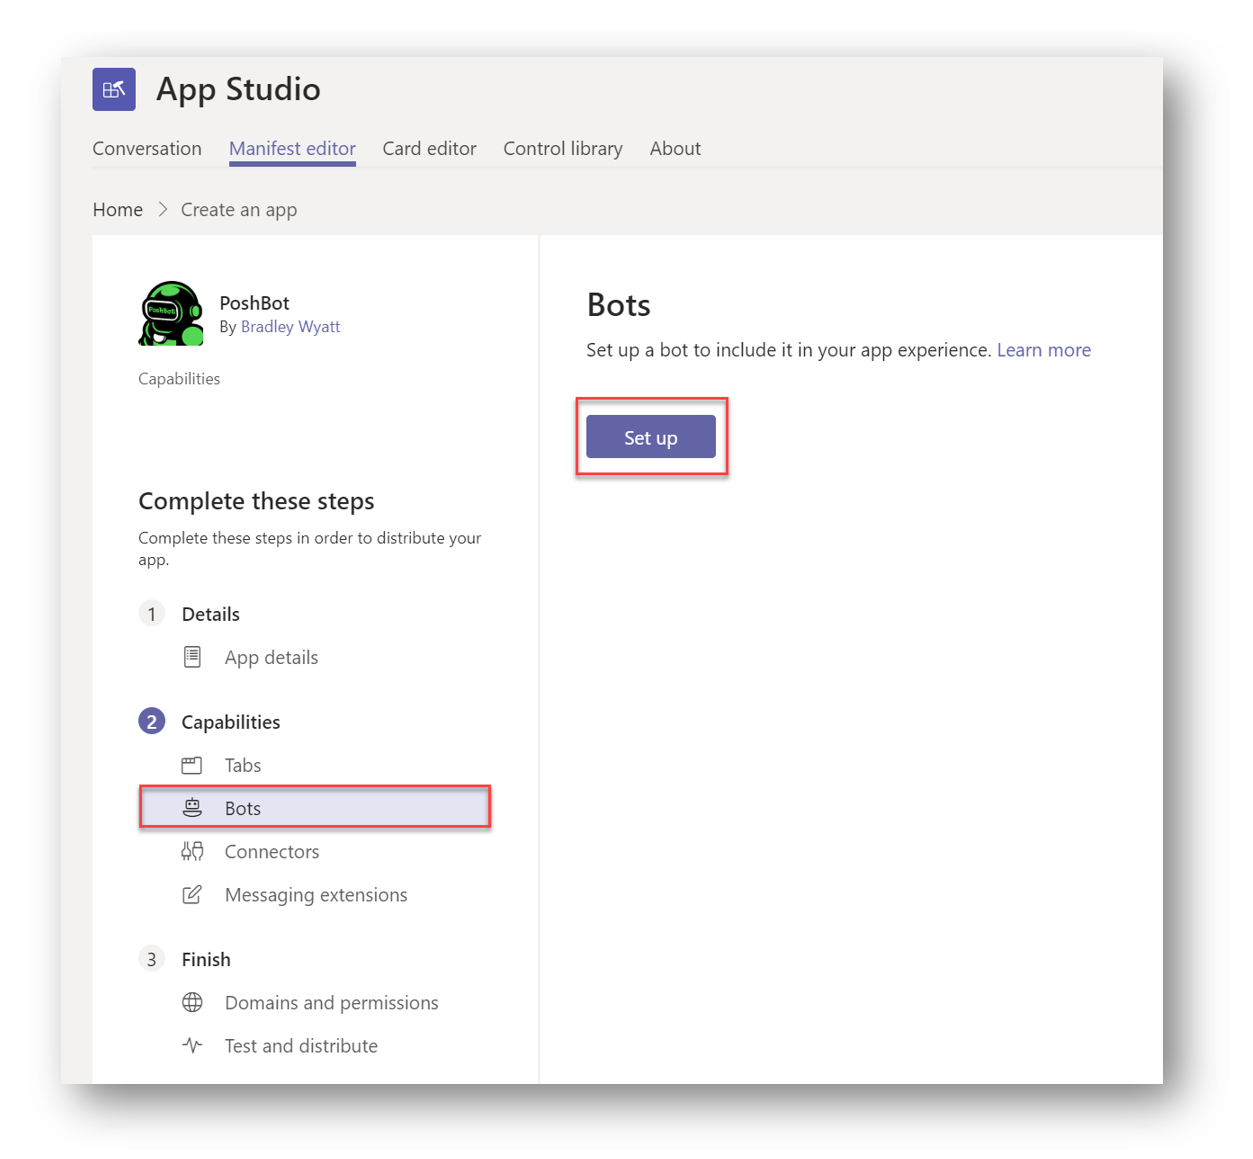
Under Capabilities select bots and then press Set Up
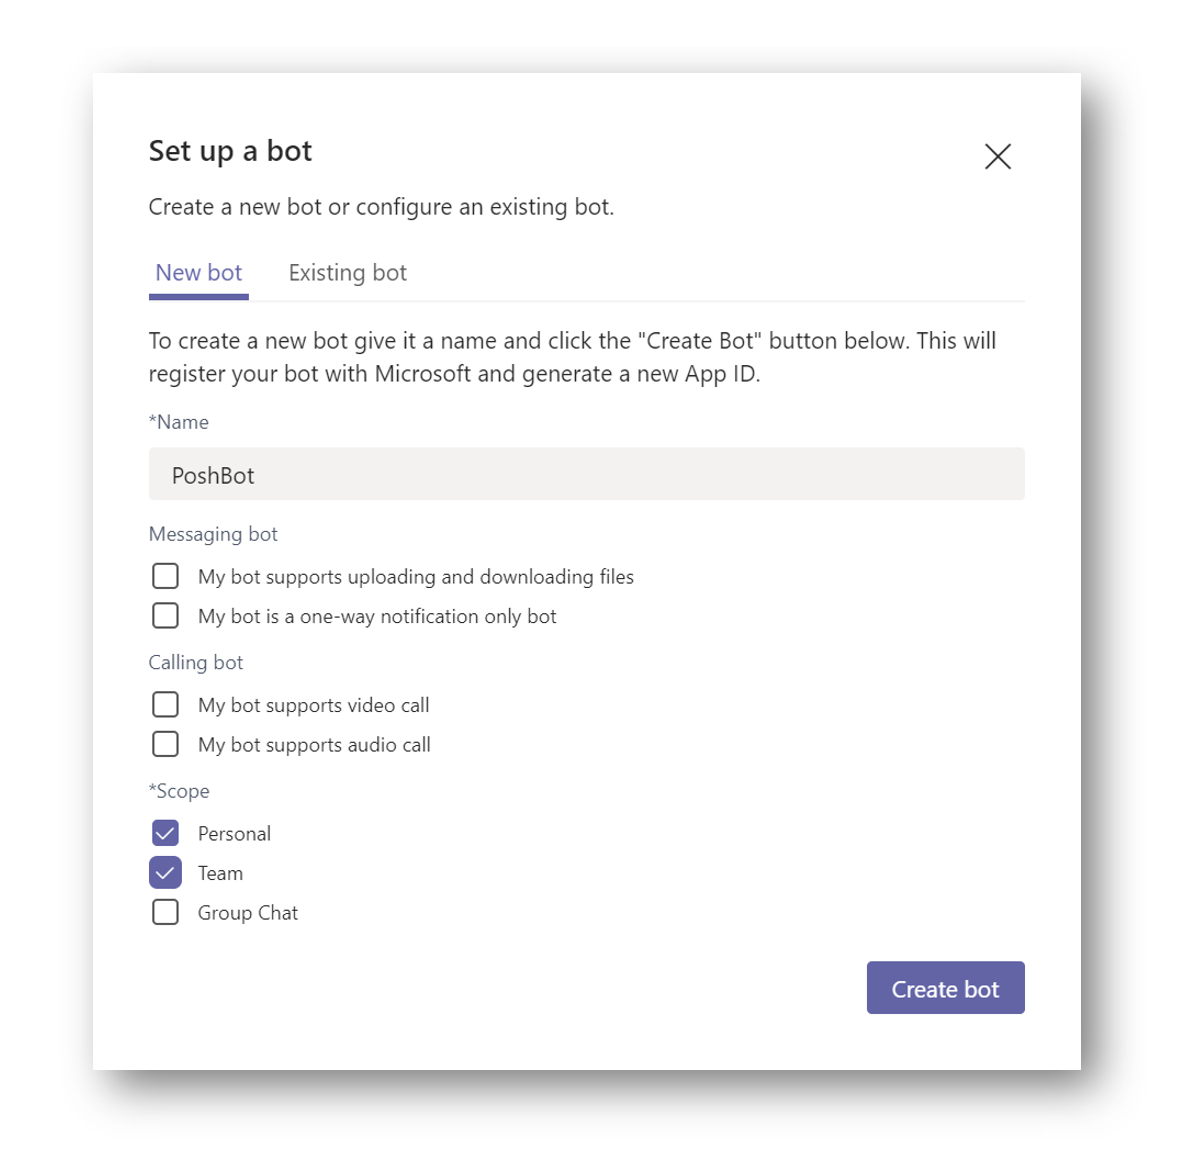
Select Personal and Team and then press Create Bot
The Messaging Endpoint should be the URL of the Azure Function
HINT: We got this right before the “Create a Bot in Bot Framework” section
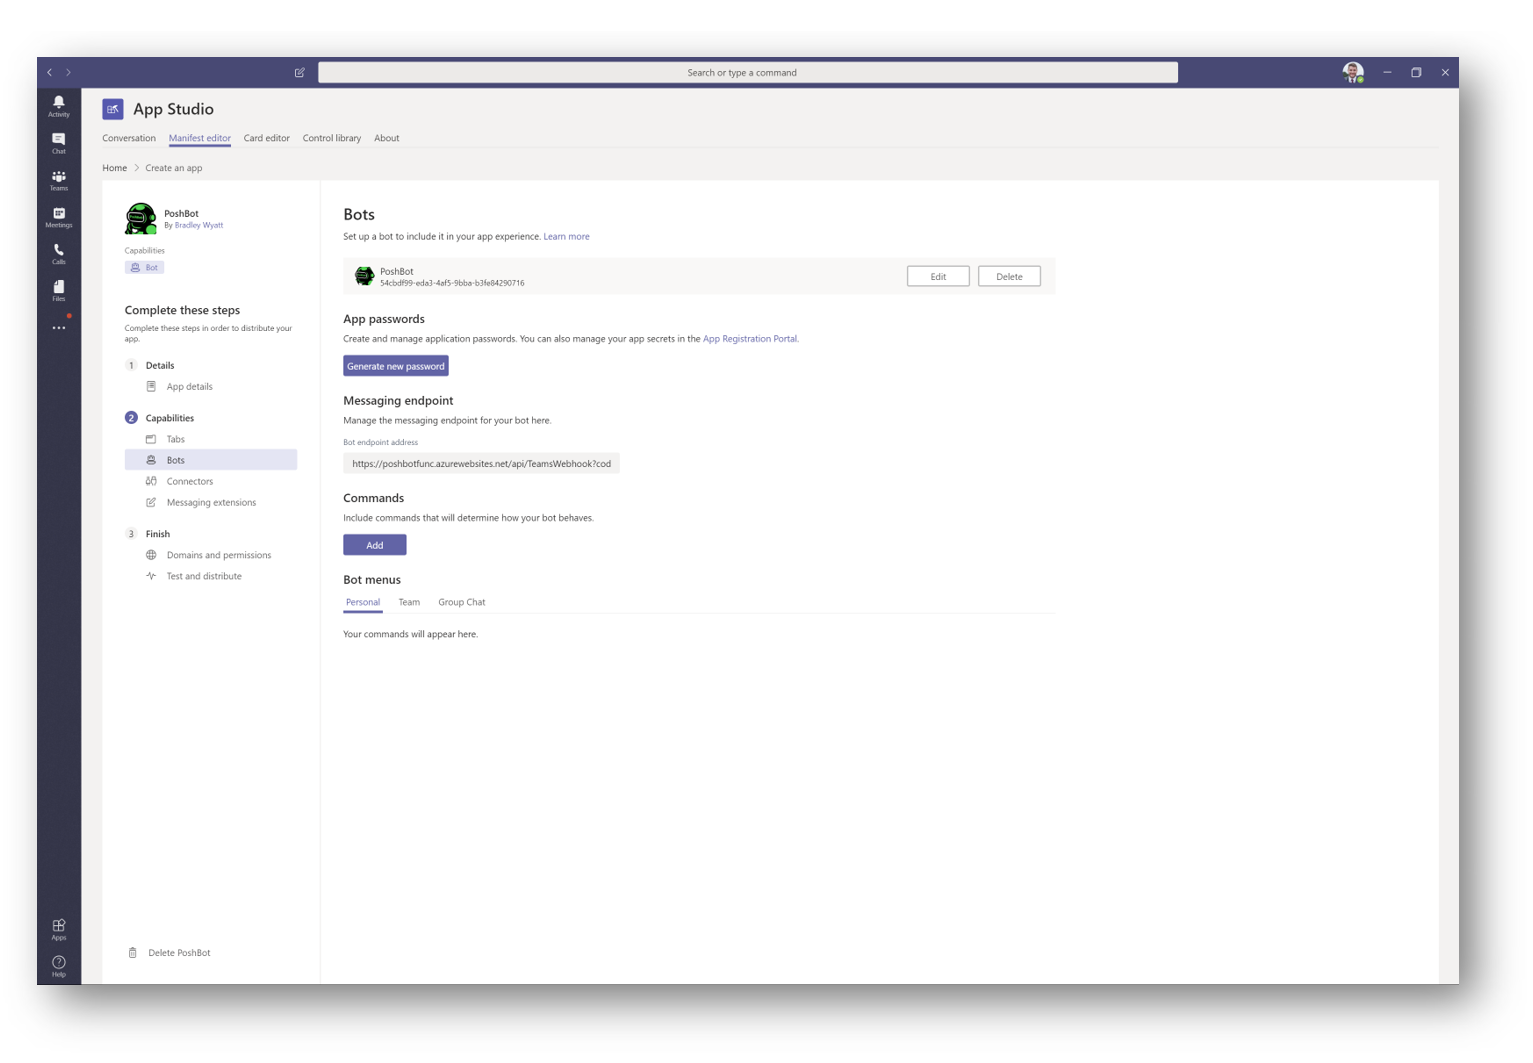
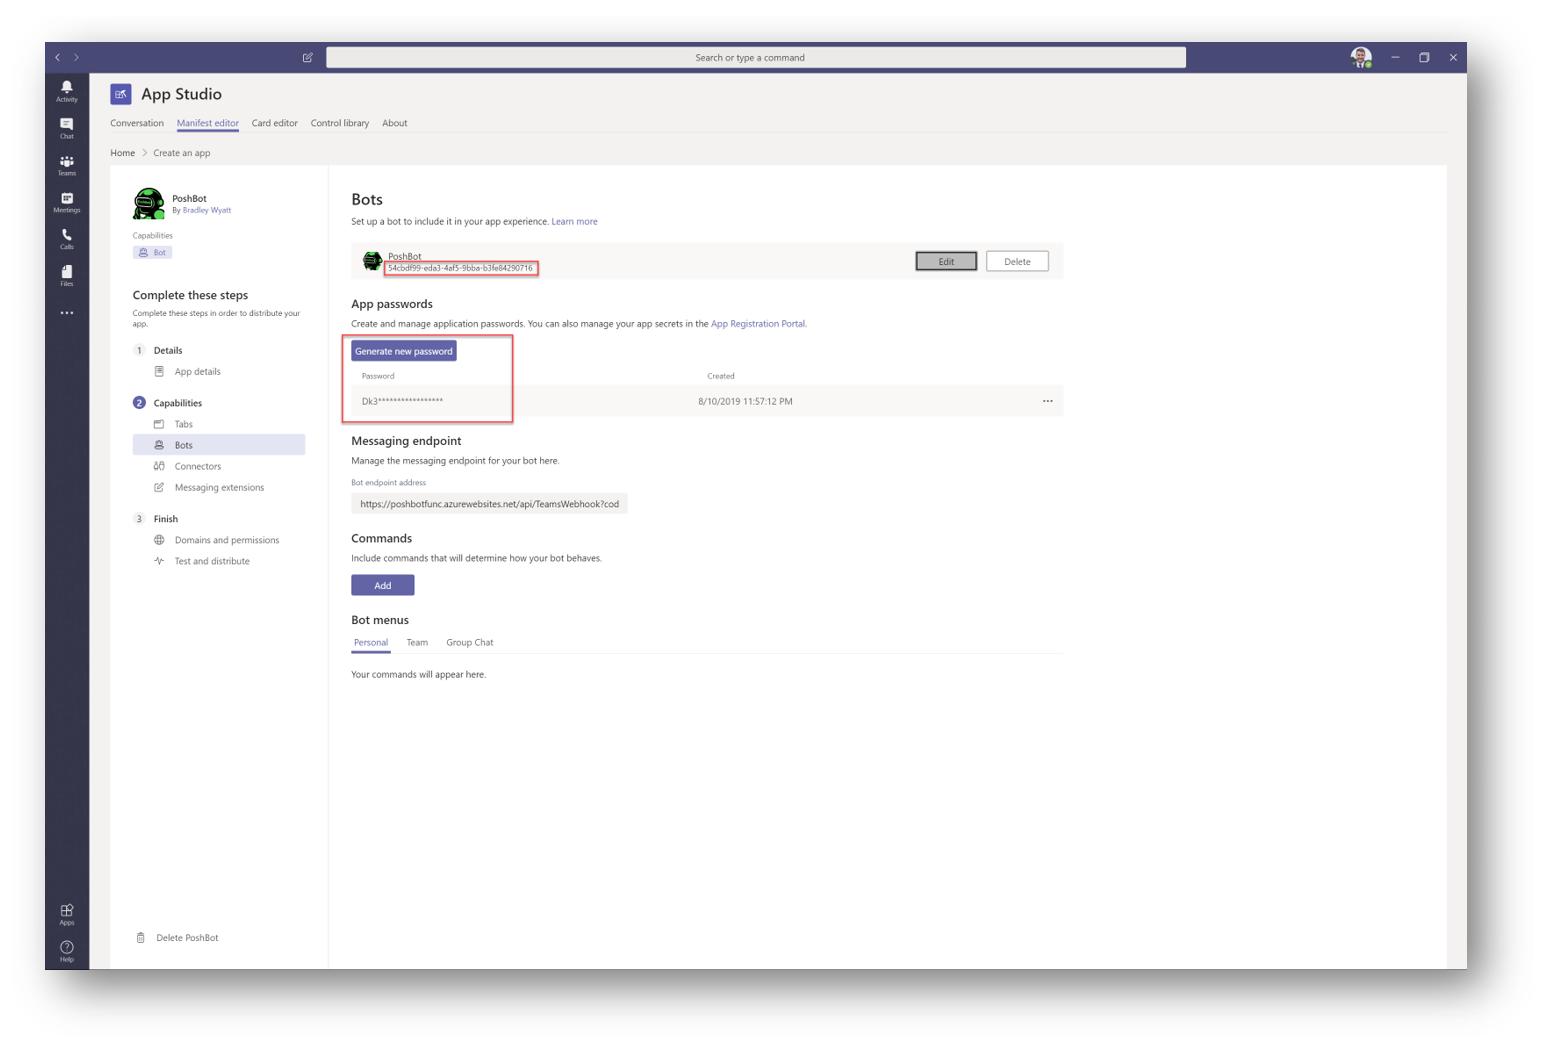
Take note of the GUID (APP ID) under the bot name, this is important as we will need this later, press Generate Password and take note of this as well
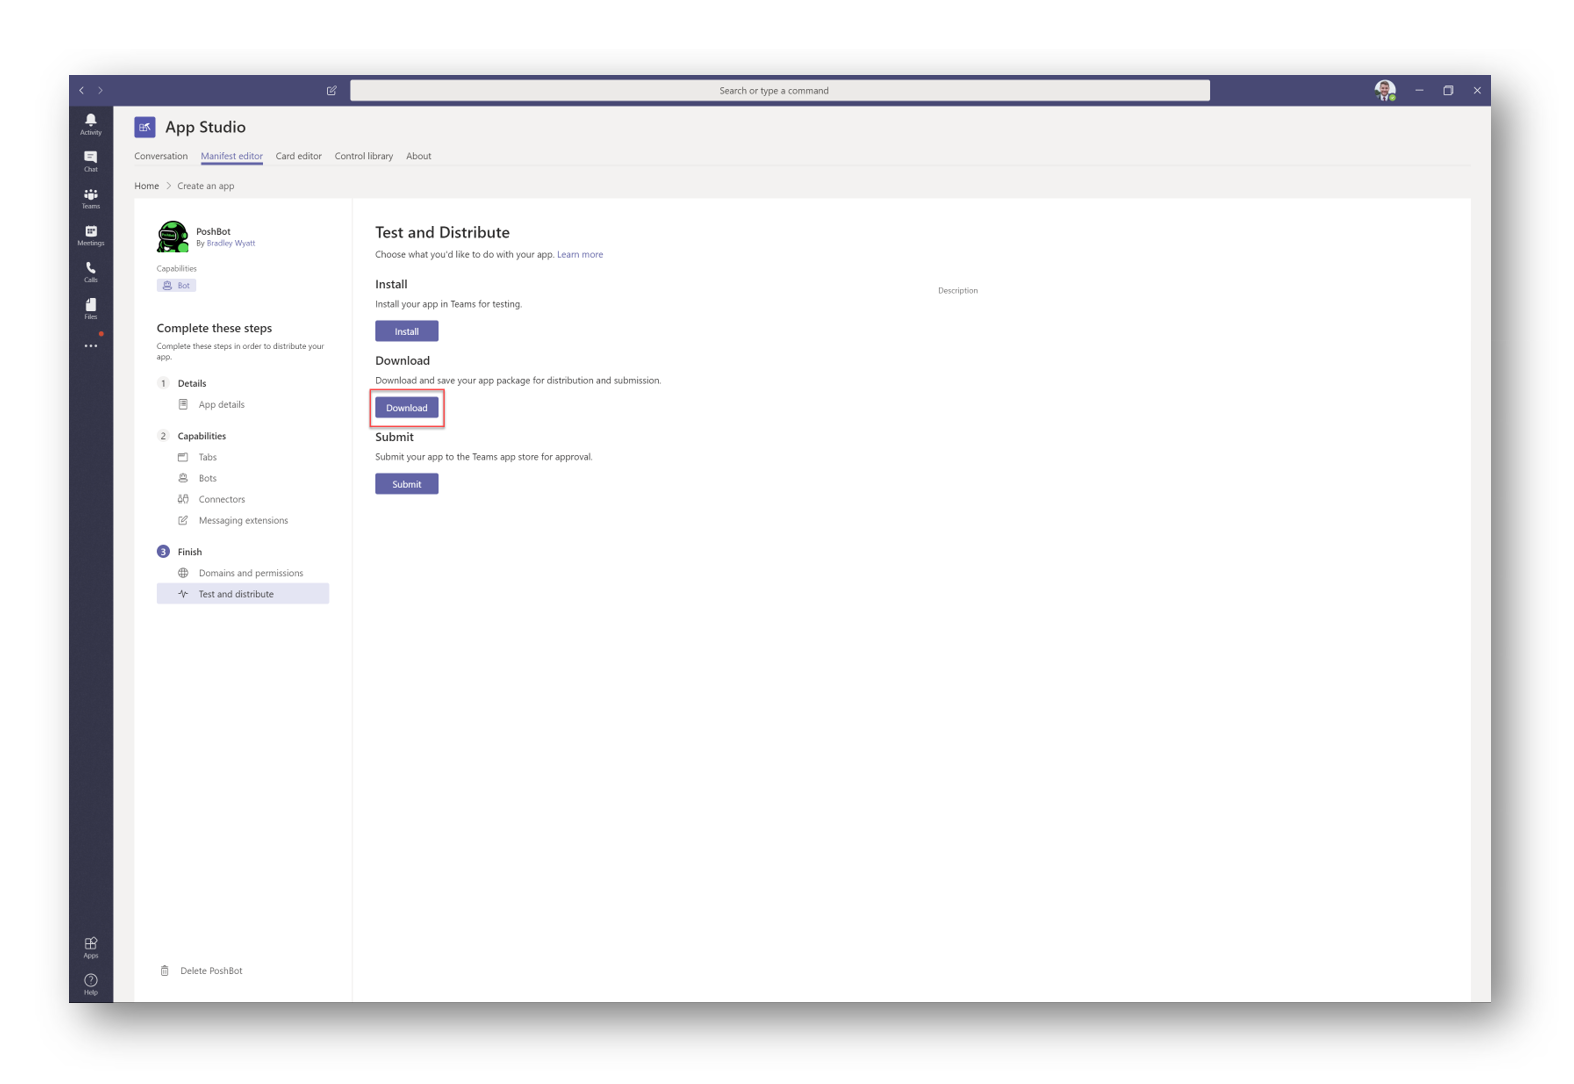
Under Finish select Test and Distribute and then click the Download button which will download a zip file to your Downloads folder
Sideload the Bot Manifest in Teams
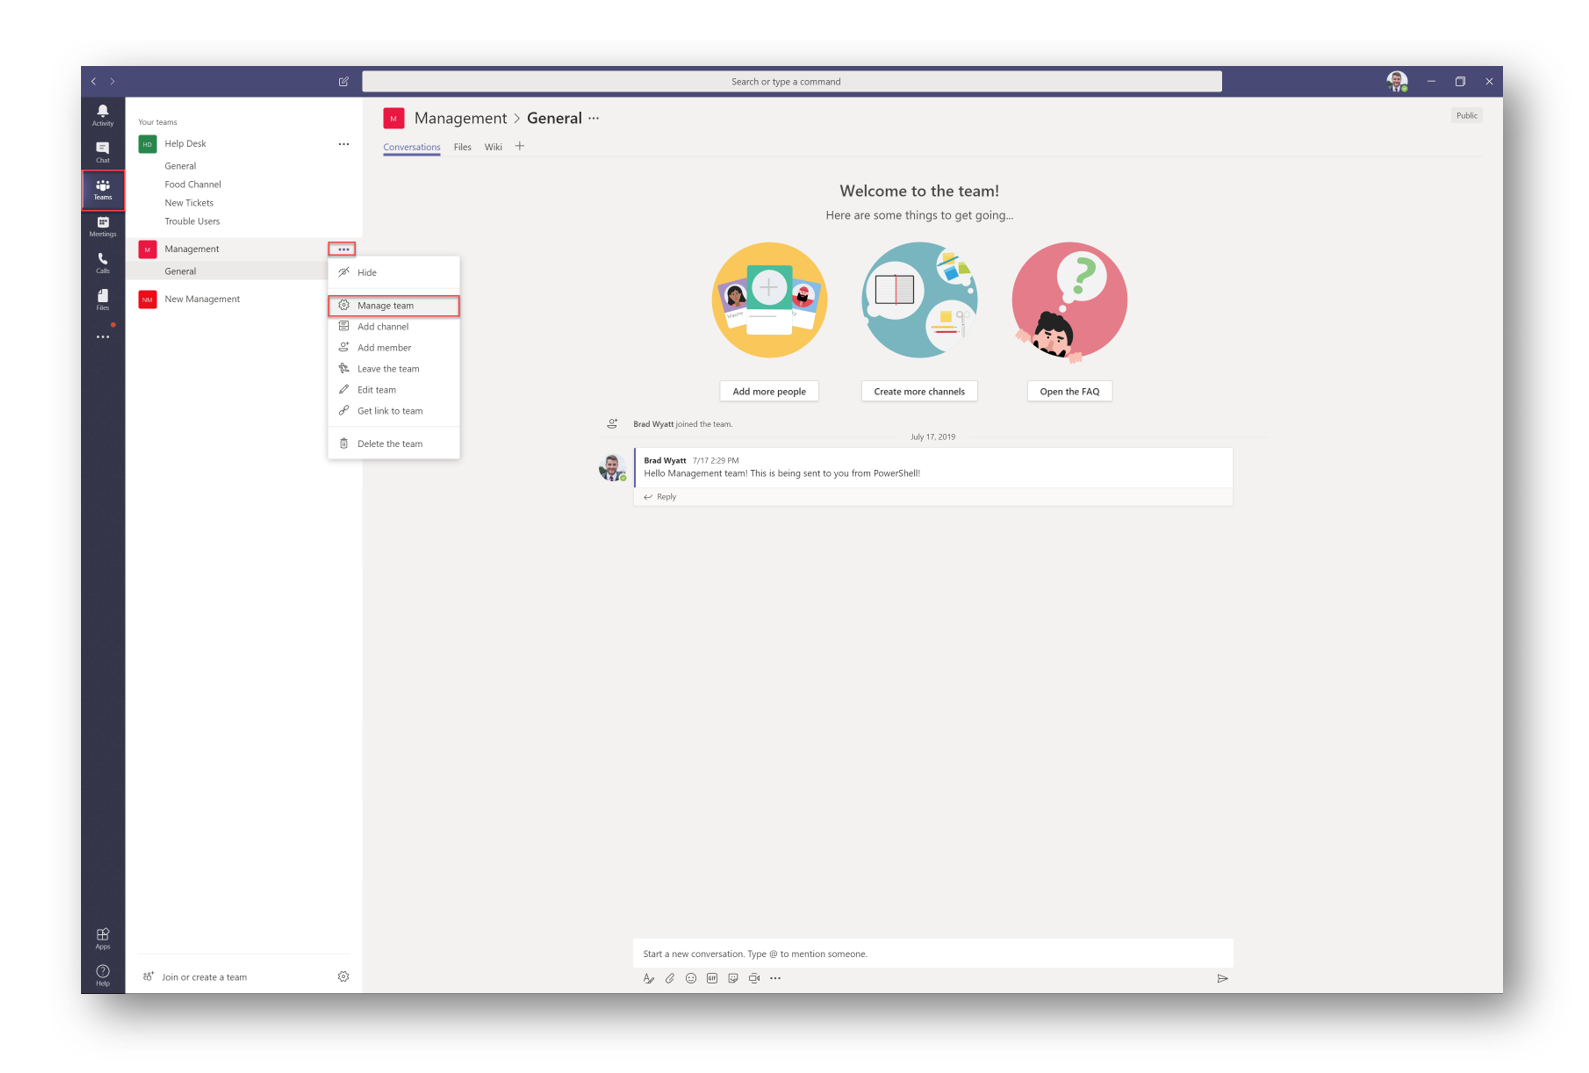
In Teams, go to any Team and click the ellipses (3 dots) and then select Manage Team.
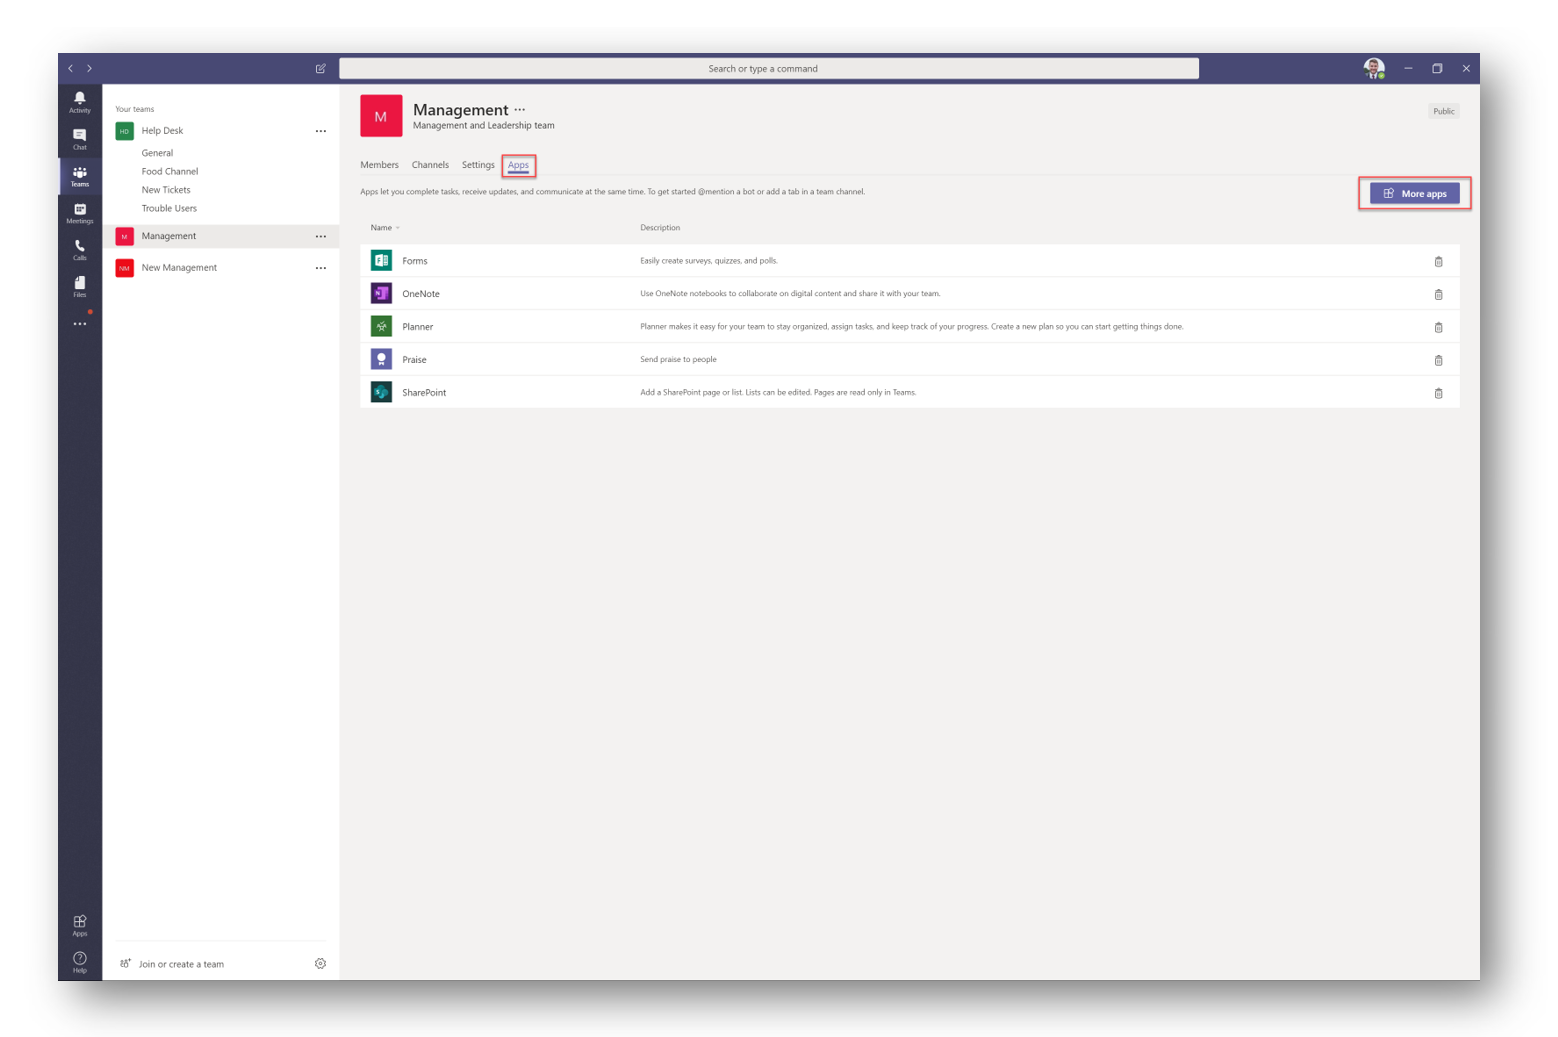
 Select the App tab and then select More Apps
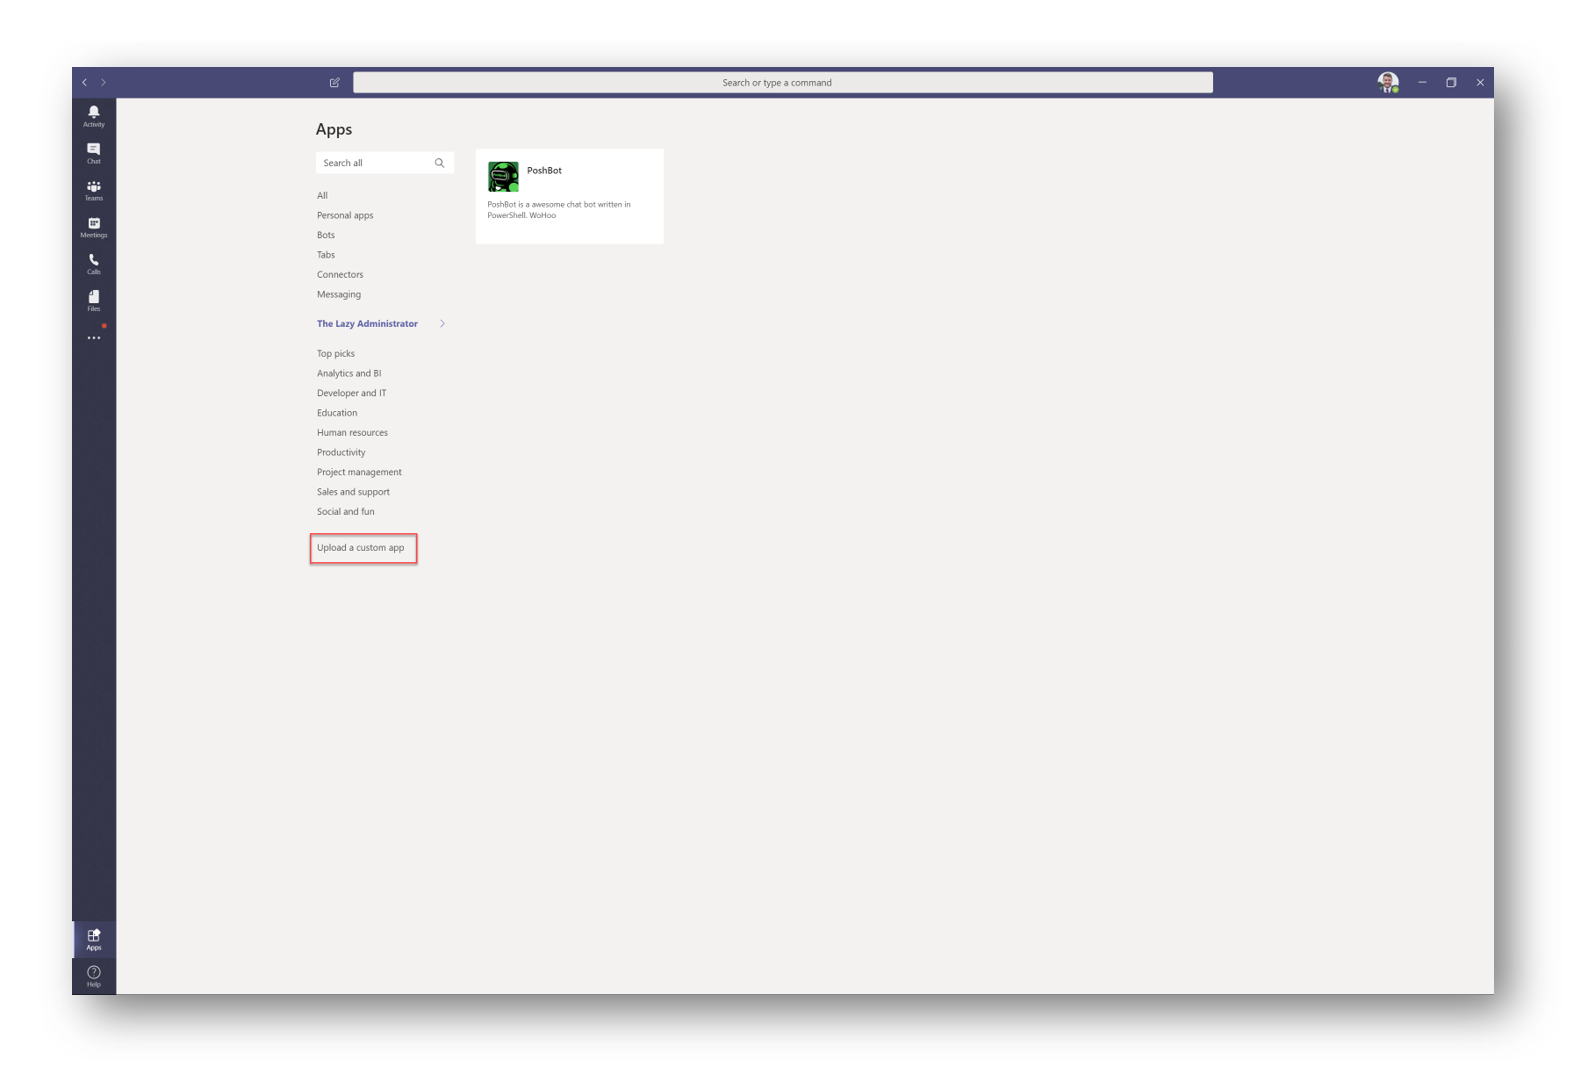
 Select Upload custom app and navigate to the zip file you have in your Downloads folder
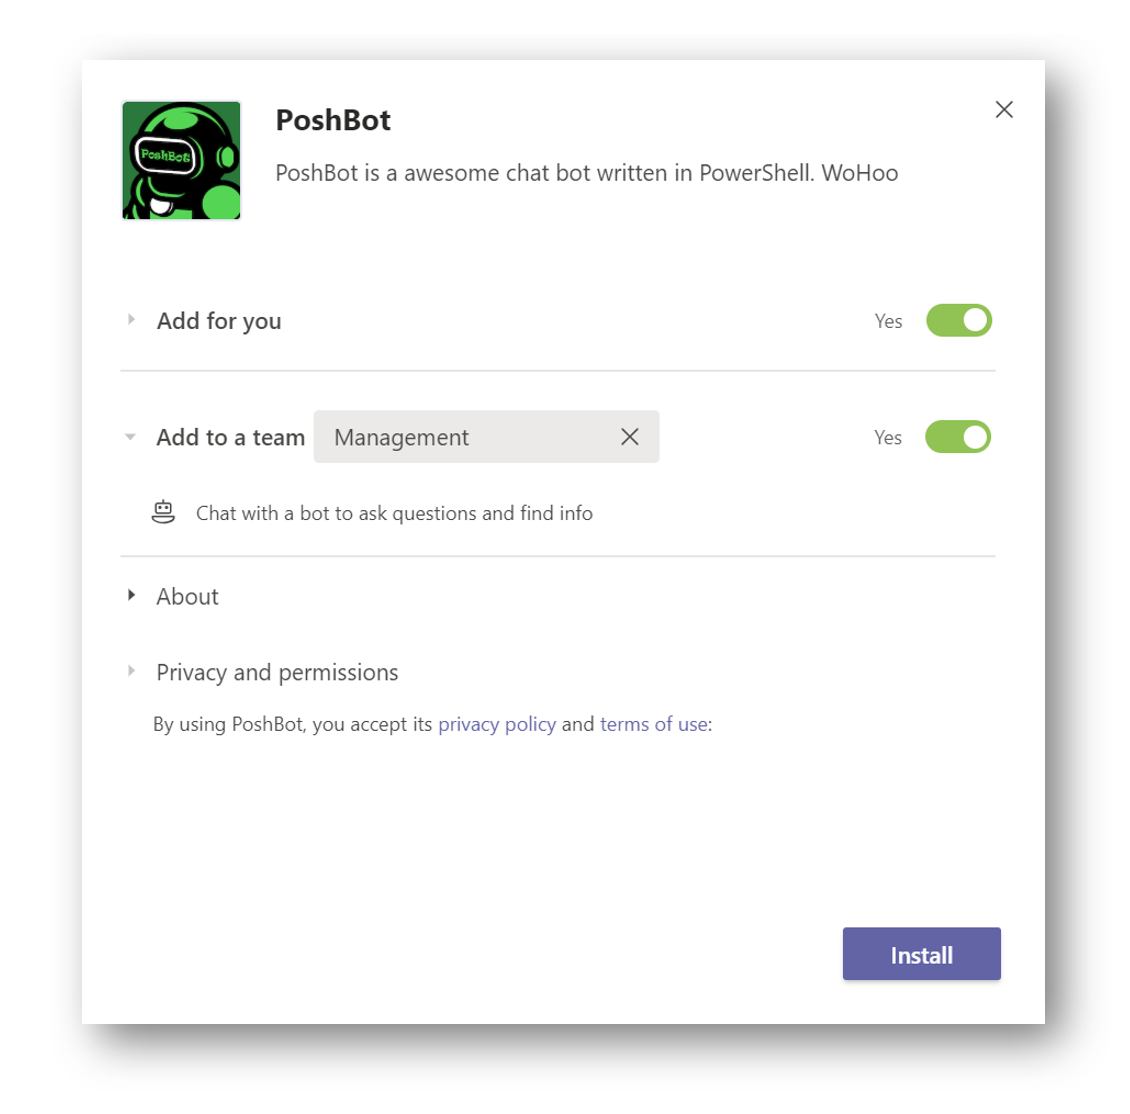
 Click the PoshBot app and select Install
Determine Your Teams ID
PoshBot needs to know your Teams ID so it can query it for the user roster. Without this, PoshBot cannot resolve User Principal Names to IDs and vice versa.
Go to your Teams again, select the elipses, and select Get link to Team
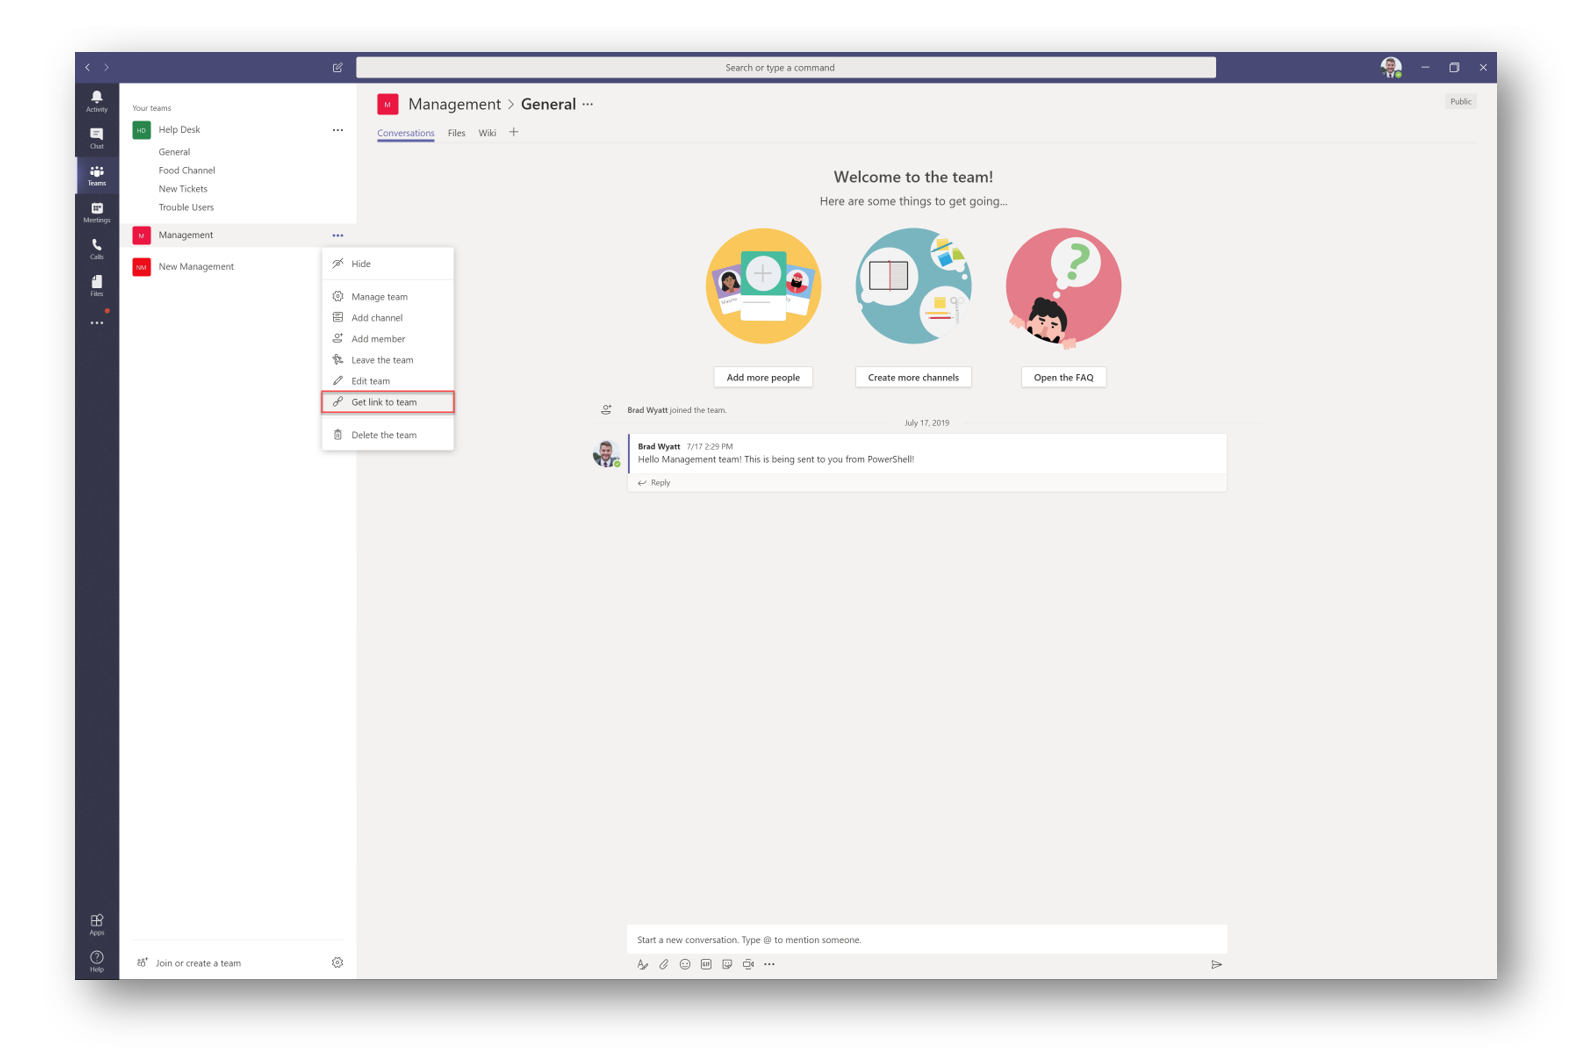
Copy the Team ID

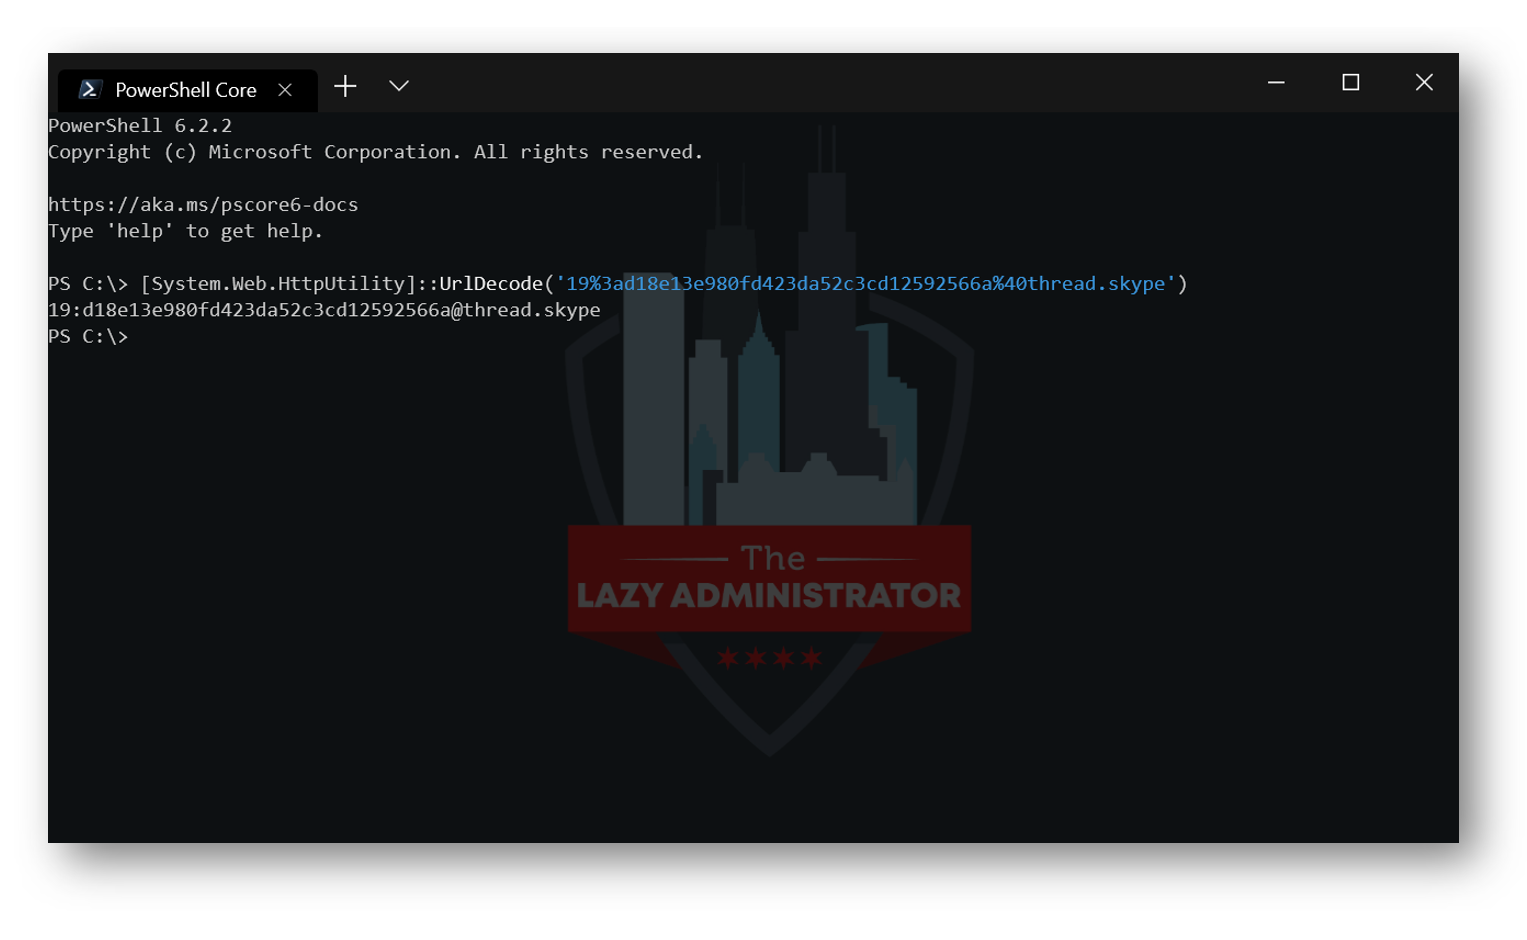
This ID is URL encoded so run the following PowerShell command to decode it and save the value somewhere you can reference later
[System.Web.HttpUtility]::UrlDecode('<YOUR-ENCODED-TEAMS-ID>')
 Create PoshBot Startup Script
The following example script shows how to create a new Teams back-end using the values created above.
Note that with the Teams back-end, Azure Active Directory User Principle Names are used when defining the list of bot admins.
pbc.BotAdmins: Enter the UPN of the Bot Admins
BotName: Enter the Bot Name
TeamID: Enter the Teams ID you got above
ServiceBusNameSpace: Enter the service bus NAME (not the entire URL)
AccessKey: Enter the SAS key we got way earlier
Credential (Bot App ID): Enter the bot GUID or App ID I noted in the “Install App Studio in Teams” section
Credential (Bot App Password): Enter the bot password I noted in the “Install App Studio in Teams” section
Base Script
Import-Module PoshBot
$pbc = New-PoshBotConfiguration
$pbc.BotAdmins = @('<AAD-USER-PRINCIPAL-NAME>')

$backendConfig = @{
    Name                = 'TeamsBackend'
    BotName             = '<BOT-NAME>'
    TeamId              = '<TEAMS-ID>'
    ServiceBusNamespace = '<SERVICE-BUS-NAMESPACE-NAME>'
    QueueName           = 'messages'
    AccessKeyName       = 'receive'
    AccessKey           = '<SAS-KEY>' | ConvertTo-SecureString -AsPlainText -Force
    Credential          = [pscredential]::new(
        '<BOT-APP-ID>',
        ('<BOT-APP-PASSWORD>' | ConvertTo-SecureString -AsPlainText -Force)
    )
}
$backend = New-PoshBotTeamsBackend -Configuration $backendConfig


$bot = New-PoshBotInstance -Configuration $pbc -Backend $backend
$bot | Start-PoshBot -Verbose
My Example (Trimmed some sensitive information)
Import-Module PoshBot
$pbc = New-PoshBotConfiguration
$pbc.BotAdmins = @('[email protected]')

$backendConfig = @{
    Name                = 'TeamsBackend'
    BotName             = 'PoshBot'
    TeamId              = '19:[email protected]'
    ServiceBusNamespace = 'LazyAdminPoshBot'
    QueueName           = 'messages'
    AccessKeyName       = 'receive'
    AccessKey           = 'iuPxa8tl6Pp+W0WILFlj1JbY=' | ConvertTo-SecureString -AsPlainText -Force
    Credential          = [pscredential]::new(
        '54cbdf99-eda3-4af5-9bba',
        ('Dk383sloLq-XZ]@Kl4zg' | ConvertTo-SecureString -AsPlainText -Force)
    )
}
$backend = New-PoshBotTeamsBackend -Configuration $backendConfig


$bot = New-PoshBotInstance -Configuration $pbc -Backend $backend
$bot | Start-PoshBot -Verbose
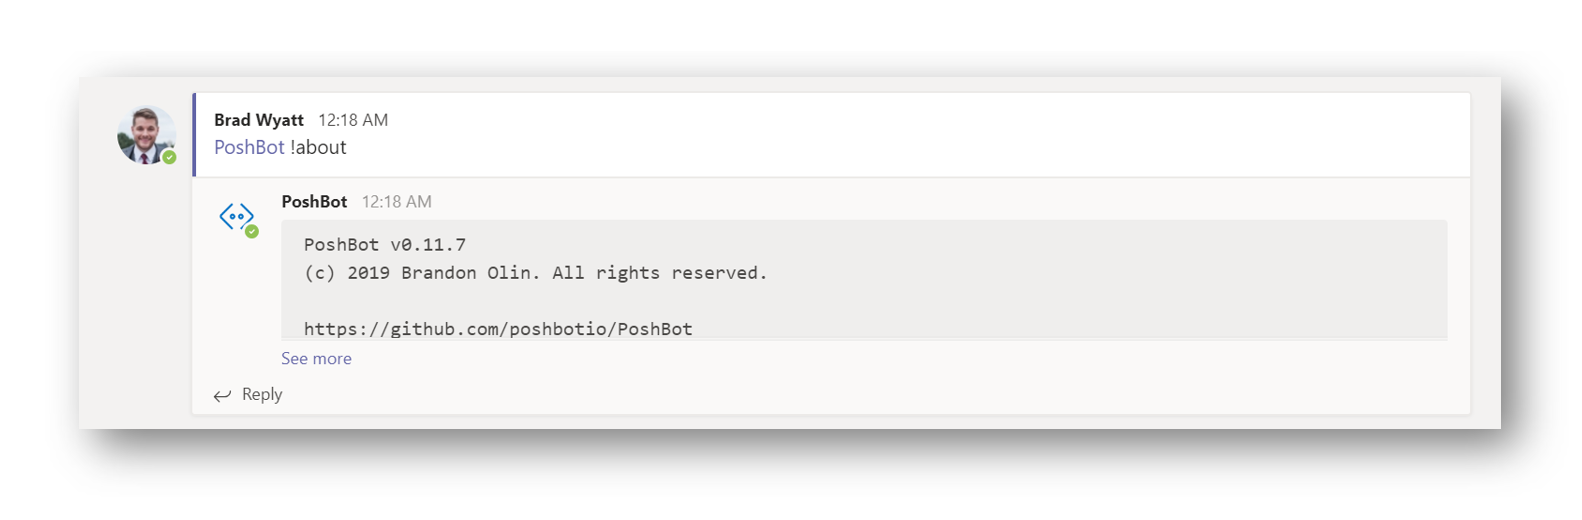
I loaded mine in ISE and it didn’t error and was still in a “running” state so I knew it was working. I would recommend setting this up as a scheduled task or service. I popped over to my Teams channel where I installed the bot and ran @PoshBot !about and was returned this:
 Sources
1. https://github.com/poshbotio/PoshBot

My name is Bradley Wyatt; I am a 6x Dual-Microsoft Most Valuable Professional (MVP) in Microsoft Azure and Microsoft 365. I have given talks at many different conferences, user groups, and companies throughout the United States, ranging from PowerShell to DevOps Security best practices, and I am the 2022 North American Outstanding Contribution to the Microsoft Community winner.
6 thoughts on “ChatOps: Setting up PoshBot for Microsoft Teams”
Excellent detail. Will try in dev soon.
I really love this guide and followed it to the tee. However, I did encounter a few issues and have some outstanding questions that I can’t find answered anywhere.
When attempting to start the bot using the startup script at the end, it fails with a 400 Bad Request, error authenticating to Microsoft Teams. I verified that my bot credentials and app id were correct by using CURL to verify the creds against the oauth URL. Those worked fine and gave me a token each time, so I know the creds were good. But it continued to fail and fail and fail. Until I read something in a bot framework document somewhere that said bots don’t work unless in your AAD application you are using the option “any organizational directory” — effectively making the bot multitenant. I had it set to just my organizational directory. Figuring why not, I changed it to multi-tenant and bam – everything works now. Was this the case in your testing?
Also, I can directly interact with the bot in Teams but it doesn’t work in the General channel at all. I checked the settings for the bot and it’s set to Personal and Team. But it continually throws errors “Could not resolve user (GUID)” , then Could not resolve channel (decoded [email protected]) whenever you try to @ the bot in the channel. Did you see this as well?
I know you fixed this but if anyone else comes across this issue he has posted the fix 🙂 https://blog.darrenjrobinson.com/chatops-for-microsoft-identity-manager/
Yes, and I also discovered what the issue was where my bot could talk in DM but not in the channel. The name of the bot package that you upload when you add the bot to Teams (as configured in the App Studio) *MUST* match the name of the bot across all spots where it is named. That means no caps variations. In my particular instance, I had registered the bot on the backend as ‘org-botname’ but I had uploaded the bot as ‘ORG-botname’ to Teams. When I addressed the bot in Teams on the desktop client, it would do the @ completion as @ORG-Botname and the message would log a failure. On a mobile client, however, when I addressed the bot, it would @ complete as @org-botname and things worked as expected. Super lucky to discover that this was the case, and I didn’t see it documented anywhere. Might want to call this out in your guide!
Hey this is a great article. I struggle following directions from PoshBot documentation. Yours is much more in detail/up to date. I have now my bot up and running thanks to you. Great job!
Great article. Have you figured on how to format a message as a table output in MS Team? I tried New-PoshbotCardResponse but it did not display the msg as a table.