Configure Windows 10 Accent Color with Intune and PowerShell
Table of Contents
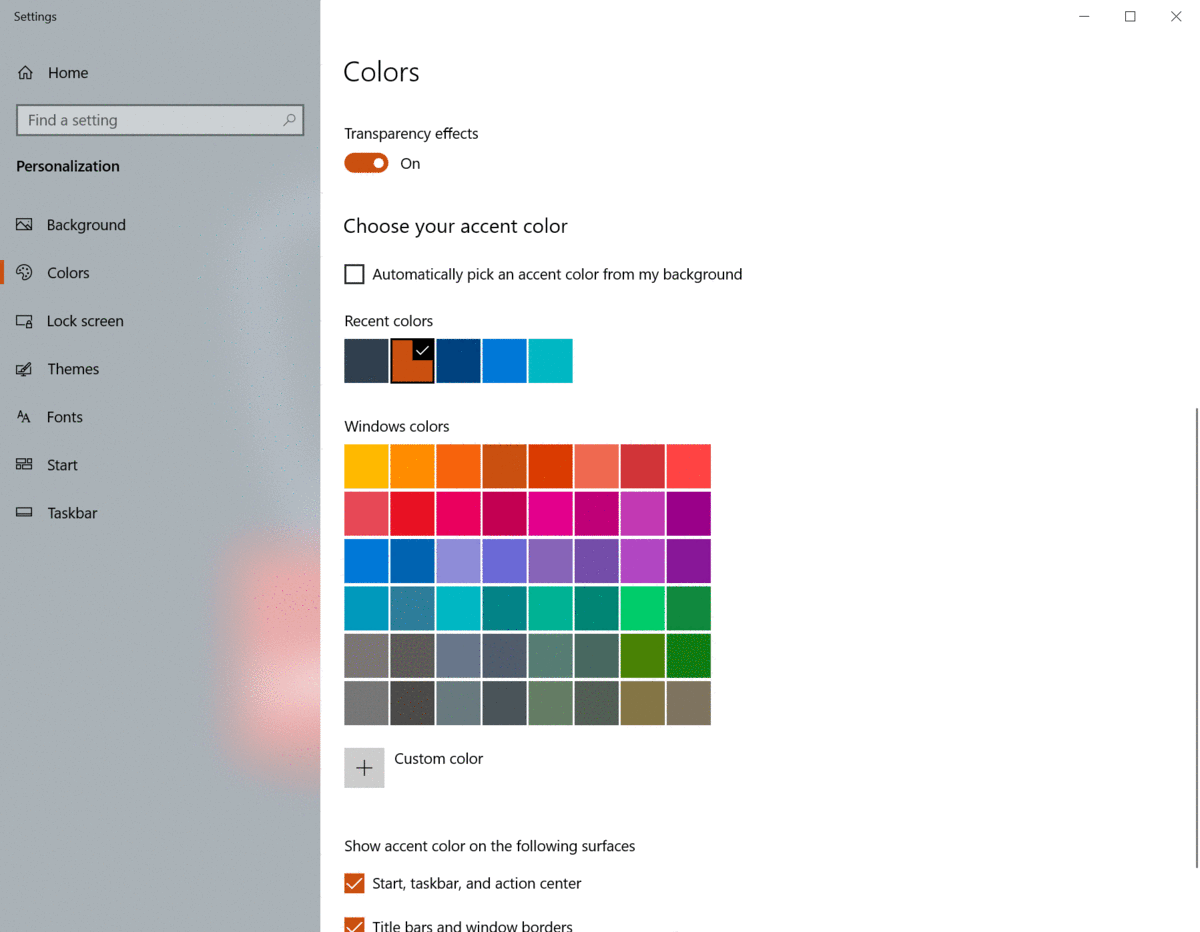
My last two articles showed you how you can set a computers desktop wallpaper and lock screen wallpaper without having Enterprise or Education by using a PowerShell script and Intune. Now I wanted to figure out how to configure the Windows accent color to also match my corporate branding.
Get Color Values
The first thing we need to do is to get the proper registry values for the color we want to use. For this I just set my local computer’s accent color to the color I wanted to apply to my target machines. You only need to do this one time, once you set the color you want and copy the keys you will not have to do it again.
Once you set the proper color, you will want to navigate to the following registry path: HKCU:\Software\Microsoft\Windows\CurrentVersion\Explorer\Accent
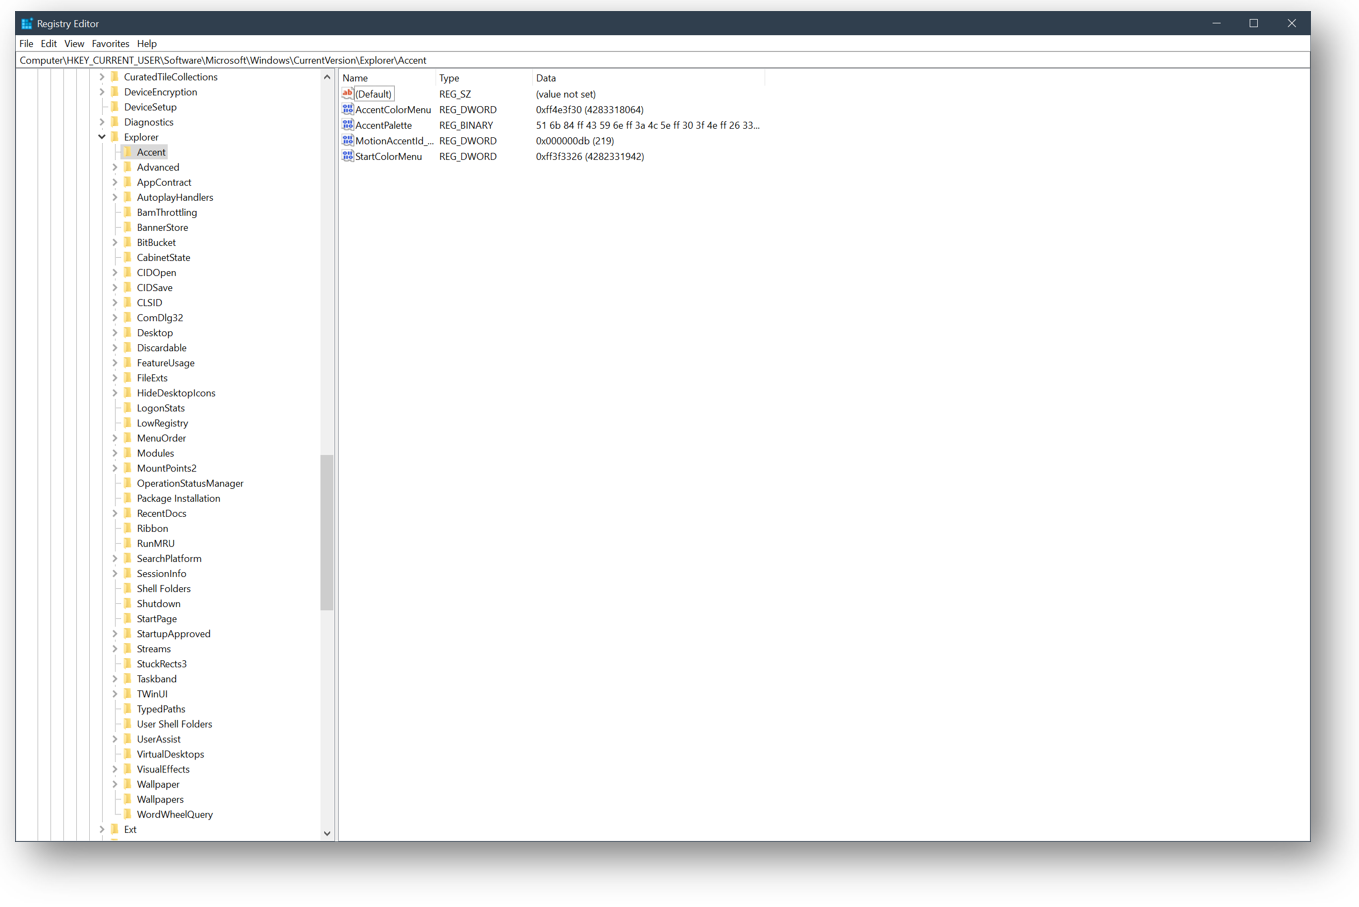
- The fist key we want to look at is the AccentColorMenu key. In my case the value is 0xff4e3f30.
- The next key is the AccentPalette key, the value I have is 51,6b,84,ff,43,59,6e,ff,3a,4c,5e,ff,30,3f,4e,ff,26,33,3f,ff,1d,26,2f,ff,0f,14,19,ff,88,17,98,00.
NOTE: Notice that in the Registry Editor I do not see commas in-between the values, this is exampled in further detail below but you will need to add commas in-between each number pair - The third key is the MotionAccentId_v1.00 key which 99.99% of the time will have the value of, 0x000000db.
- Lastly, the StartColorMenu key which will configure the color of the start menu, has a value of 0xff3f3326.
Configure PowerShell Script
Copy the script below as it has everything you need already. The only thing we need to change is the key values that we got above. By using PowerShell Hash Tables, I can store the key configuration, including the type (DWORD, BINARY), name, and value. Using the key values we got above, change the Value only for each key. You do not need to change the Type, or Key as it will always be the same.
$RegPath = "HKCU:\Software\Microsoft\Windows\CurrentVersion\Explorer\Accent"


#Accent Color Menu Key
$AccentColorMenuKey = @{
	Key   = 'AccentColorMenu';
	Type  = "DWORD";
	Value = '0xff4e3f30'
}

If ($Null -eq (Get-ItemProperty -Path $RegPath -Name $AccentColorMenuKey.Key -ErrorAction SilentlyContinue))
{
	New-ItemProperty -Path $RegPath -Name $AccentColorMenuKey.Key -Value $AccentColorMenuKey.Value -PropertyType $AccentColorMenuKey.Type -Force
}
Else
{
	Set-ItemProperty -Path $RegPath -Name $AccentColorMenuKey.Key -Value $AccentColorMenuKey.Value -Force
}


#Accent Palette Key
$AccentPaletteKey = @{
	Key   = 'AccentPalette';
	Type  = "BINARY";
	Value = '51,6b,84,ff,43,59,6e,ff,3a,4c,5e,ff,30,3f,4e,ff,26,33,3f,ff,1d,26,2f,ff,0f,14,19,ff,88,17,98,00'
}
$hexified = $AccentPaletteKey.Value.Split(',') | ForEach-Object { "0x$_" }

If ($Null -eq (Get-ItemProperty -Path $RegPath -Name $AccentPaletteKey.Key -ErrorAction SilentlyContinue))
{
	New-ItemProperty -Path $RegPath -Name $AccentPaletteKey.Key -PropertyType Binary -Value ([byte[]]$hexified)
}
Else
{
	Set-ItemProperty -Path $RegPath -Name $AccentPaletteKey.Key -Value ([byte[]]$hexified) -Force
}


#MotionAccentId_v1.00 Key
$MotionAccentIdKey = @{
	Key   = 'MotionAccentId_v1.00';
	Type  = "DWORD";
	Value = '0x000000db'
}

If ($Null -eq (Get-ItemProperty -Path $RegPath -Name $MotionAccentIdKey.Key -ErrorAction SilentlyContinue))
{
	New-ItemProperty -Path $RegPath -Name $MotionAccentIdKey.Key -Value $MotionAccentIdKey.Value -PropertyType $MotionAccentIdKey.Type -Force
}
Else
{
	Set-ItemProperty -Path $RegPath -Name $MotionAccentIdKey.Key -Value $MotionAccentIdKey.Value -Force
}


#Start Color Menu Key
$StartMenuKey = @{
	Key   = 'StartColorMenu';
	Type  = "DWORD";
	Value = '0xff3f3326'
}

If ($Null -eq (Get-ItemProperty -Path $RegPath -Name $StartMenuKey.Key -ErrorAction SilentlyContinue))
{
	New-ItemProperty -Path $RegPath -Name $StartMenuKey.Key -Value $StartMenuKey.Value -PropertyType $StartMenuKey.Type -Force
}
Else
{
	Set-ItemProperty -Path $RegPath -Name $StartMenuKey.Key -Value $StartMenuKey.Value -Force
}


Stop-Process -ProcessName explorer -Force -ErrorAction SilentlyContinue
You may have noticed that for the AccentPaletteKey or $AccentPaletteKey, the value (or $AccentPaletteKey.Value) gets changed. This is because the current value that we see in the Registry Editor is not formatted correctly, we need to take each number pair and make it a proper hex value by adding “0x” before the number. So 51 would be 0x51, and so forth. There is nothing more you need to do as the PowerShell script will automatically convert each pair to the proper hex value for you.
If you wanted to verify the key values are correct, change your Windows accent color to another color and then run your PowerShell script locally.
The Explorer.exe process is restarted at the end because without it, the Start Menu color does not get applied.
The PowerShell script will also check the existence of the keys, if they do not exist it will automatically create the key and set it to the right value for you automatically.
Once you have your PowerShell script working and with the color values you want, save it locally. The next step is to configure a Configuration Policy and upload the script into Intune.
Set The Policy and Apply to Computers
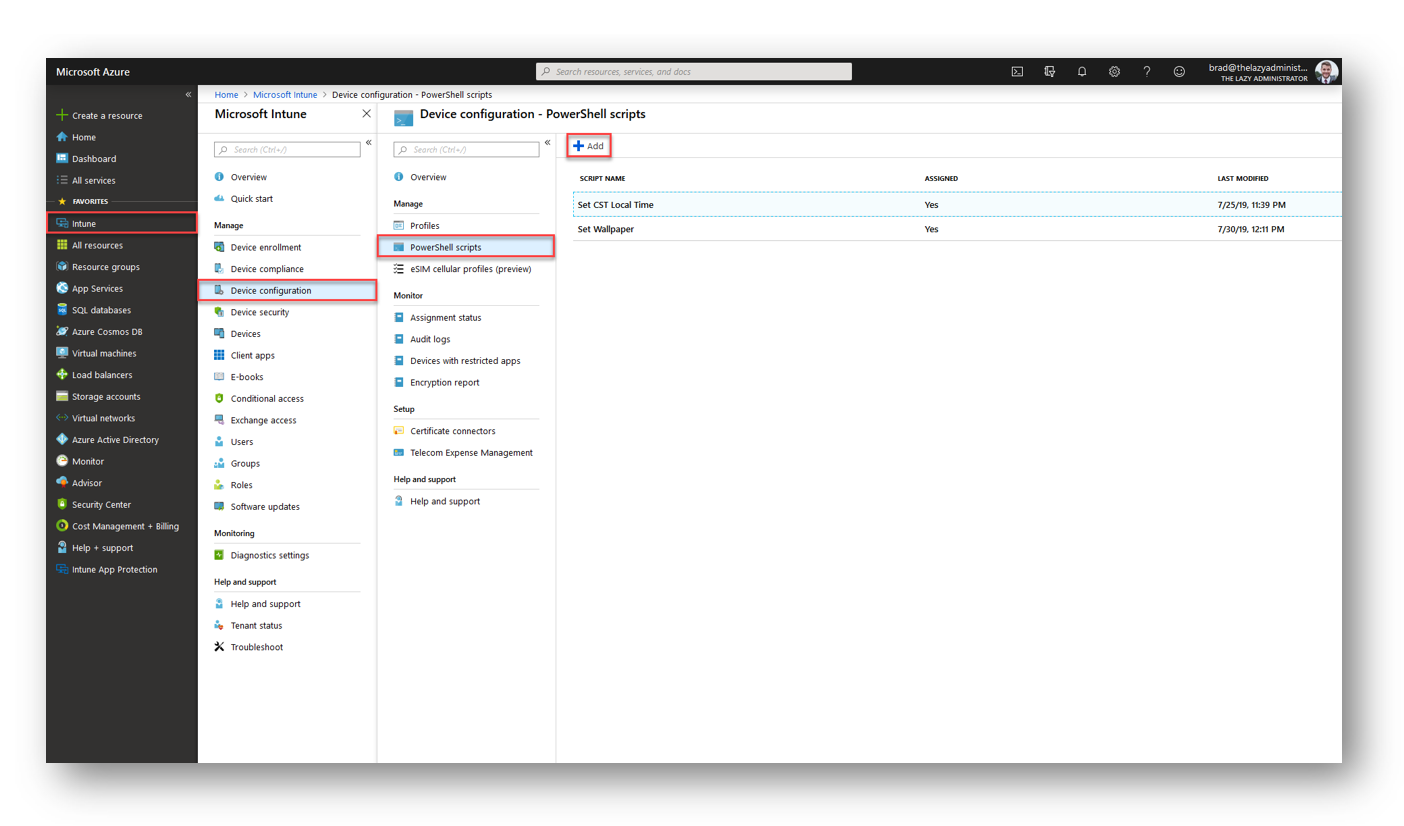
The final step is to configure an Intune Configuration Policy and apply it to our end user machines.
In the Azure Portal, navigate to Intune > Device Configuration > PowerShell scripts and press “+ Add” to add a new PowerShell configuration script
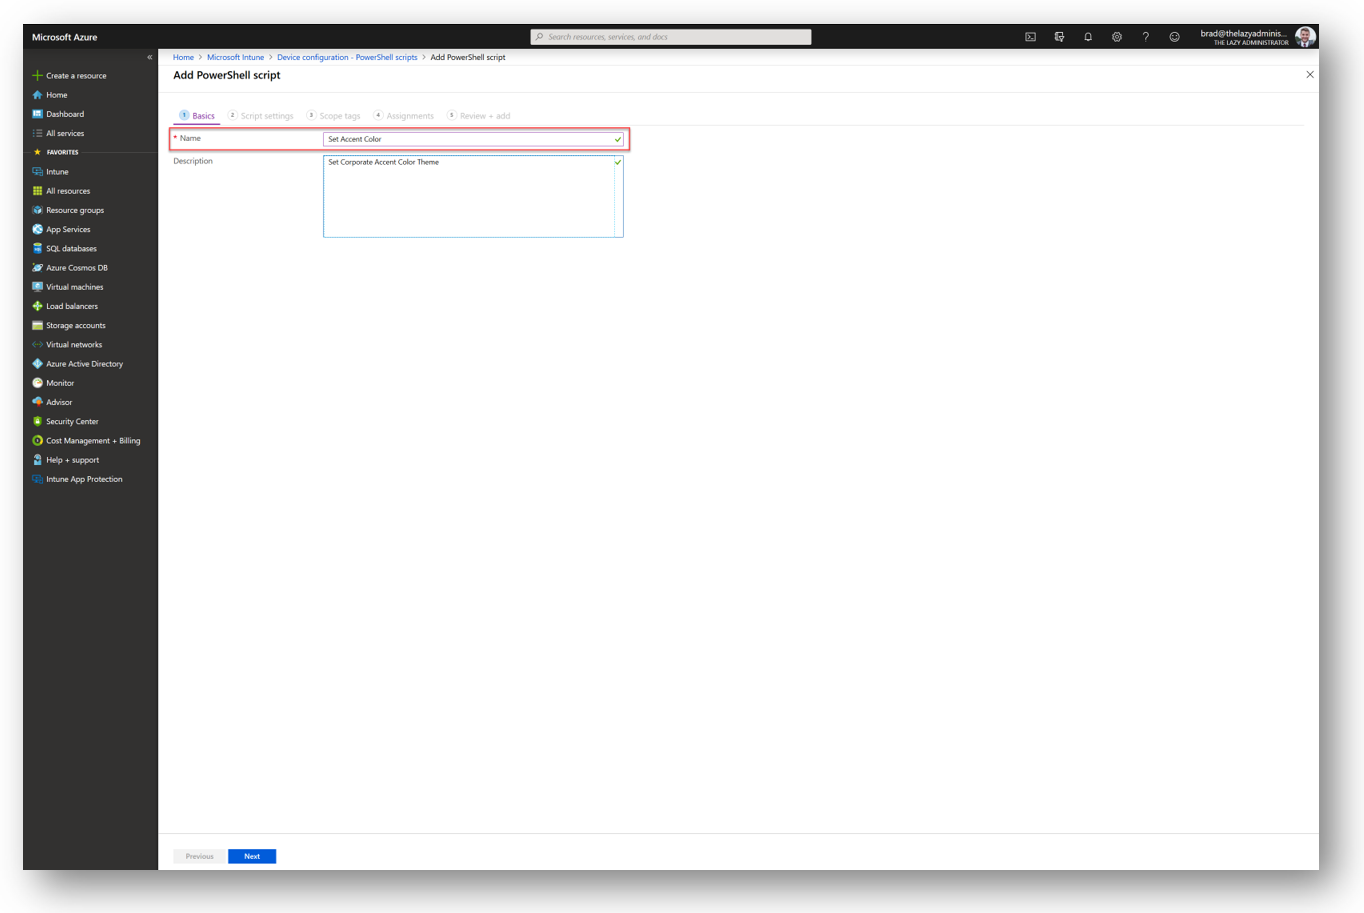
 In the Basics section, give your policy a valid Name and Description and then press Next
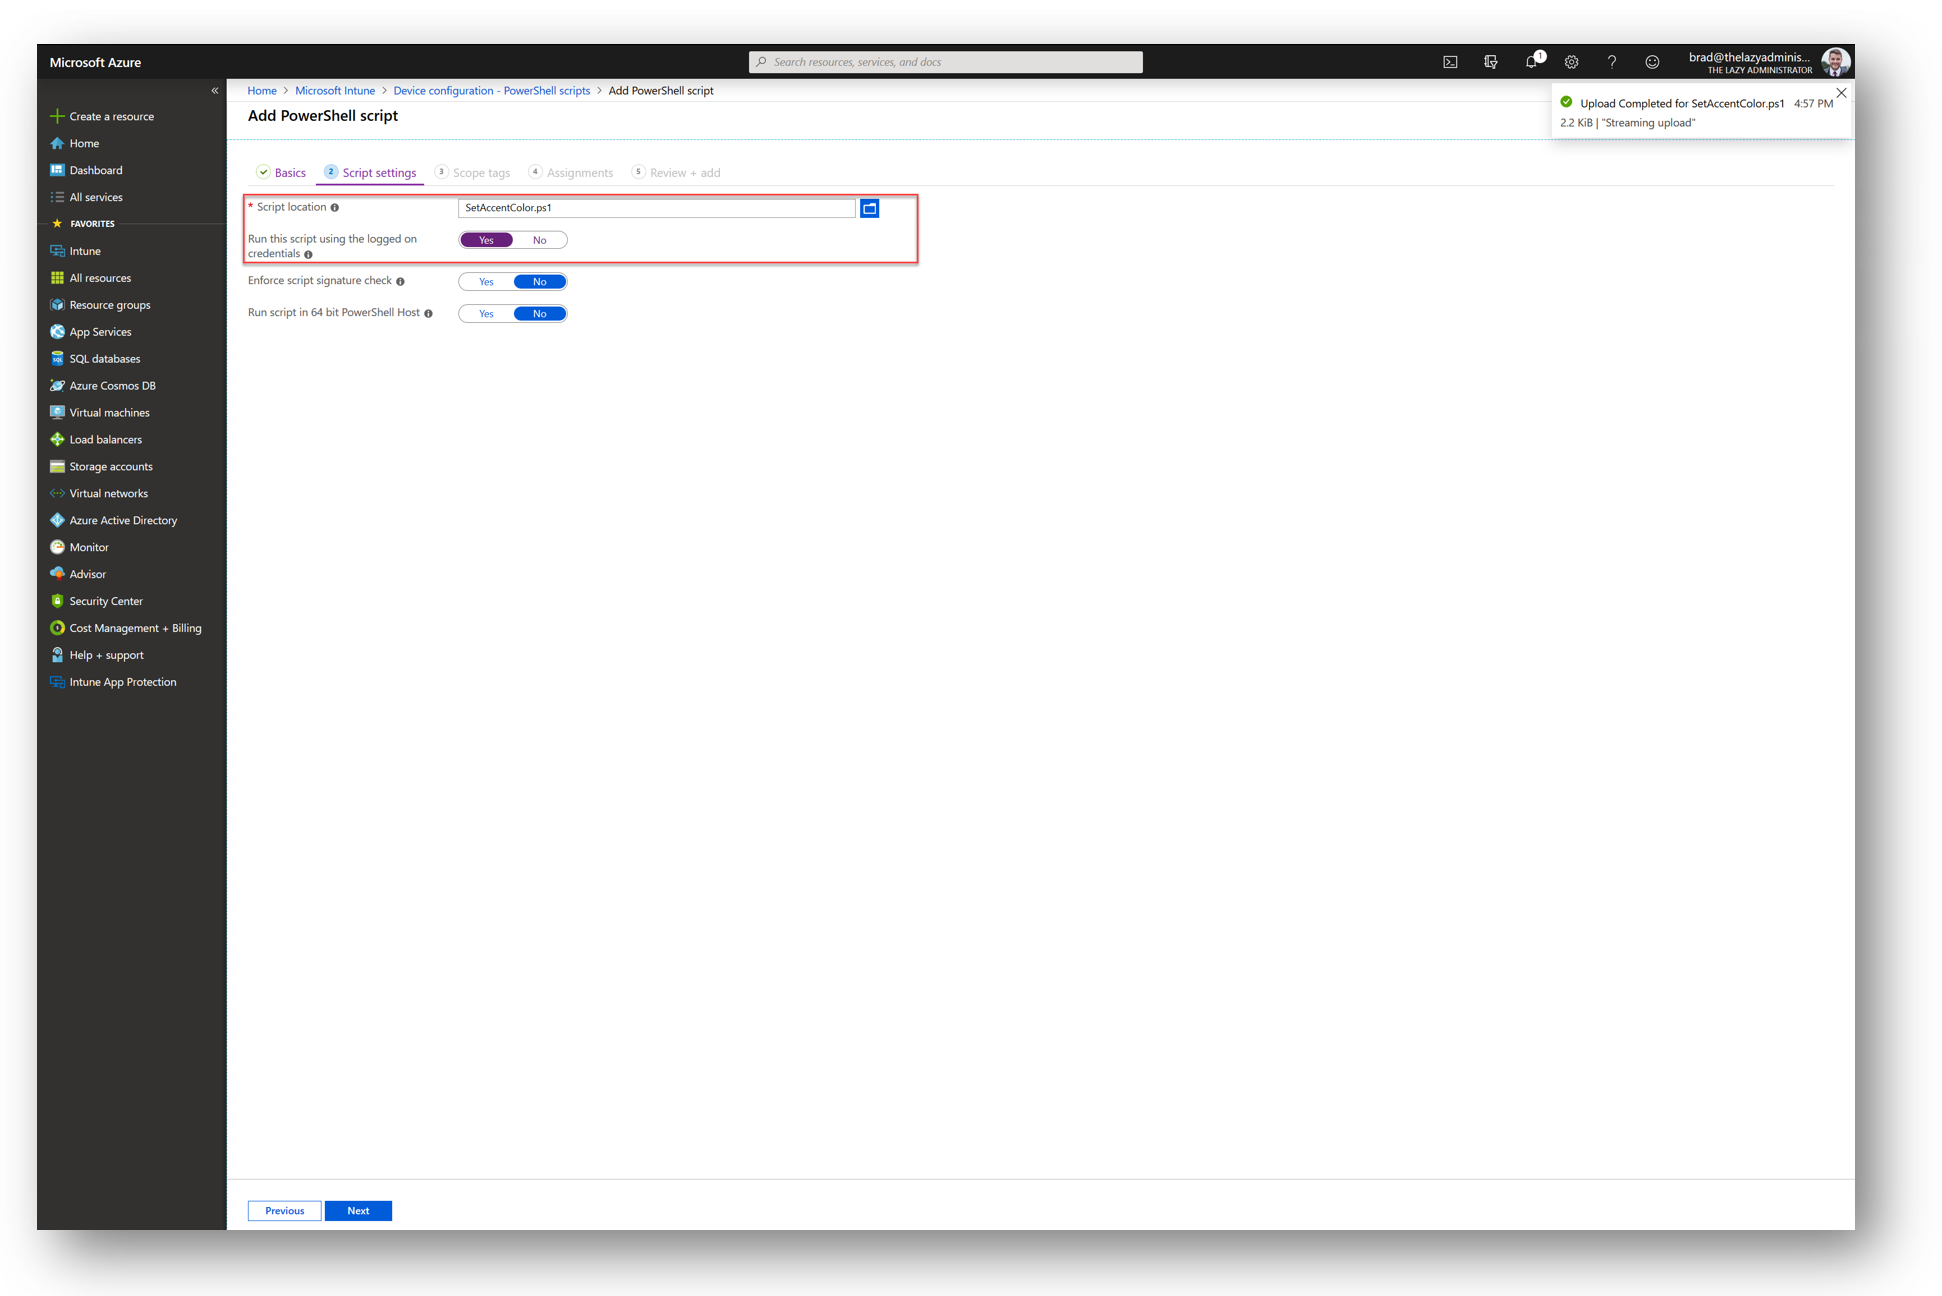
In the Script Settings section, specify the PowerShell script file we created and saved up above.
NOTE: Make sure to enable running the script using the logged on user credentials as this will be modifying the users HKCU registry hive.
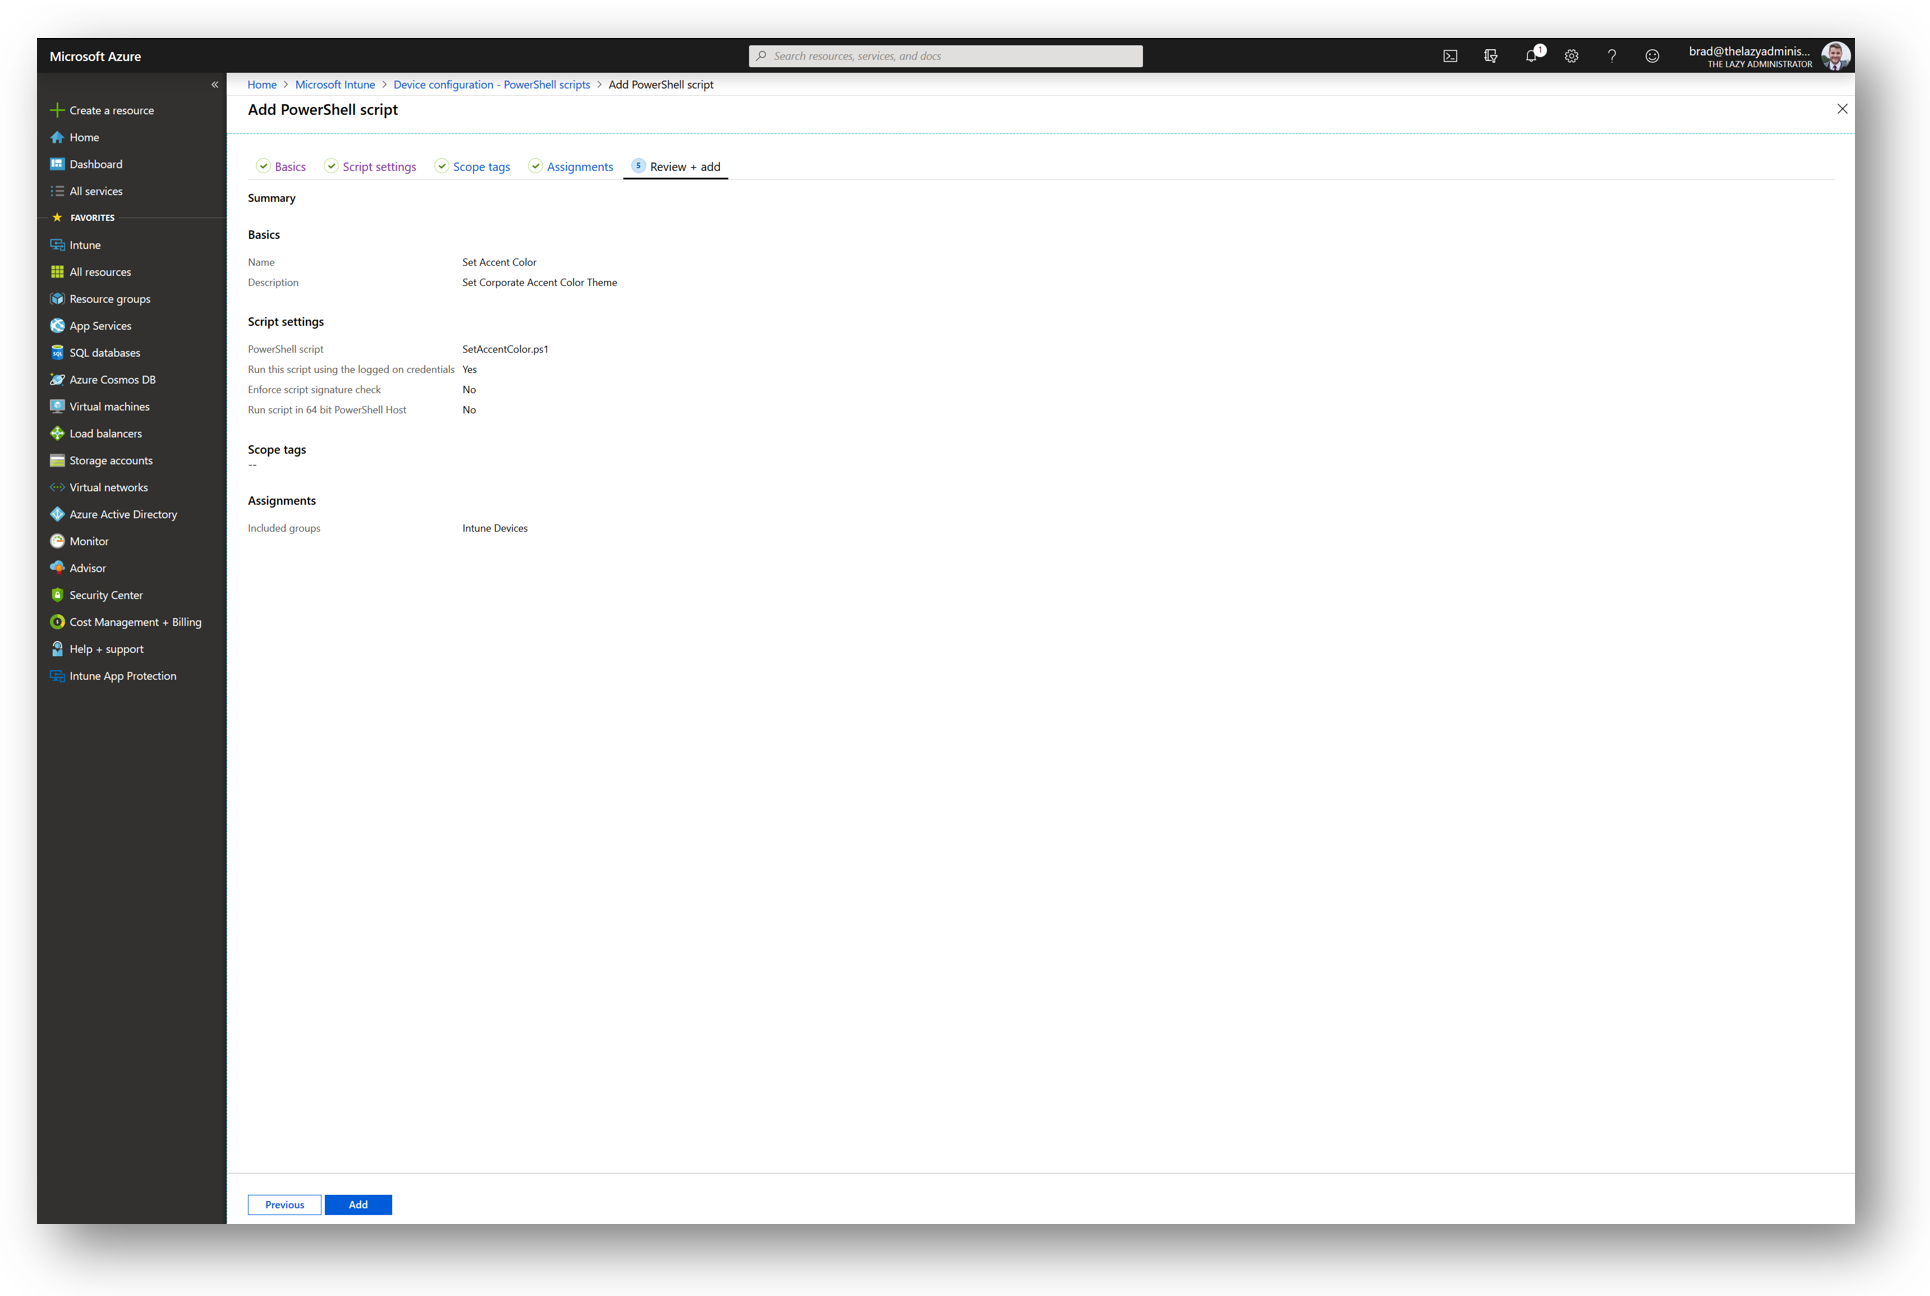
In the Scope Tags section, configure any scope tags for the policy. I do not have any scope tags so I will press Next
In the Assignments section, I will assign this policy to my “Intune Devices” group. You can apply this to any group you prefer. Once you have assigned the policy to the correct group(s) press Next

Finally, in the Review + Add section, review your new configuration policy. If it is set up to your enterprises needs, press Add.
On my target machine I can see that the policy applied as my accent color is the dark blue/grey that I configured

My name is Bradley Wyatt; I am a 6x Dual-Microsoft Most Valuable Professional (MVP) in Microsoft Azure and Microsoft 365. I have given talks at many different conferences, user groups, and companies throughout the United States, ranging from PowerShell to DevOps Security best practices, and I am the 2022 North American Outstanding Contribution to the Microsoft Community winner.