Documentation as Code: Using YAML, GitHub Actions, and Azure to Power a Living Catalog
Table of Contents
Objective
More and more companies are moving into the world of DevOps and automation. As this grows, you begin to face a scaling problem. You now have dozens of automations interacting with different systems, each using its own API keys or managed identities. With so many moving pieces, you need a way to keep track of everything. After spending time looking through different products to help with this problem, I realized that we could lean into automation itself to help with a solution. When creating the product I kept several goals in mind:
- Be able to manage, update and deploy using Git. Leveraging CI/CD to update the front end for me.
- Automation project structure should be simple, I don’t want engineers or managers spending a lot of time adding or editing projects.
- The site should be easily customizable to fit different needs.
- Ability to track time saved and cost saved
- Filter automations by customer, tags, products, engineers, statuses, etc.
- Track expiring secrets and keys.
- Lock the site behind SSO if enabled
Feel free to browse the example site here! 👉 example site
Getting Started
GitHub
Fork the Repo
The first thing you will want to do is to fork the repository. The repository contains all the code you will need to get your site up and running, add automation projects, engineers, tags and more. You can review the entire repository here.
Clone the Repo
Next, we need to clone it. Cloning it will allow us to modify it and deploy our changes. To clone it, run the following git command:
git clone [THE URL OF YOUR CLONED REPO]Azure
Create Static Web App
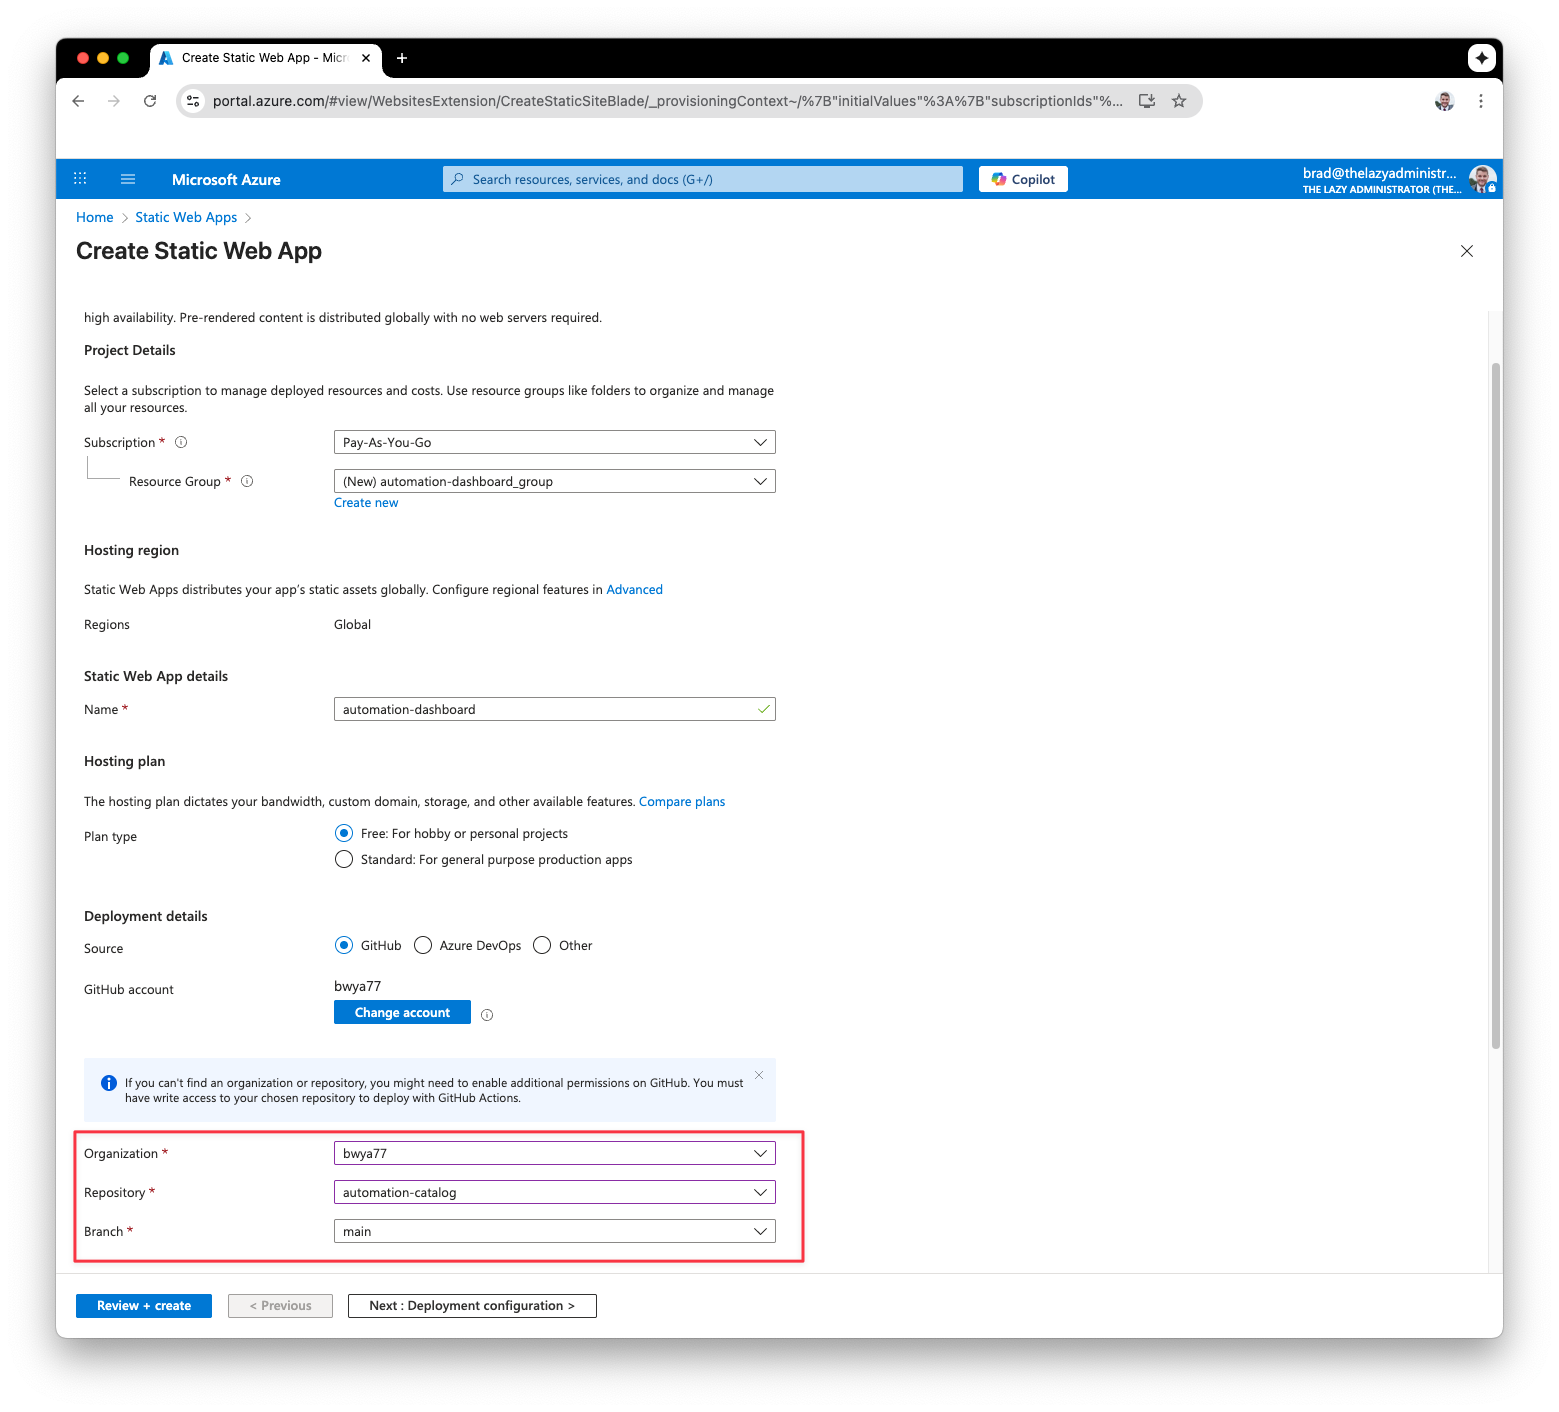
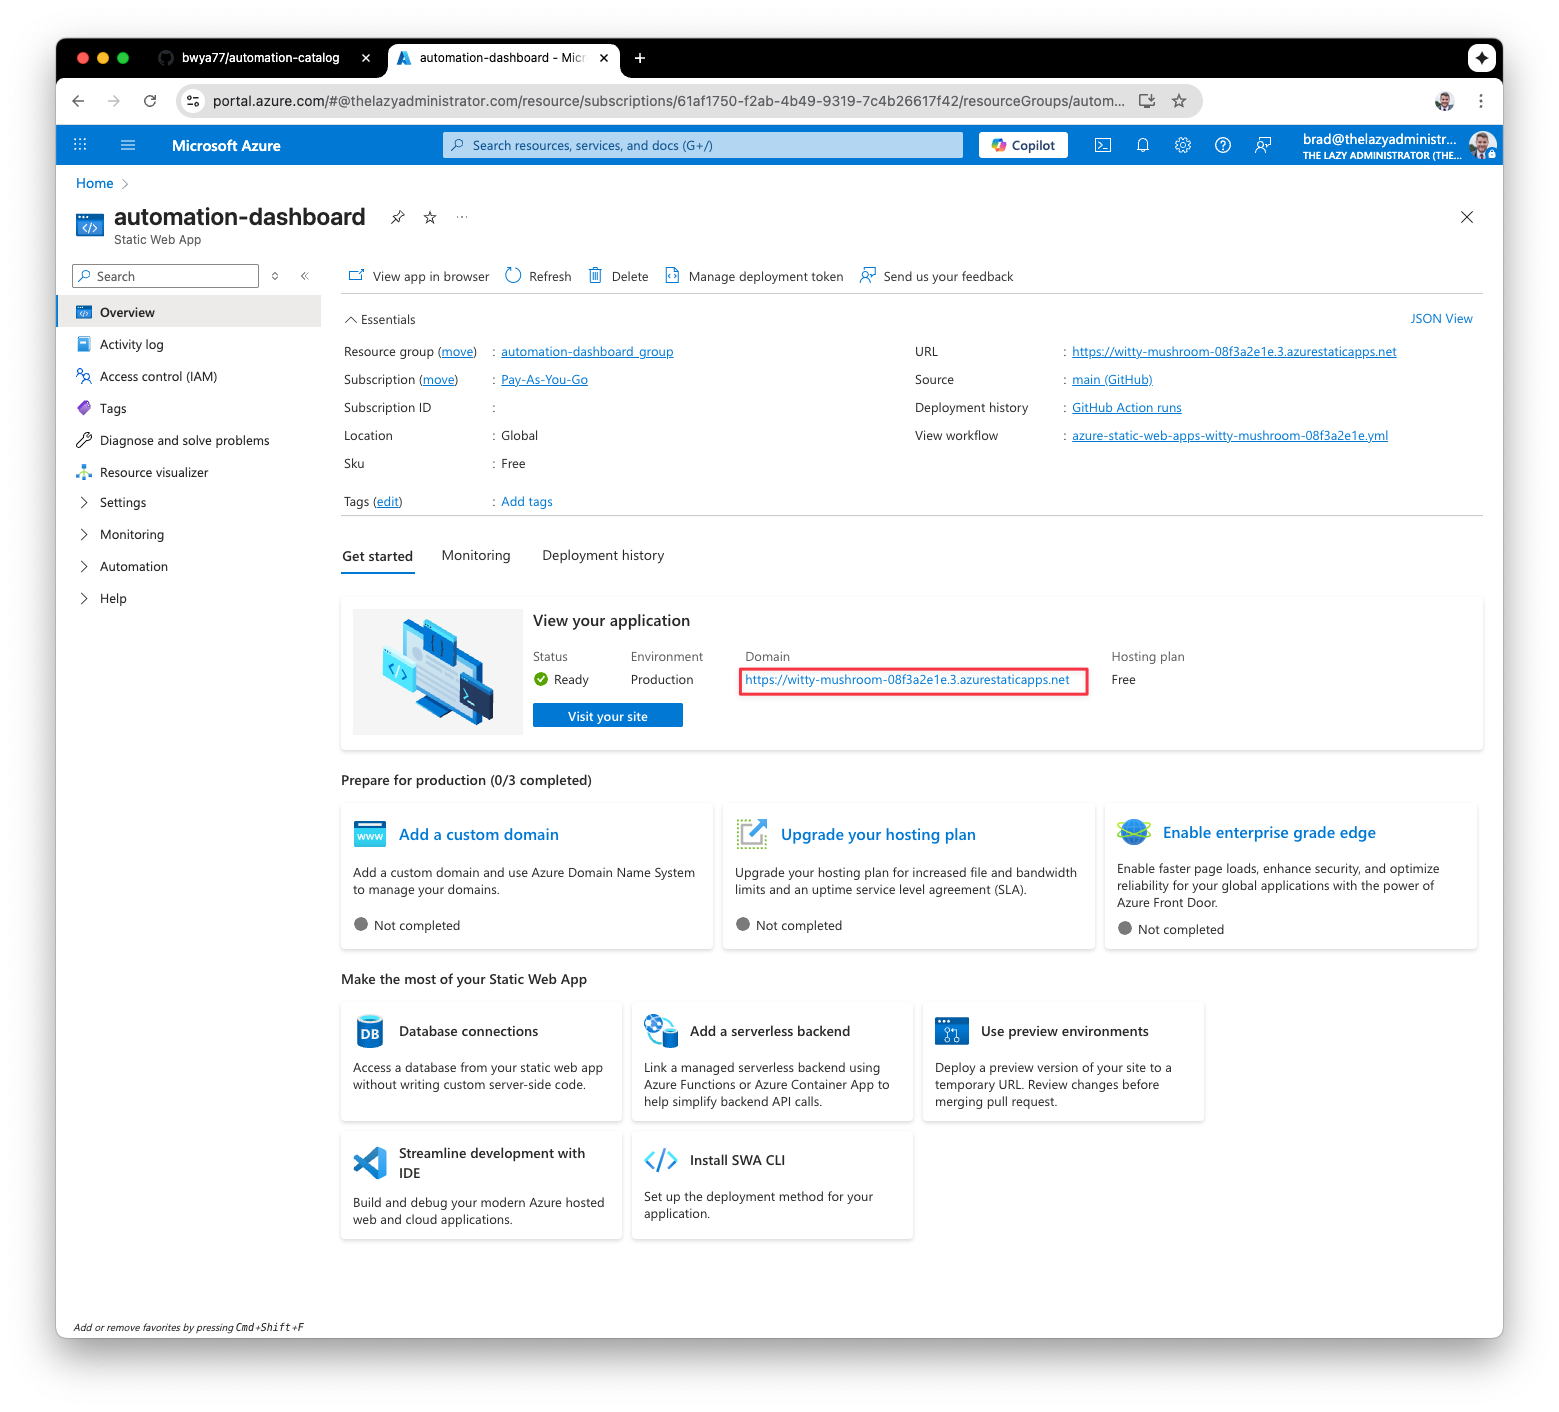
In the Azure Portal, create a new Azure Web App. Select or create a new Resource Group, give your static web app a valid Name, and for the source authenticate to your GitHub account and point it to your cloned repository. When finished, click Review + Create.
Add Deployment Token Env Variable
Next, go to your newly created Static Web App resource and at the top click, “Manage deployment token”
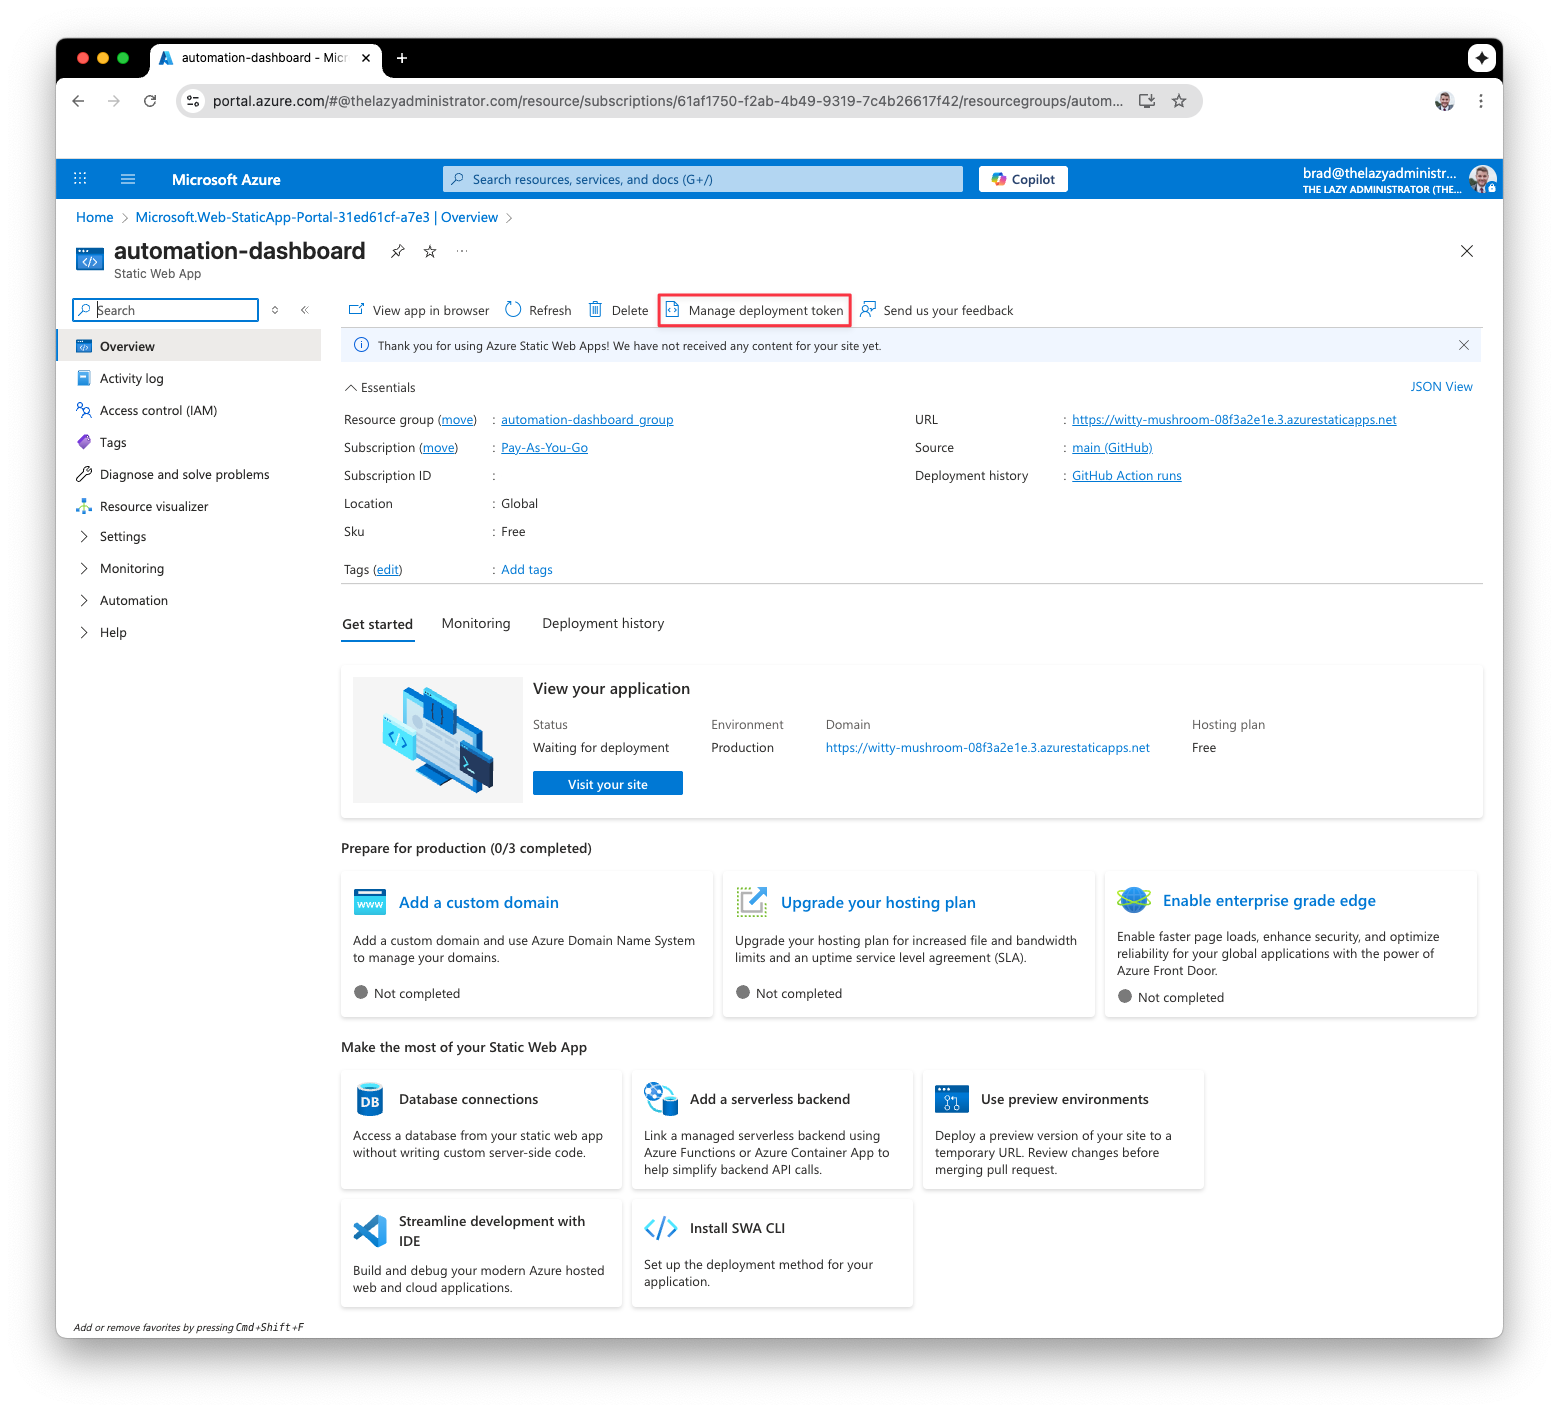
Copy your deployment token

Modify and Deploy
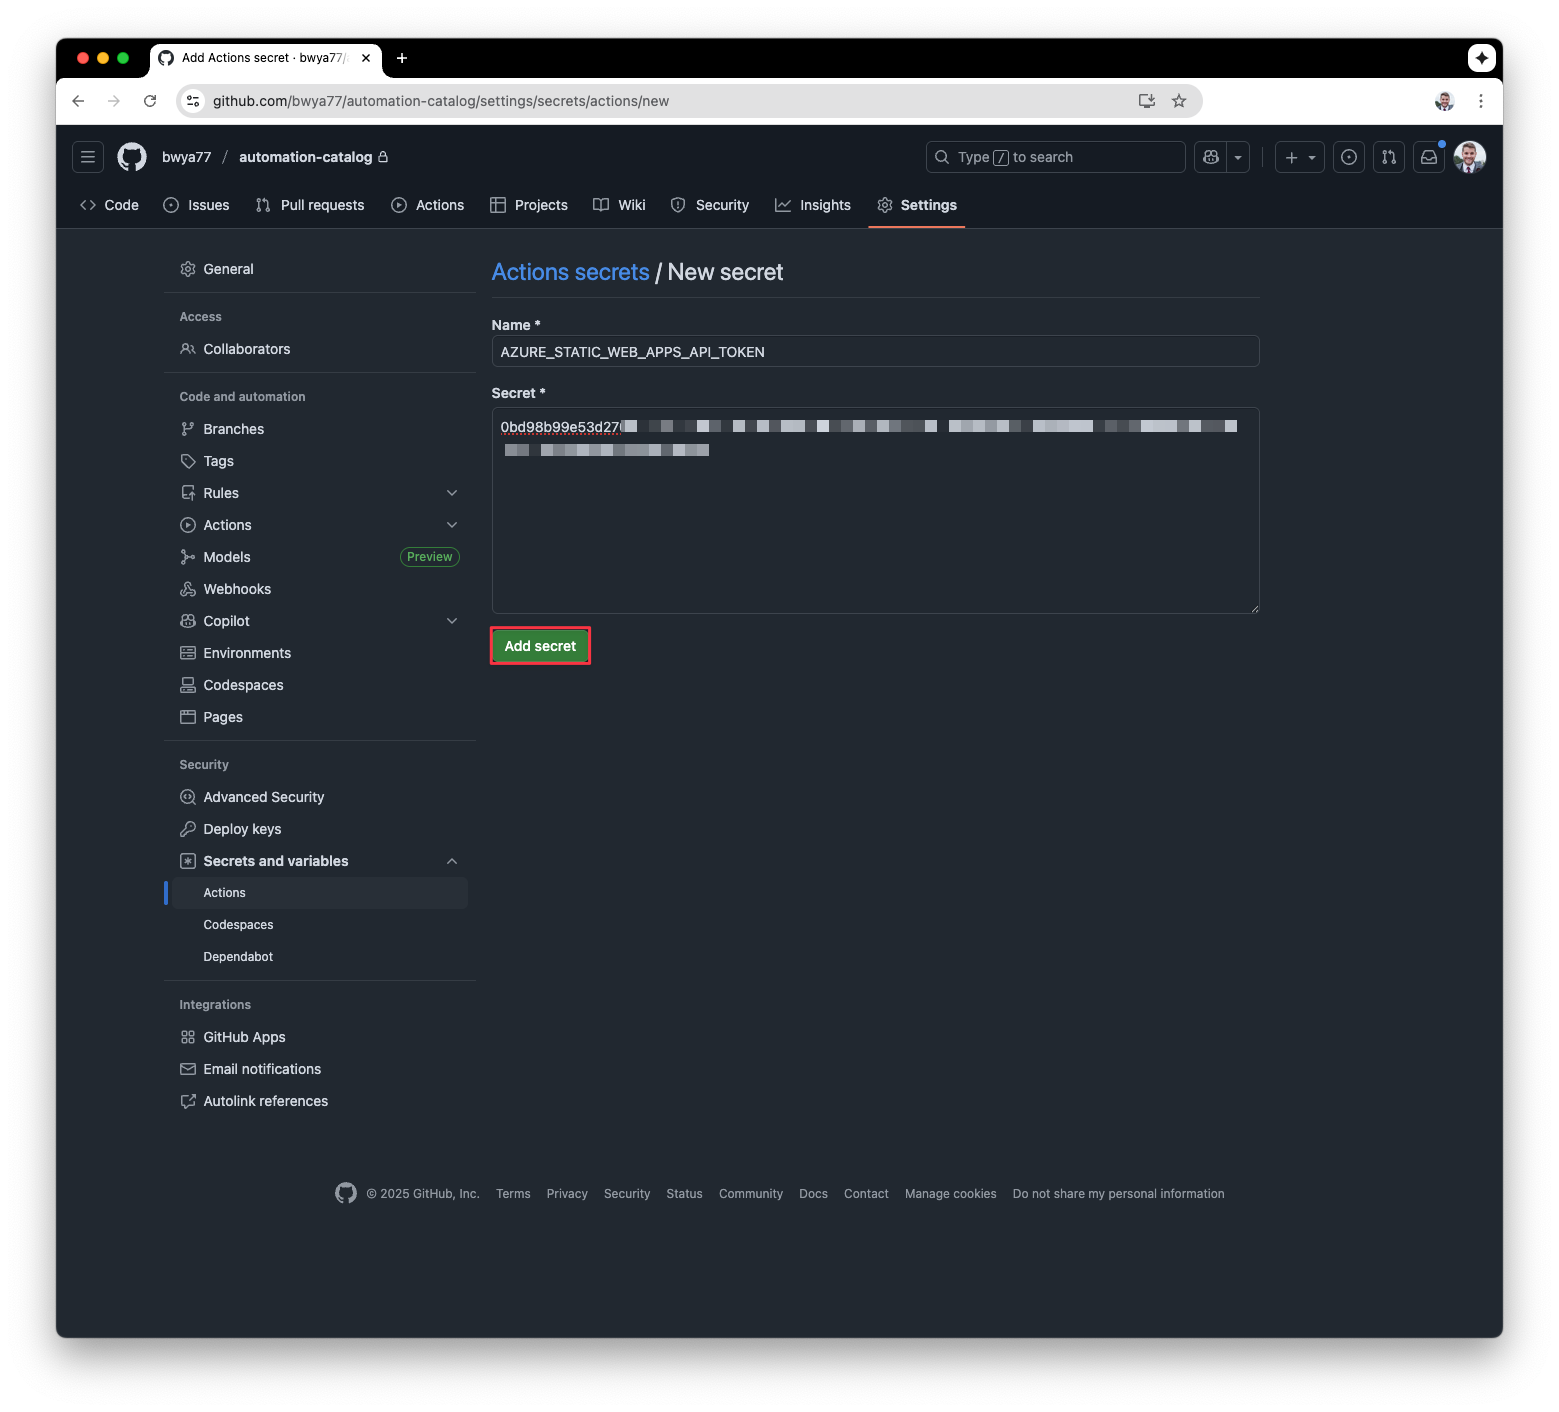
Go back to GitHub to your forked repository. Click Settings > Secrets and Variables > Actions and click New repository secret. The name of the secret should be AZURE_STATIC_WEB_APPS_API_TOKEN and the value is the deployment token from the previous step. Click Add Secret.
Modify the Github Workflow
Navigate to the location where you cloned your repository. Go to the .github folder and then the workflows folder. Delete any other files that may have been created when we linked our static app. We should only have azure-static-web-apps.yml. Make sure the file matches exactly to the code below:
name: Deploy to Azure Static Web Apps

on:
  push:
    branches:
      - main
  pull_request:
    types: [opened, synchronize, reopened, closed]
    branches:
      - main

jobs:
  build_and_deploy_job:
    if: github.event_name == 'push' || (github.event_name == 'pull_request' && github.event.action != 'closed')
    runs-on: ubuntu-latest
    name: Build and Deploy Job
    steps:
      - uses: actions/checkout@v4
        with:
          submodules: true
          lfs: false

      - name: Setup Node.js
        uses: actions/setup-node@v4
        with:
          node-version: '20'
          cache: 'npm'

      - name: Install dependencies
        run: npm ci

      - name: Build application
        run: npm run build

      - name: Deploy to Azure Static Web Apps
        id: builddeploy
        uses: Azure/static-web-apps-deploy@v1
        with:
          azure_static_web_apps_api_token: ${{ secrets.AZURE_STATIC_WEB_APPS_API_TOKEN }}
          repo_token: ${{ secrets.GITHUB_TOKEN }}
          action: "upload"
          app_location: "dist"
          api_location: ""
          skip_app_build: true

  close_pull_request_job:
    if: github.event_name == 'pull_request' && github.event.action == 'closed'
    runs-on: ubuntu-latest
    name: Close Pull Request Job
    steps:
      - name: Close Pull Request
        id: closepullrequest
        uses: Azure/static-web-apps-deploy@v1
        with:
          azure_static_web_apps_api_token: ${{ secrets.AZURE_STATIC_WEB_APPS_API_TOKEN }}
          action: "close"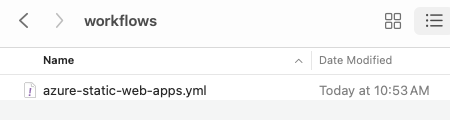
Commit our Changes
Now that we have deleted any excess files or modified the workflow file, commit our changes back to GitHub.
git add . && git commit -m 'initial' && git pushBack in GitHub we should see the Github action deployment begin:
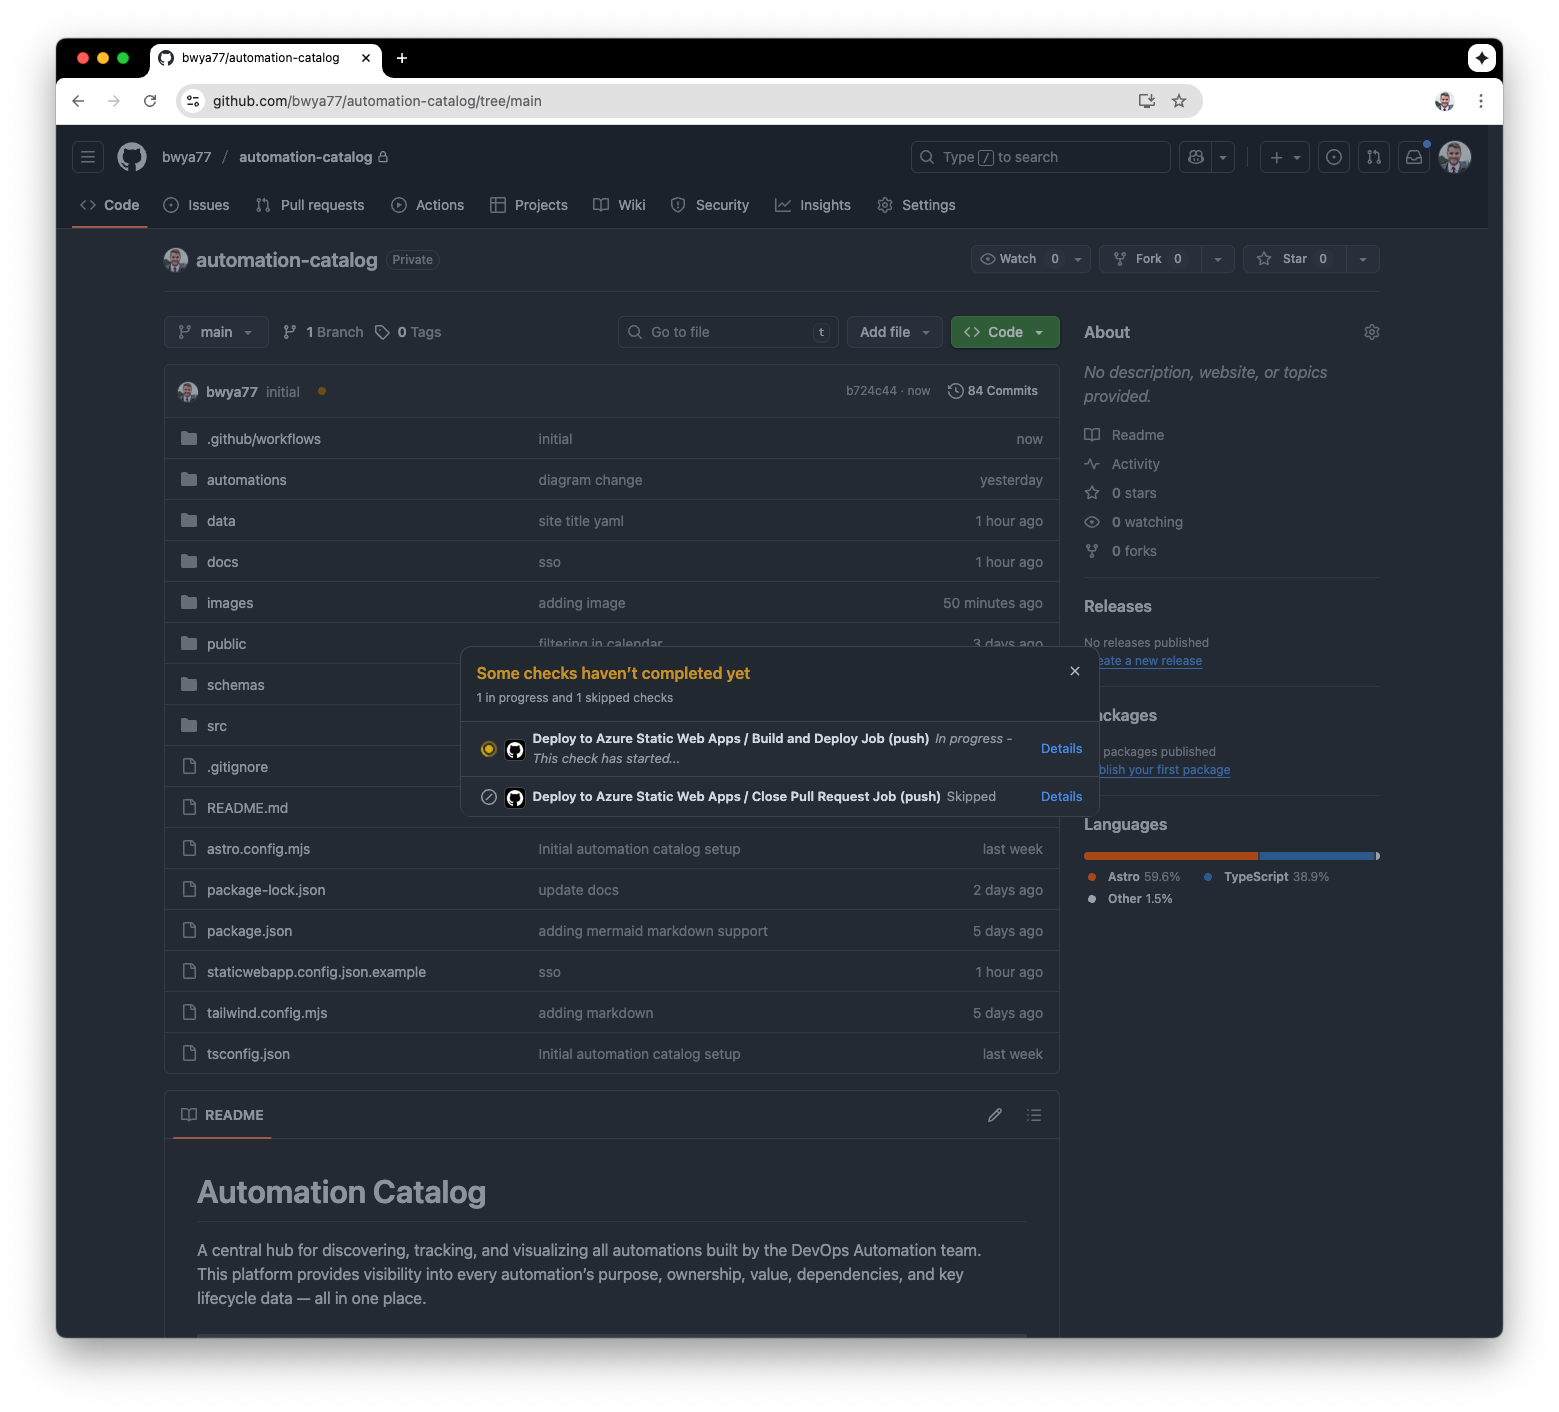
Once the run finishes, the orange dot will be replaced by a green checkmark. When that happens you can verify the site is up by going to the URL of the static web app. If you do not know the URL, go back to the Azure Portal to your Static Web App and you will see the URL.
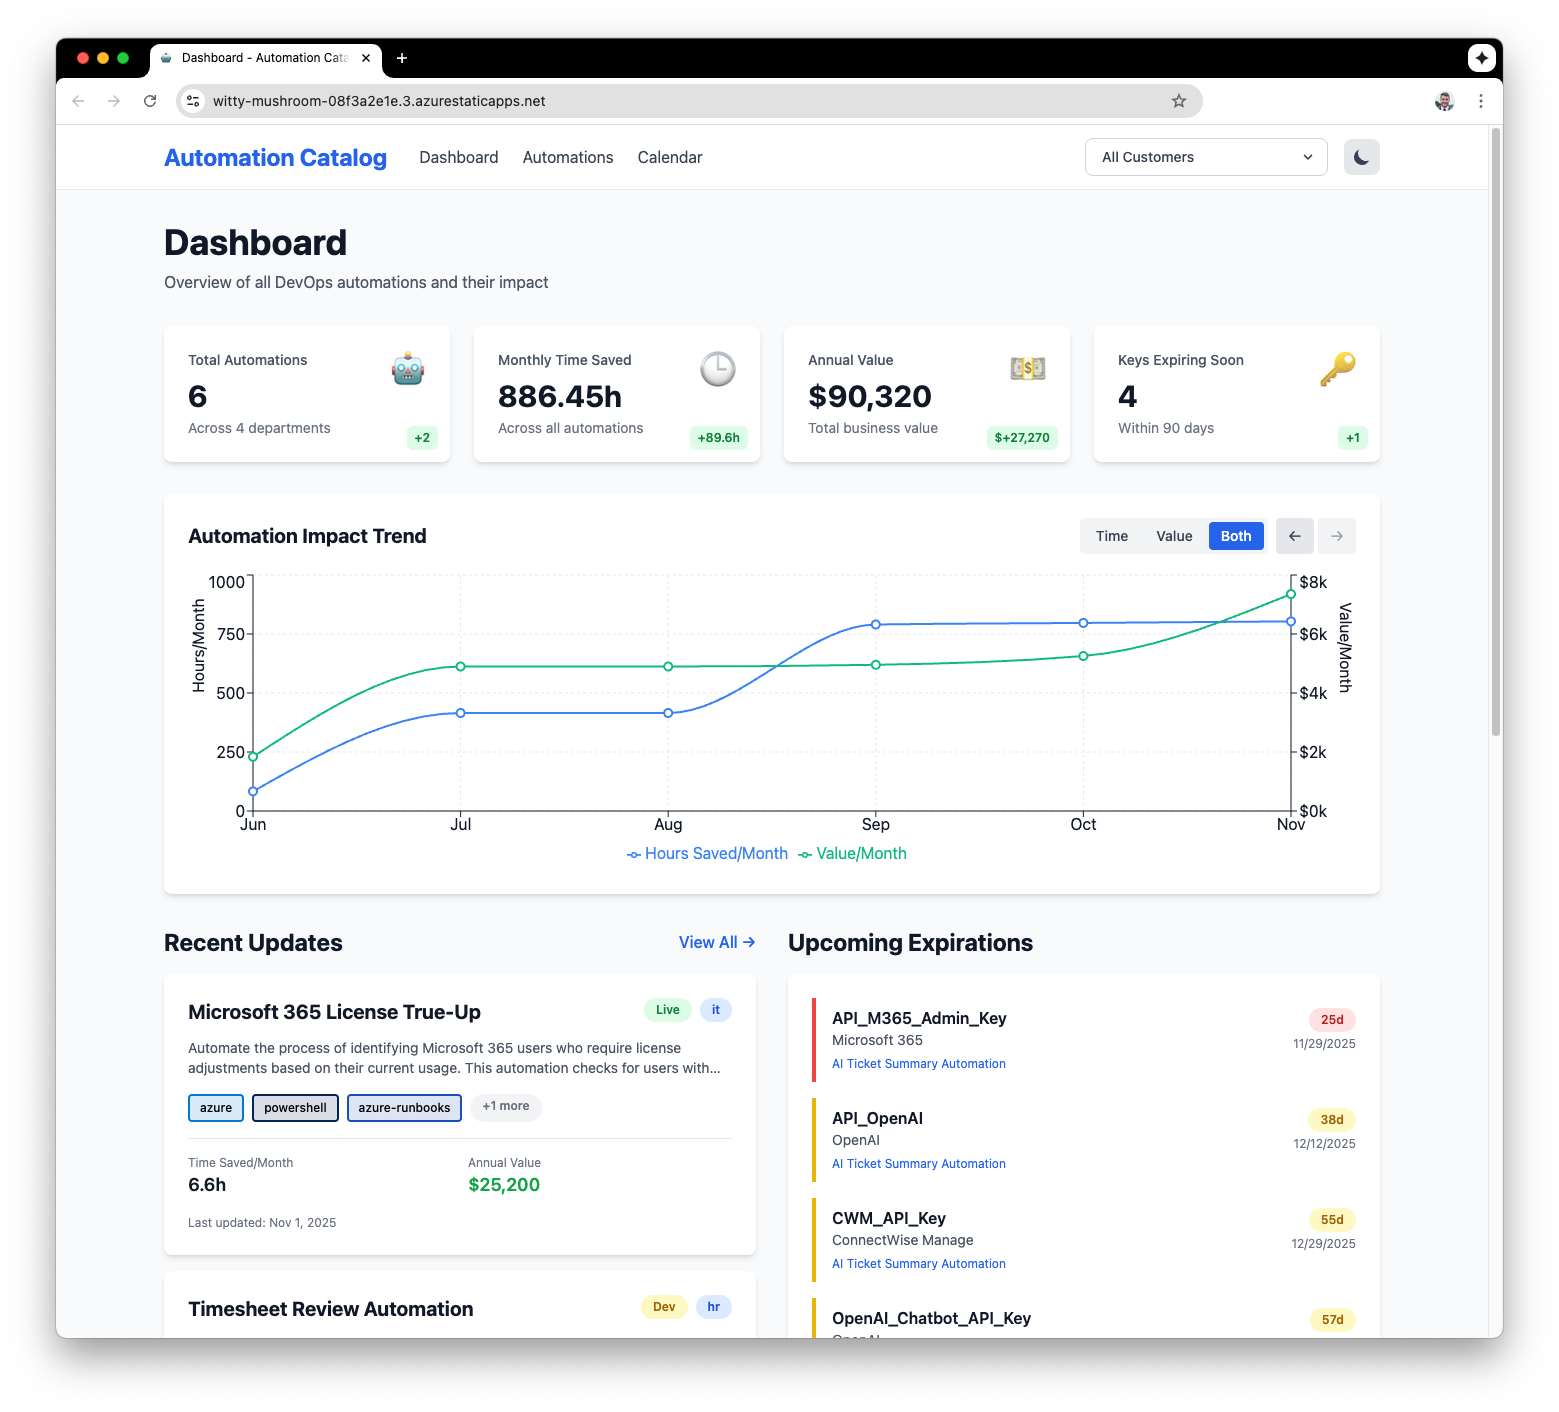
There I can see that its live with the example data that the repository comes with.
Bring our own Data
Engineers
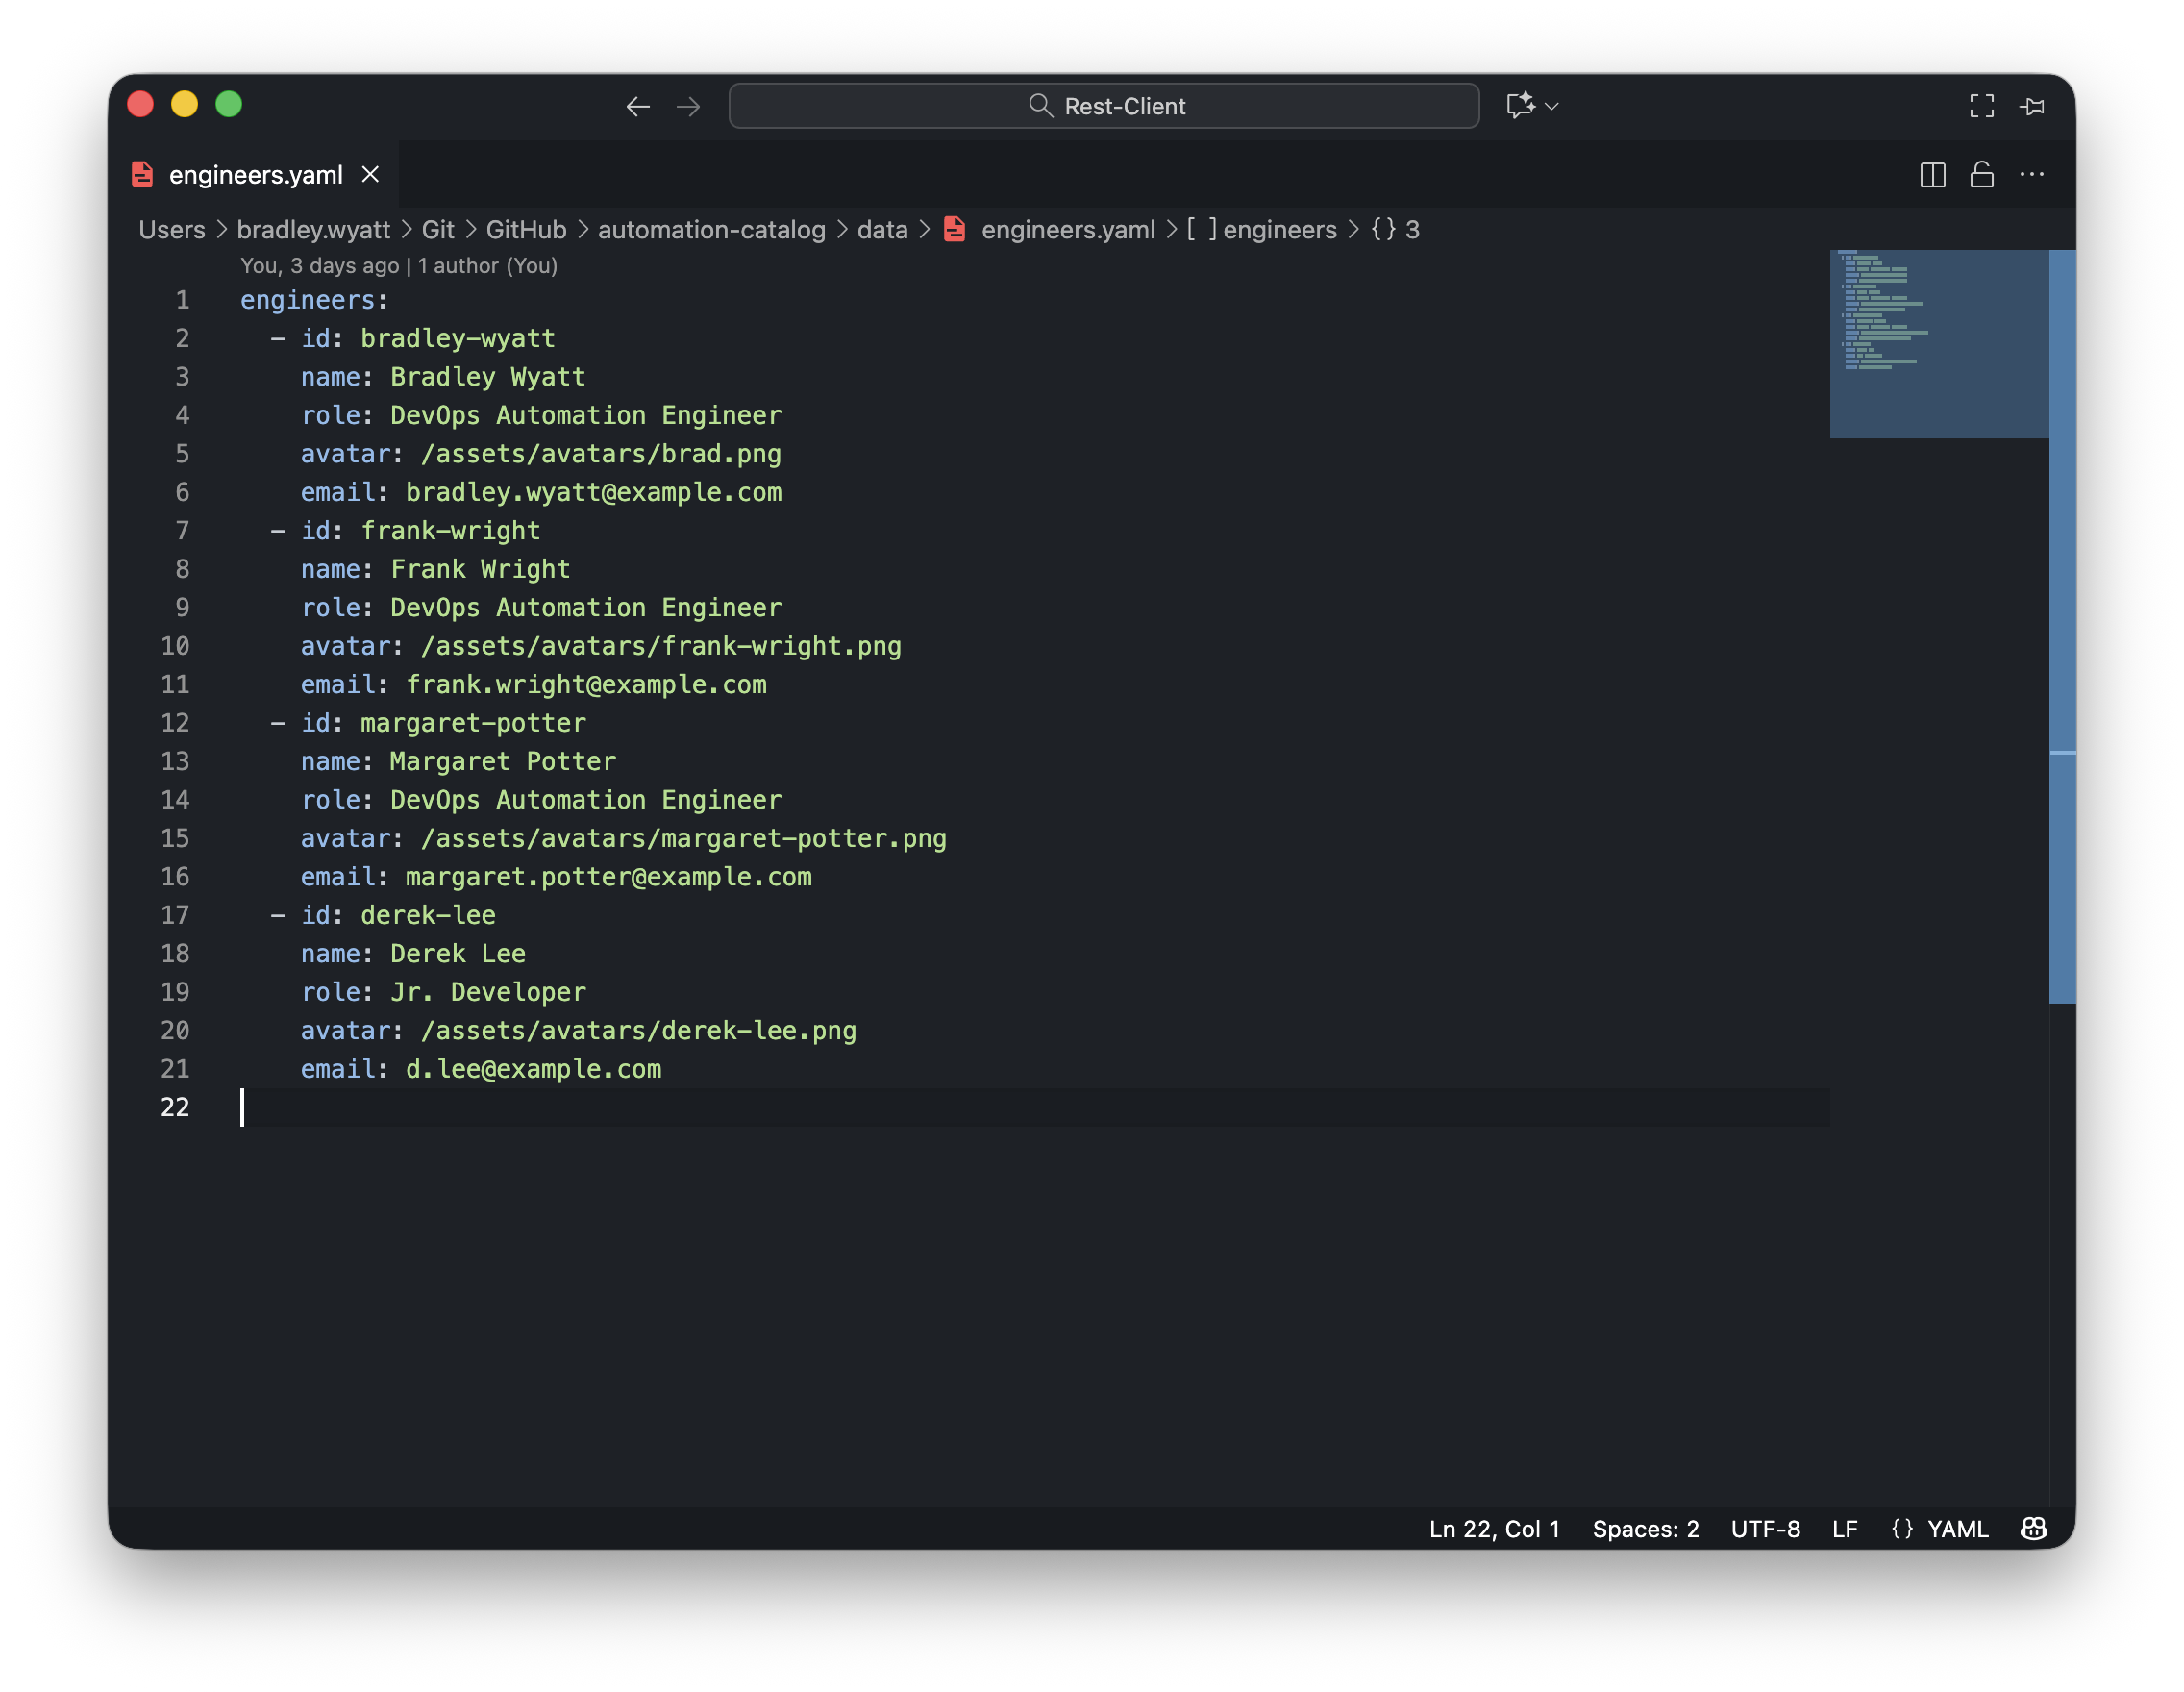
We can bring in our own engineers by going to the cloned repository > then the data folder and click the engineers.yml file. This file specifies our engineers id, name, role, avatar and email. If the avatar is not specified or the file cannot be found, it will default to show their initials in a circle. The avatar files can be found public/assets/avatars.
Engineers show up on the dashboard and also on each automation page they are listed as the engineer on.
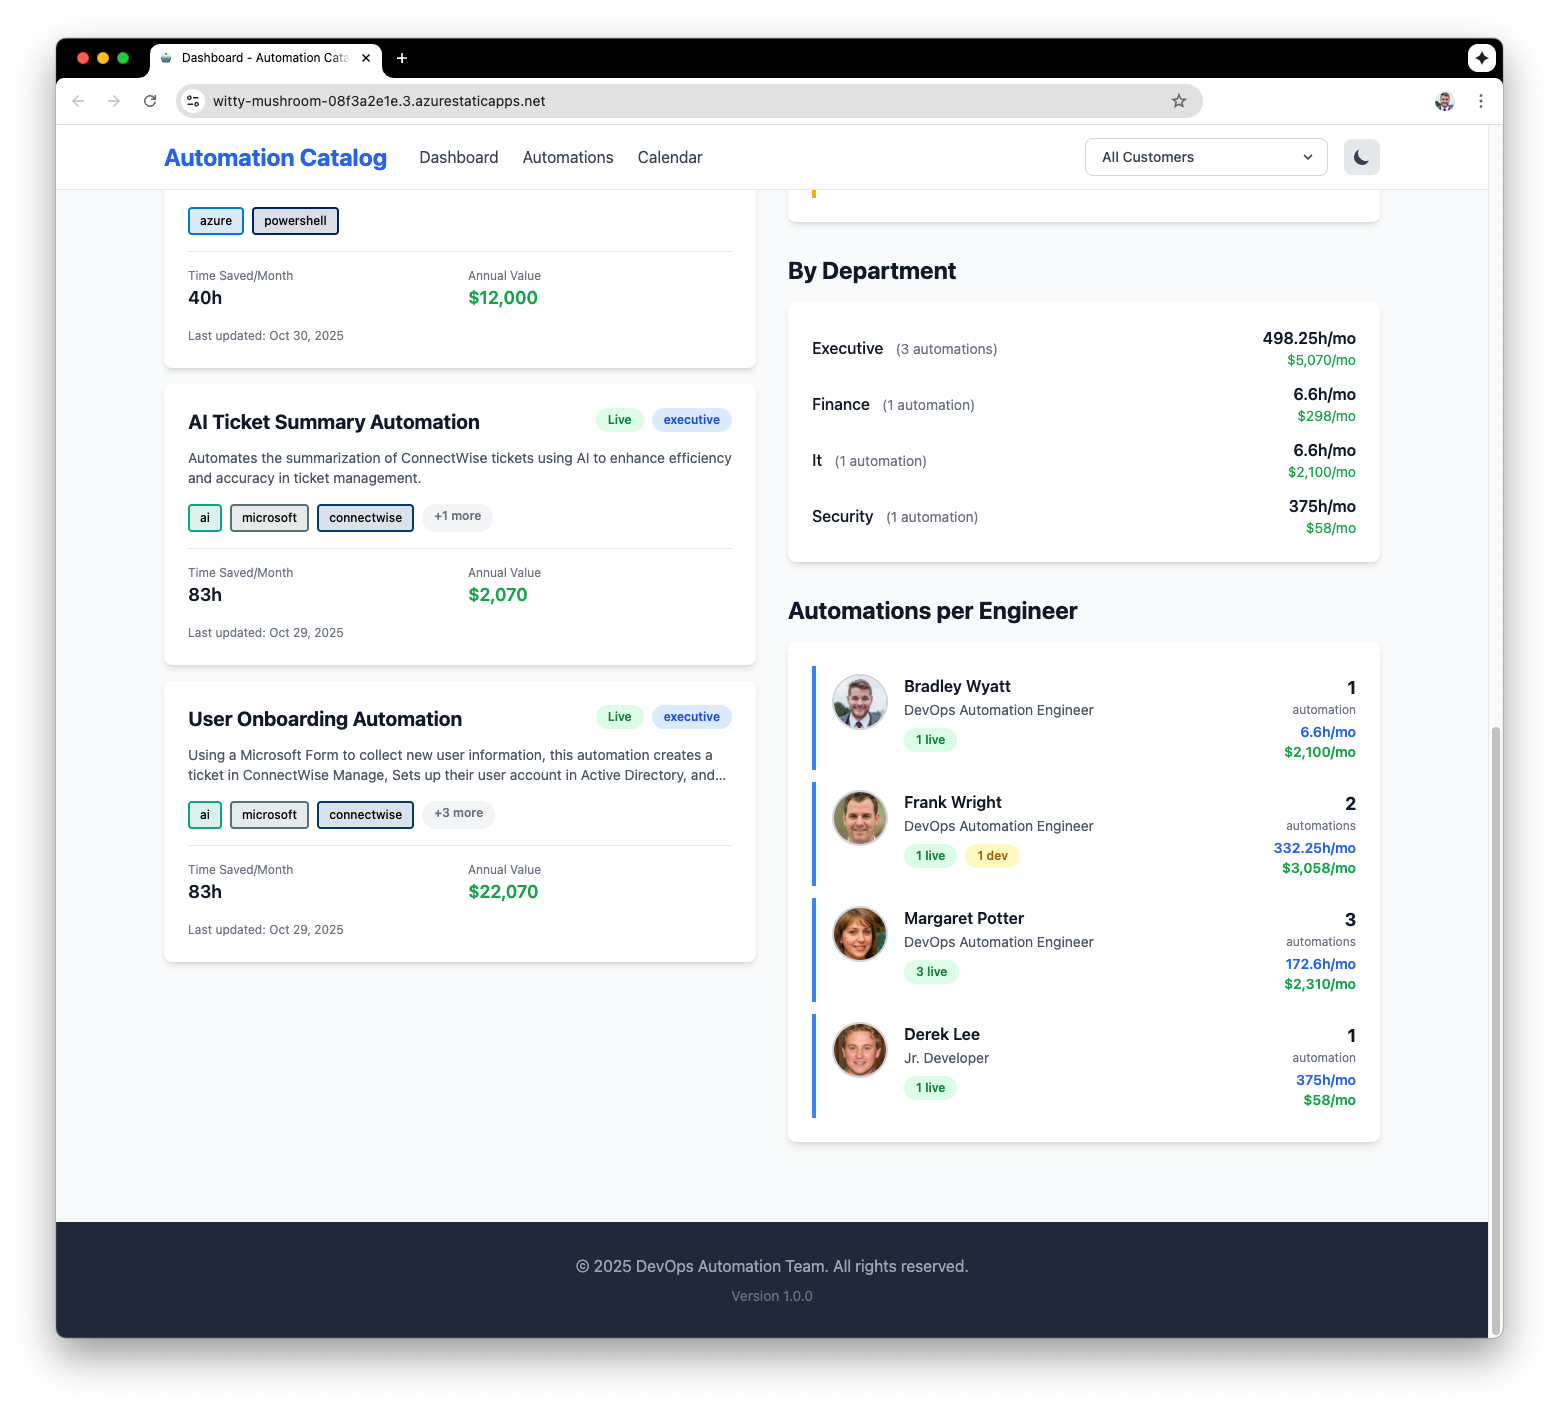
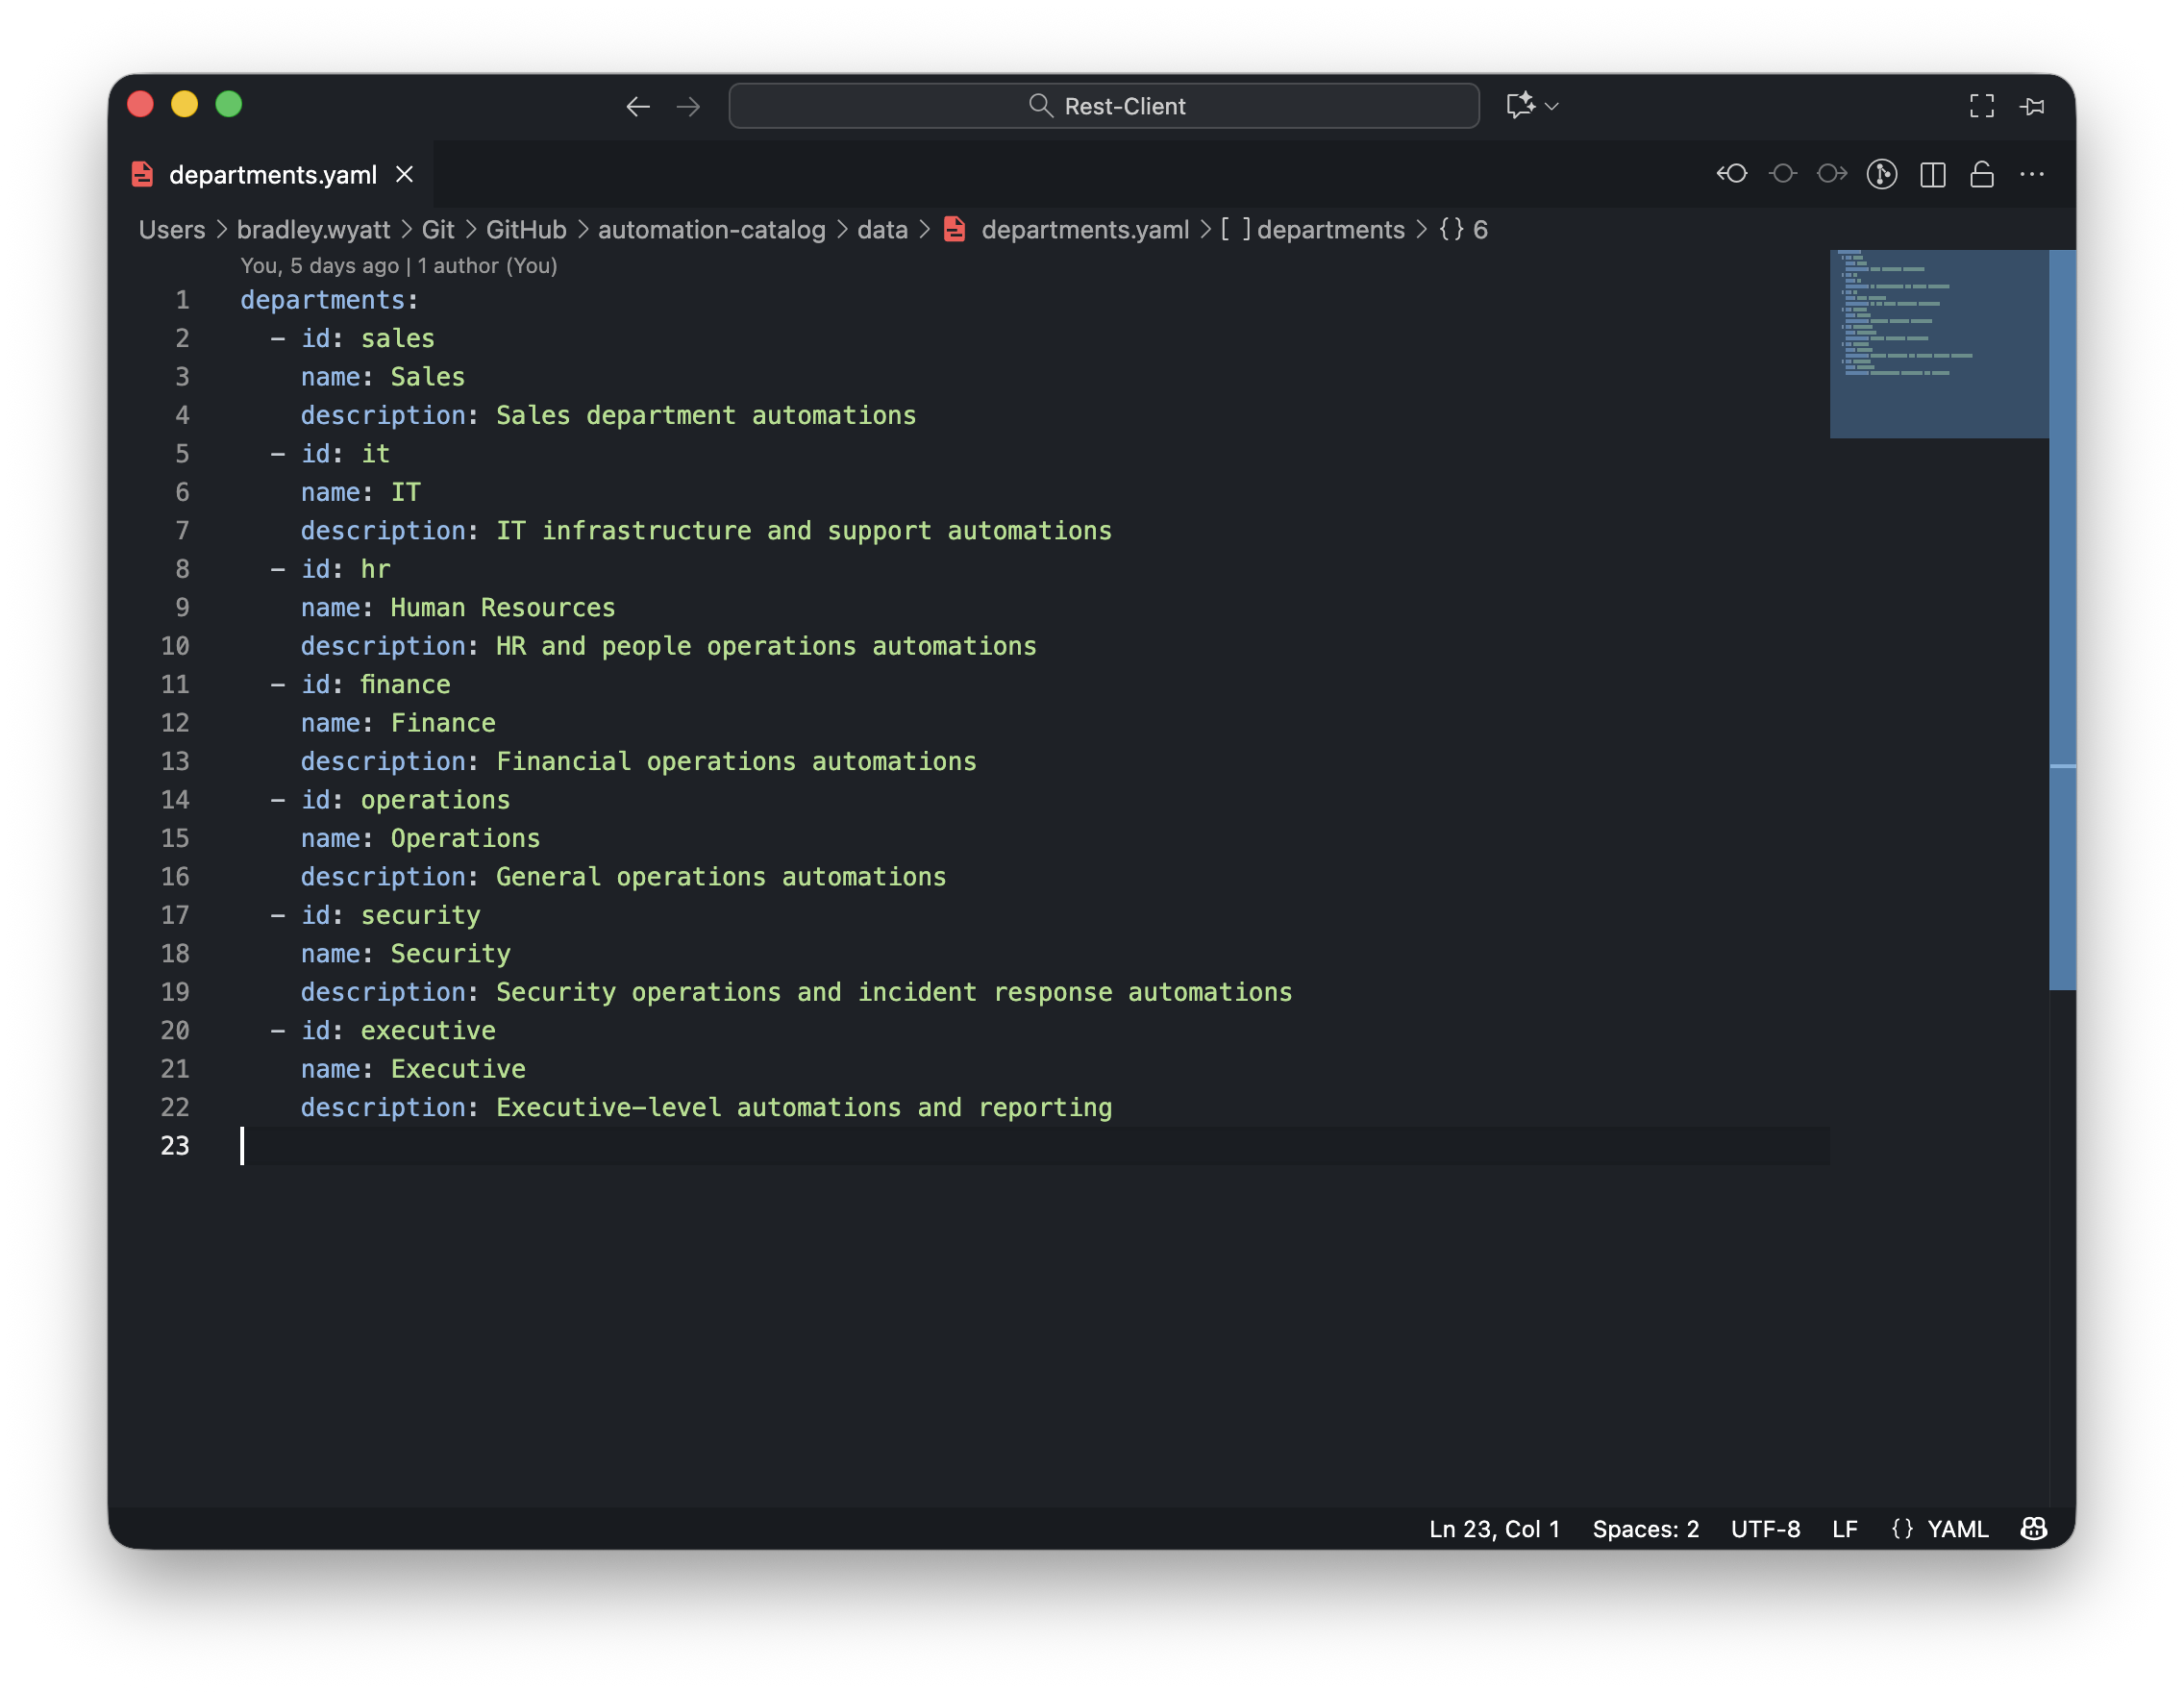
Departments
Departments are there so you filter your automations to see what is in production for each department. This also allows you to see how much time your automations are saving each department as well as how much money is saved. You can add, remove and modify departments by going to the cloned repository > then the data folder and click the departments.yml file.
Tags
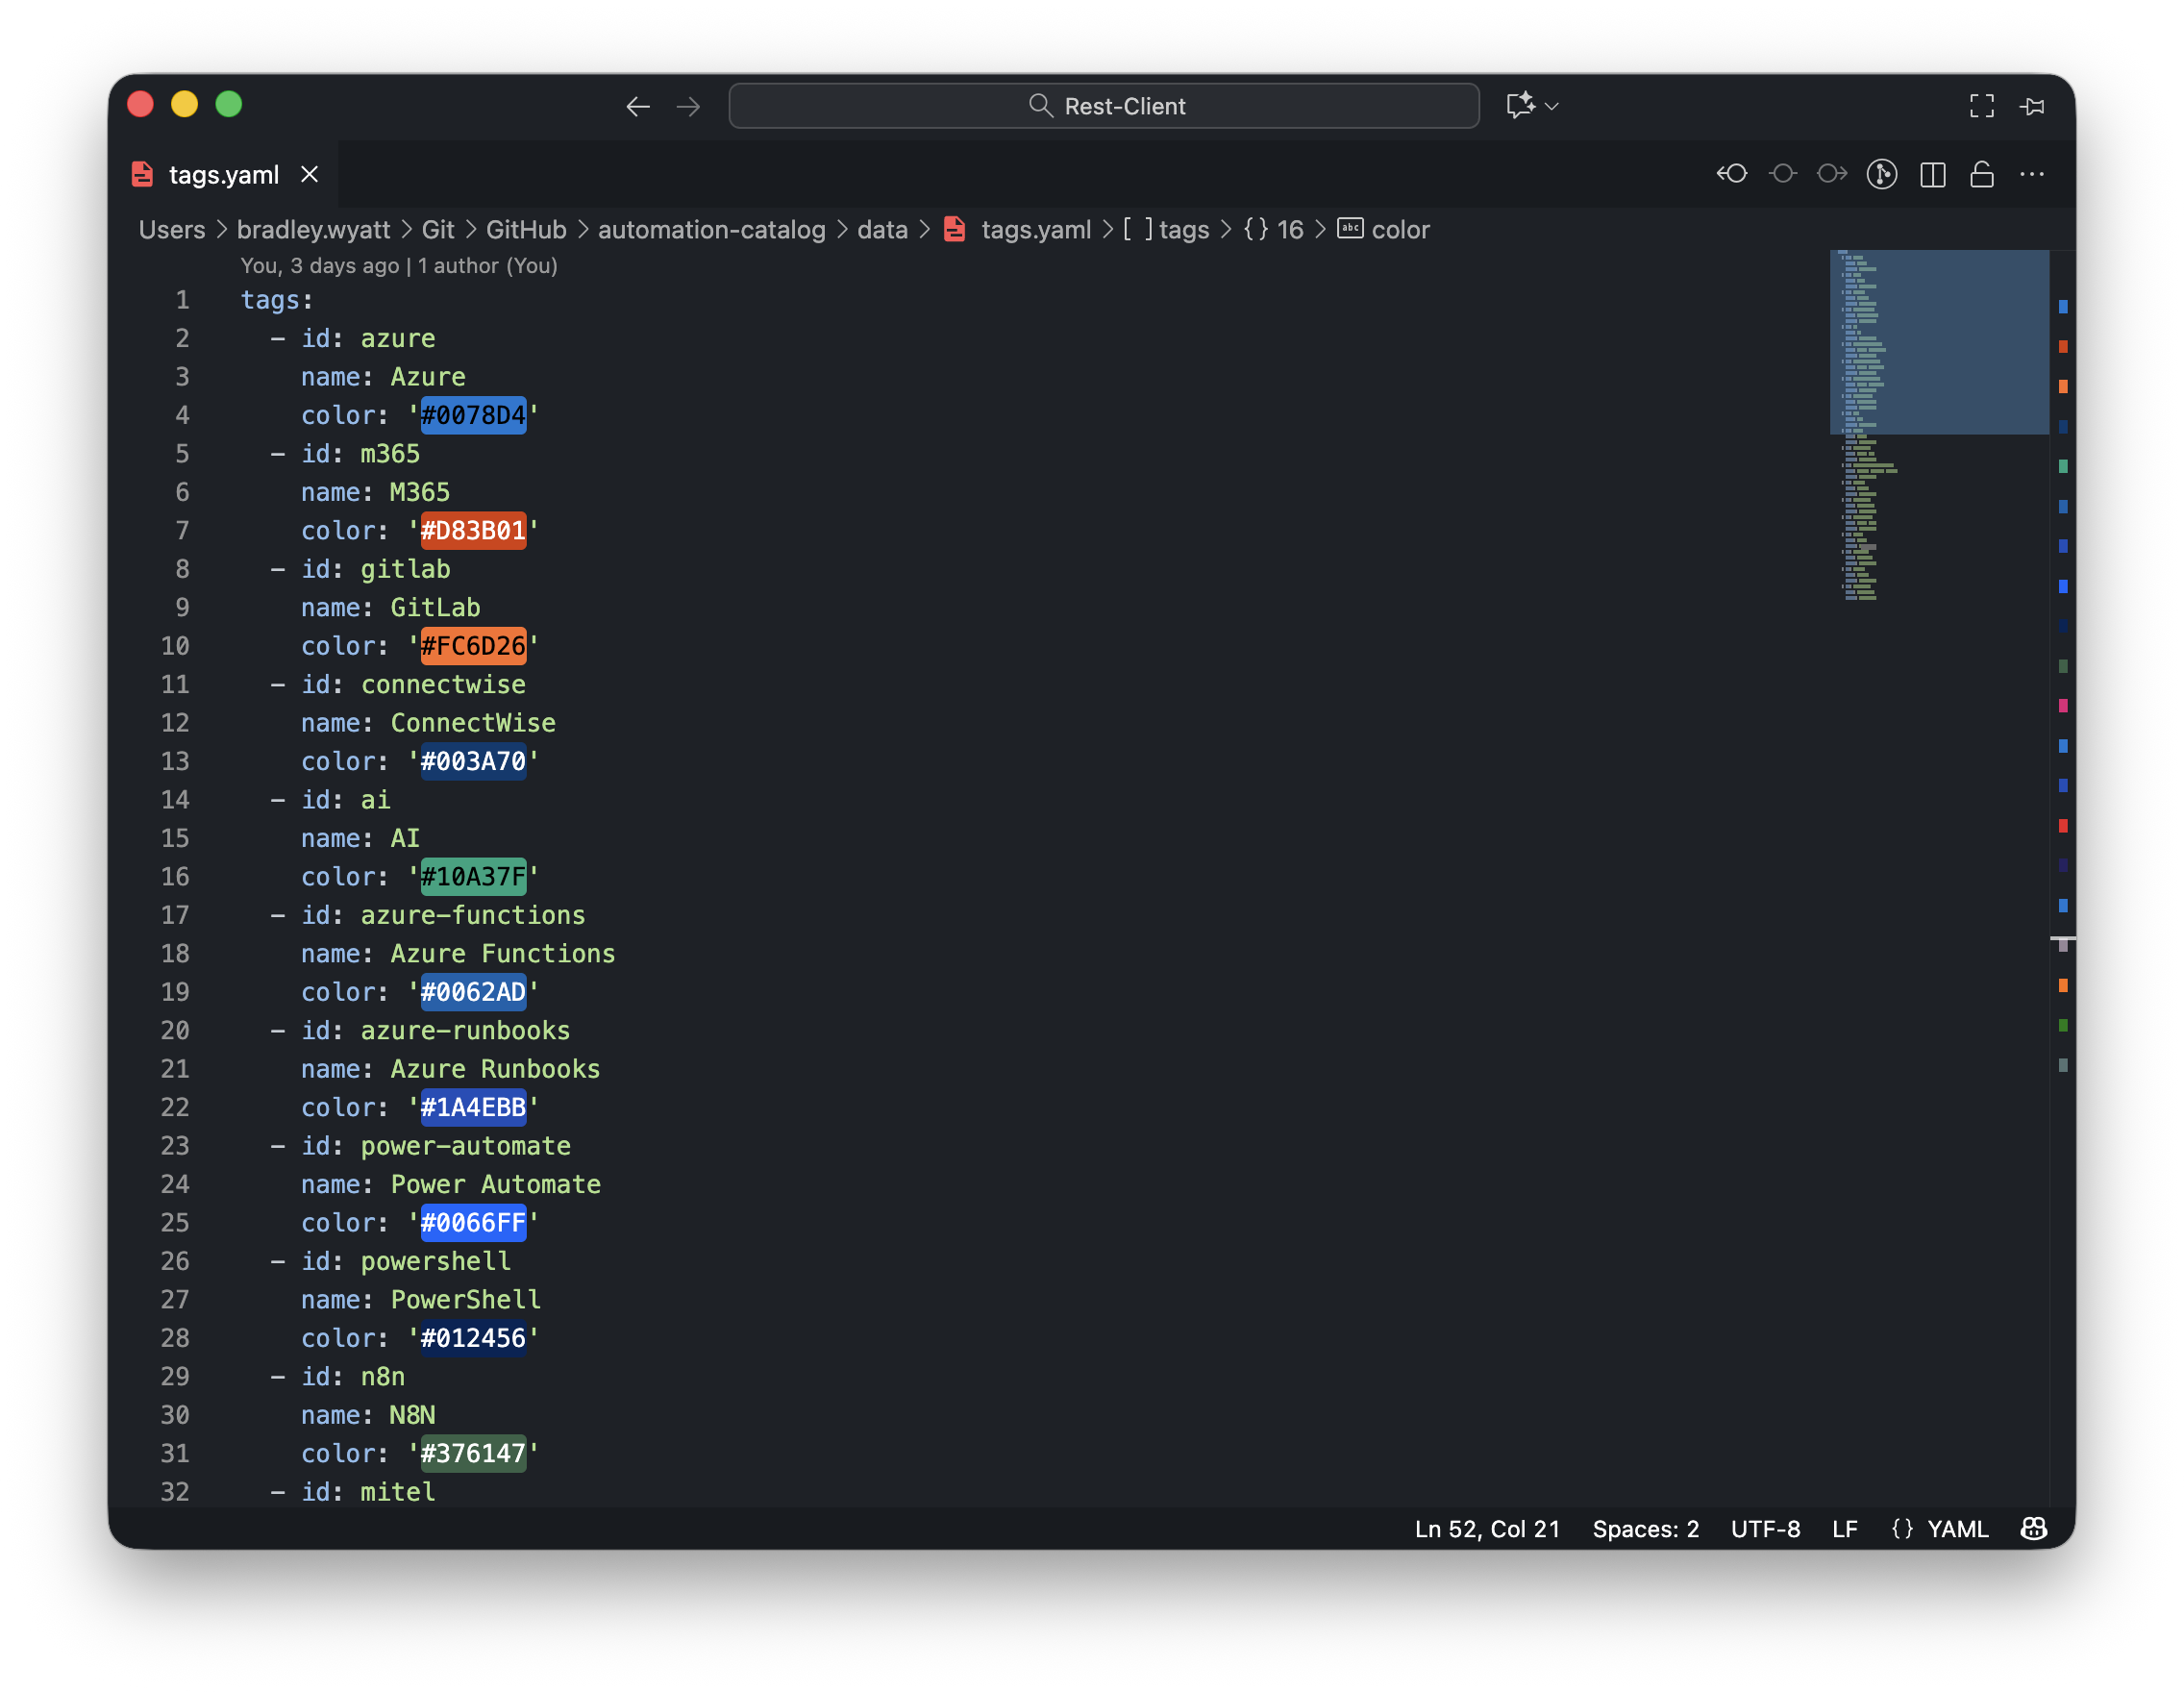
Tags allow you to tag your automations with different things like products, services, and more. Its a great way to be able to filter your automations. In my site I like to tag them with the different suite of products we use so I can quickly see which automation connect to our PSA software, which automation hook into logic apps, or even use our hybrid runbook worker. You can also define a tag color which will be displayed on the site, if a tag does not have a color it will go to a default color. To add, delete, or edit your tags go to the cloned repository > then the data folder and click the tags.yaml file.
Site
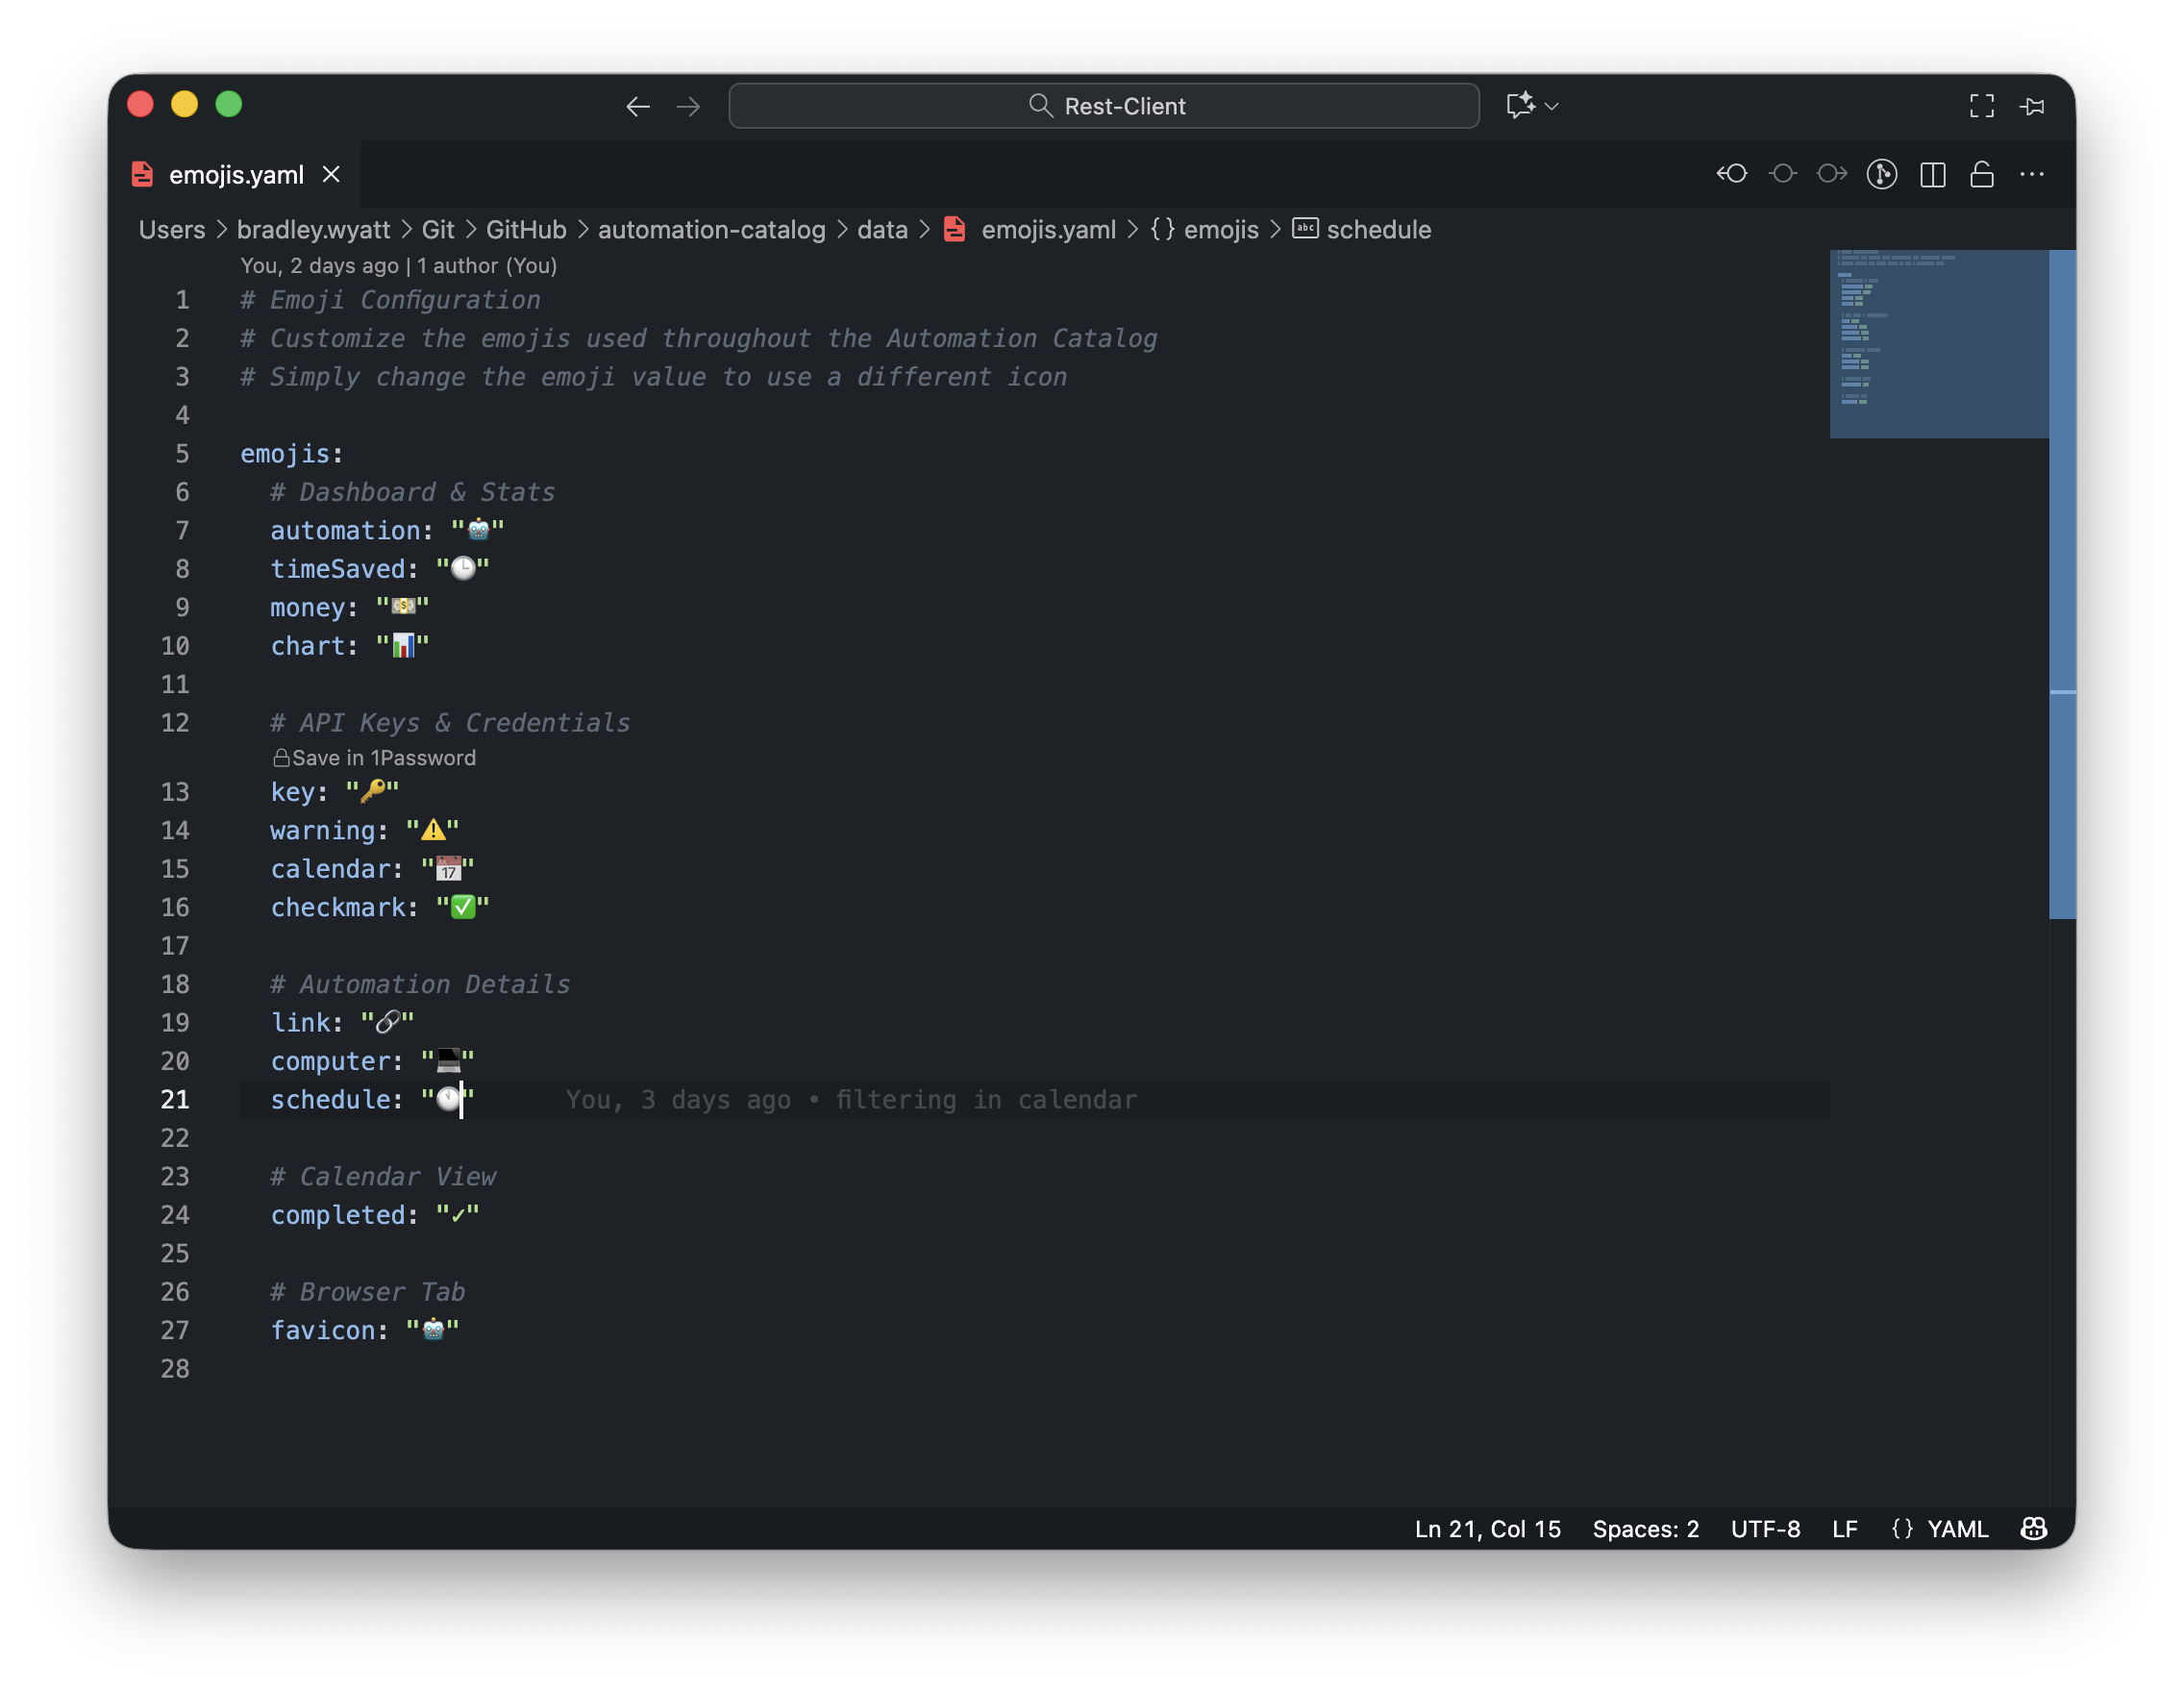
You can change the site title, description and footer text by modifying the site.yaml in the data folder. You can also change the emojis displayed on the site by modifying the emojis.yaml file. This includes the link emojis, dashboard and widget emojis and even the favicon for the site. Lastly, the version.yaml file will change the version found in the footer. This was included in a separate file so you could perform different automations based on the version number.
Add an Automation Project
Project File Requirements
Every automation project must have 2 items:
metadata.yamlfileREADME.md
A diagram file is also optionally included but since the README.md file can render mermaid diagram, its not mandatory.
If you do not include a diagram file or its unable to find it, it will not show the diagram section. Many of the projects I work on I include a mermaid markdown diagram in the README.md file so if I didn’t include a separate diagram file I didn’t want it to bomb out.
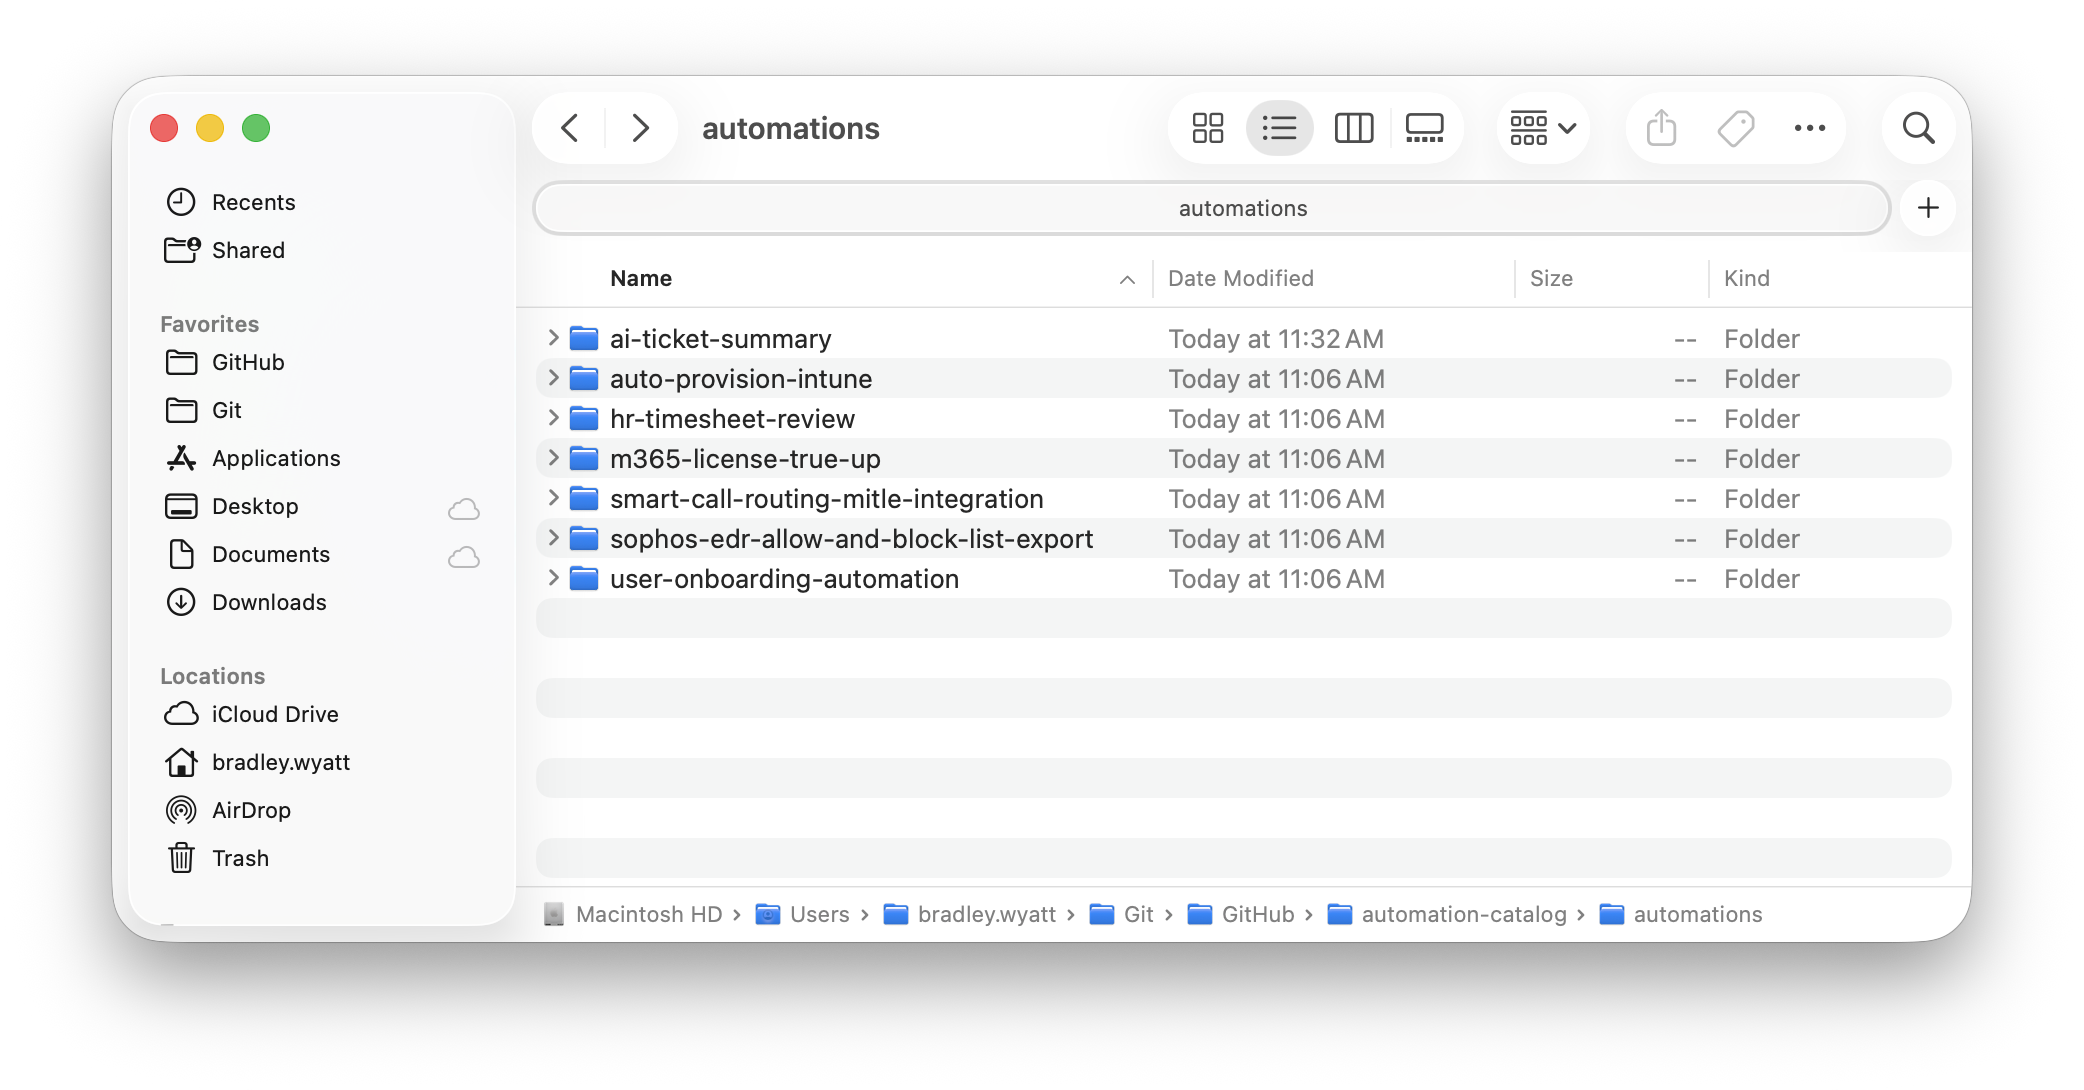
Each automation project is contained in their own folder in the automations directory.
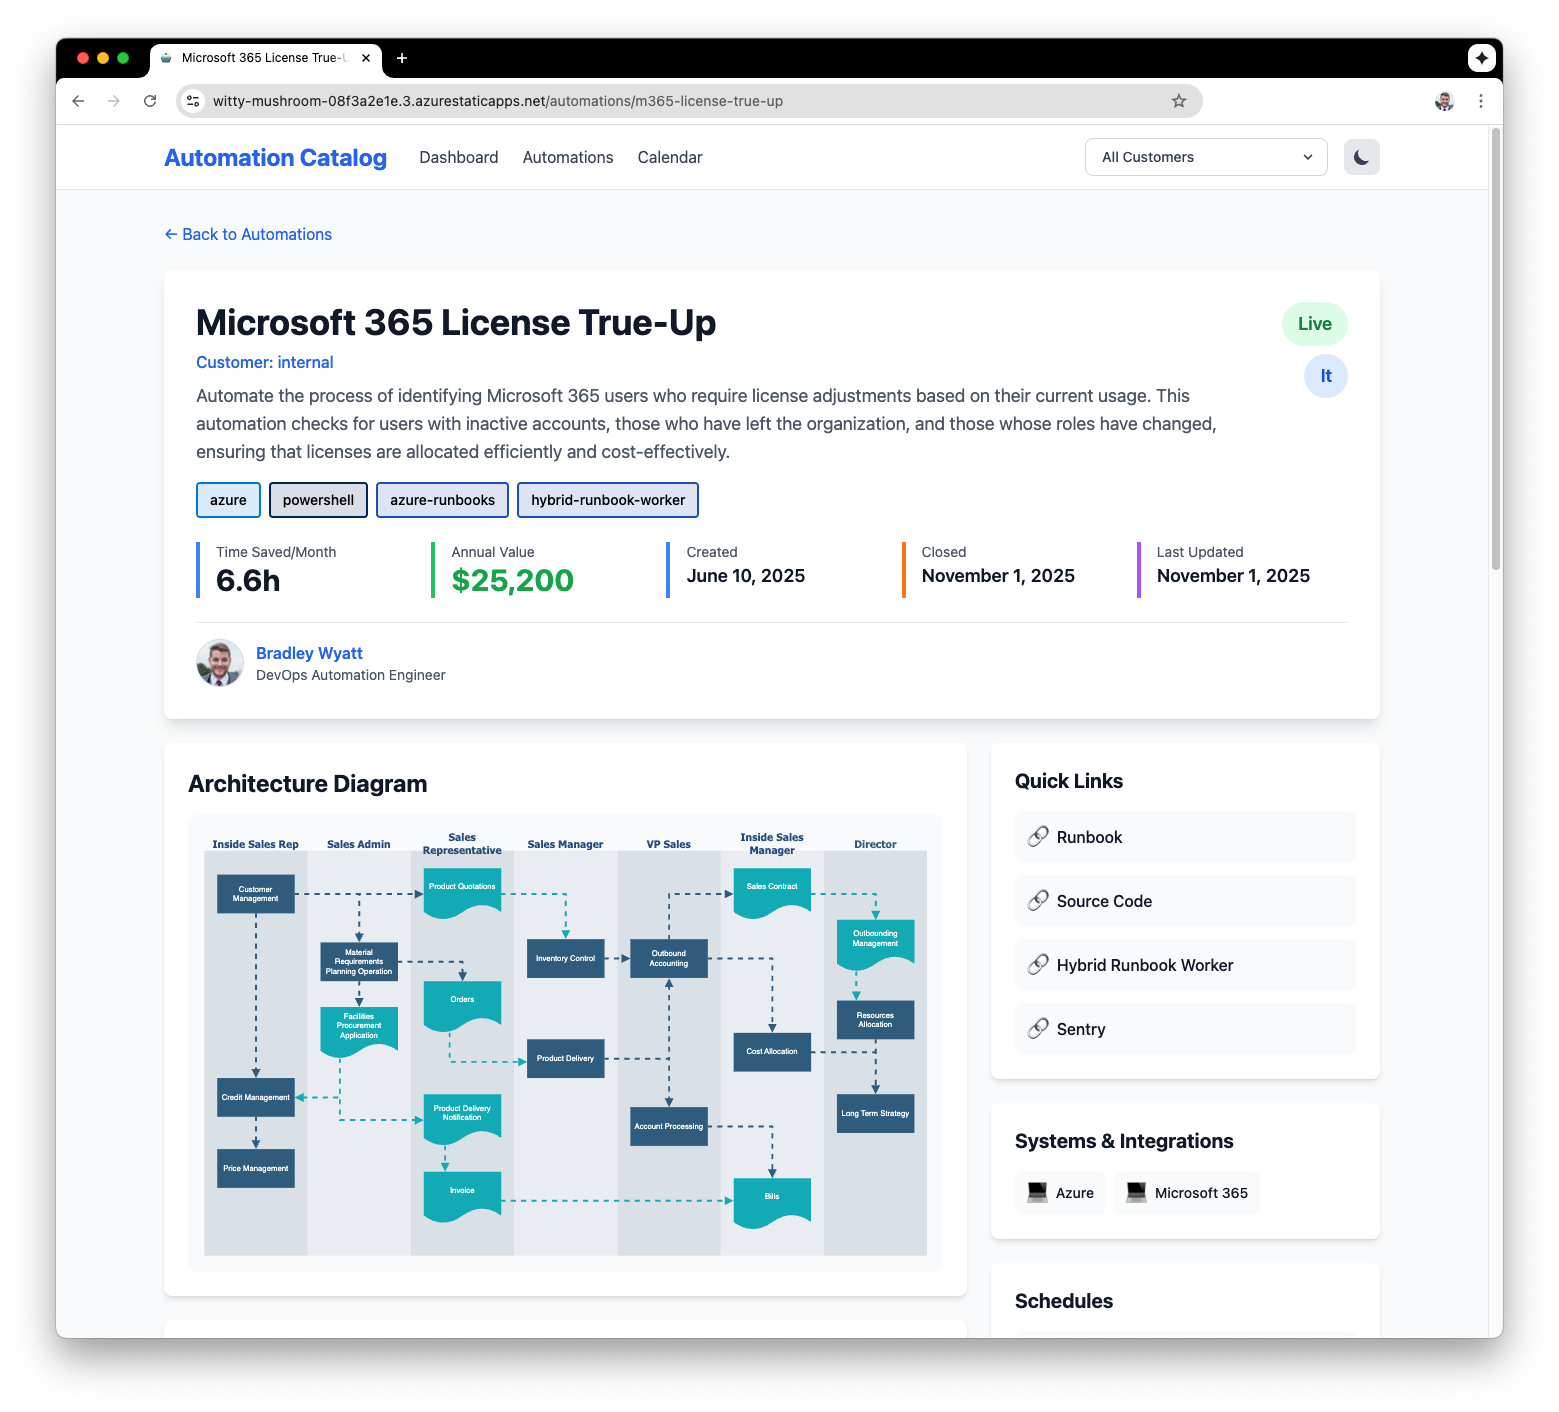
metadata.yaml
The metadata.yaml file contains all the information for an automation project. This includes the engineer, the customer (optional), tags, and value information. It also includes any and all API keys the automation uses and their expiration dates, the automation schedule and more. The Azure static app will do the rest, allowing you to filter your projects, see which engineers did which project, linking automations to customers and departments, etc.
name: AI Ticket Summary Automation
author: margaret-potter
department: executive
customer: "Wyatt Technology Solutions"
status: live
description: Automates the summarization of ConnectWise tickets using AI to enhance efficiency and accuracy in ticket management.
tags:
  - ai
  - microsoft
  - connectwise
  - powershell
systems:
  - Connectwise Manage
  - Microsoft 365
time_saved_hours_per_month: 83
annual_value_usd: 2070
created: 2025-10-23
last_updated: 2025-10-29
closed: 2025-11-10
links:
  - name: Source Code
    url: https://gitlab.com/
  - name: Runbook
    url: https://example.com/user-onboarding-automation
  - name: Microsoft Form Template
    url: https://forms.microsoft.com/
schedules:
  - frequency: On Form Submission
api_keys:
  - name: API_M365_Admin_Key
    system: Microsoft 365
    expiration: 2025-11-29
    notes: M365 Admin API Key for user provisioning
    url: https://example.itglue.com/42/passwords/3233
  - name: API_OpenAI
    system: OpenAI
    expiration: 2025-12-12
    notes: OpenAI API Key for AI processing
    url: https://example.itglue.com/42/passwords/3233
  - name: CWM_API_Key
    system: ConnectWise Manage
    expiration: 2025-12-29
    notes: ConnectWise Manage API Key for ticket access
url: https://example.itglue.com/42/passwords/3233README.md
The README.md file is a markdown file that describes the project, includes any notes, descriptions, etc. You can define your project README.md standards. The Static App will render all markdown for you including mermaid markdown diagrams as long as they are contained in a code block with the language set at mermaid.
Diagram
If Diagram.svg is found, it will render the diagram for the project. SVG allows us to include diagrams with animated parts
Track Schedules
In the metadata.yaml file, you can define one or more schedules for an automation. If you include days, the site will render the days similar to tags. If there is no schedules: in the metadata file the scheduled widget will not appear.
schedules:
  - frequency: Every 2 days
    time: 6:00 AM
    timezone: America/Chicago
    days:
      - Mon
      - Wed
      - Fri
      - Sun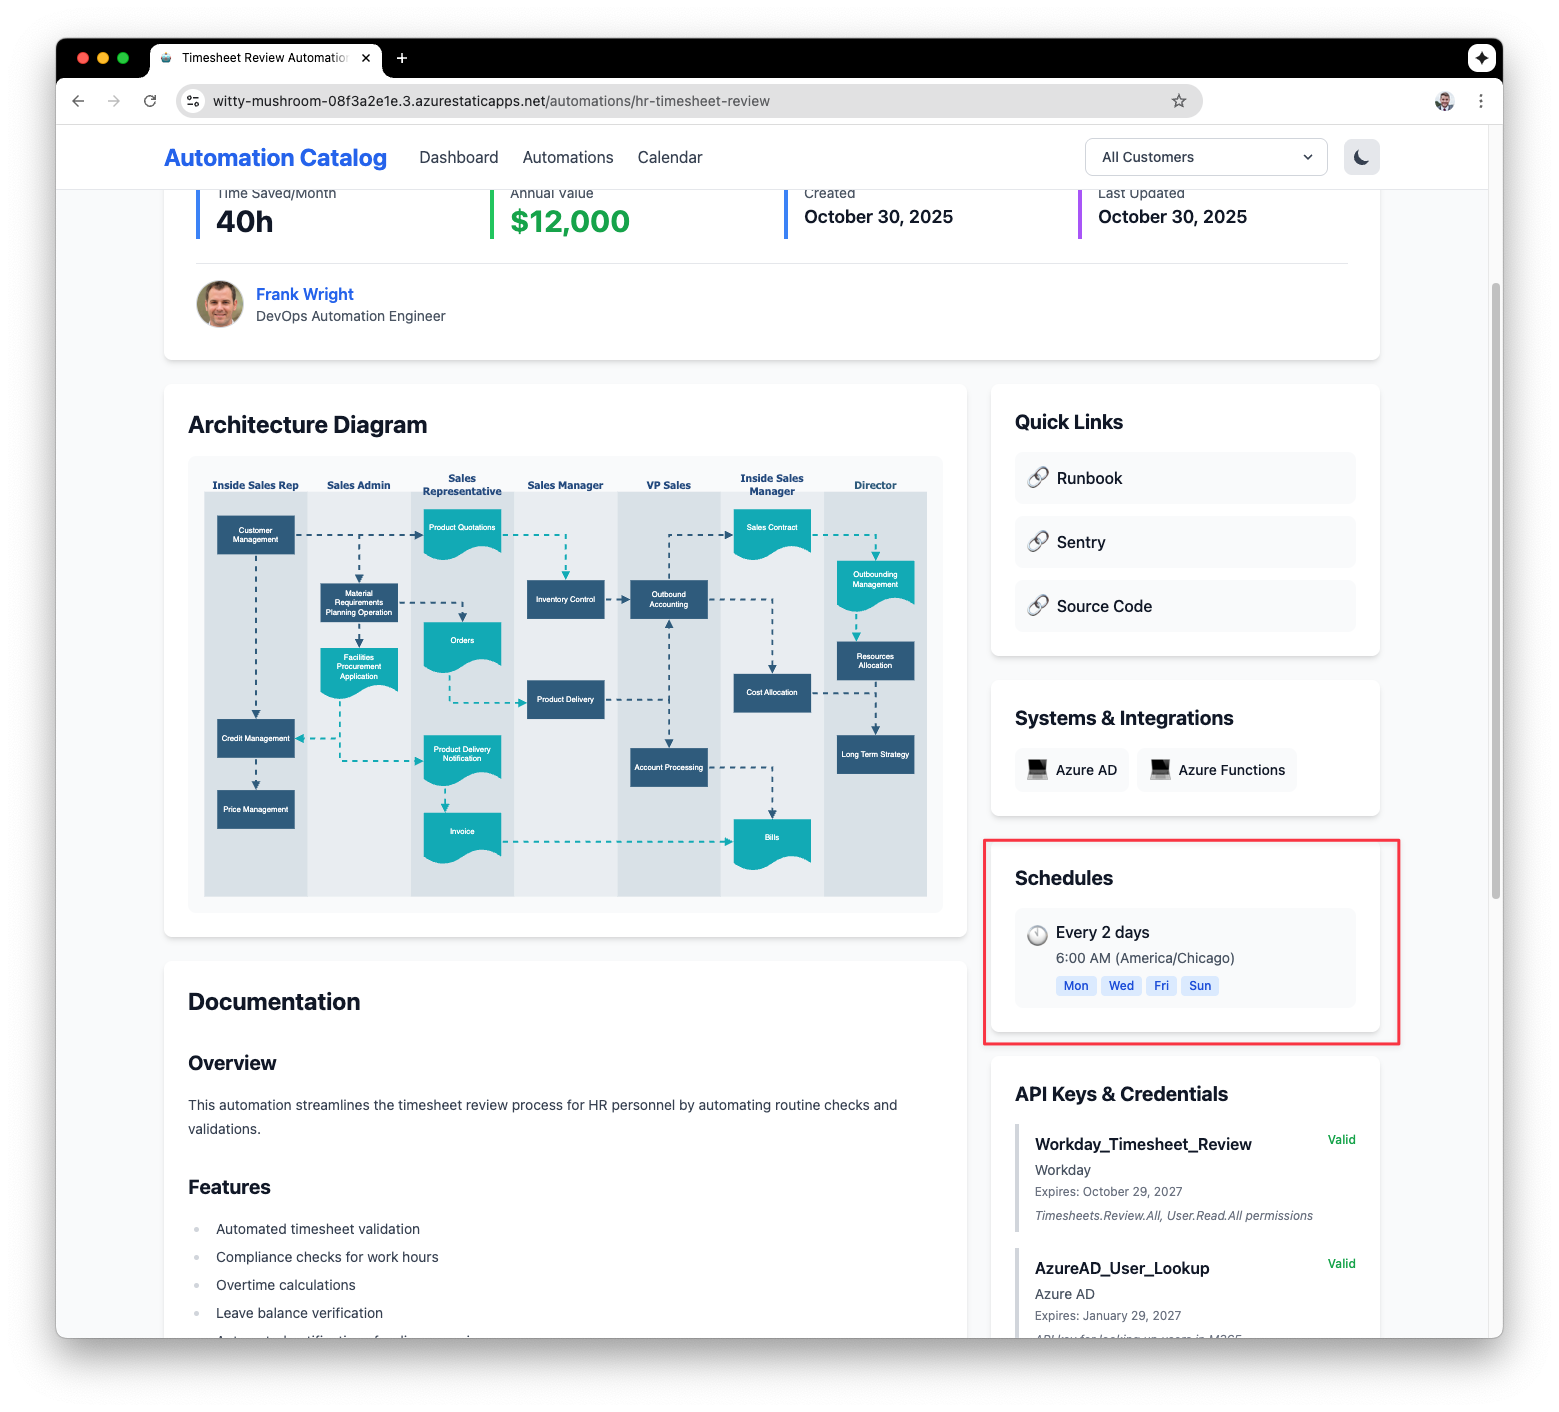
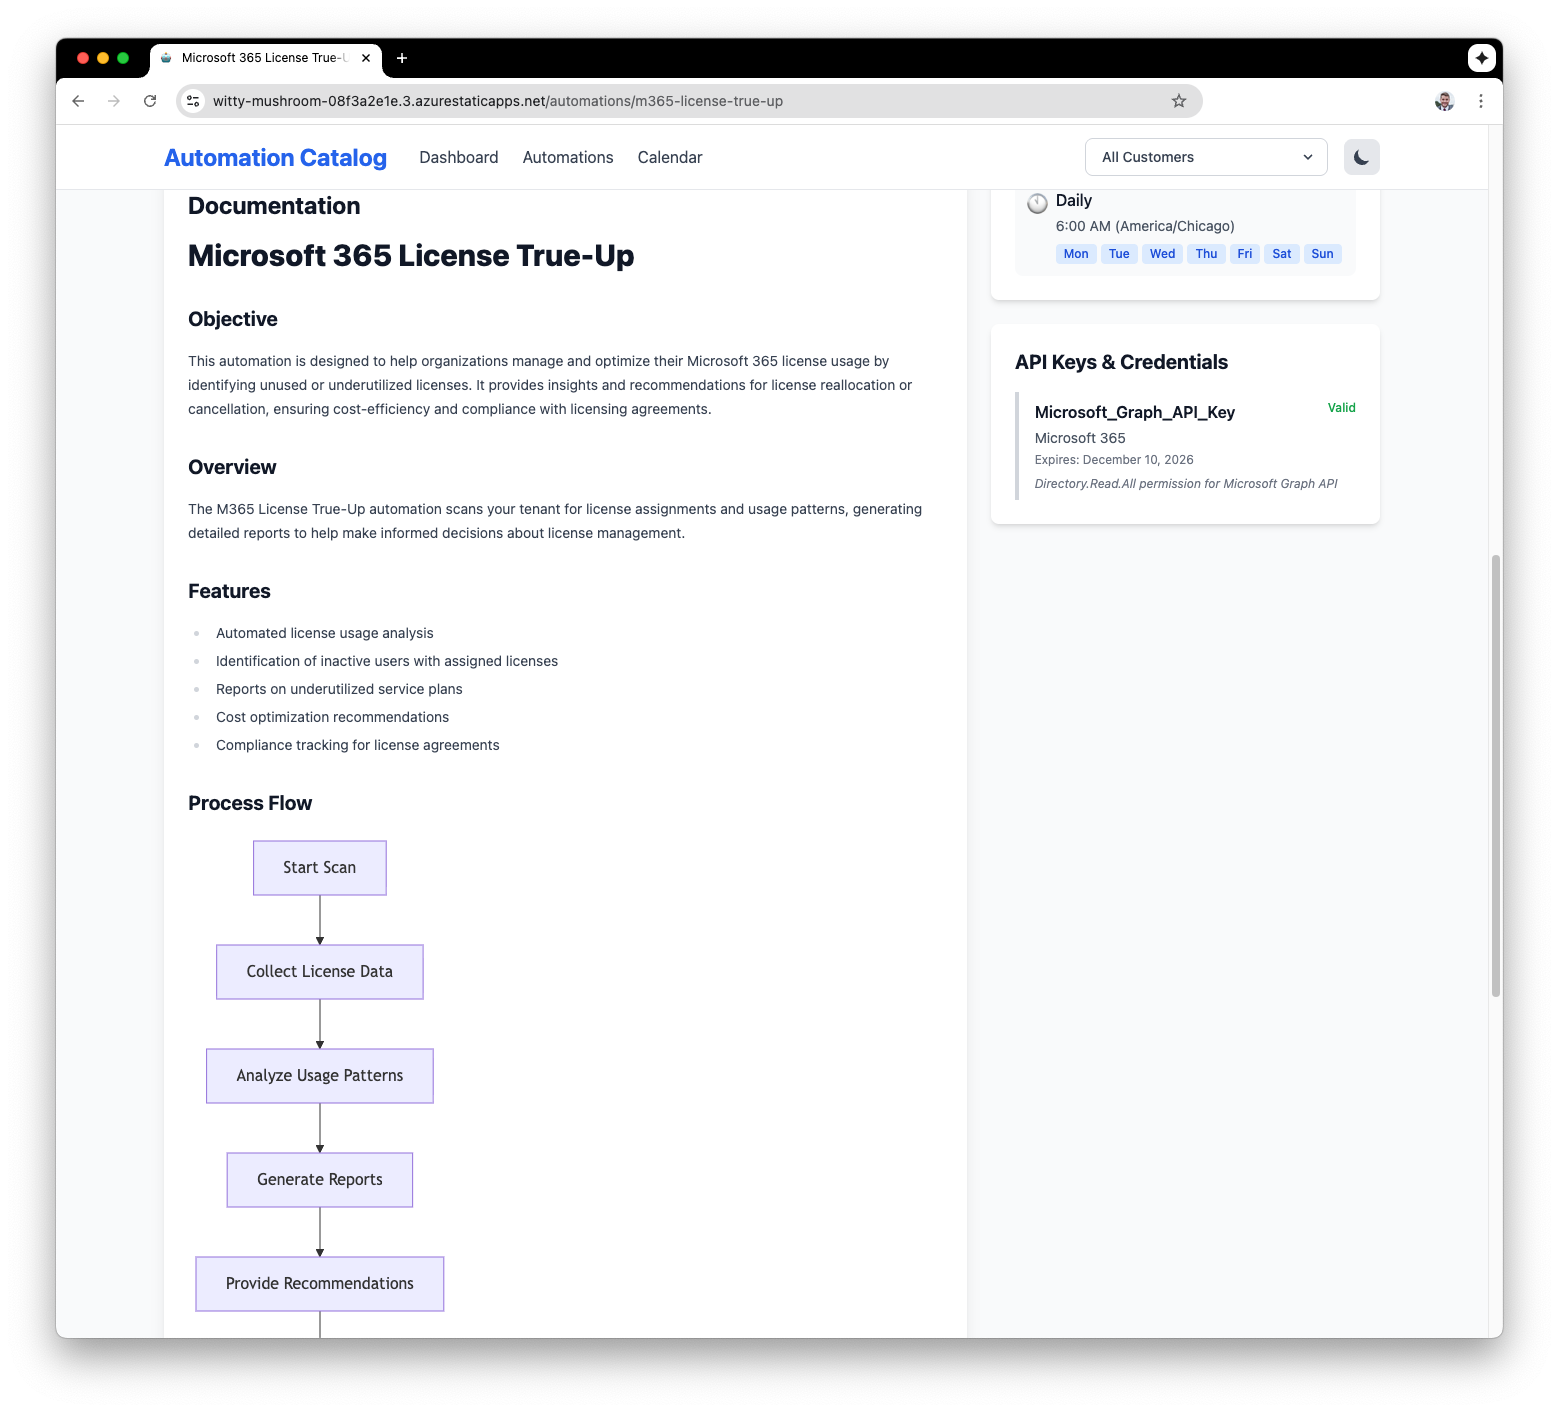
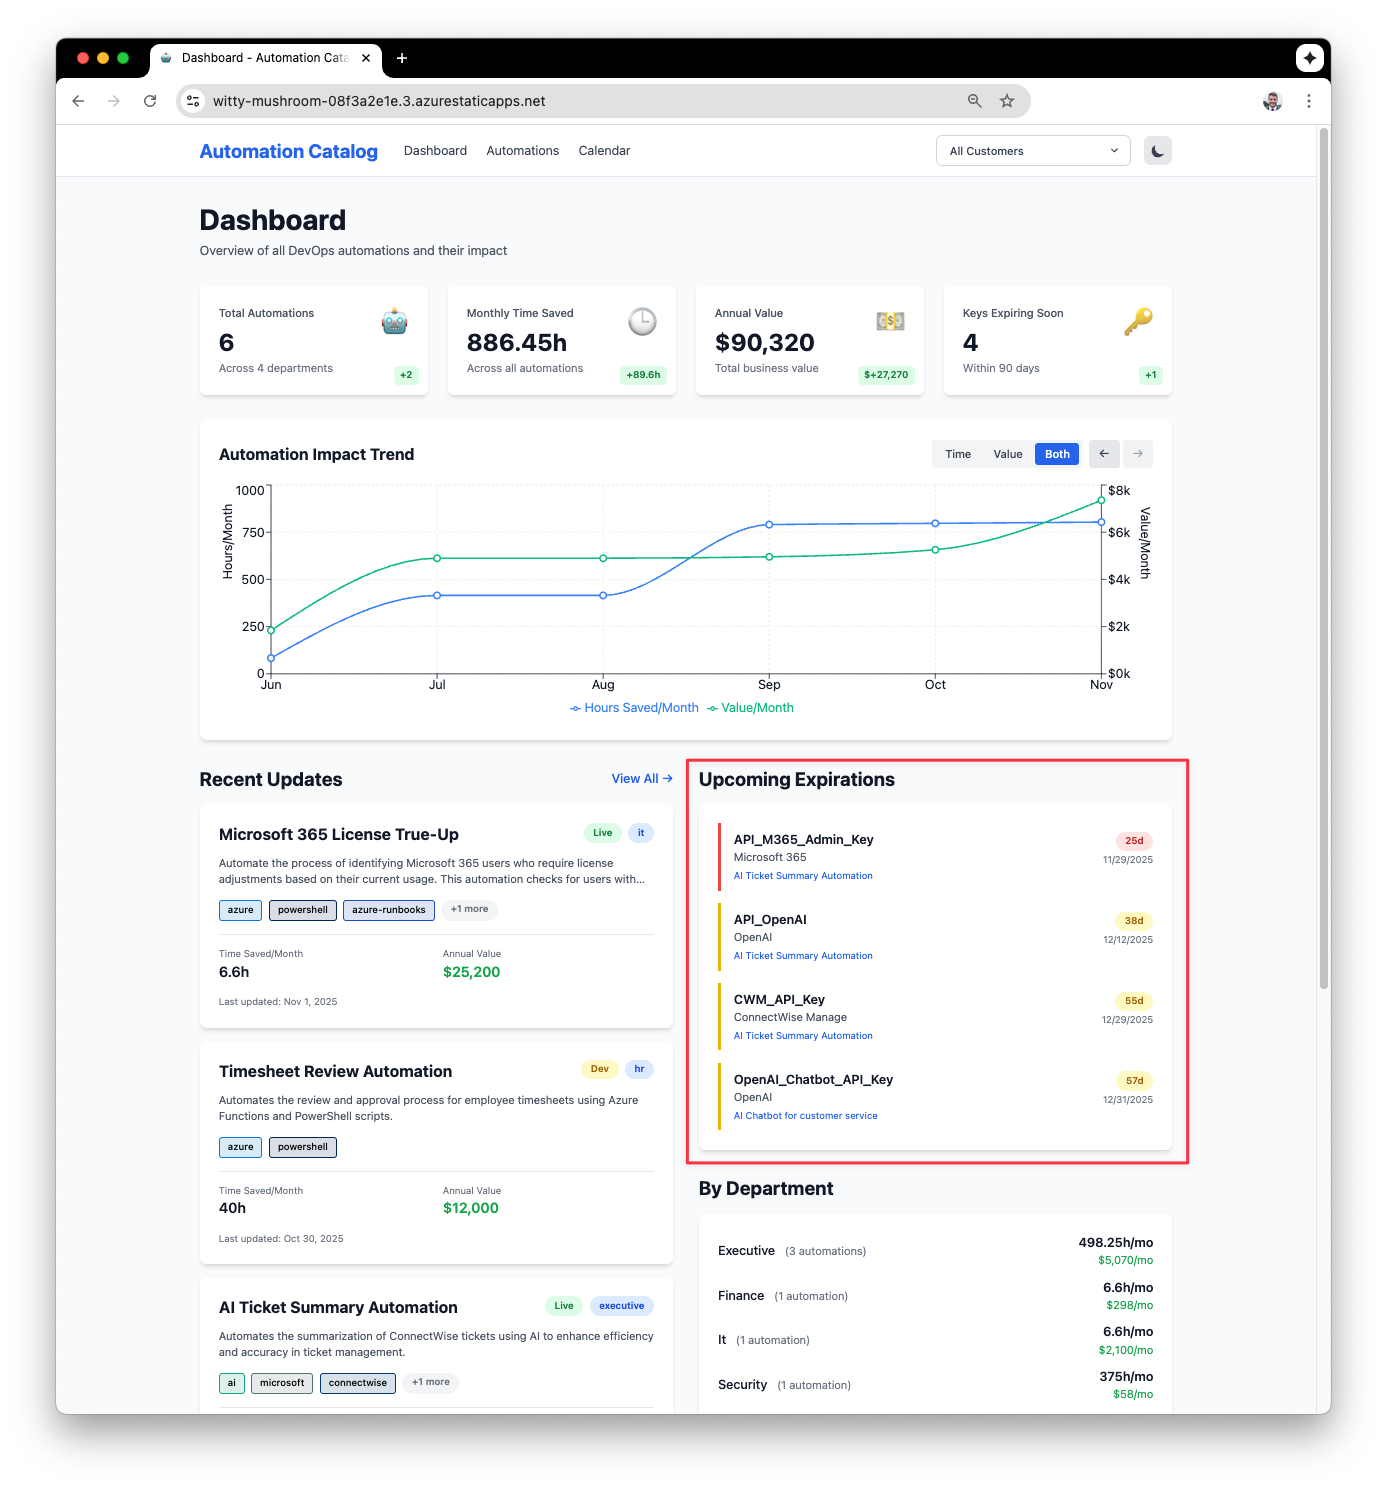
Track API Keys and Credentials
Each project can also track any Keys or credentials which will show you in a calendar when they are expiring. If the api-keys block is missing from the yaml file it will not show the keys widget.
```yaml
api_keys:
  - name: Workday_Timesheet_Review
    system: Workday
    expiration: 2027-10-29
    notes: Timesheets.Review.All, User.Read.All permissions
    url: https://example.itglue.com/42544/passwords/3967
  - name: AzureAD_User_Lookup
    system:  Azure AD
    expiration: 2027-01-29
    notes: API key for looking up users in M365
    url: https://example.itglue.com/4244/passwords/3389
```You can include a url to the api key or documentation for the credential. This will allow you to click the api key in calendar to go to it.
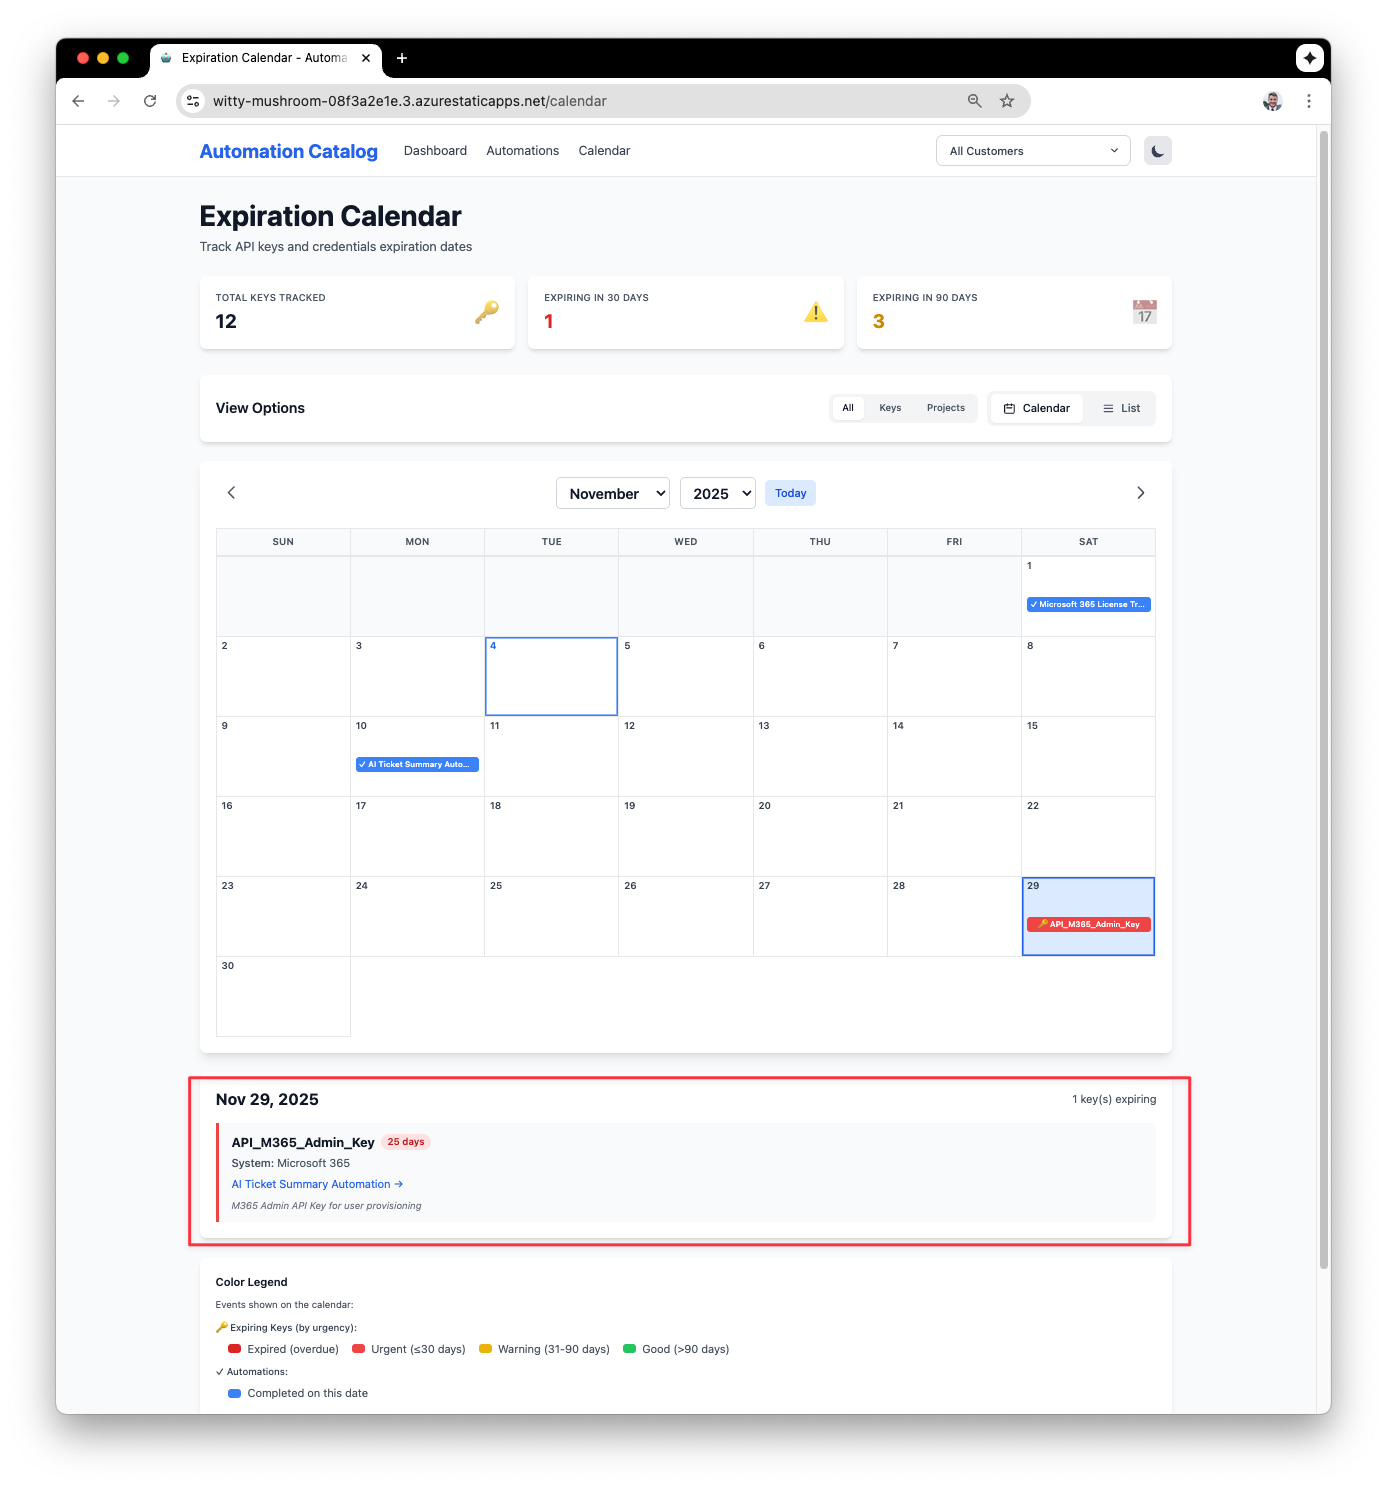
The dashboard will also display upcoming expirations.
Dark Mode
Of course the static web app allows the user to select light or dark mode. When you change the theme it will load that theme the next time your return as well.
Filter by Customer
In your projects metadata.yaml file you can enter in (optional) a customer. When there are multiple customers you can click the drop down in the top right corner and filter your page by that customer. I would recommend for managed service providers to set internal automations as customer ‘internal’ even if you do not yet have customer facing automations yet. This will make it easier down the road when you do.
Advanced Filtering
The Automations page allows you filter further against things like departments, tags, developers and status.
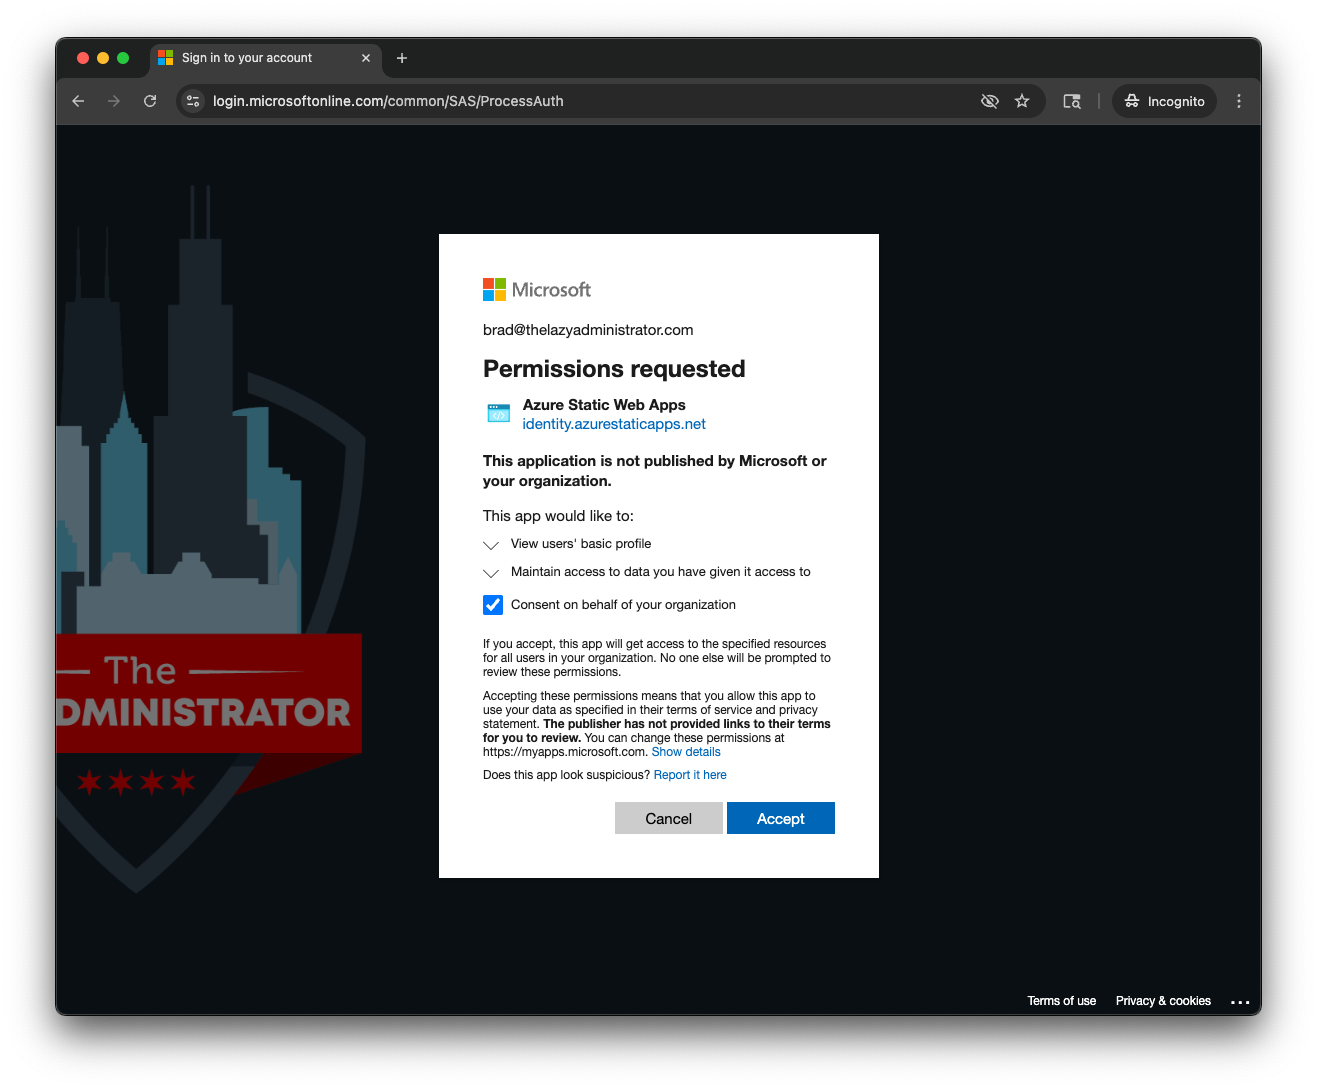
SSO
Enable SSO
SSO allows us to restrict access to our site to only members within our organization and requires users to authenticate. You can find a detailed document going over the setup in the docs folder called Enabling_SSO.md.
First, we need to go to /public and change staticwebapp.config.json.example to staticwebapp.config.json and then commit that change to rebuild the web app.
the file should have the following config:
{
  "navigationFallback": {
    "rewrite": "/index.html"
  },
  "routes": [
    {
      "route": "/*",
      "allowedRoles": [ "authenticated" ]
    }
  ],
  "responseOverrides": {
    "401": {
      "statusCode": 302,
      "redirect": "/.auth/login/aad"
    }
  }
}Once the web app is rebuilt, we can check the web apps routes in the portal by going to the web app > routes:
[
  {
    "route": "/*",
    "allowedRoles": [
      "authenticated"
    ]
  }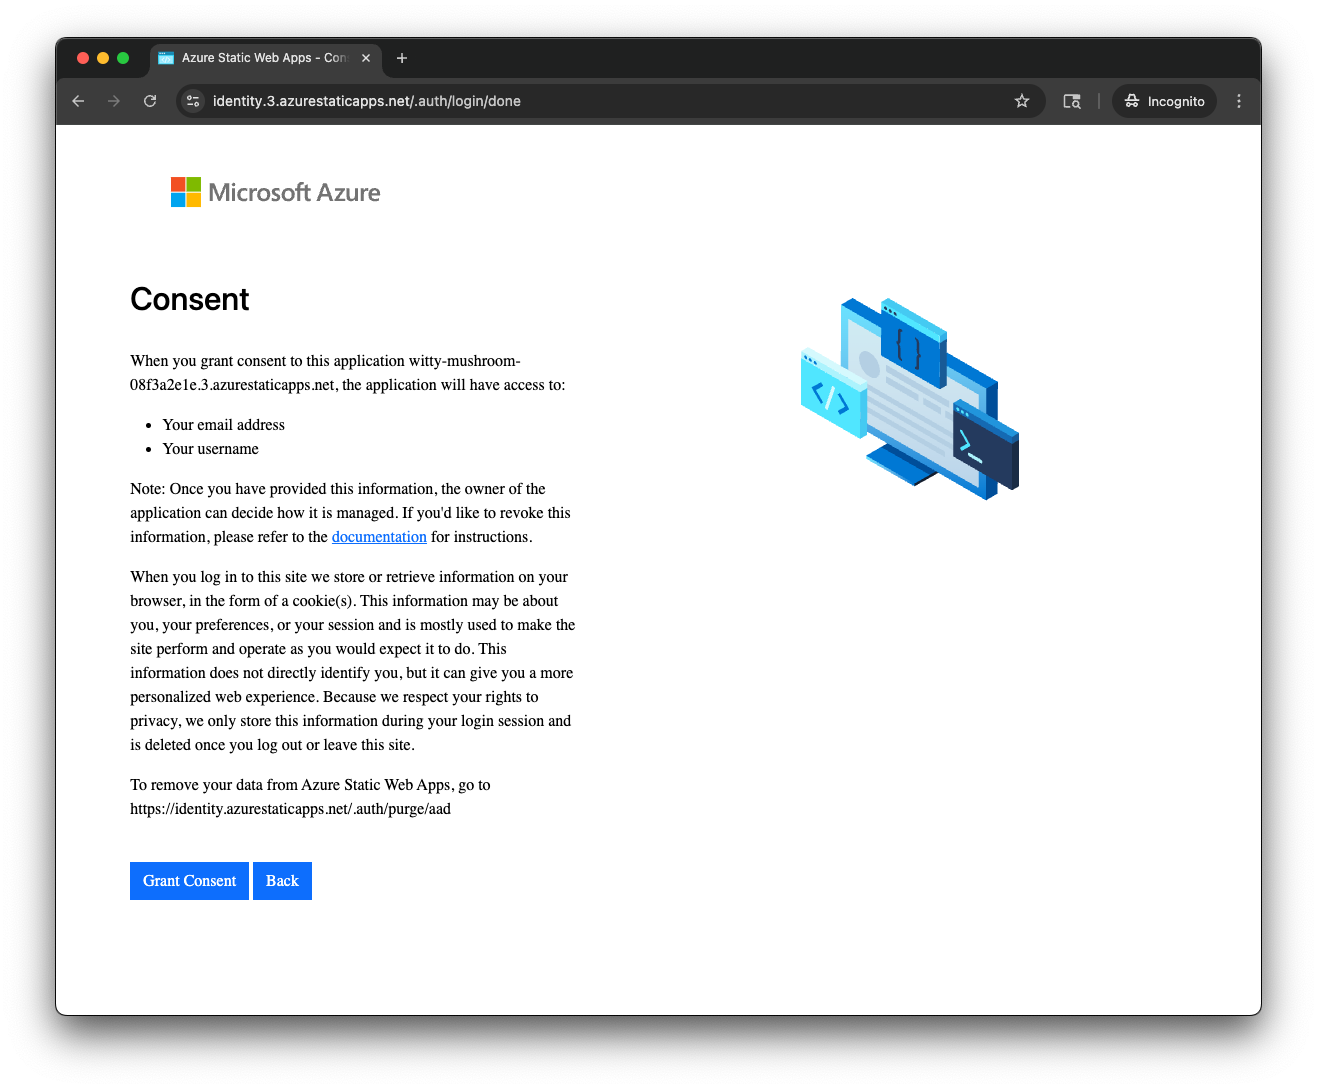
]After the build completes, if this is the first time, log in with a global admin and perform the consent
Disable SSO
To disable SSO you can change the name of the staticwebapp.config.json back to staticwebapp.config.json.example or remove the file entirely and then commit the changes to rebuild the web app.

My name is Bradley Wyatt; I am a 6x Dual-Microsoft Most Valuable Professional (MVP) in Microsoft Azure and Microsoft 365. I have given talks at many different conferences, user groups, and companies throughout the United States, ranging from PowerShell to DevOps Security best practices, and I am the 2022 North American Outstanding Contribution to the Microsoft Community winner.