Migrate your Runbooks in Azure Automation to Managed Identities
Table of Contents
Microsoft has recently announced that on September 30th, 2023, Azure Automation RunAs accounts, including Classic Run As accounts, will be retired so you will need to migrate your runbooks to managed identities for authentication. Managed Identities provide the same functionality as a RunAs accounts, plus:
- Secure authentication to any Azure service that supports Azure Active Directory (Azure AD) authentication.
- Minimized management overhead with easy access to resources.
- Simplified runbooks with no requirement to use multi-line code.
Review your Automation Accounts
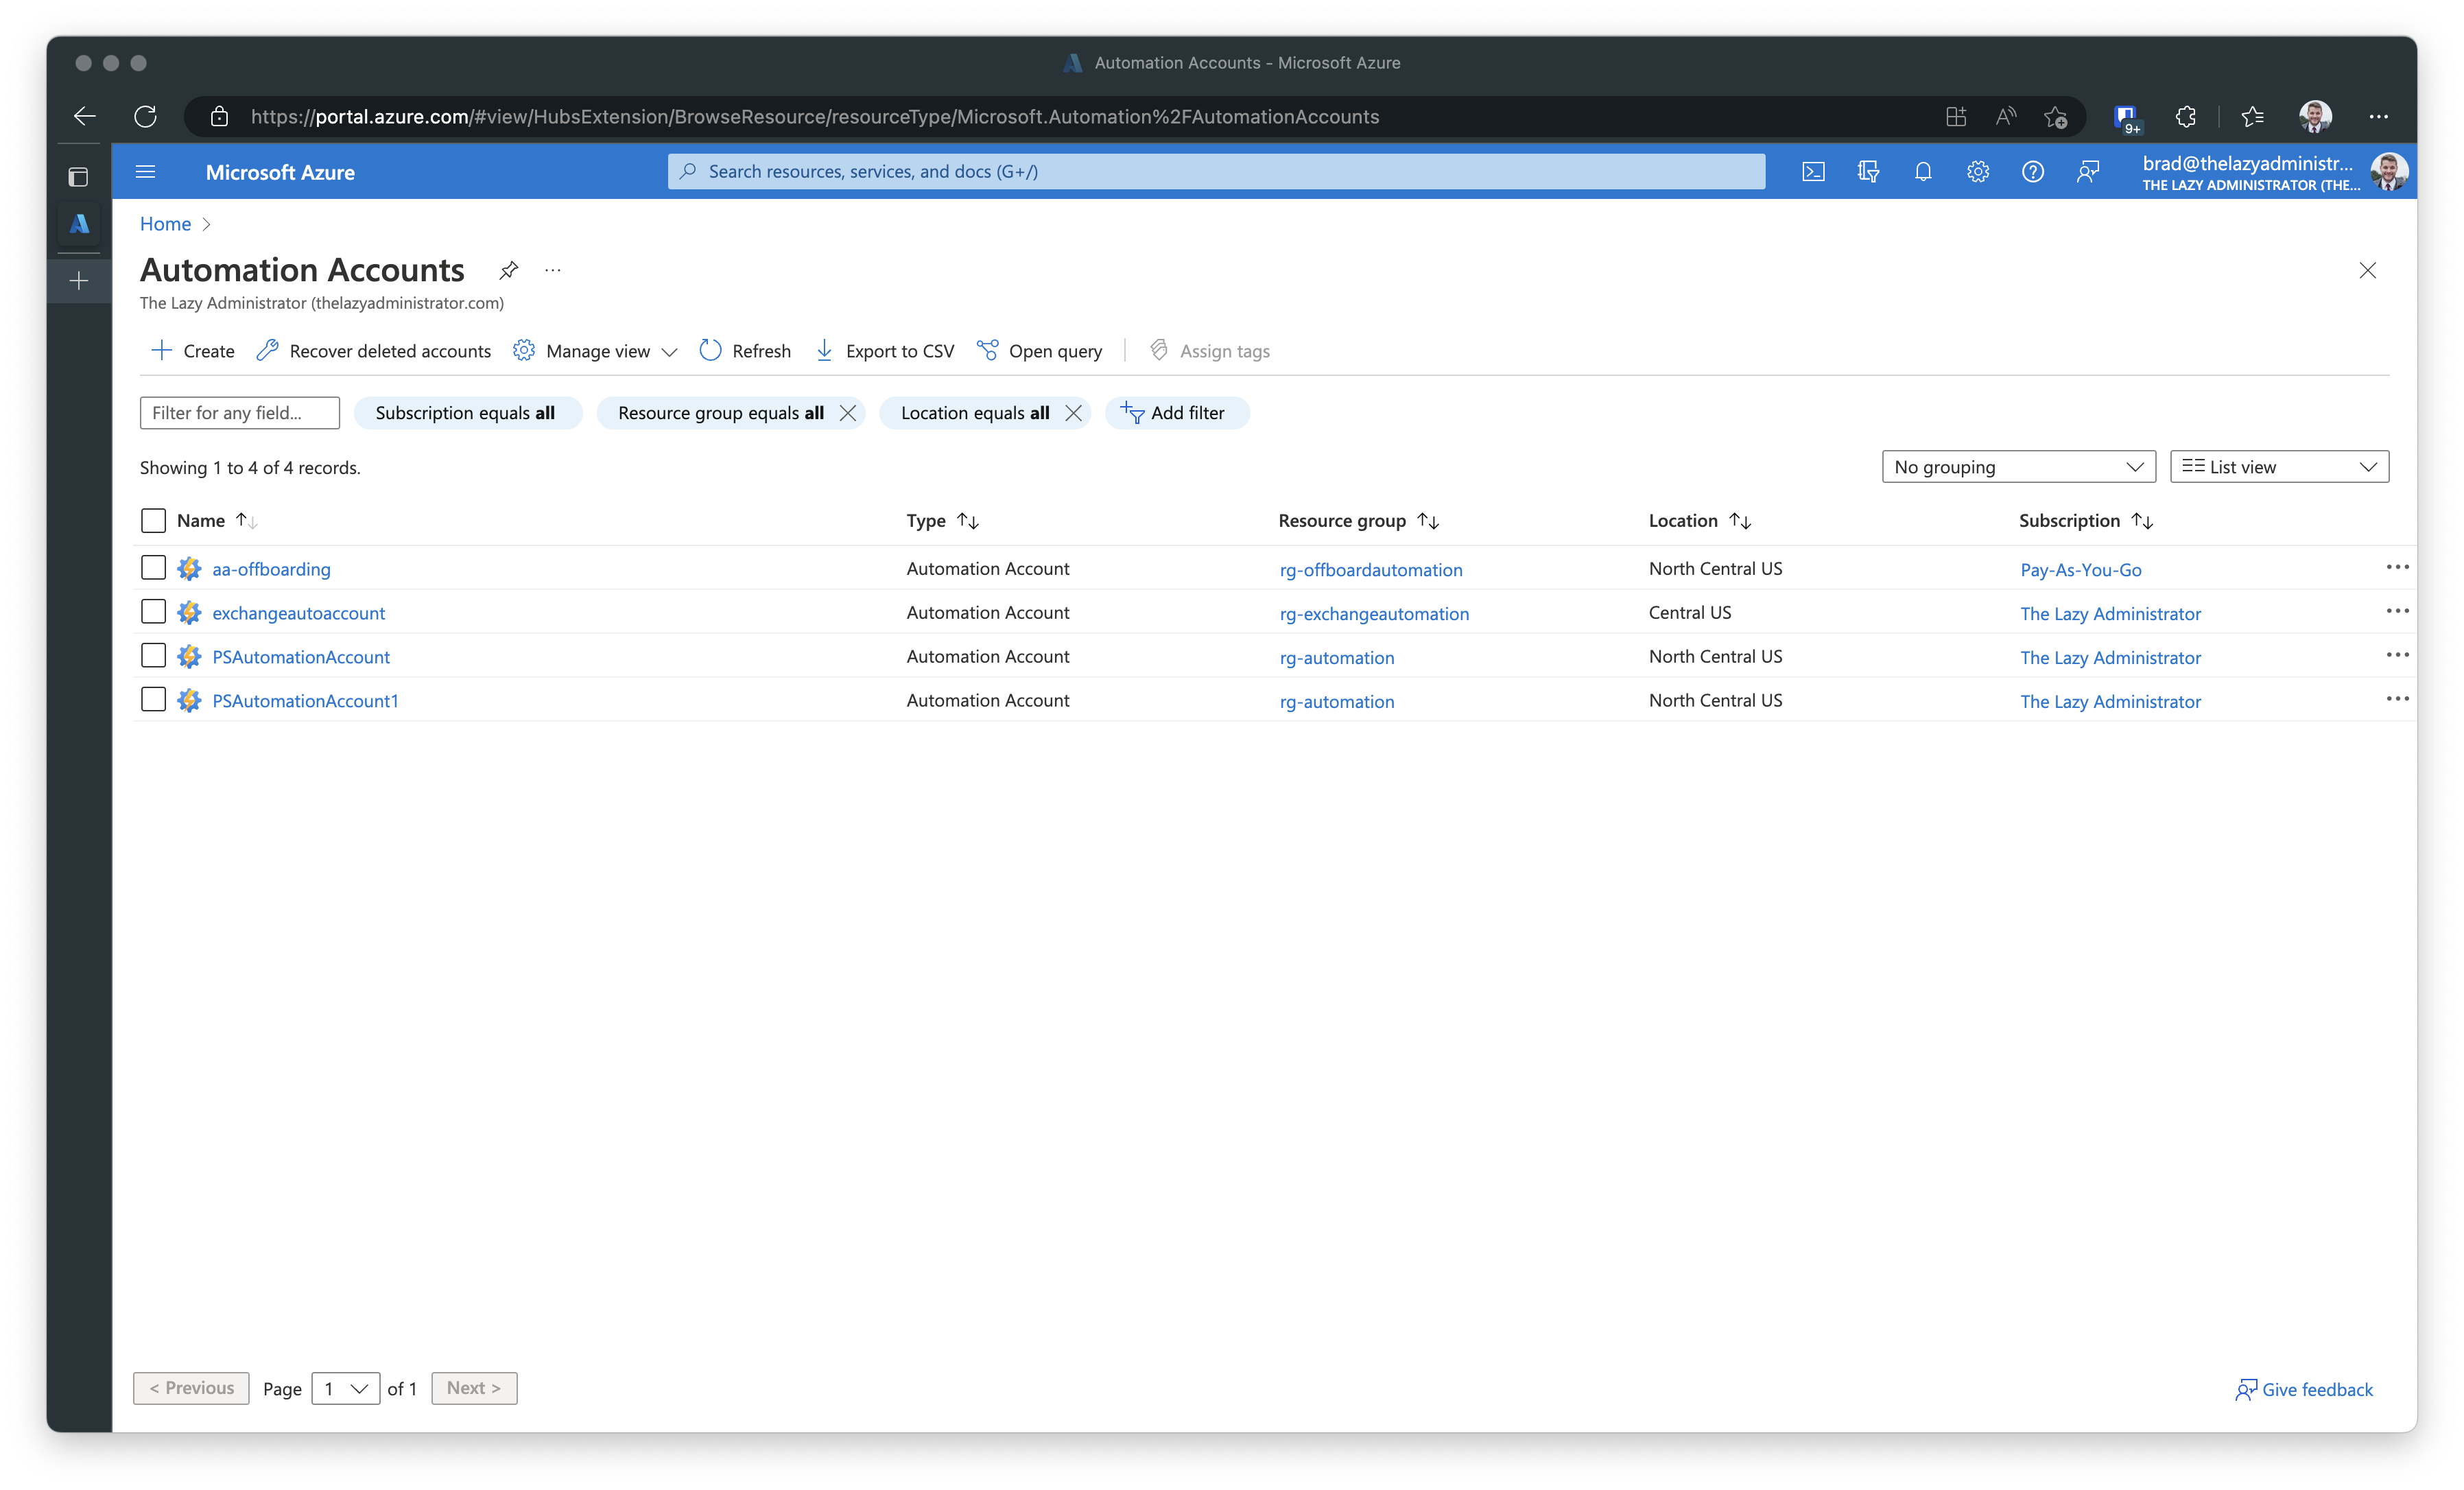
The first item that must be done, is to review your Automation Accounts within Azure to see which one, if any, are using RunAs or Classic RunAs Accounts. In Azure go to Automation Accounts. In the screenshot below we can see that I have a total of four (4) different automation accounts that span three (3) resource groups, and two (2) Azure subscriptions.
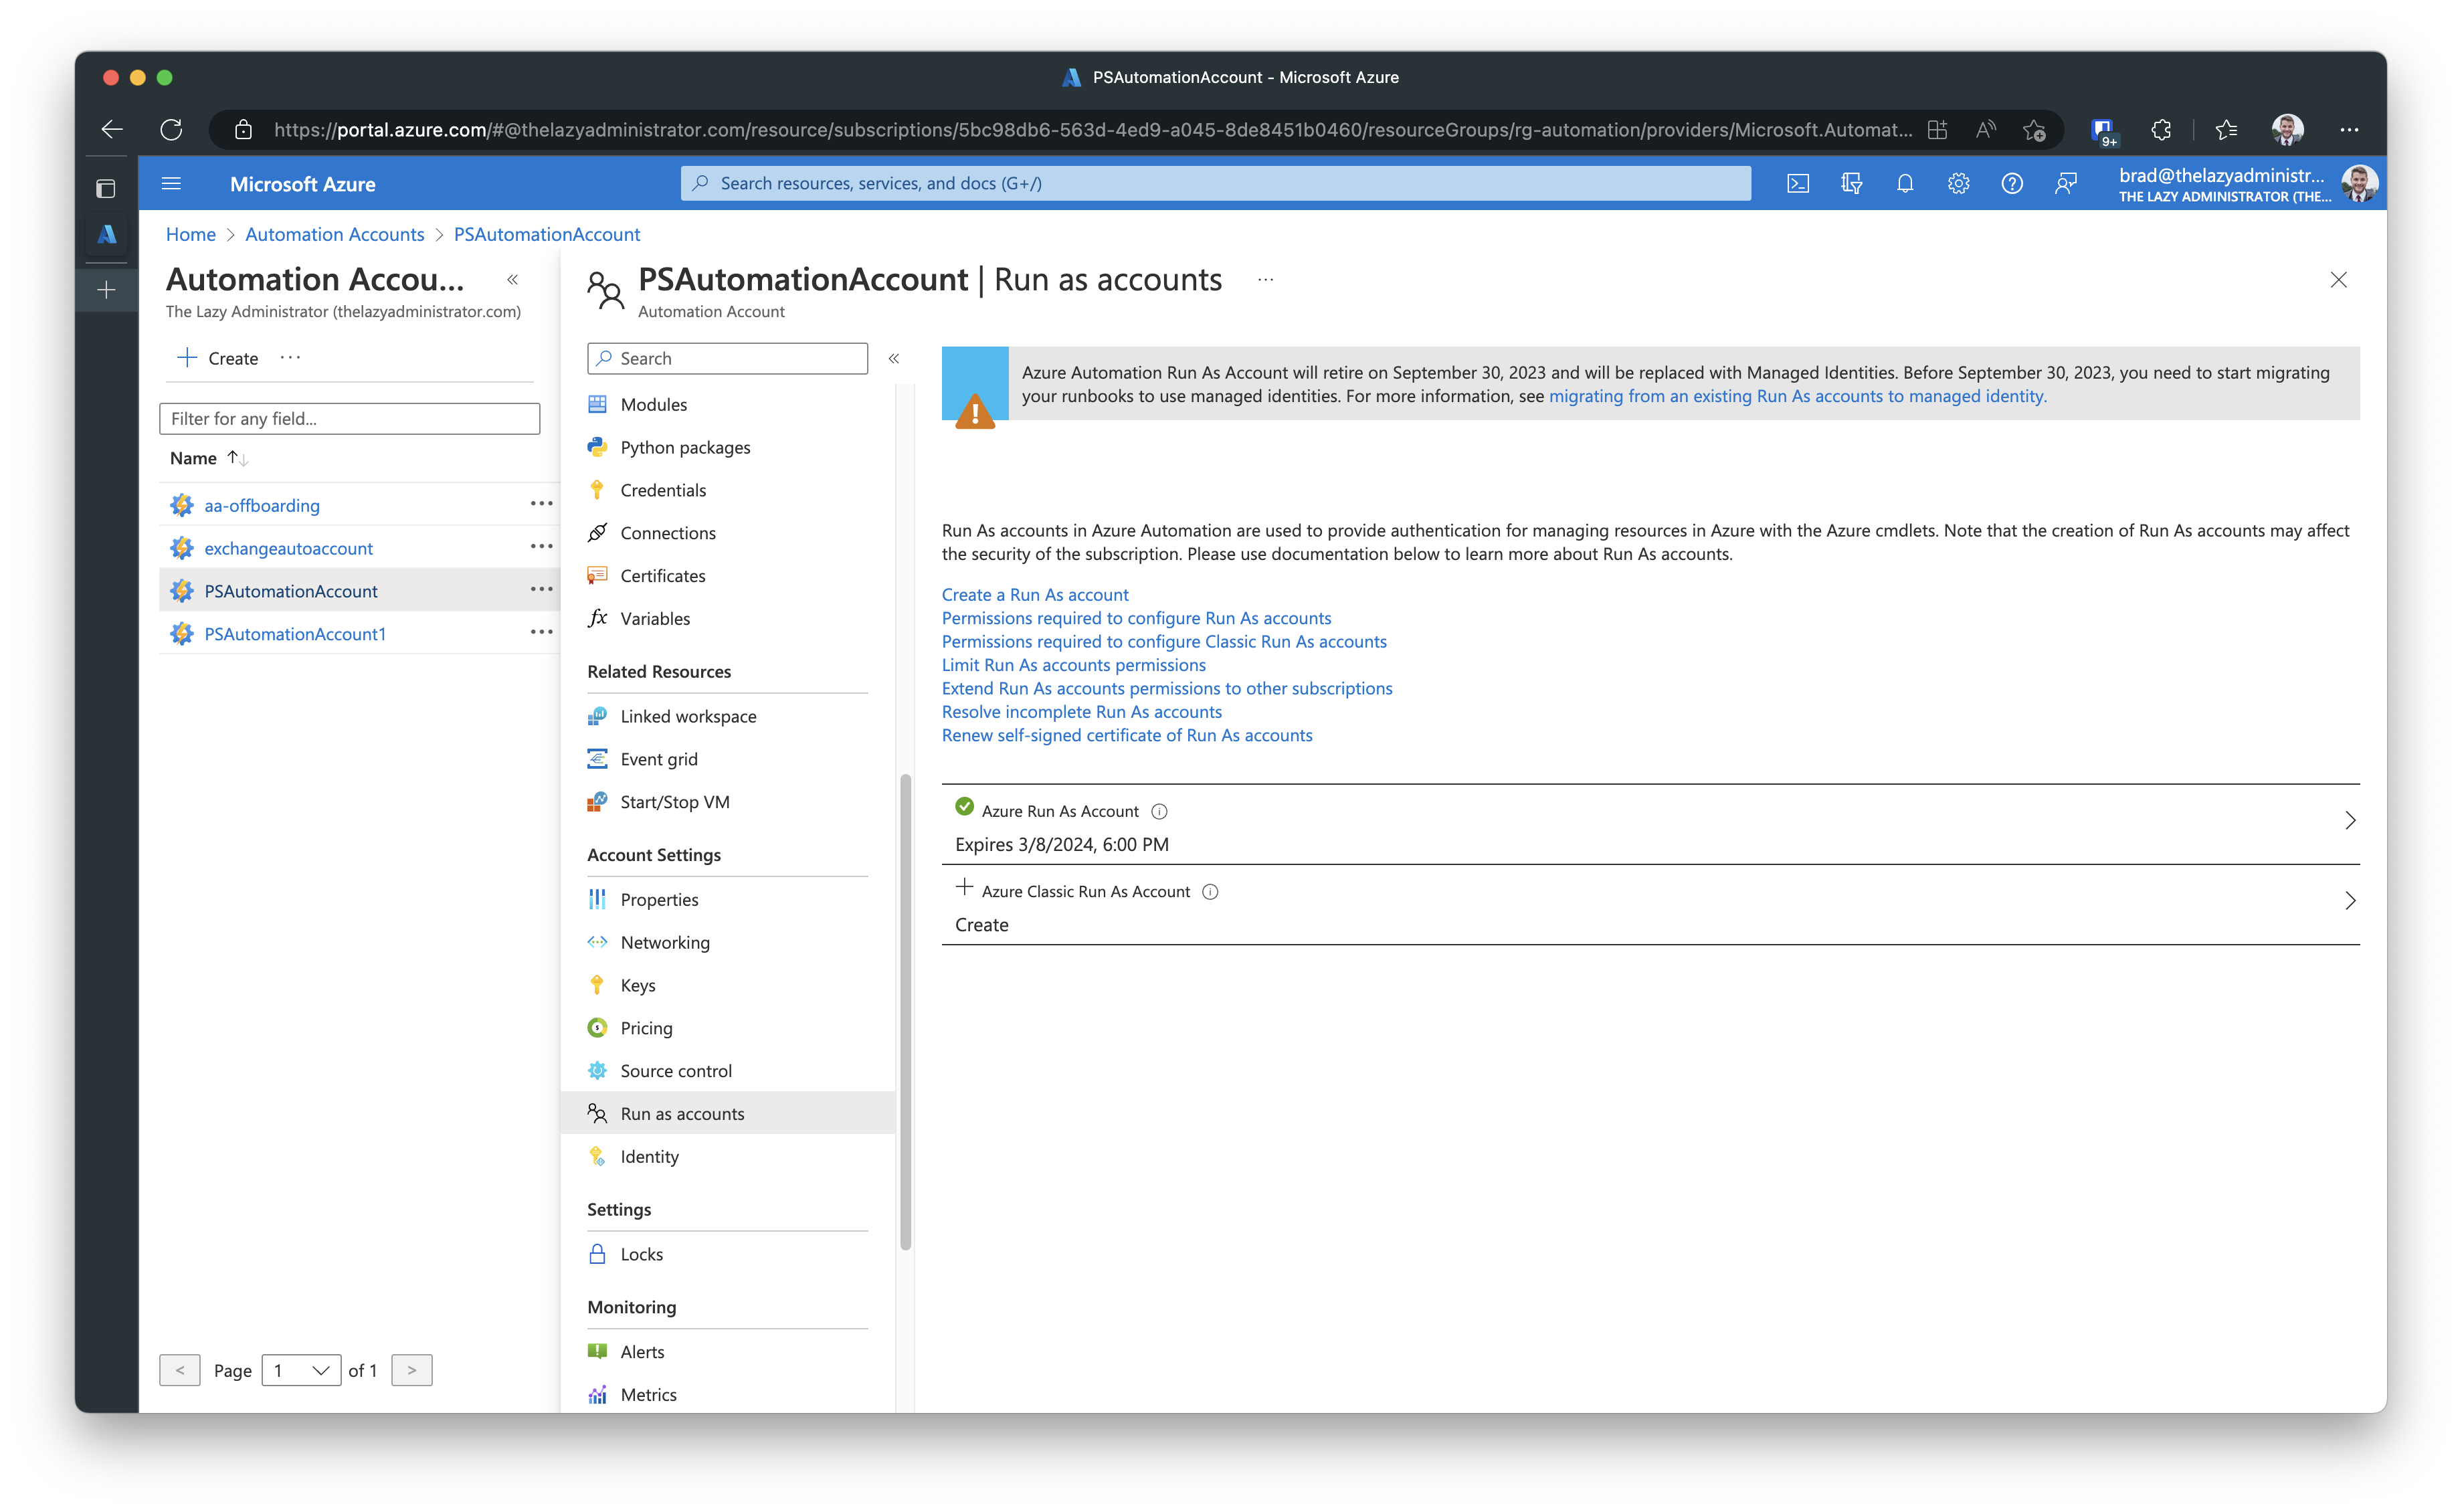
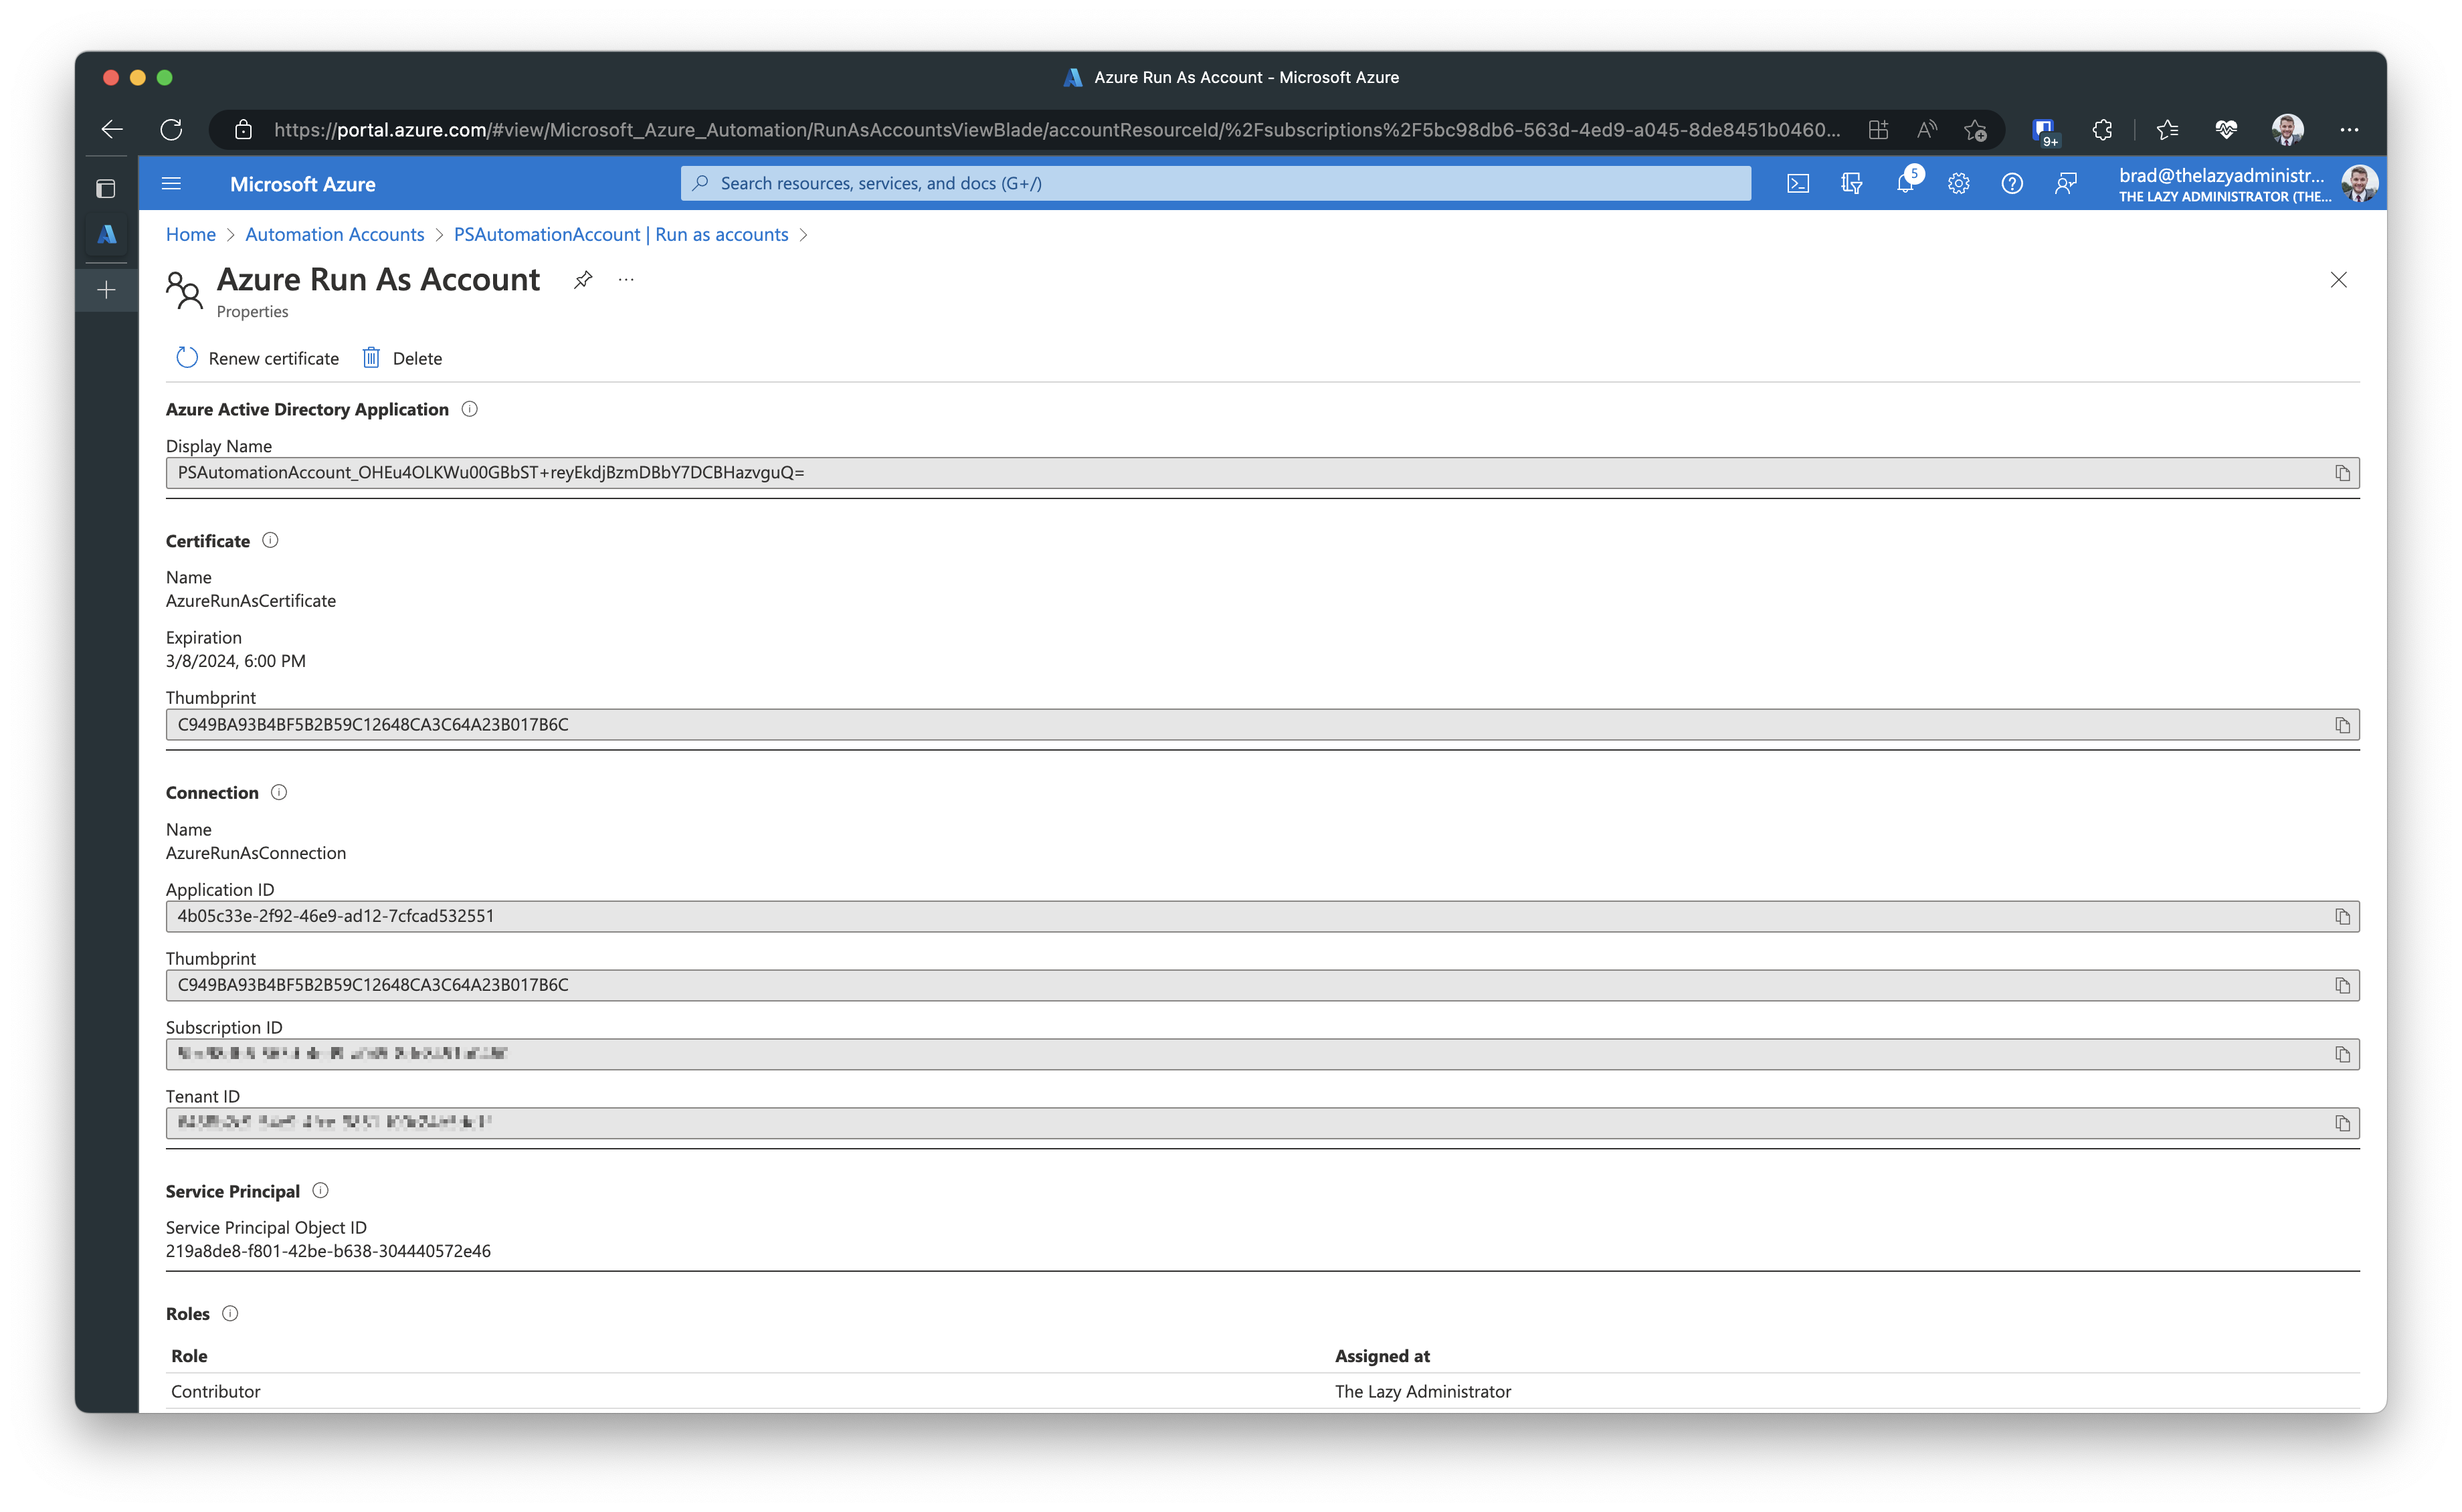
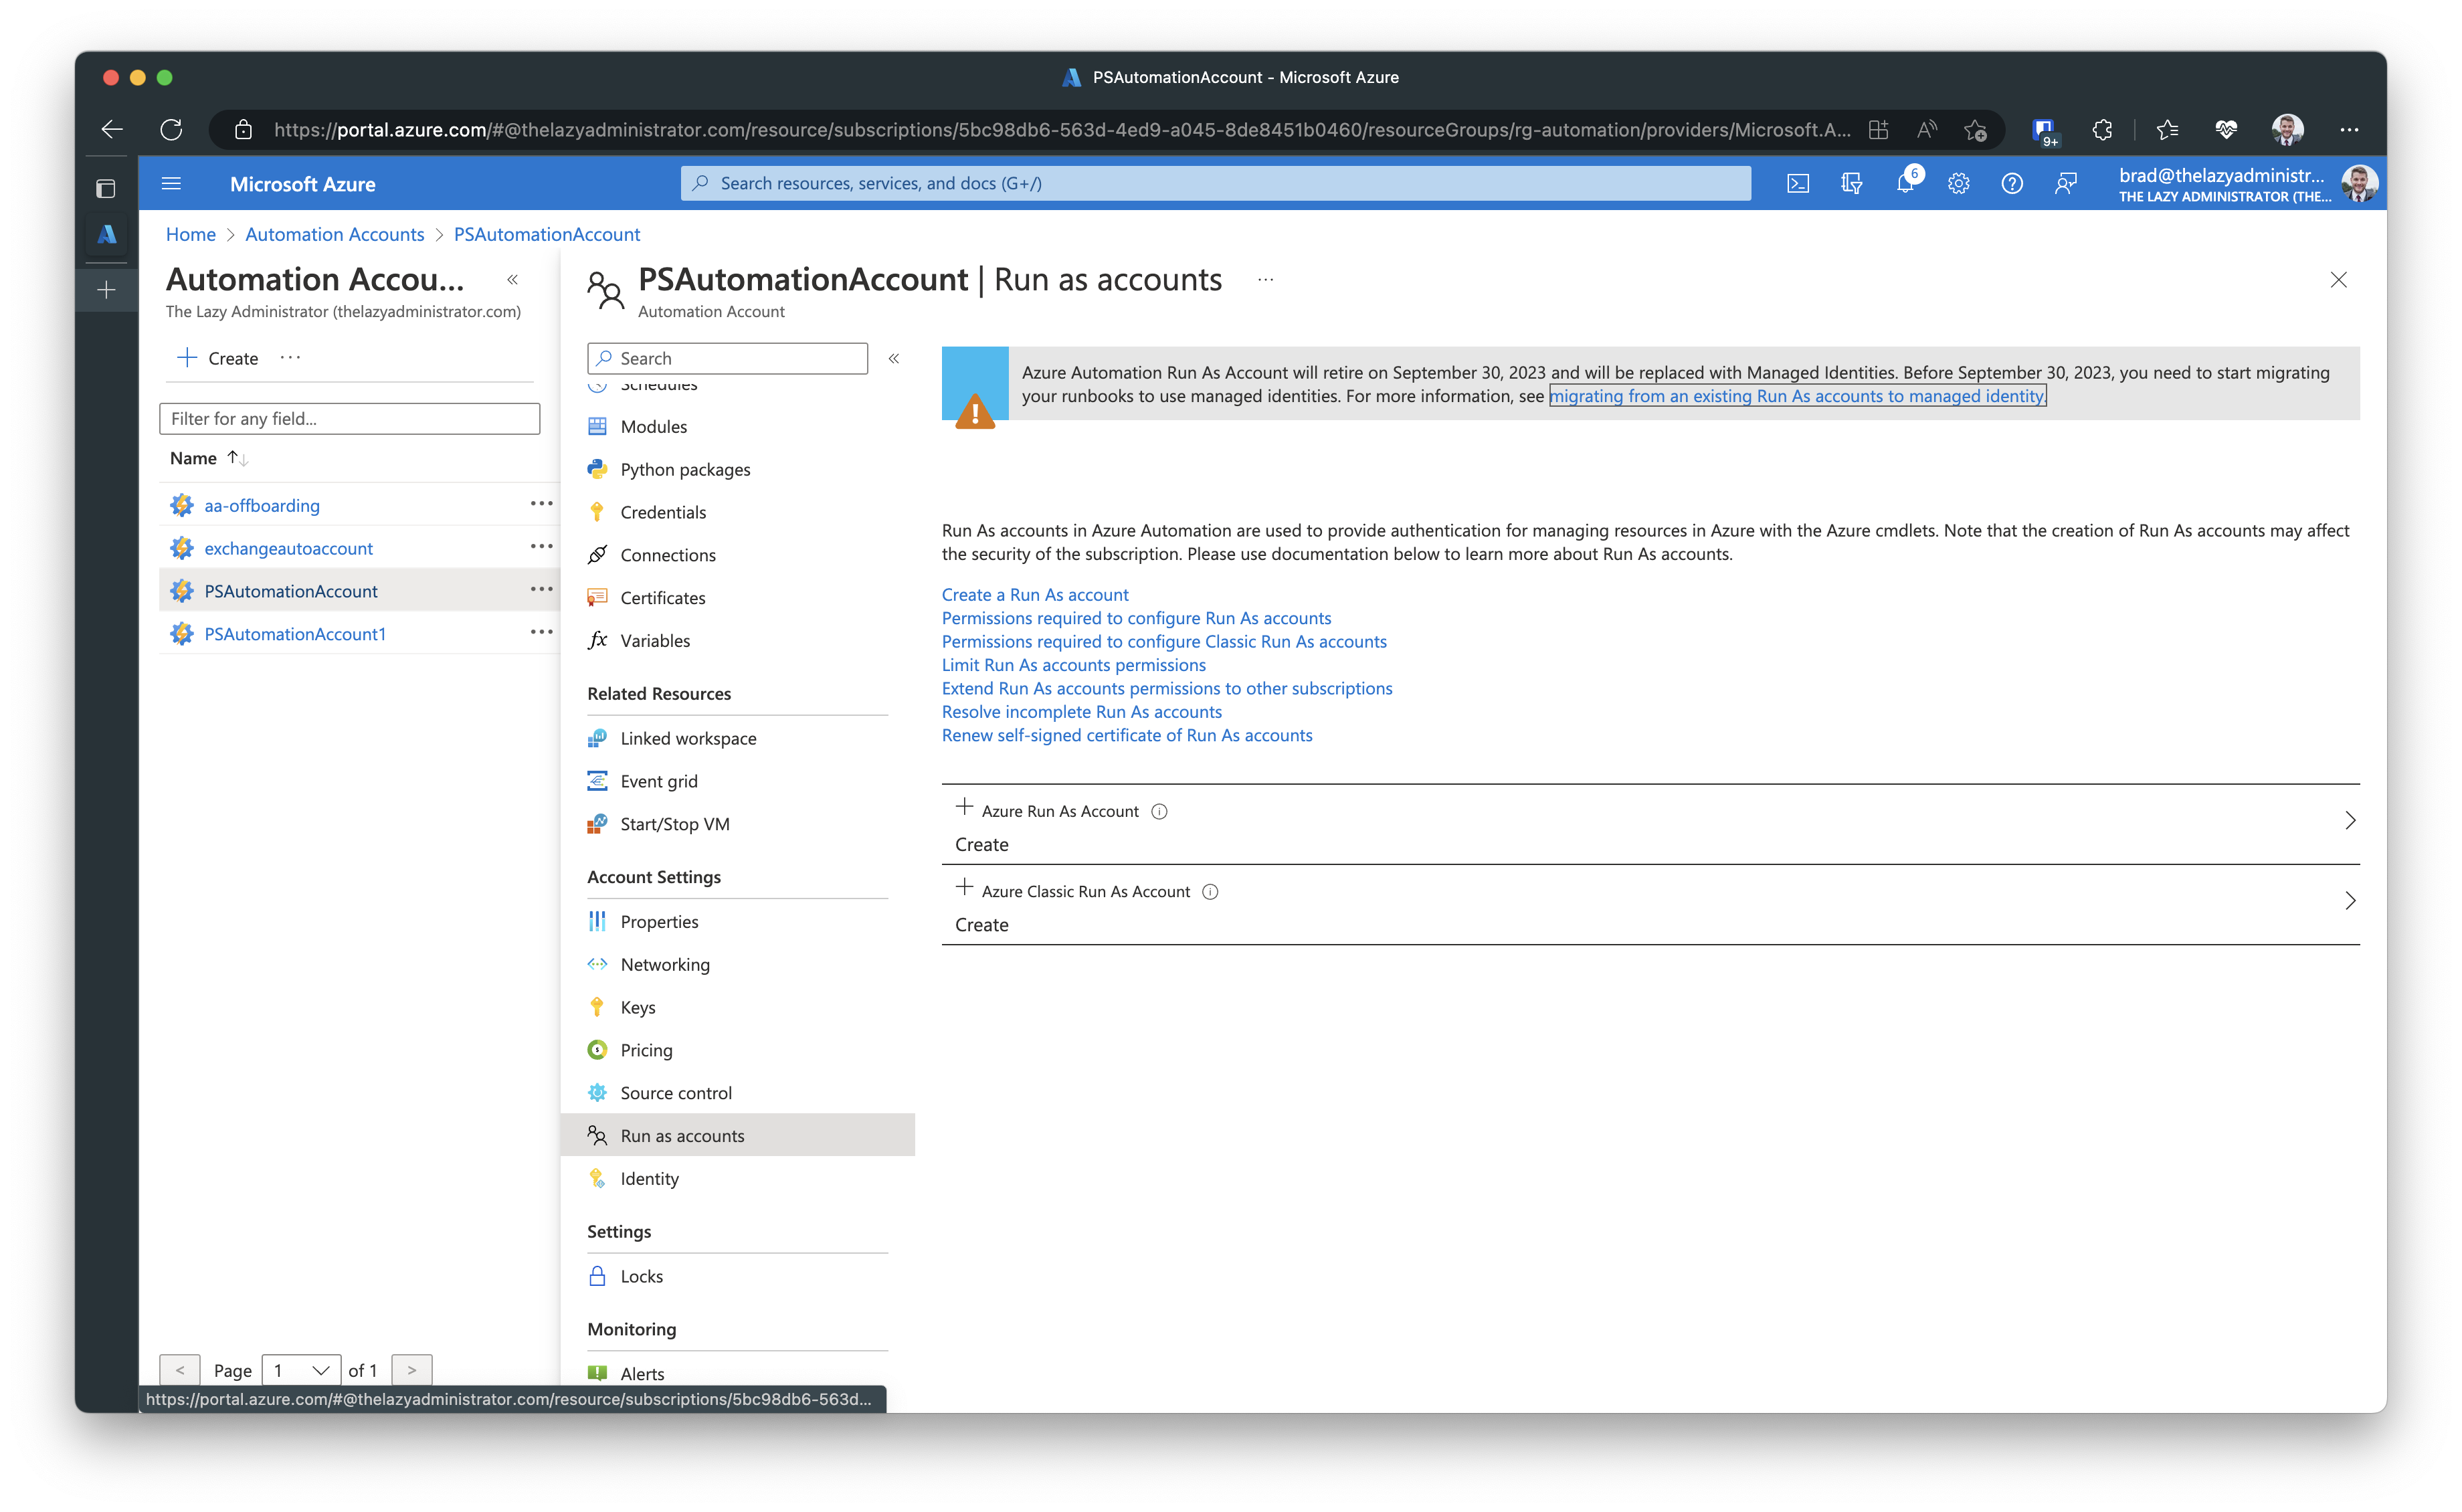
If I click an Automation Account and go to Run as accounts, I can see if the Automation Account has an associated Run As Account. In the example below, I have one Run As Account.
Check Role Assignments for the Run As Accounts
Next, I need to note the roles the Run As Account has assigned to it. If I click the Run As Account from the screen above it will show me properties of it. At the bottom it will list out the roles. 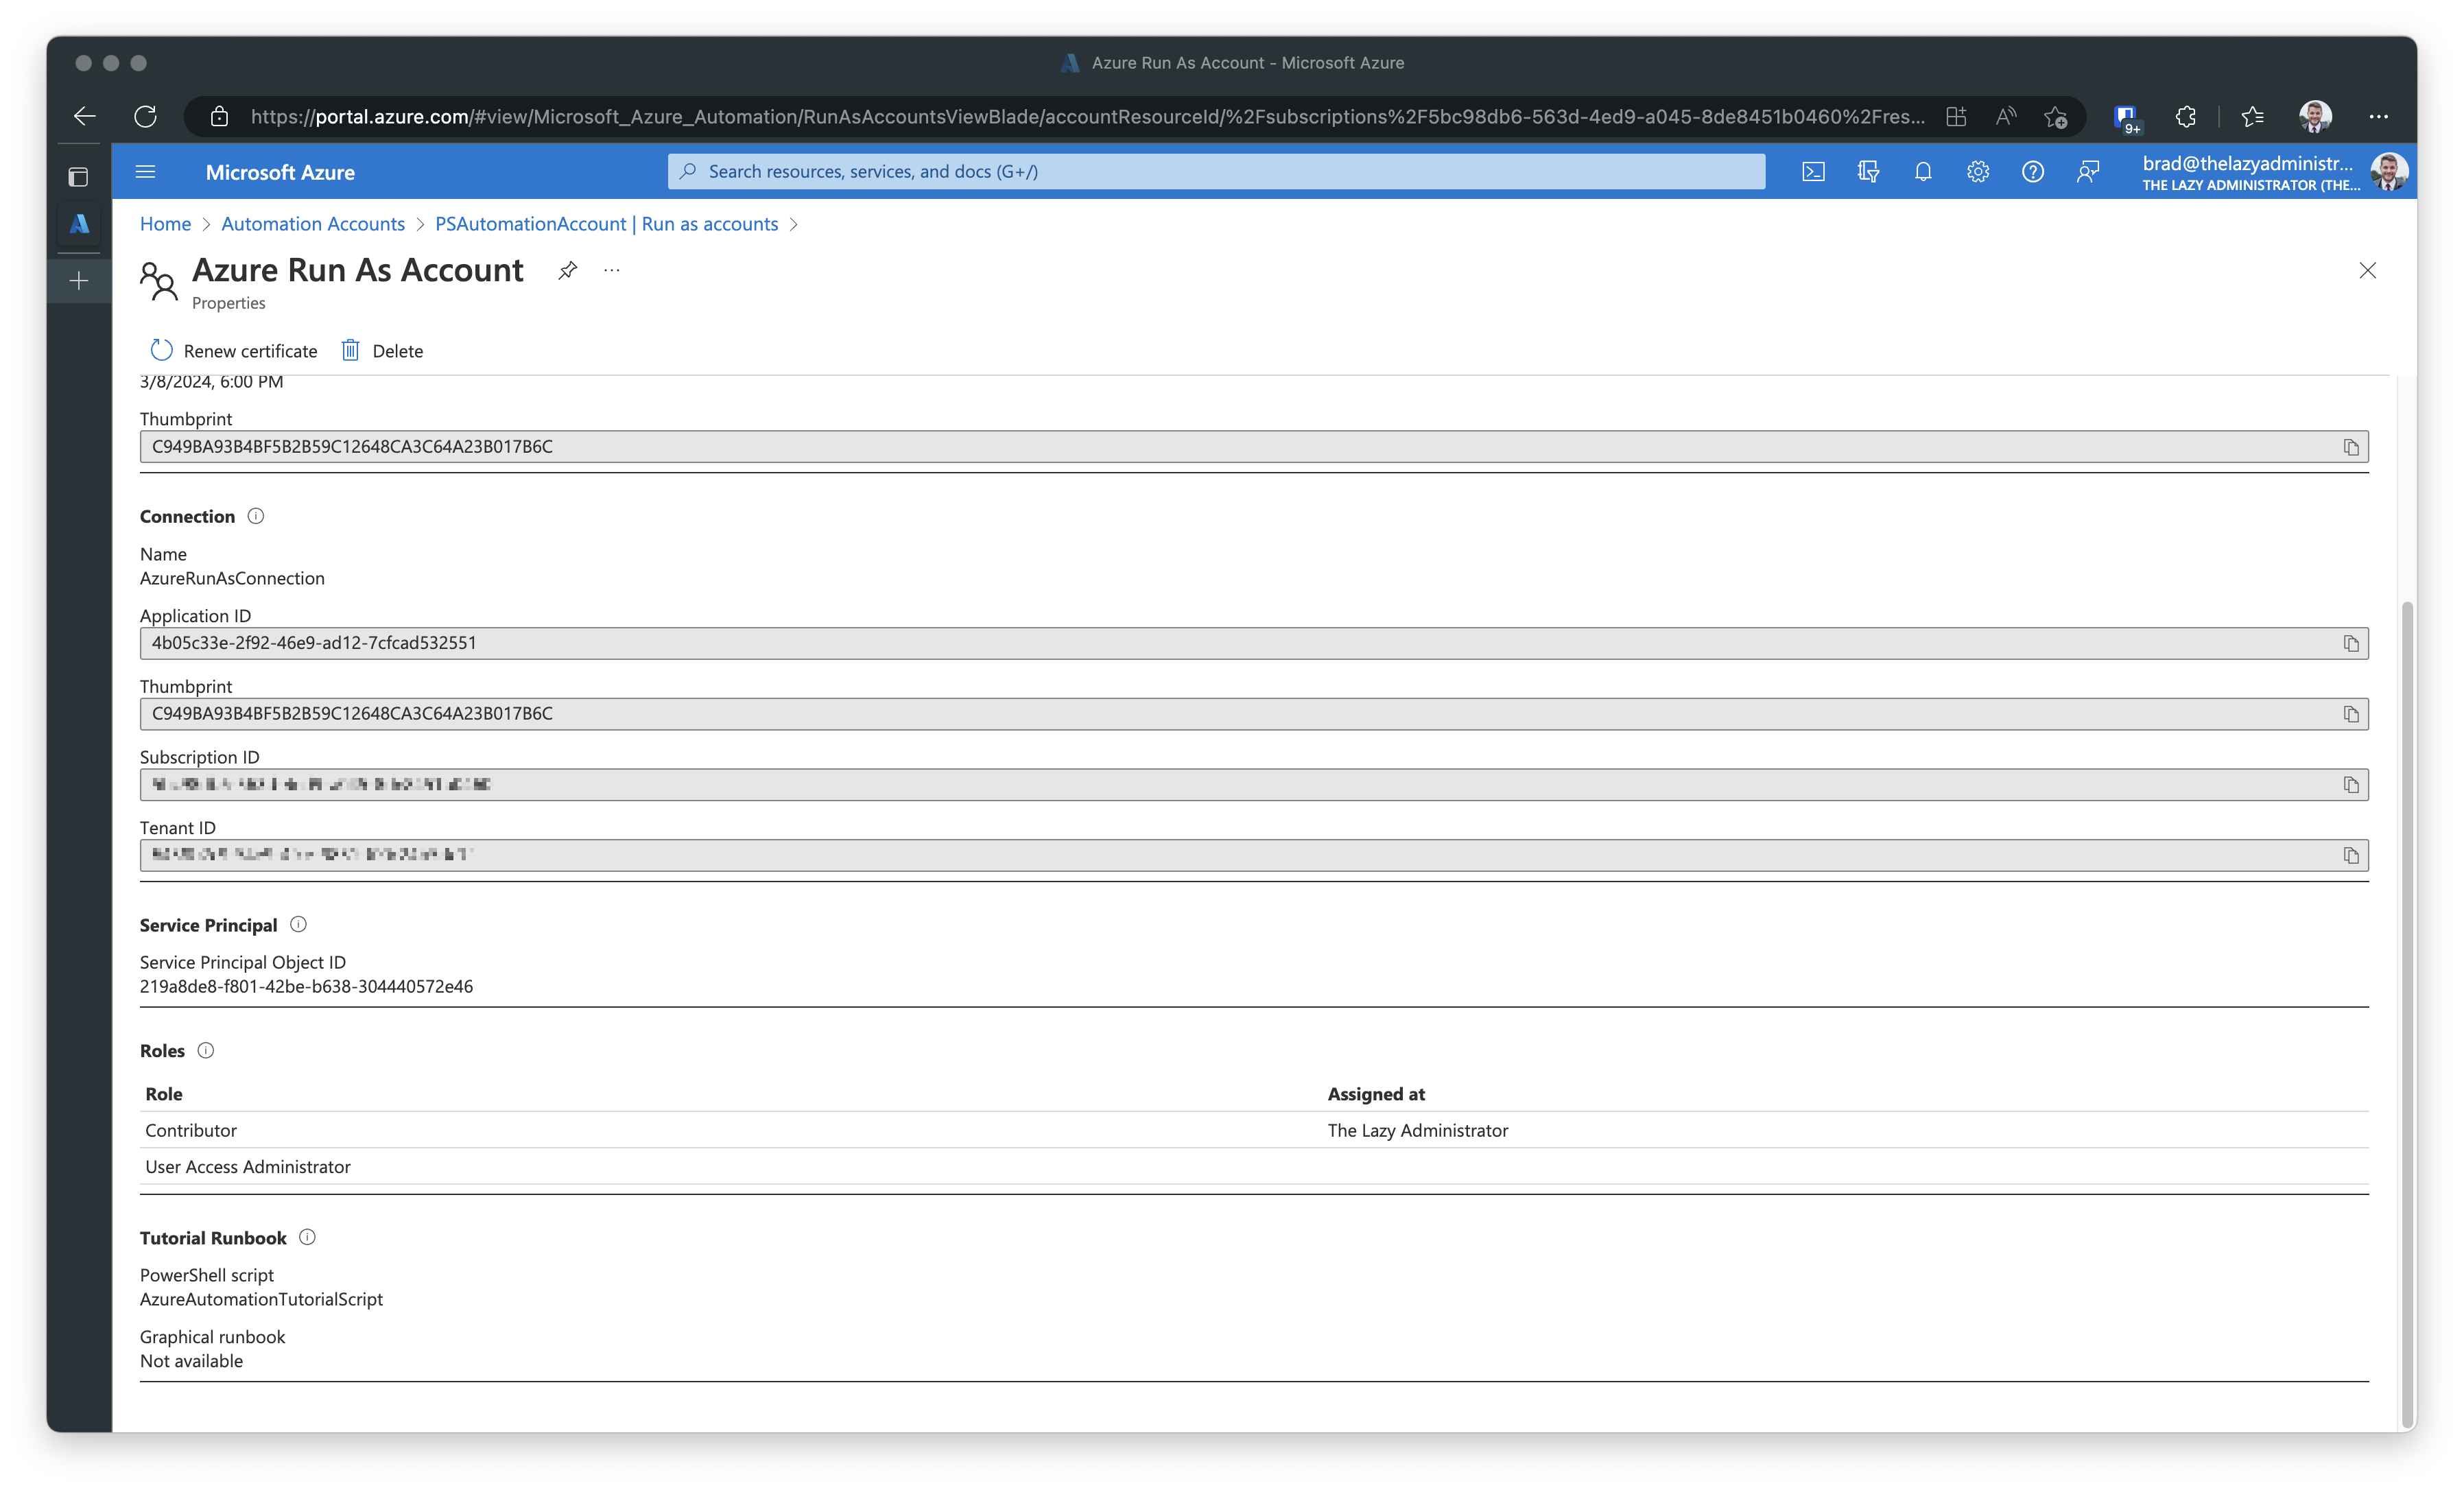
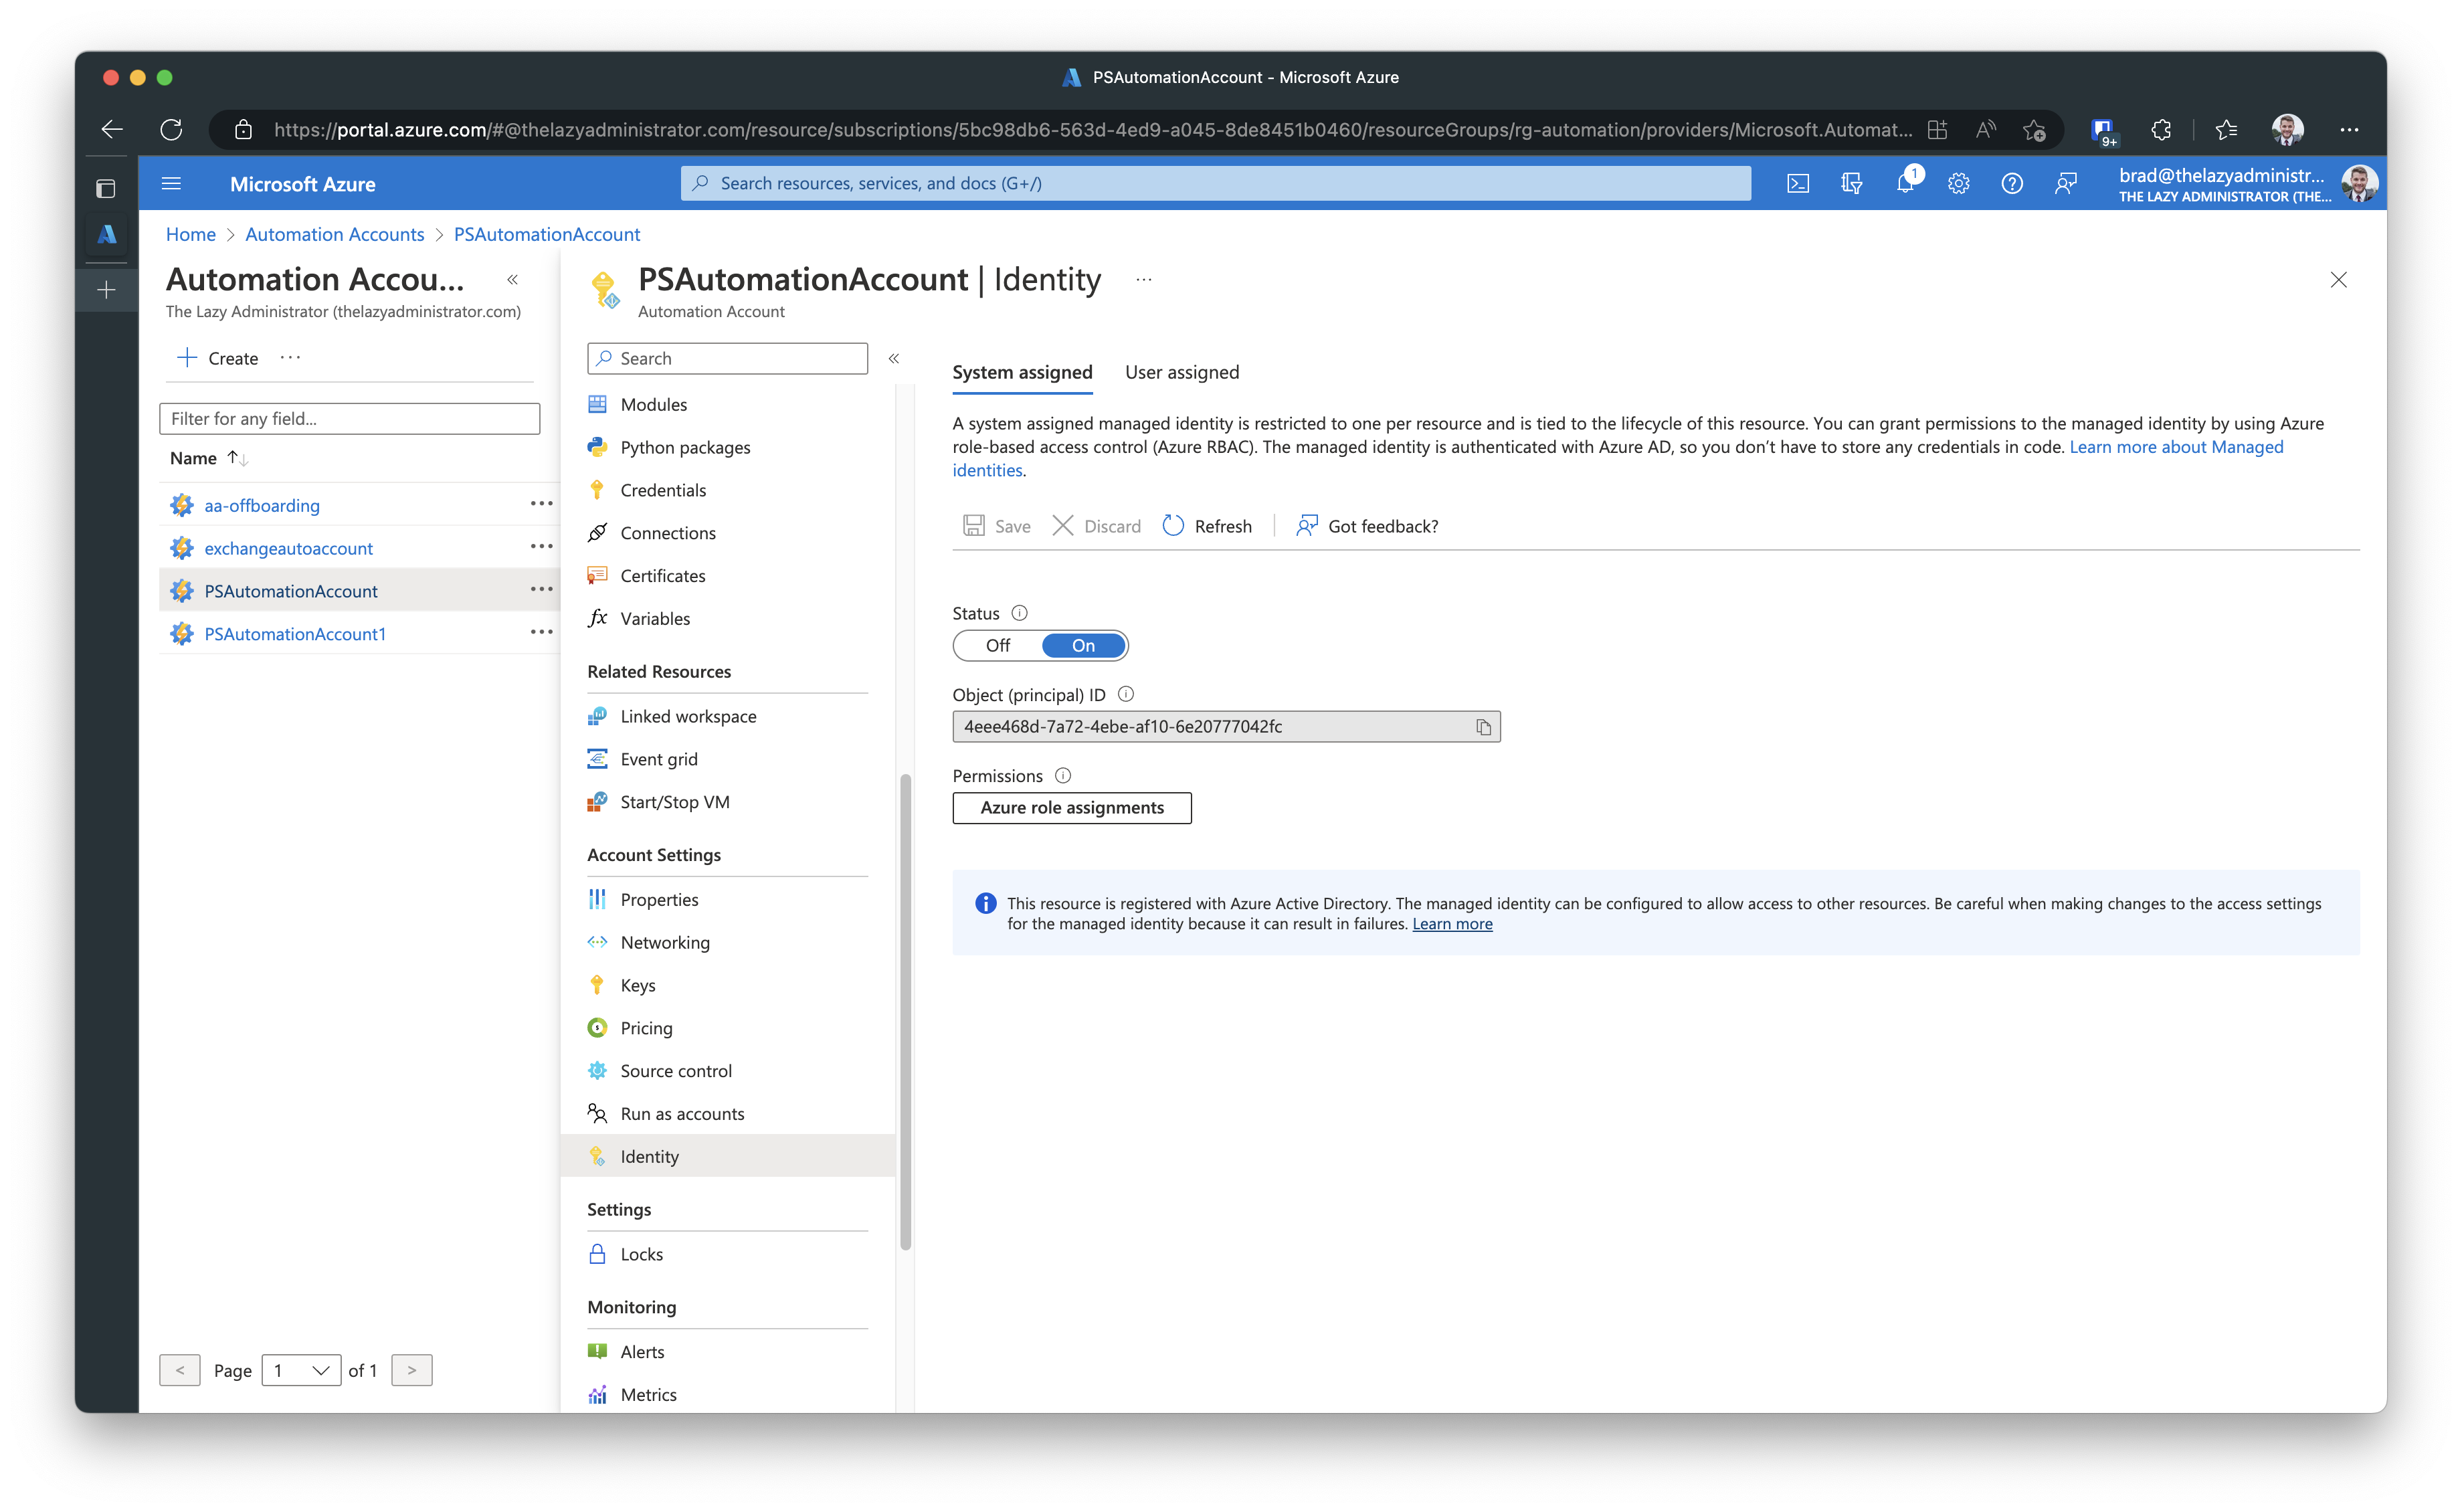
Create the Managed Identity
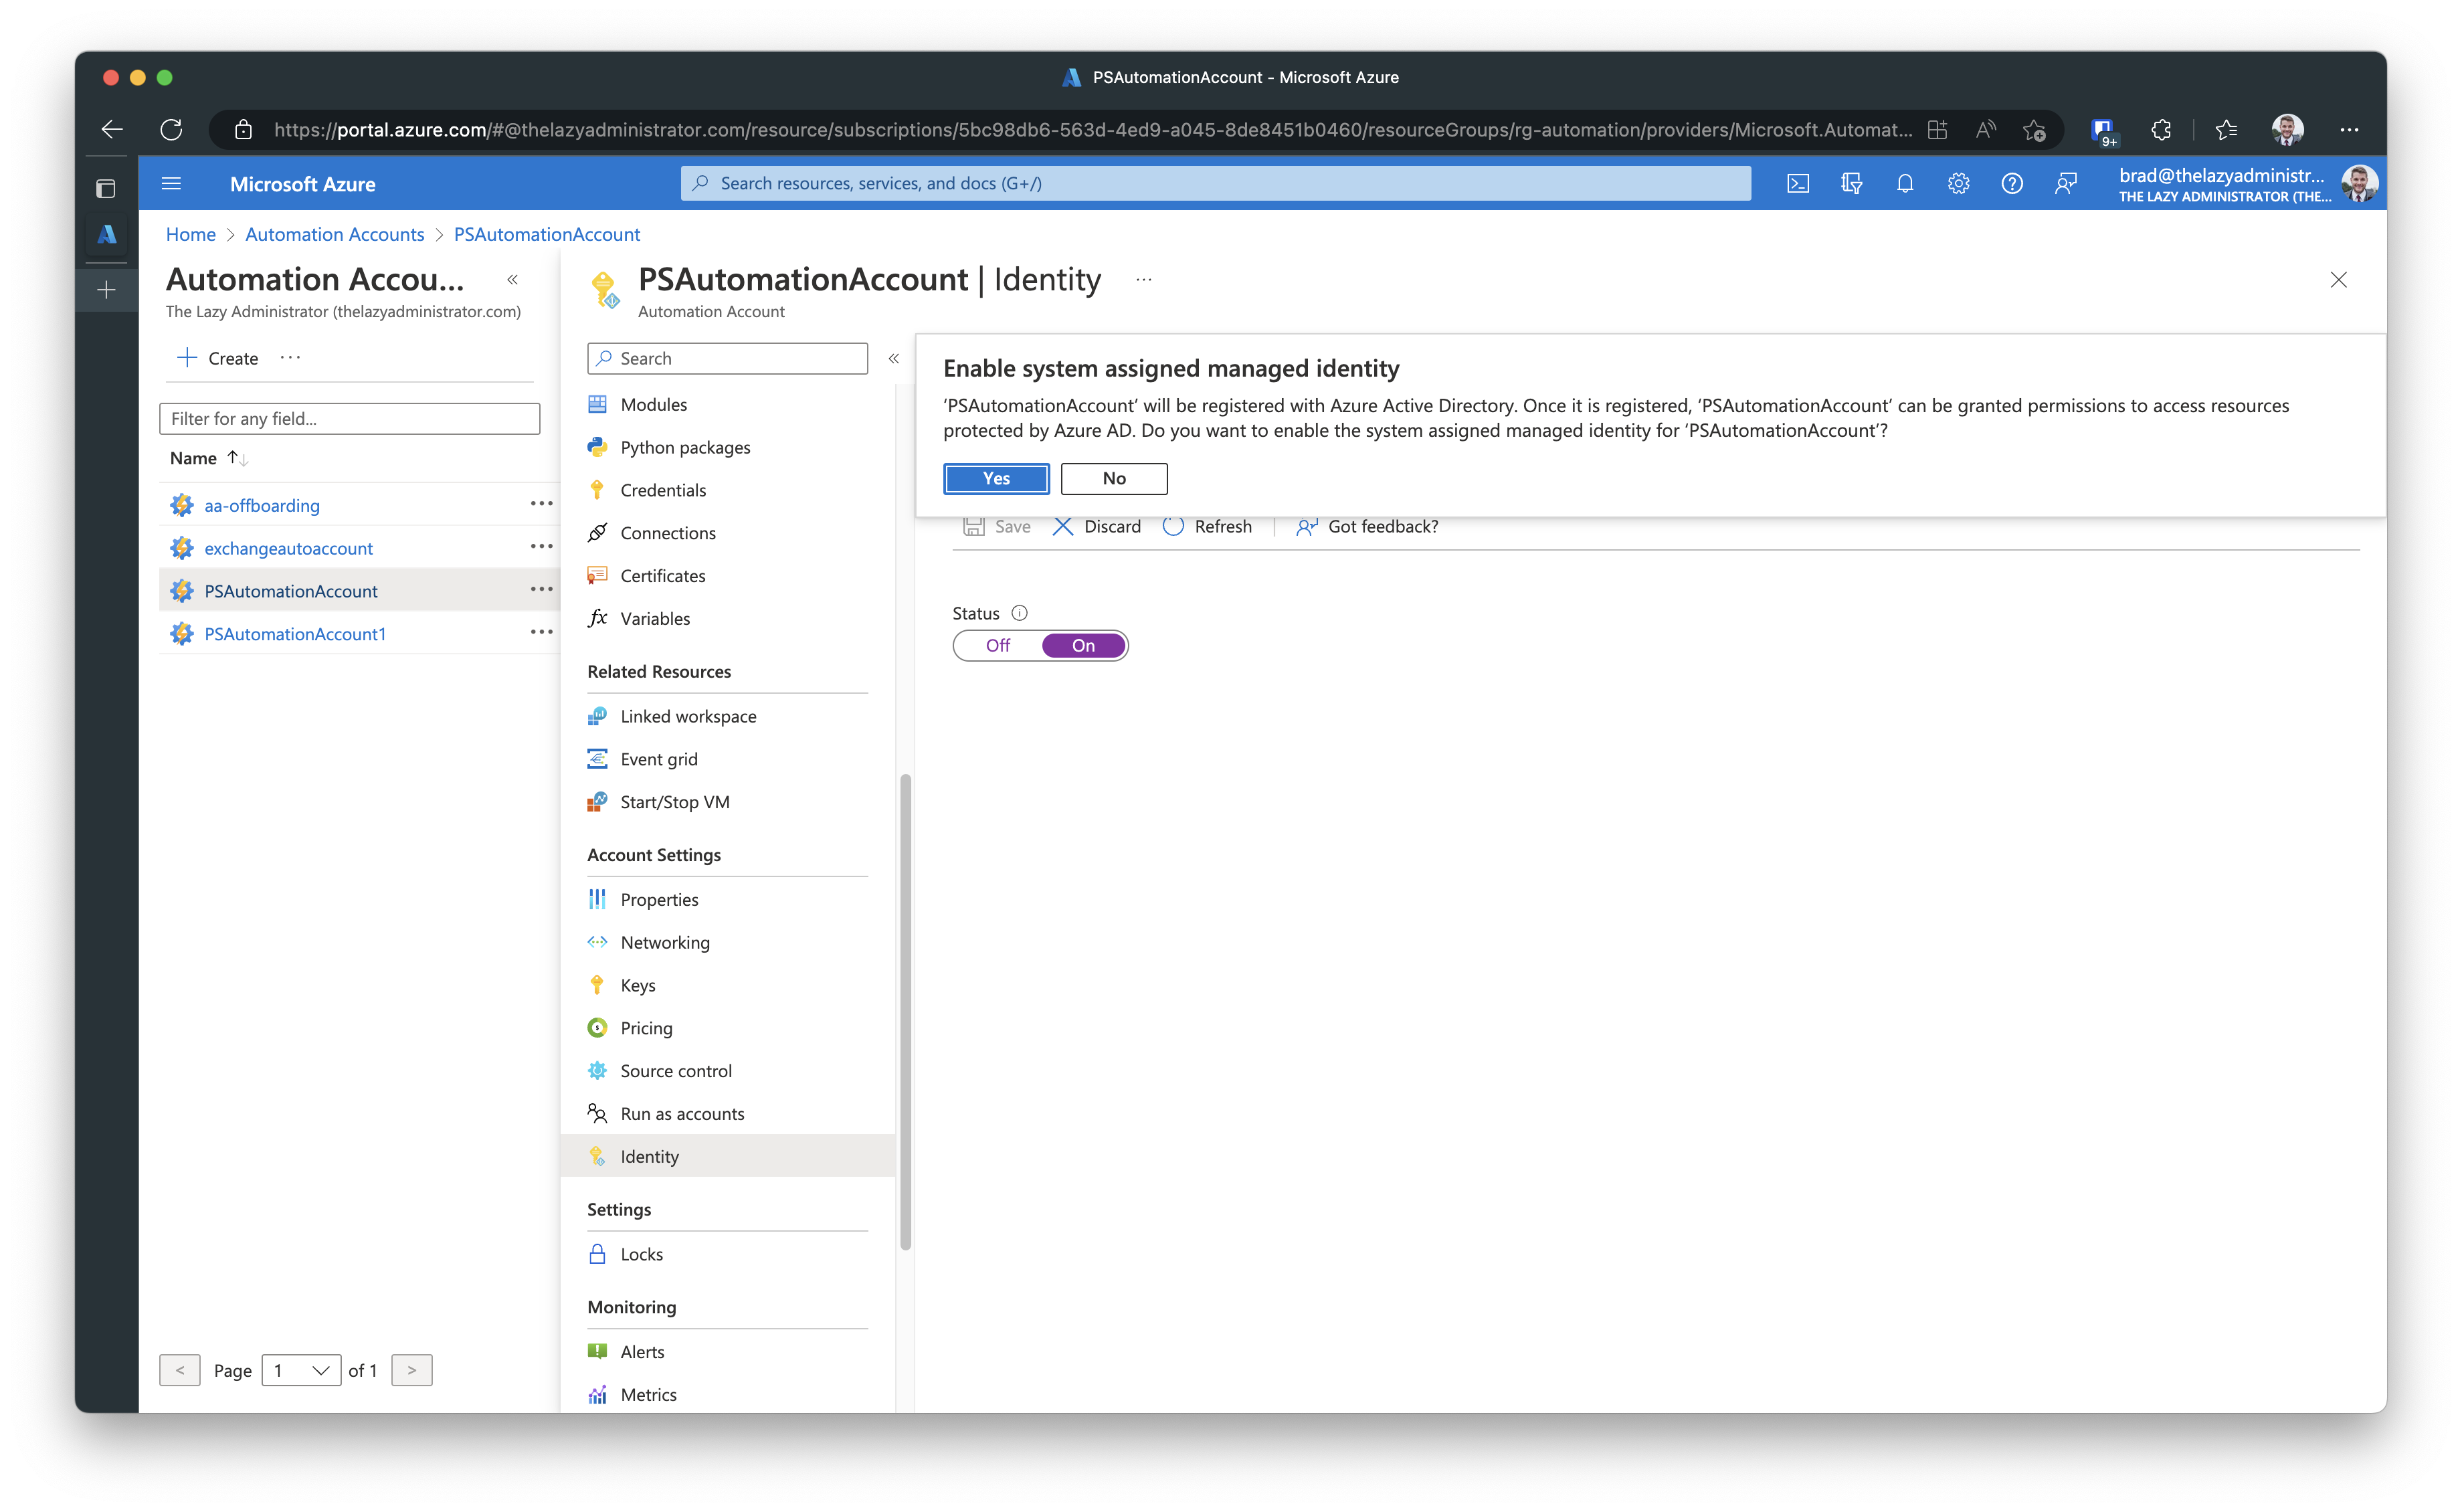
Now I need to create the Managed Identity to migrate to. Going back to the Automation Account and selecting Identity will allow me to create a new System assigned, or User assigned managed identity.
System Assigned Managed Identity vs User Assigned
System-assigned managed identities are automatically created with the Azure resource and the life cycle of the managed identity depends on the Azure resource. If the Azure resource is deleted, the managed identity is automatically deleted as well. A system-assigned managed identity is a 1:1 pairing meaning it cannot be assigned to other resources.
User-assigned managed identity is different in regards to the lifecycle as it is managed independently of the Azure resource. It is created separately and attached to any Azure resource that supports Managed Identities. A single user-assigned managed identity can be assigned to multiple Azure resources at any given time.
Learn more about the differences here.
Back to the Identity creation, I will choose a new System-assigned managed identity. By click On and saving it, Azure will automatically create the managed identity.
Once it finishes creating the managed identity, you will see the Object ID and you can begin assigning permissions.
Assign Permissions to the Managed Identity
Click on Azure Role Assignments after you create your new managed identity. Add the same permissions your previous RunAs account had. This is a good opportunity to ensure that it does not have more permissions than it needs. In the scope section you can select Subscription, Resource Group, Key Vault, Storage or SQL.
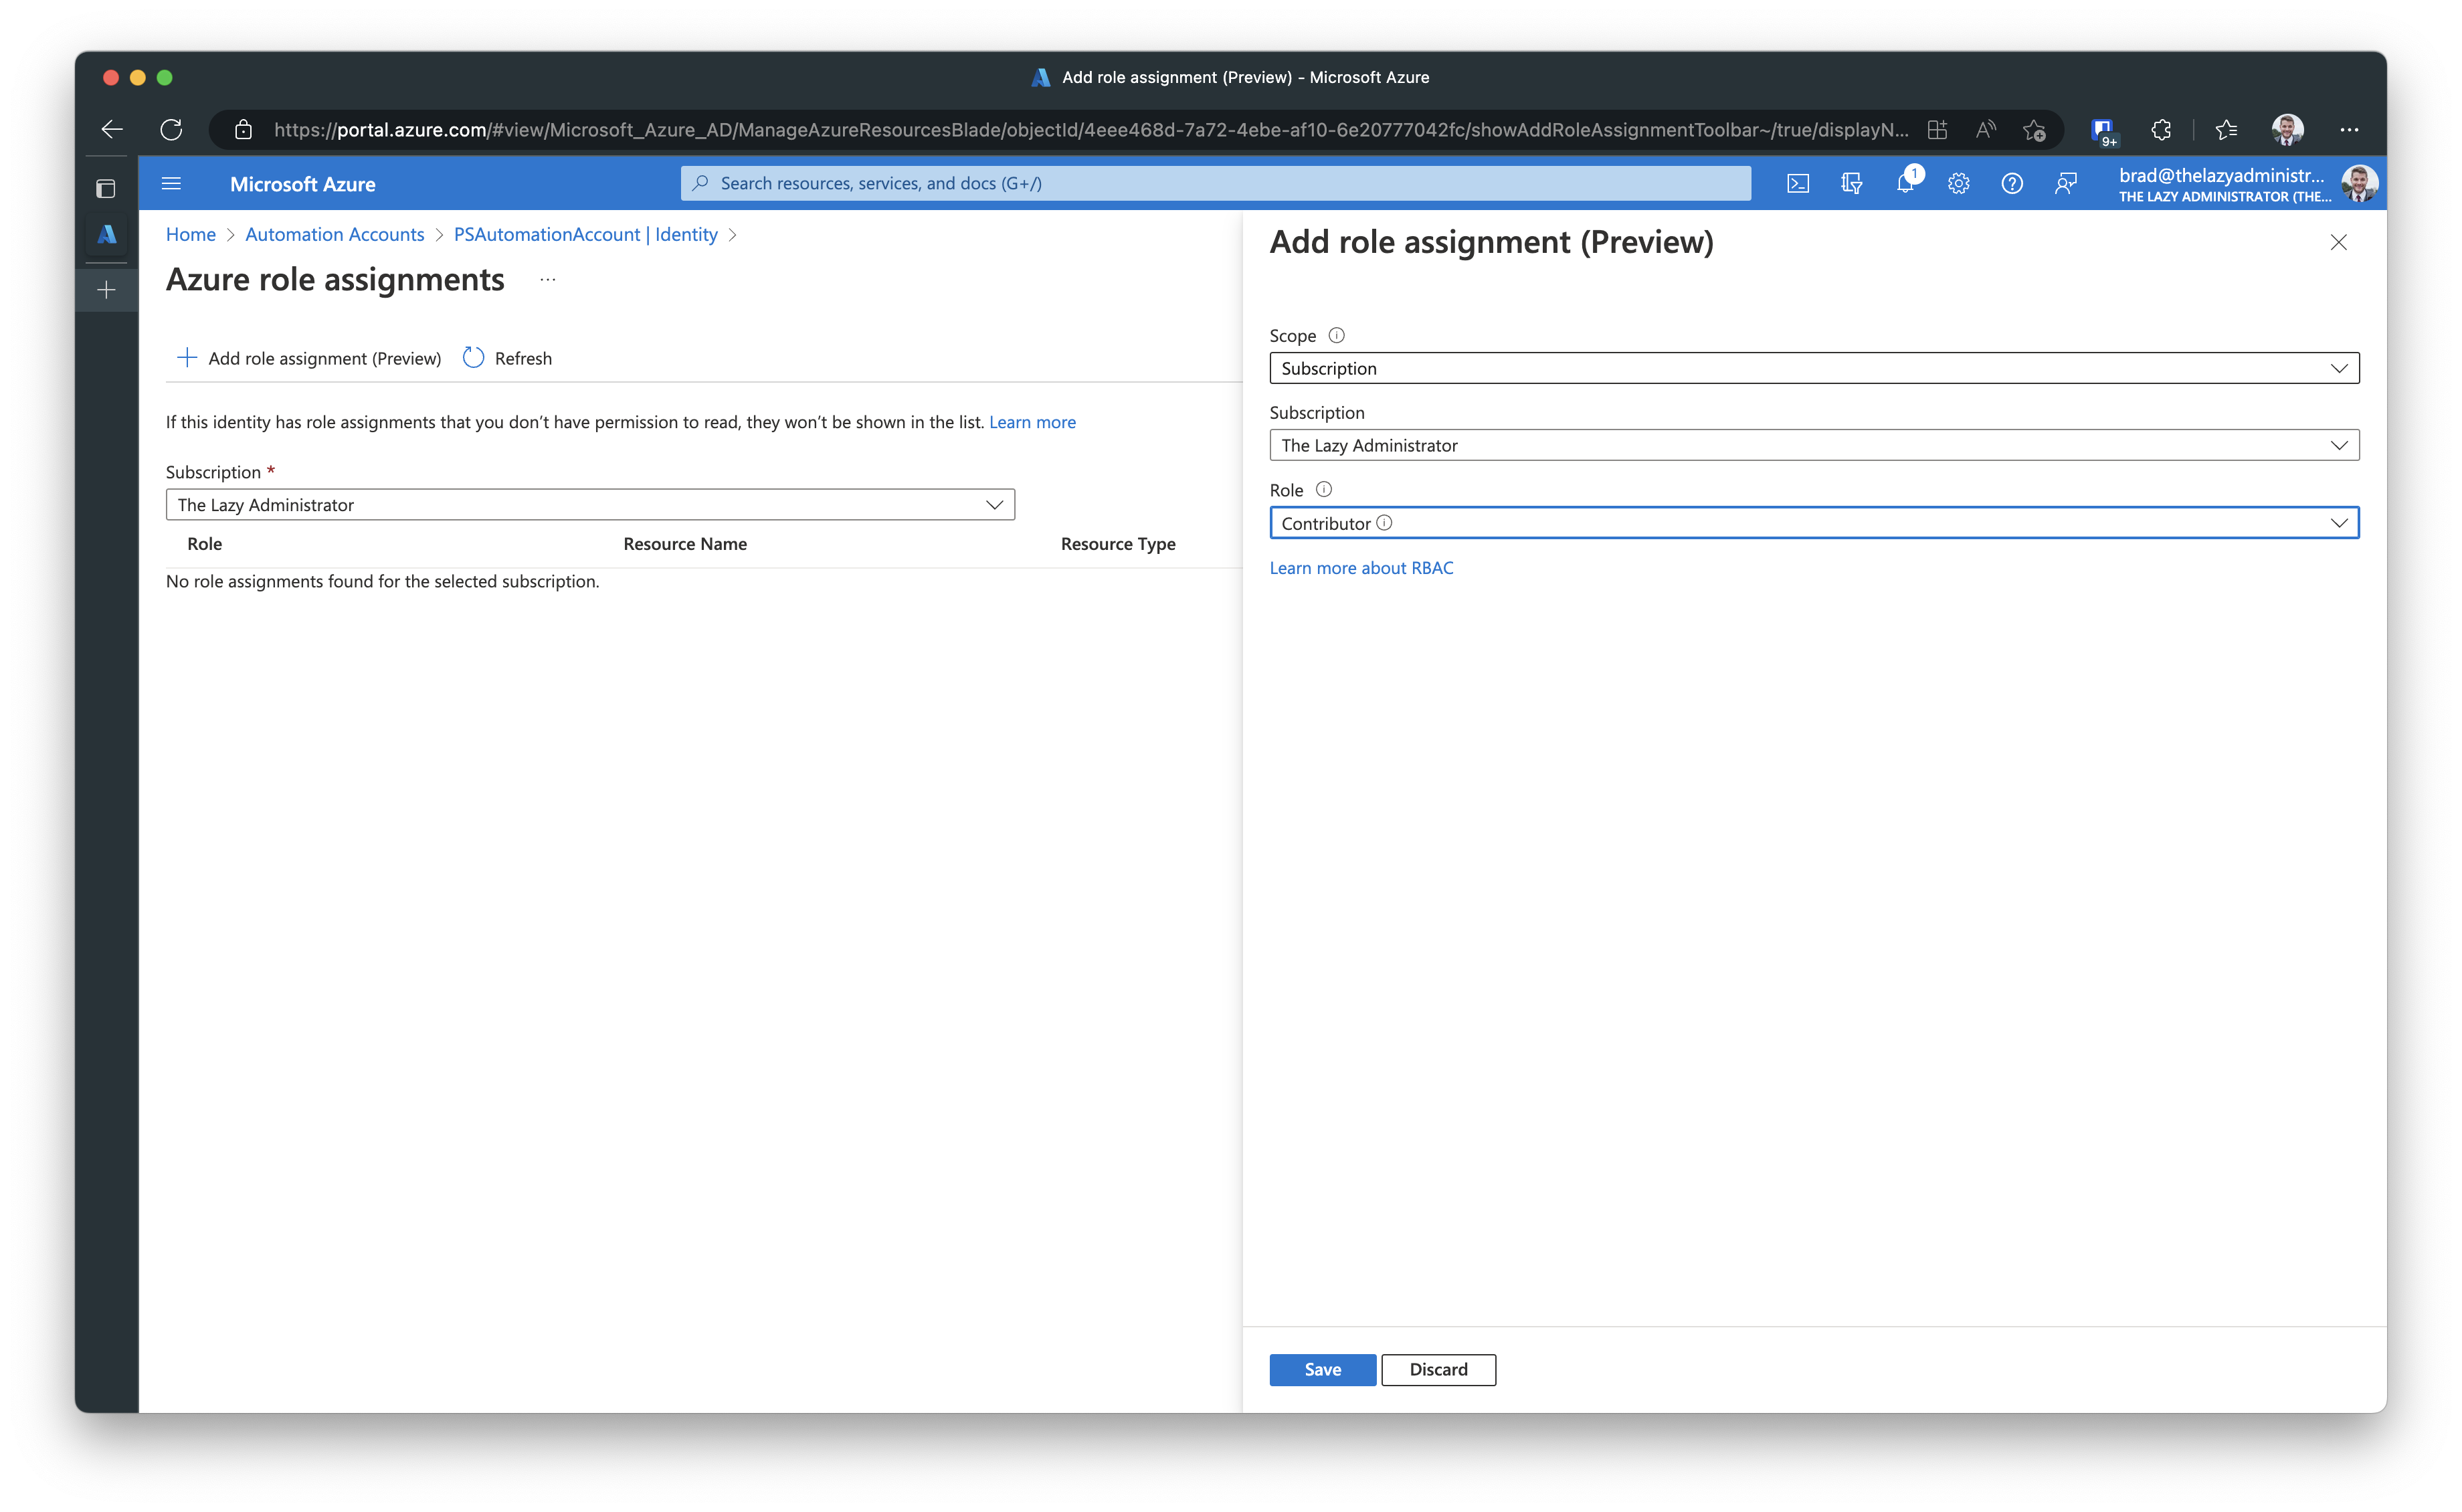
Once you are finished, you will see the role assignments assigned to the new managed identity.

Update Runbook Code to Use Managed Identities
Next, we need to update the runbook code to use the newly created managed identity and not the runas account. Below is a screenshot of my runbook, we can see that it is clearly using the RunAs account.
 Since I used a system assigned managed identity, my runbook will connect using Conenct-AzAccount -Identity. I do not need to specify anything further like the name, resource group, etc. because the managed identity is tied to the automation account that is running the runbook.
Once I have finished editing my runbook it will look something like this, 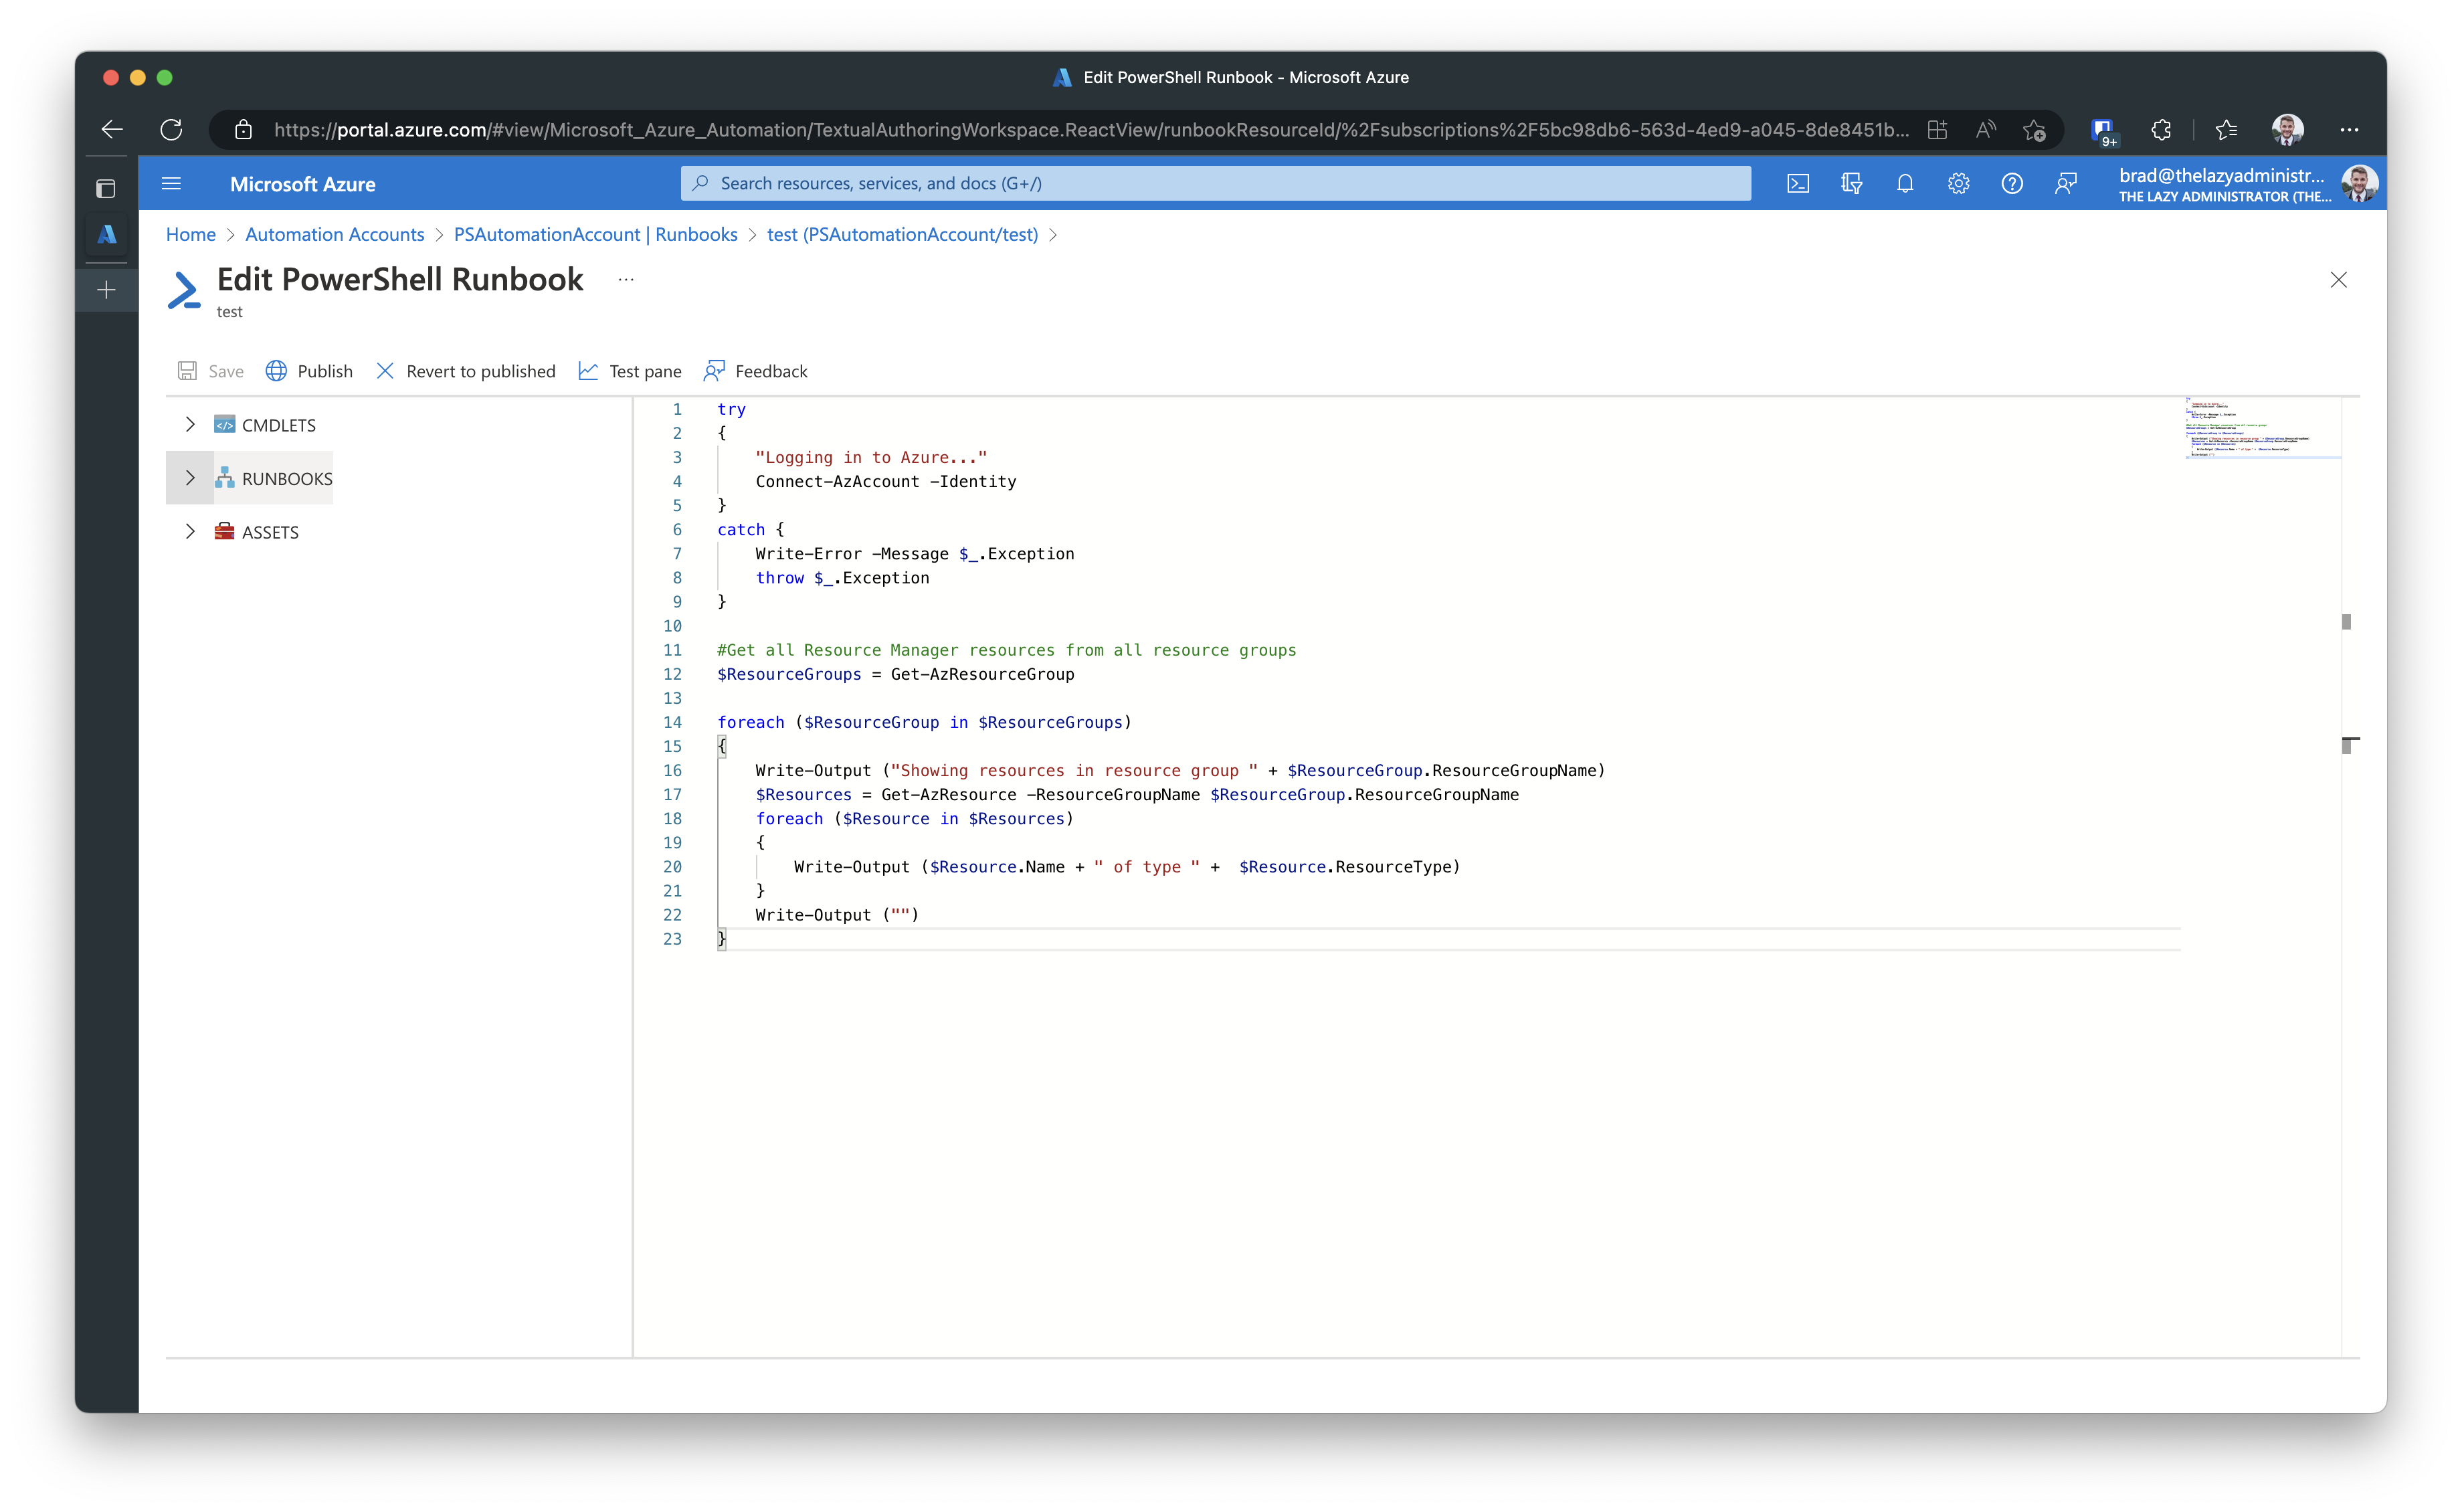
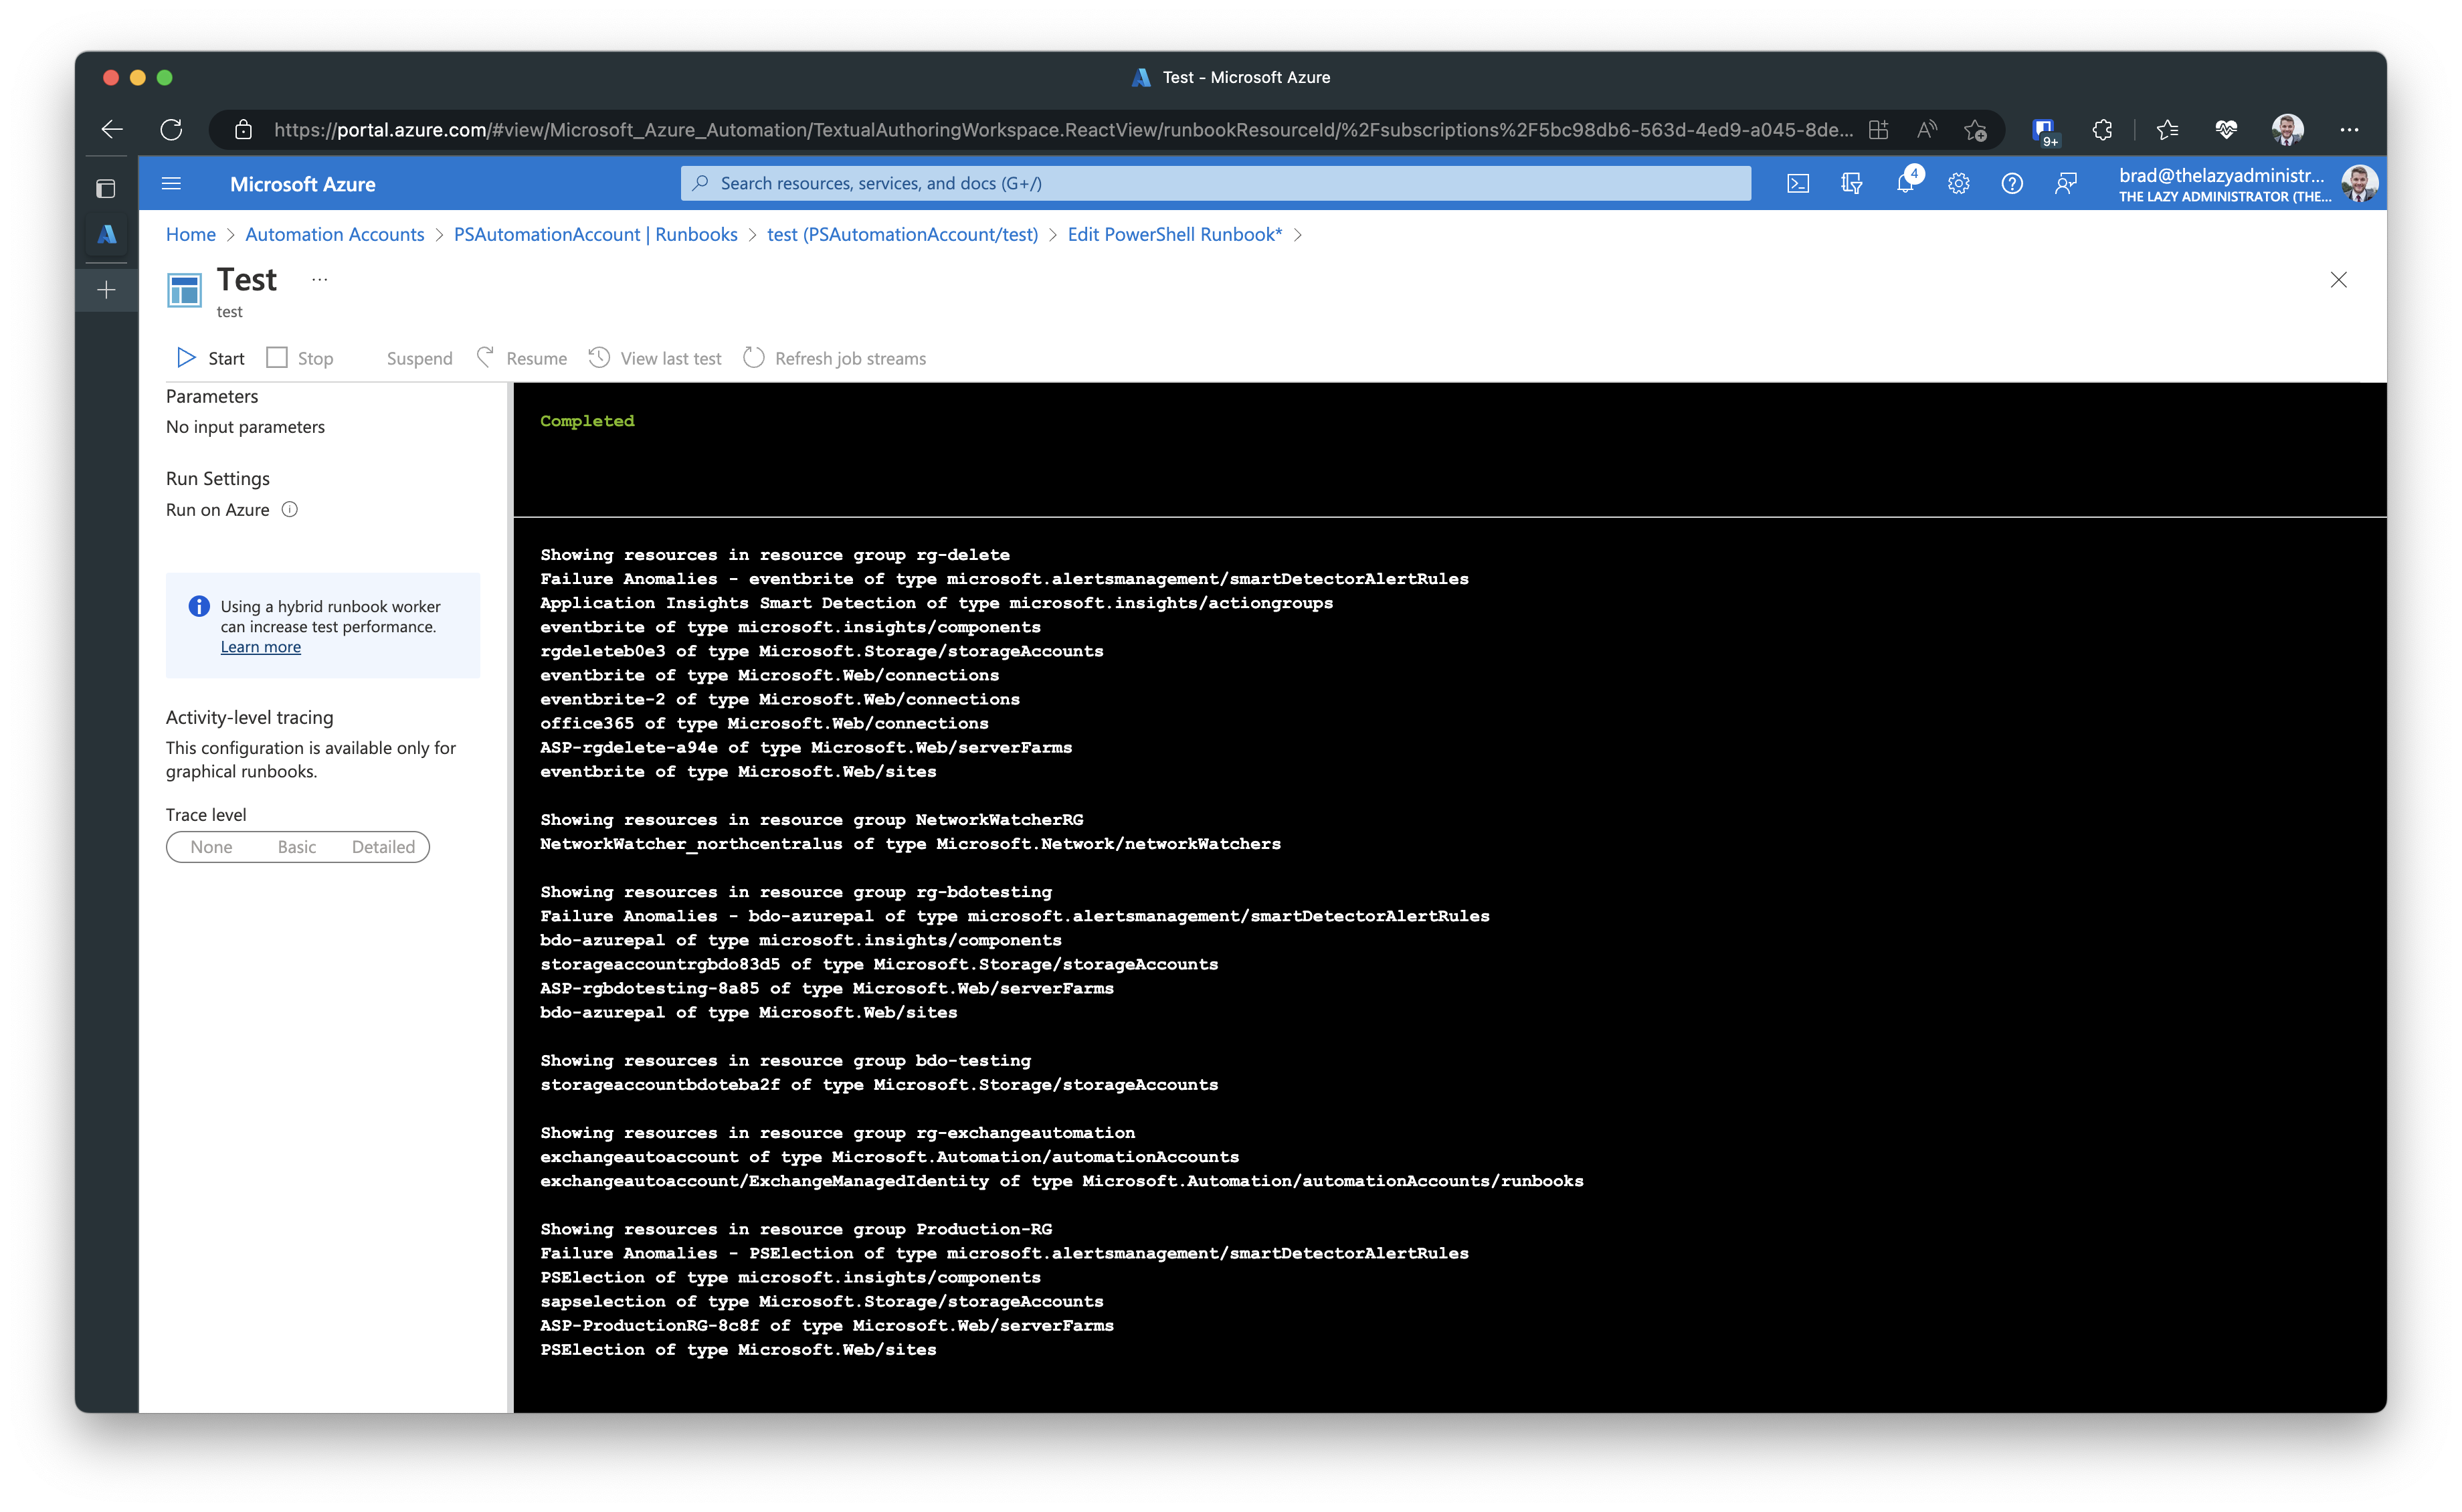
Now if I go ahead on test it…
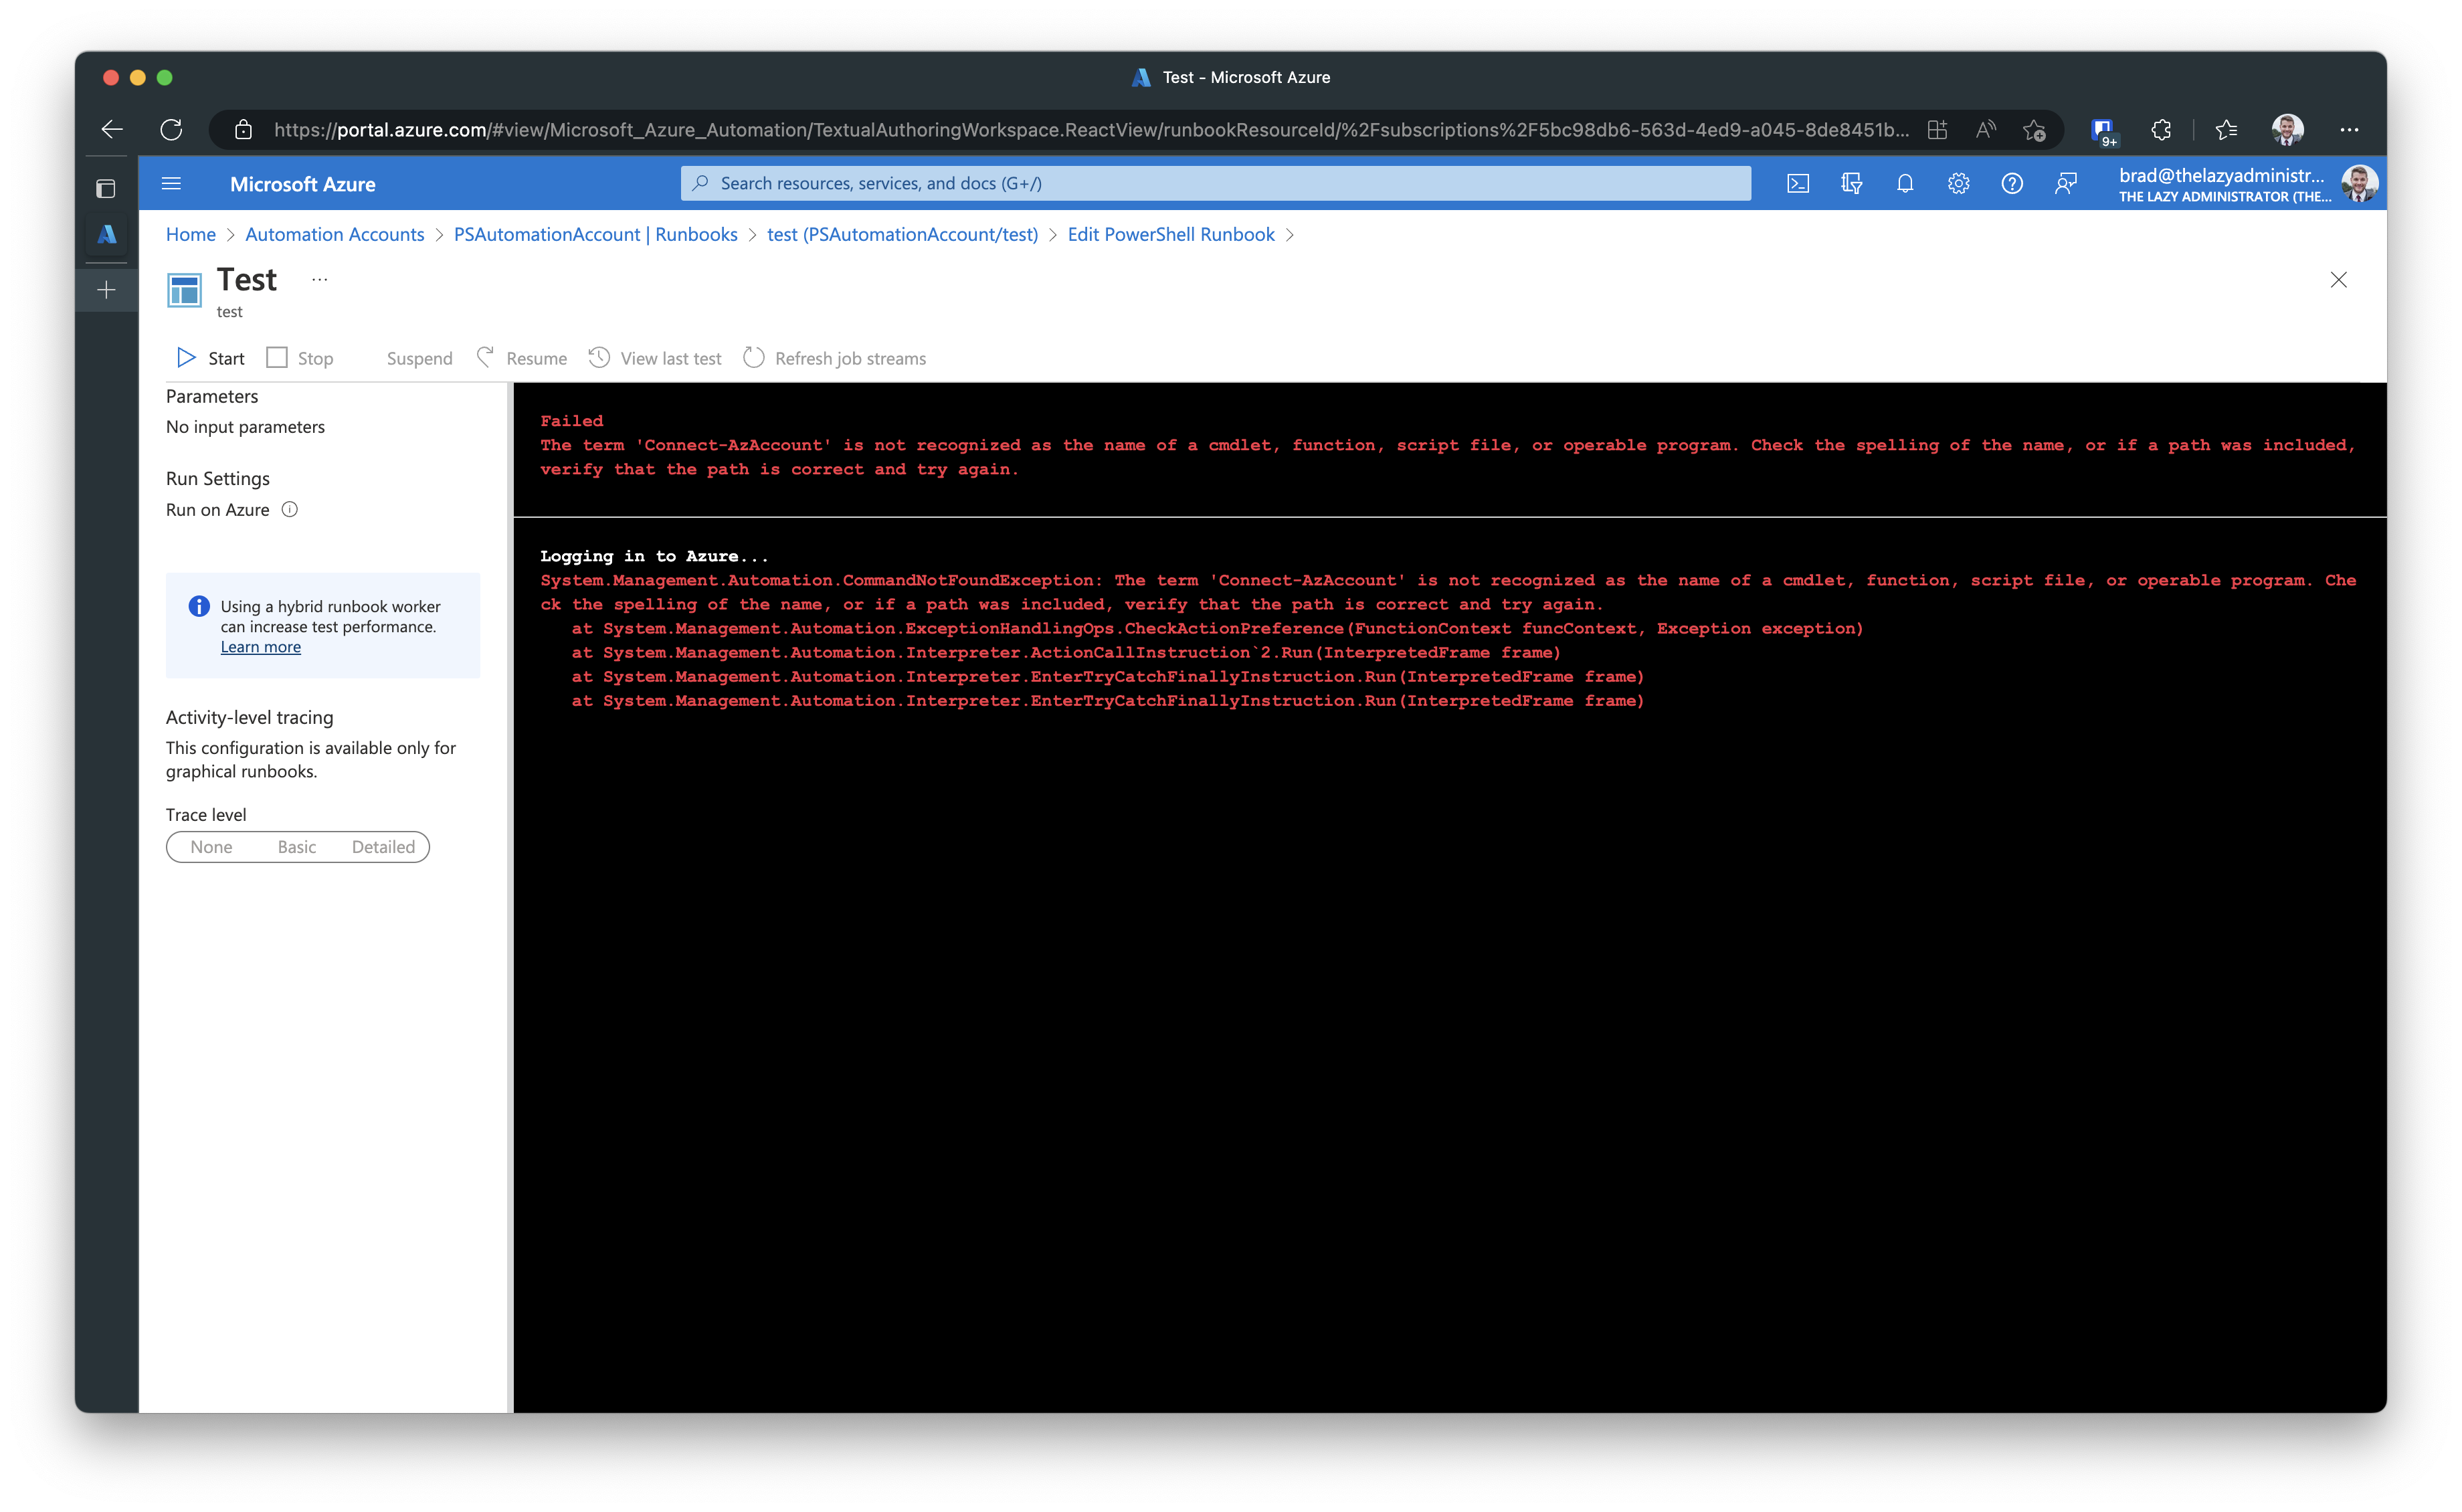
And the reason is during the updating of the code, I switched from using the AzureRM cmdlets to the Az cmdlets. Because Microsoft will be retiring the AzureRM module in February 2024, we will need to switch over to the Az module.
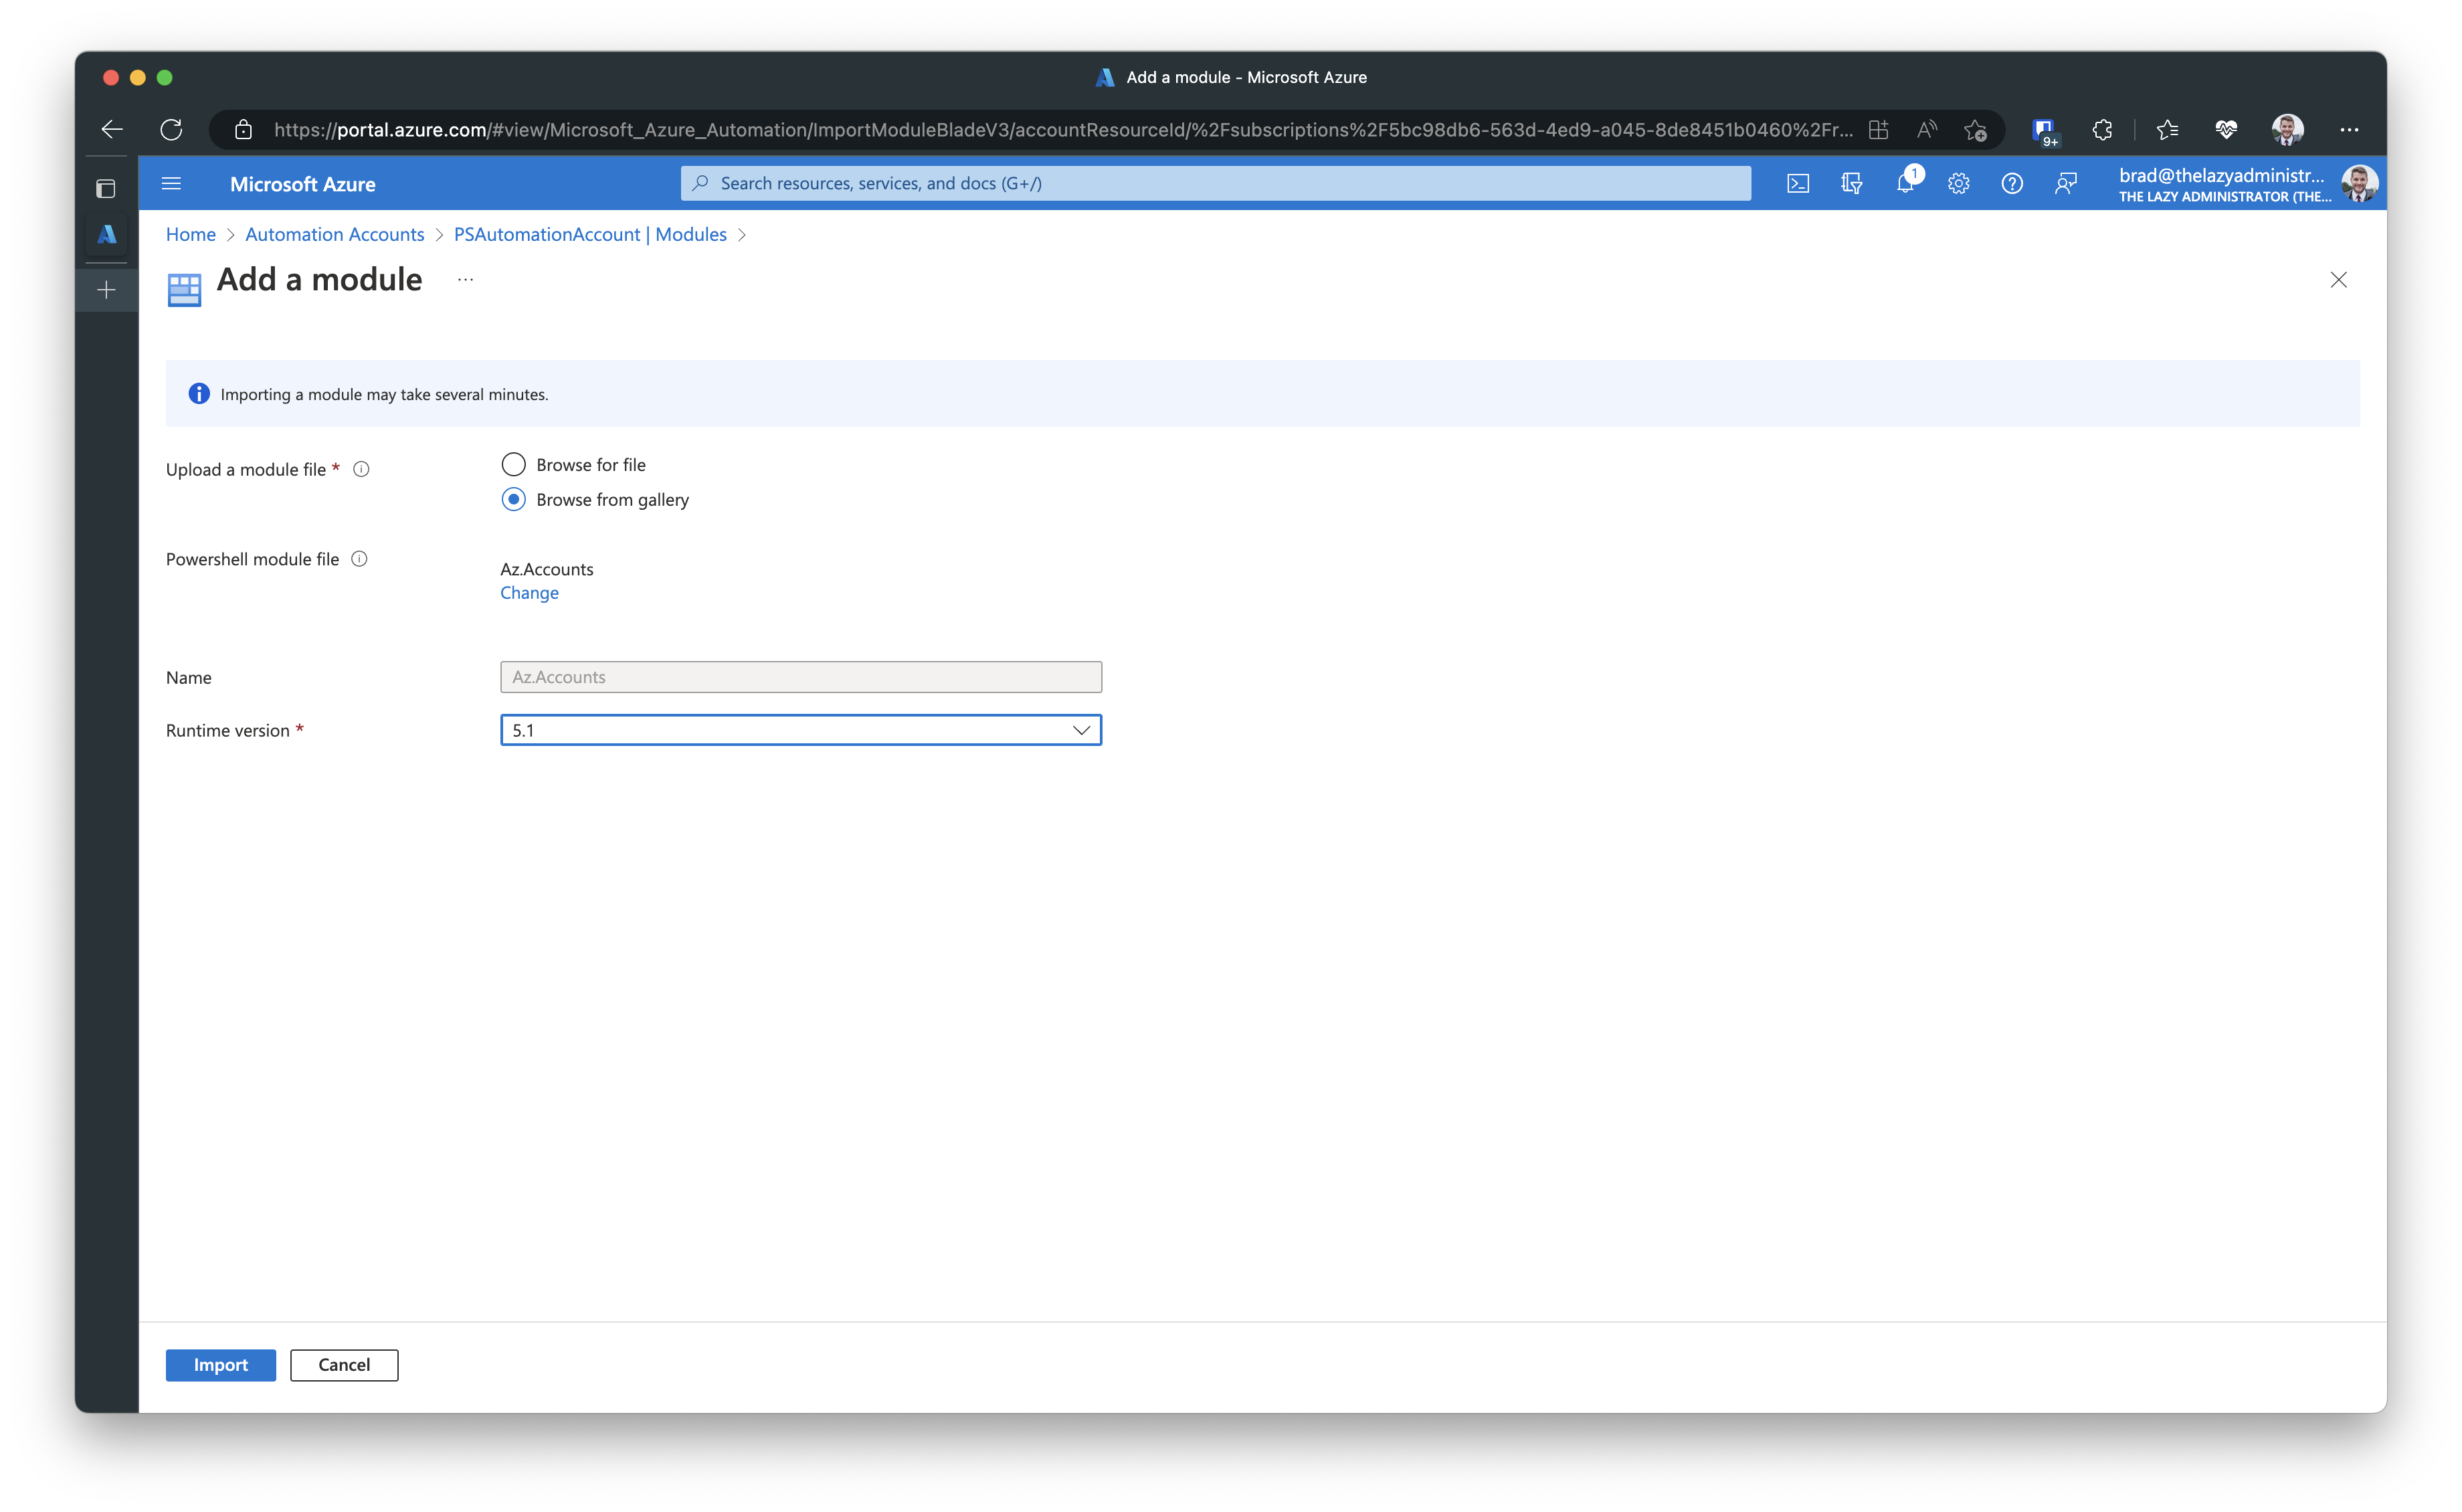
Importing the Az Module
If your runbook already was using the Az module and not the AzureRM module, skip ahead to the next section.
If we go back to our Automation account and go down to Modules, we can see that we do not have the Az module available for our runbooks.
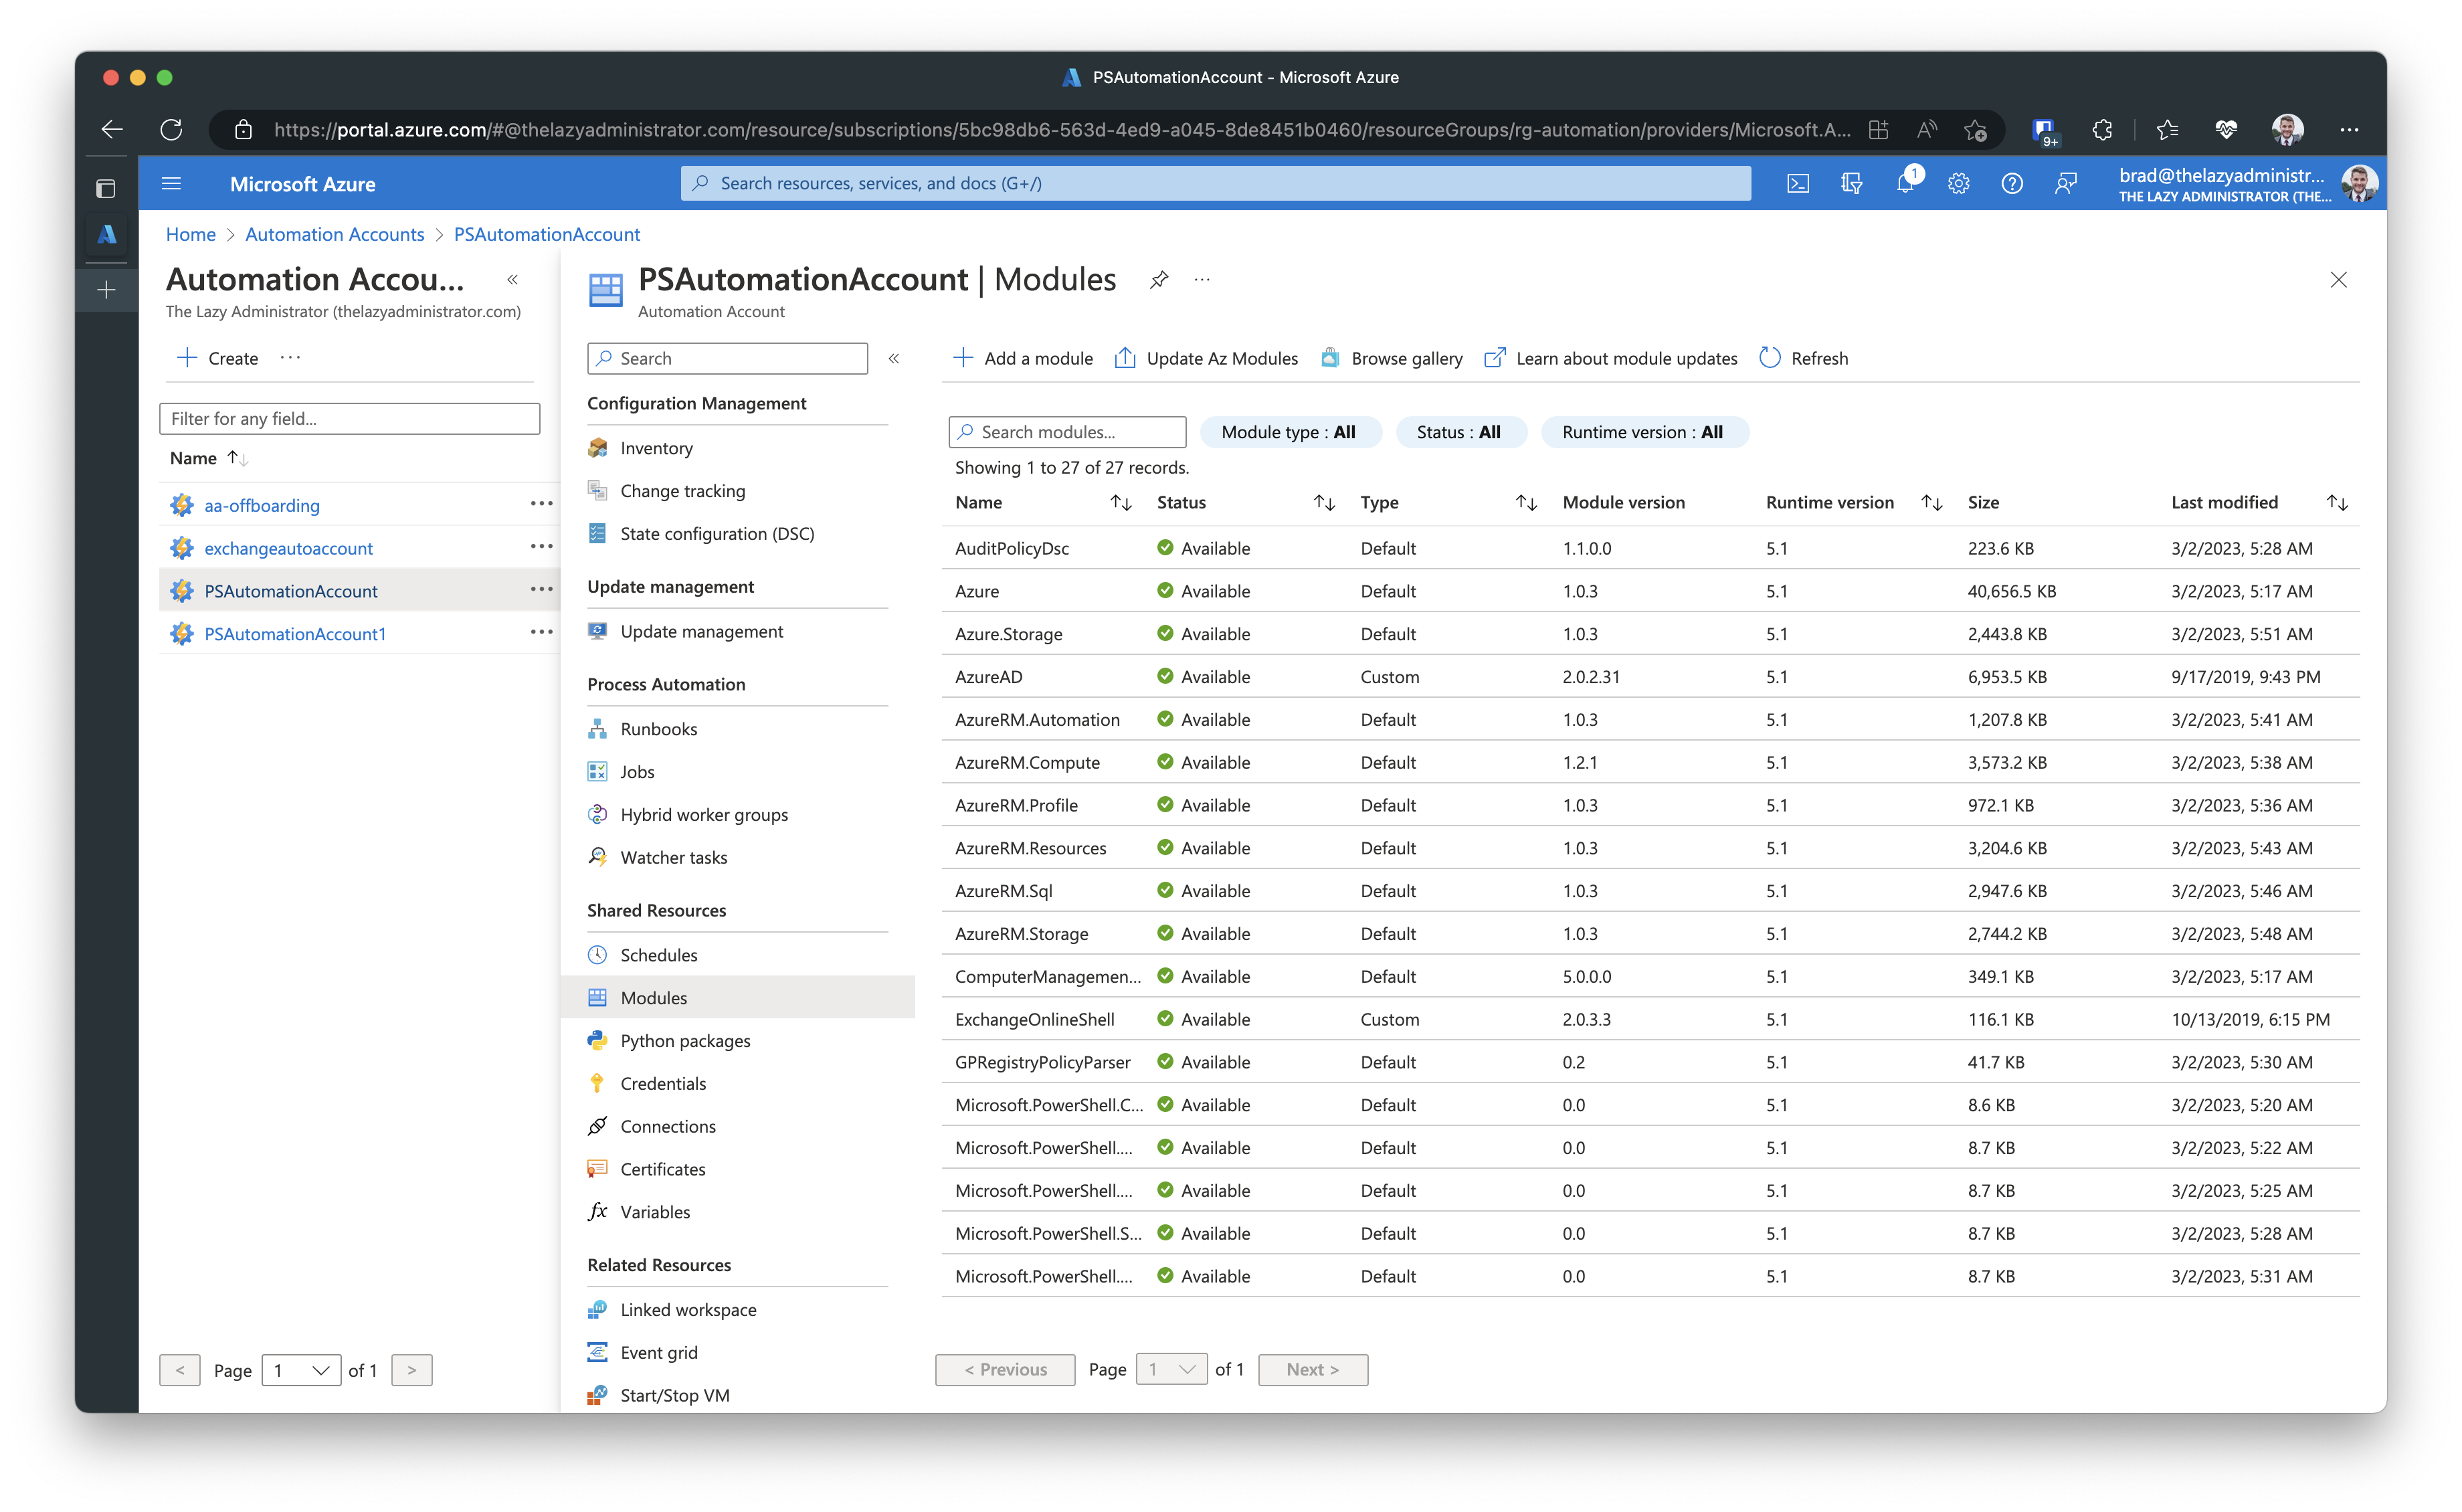
Click + Add a module and we are going to browse from the gallery. Looking at my runbook I am calling several Az commands. Connect-AzAccount, Get-AzResource, and Get-AzResourceGroup. I can see that Get-AzResourceGroup comes from the module Az.Resources, as well as Get-AzResource. Connect-AzAccount comes from Az.Accounts. I will import Az.Accounts first because Az.Resources is dependent on Az.Accounts.
Now, I have all the correct modules installed and available for my runbook

If I go back to my runbook and test it, I can now see that is works without issues.
Clean up RunAs Resources
The final task is to clean up the RunAs resources. Go back to the Automation Account > Run as Accounts and then click Delete
Once finished you will see that your automation account no longer has any run as accounts tied to it. It will also be deleted from Azure Active Directory.

My name is Bradley Wyatt; I am a 6x Dual-Microsoft Most Valuable Professional (MVP) in Microsoft Azure and Microsoft 365. I have given talks at many different conferences, user groups, and companies throughout the United States, ranging from PowerShell to DevOps Security best practices, and I am the 2022 North American Outstanding Contribution to the Microsoft Community winner.
2 thoughts on “Migrate your Runbooks in Azure Automation to Managed Identities”
Hola Brad.
Este articulo me funcionó perfectamente para un caso que se me presentó con un cliente.
Muchas gracias. Saludos desde Colombia.
—
Hi Brad.
This article helped me to solve this issue with a customer. Thanks a lot. Greetings from Colombia.