Configure and Deploy Intune MDM
Table of Contents
Description
In this article I will be configuring and deploying Intune as a stand-alone MDM solution. This article will walk you through deploying applications to devices, configuring your Company Portal, enrolling end user devices, creating policies and more.
Solution
Configure MDM Authority
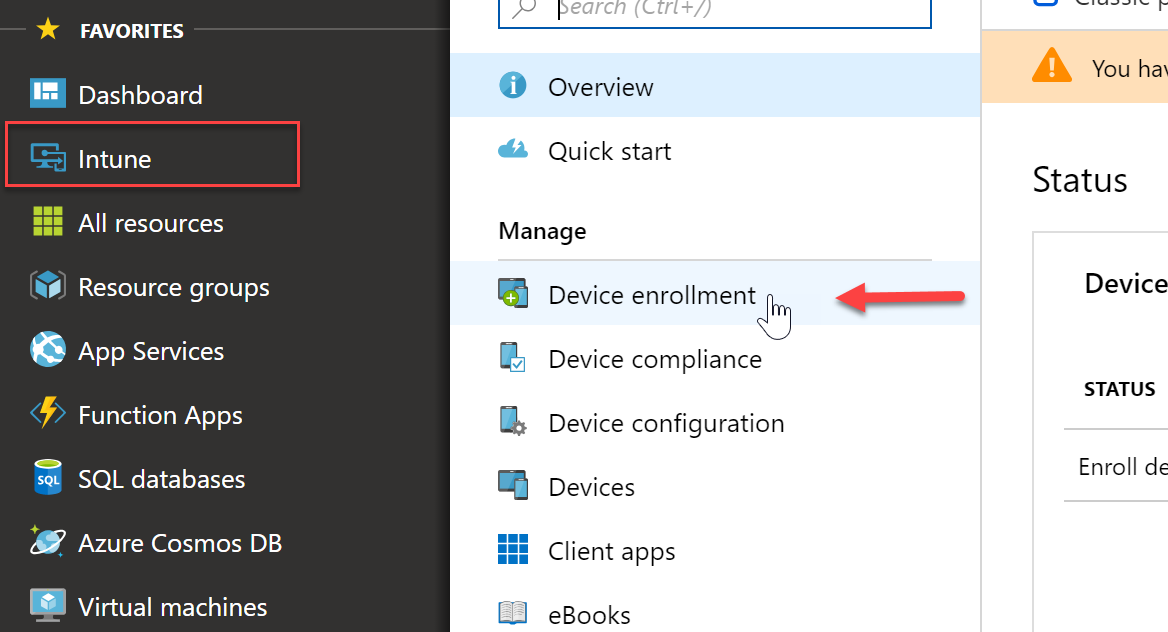
- First we must configure Intune as my MDM authority. Since I am doing a stand alone I want Intune as the only authority and not Configuration Manager. By logging into portal.azure.com I can expand the Itune node and select “Device Enrollment”
- Select “Intune MDM Authority” and then click “Choose”
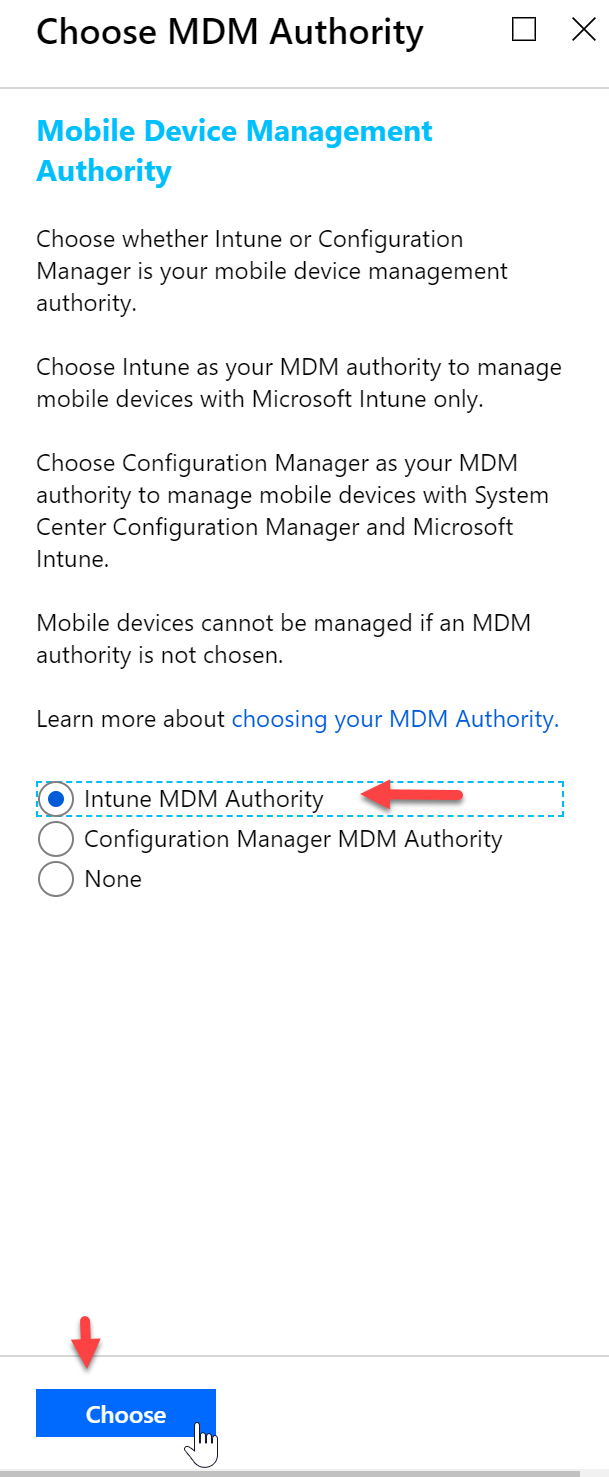
- I will get a notification that my changes were saved successfully

Configure APN Certificate
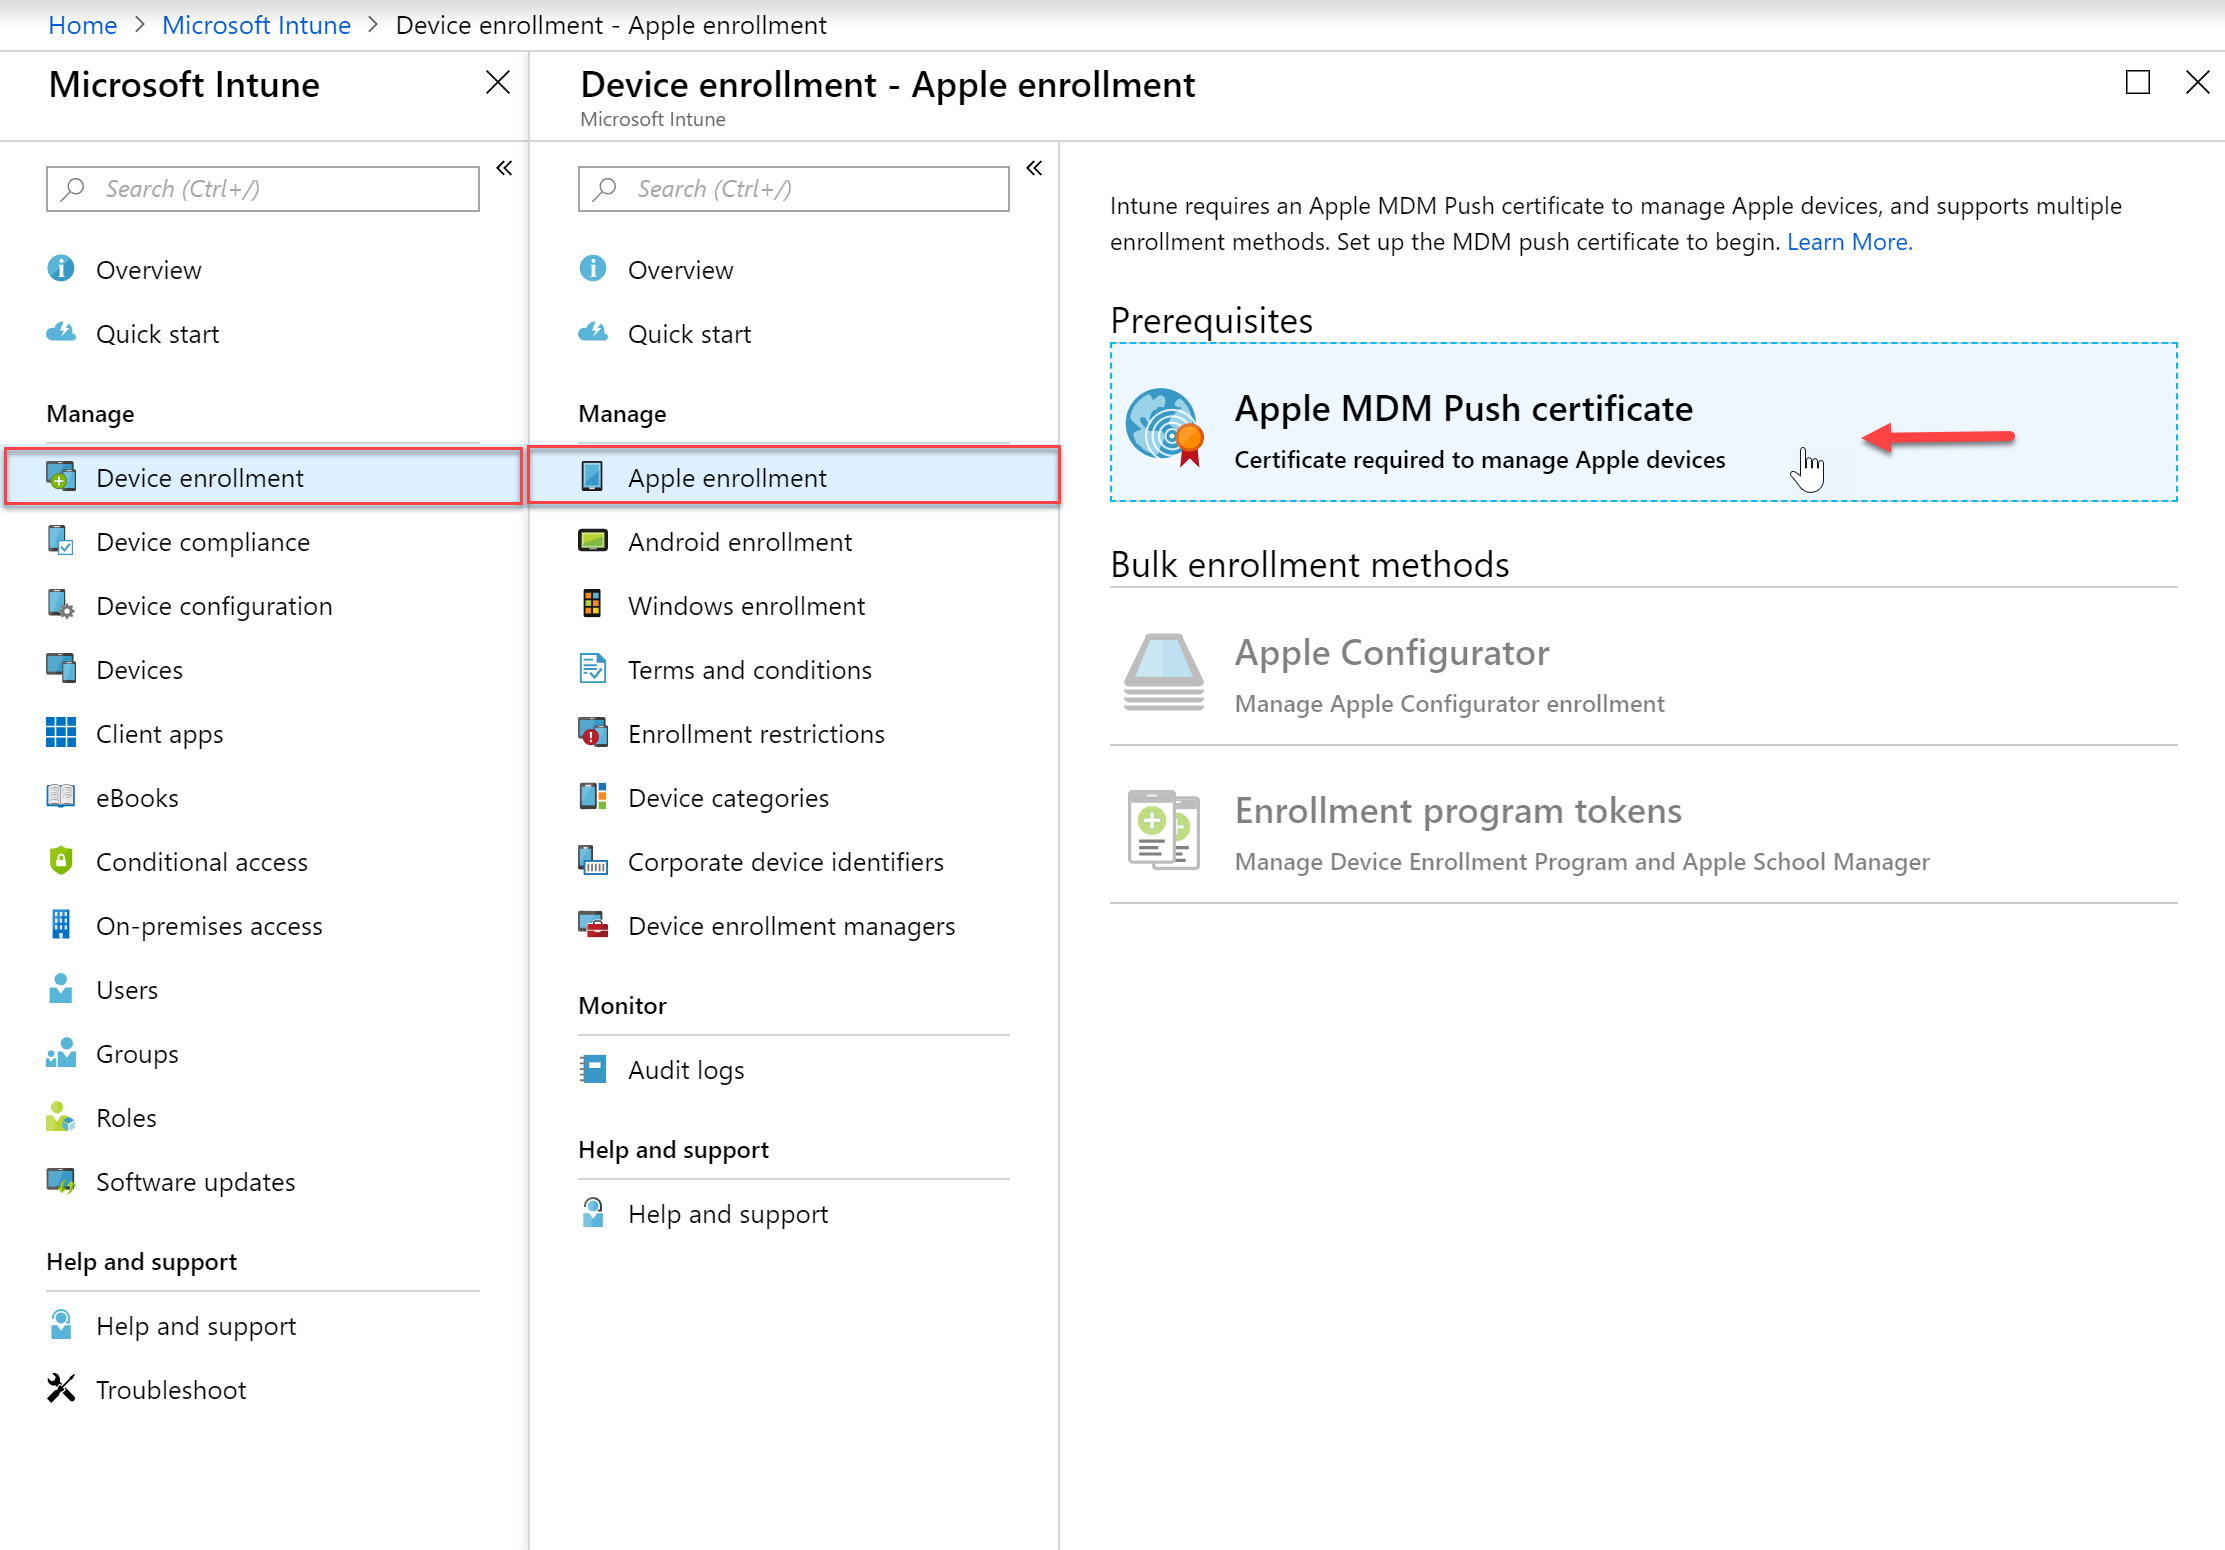
To manage iOS devices you must have an Apple Push certificate.
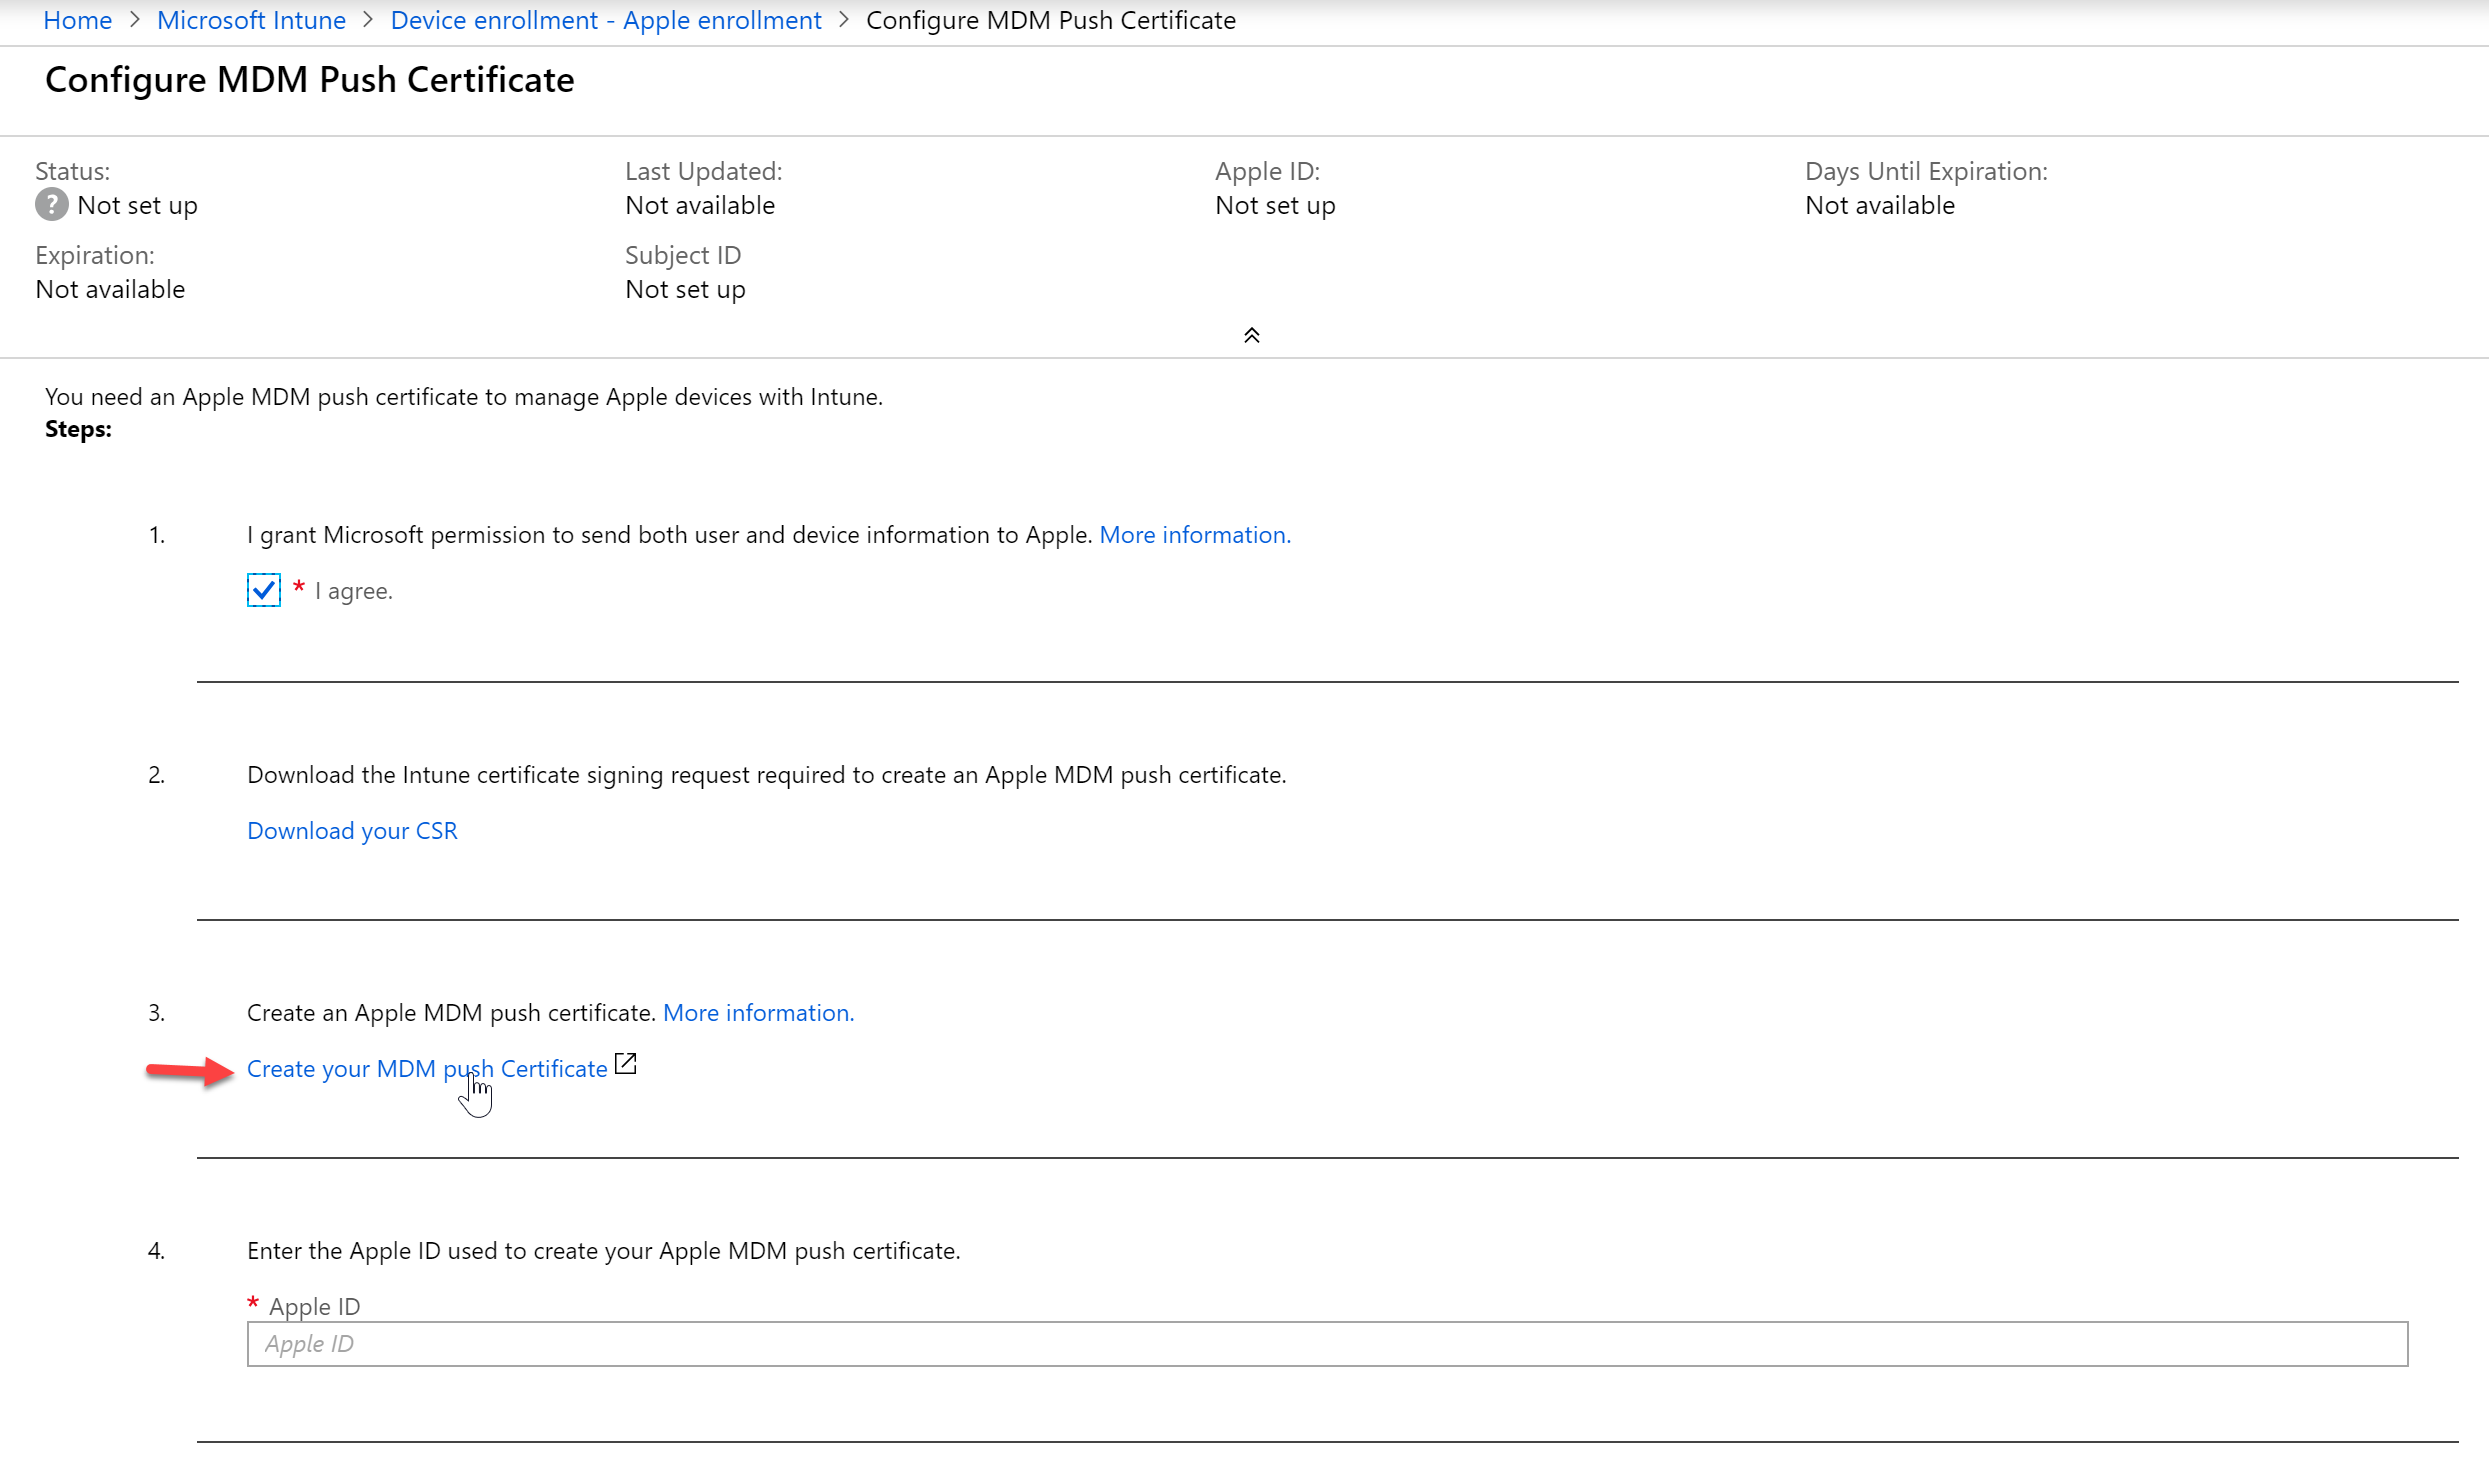
- In the Intune blade we want to go to Device Enrollment and then Apple Enrollment and select “Apple MDM Push Certificate”
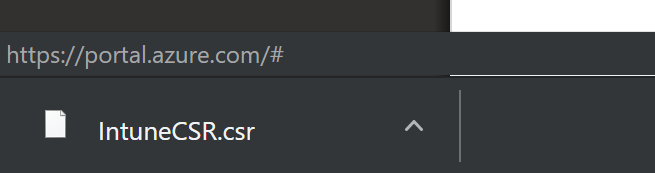
- Agree to the terms in step 1 and then download the CSR
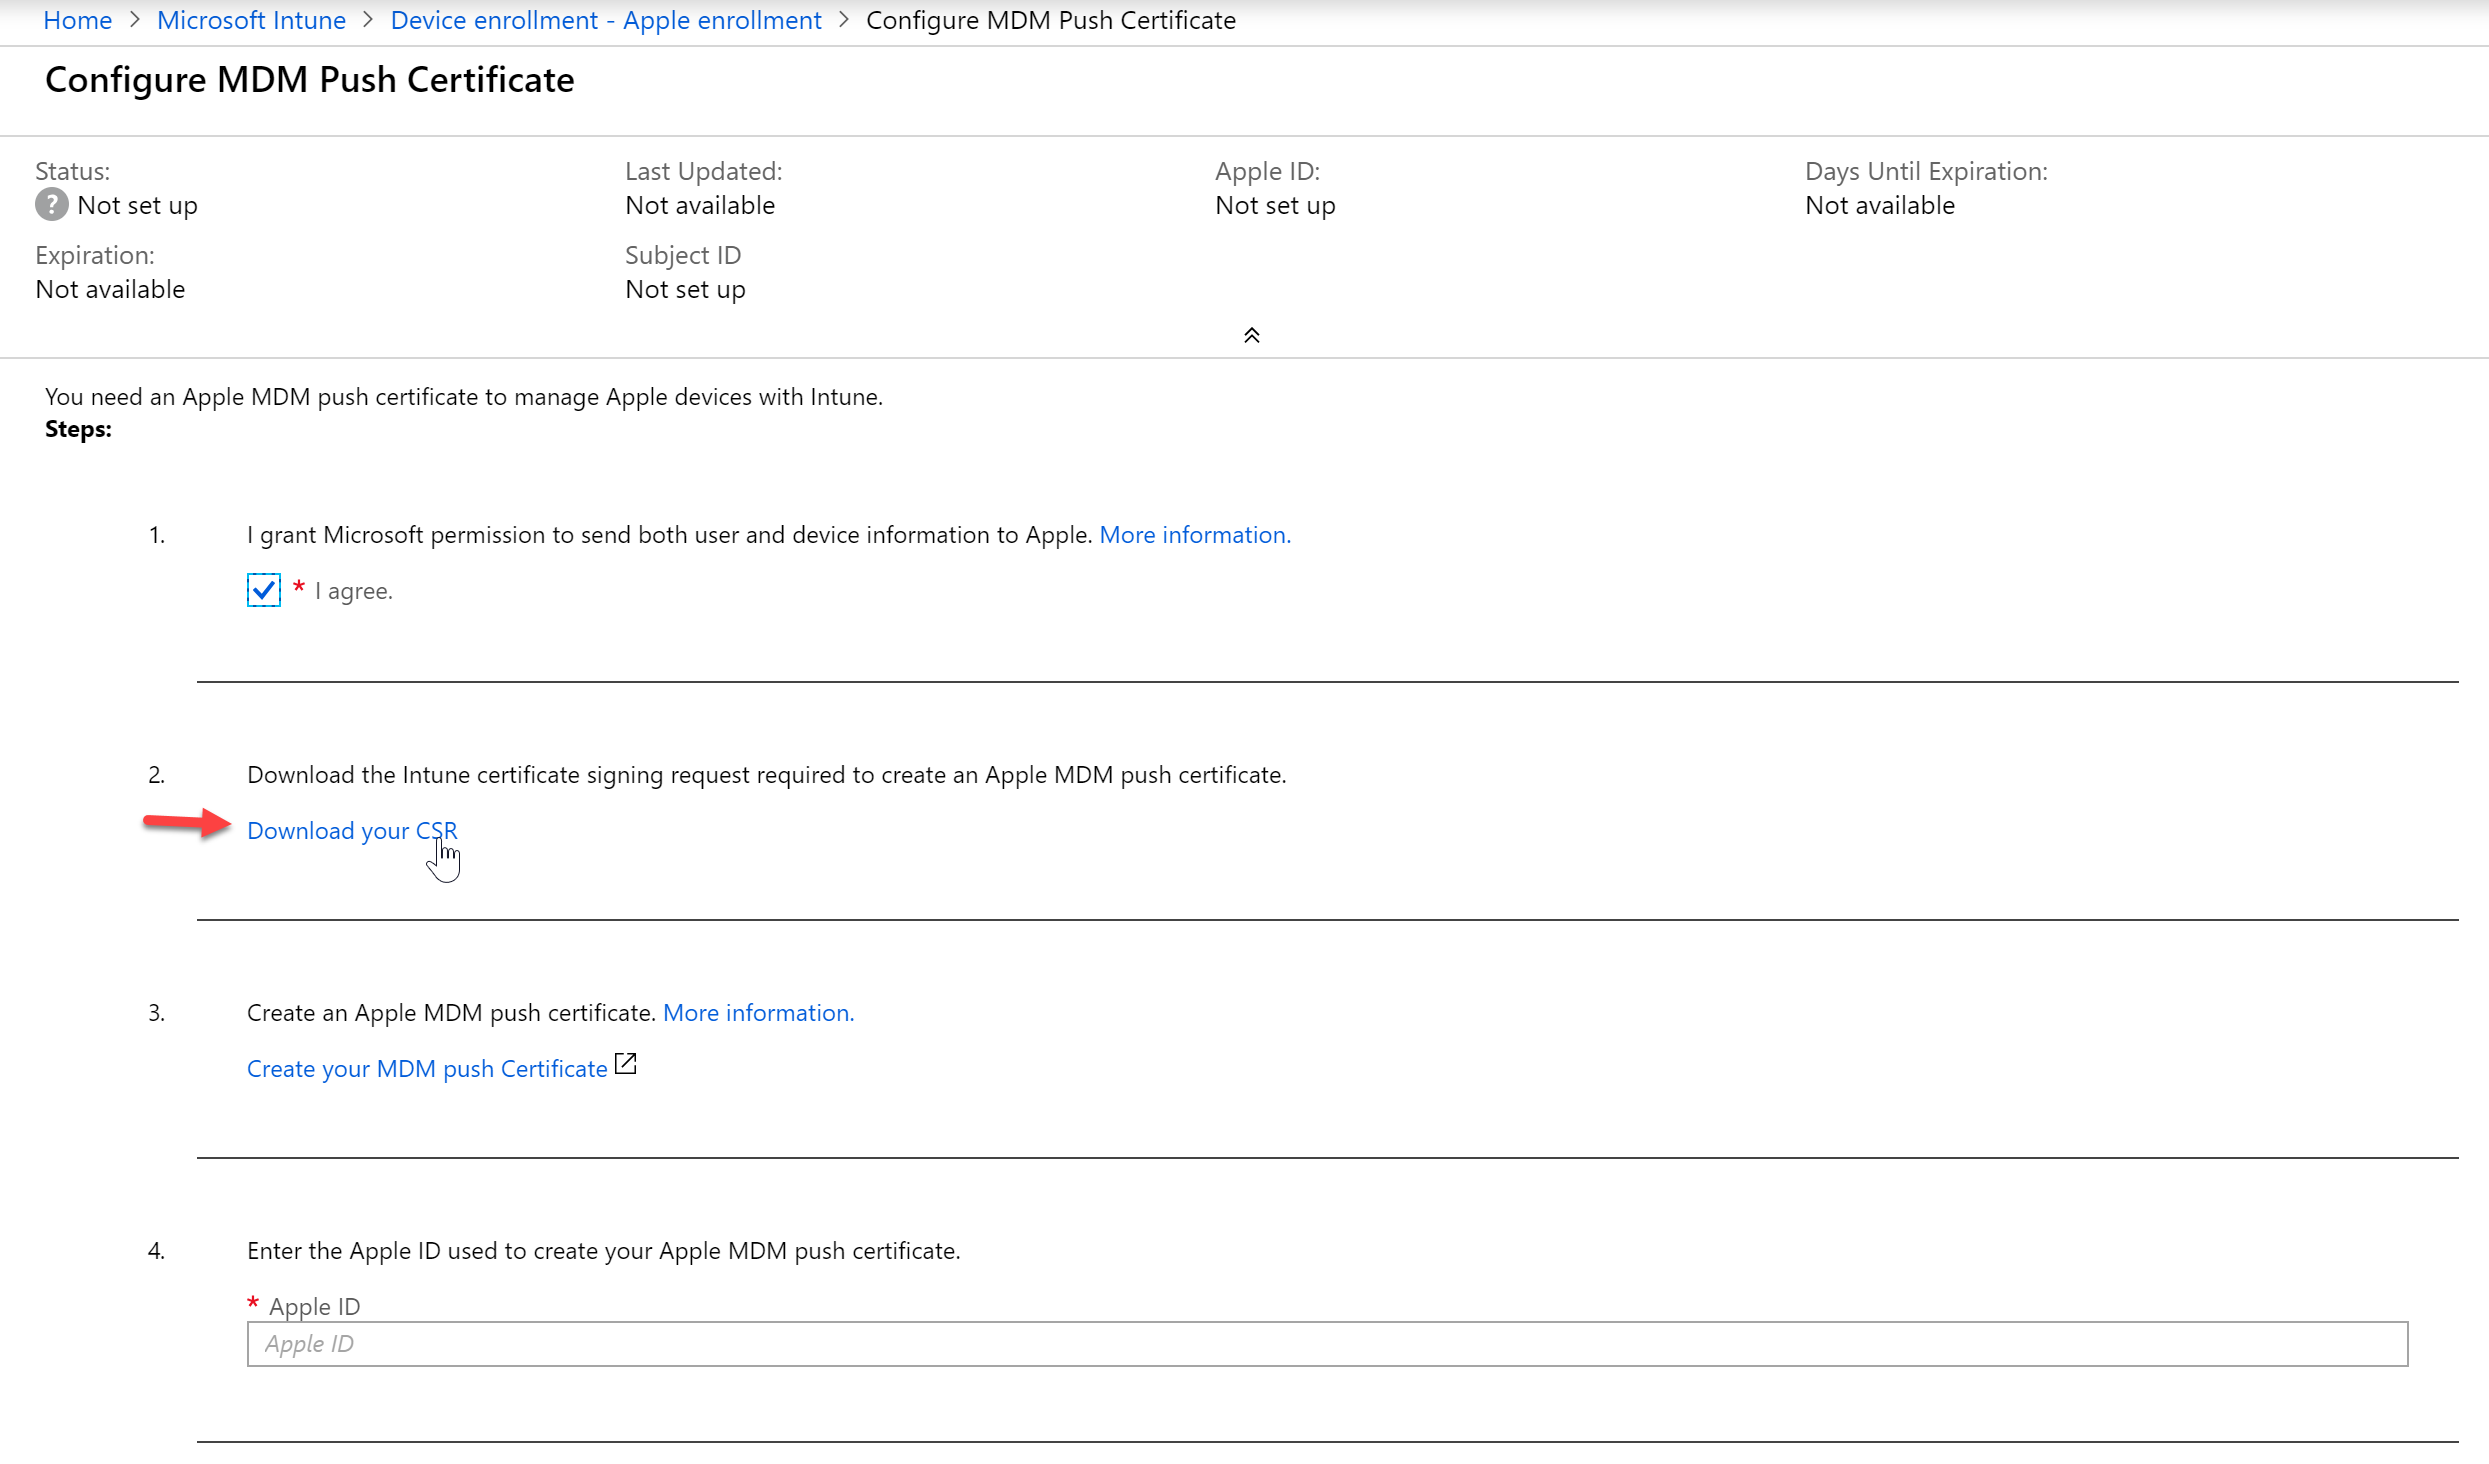
- It will download the file, “IntuneCSR.csr”
- Next, click “Create your MDM push certificate.” You will need to have an Apple ID so if you do not have one you will need to create one
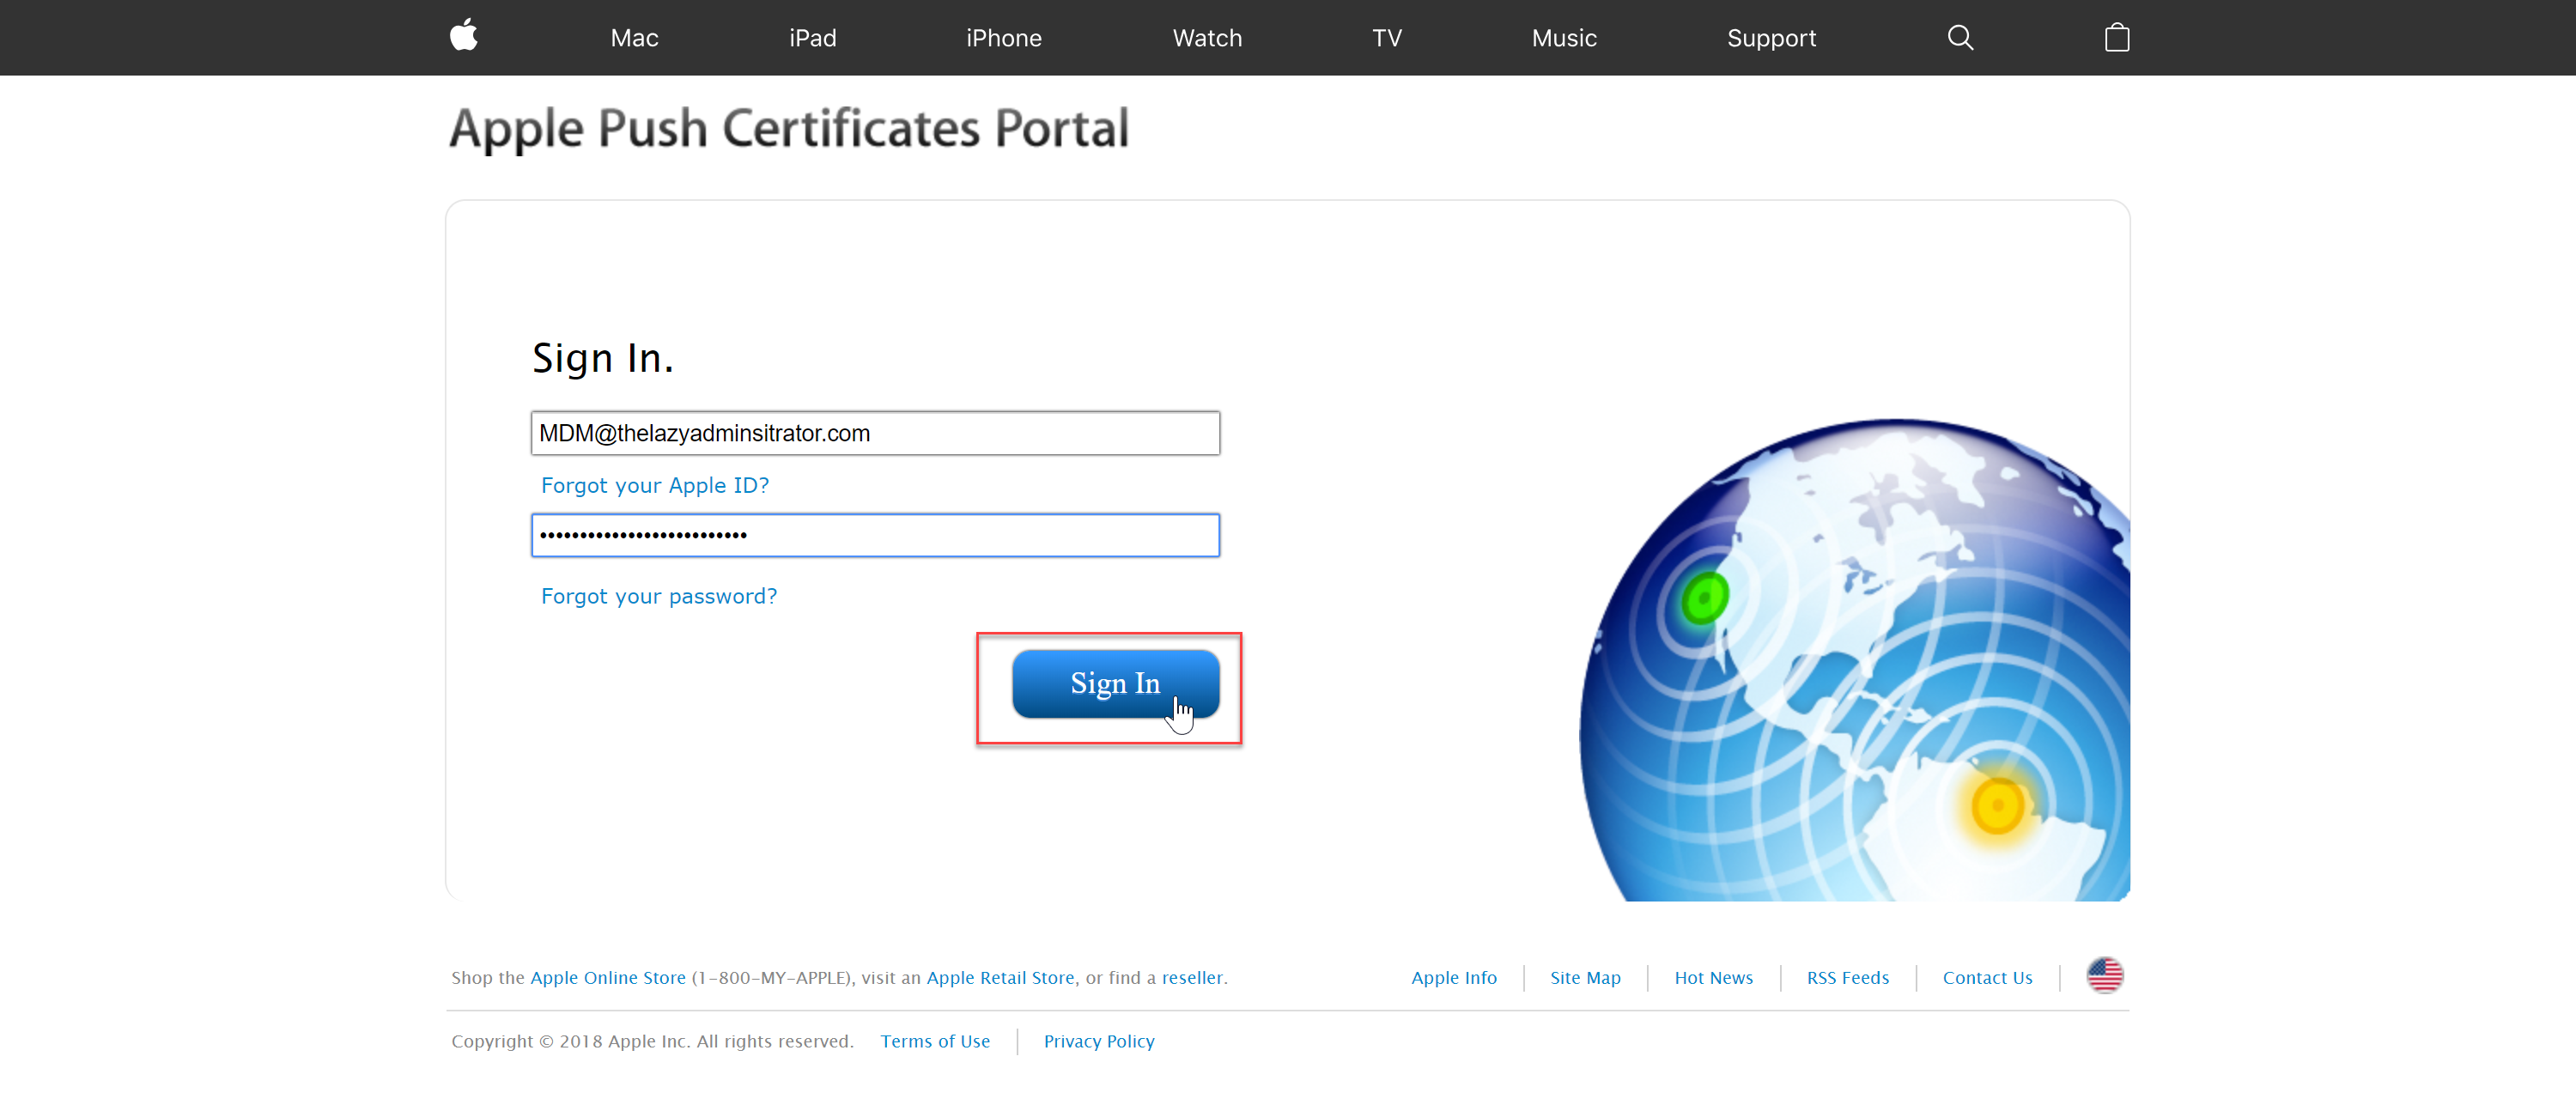
- Sign in with your Apple ID into the Apple Push Certificates Portal
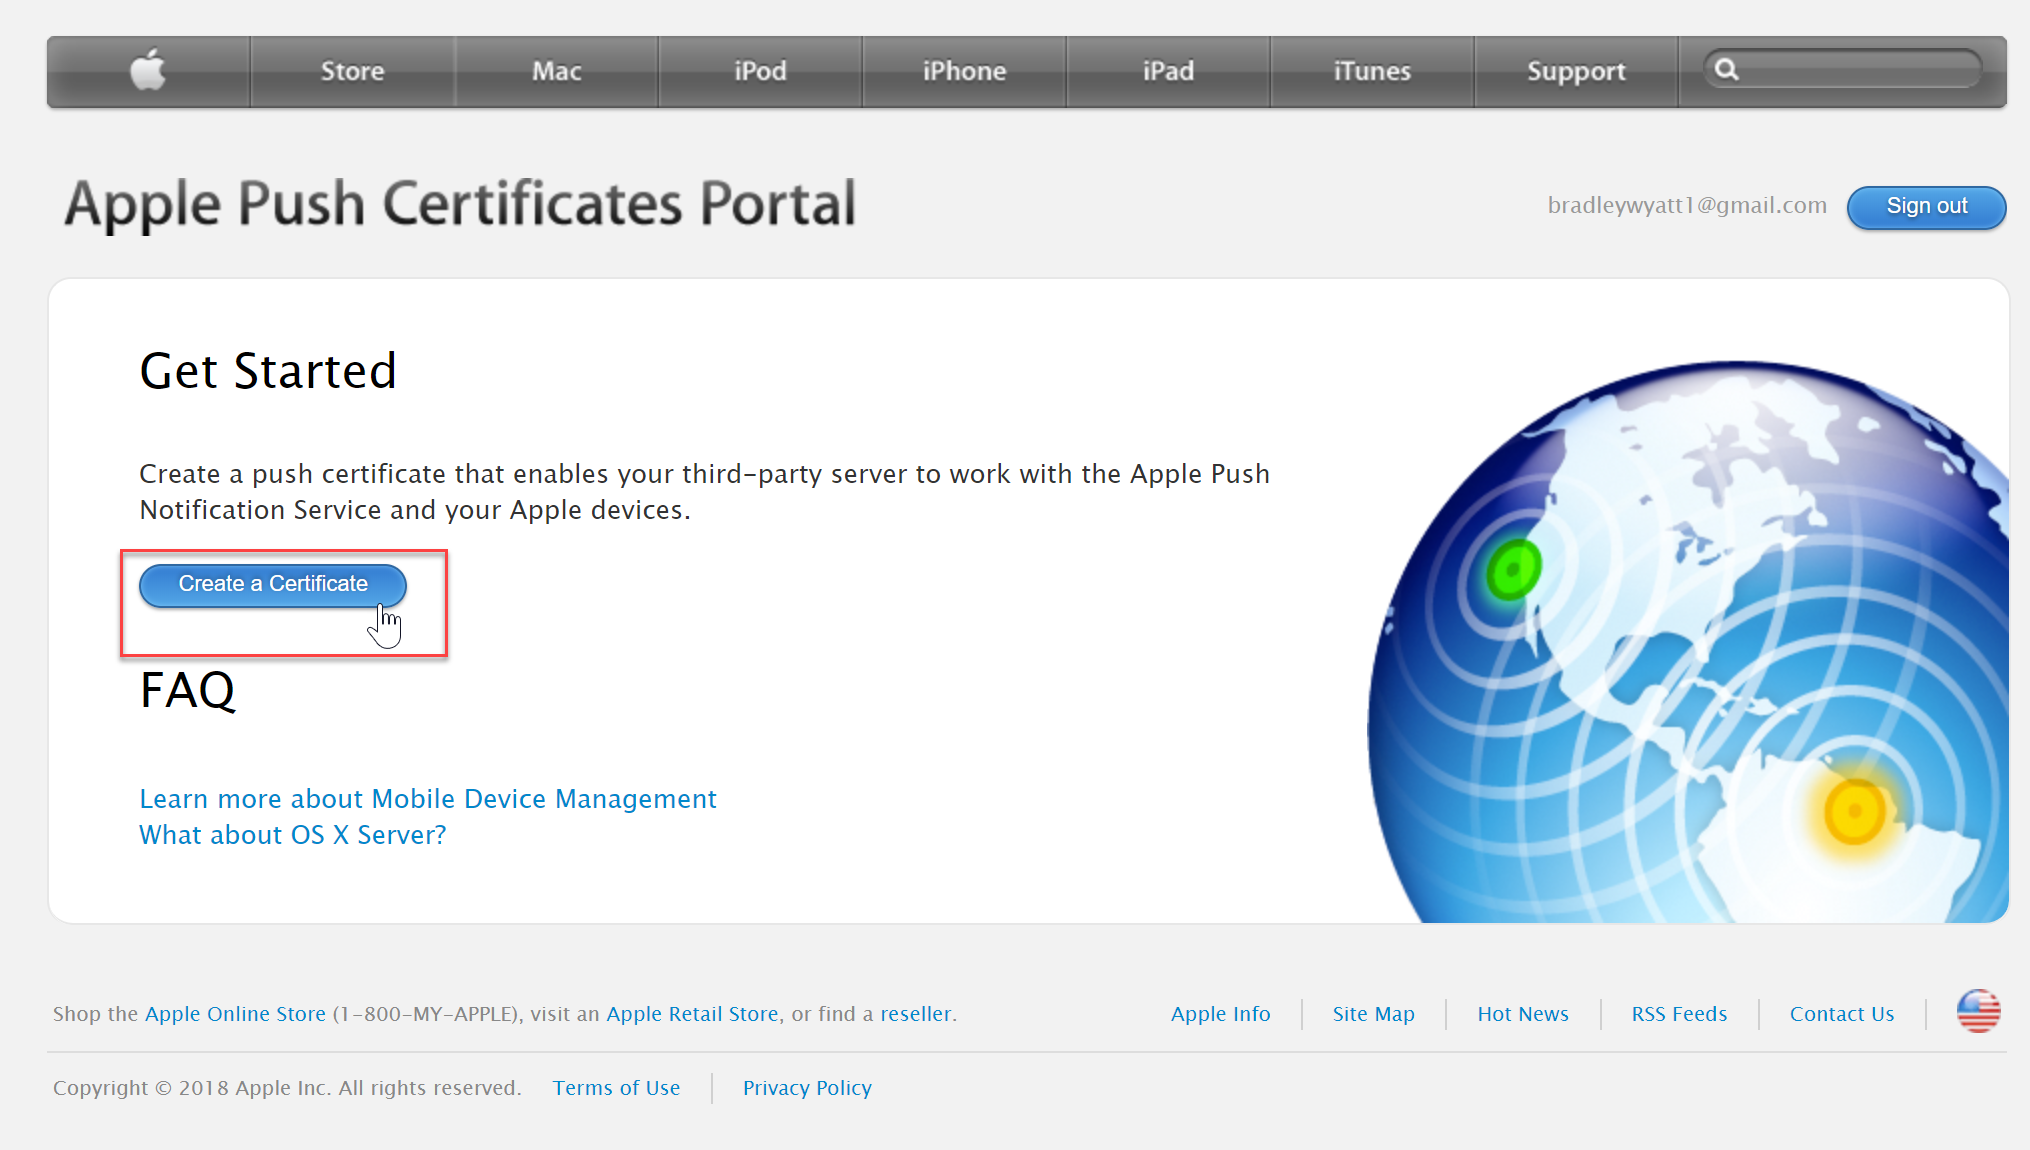
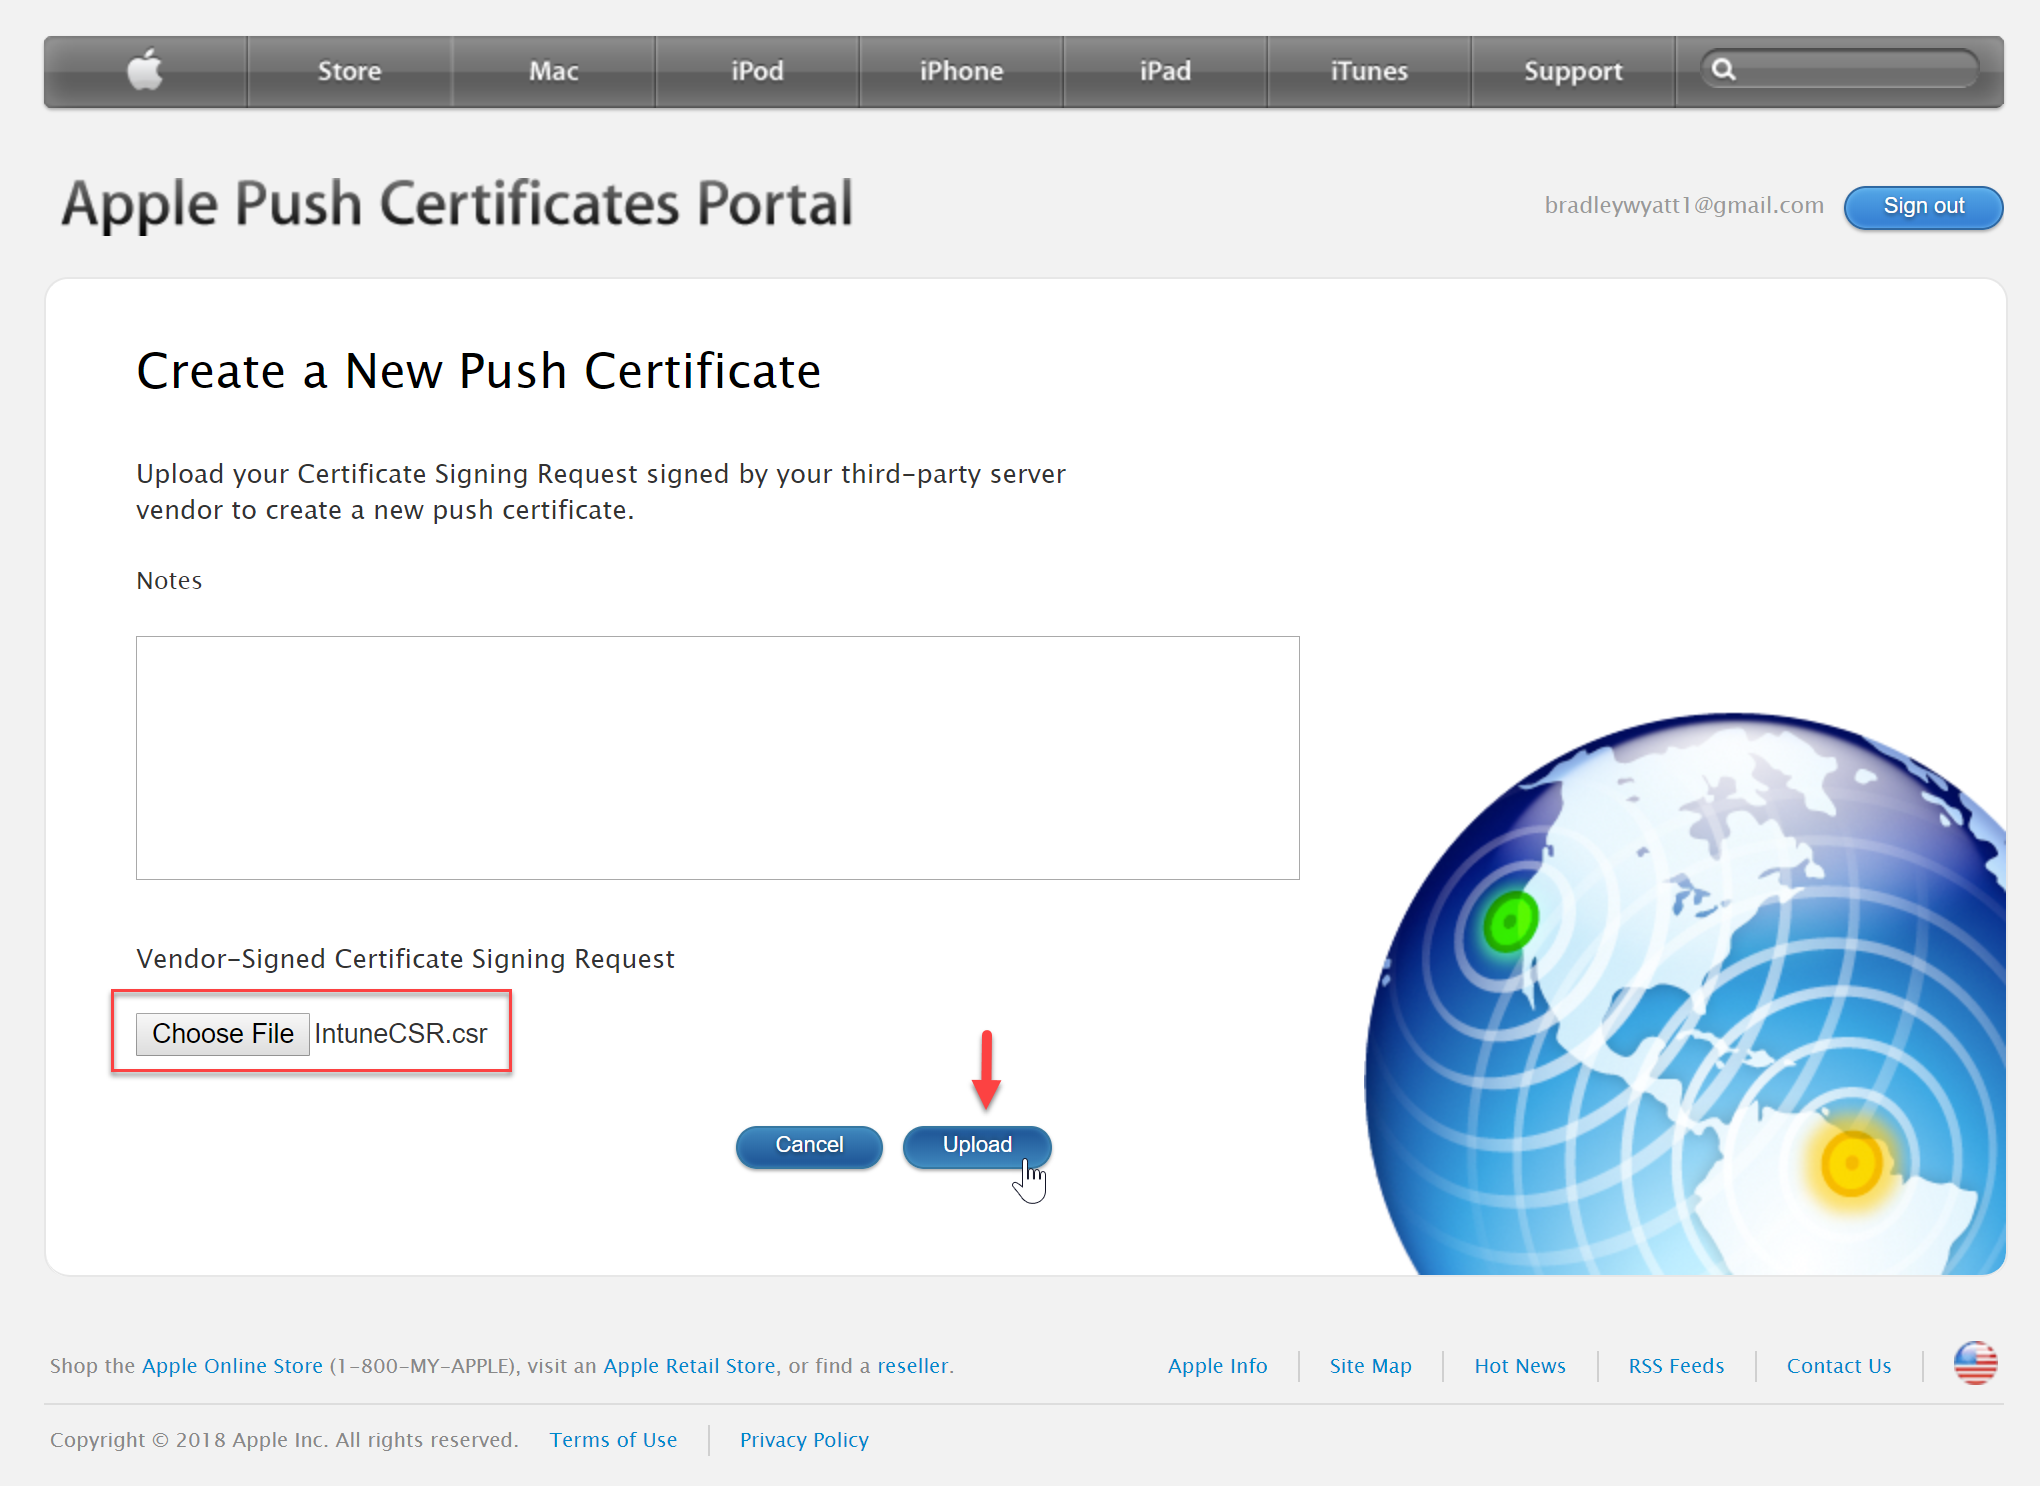
- Now click “Create a Certificate” after you have successfully signed into the portal with your Apple ID.
- Navigate to your CSR file that you downloaded from the Intune portal above and then select “Upload”
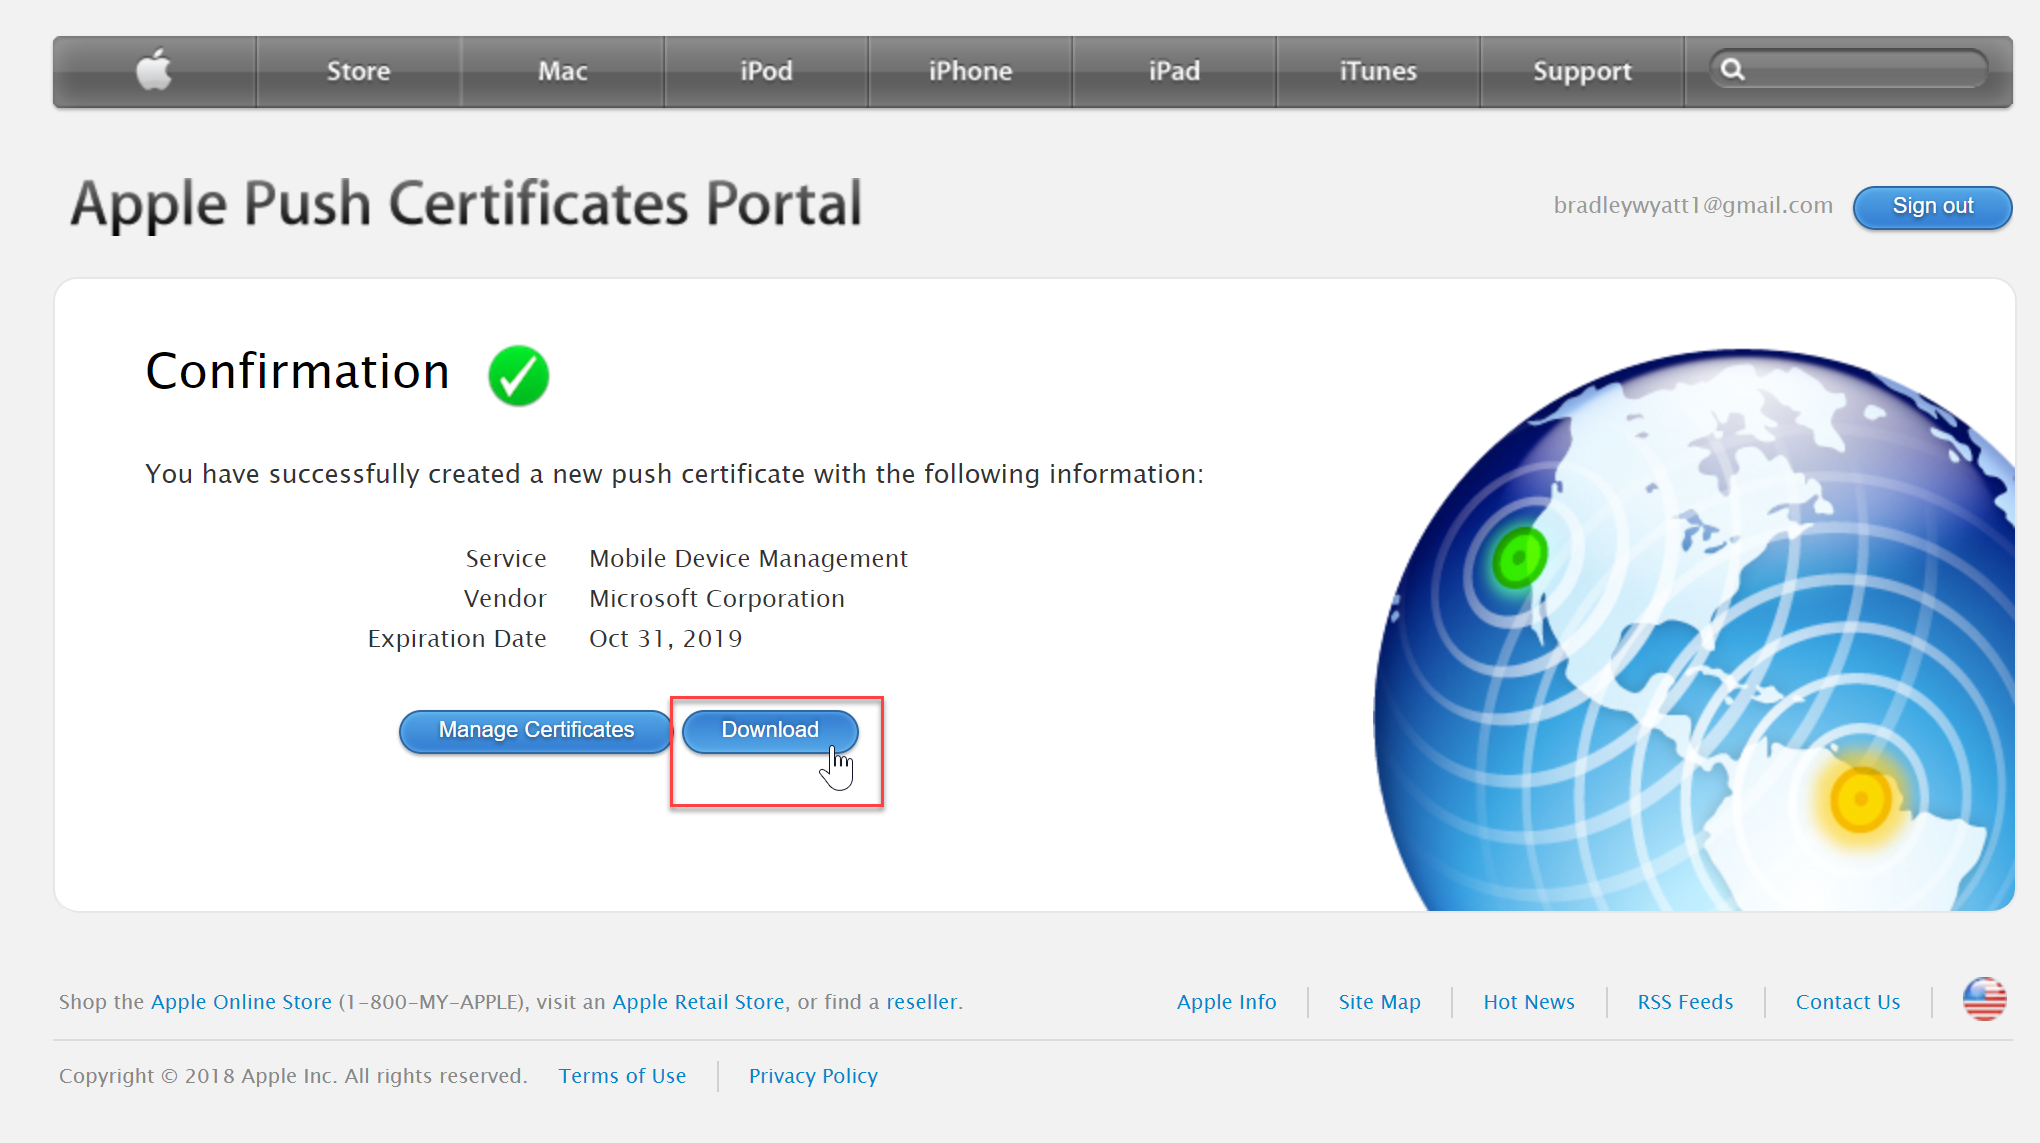
- Once you have a green confirmation, download your certificate
- Go back to the Intune portal and in step 4, enter your Apple ID you used to create the certificate. In step 5 browse to the downloaded certificate and then press “Upload”
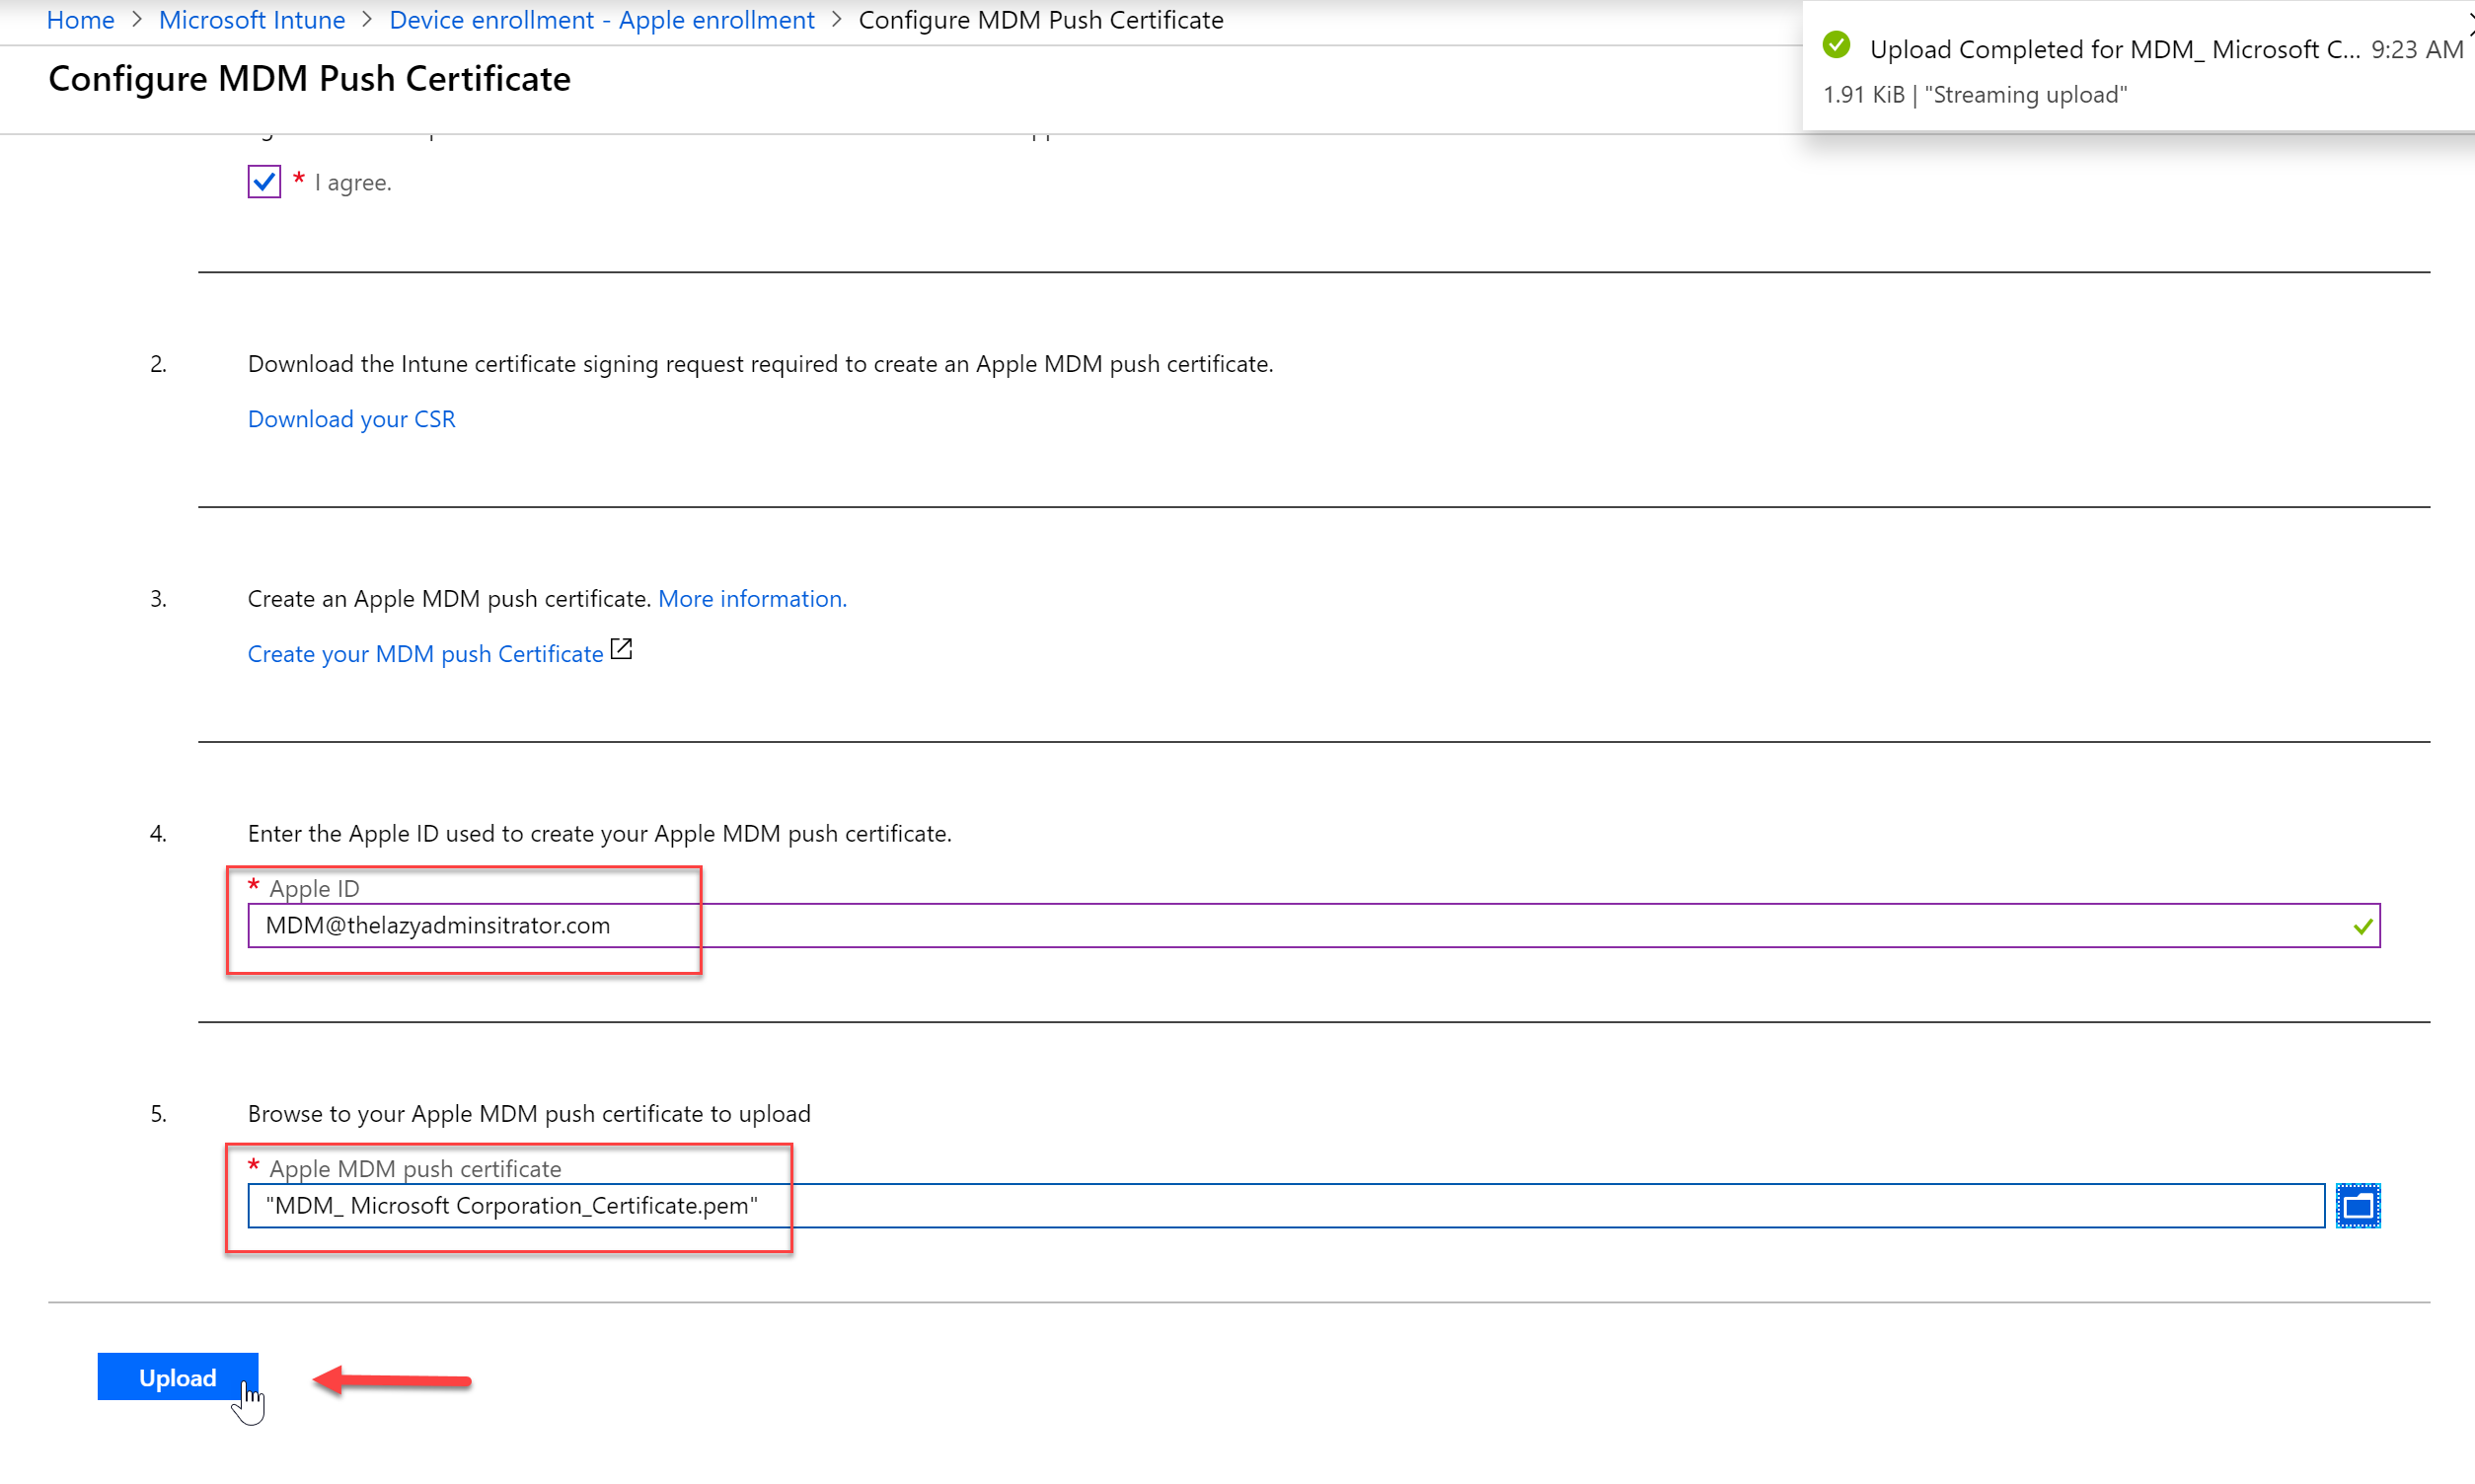
- Once we finish the upload, we can scroll up and see details regarding our certificate, including the expiration data

Configure MDM DNS Records
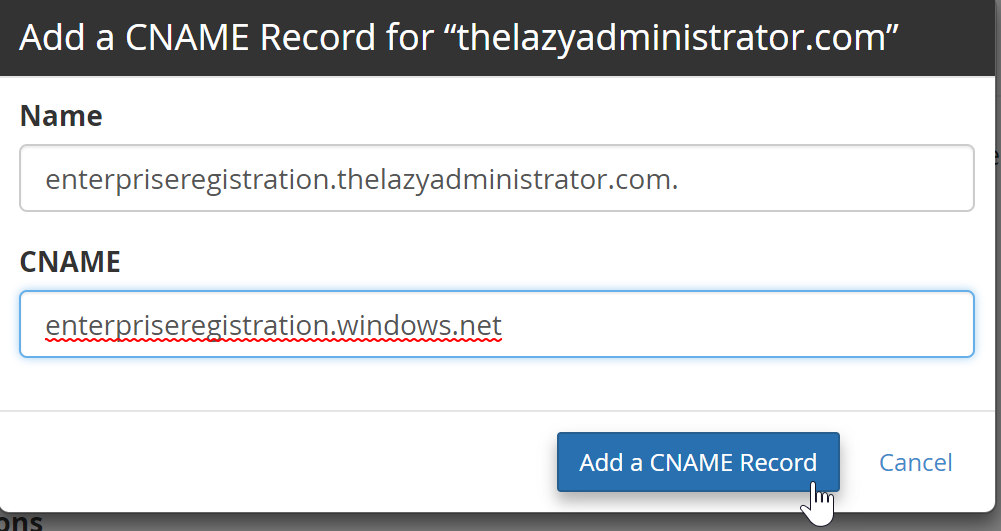
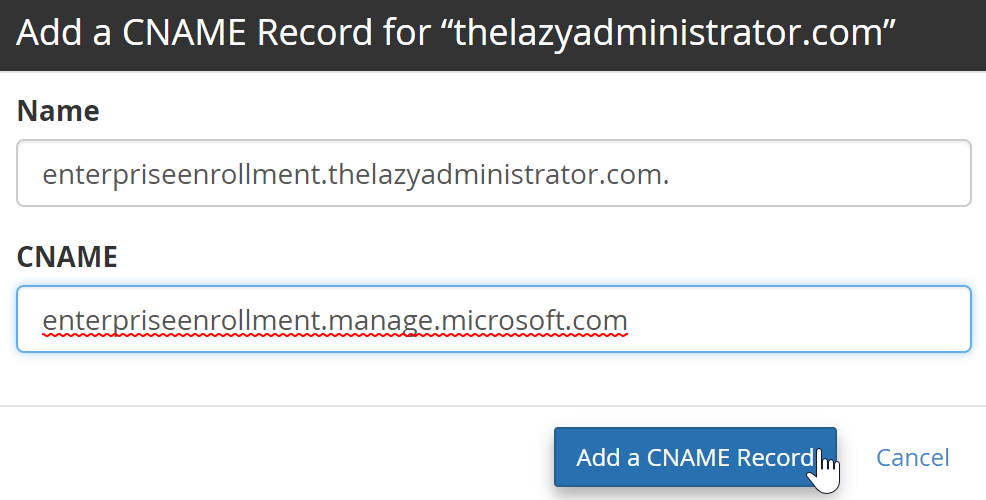
For Windows devices, there are two DNS CNAME records you need to create (pictured below):
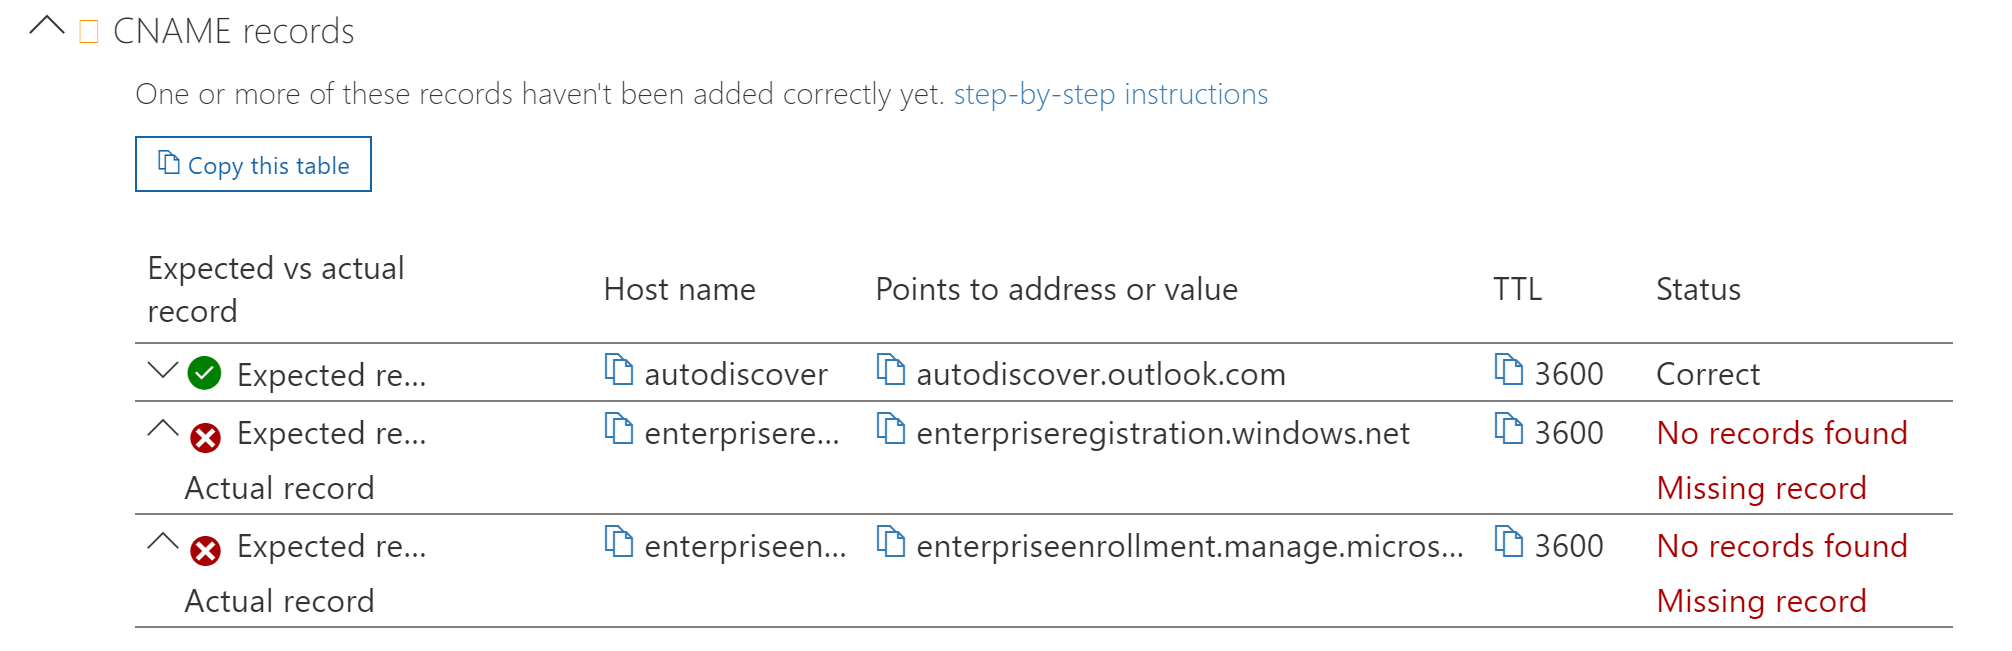
- There are two CNAME records you will need to add. Once
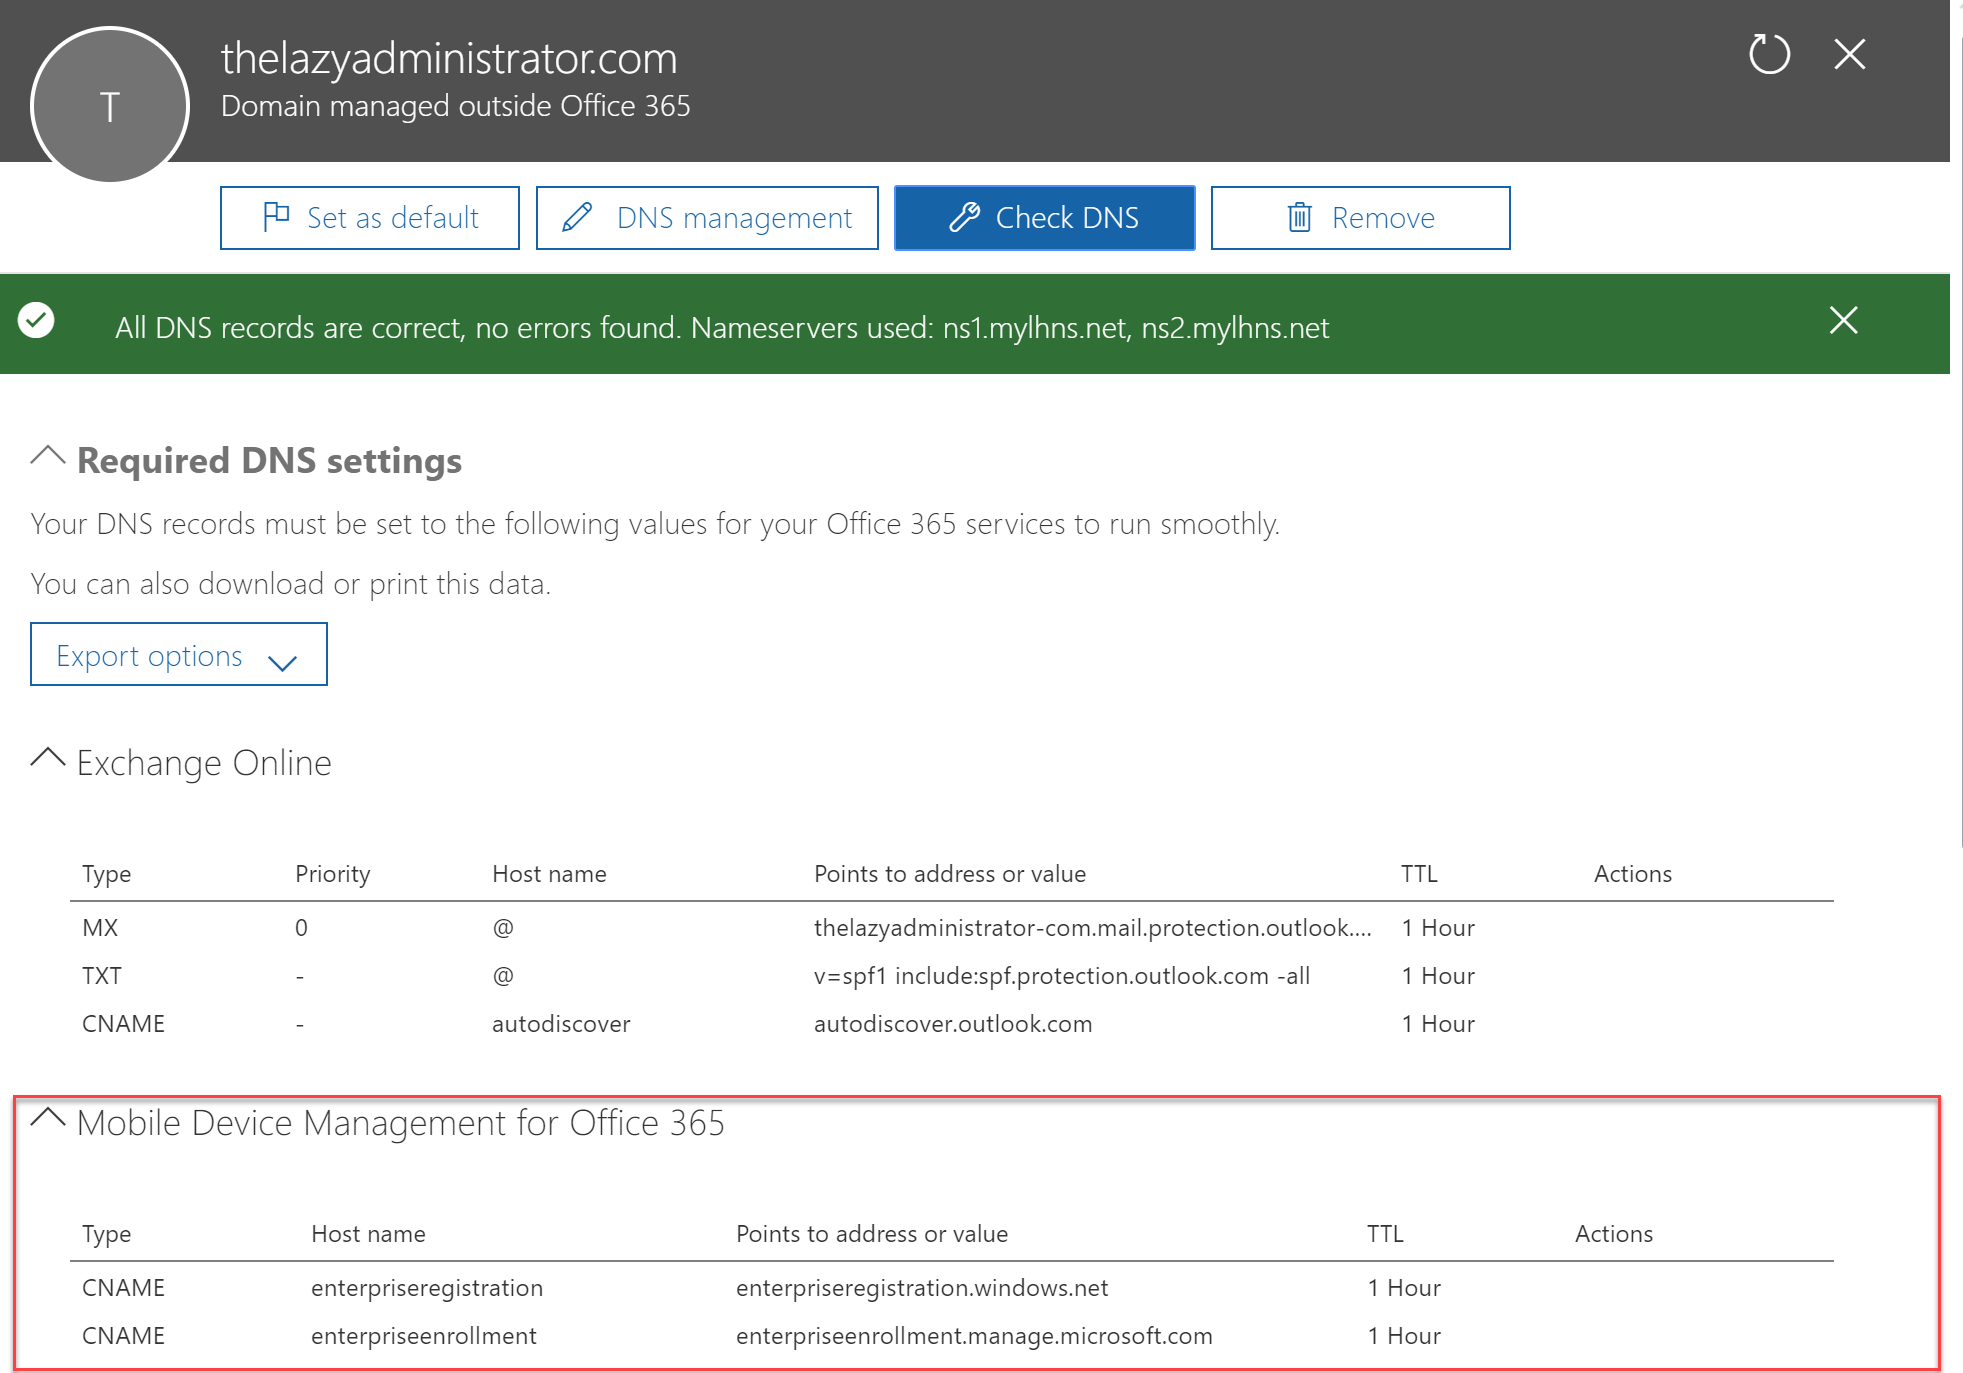
- Checking my DNS for MDM again, I can see that the records are now in place and valid
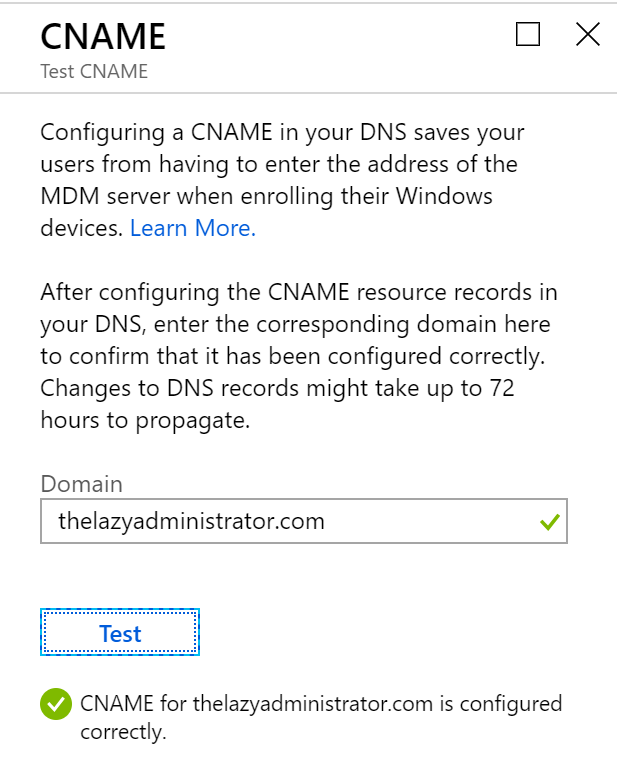
- Back in the Intune azure portal, under Device Enrollment, go to Windows enrollment and then CNAME Validation

- Verify that your domain comes back successful
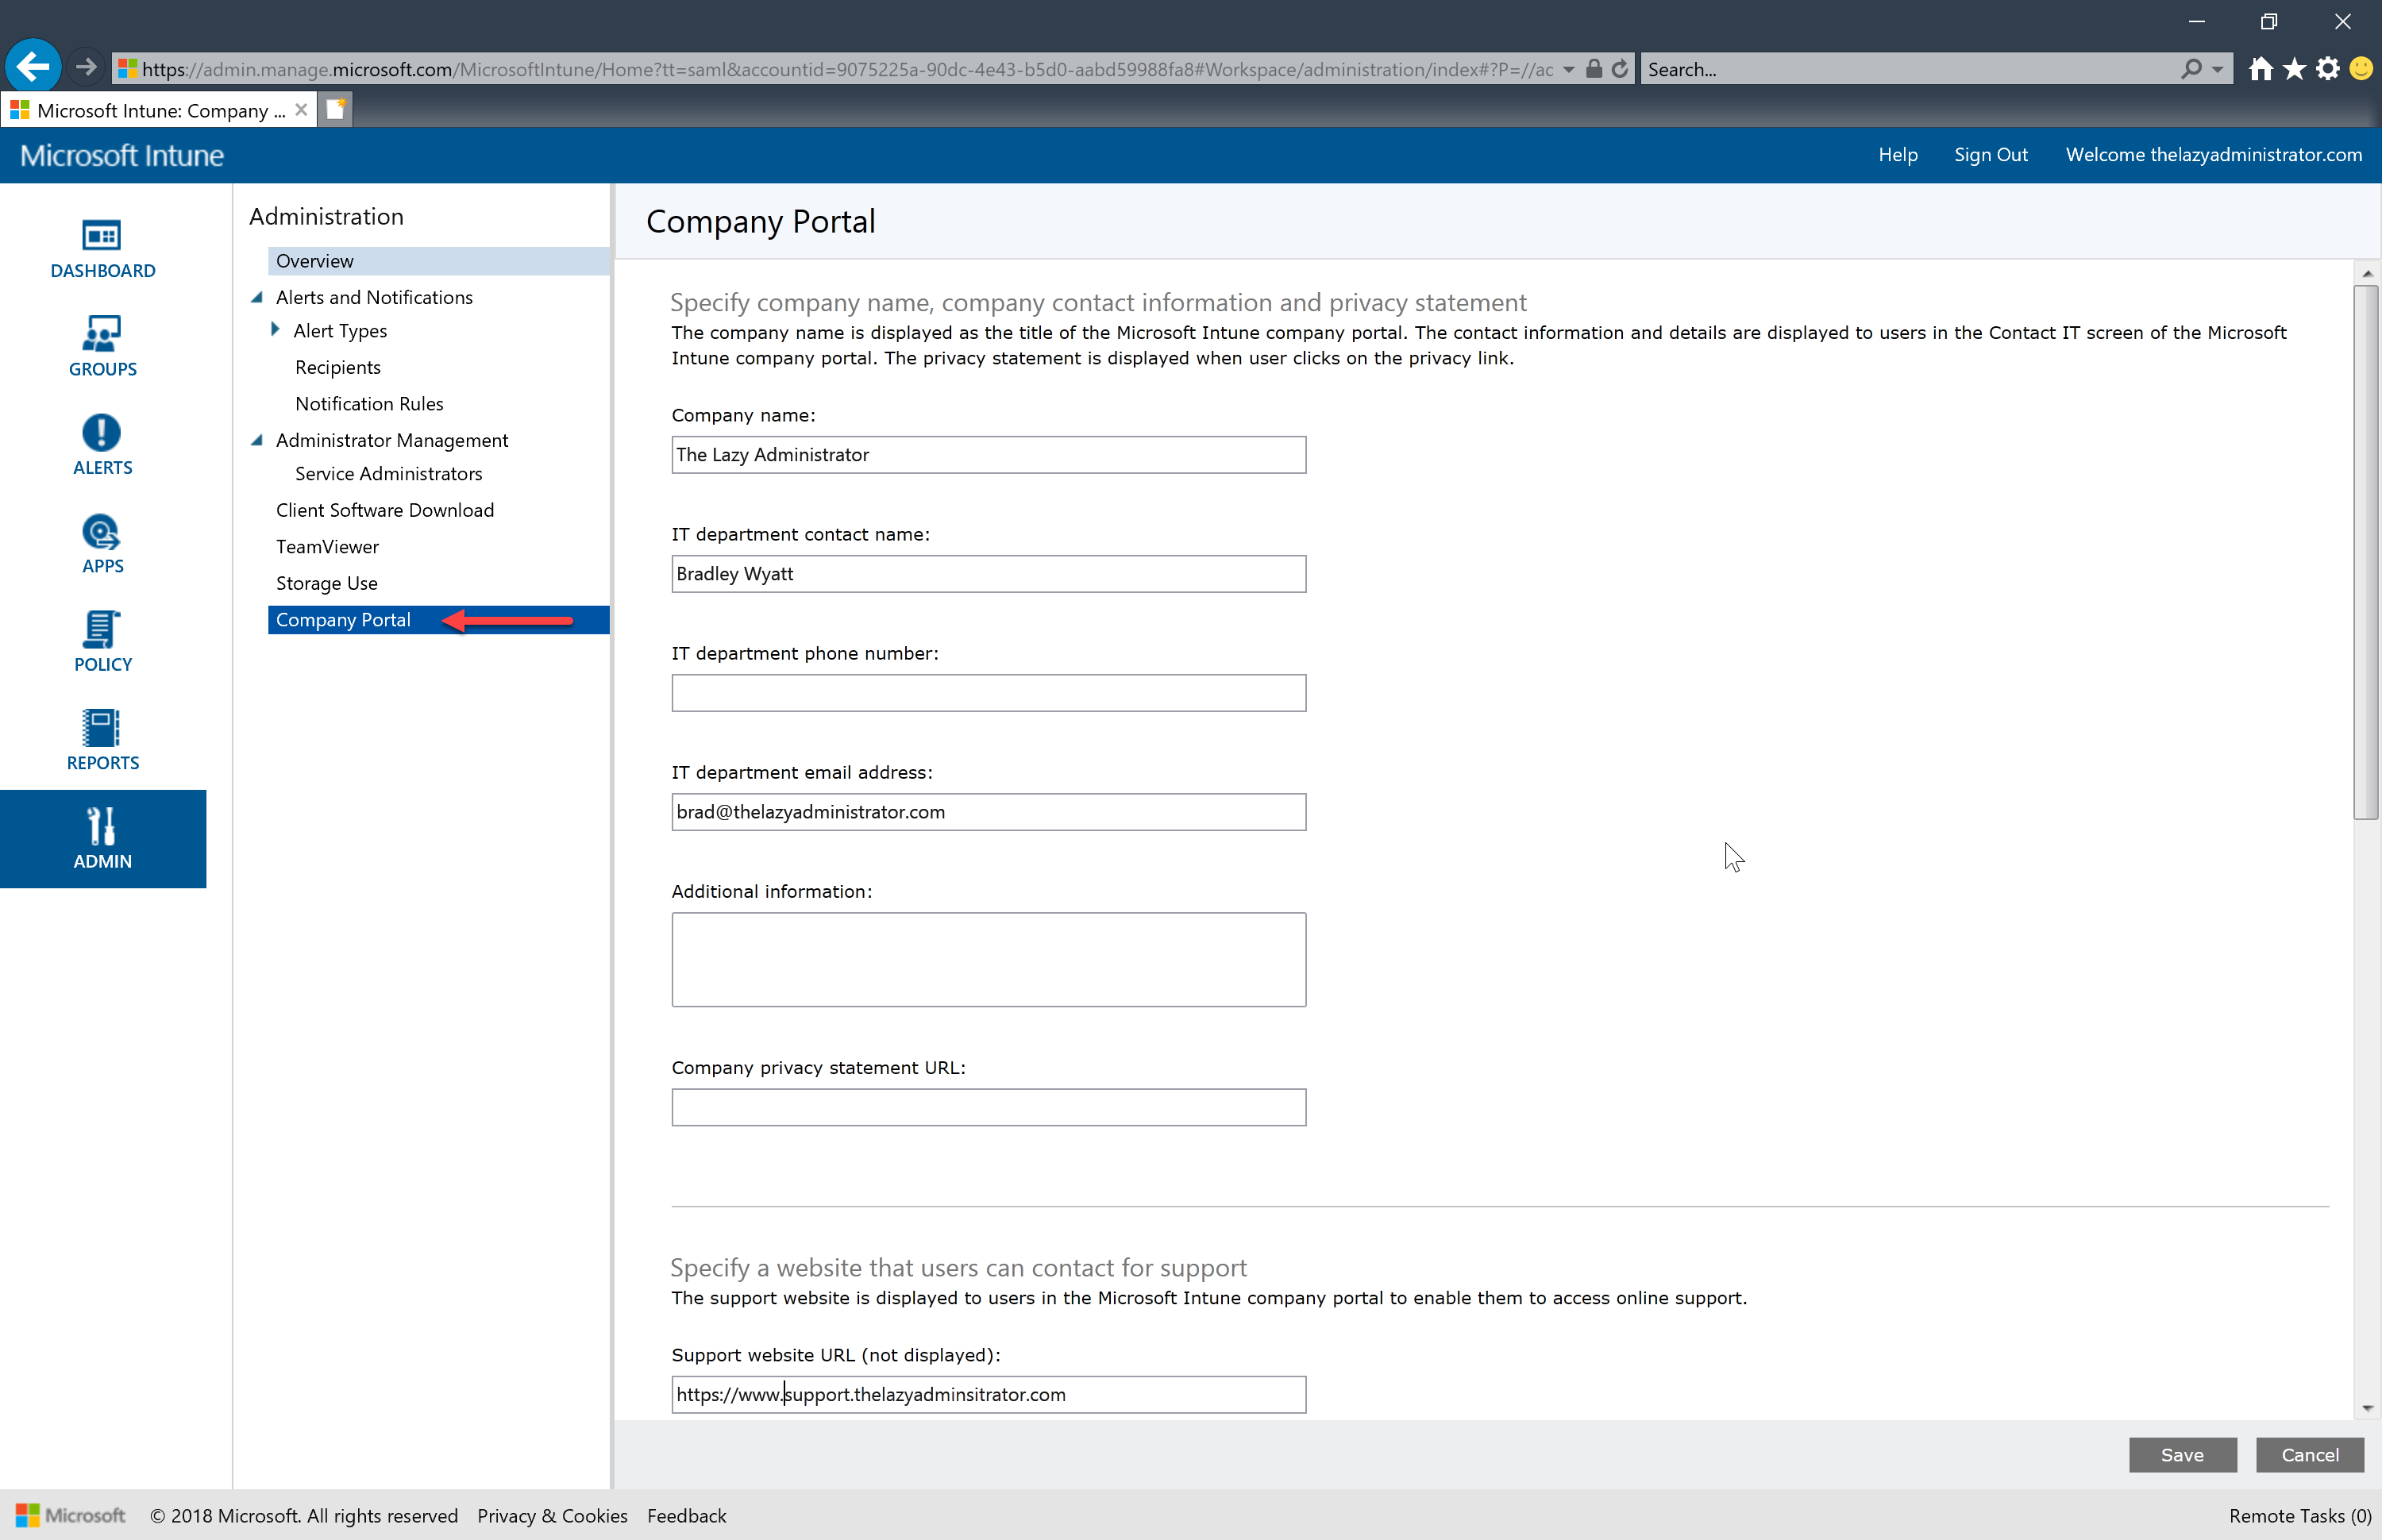
Configure Company Portal
The company portal is a web page and a mobile device application that supports BYOD users. It gives them a centralized location to install published applications, self management, and retrieve information.
- Currently the Company Portal can be configured on the legacy Intune Portal at admin.manage.microsoft.com
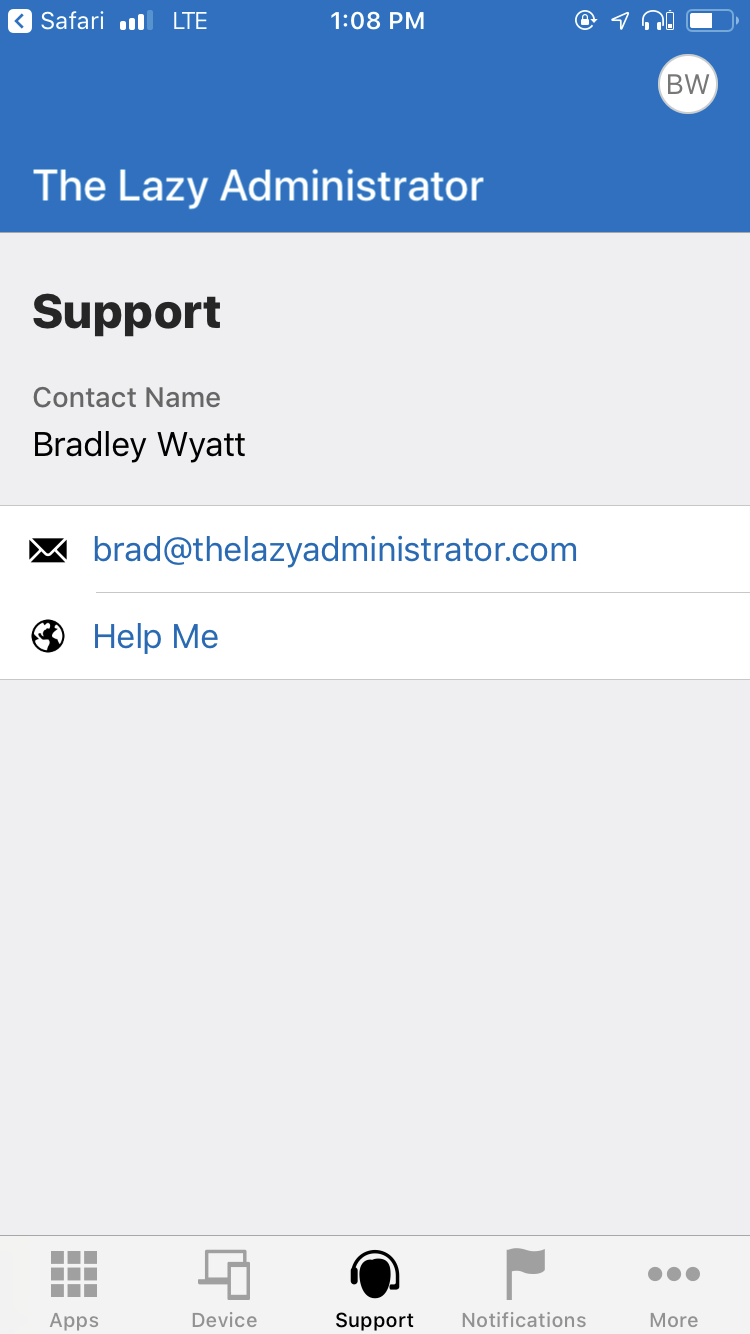
- On the iOS Company Portal application under support you can see the email and website we specified for help. This is handy for end users as they have a very simple and clear way to contact you or your IT team.
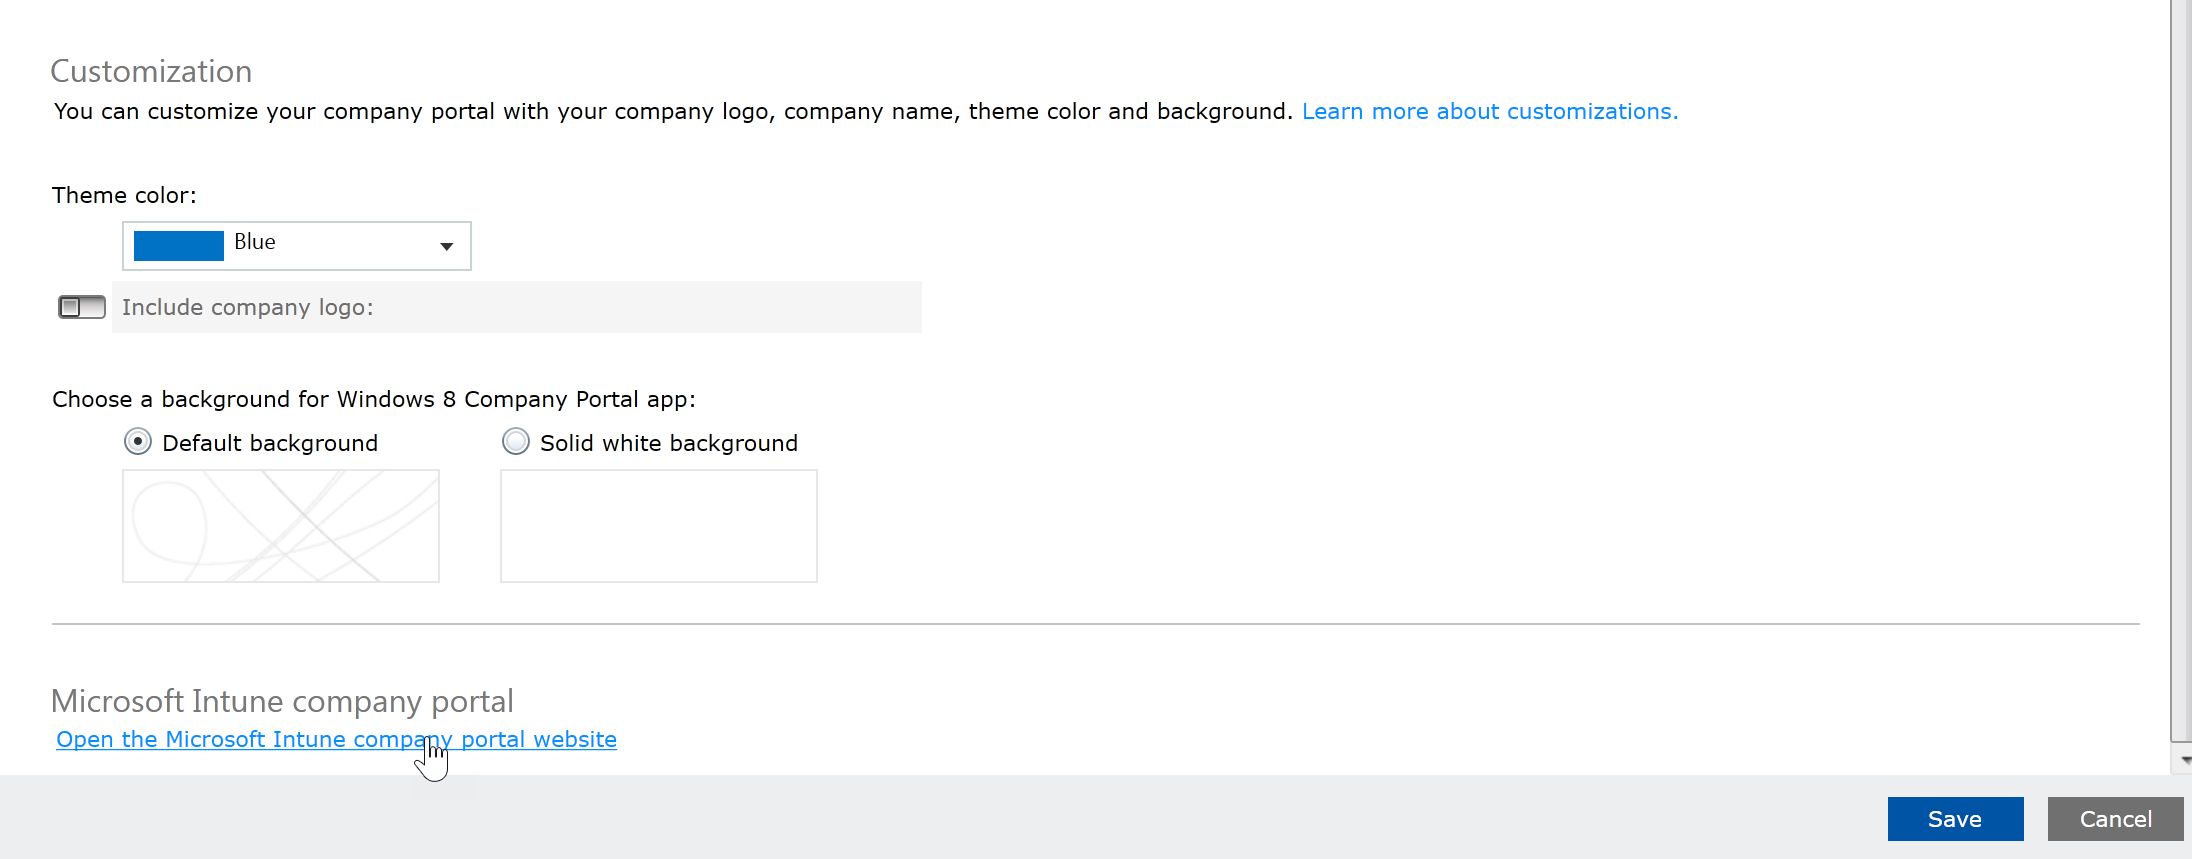
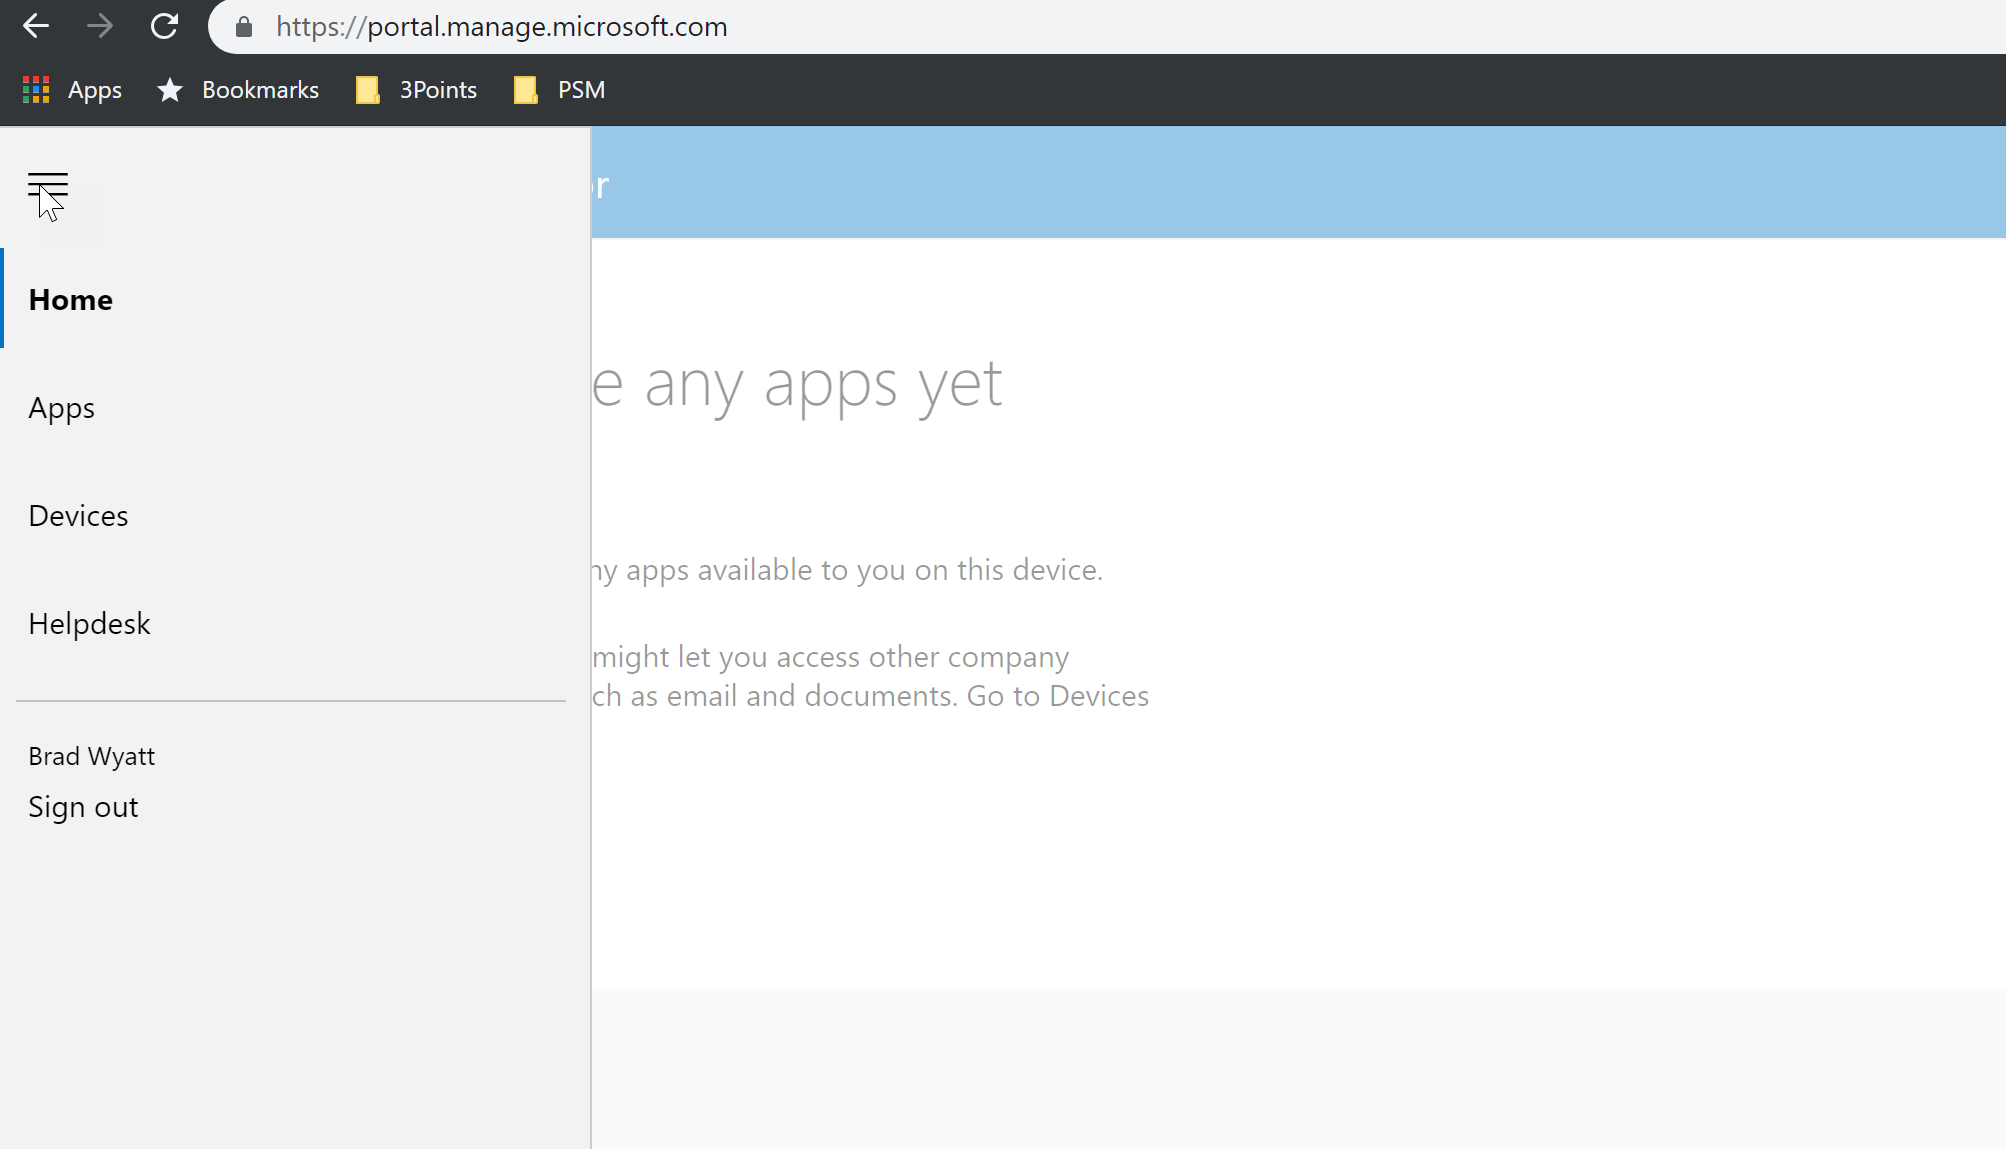
- At the bottom, once you save your Company Portal changes you can launch the portal website (https://portal.manage.microsoft.com/)
- Here I can see the basic portal
Configure Portal Terms and Conditions
The Terms and Conditions can be prompted to users prior to them accessing the Intune Company Portal. In the Azure Intune portal you can configure your policies, apply to users or groups, and review the acceptance reporting.
- Log into the Azure Intune Portal
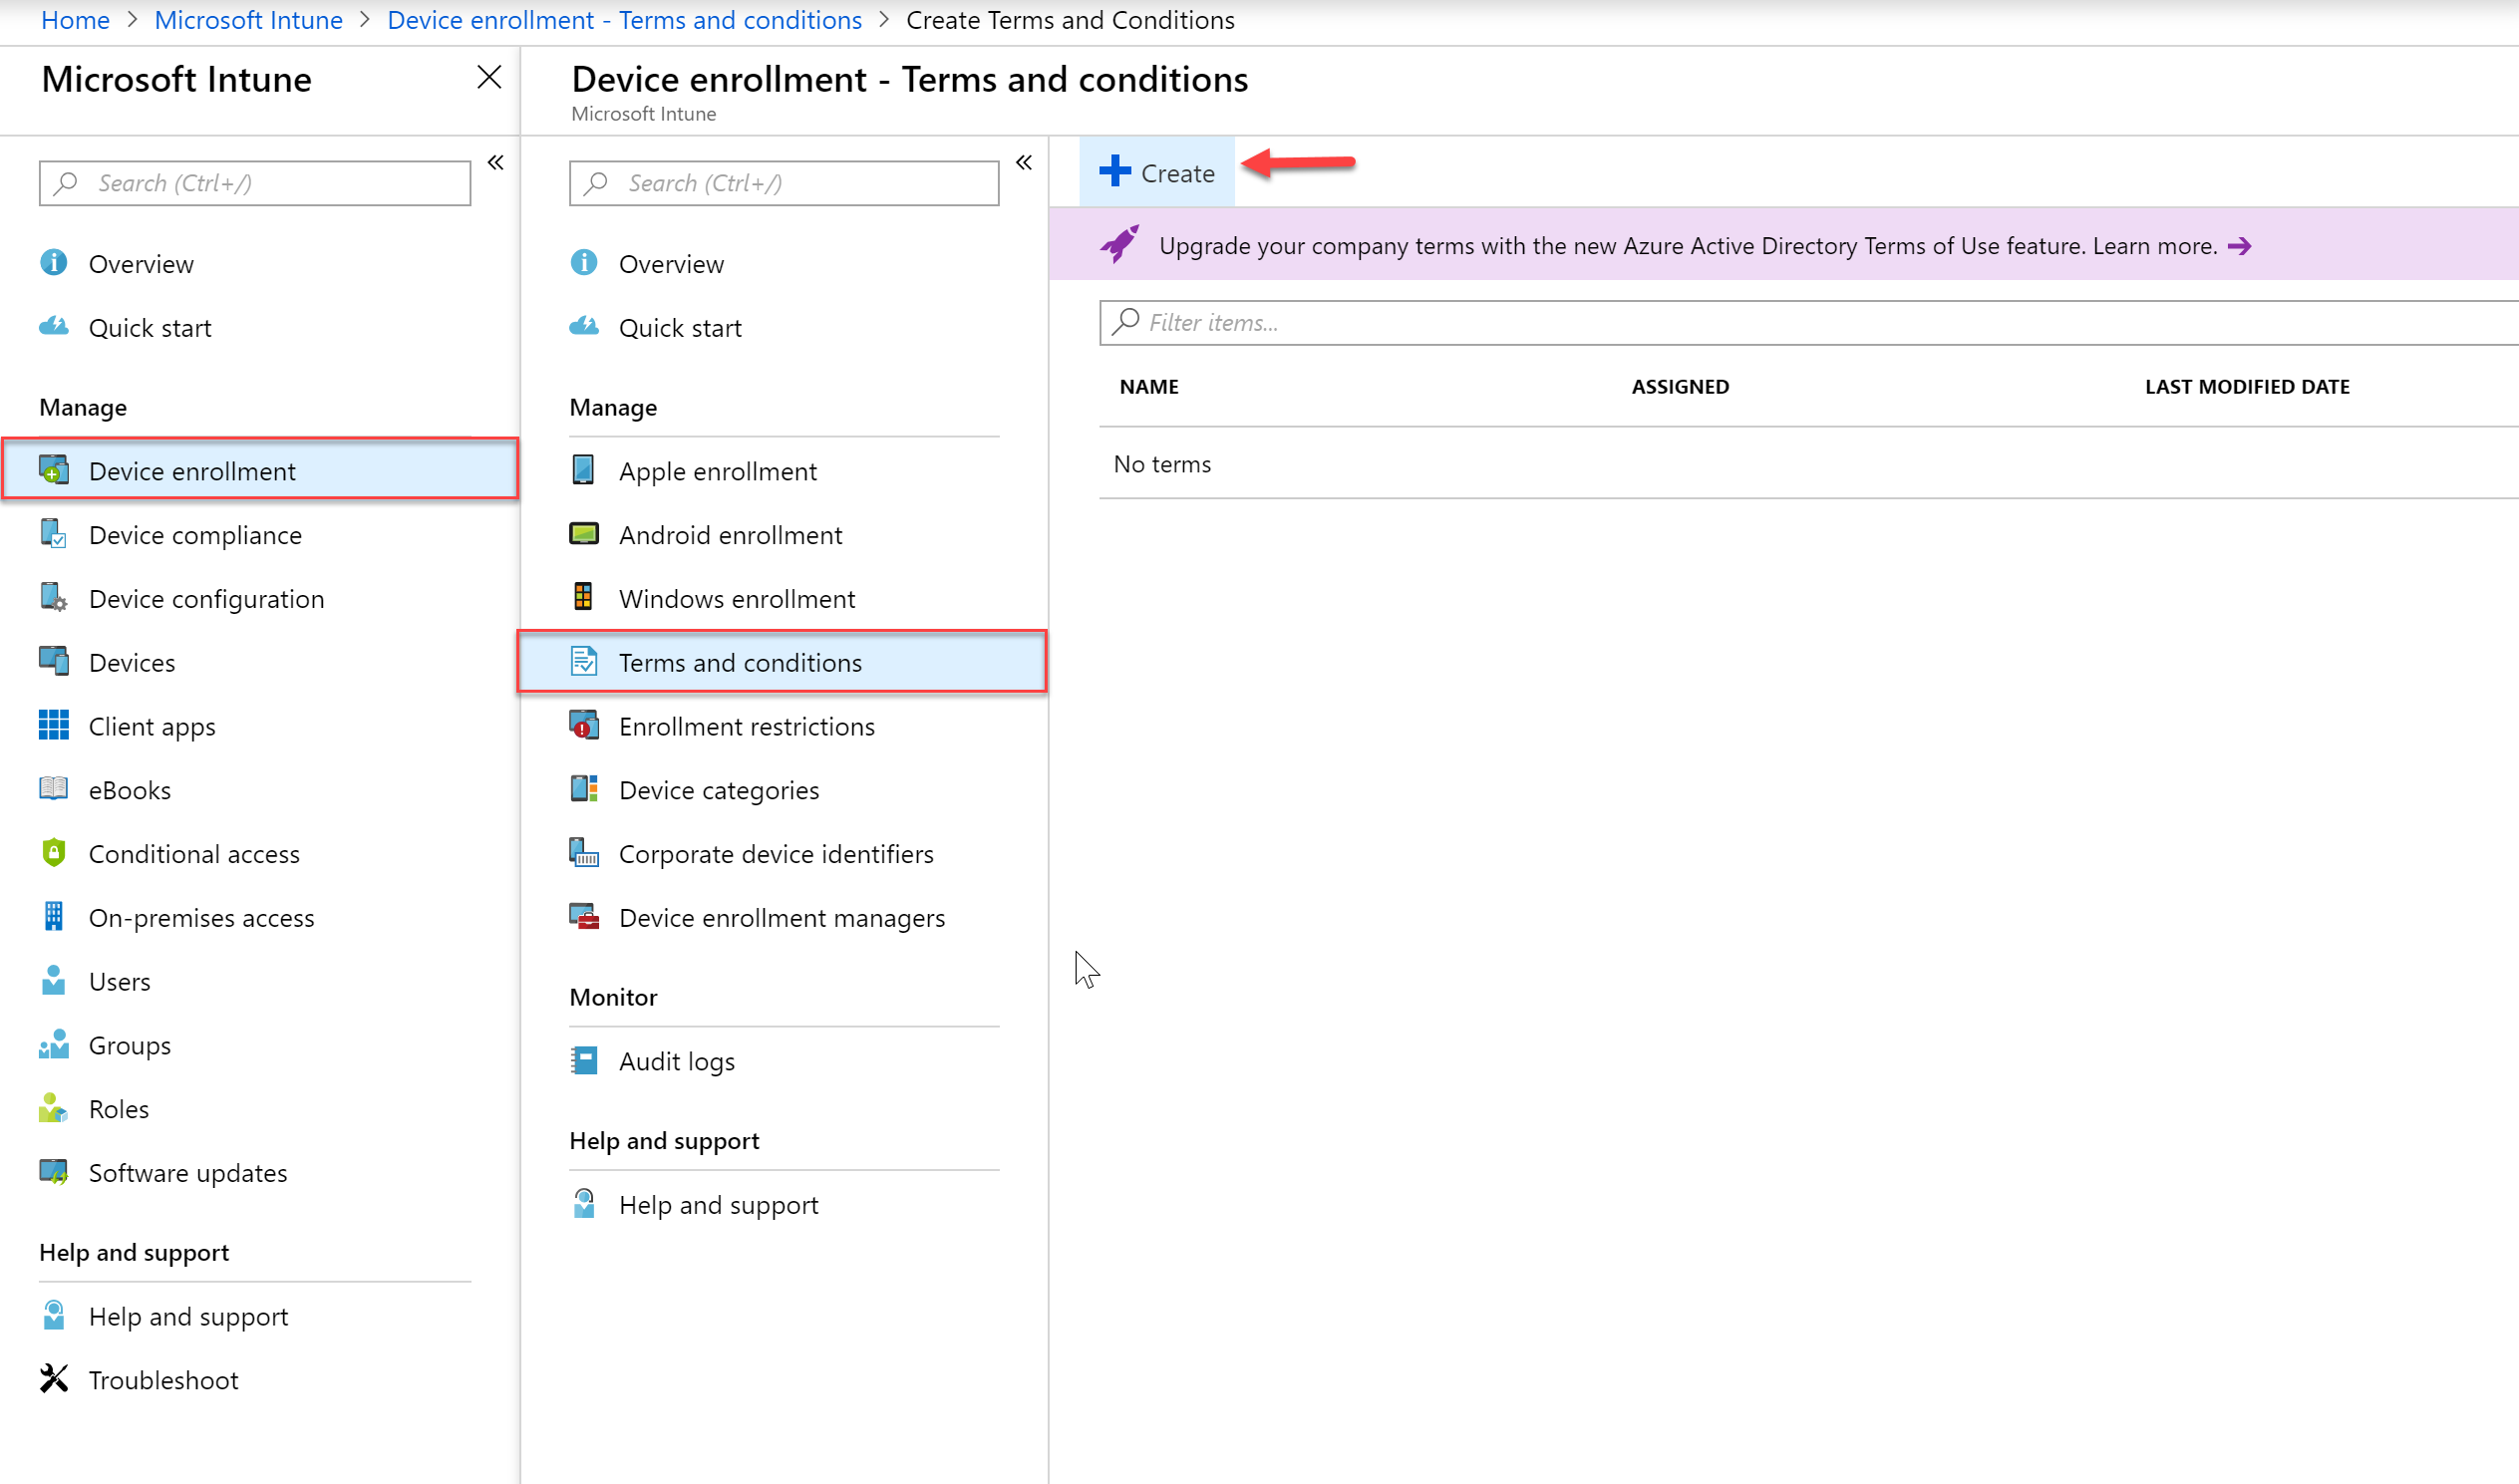
- Navigate to the Intune blade, then Device Enrollment > Terms and Conditions and then click “Create”
- Create the required information regarding your Terms and Conditions and then press OK

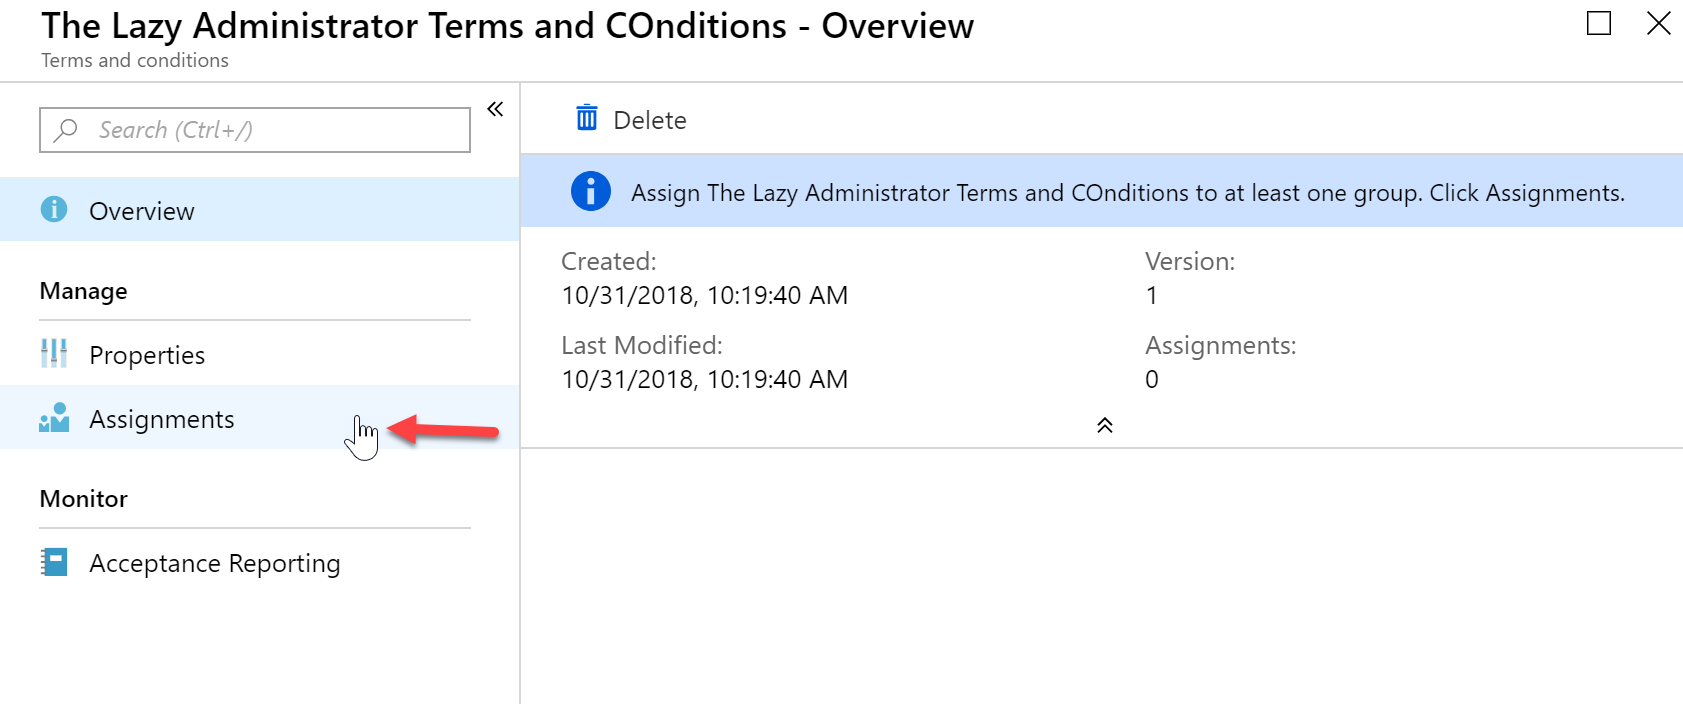
- You will get a notification that your policy must be assigned to users or groups in your environment

- Under your Terms and Conditions overview select “Assignments”
- Select the Users or Groups you want to assign the Terms and Conditions to and then press Save

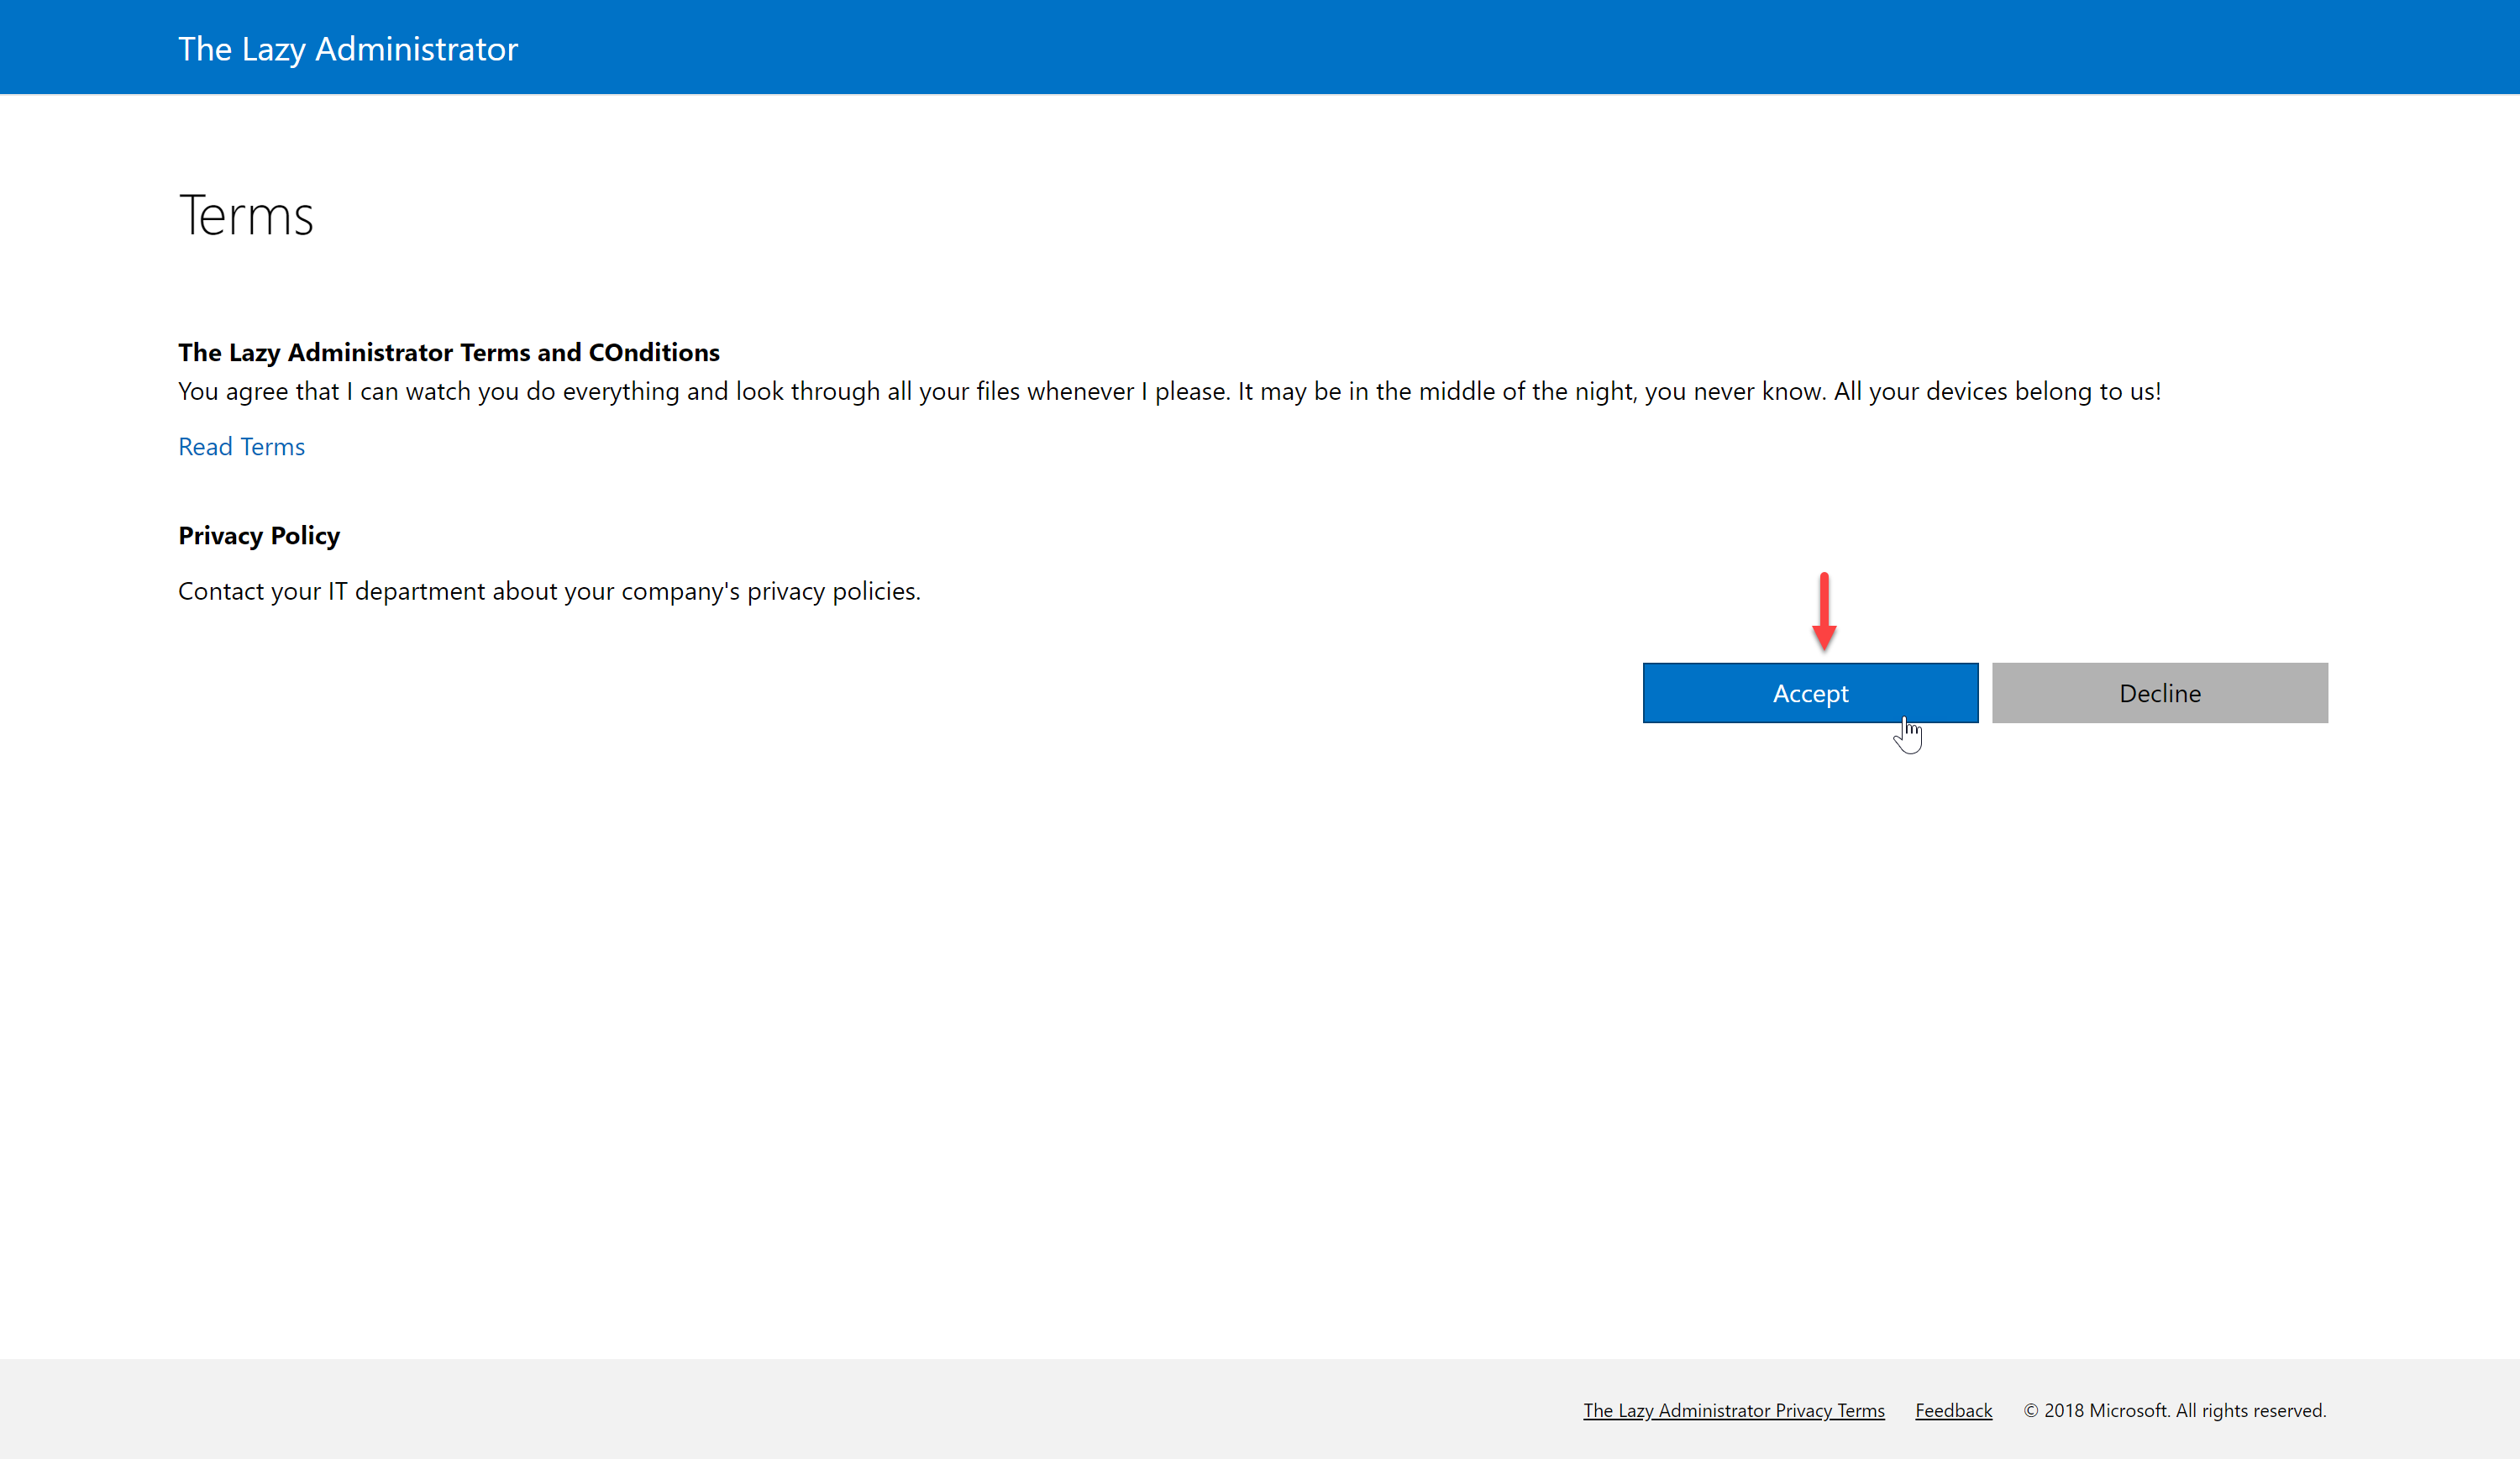
- Next time you or your users log into the Company Portal they will be greeted with the Terms and Conditions that were assigned to them.
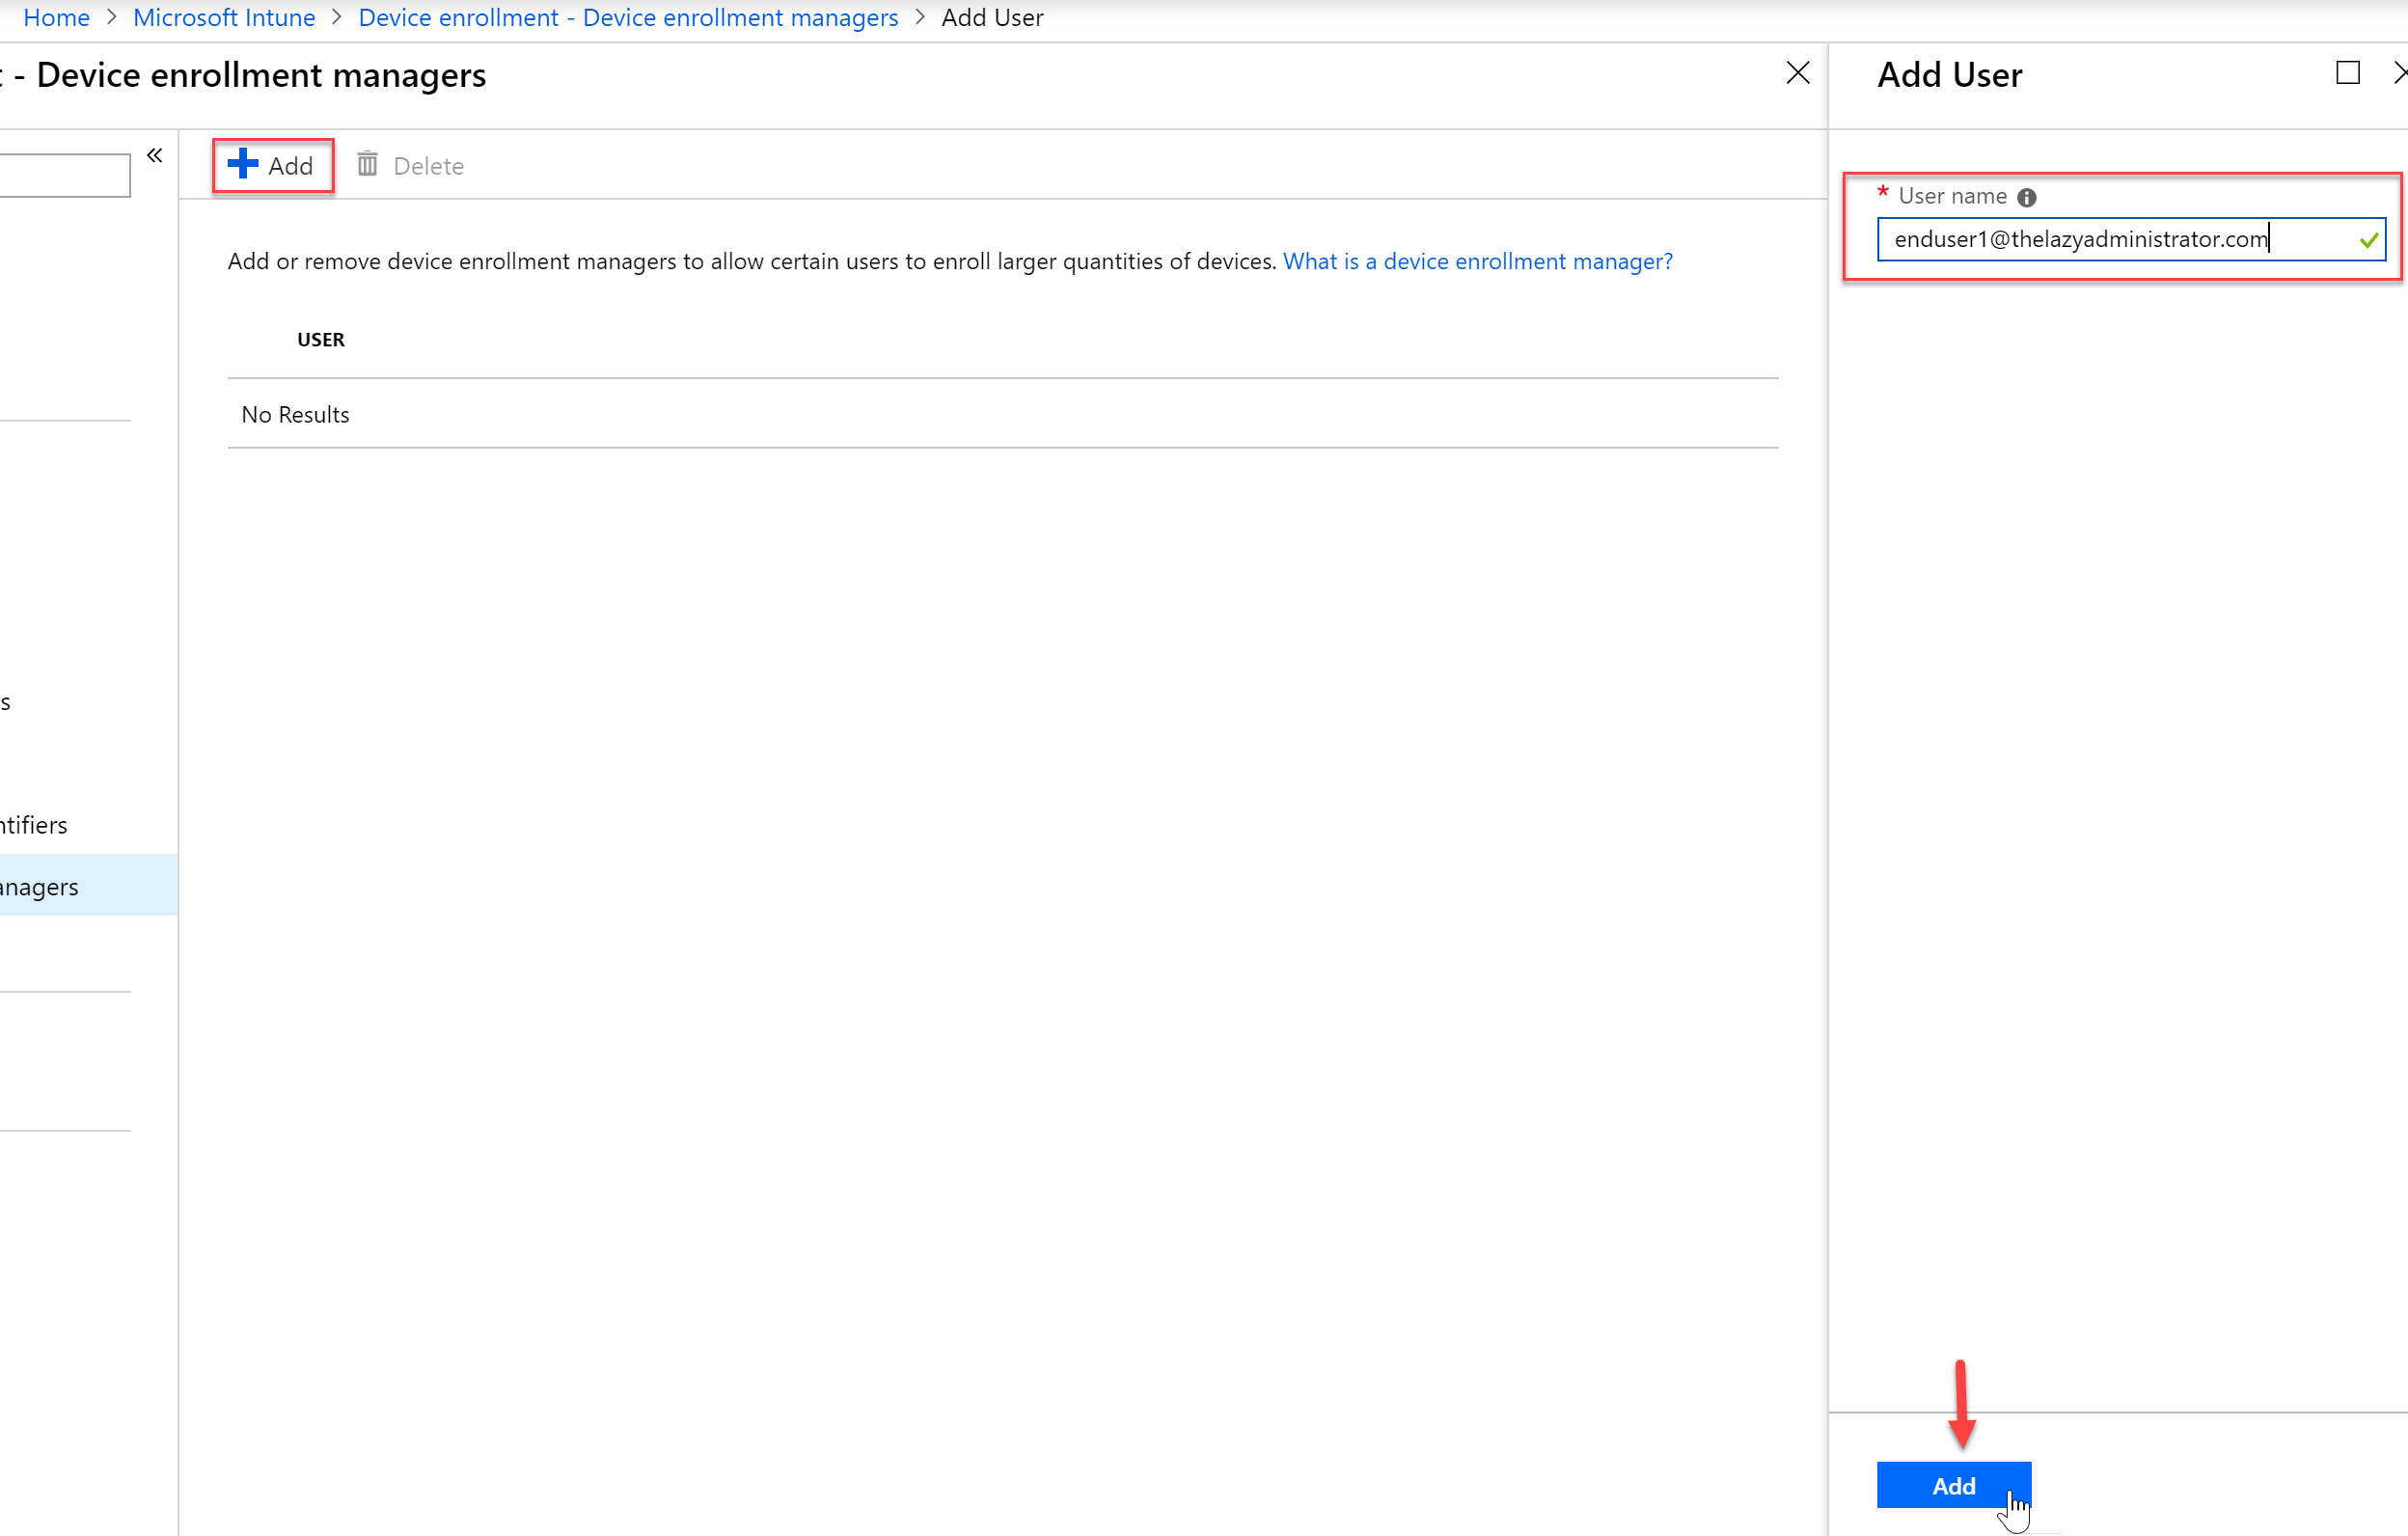
Device Enrollment Administrator
Device Enrollment Administrators are users that are able to enroll more than the default of 5 devices to Intune. This is meant for a standard user and not an Administrator account
- Navigate to the Azure Portal and expand the Intune blade
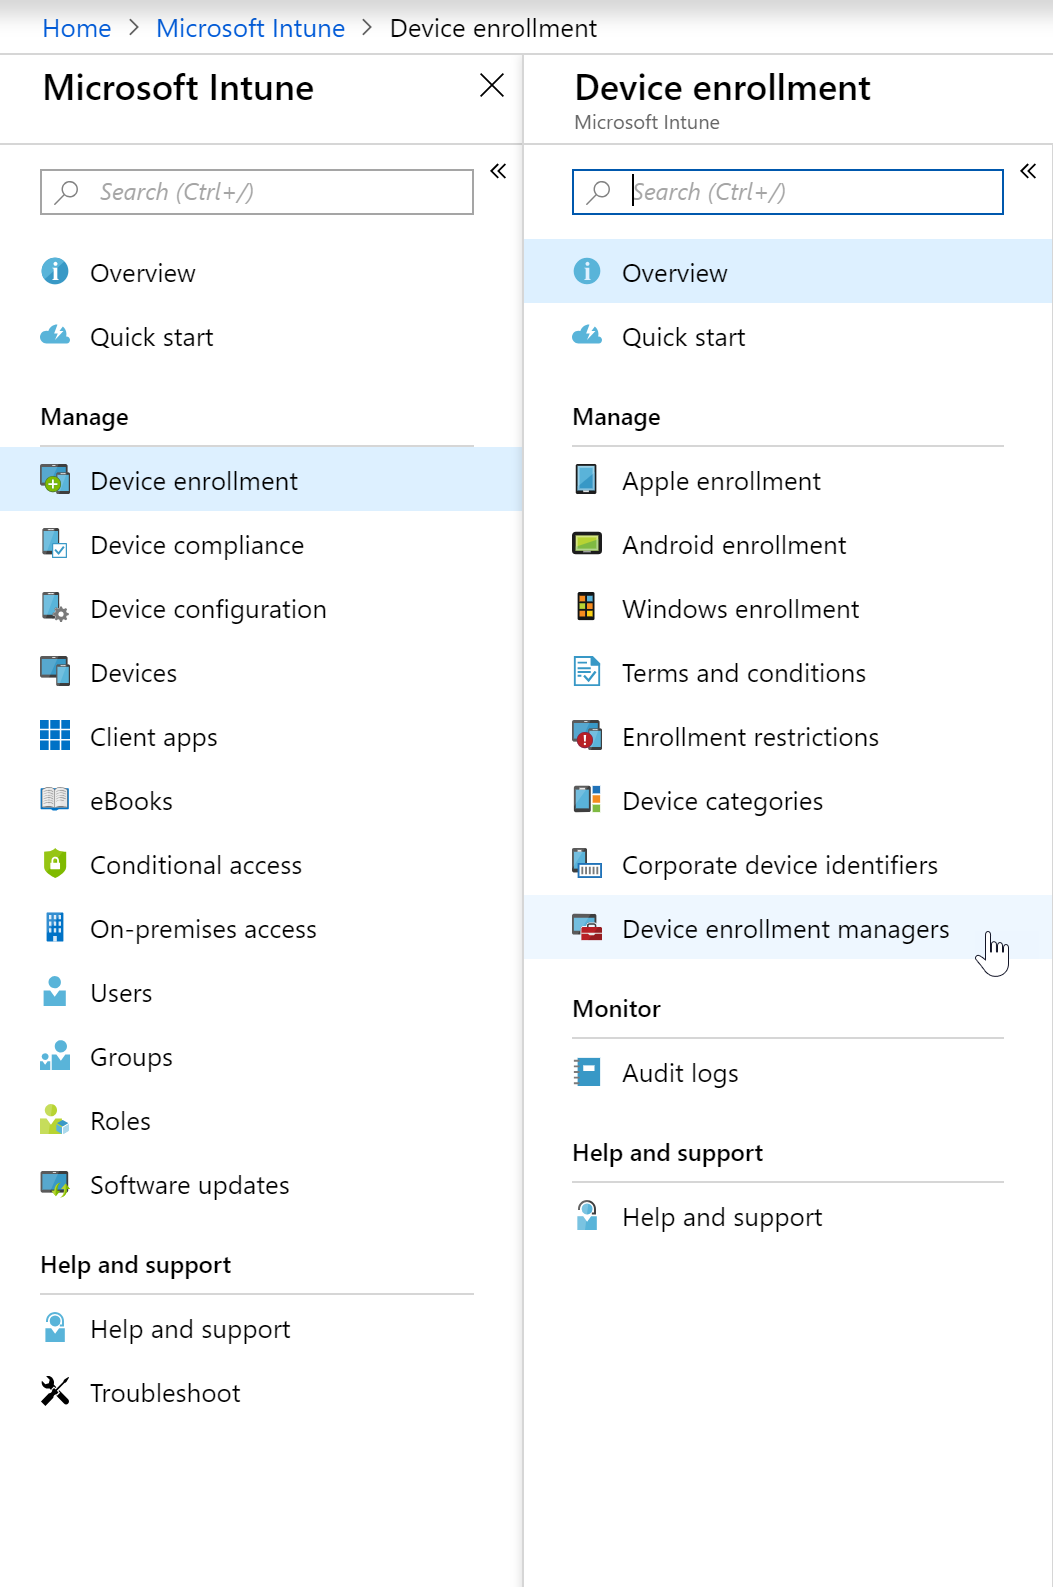
- Expand “Device Enrollment” and select “Device Enrollment Managers”
- Click Add and then enter your users UserPrincipalName and then select the “Add” button on the bottom
Device Enrollment and Type Restrictions
The default amount of devices a regular users can enroll into Intune is 5 unless you have granted the user to be a Device Enrollment Administrator (above). You can also change the default amount for users in the Portal.
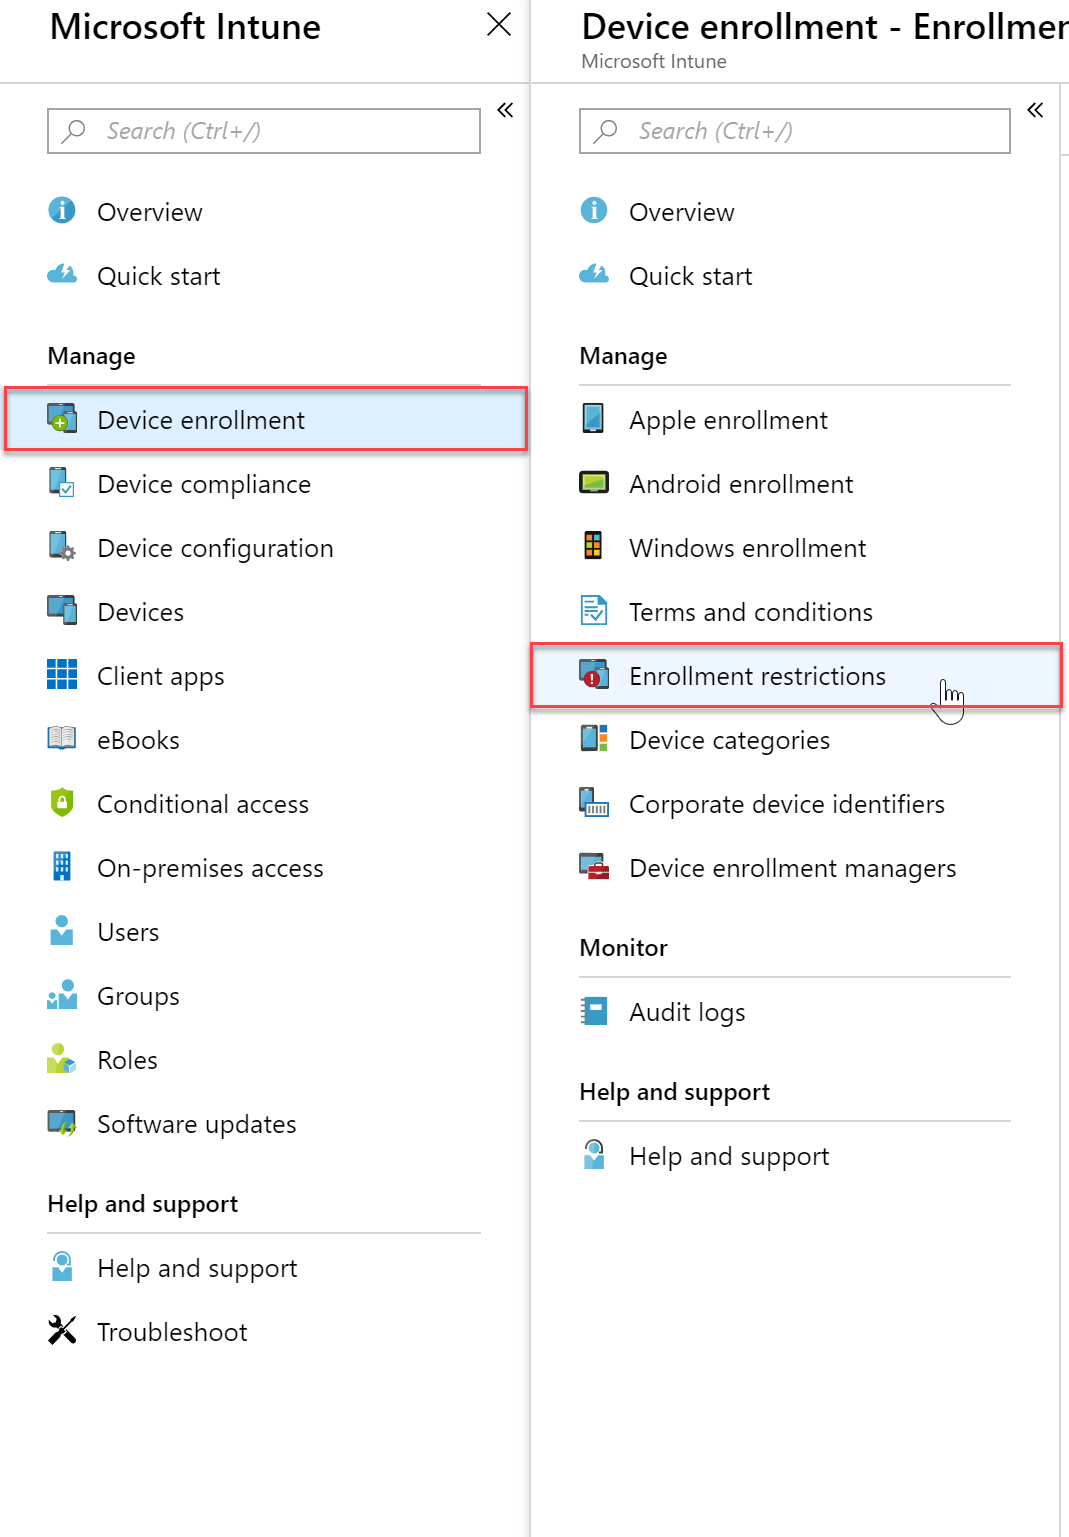
- Log into the Azure portal and select the Intune blade
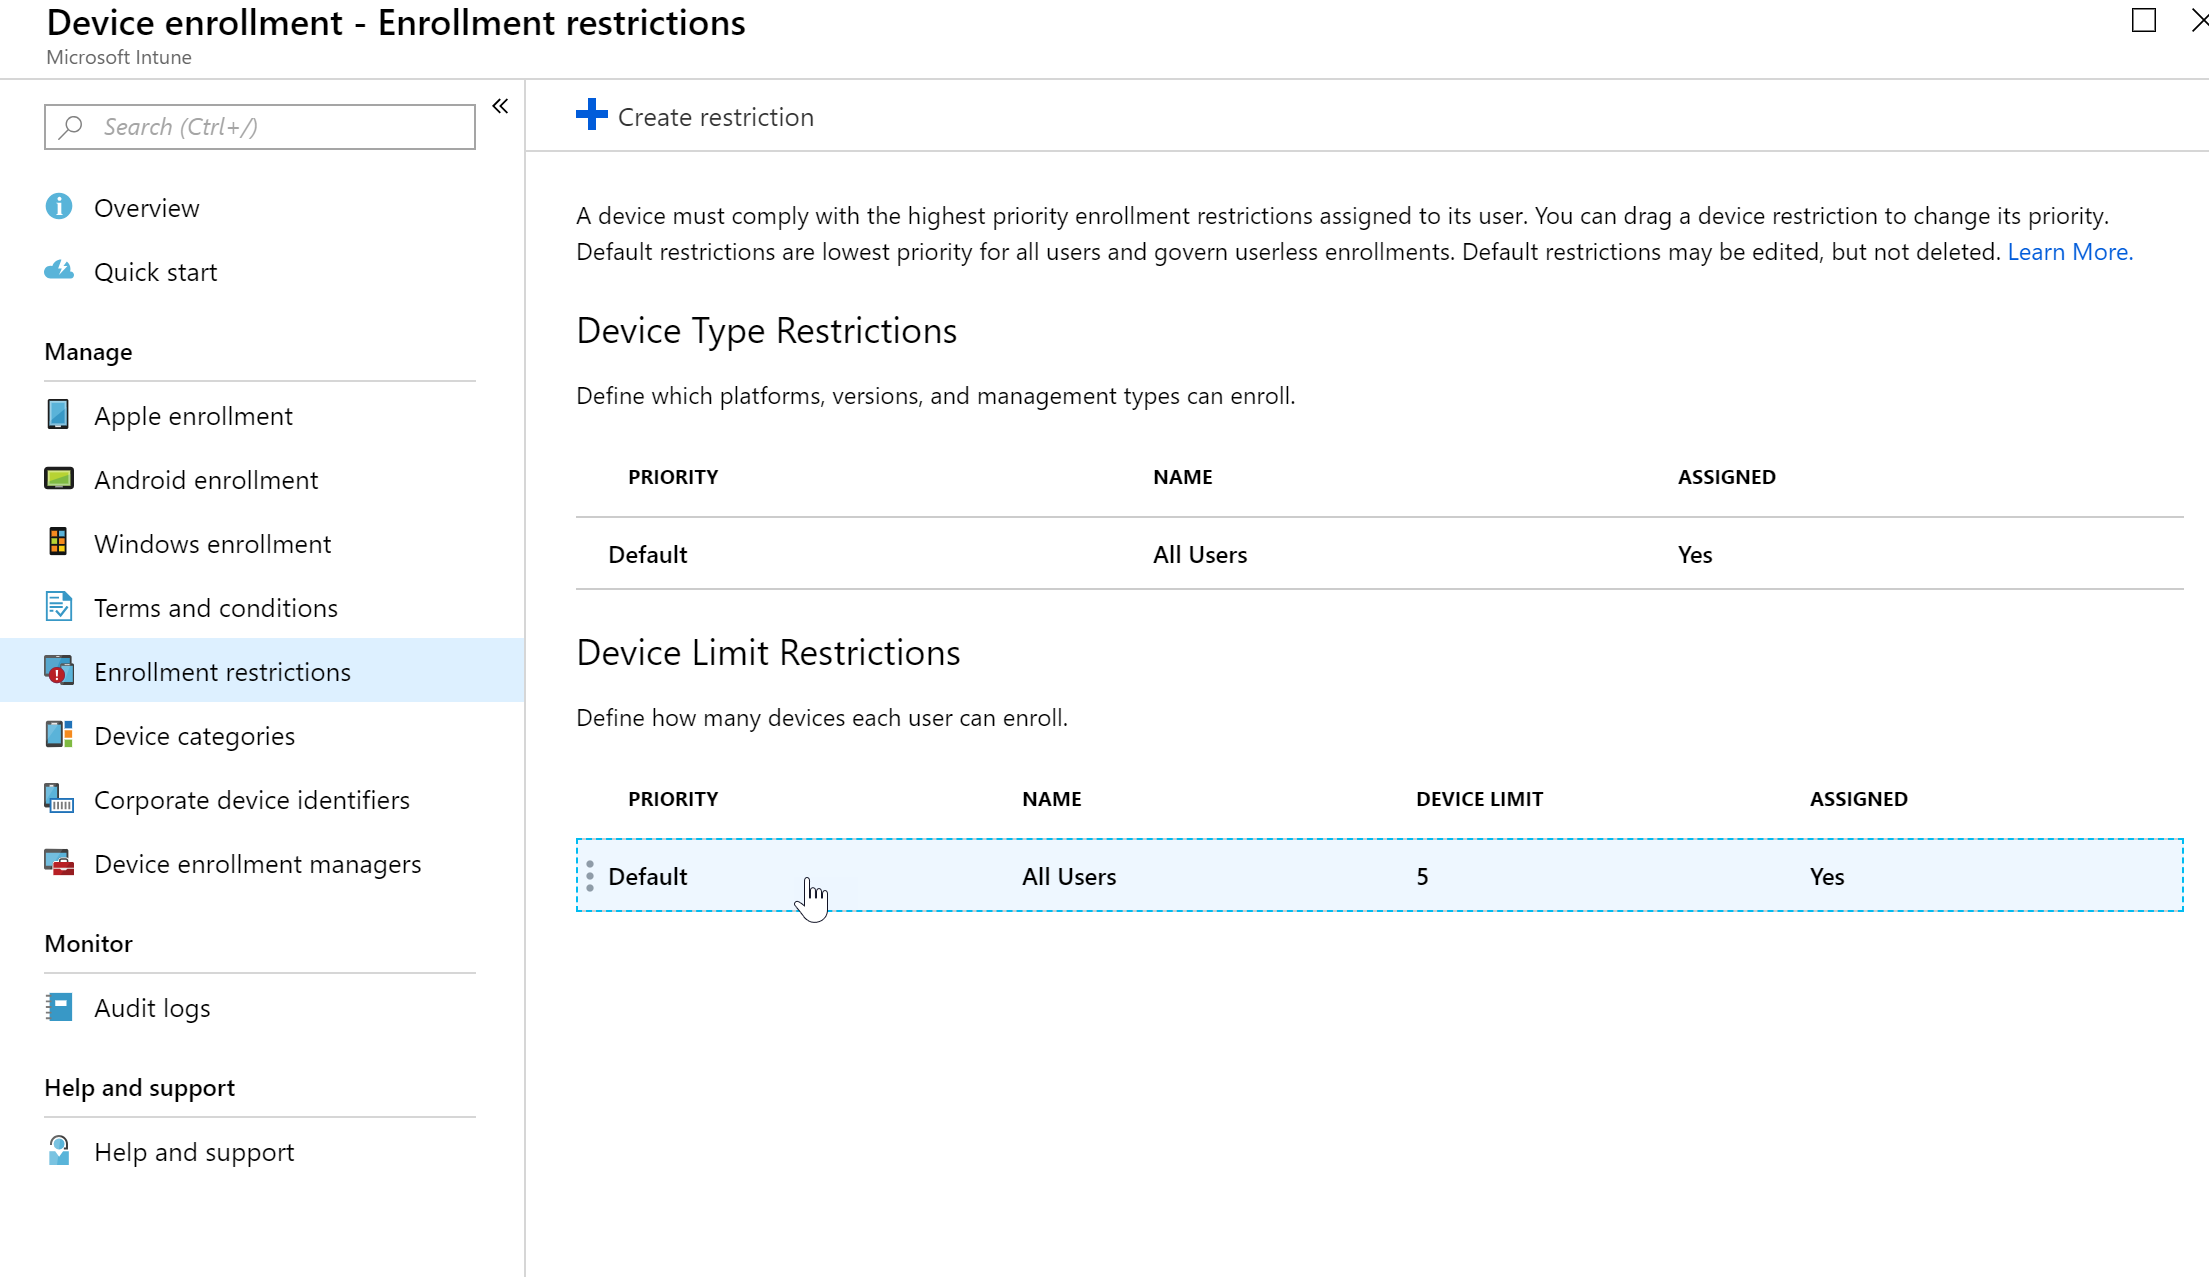
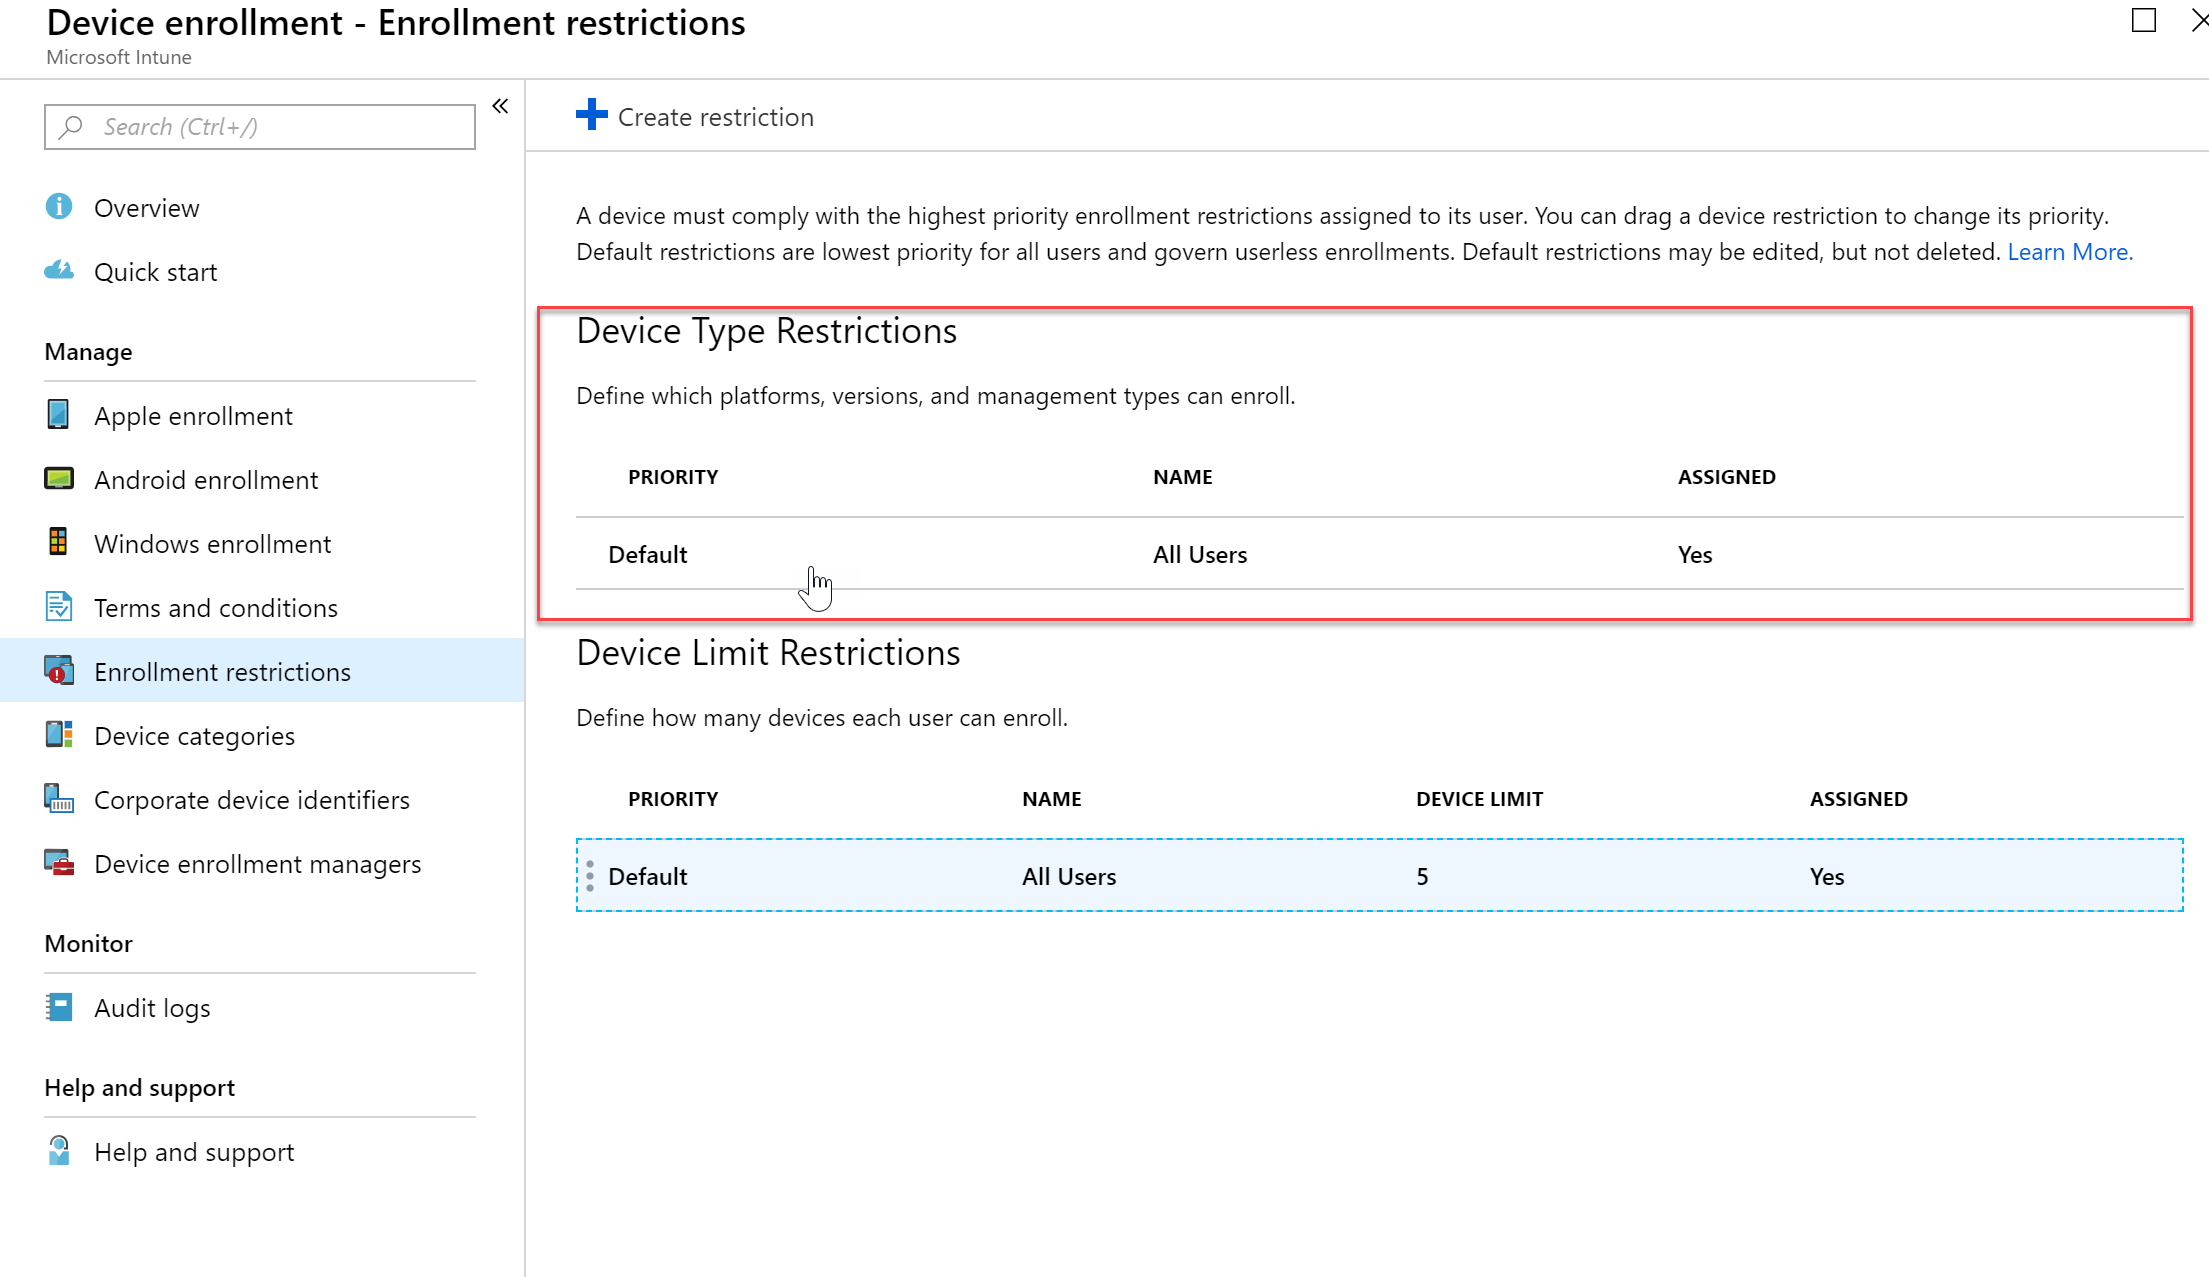
- Select “Device Enrollment” and then click “Enrollment Restrictions”
- Here you can either edit your restriction policies or create a new restriction policy
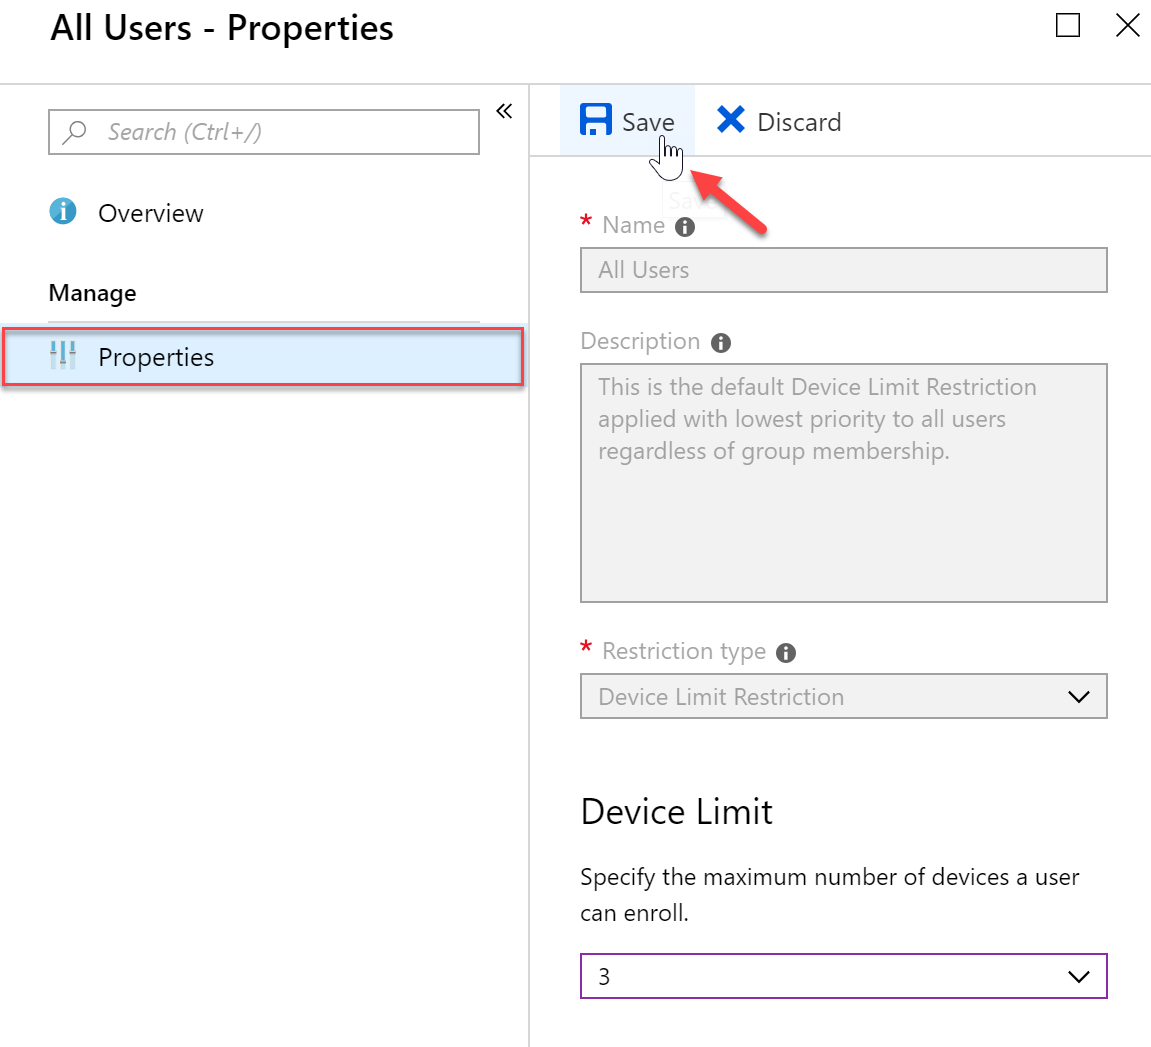
- Here I am changing the device limit from the default of 5 to 3 and then saving my changes
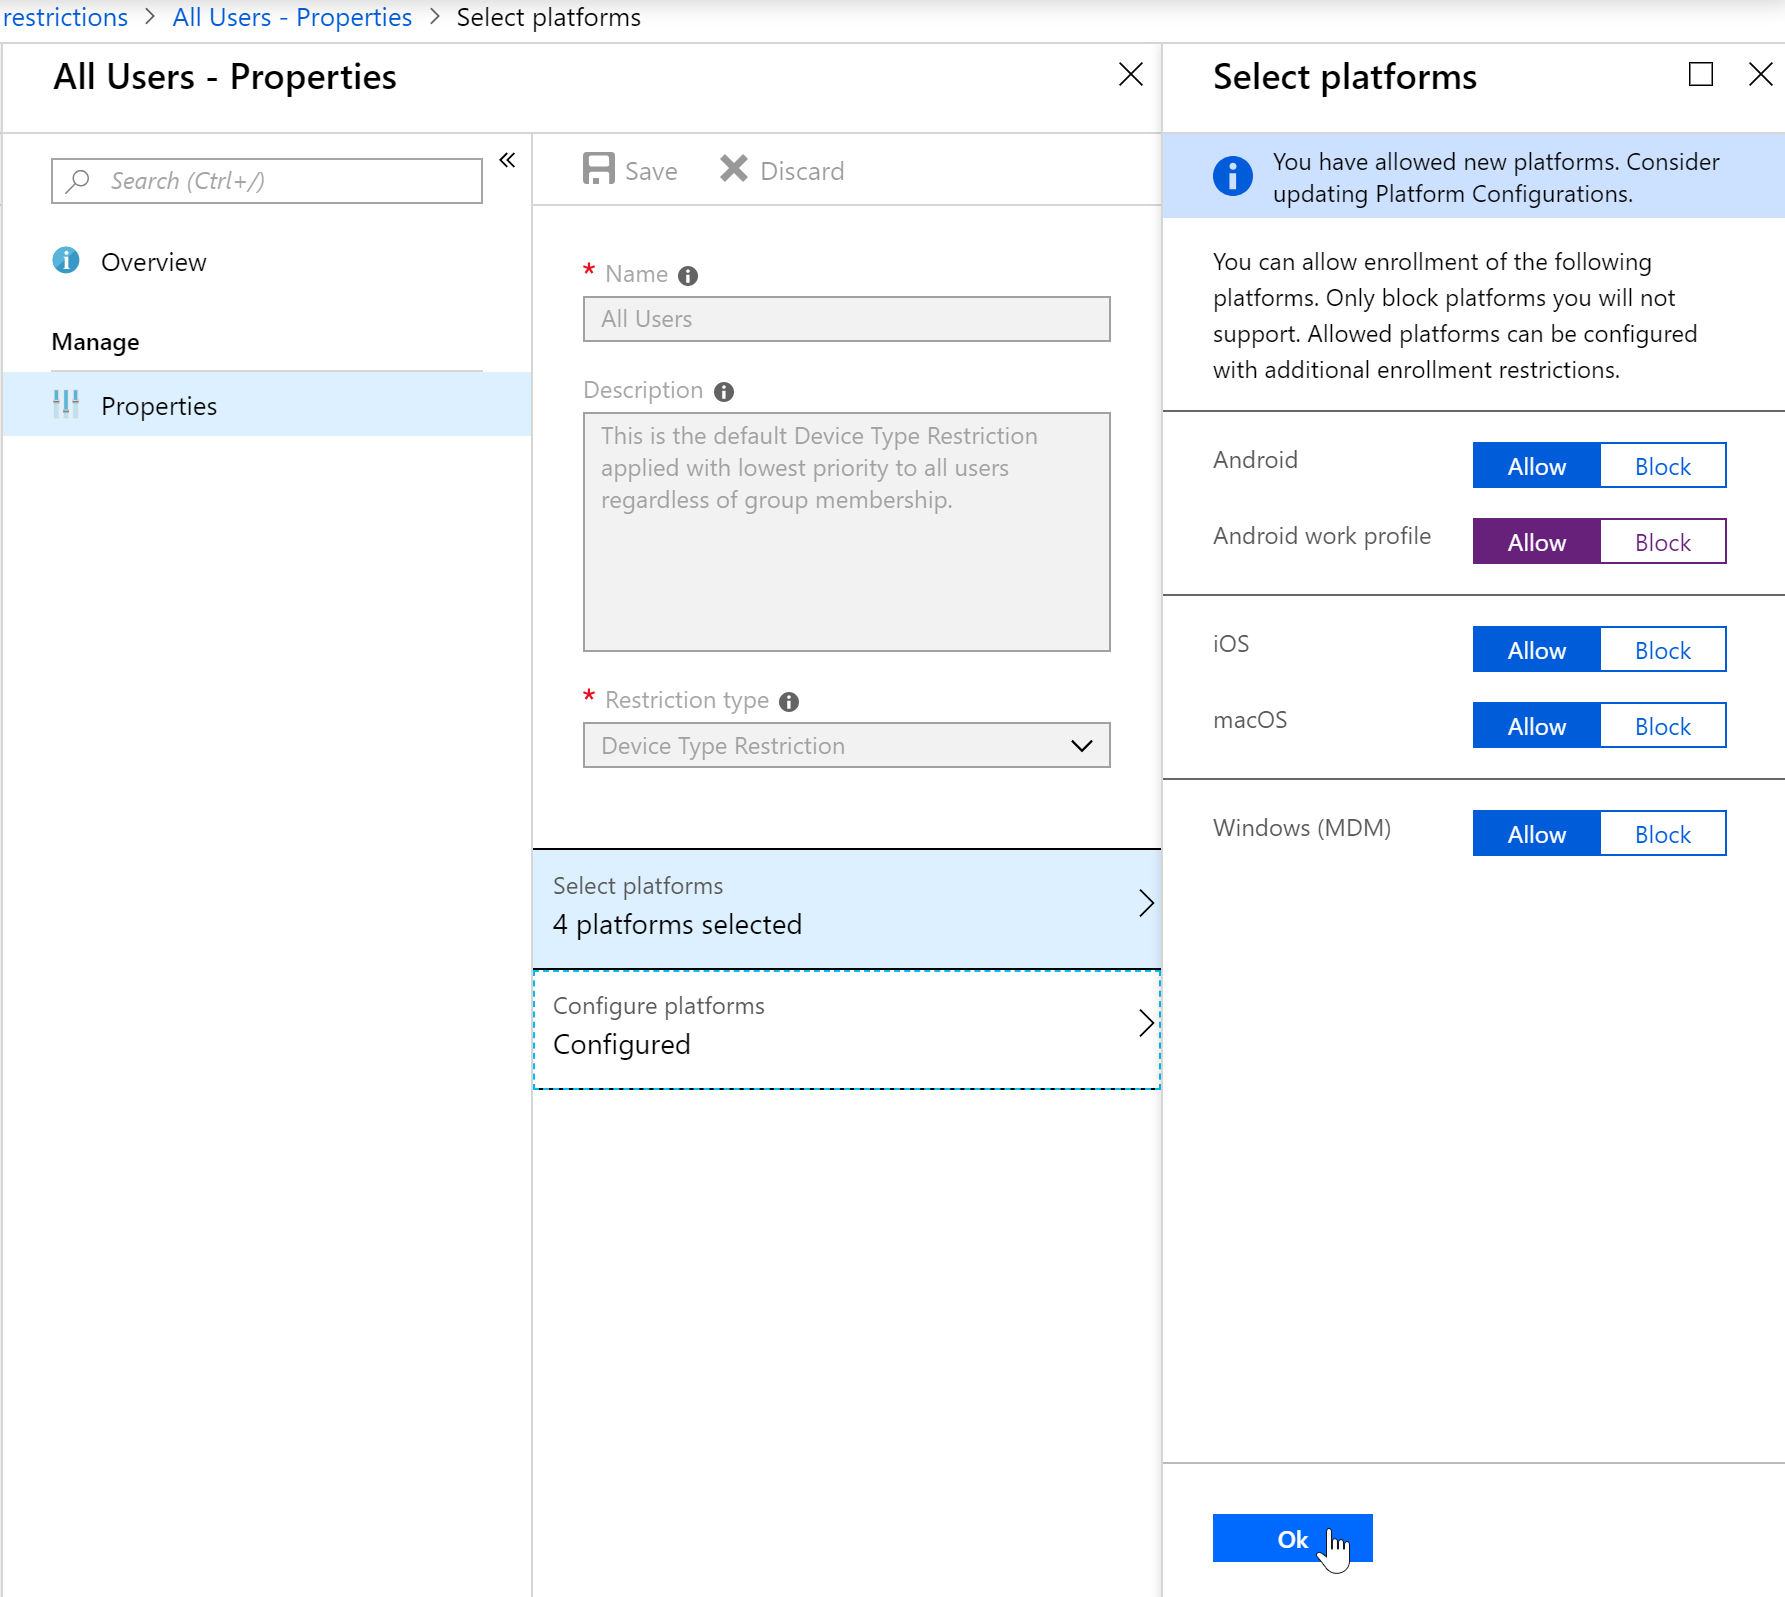
- If I want to change the Device Type Restriction Policy I can go back to the Enrollment Restrictions pane and select the Device Type Restriction policy
- Here I am making a change to the Android Work Profile (seen in purple) and saving my changes
Device Group Mappings
Use Microsoft Intune device categories to automatically add devices to groups based on categories that you define. This makes it easier for you to manage those devices.
Step 1: Device Categories
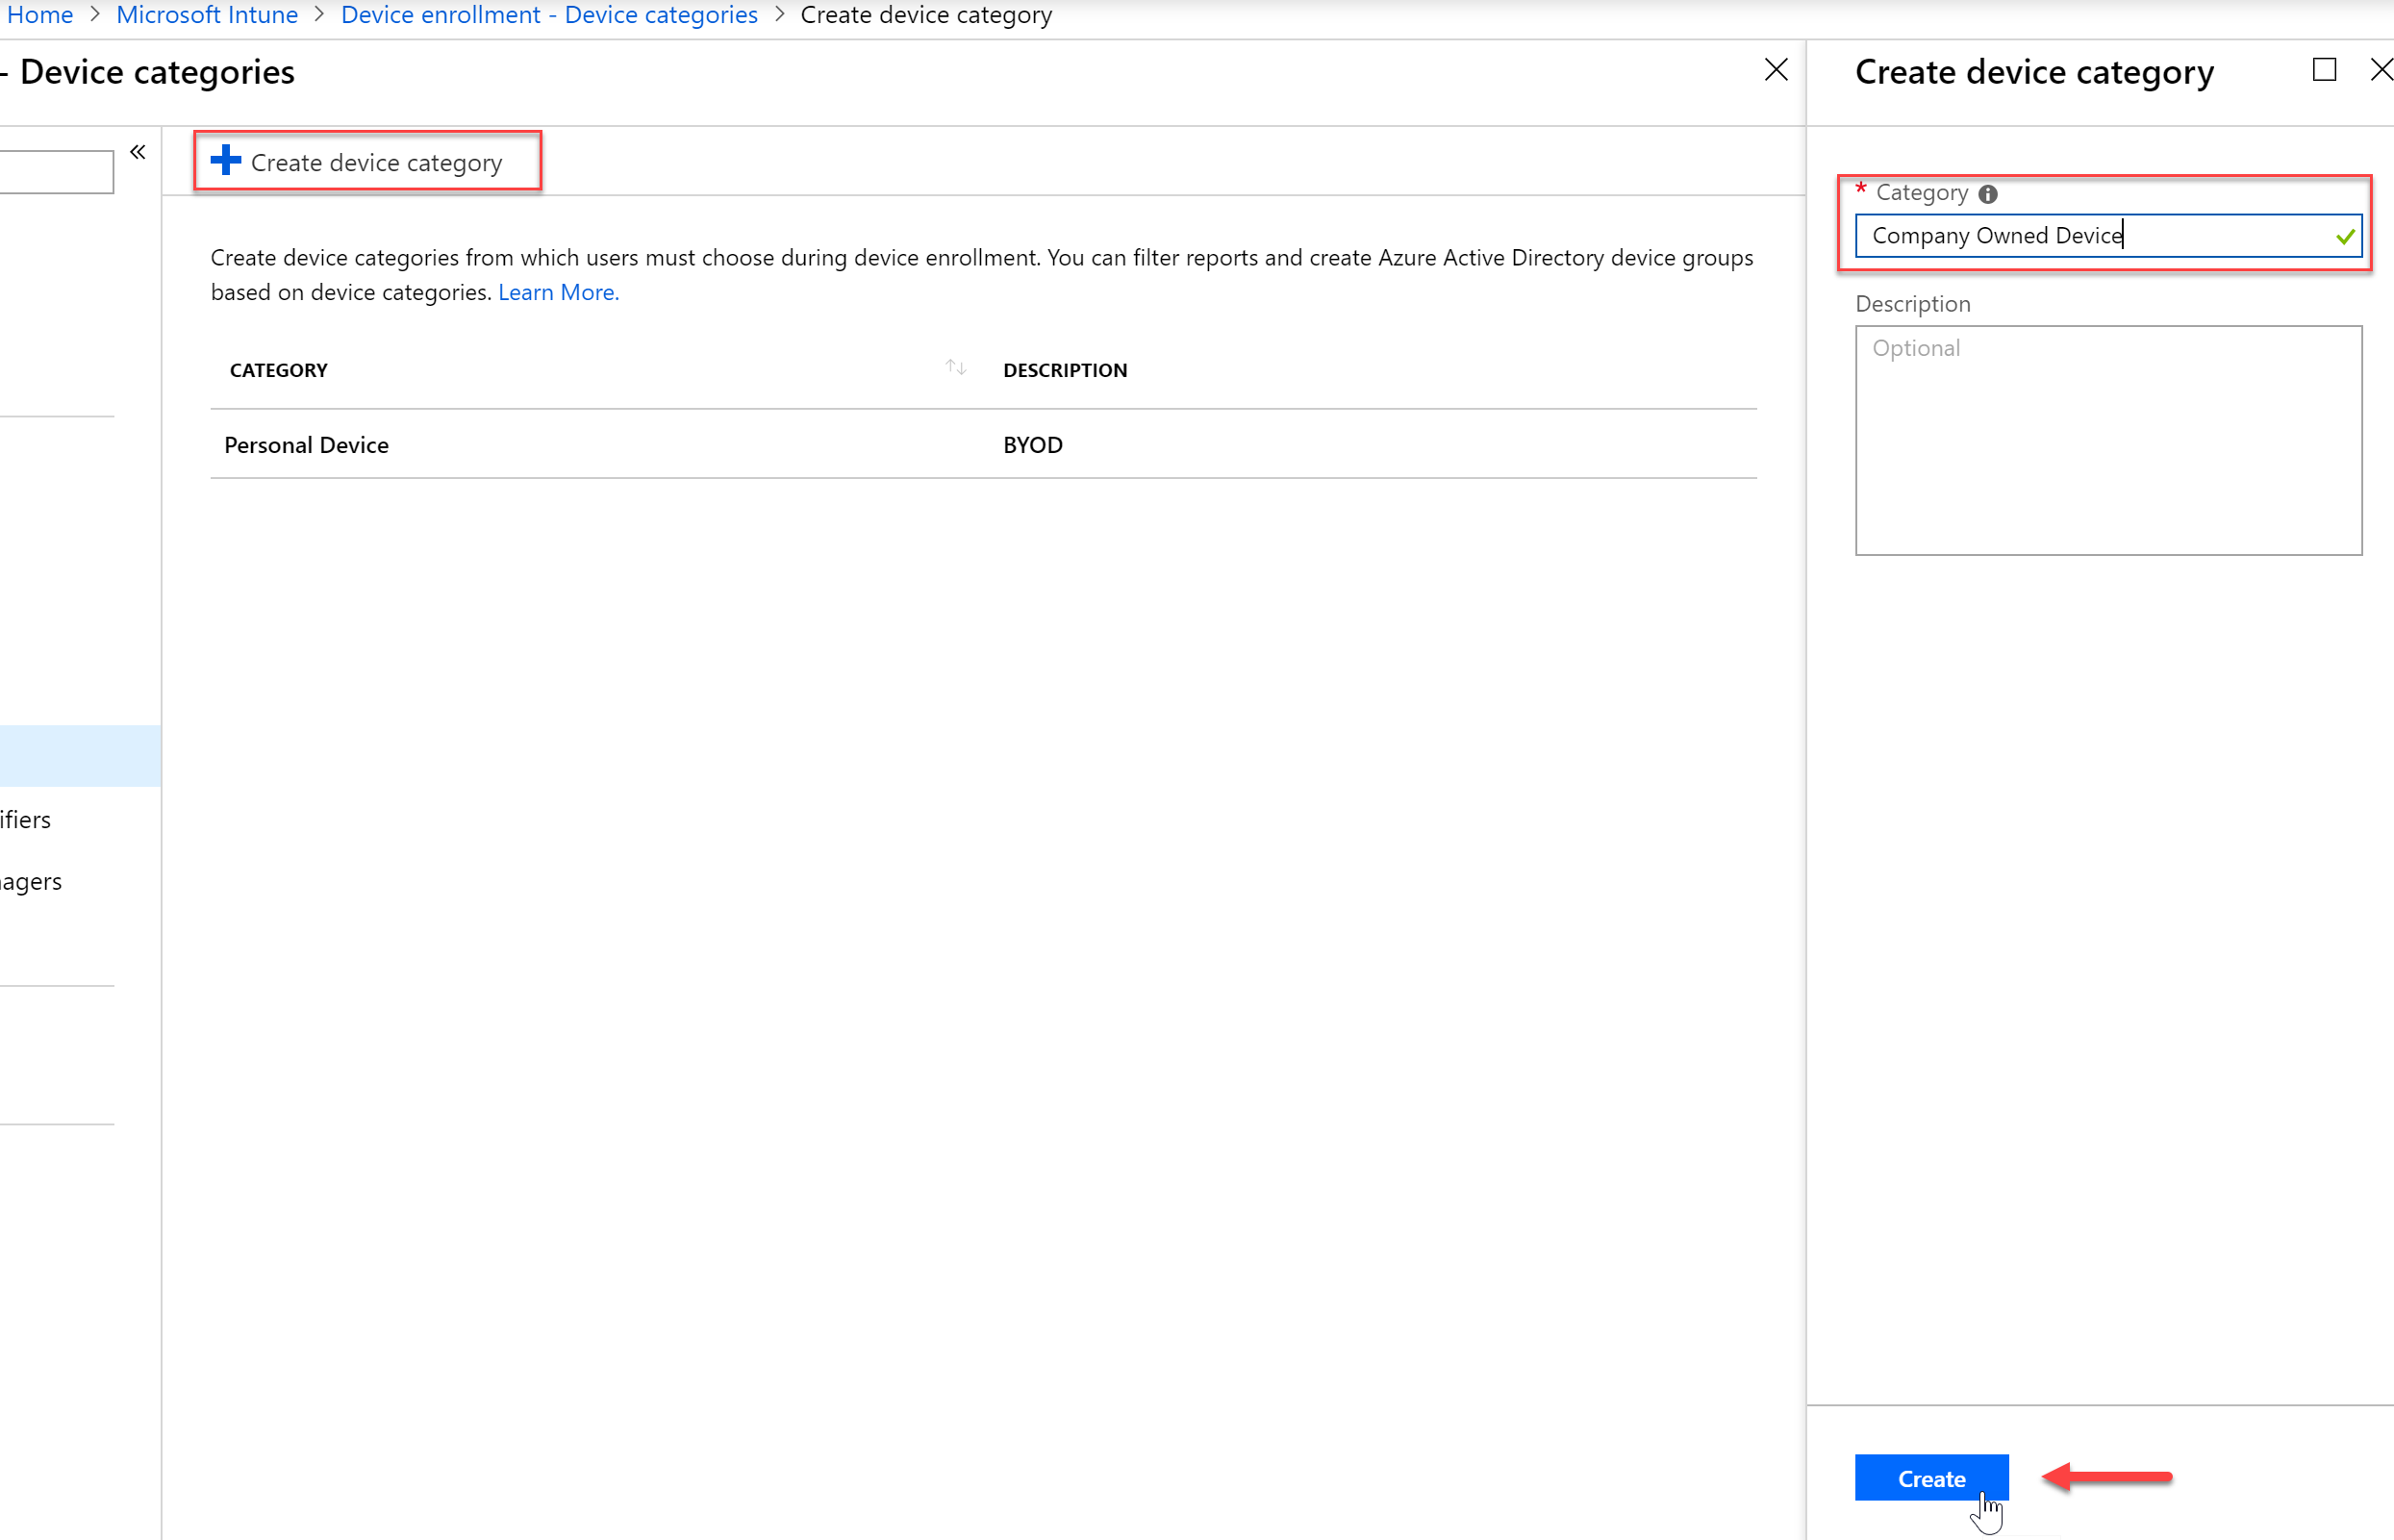
In my example I am going to create two (2) device categories. One category is for BYOD devices, or personal devices. These will be devices that end users own but may use them for work. The other category will be Company Owned Devices. These devices are purchased by the company, and given to the end users through the IT department.
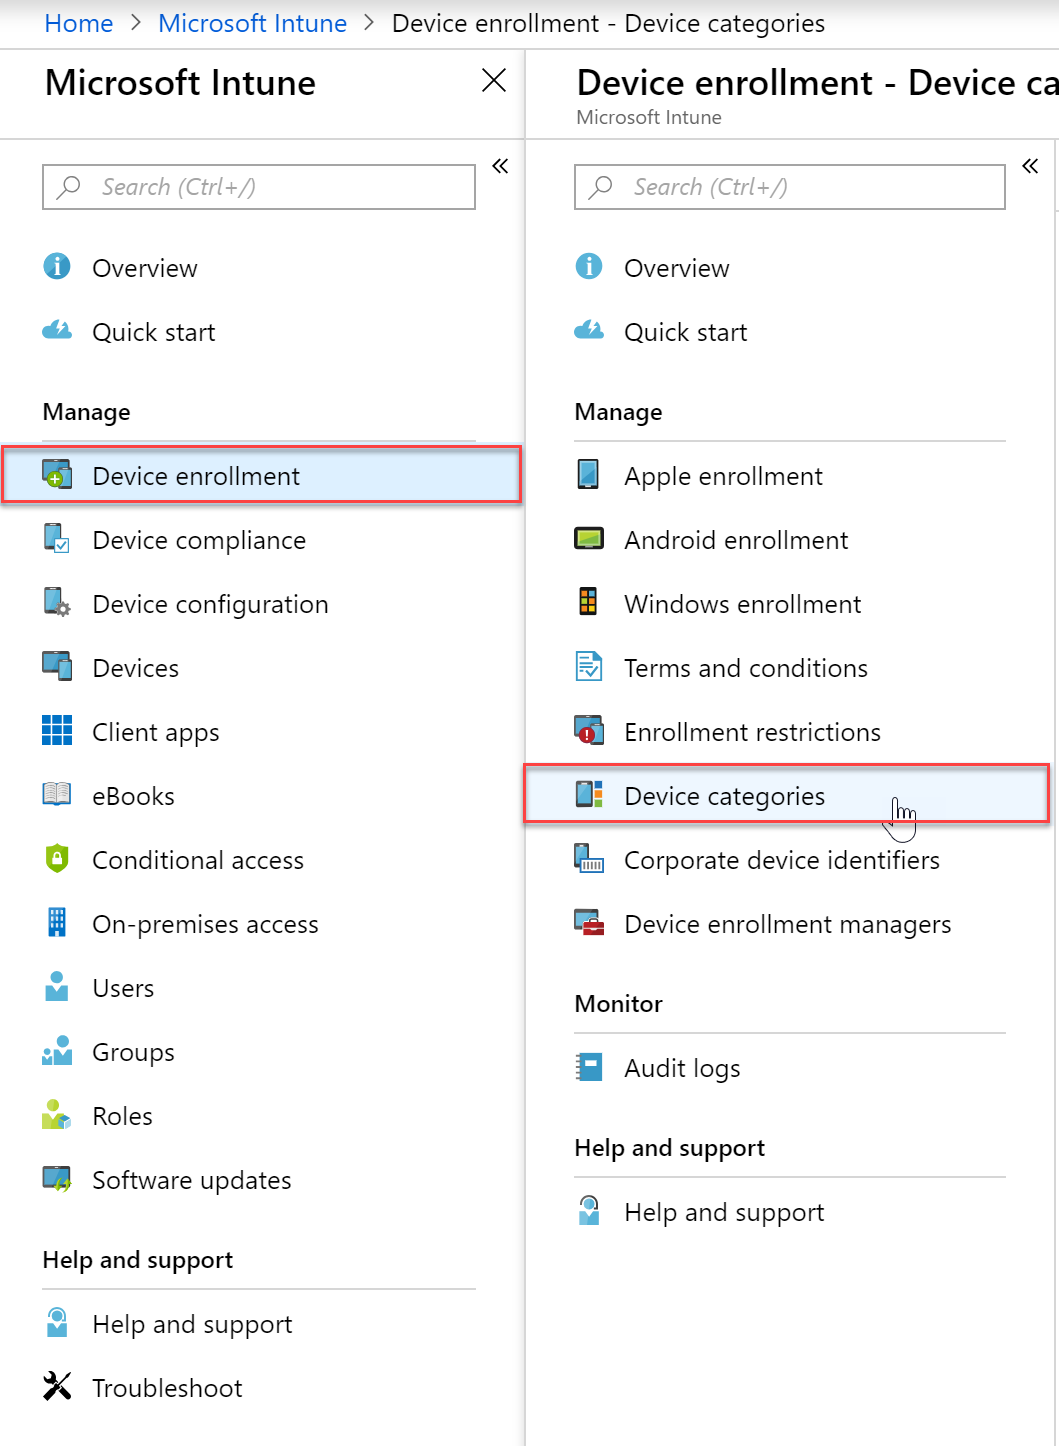
- In the Azure Portal, expand the Intune blade.
- Select “Device Enrollment” and then click “Device Categories”
- To add a new category, click Create Device Category and then supply a valid name and press “Create”
You can create any device categories you want. For example:- Point-of-sale device
- Demonstration device
- Sales
- Accounting
- Manager
Step 2: Create Azure Active Directory Dynamic Device Security Groups
In this step, you will create dynamic groups in the Azure portal, based on the device category and device category name.
Use the information in this section to create a device group with an advanced rule, by using the deviceCategory attribute. For example: device.deviceCategory -eq “Personal Device“.
When users of iOS and Android devices enroll their device, they must choose a category from the list of categories you configured. After they choose a category and finish enrollment, their device is added to the Intune device group, or the Active Directory security group that corresponds with the category they chose.
Windows users should use the Company Portal website to select a category.
Regardless of platform, your users can always go to portal.manage.microsoft.com after enrolling the device. Have the user access the Company Portal website, and go to My Devices. The user can choose an enrolled device listed on the page, and then select a category.
After choosing a category, the device is automatically added to the corresponding group you created. If a device is already enrolled before you configure categories, the user sees a notification about the device on the Company Portal website. This lets the user know to select a category the next time they access the Company Portal app on iOS or Android.
- In the Intune blade, select Groups, and the select “All Groups” and click “New Group”

- Give your group the required properties like type, name and description. We will want to add a dynamic membership rule. The one below will contain all devices that a user selects as their Personal Device.
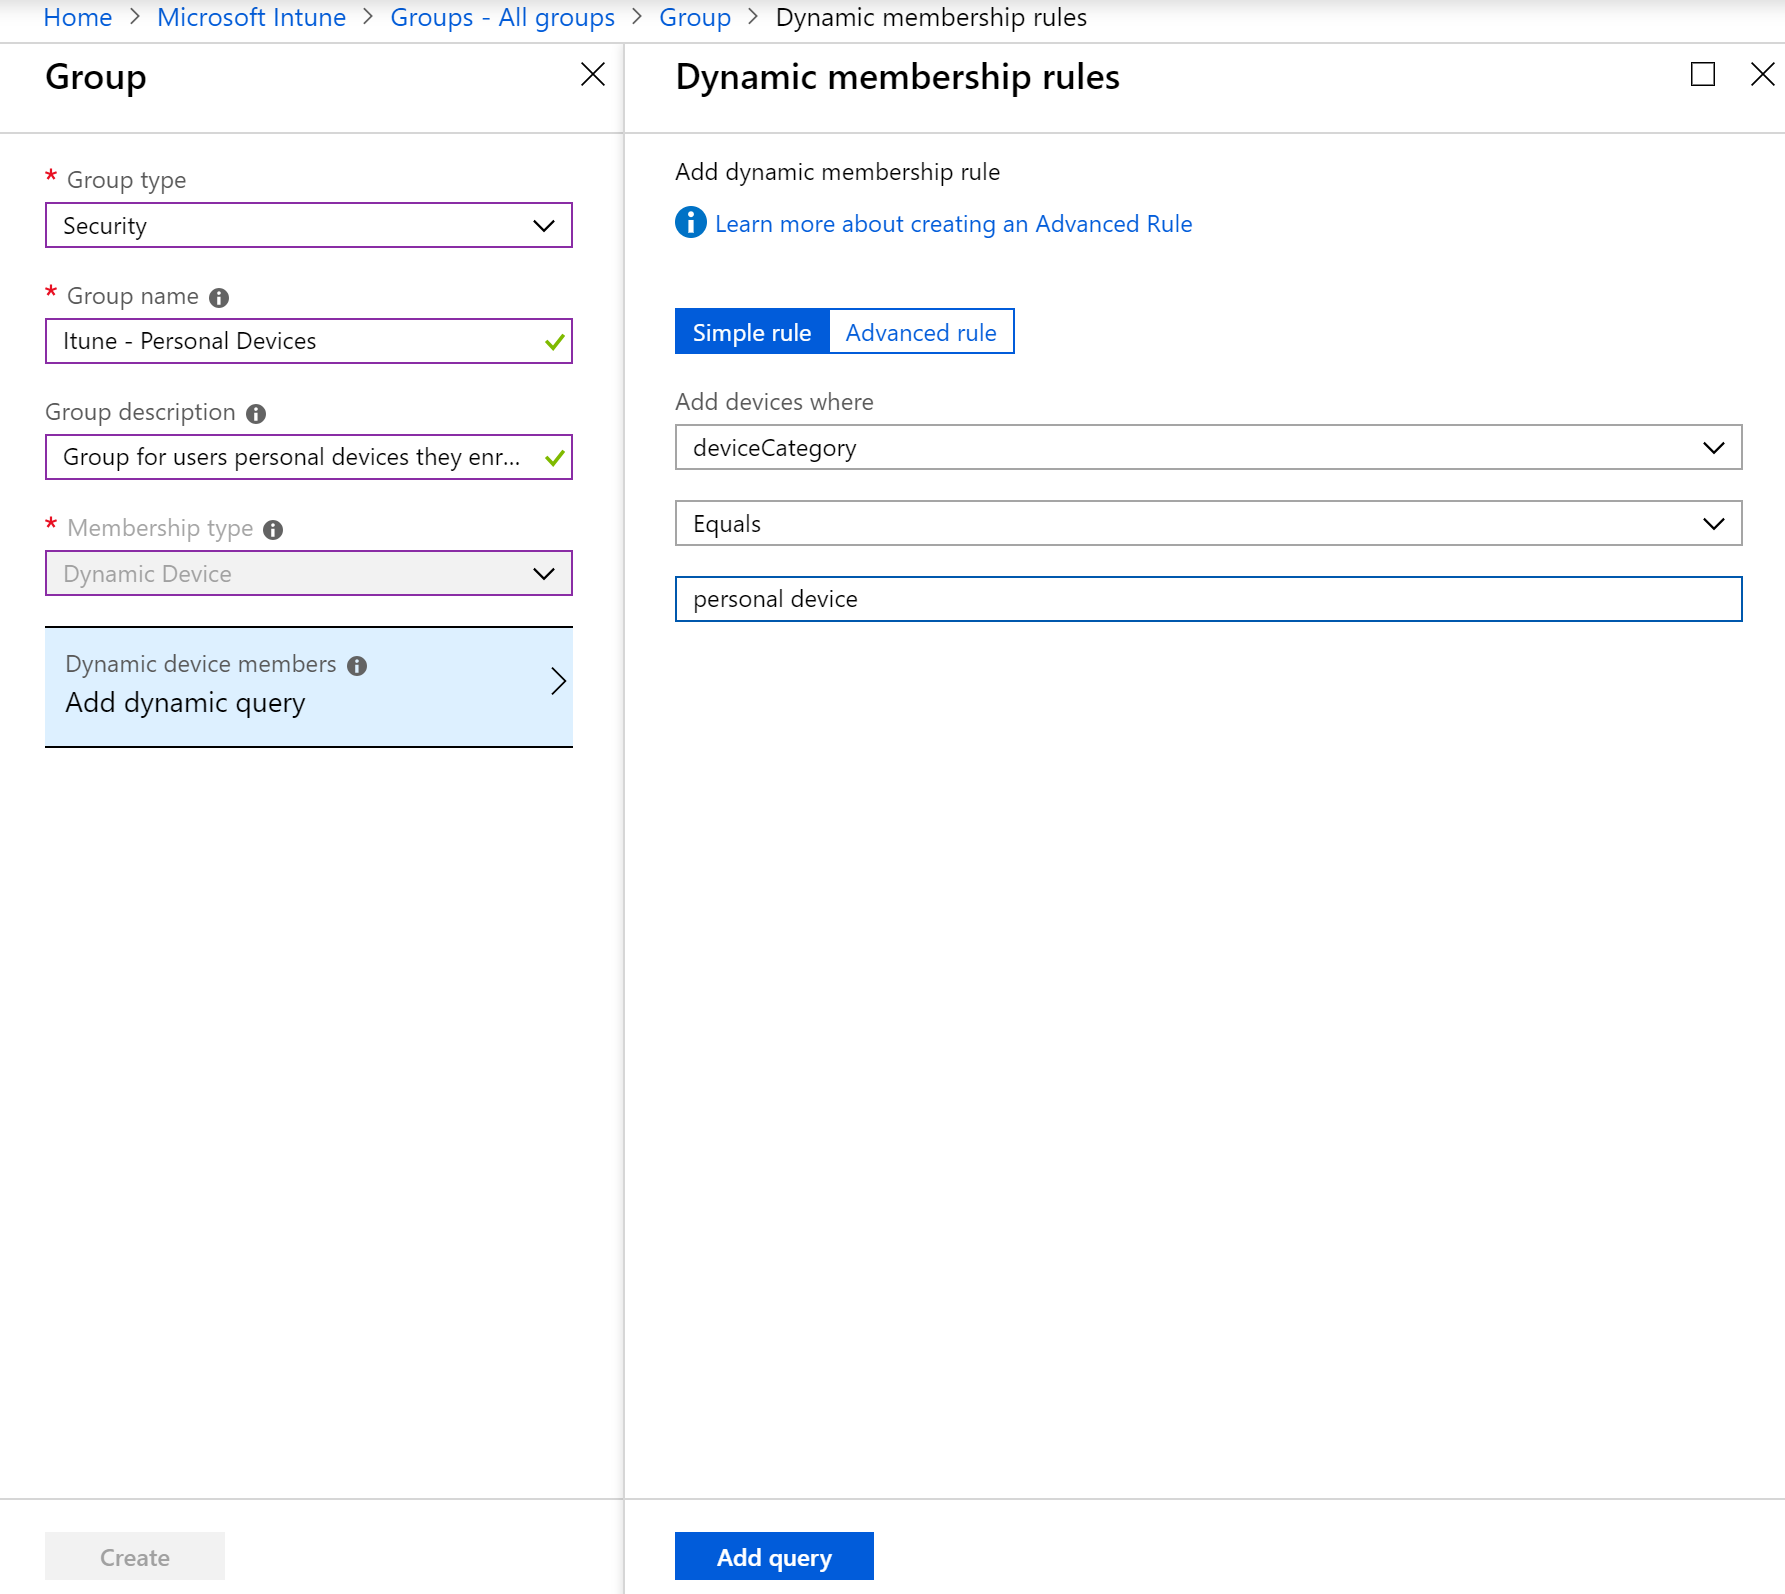
- Once you have your new Group with the correct properties and query, click “Create”

- Now back in my Azure Groups pane, I can see my newly created groups

Step 3: Select Device Category
Windows
- When users enroll their Windows devices they will need to assign a category in the online Intune portal
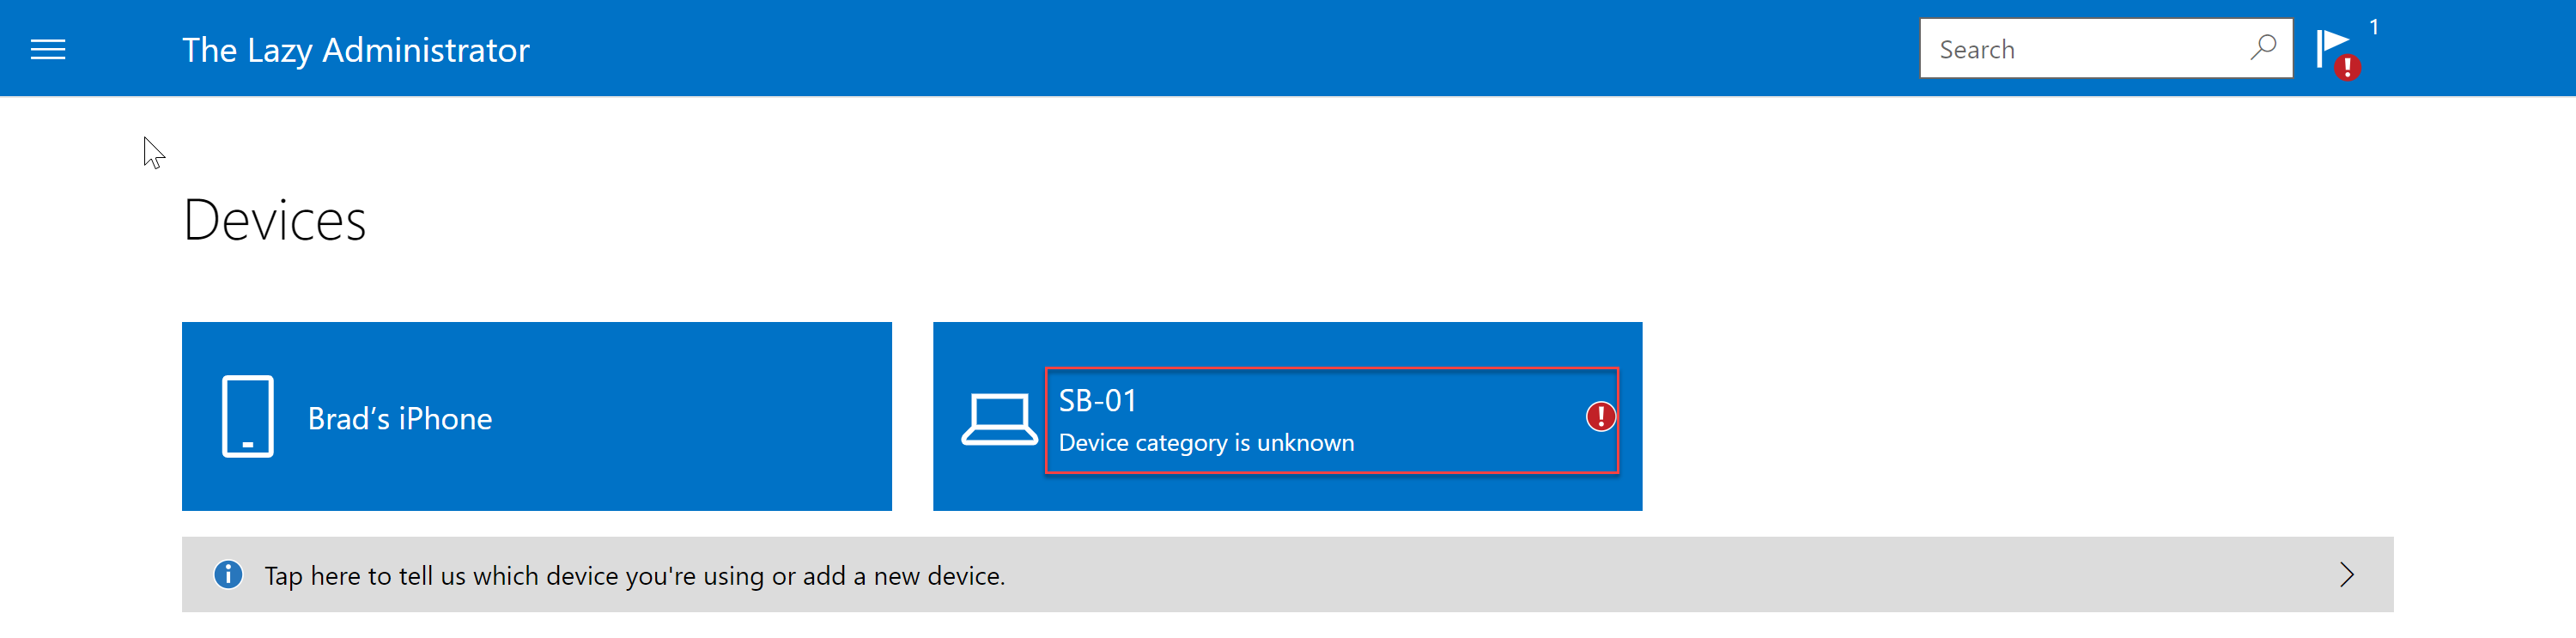
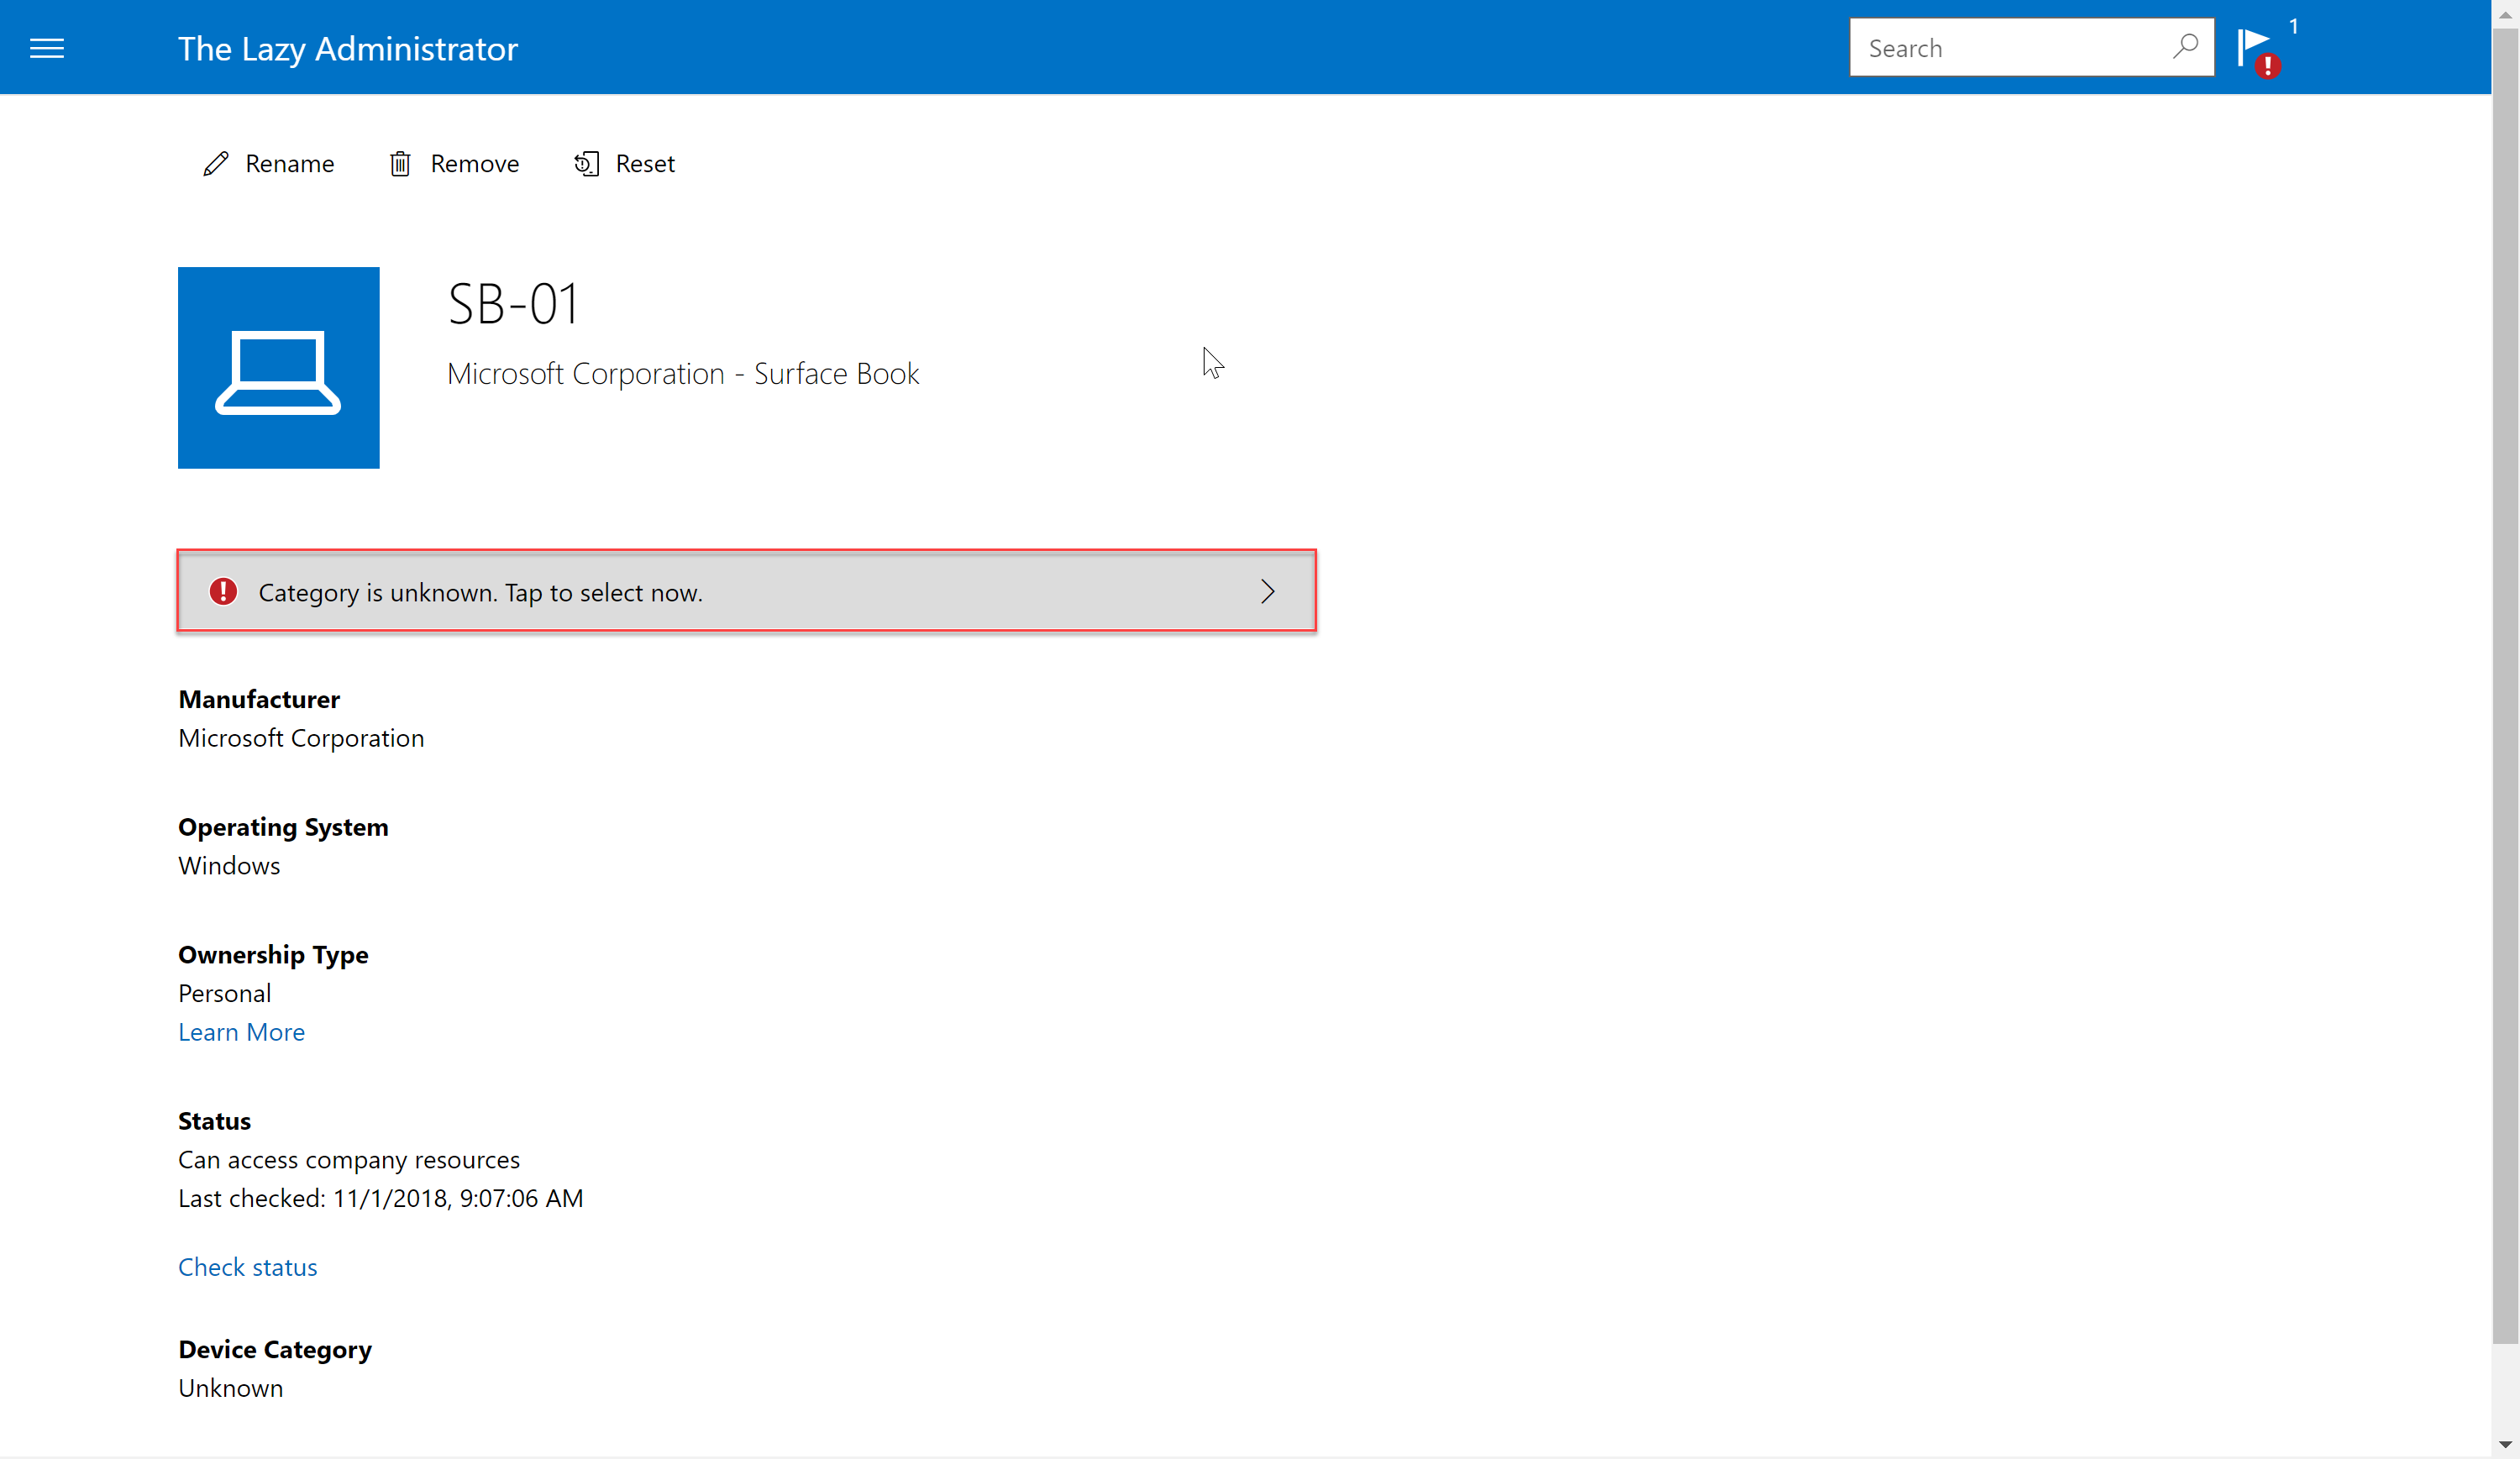
- Clicking on the device will show them the outstanding notification and allow them to select a category
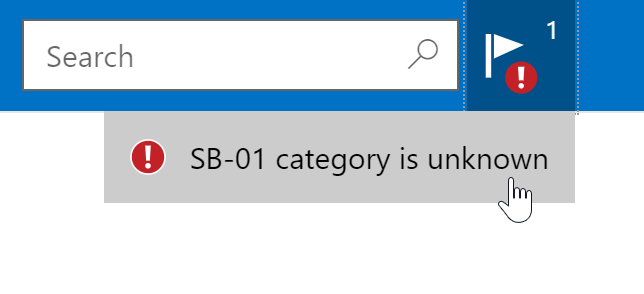
- In the top right of the portal they will also see a notification
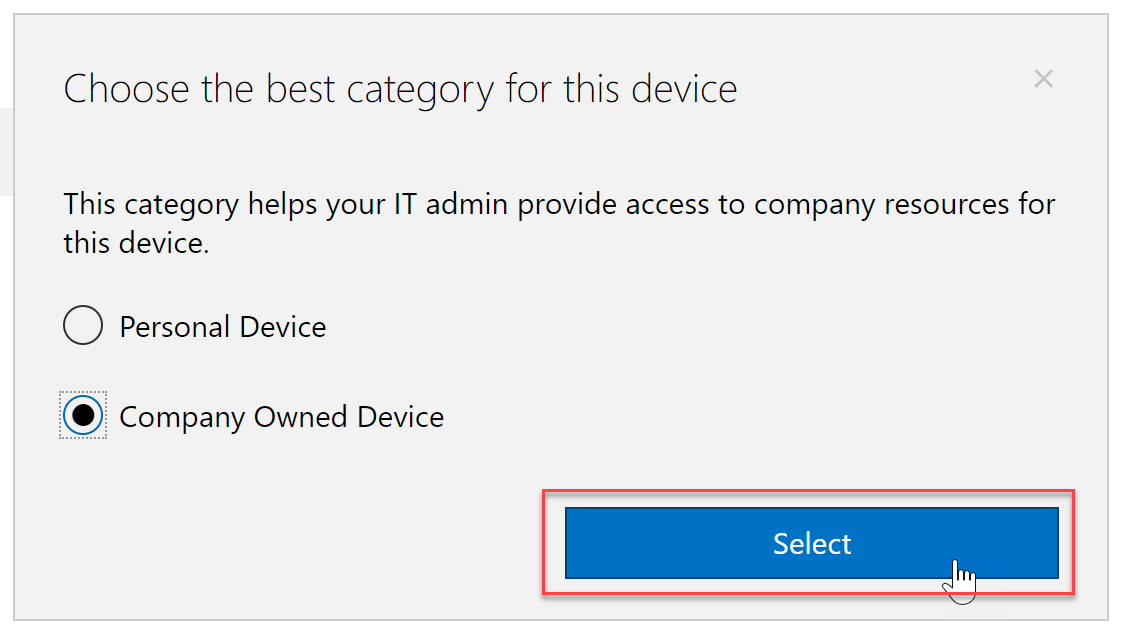
- Here we see the two categories I set up for the users to select. Since this machine is a Company Owned Device I will select the category. Behind the scenes, this device is added to that dynamic group and allows for a better management experience.
iOS
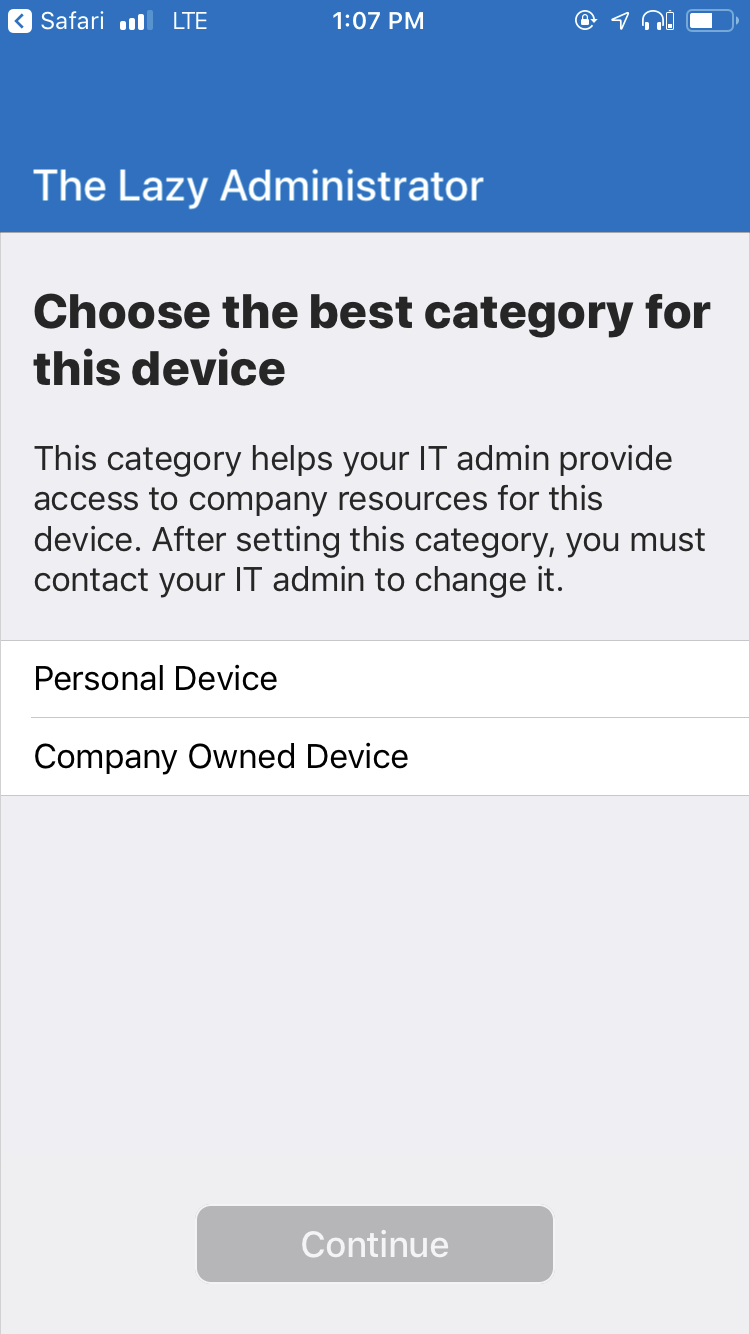
- When users enroll their devices using the Company Portal application, they will select which category the device should be placed in
Intune Policies
Compliance Policies
Compliance policies in Intune define the rules and settings that a device must comply with in order to be considered compliant by conditional access policies.
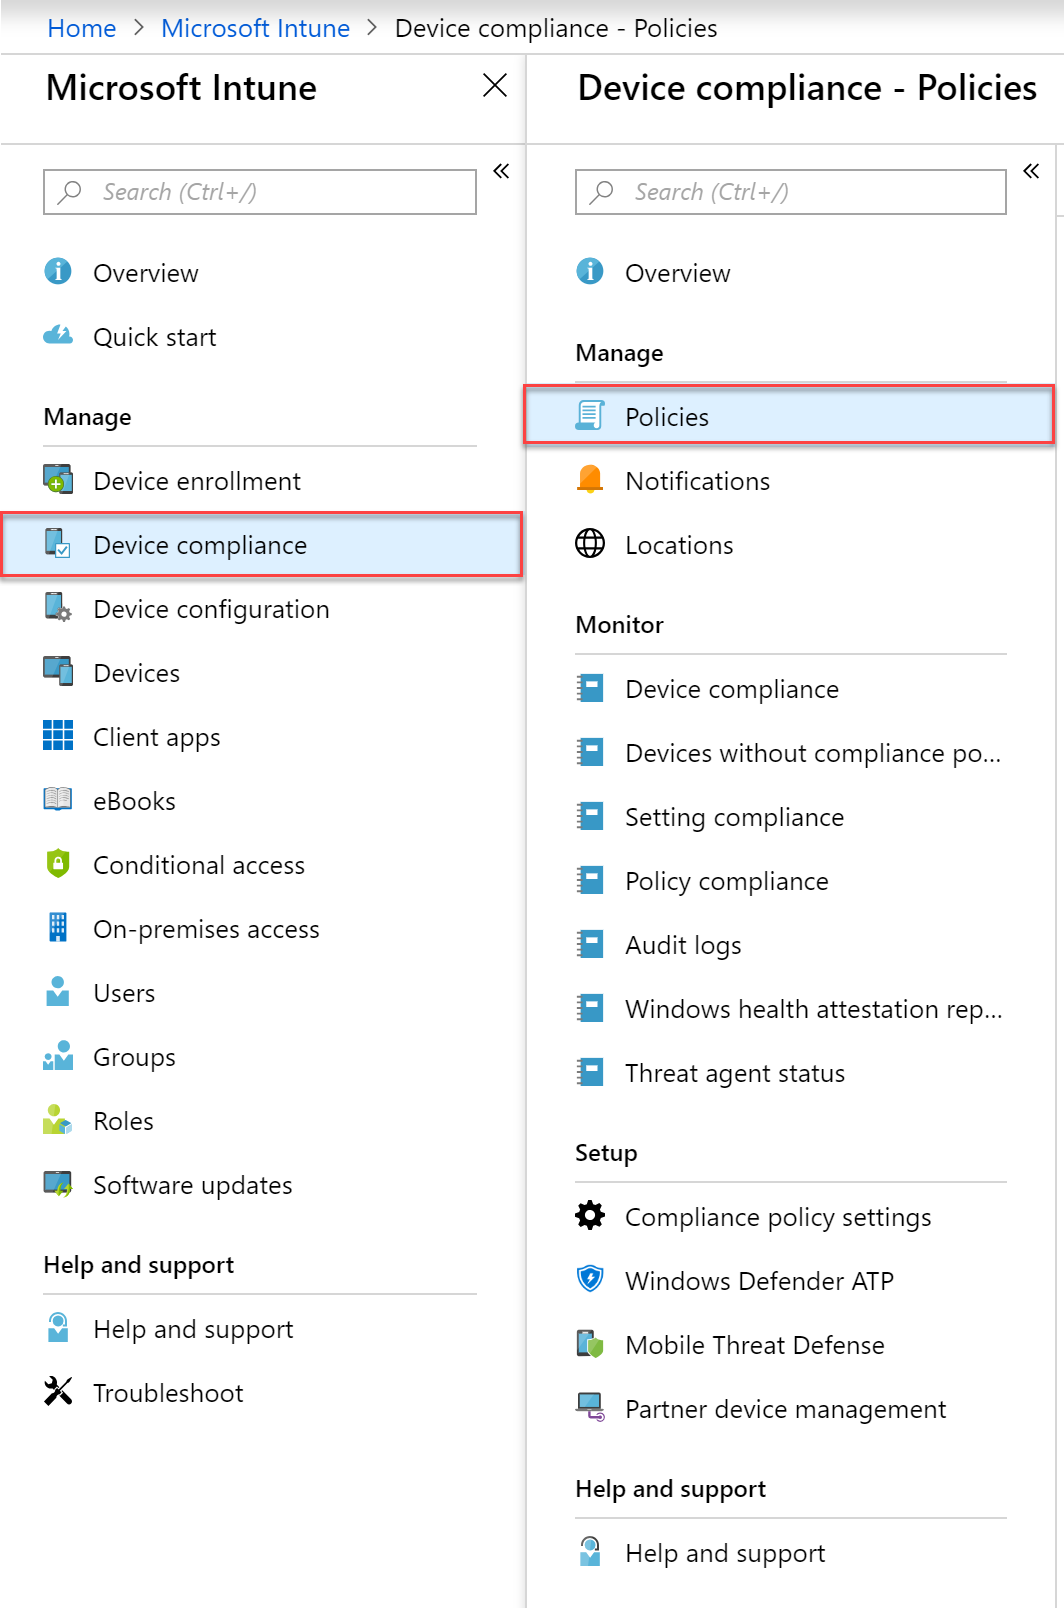
- Navigate to the Azure portal and select the Intune blade
- Select “Device Compliance” and then “Policies”
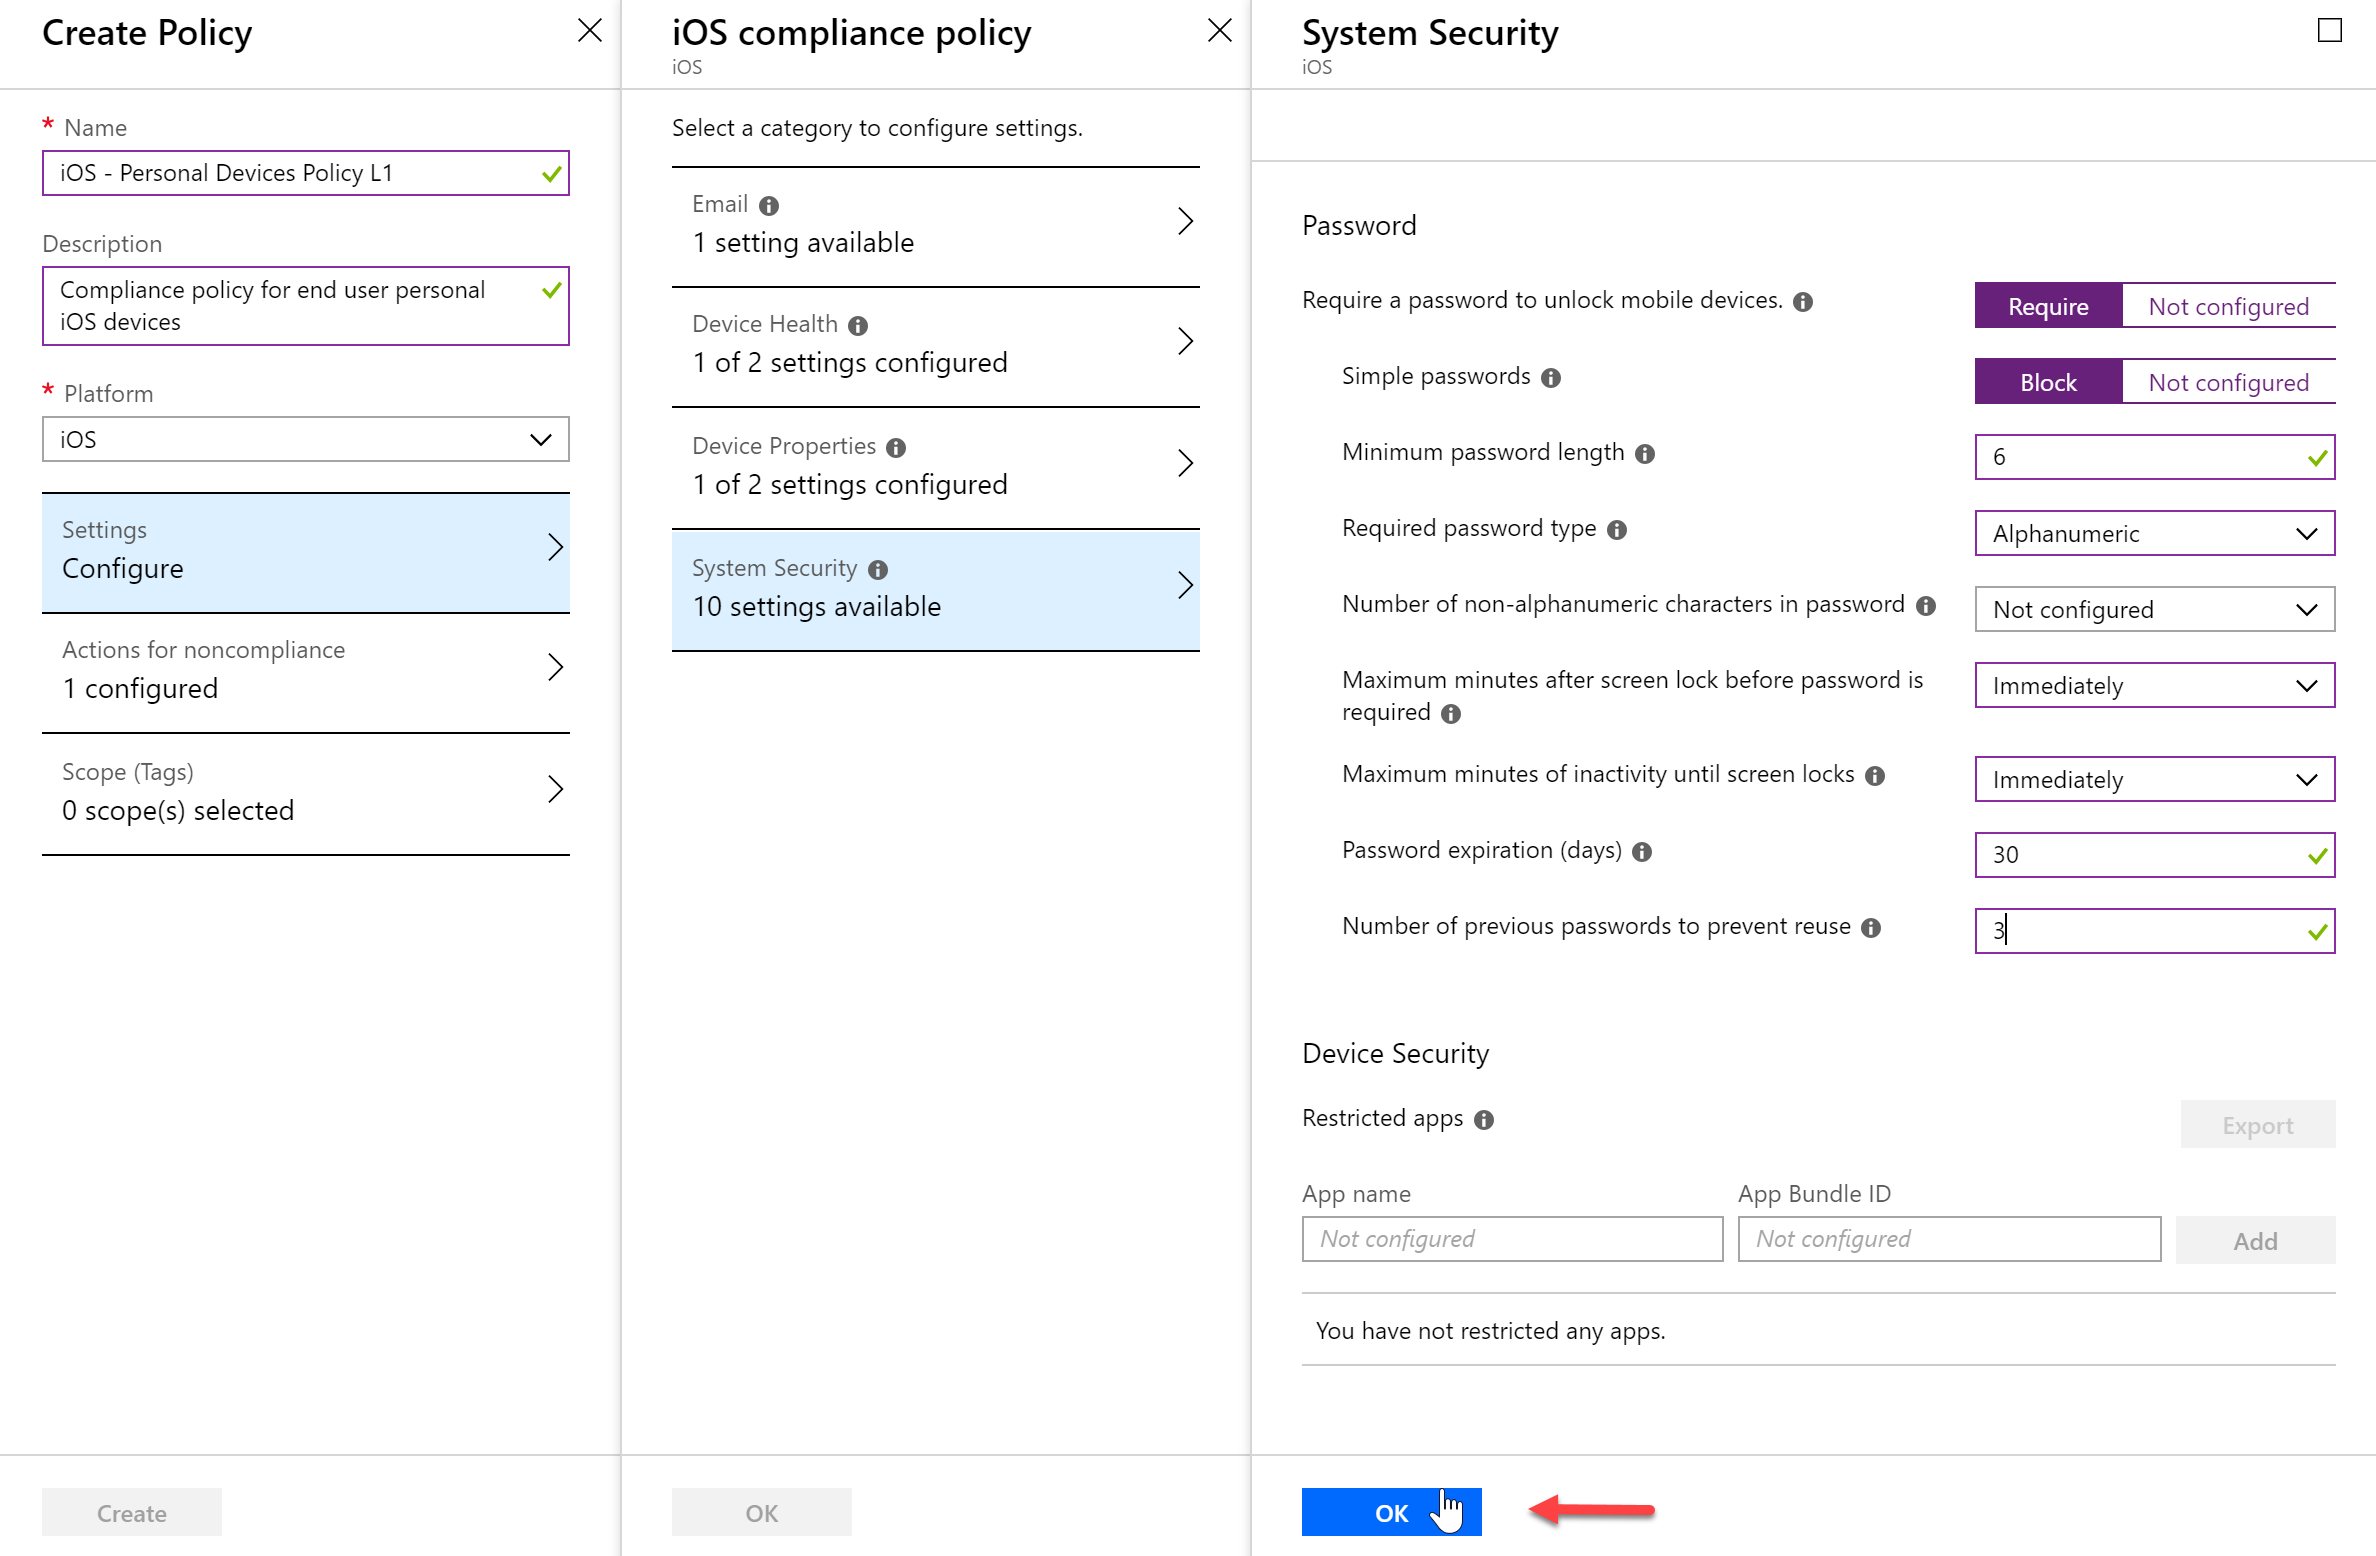
- Click “Create Policy” and then I am going to create a policy that I will apply to my end users personal devices. This will be a policy for the group we created earlier. Once we specify a name and platform we will have different compliance settings that we can configure become available.

- Once you have configured all of your Compliance settings, save the policy.
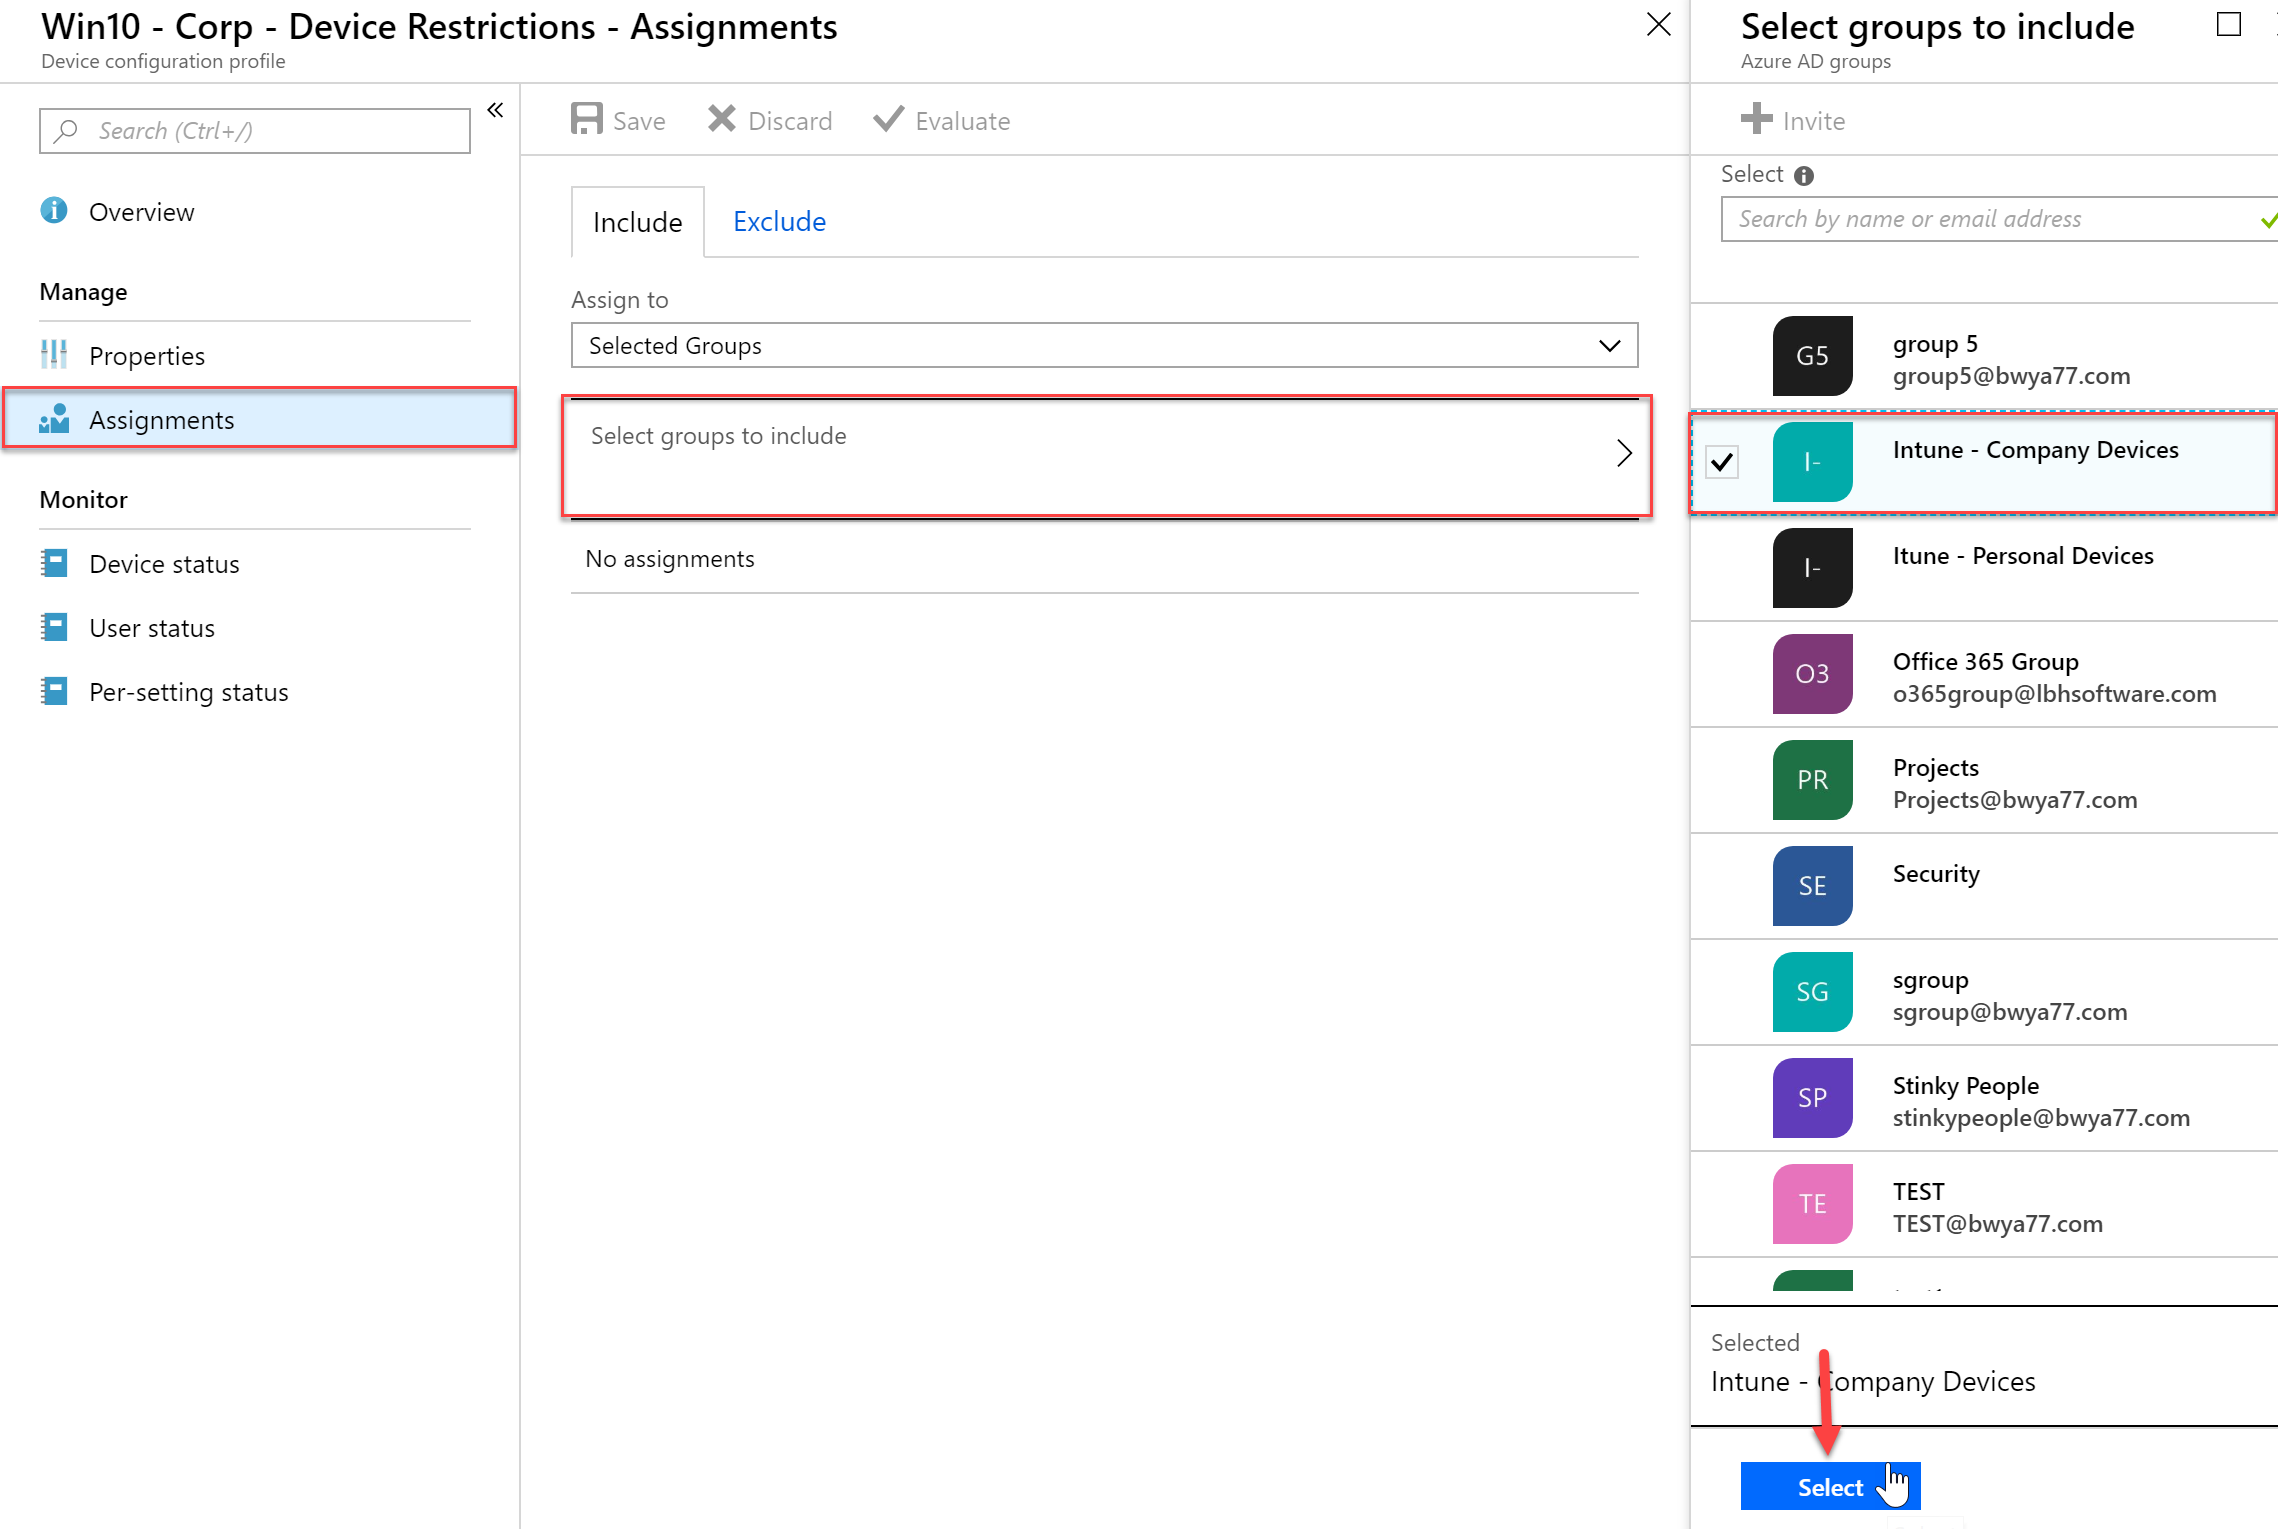
- Next, we will need to assign this policy to devices or users. Click the Assignments item under Manage
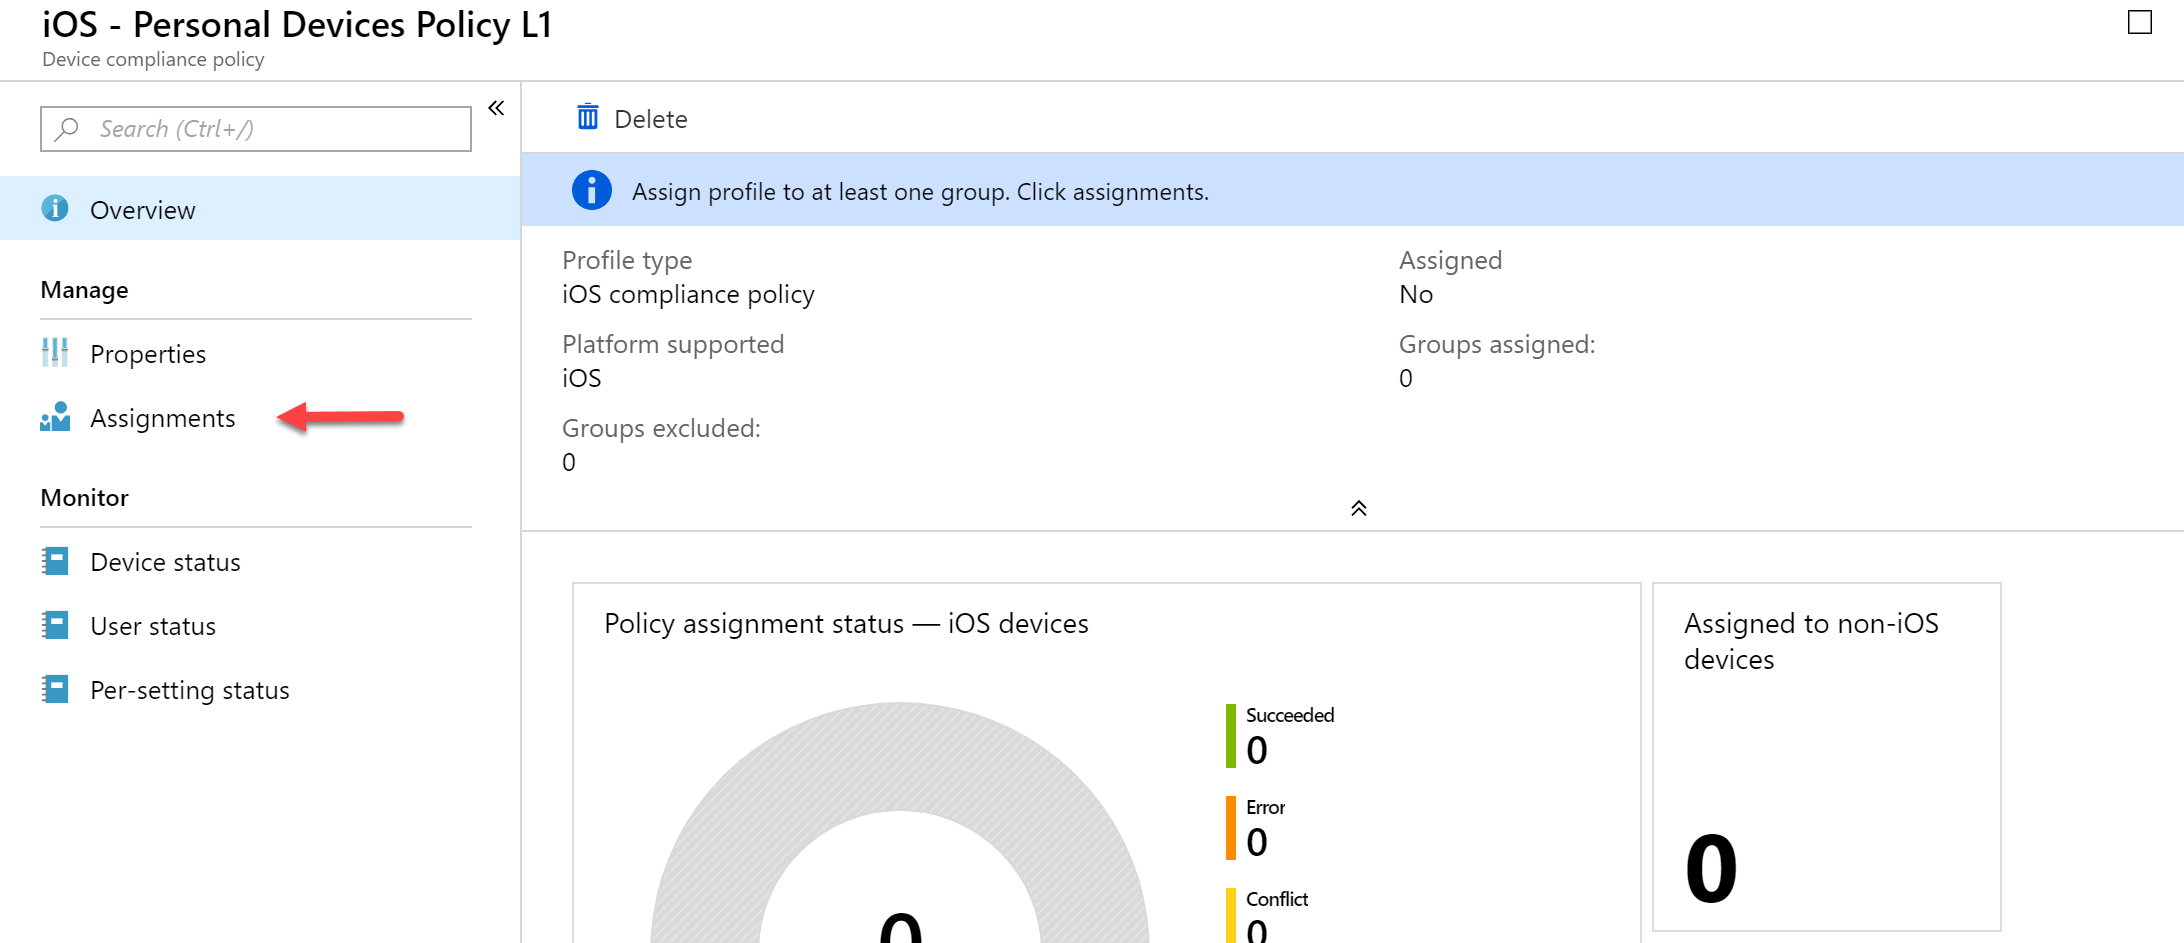
- Once I click “Select groups to include” I can select my Intune – Personal Devices dynamic group and then save.

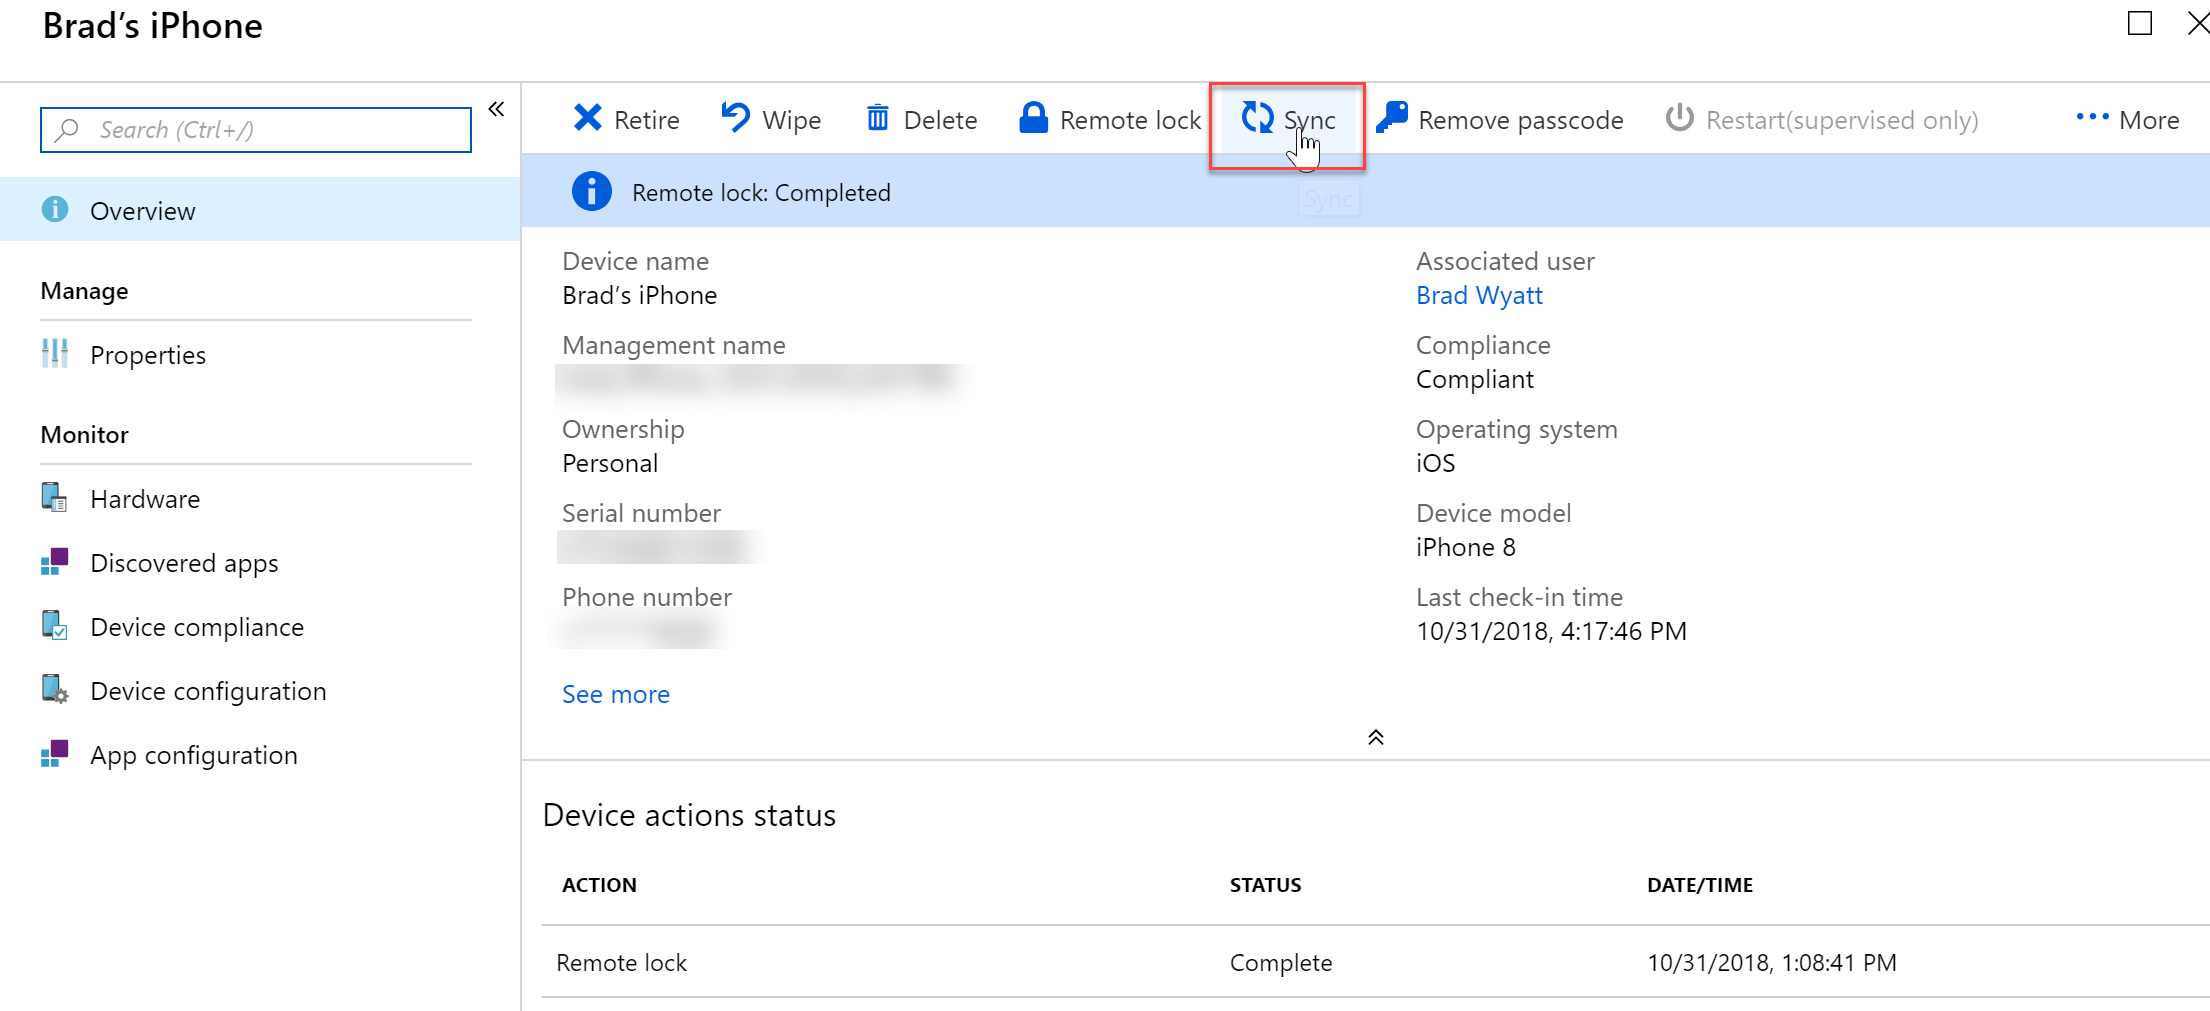
- If I want to make sure the policy goes into effect immediately on a device, I can go to All Devices and find my device and force a resync.
- If you set a passcode setting and the users current passcode does not match, they will be greeted with a password expiration notification. From there they can set their own passcode.

Configuration Policies
Commonly used to manage security settings and features on your devices, including access to company resources.
Basic Configuration Policy Overview
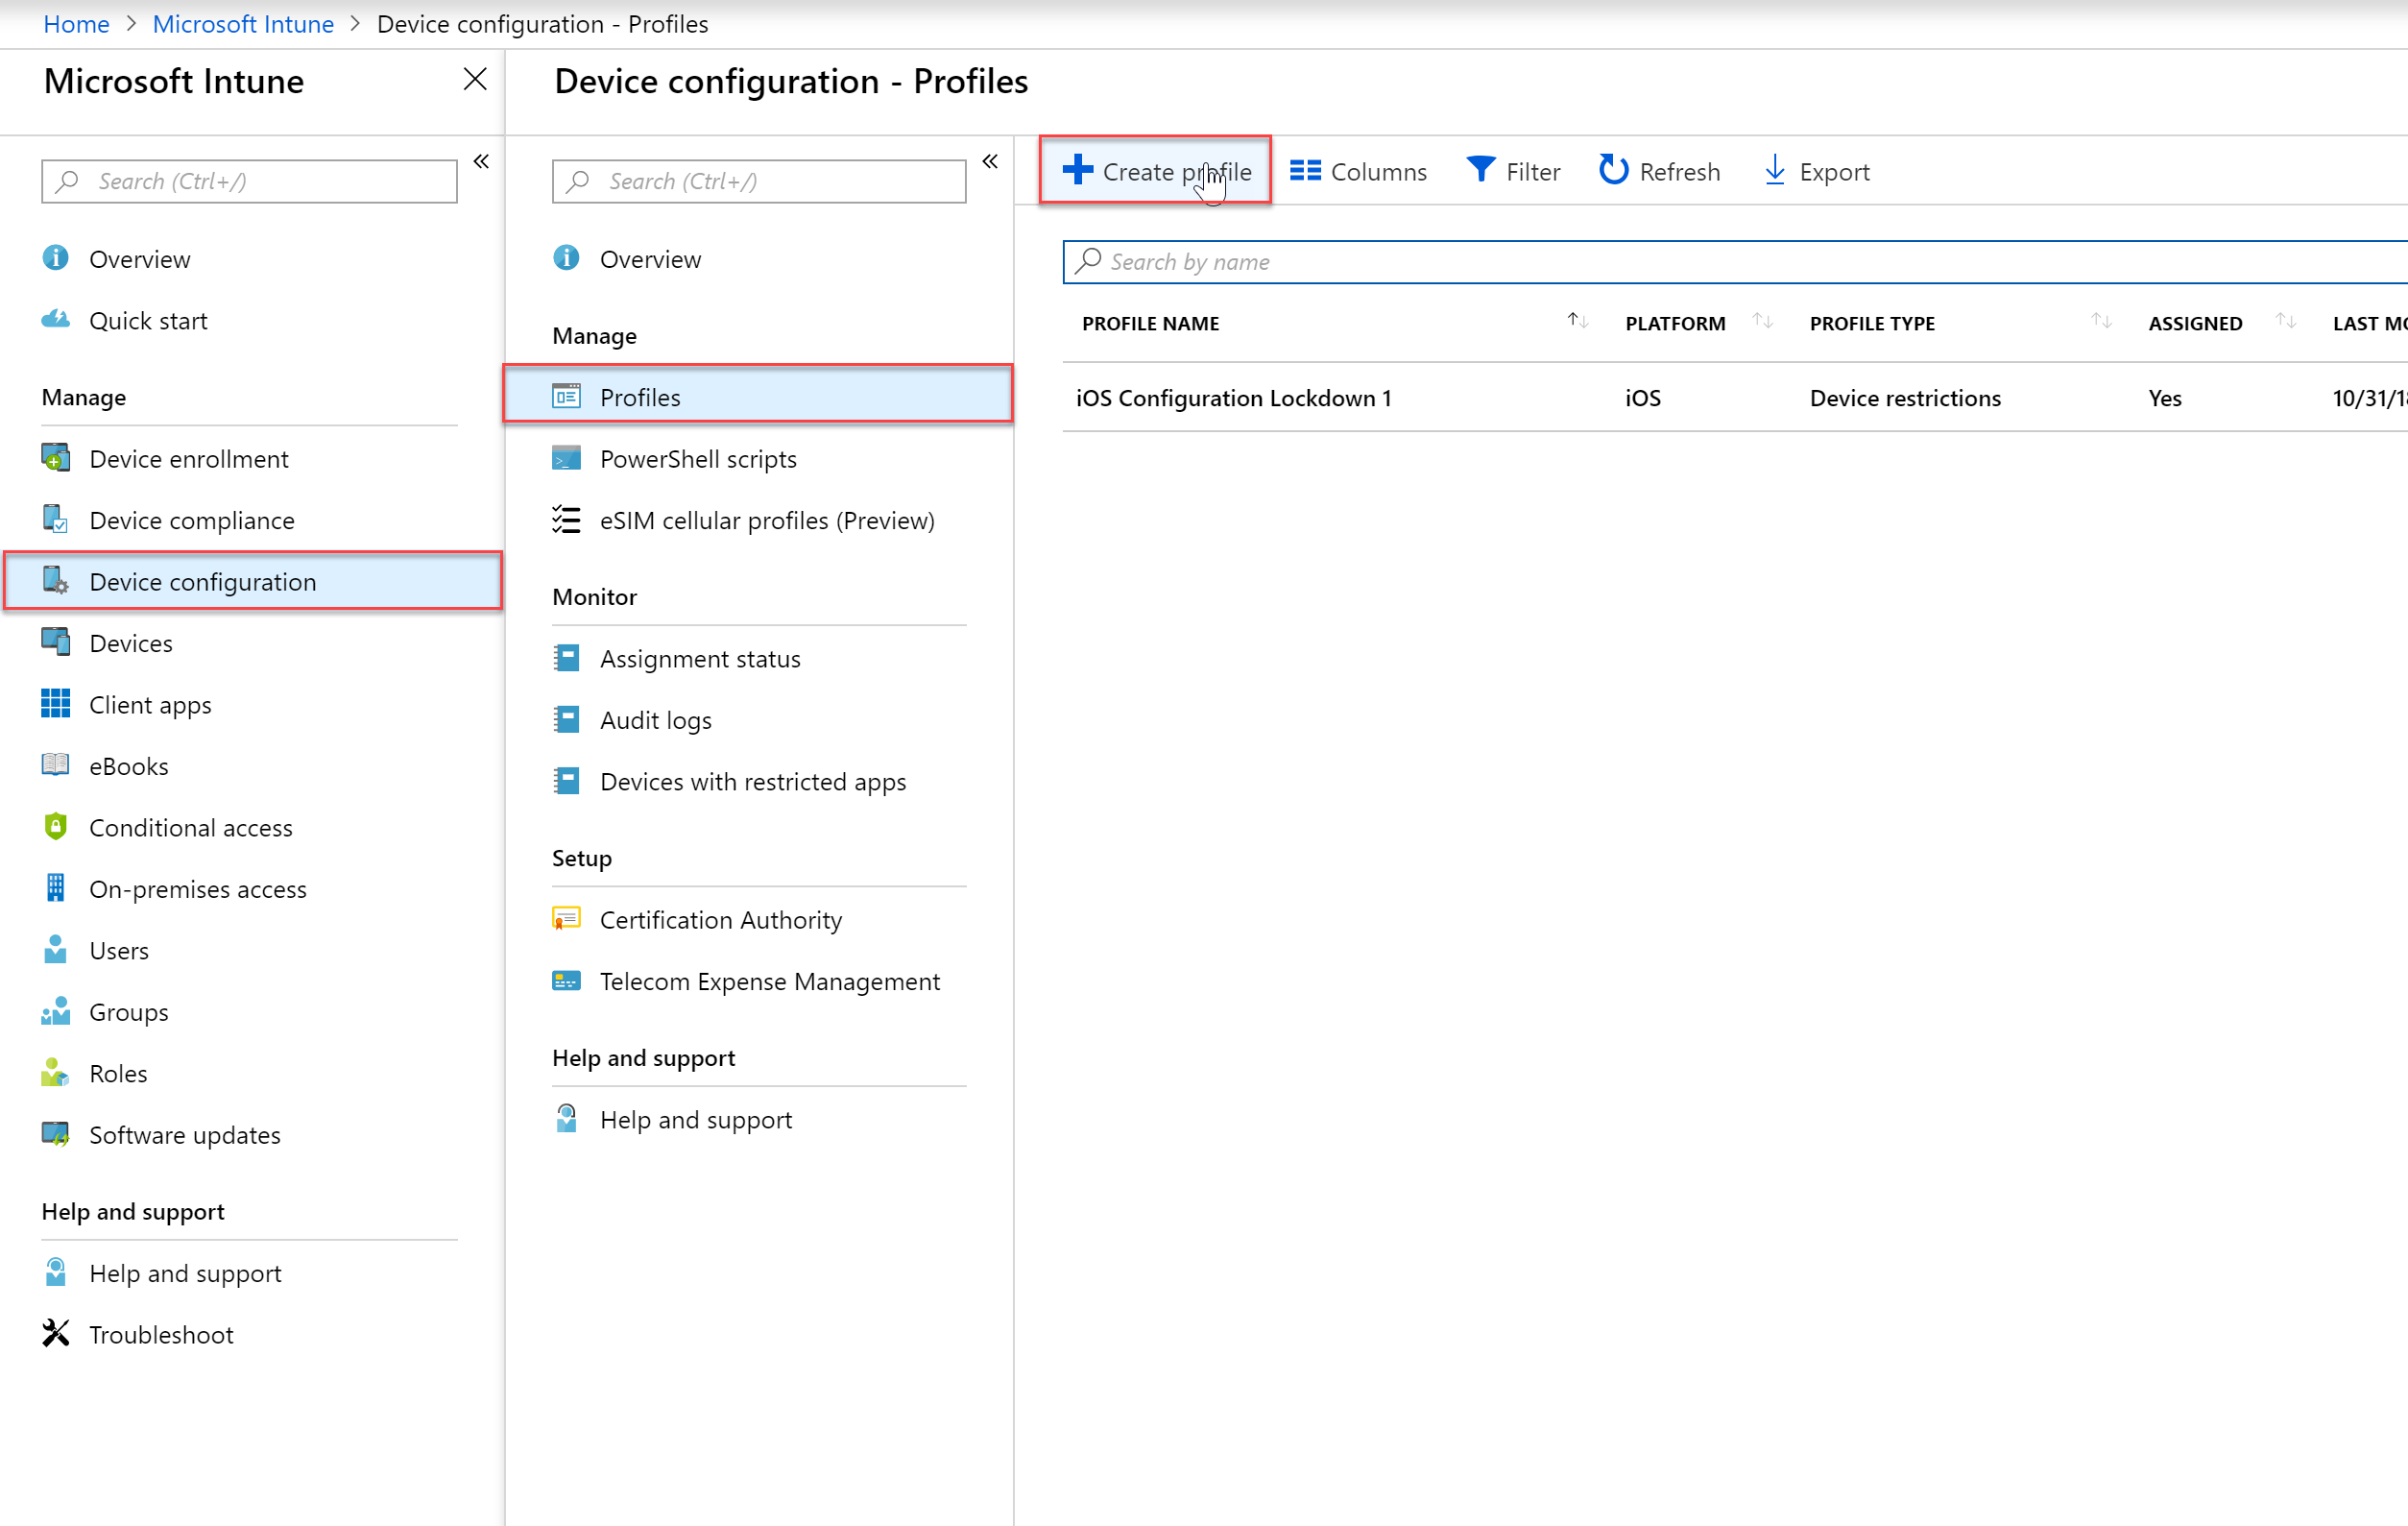
- Expand the Intune blade and then select “Device Configuration”, “Profiles” and then click “Create Profile” to create a new device configuration profile.
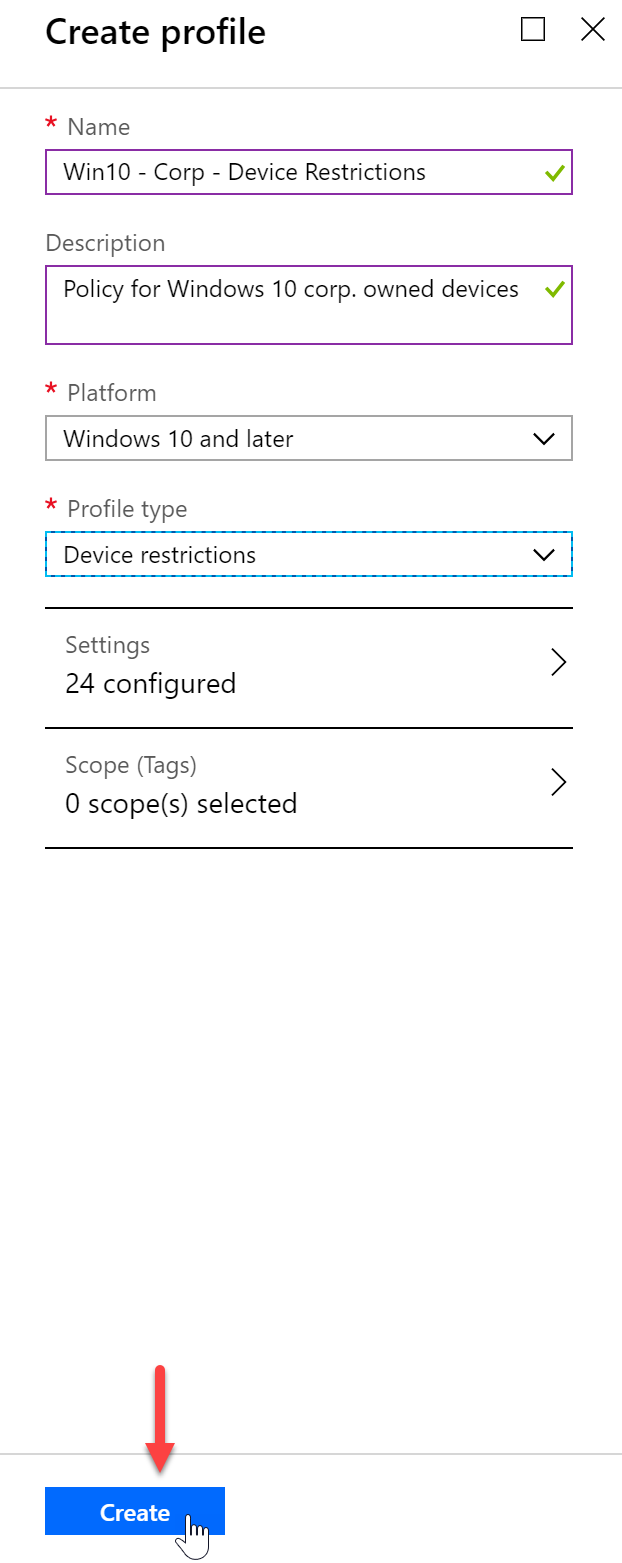
- Enter the appropriate information regarding your profile / policy. In my example I will be making a policy that is applied to corporate owned Windows 10 devices.
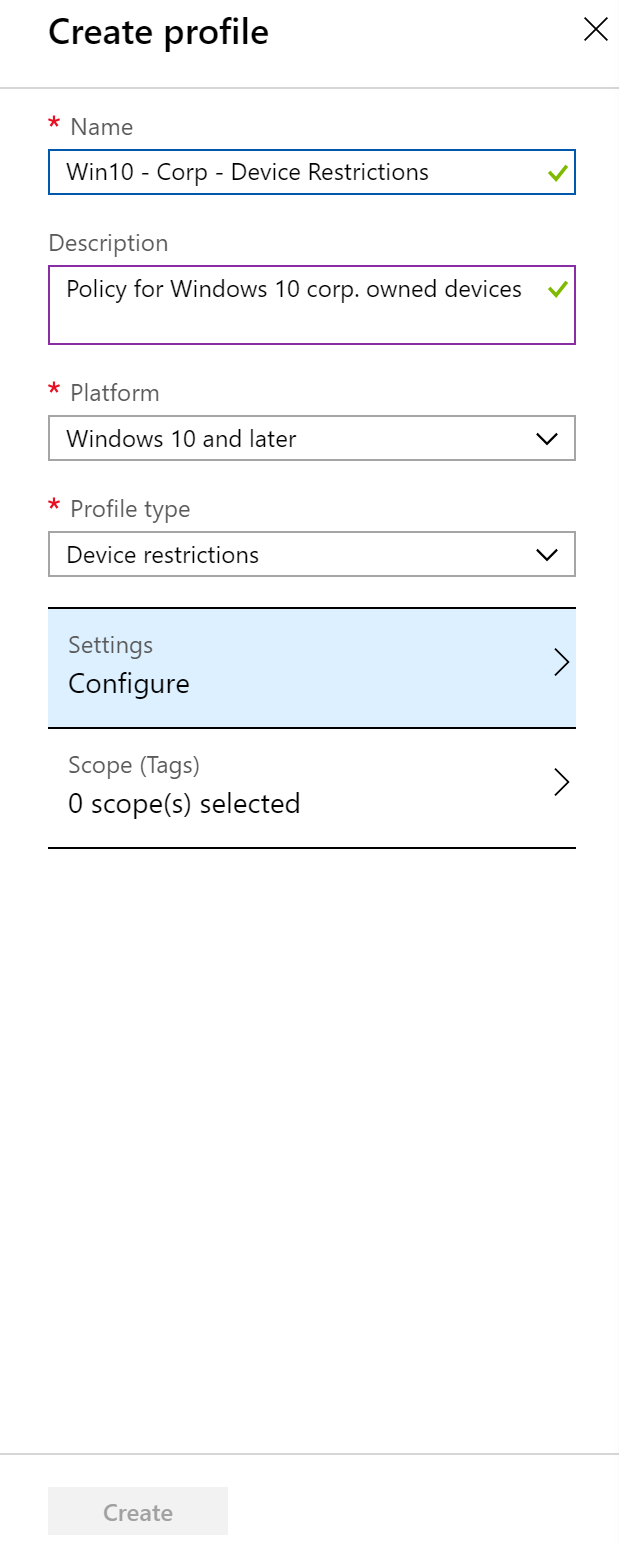
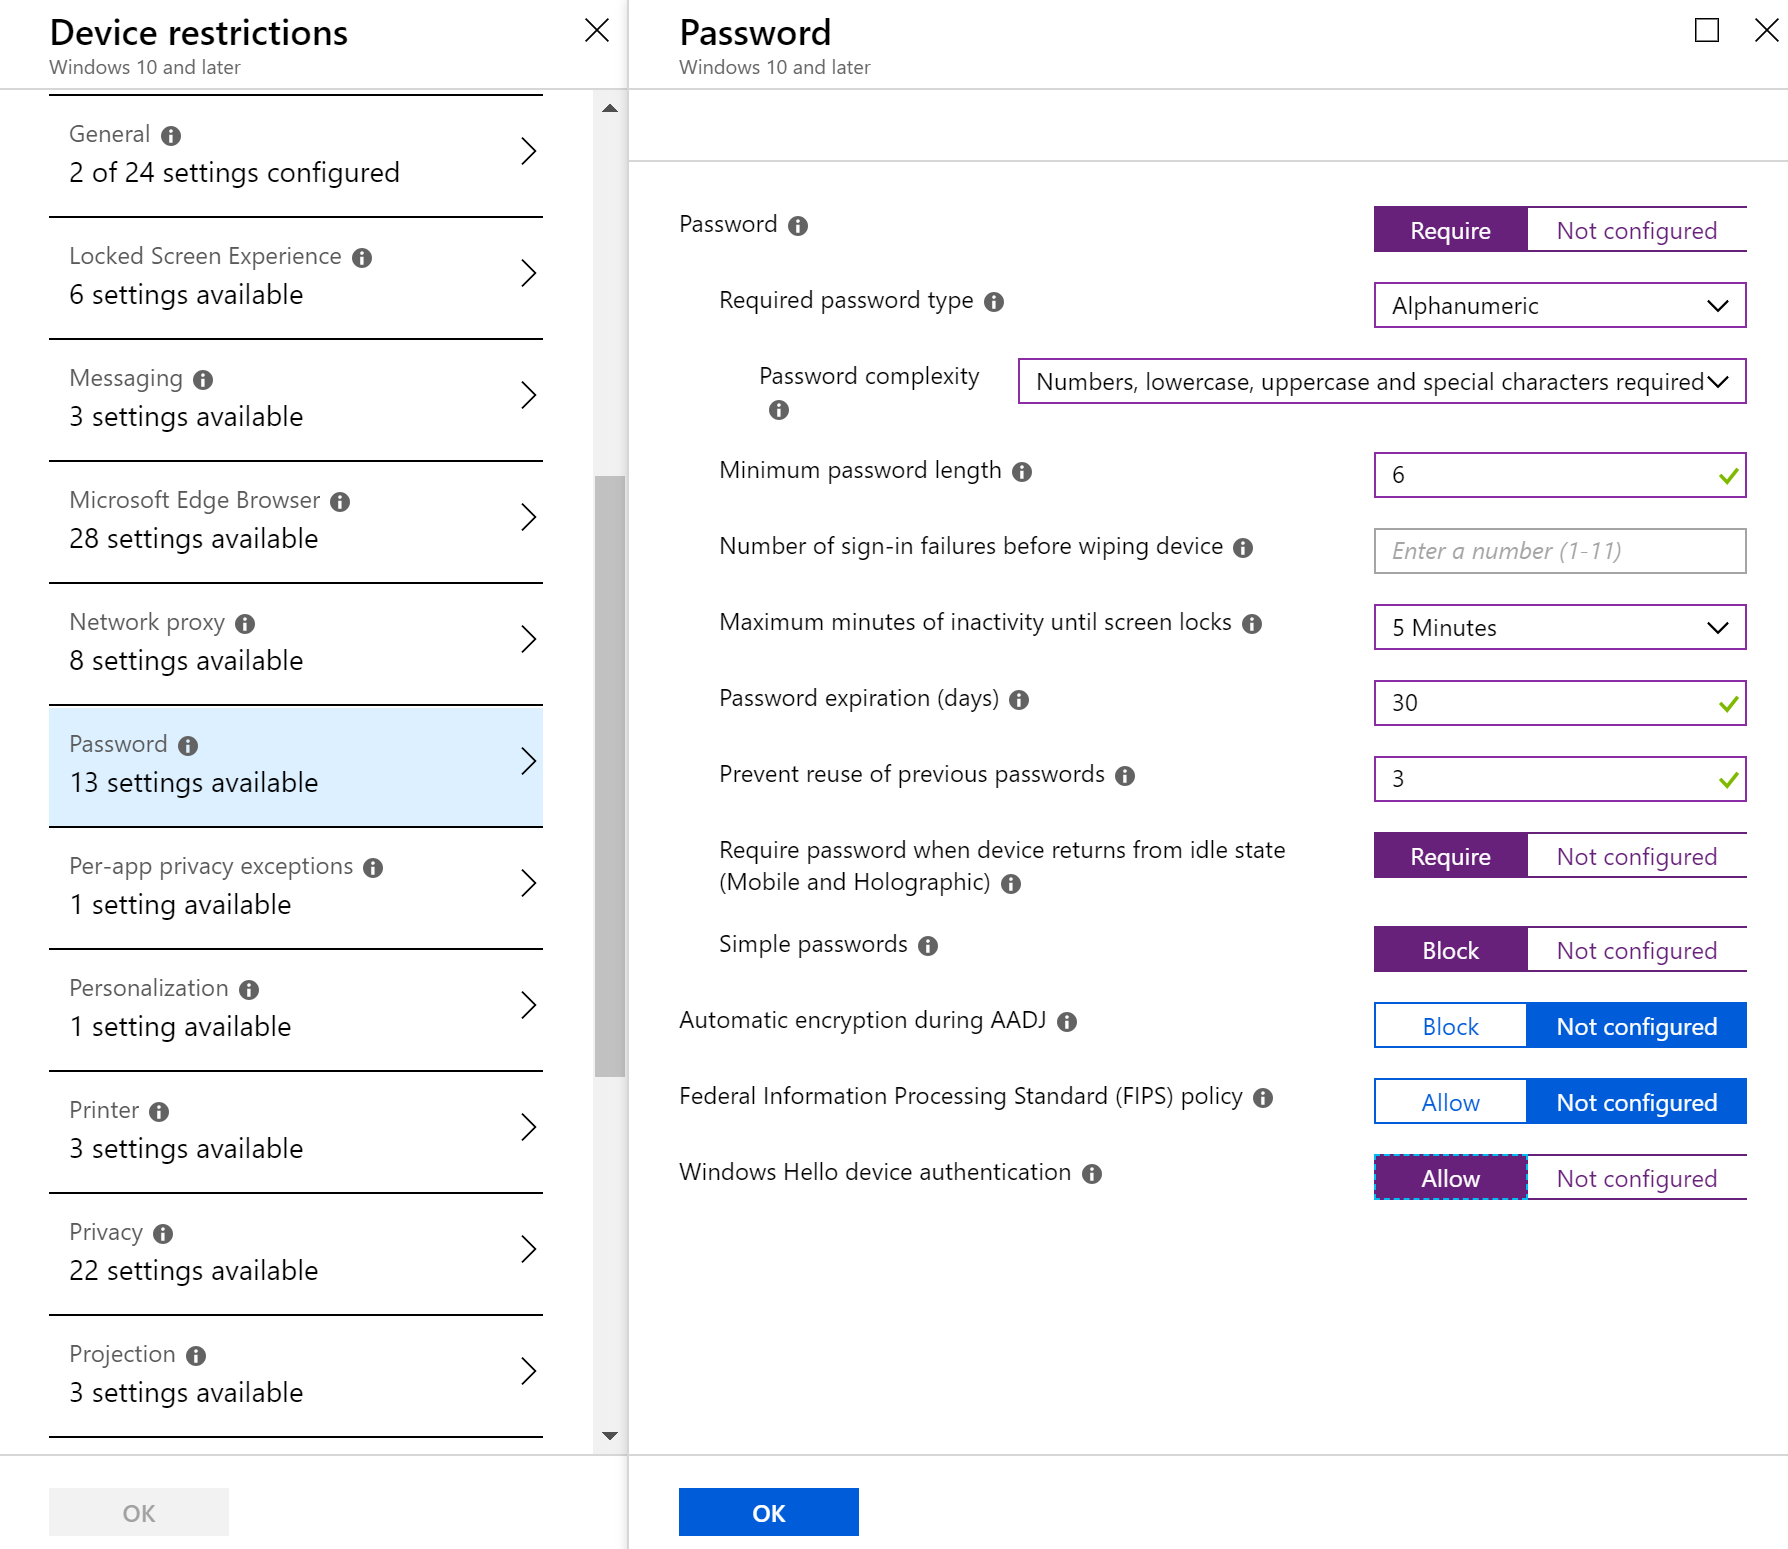
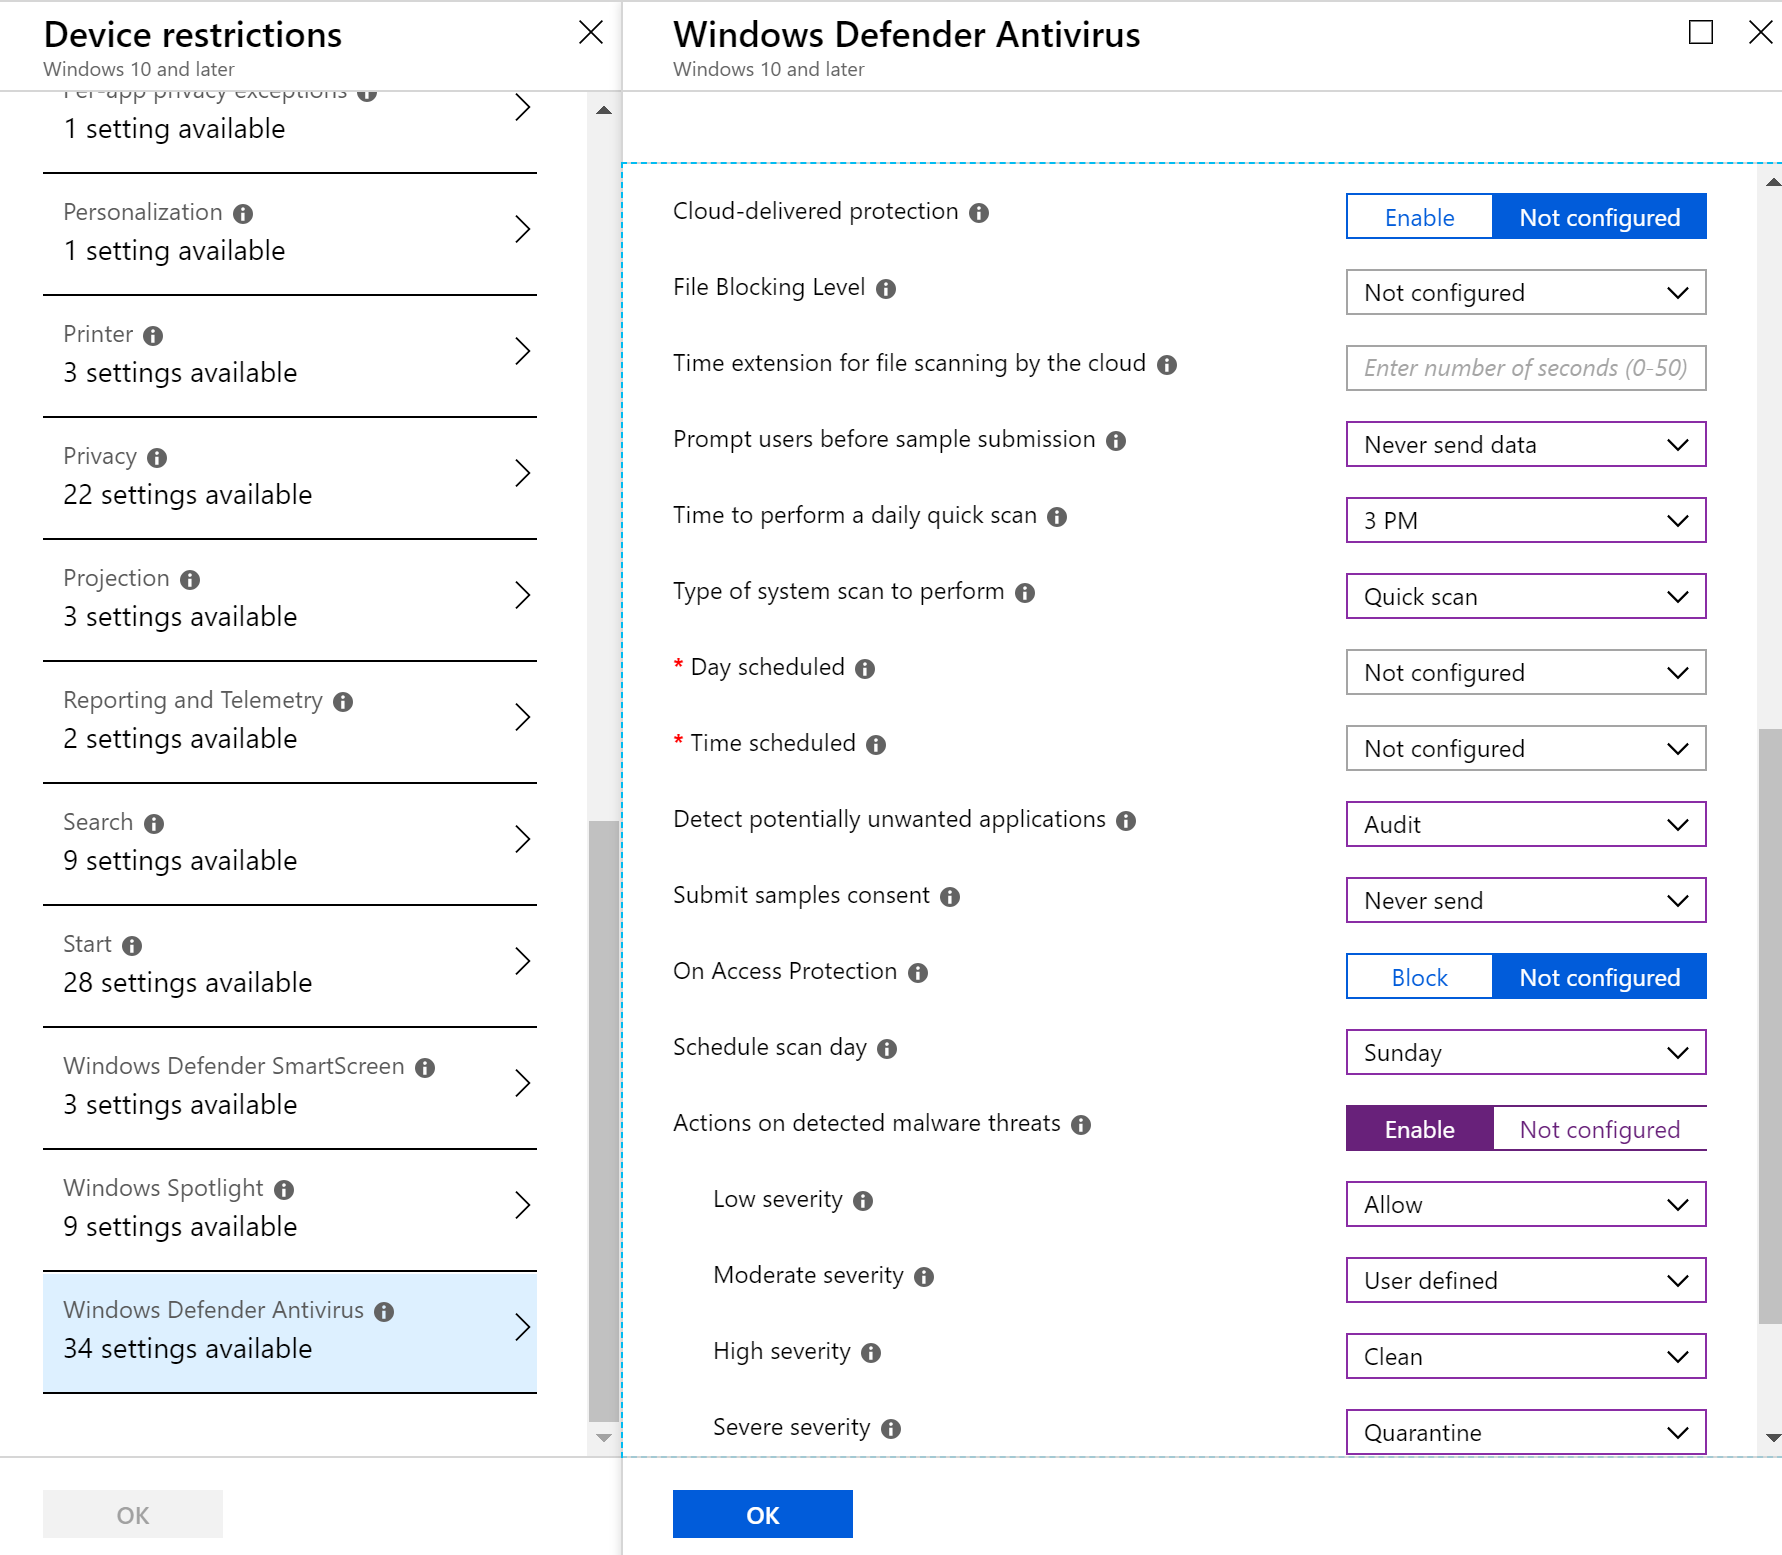
- Configure the necessary settings for your specific policy
- Once you have configured all of the settings you’d like, press “Create” under the create profile blade.
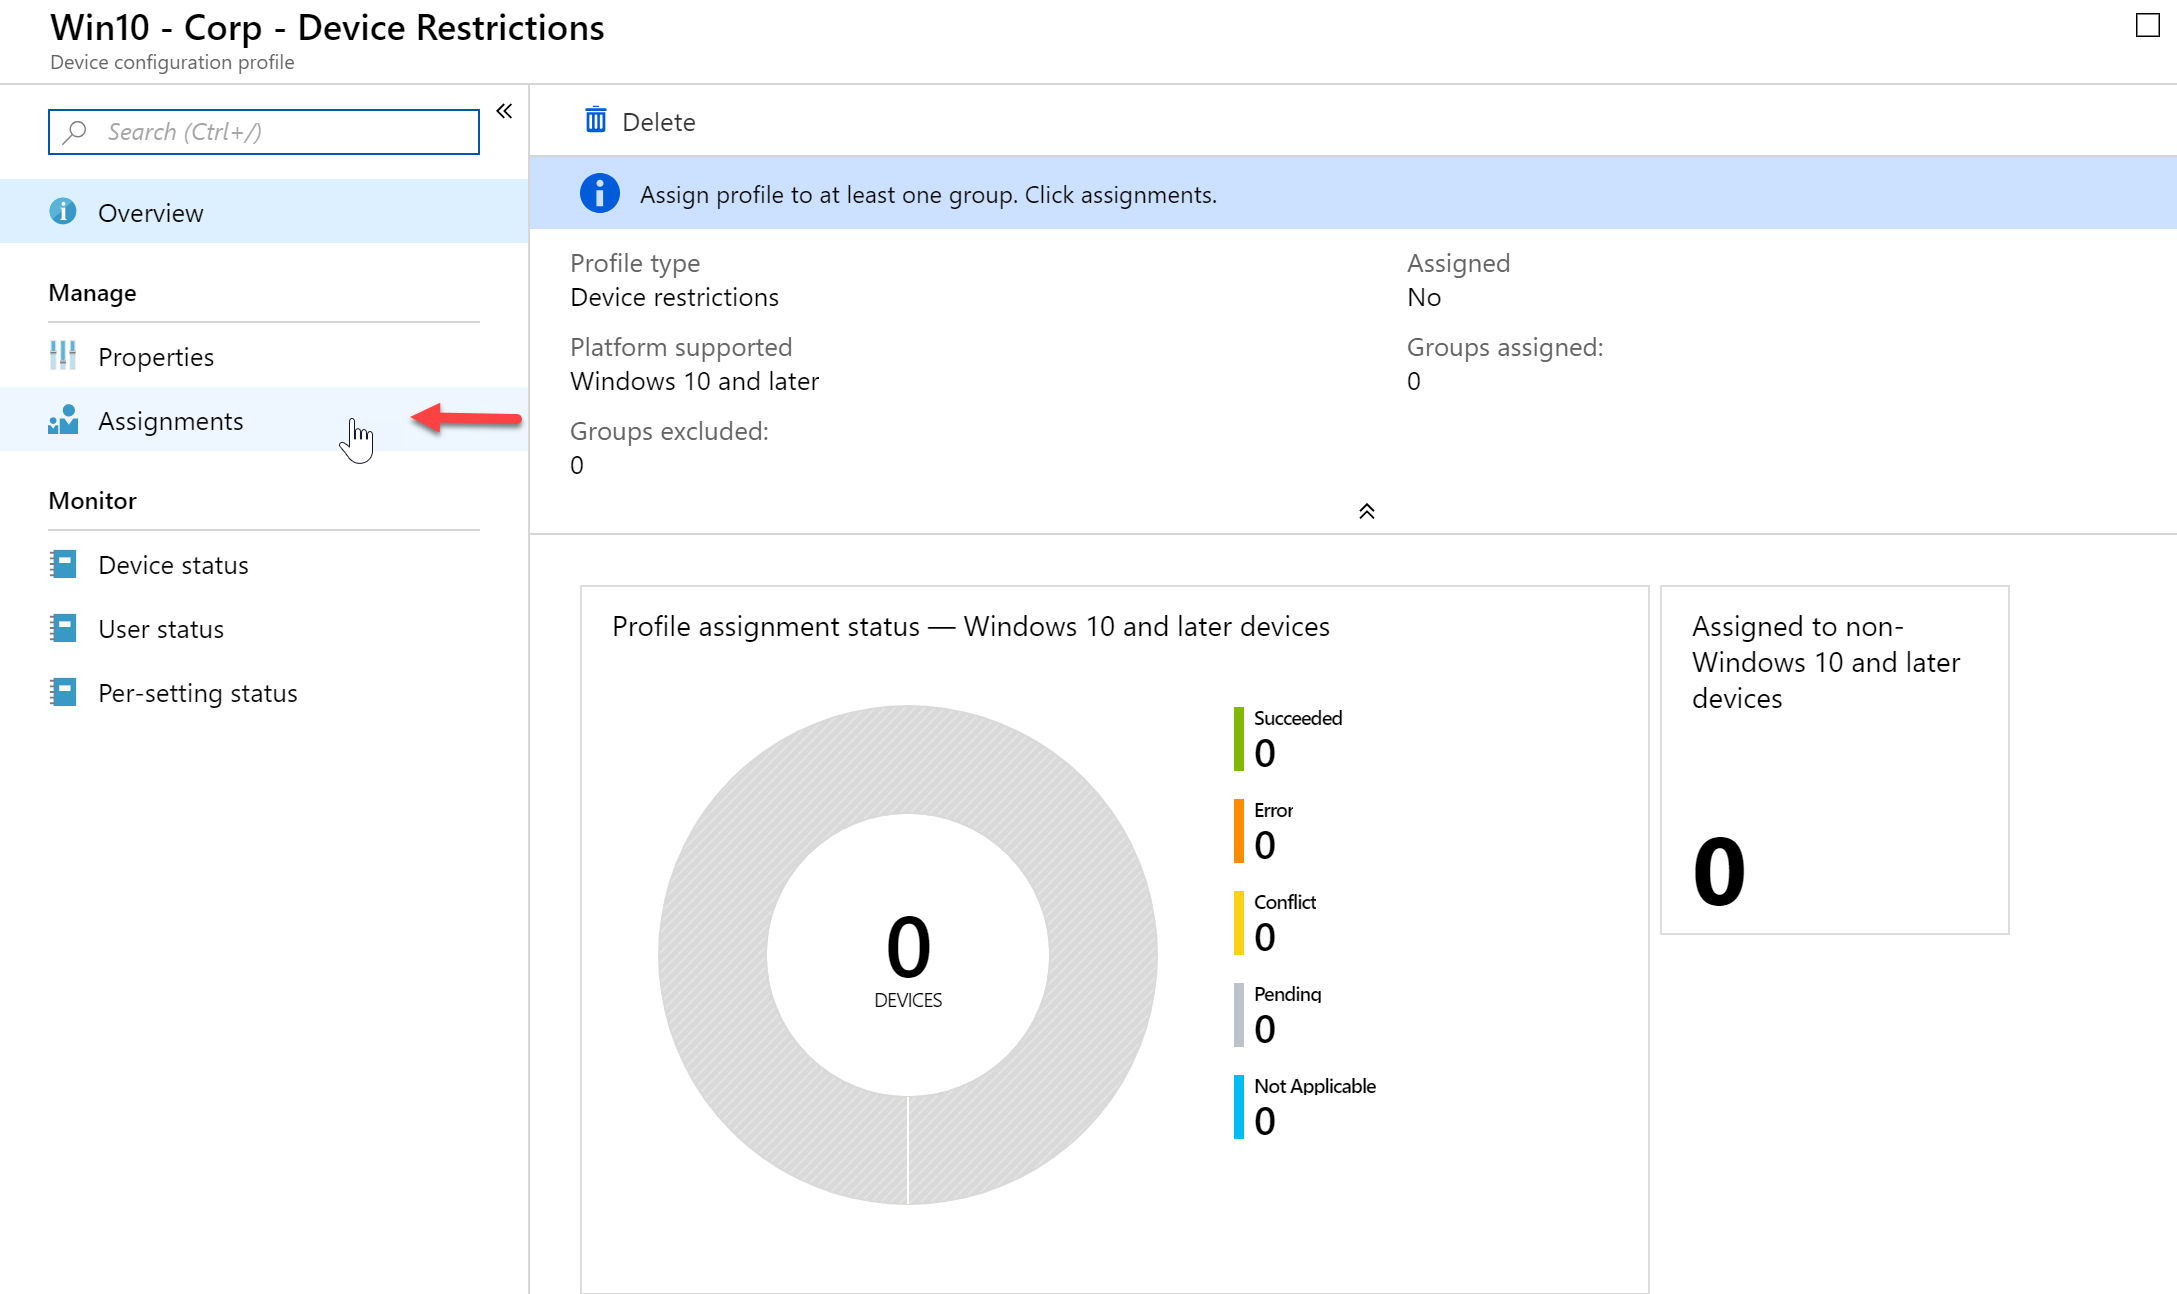
- Next, click “Assignments” so we can assign this policy
- From there I will select my Intune – Company Devices group to apply this policy to.
Uninstall Restricted Applications
In this example I will be configuring a restricted application and applying it to my iOS devices. Restricted applications are applications that users are not allowed to install and run. Users are not prevented from installing a prohibited app, but if they do so, this is reported to you.
- In the Intune blade select Device configuration > Profiles and then select your profile you want to edit or create a new one. In my example I will modify the profile applied to iOS devices.
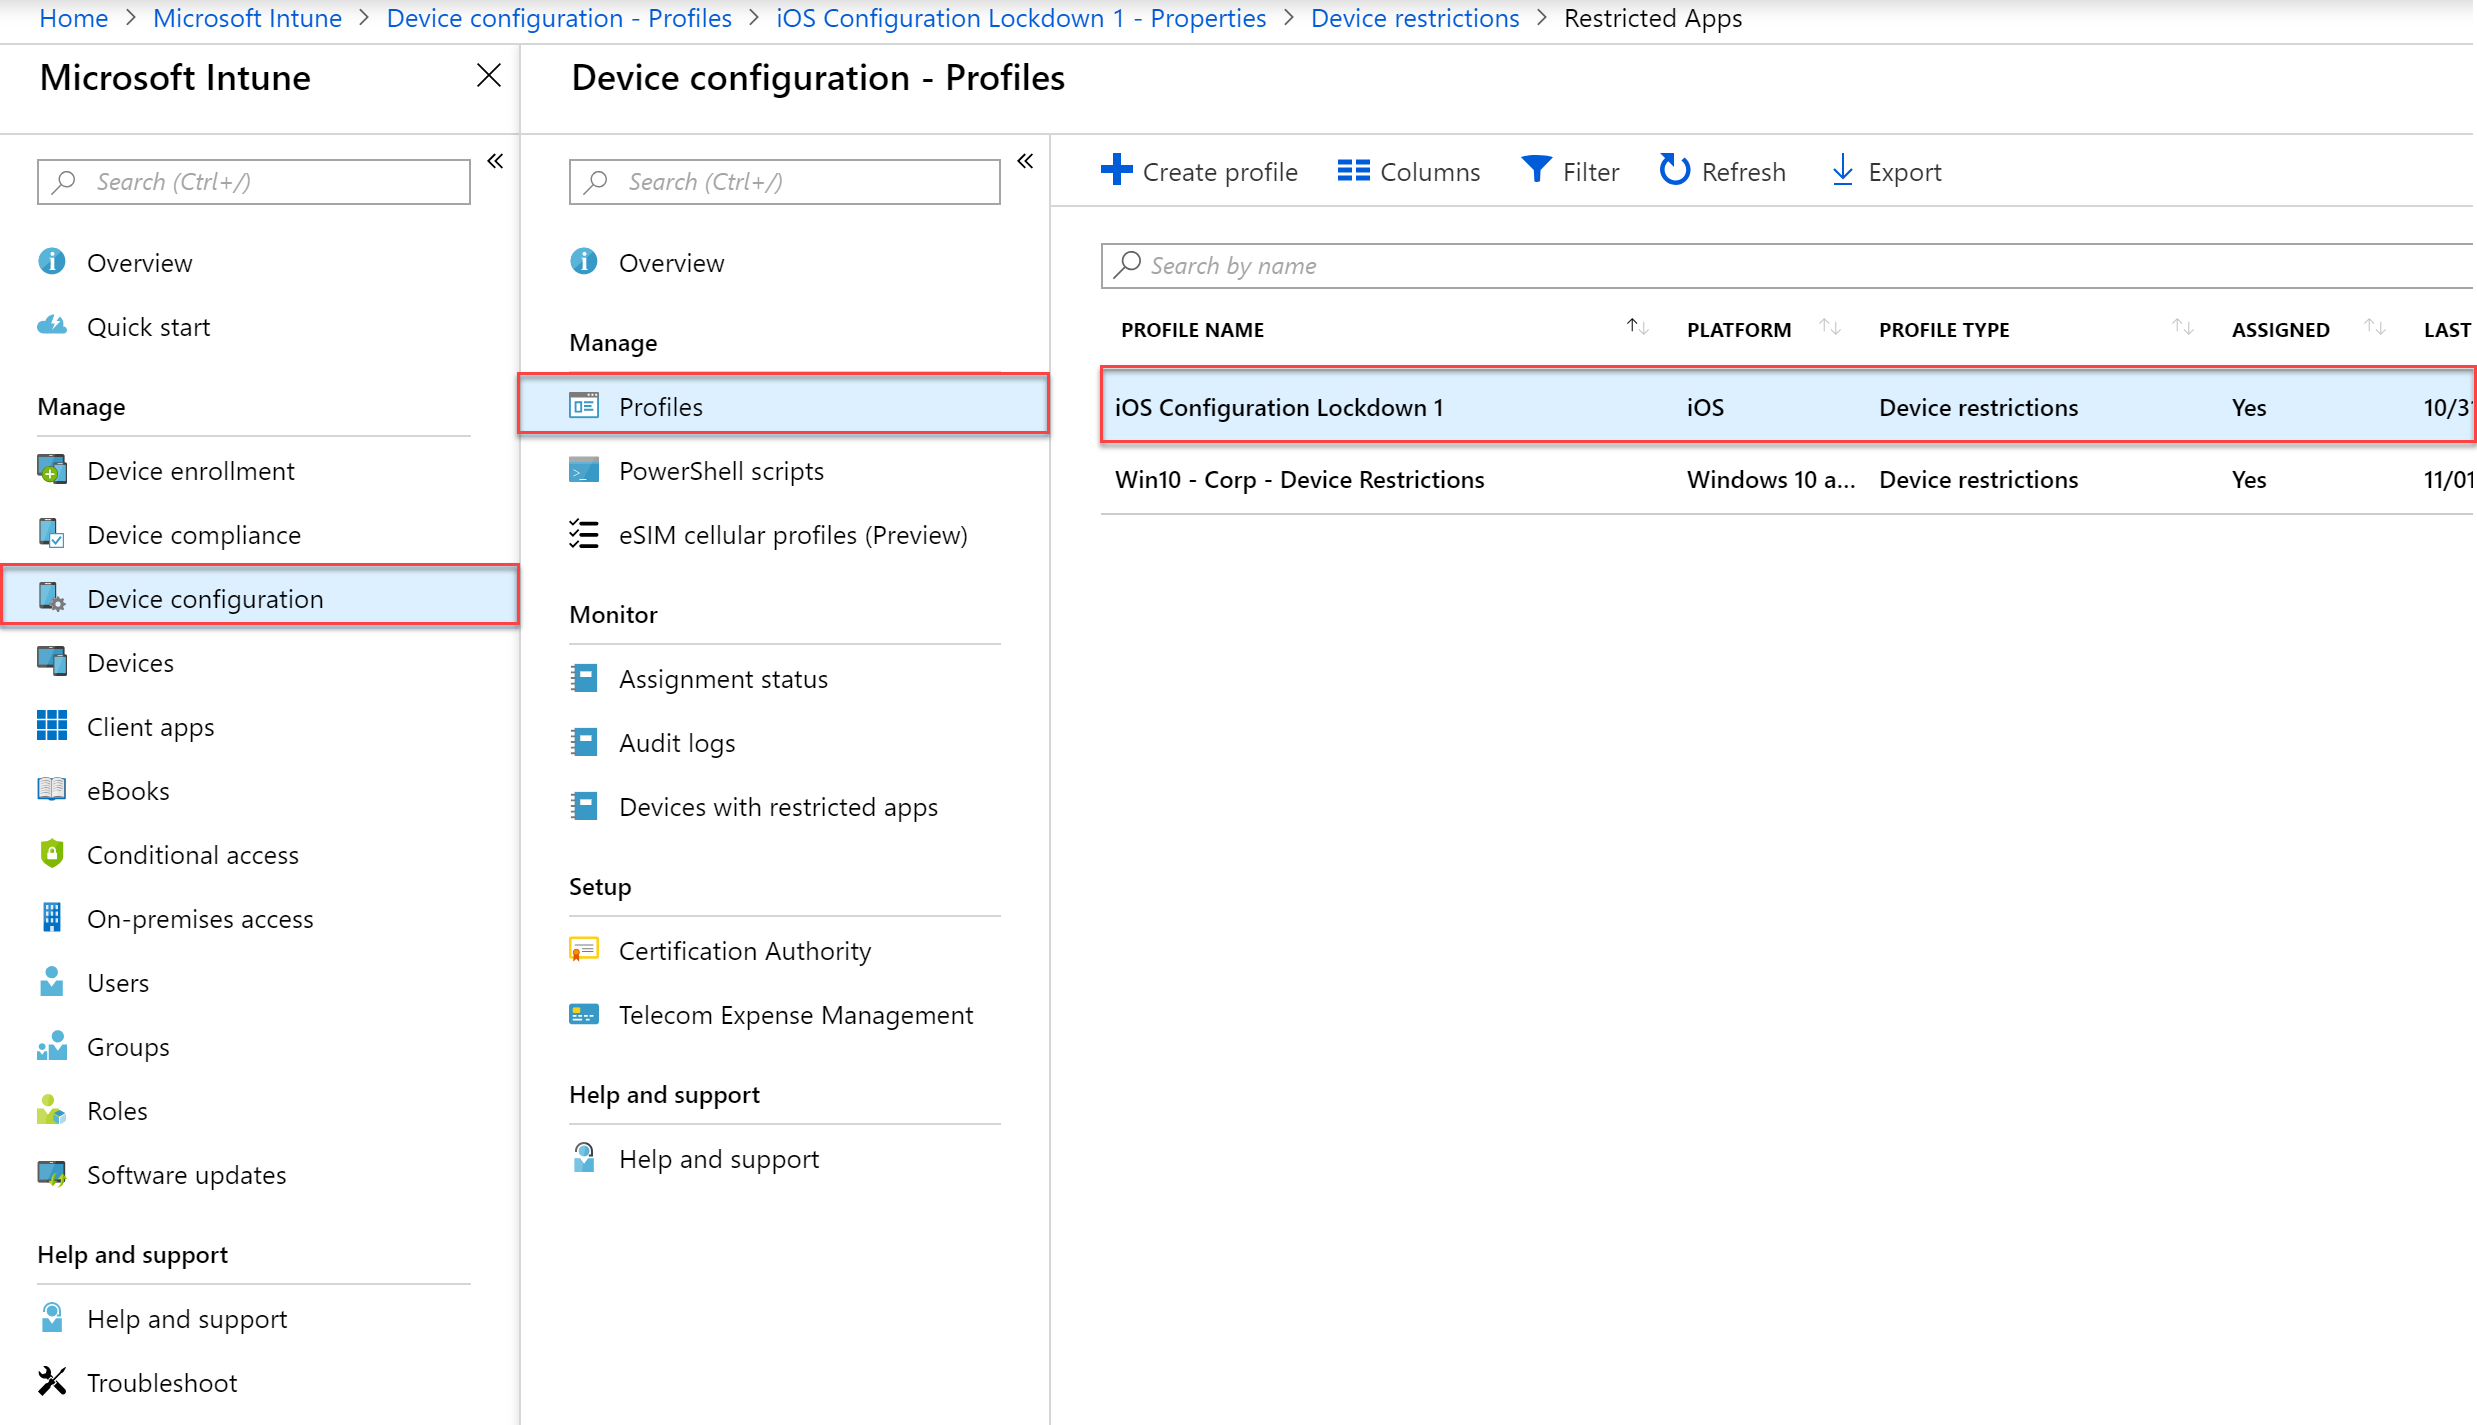
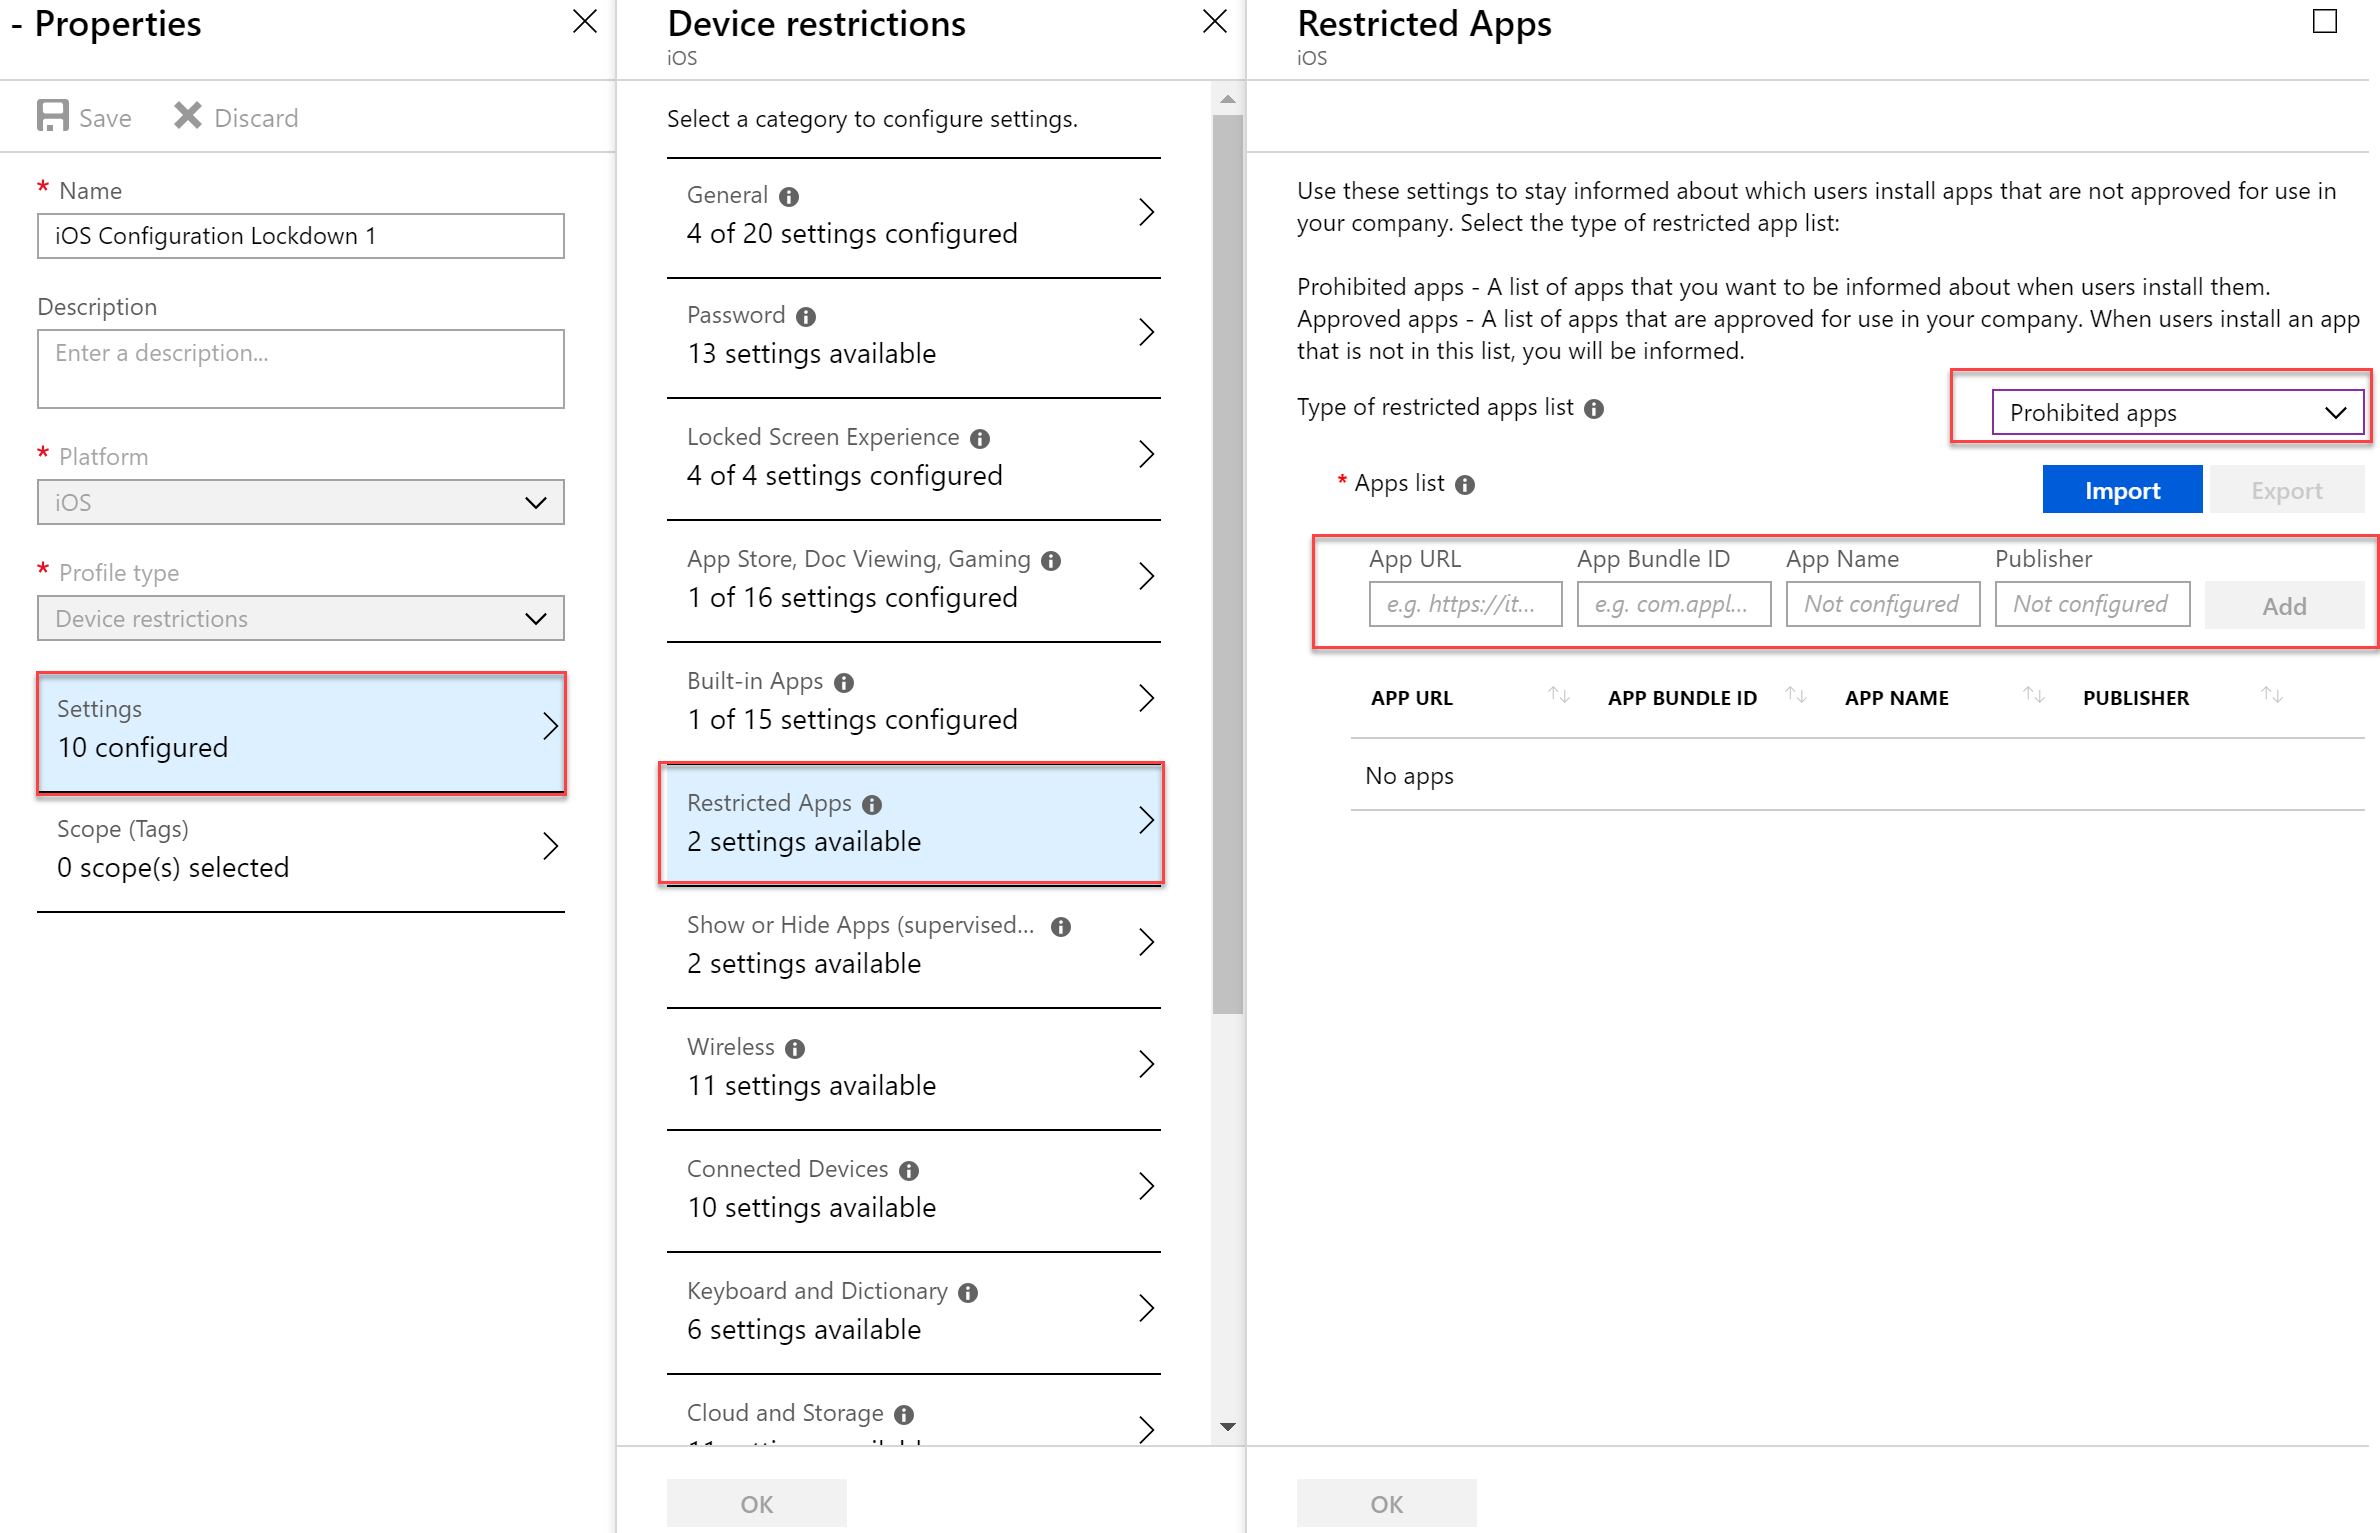
- In the profile select Settings > Restricted Apps, and then under type of restricted apps list select Prohibited Apps. In the next section we will configuring the application we are going to restrict
- Open a tab in IE, Firefox, Chrome, etc and look up your application and note the itunes store URL
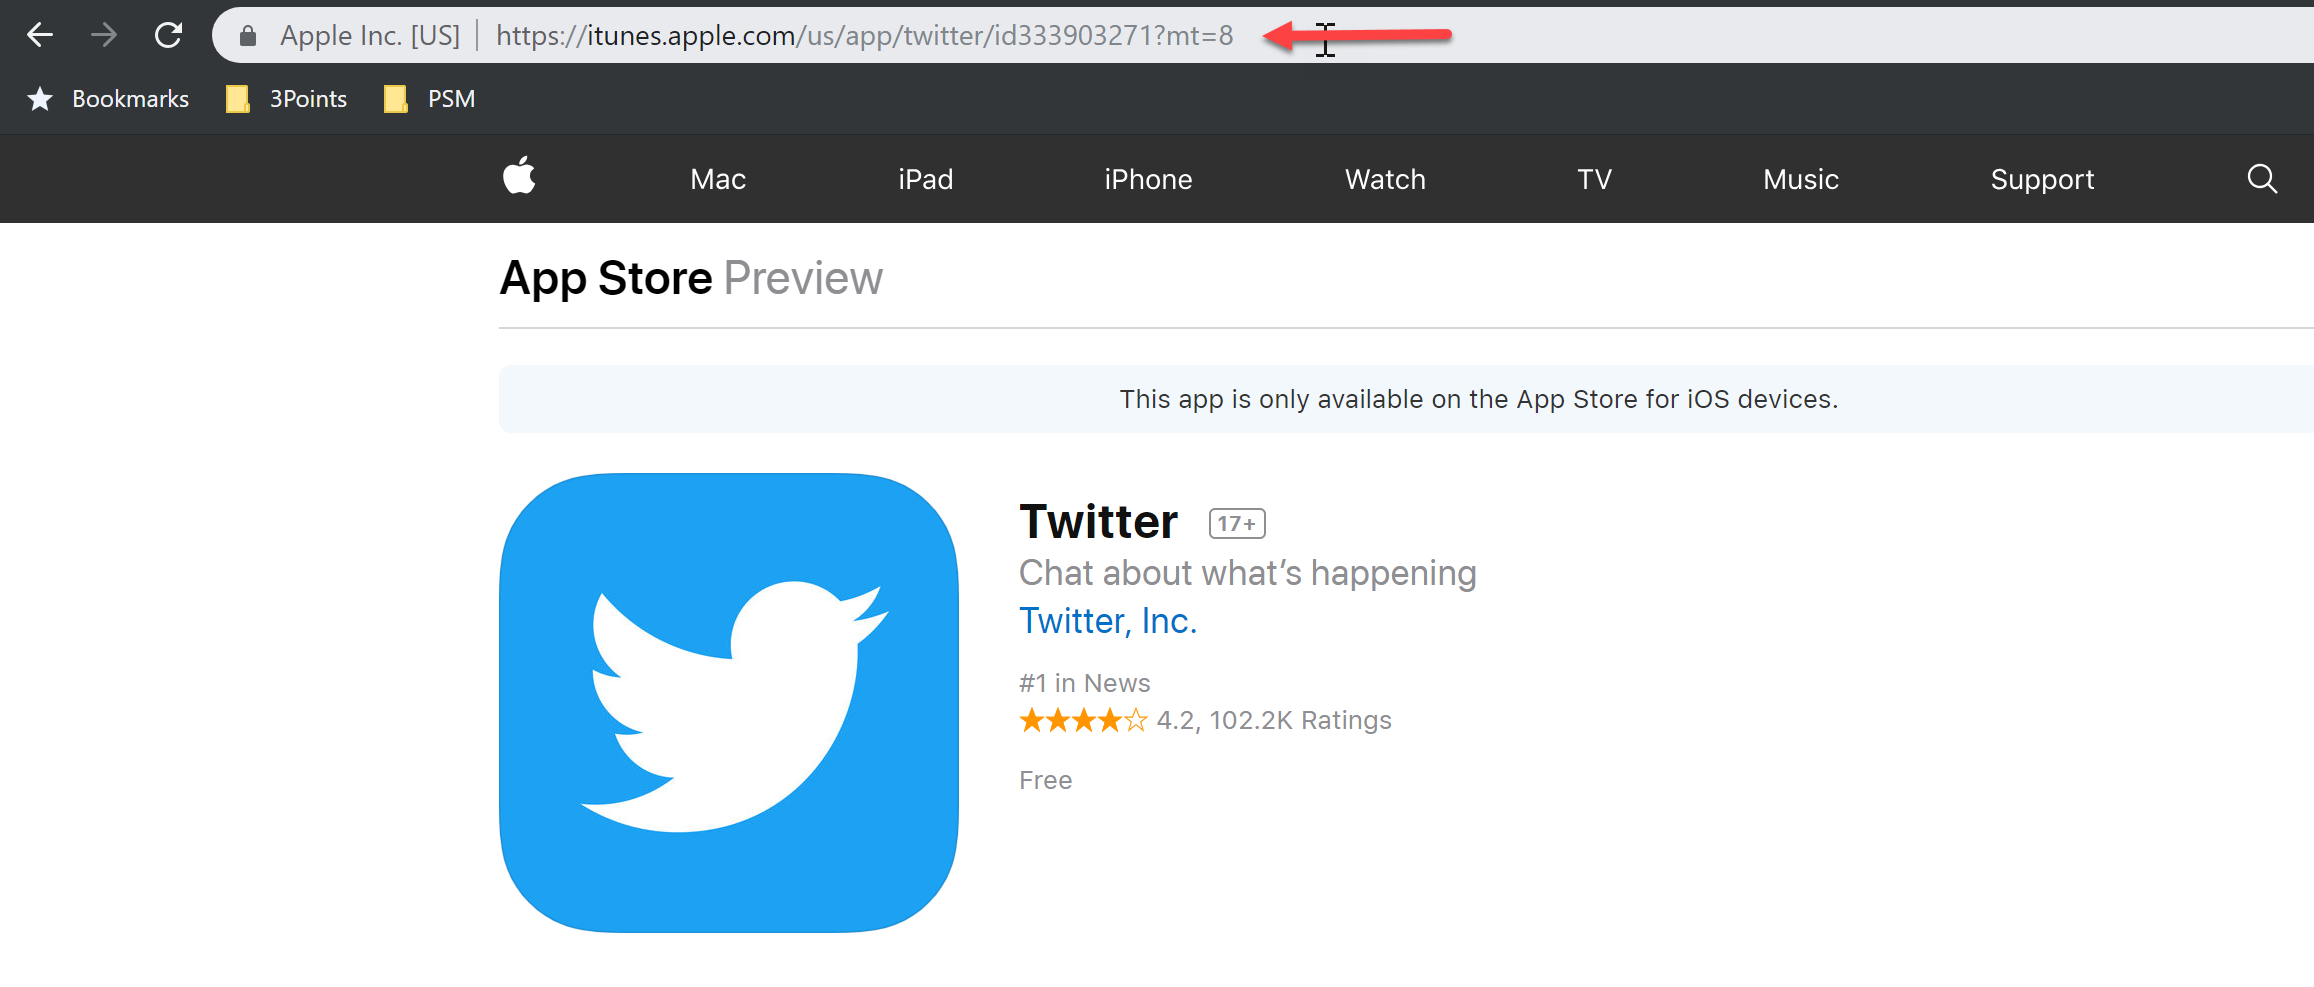
- Back in the Azure Portal, past the link and then click “Add”
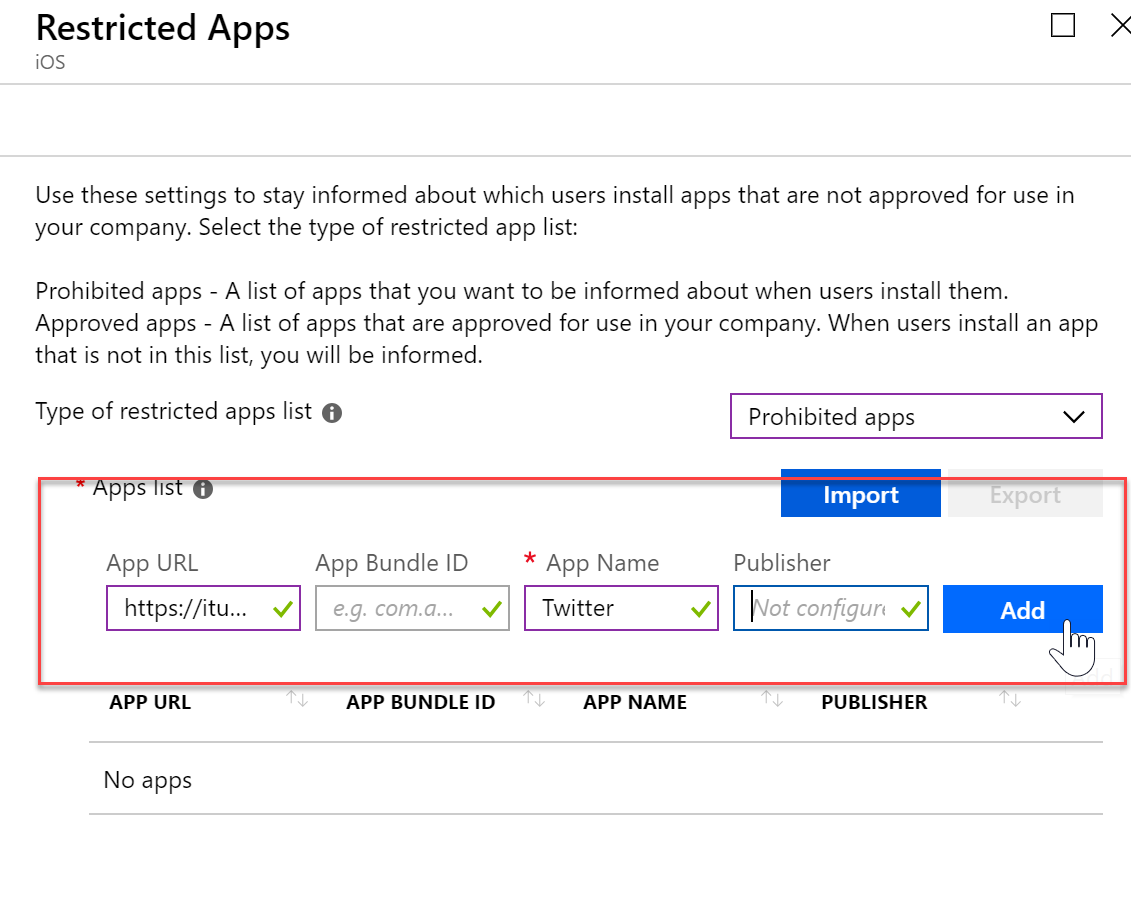
- When you have finished your restricted apps list, click OK at the bottom and then save your profile / policy.

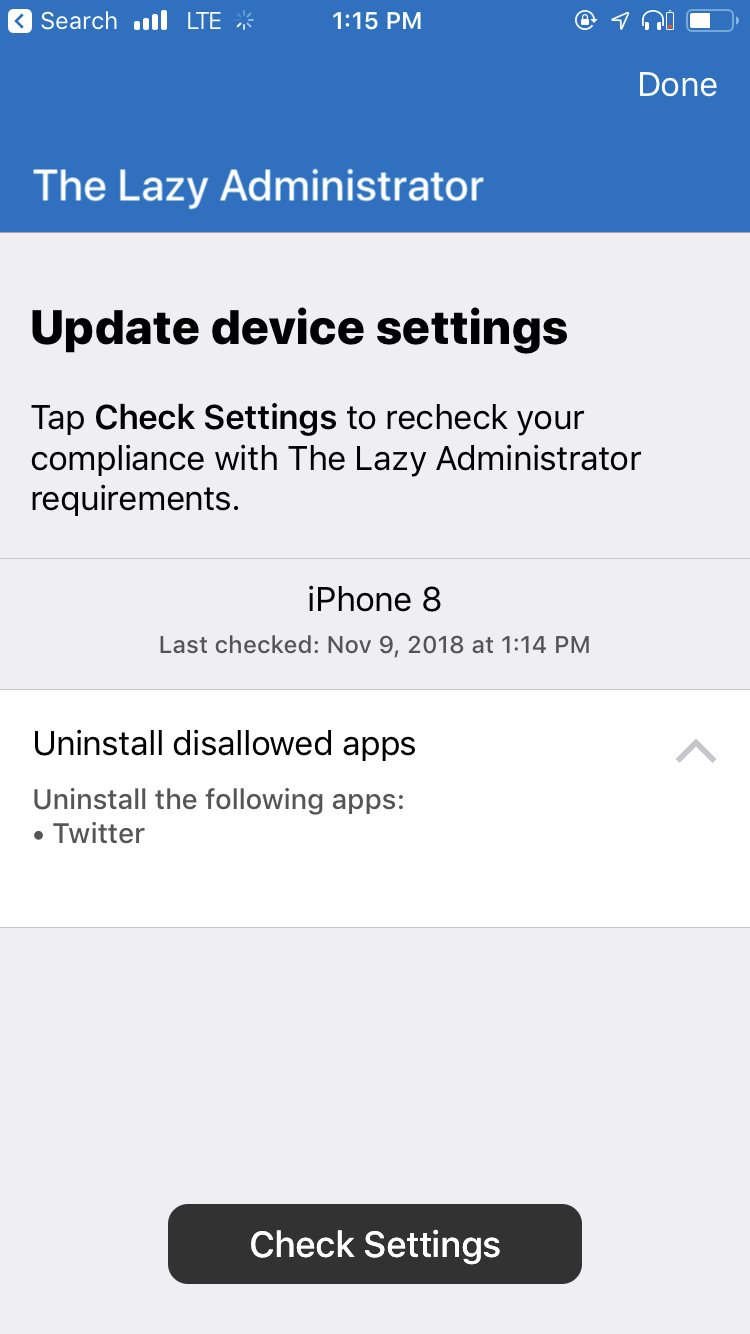
- The company portal will display a message that I must uninstall the Twitter application since it is now a disallowed application.
Configure Email Profiles
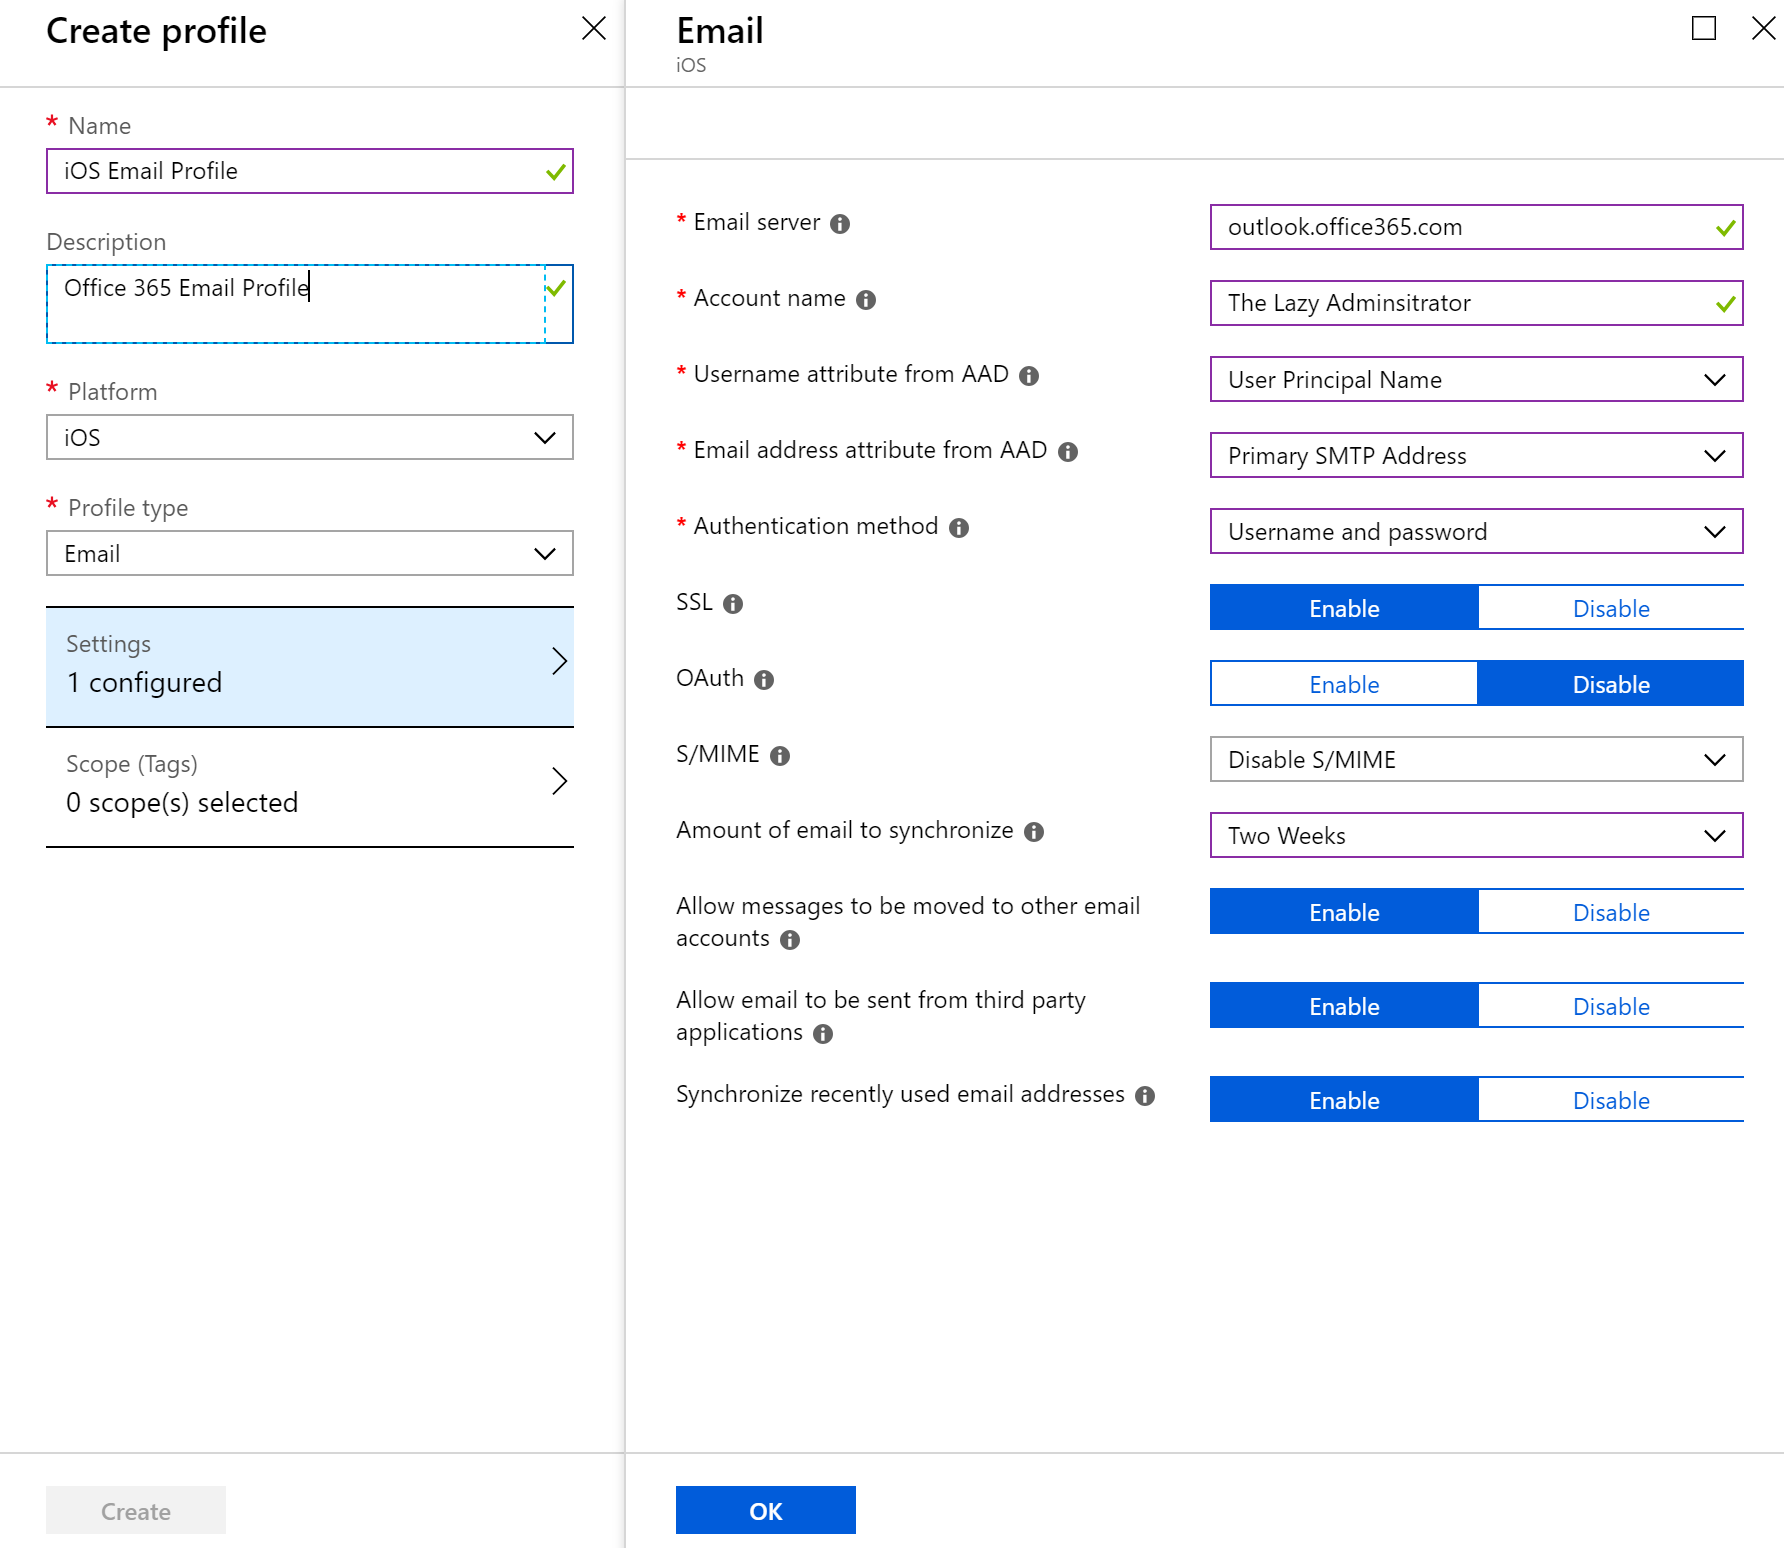
- Expand the Intune blade and then select “Device Configuration”, “Profiles” and then click “Create Profile” to create a new device configuration profile.
- Give your new profile a name and description. Select the platform that best fits your needs. under profile type select “Email”. In the email blade configure the email profile and then press OK and then Create to create the profile.
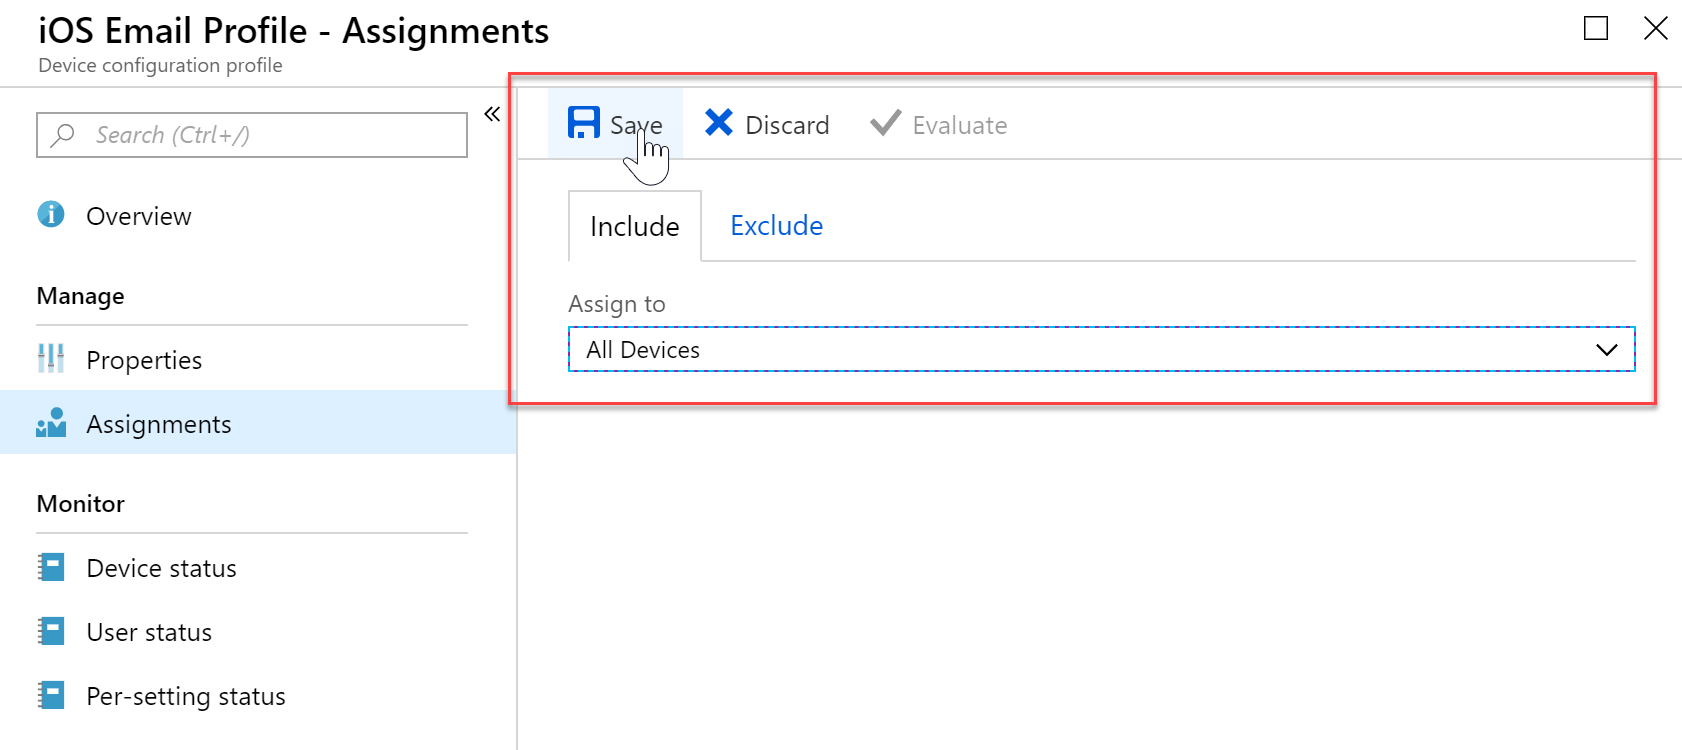
- Click Assignments to assign your profile to a group or all devices.
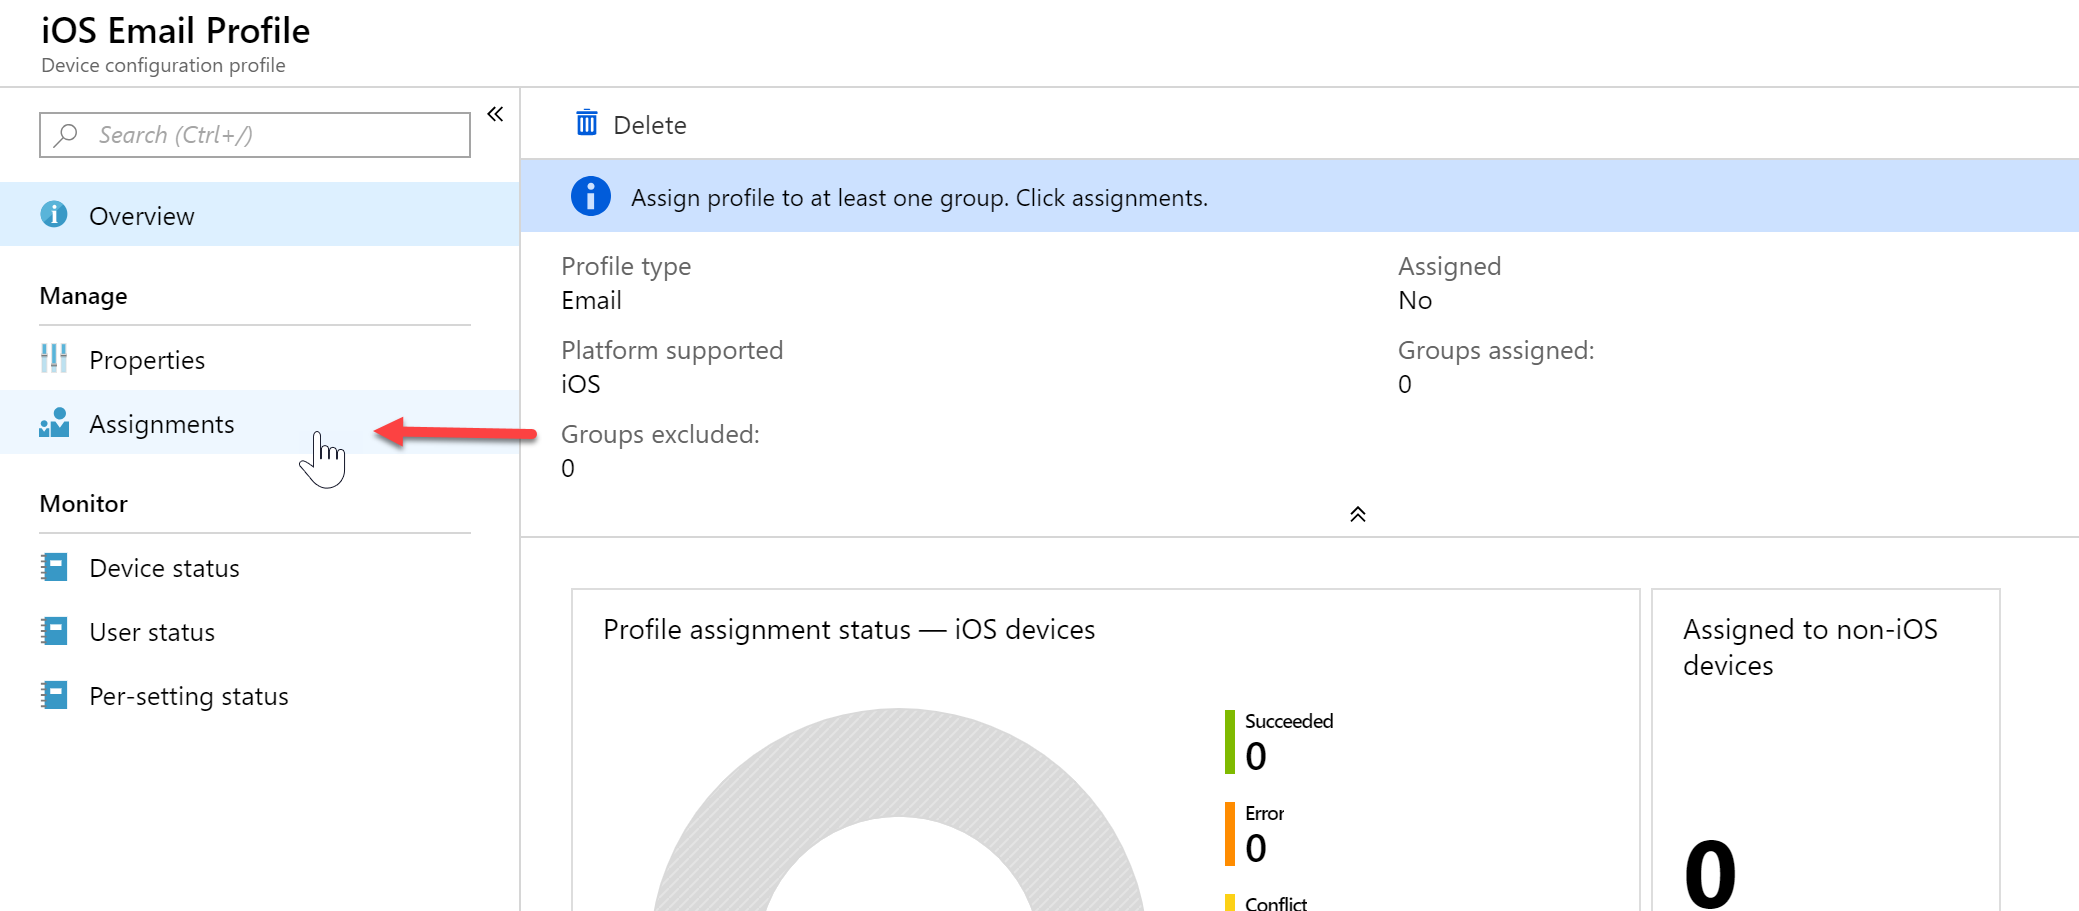
- In my example, I am applying it to all devices. This will apply to all iOS devices. If there are other devices, such as Android, it will just list as not applicable.
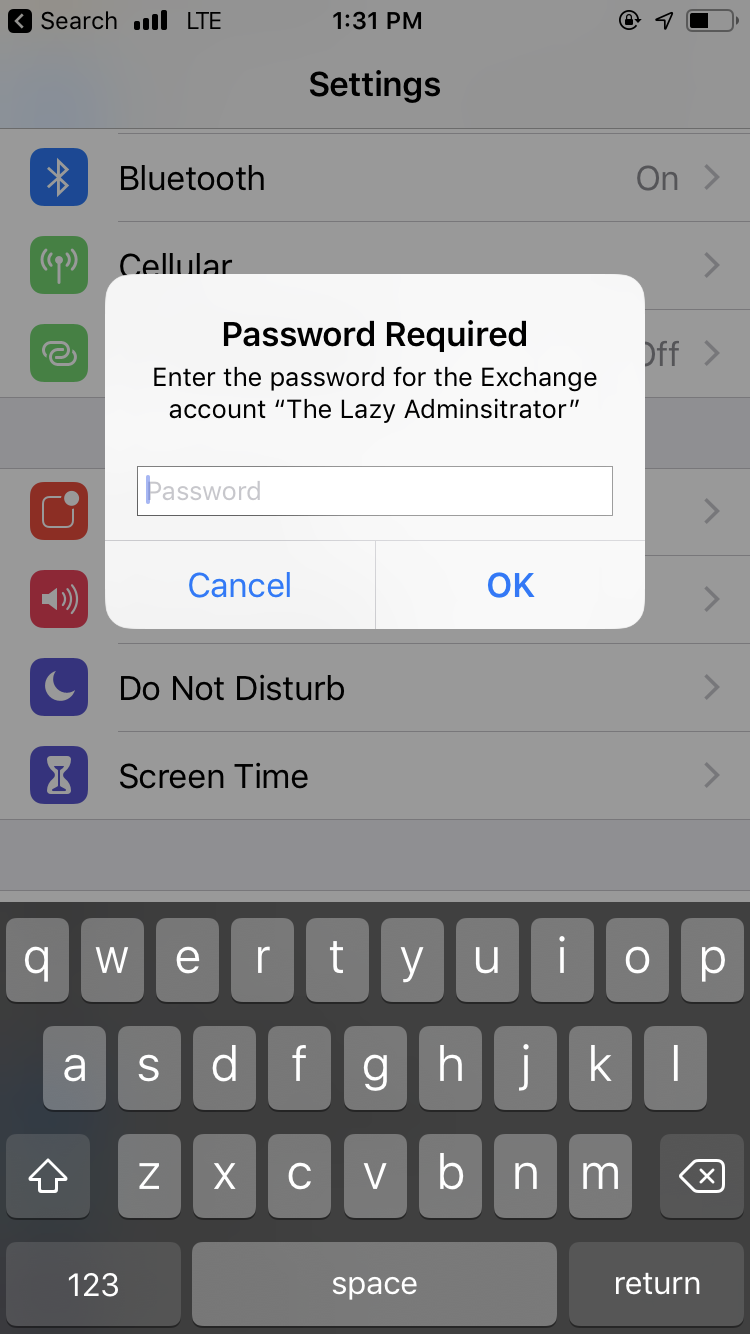
- Back on my iOS device it will automatically add the account. On an iOS device the account is in Settings > Password and Accounts. When I open the settings application it immediately asks me for my password
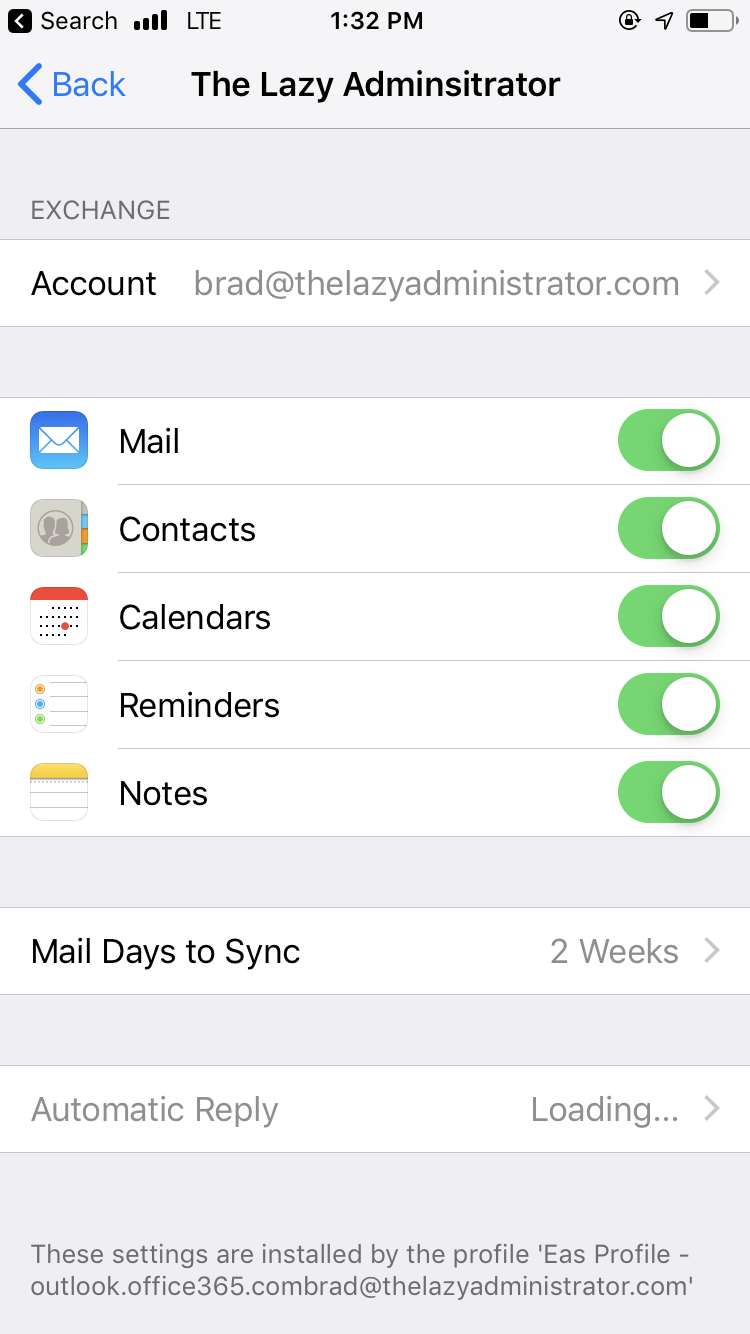
- When I go to Passwords and Accounts I can see that the account was automatically added
Modify iOS Dock
In this example I will be showing you how Intune can modify users home docks. I will be making a profile / policy that will ensure the default Phone application is on the dock.
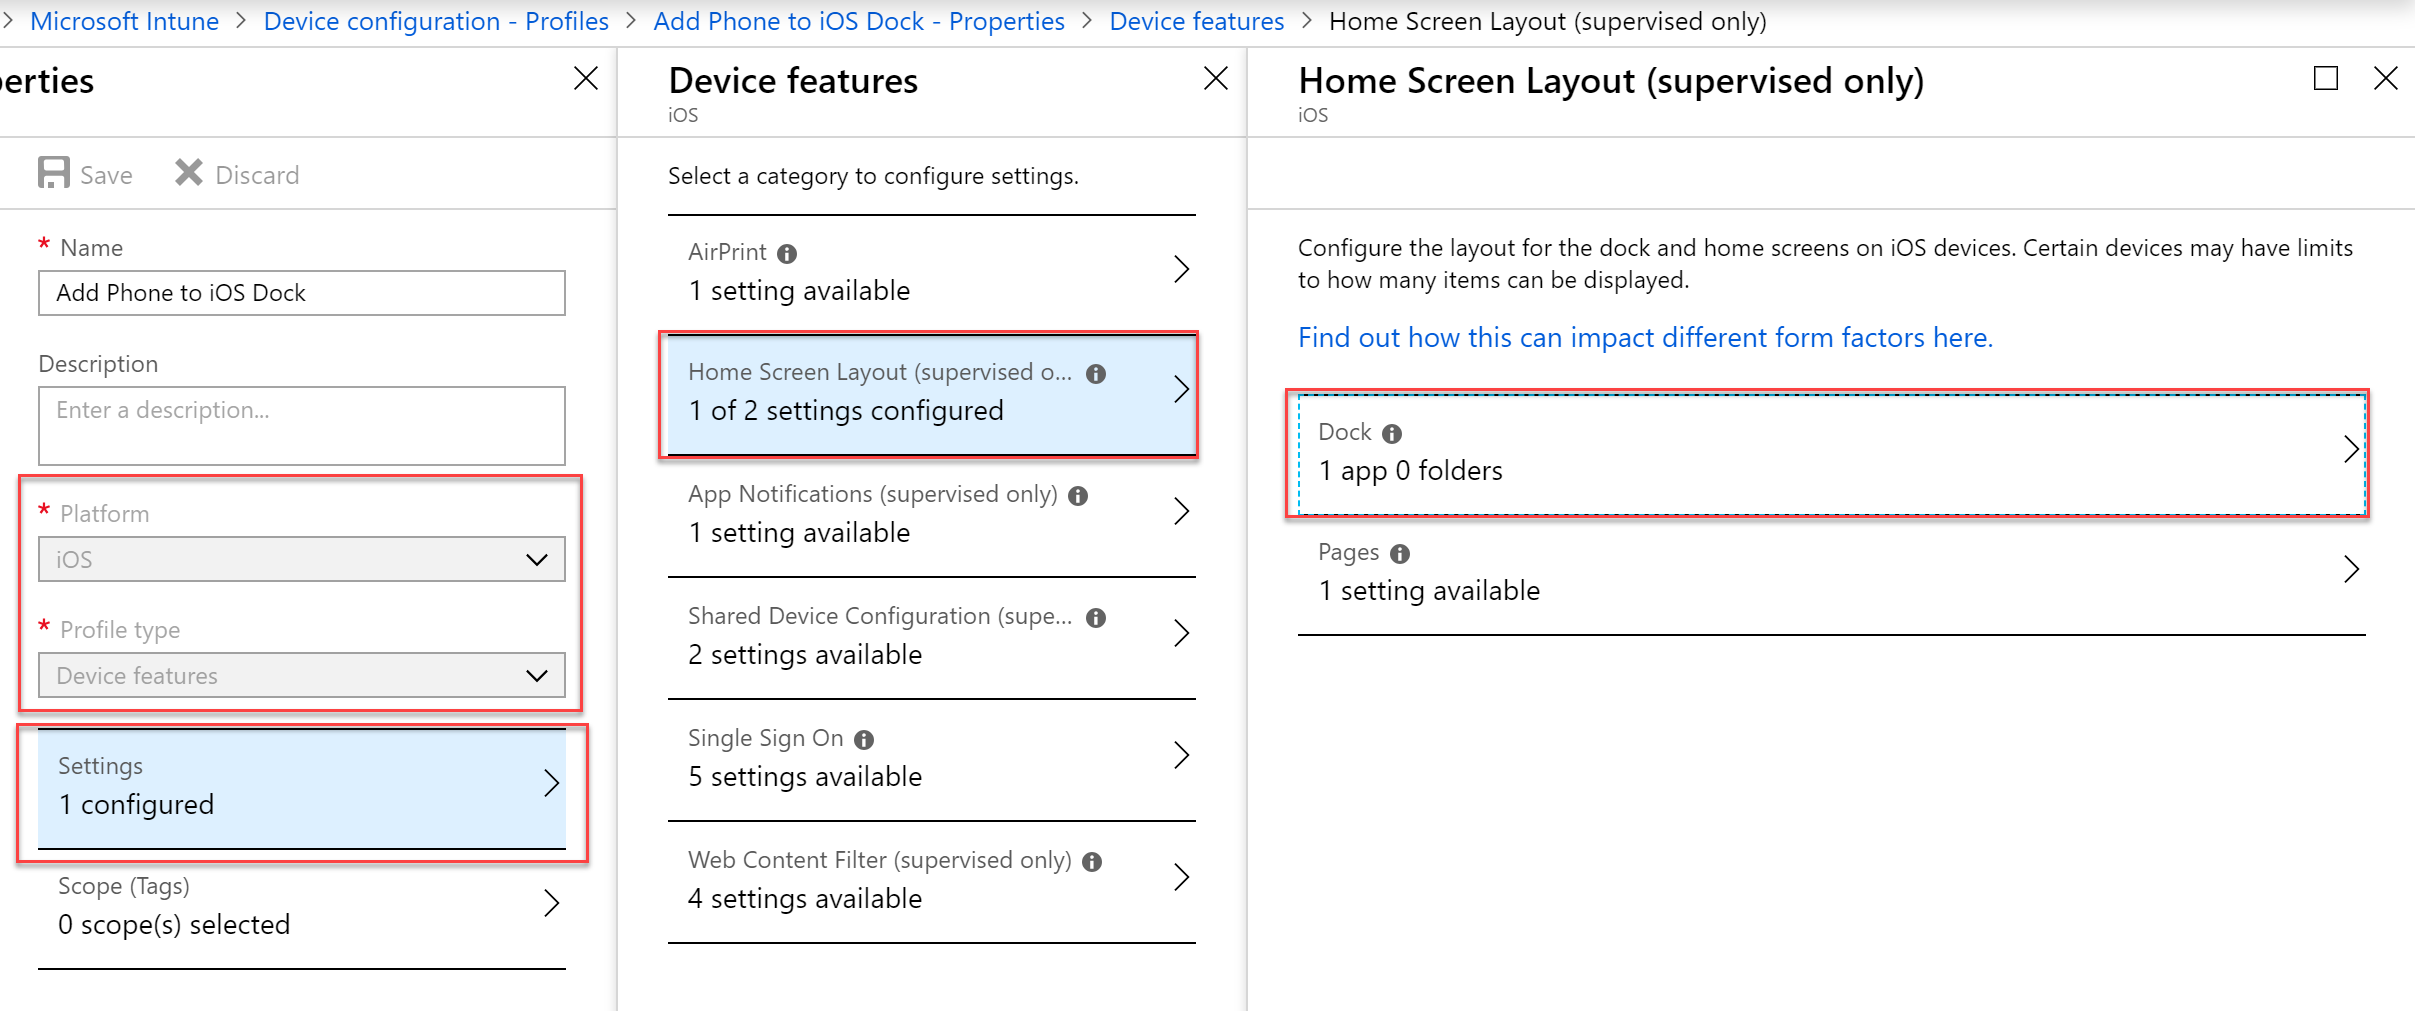
- Expand the Intune blade and then select “Device Configuration”, “Profiles” and then click “Create Profile” to create a new device configuration profile.
- The platform must be iOS and the Profile type is going to be “Device Features”. In the device features blade select Home Screen Layout and select Dock.
- When adding a new application you will need to know the App Bundle ID. If the application is not a default iOS application you can follow these steps to obtain the bundle ID.
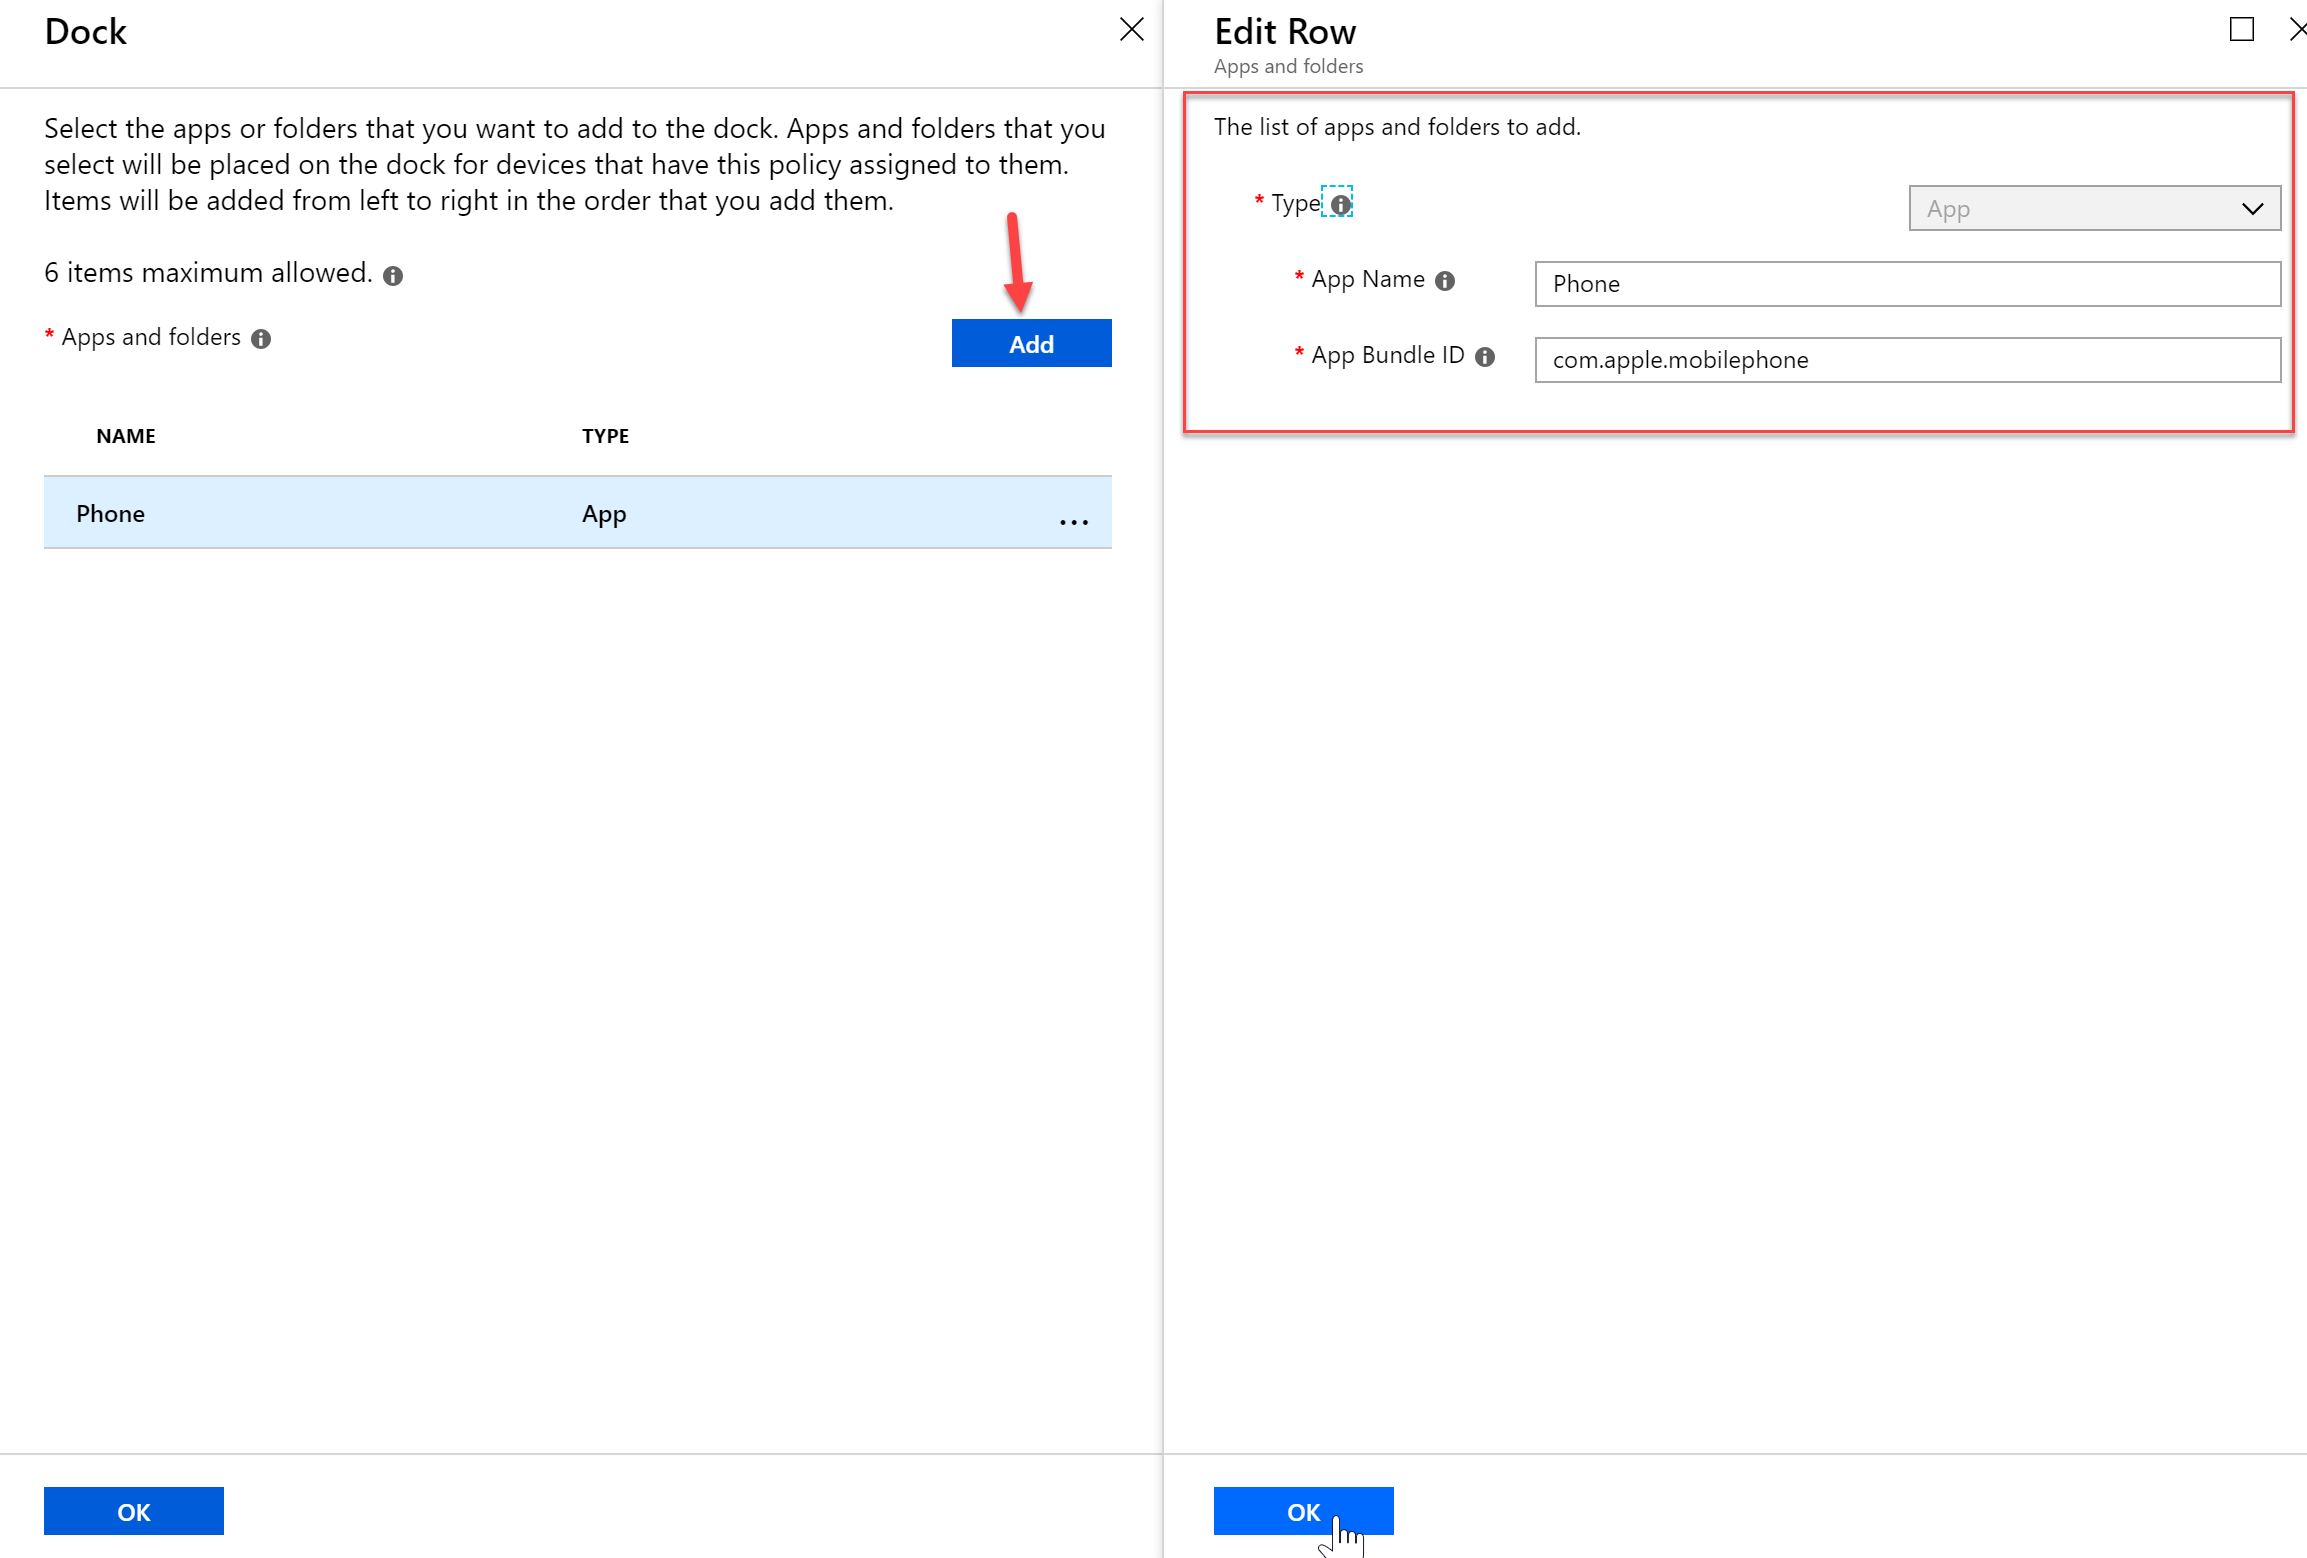
- The application will automatically be placed on the dock on iOS devices once the profile gets pushed to the device.
Software Update Policies
With Software Update Policies you can control when users can update to the newest iOS, you can restrict it so they cannot download it during business hours, or how long they must wait after it has been released until they can install it. With Windows Devices you can control devices servicing channel (Insider, Semi-Annual, etc), auto updates, maintenance windows, and more.
Windows
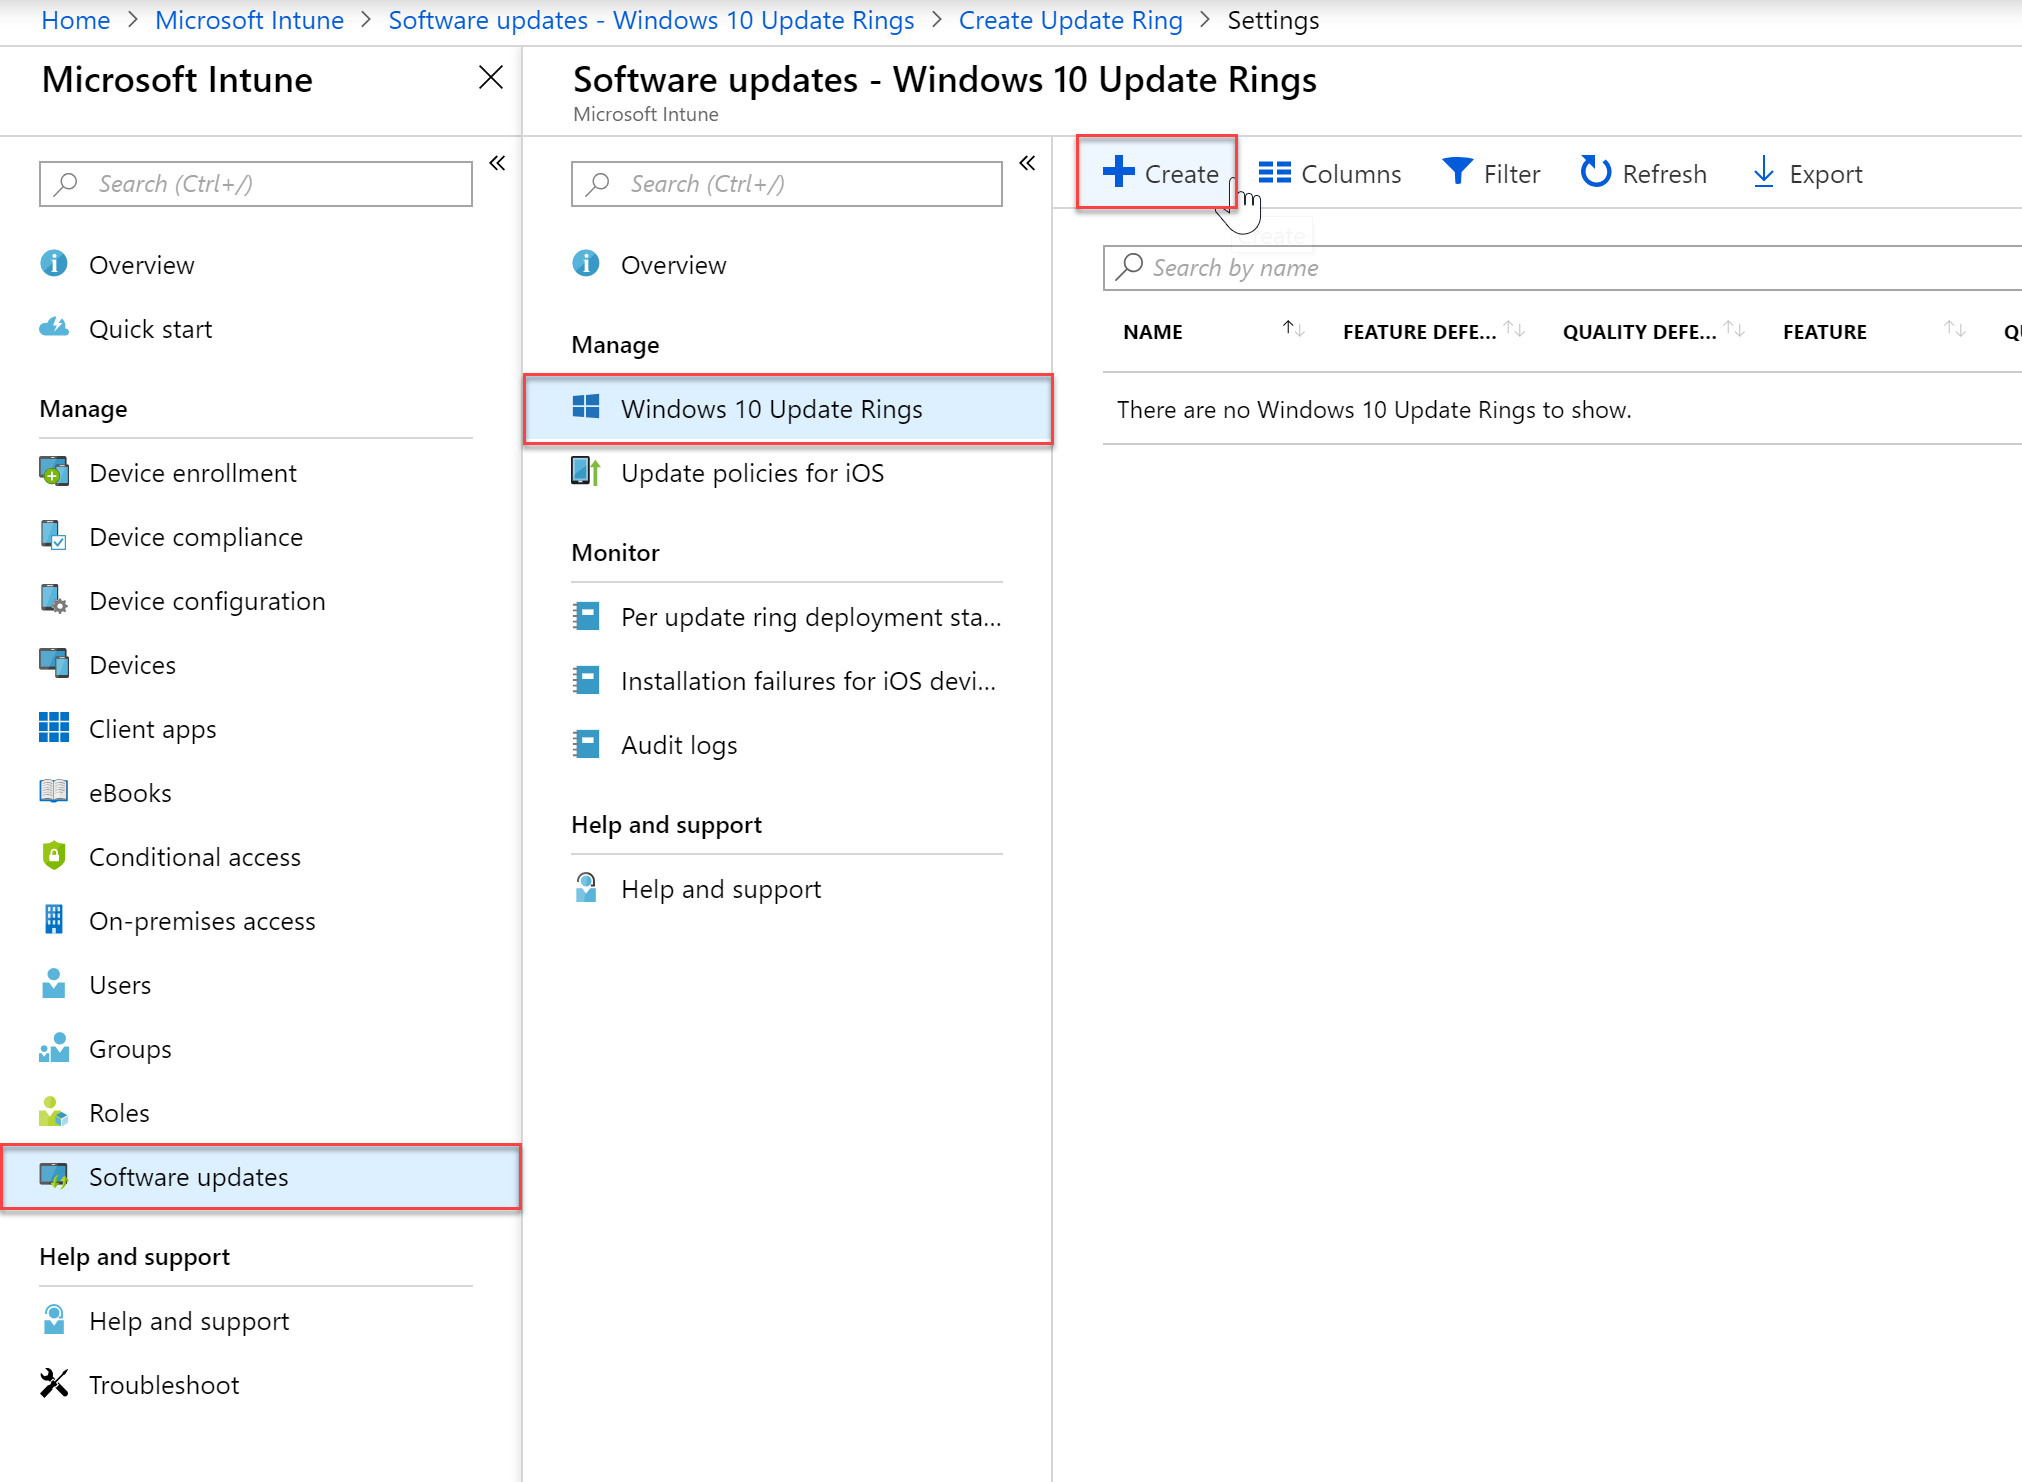
- To create a Windows Software Update policy first select the Intune blade > Software Updates > Windows 10 Update Rings, and then “Create”
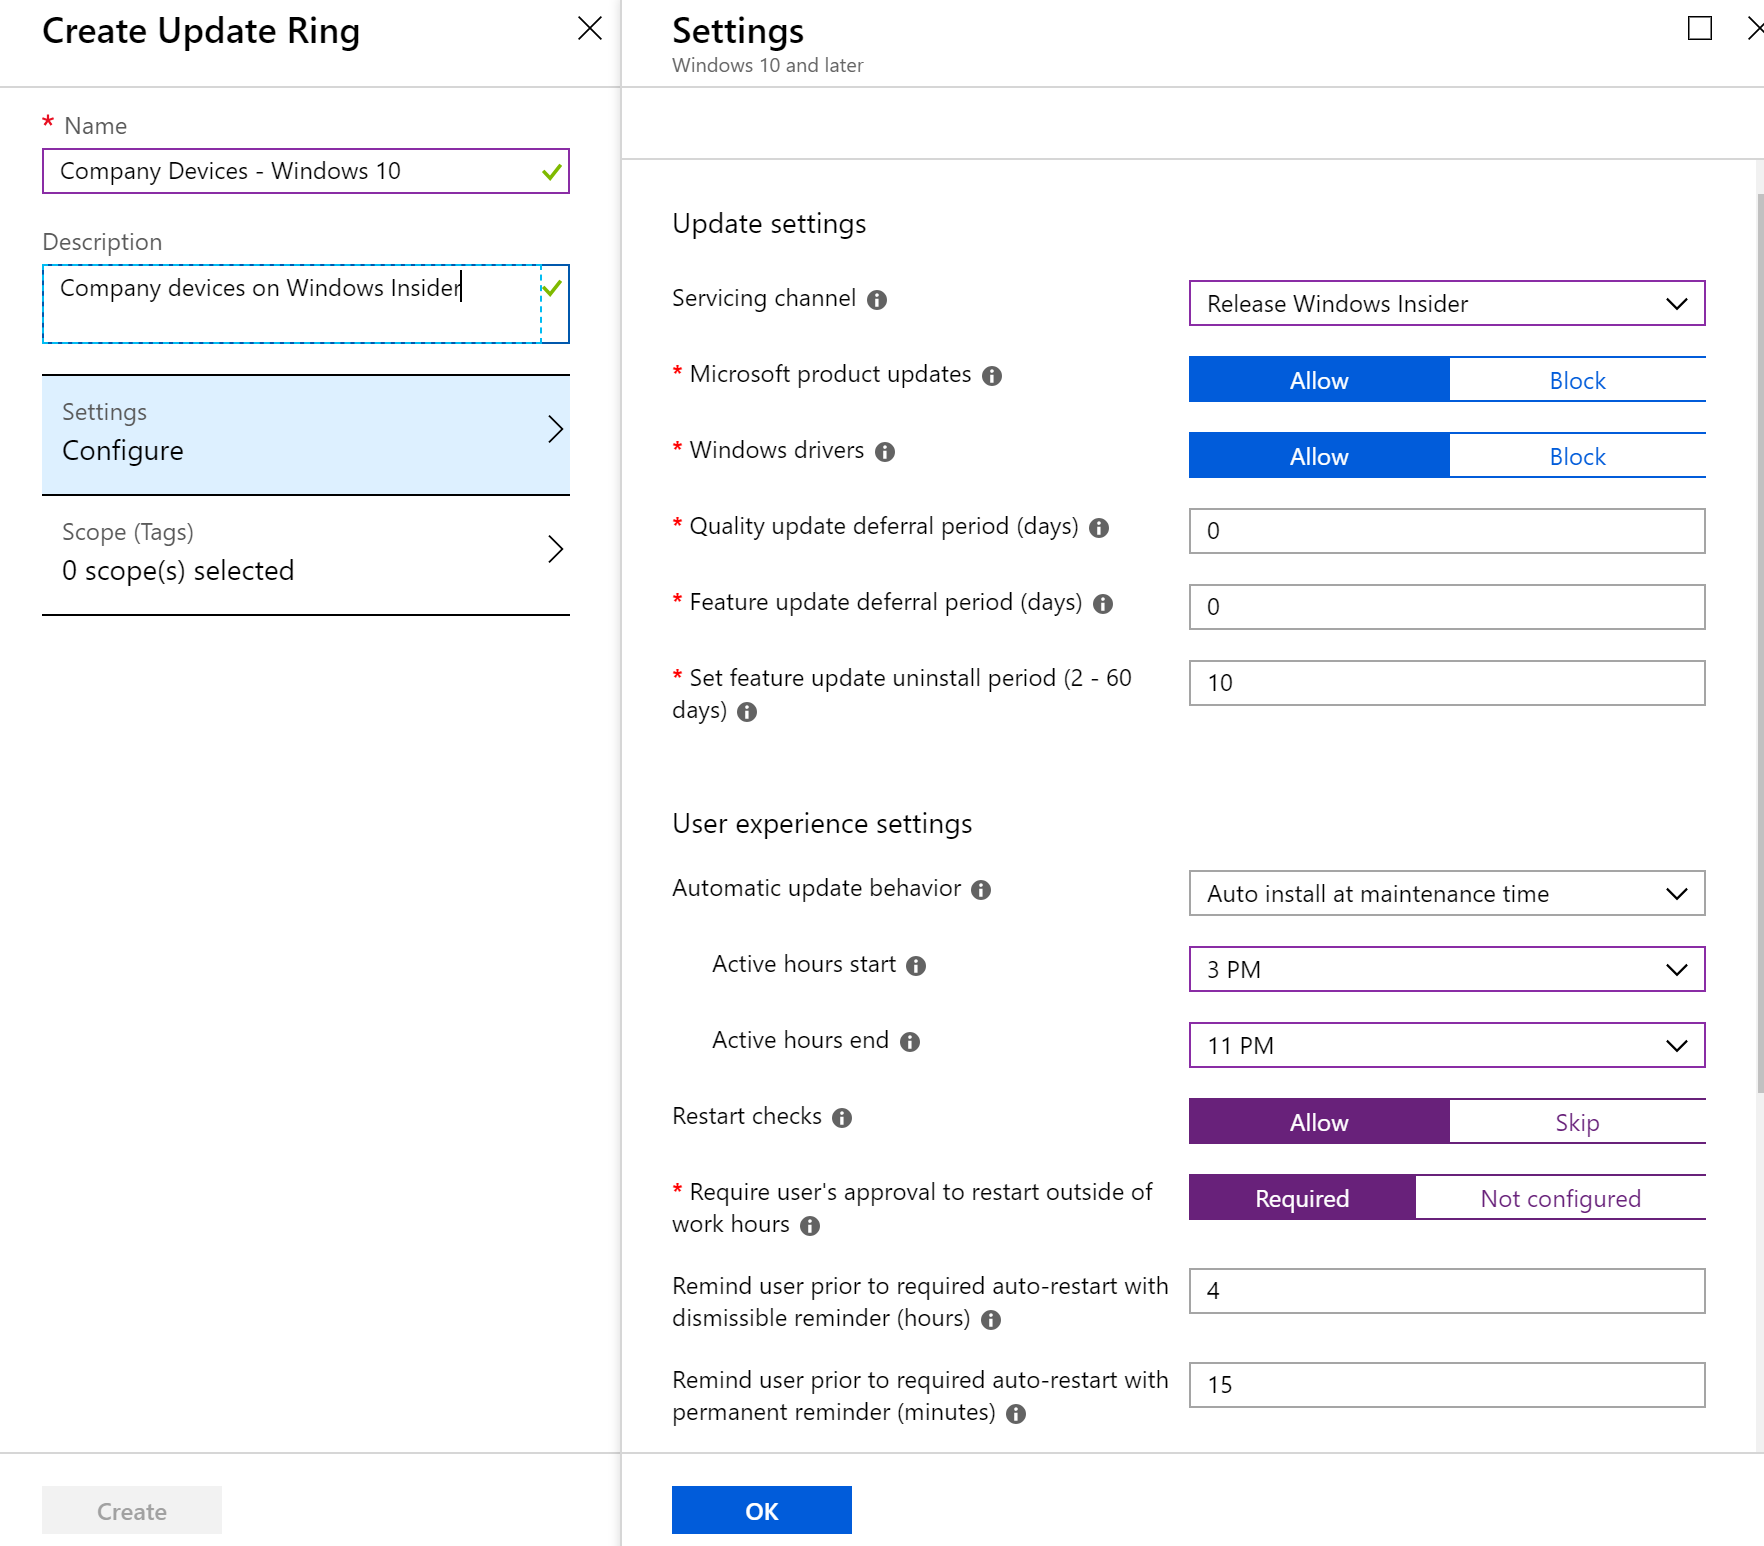
- Give your policy a name and description. In the Settings you can begin configuring the policy settings. Below I am putting my devices on the Windows Insider update ring. They will also get Microsoft product updates, and drivers. You can configure a deferral period which may be recommended for a production environment. In the User Experience Settings administrators can configure maintenance hours, in my environment I am auto installing the updates anywhere from 3PM to 11PM.
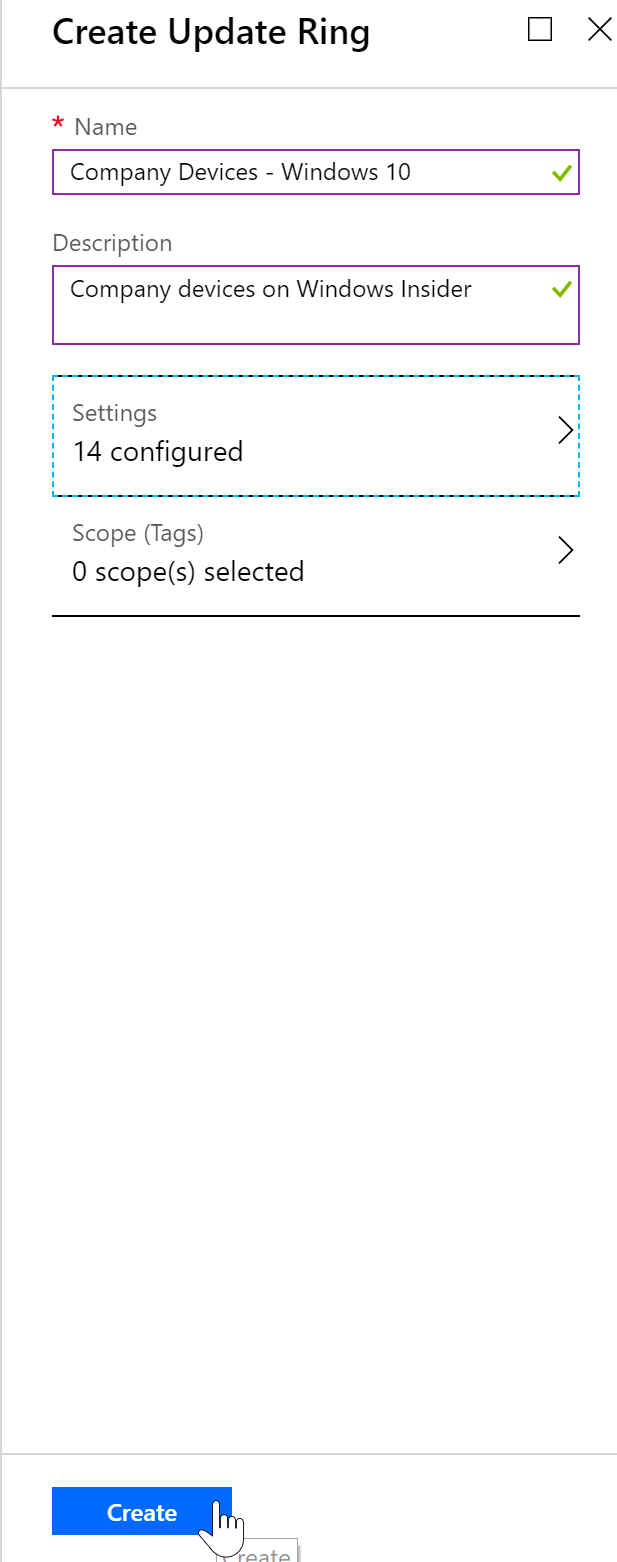
- Once you have the policy settings configured to your needs you can add scope tags and then press “Create” to create the policy.
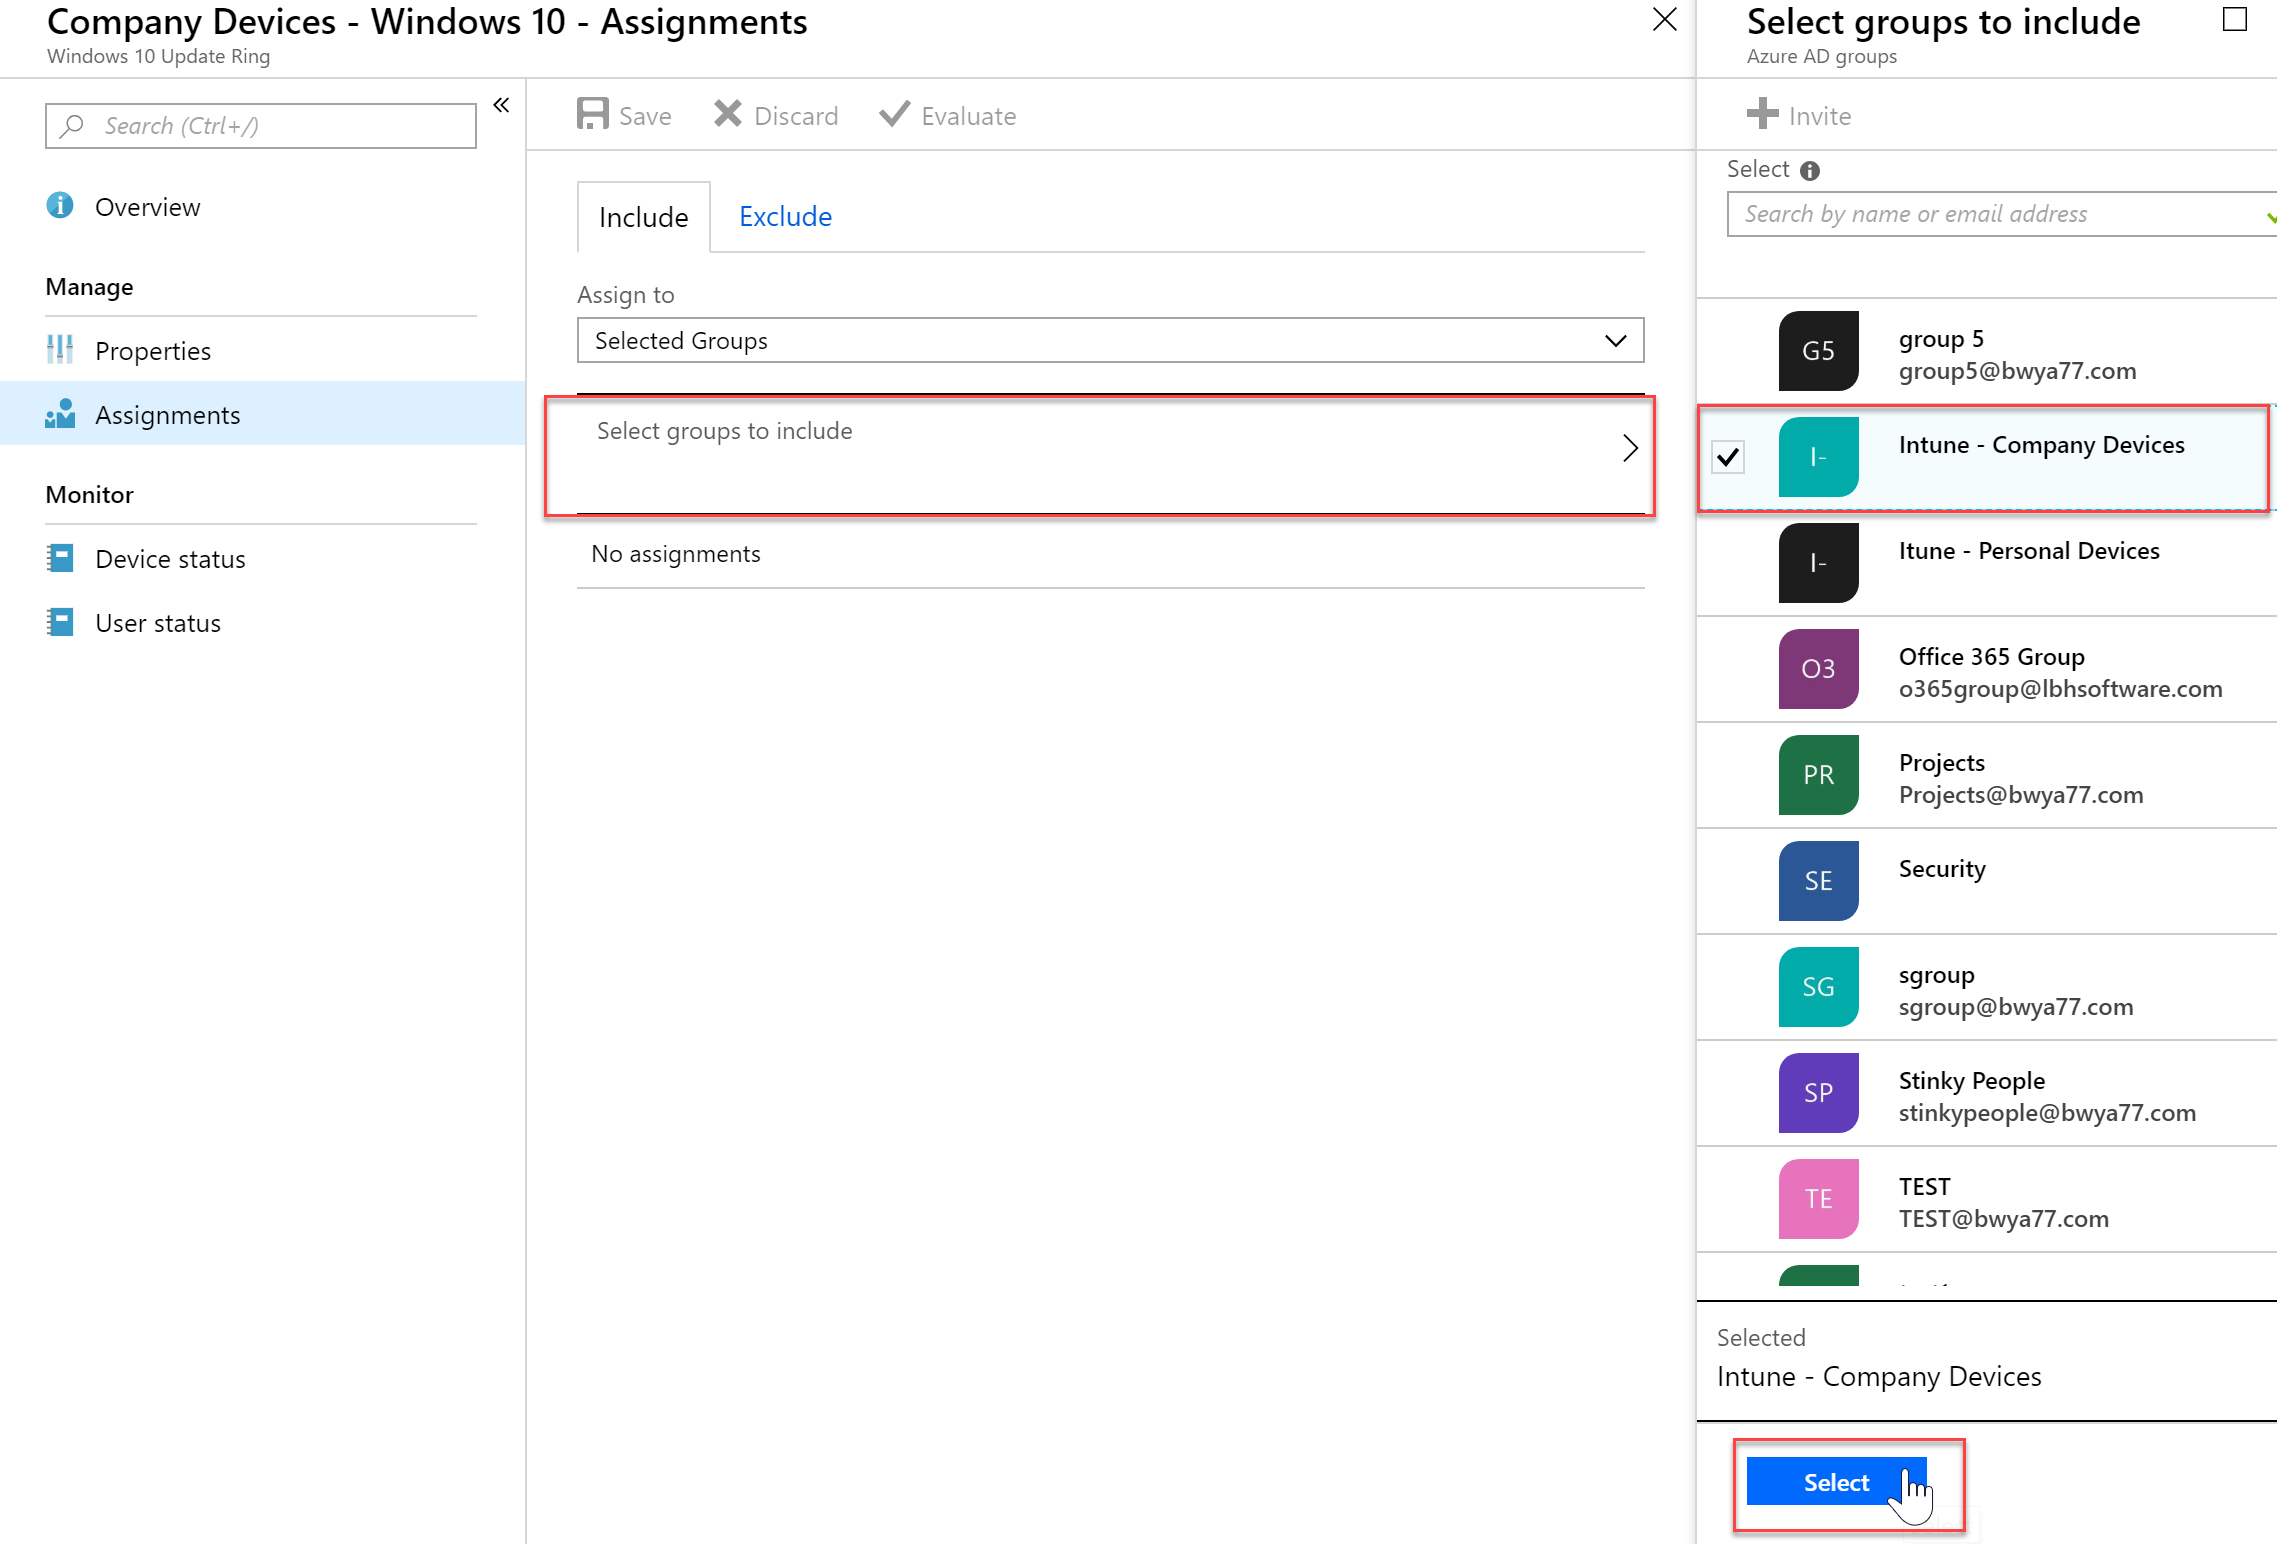
- Once the policy has been created, click “Assignments” to assign the policy to devices or groups.

- You can apply to all devices using the “Assign to” drop down, or in my case I will apply it to one of my dynamic groups I created earlier by click the “Select groups to include” and then selecting my “Intune – Company Devices” group.
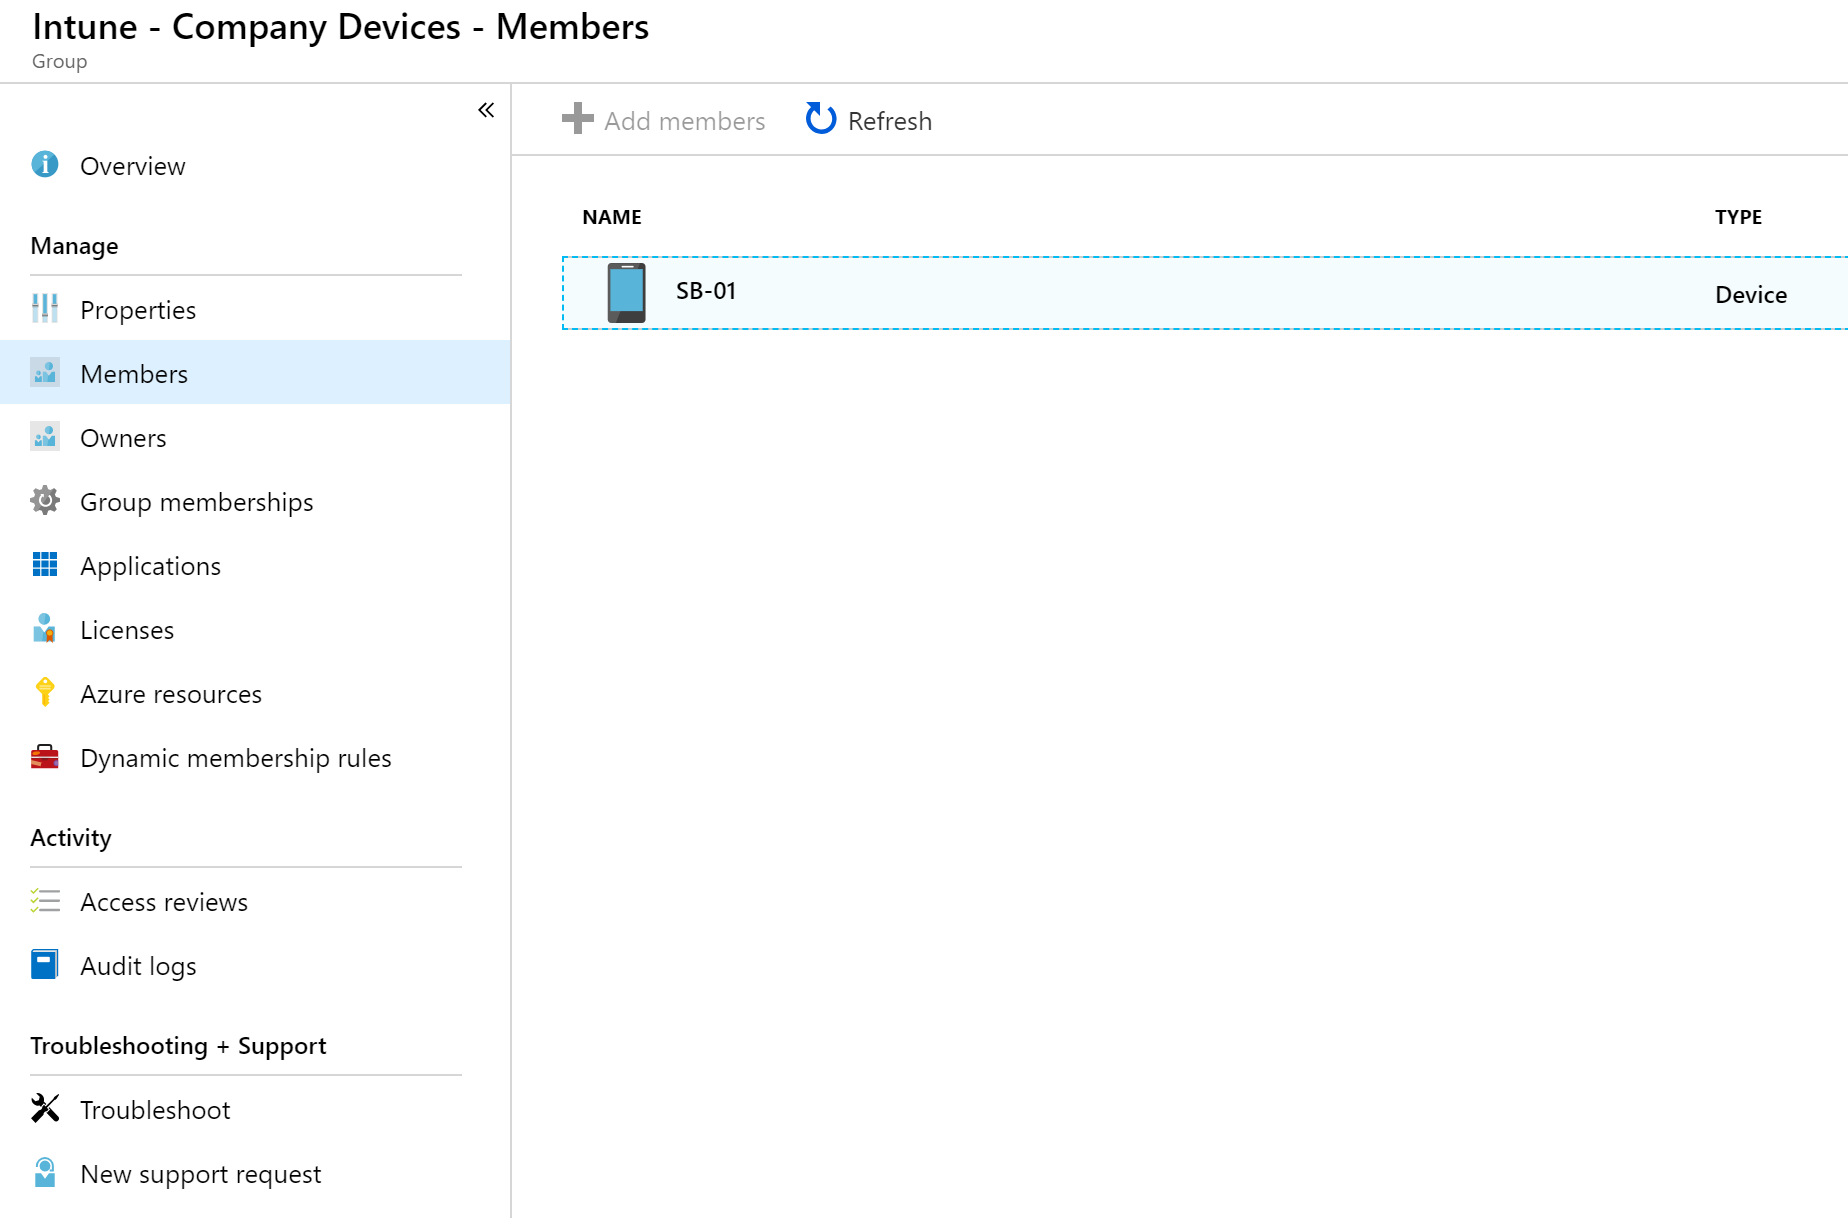
- In my Group settings I can see that my windows machine SB-01 is a member of that group so I can be sure that the policy will be applied to that machine.
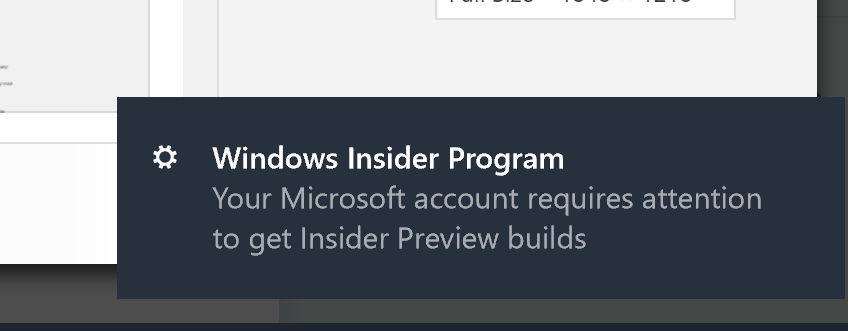
- A few minutes later, that machine gets a toast notification regarding my build change
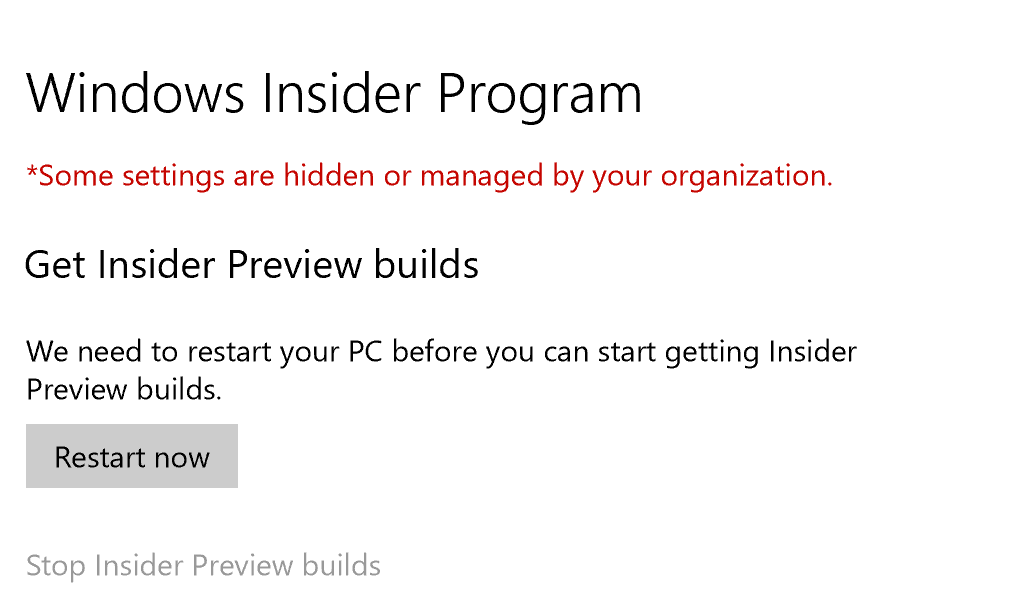
- In the Settings application on the device I can see that my computer is pending a reboot. After the reboot I will be on the correct build.
iOS
- To create a Windows Software Update policy first select the Intune blade > Software Updates > Update Policies for iOS, and then “Create”

- Give you policy a name and a description and then configure your settings. In my example I am disabling users from updating to the newest iOS during the work week and during work hours. iOS updates are also deferred for 2 weeks.
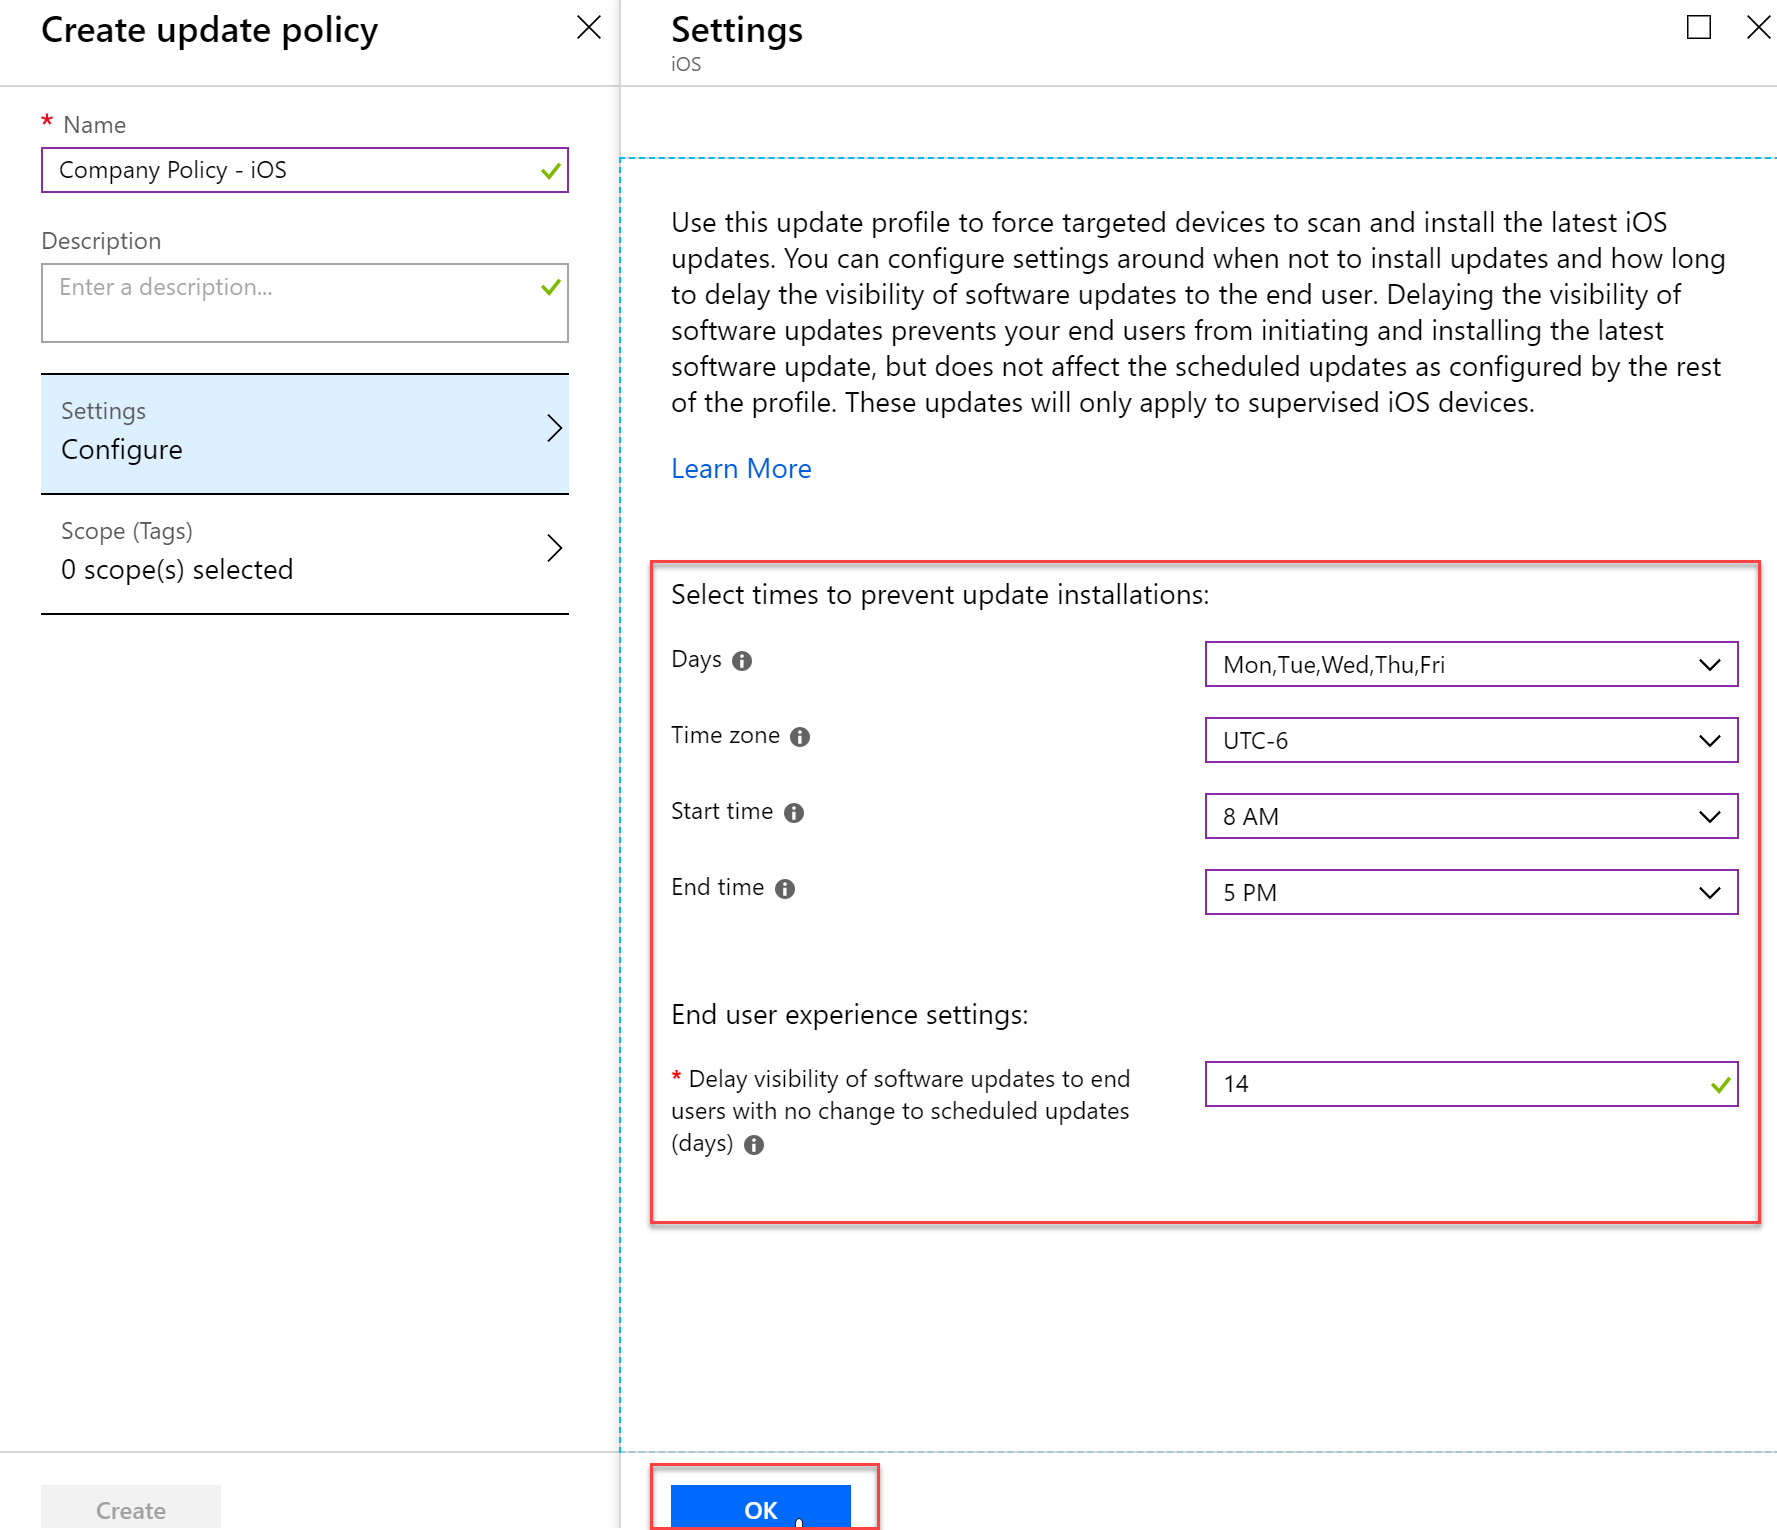
- Once you have your policy set to your liking, press the Create bottom of the blade
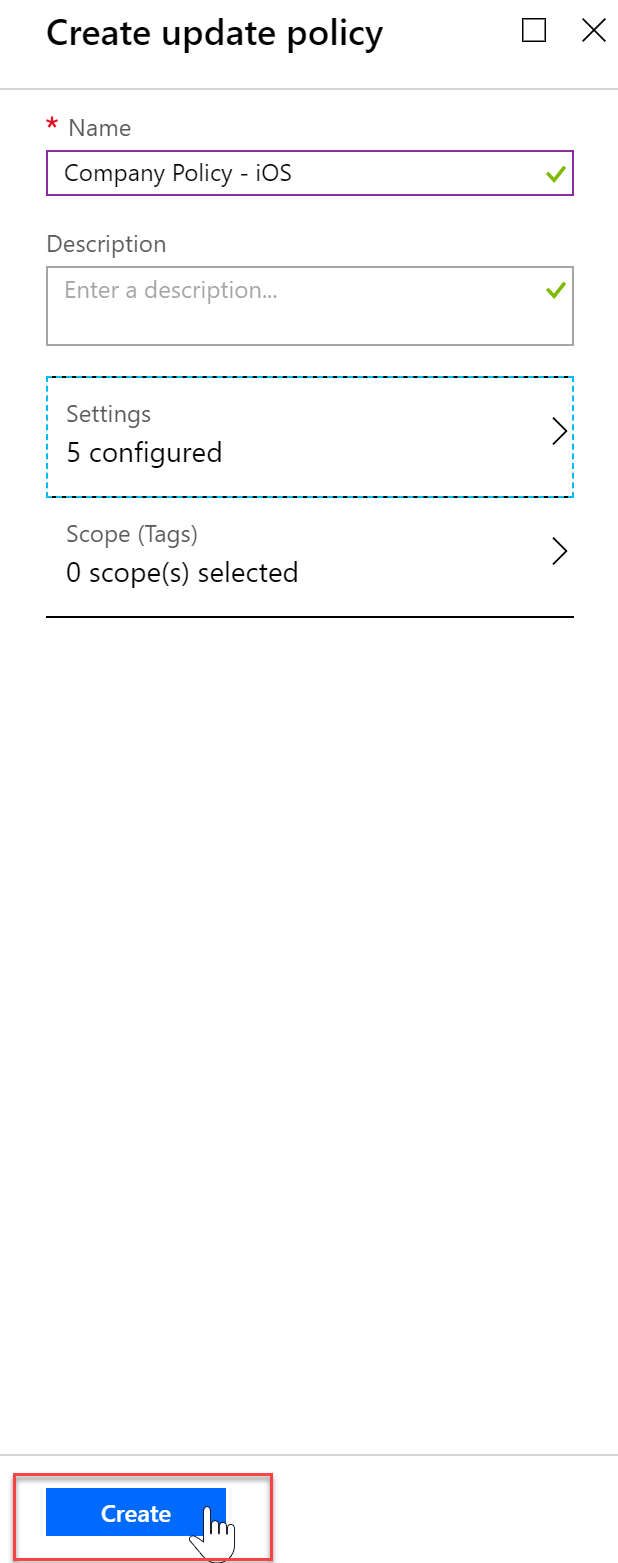
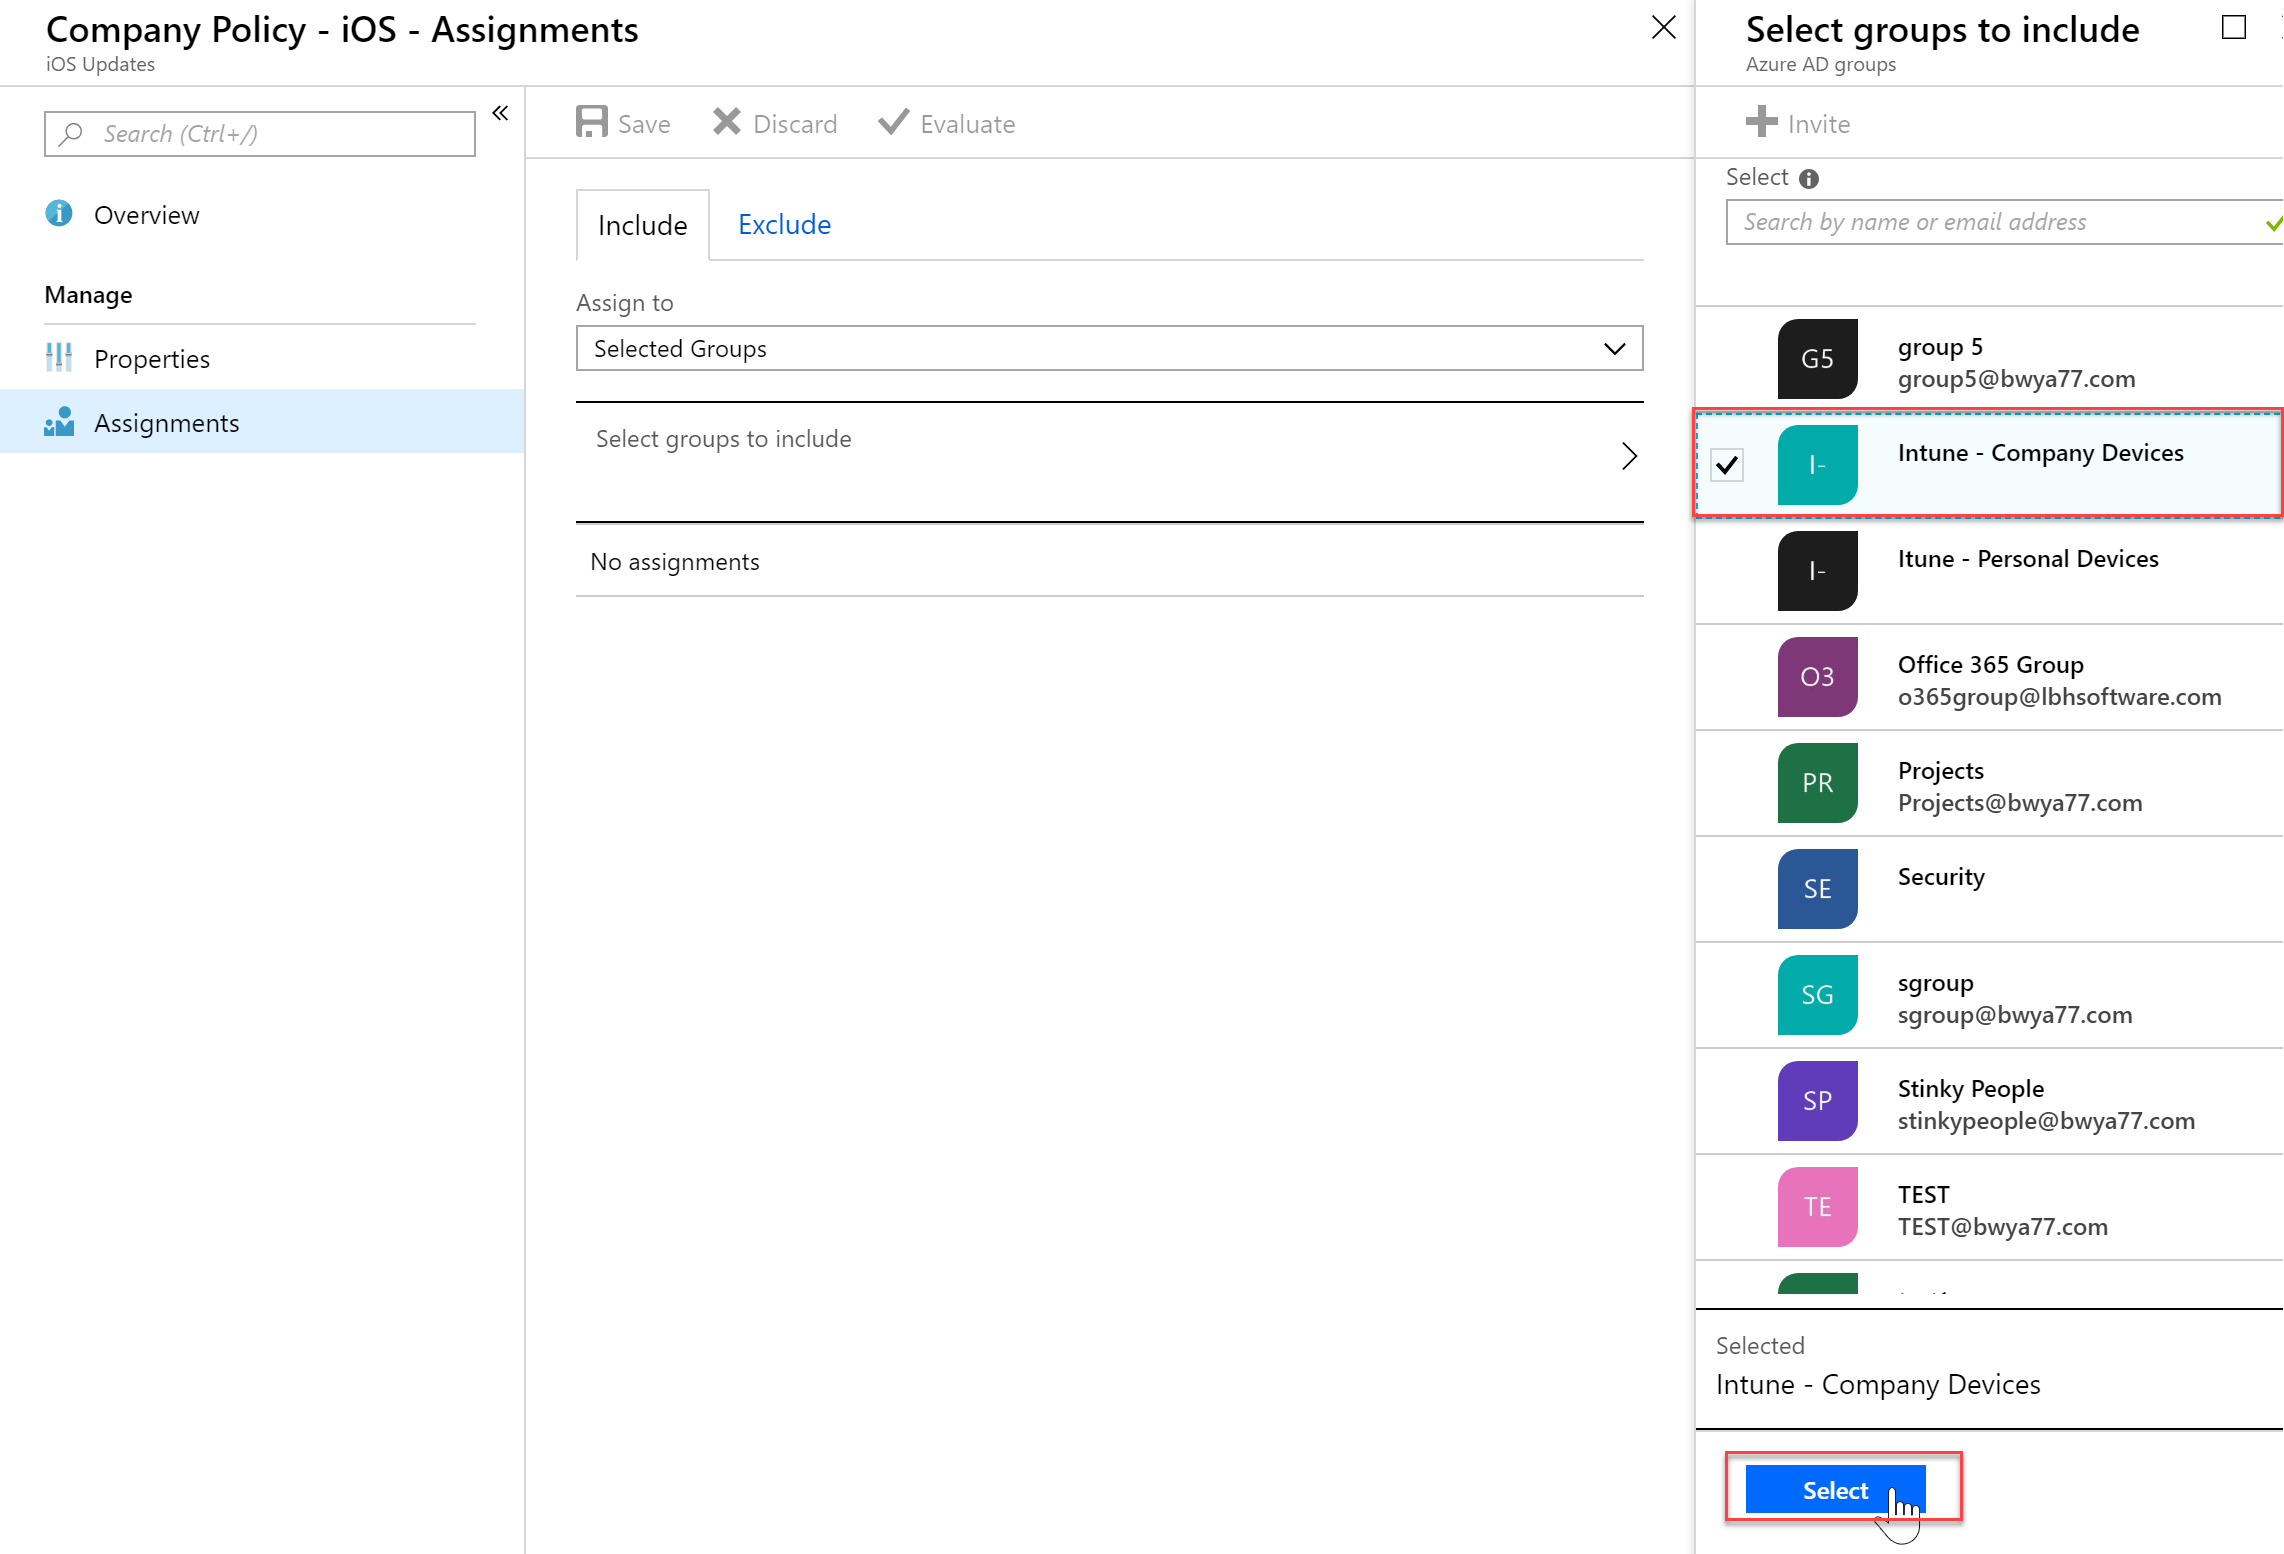
- Click “Assignment” to assign your policy to groups or devices.
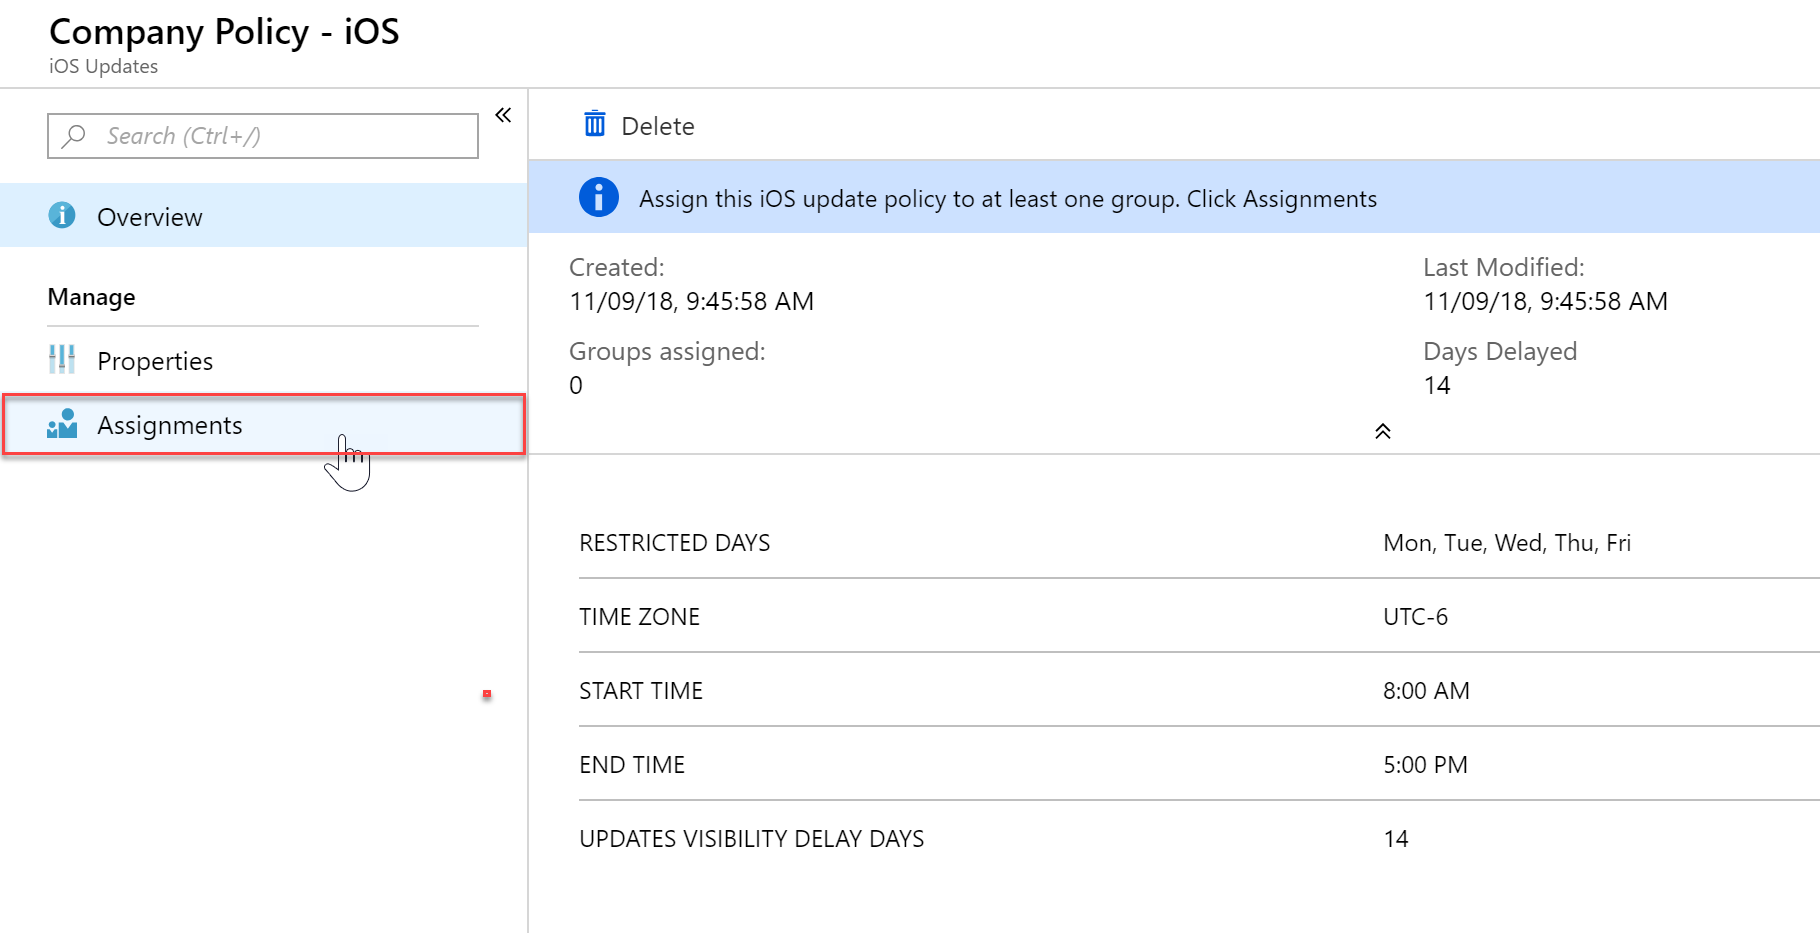
- In my example I will apply this policy to Company Devices only.
- You will now see your newly created policy

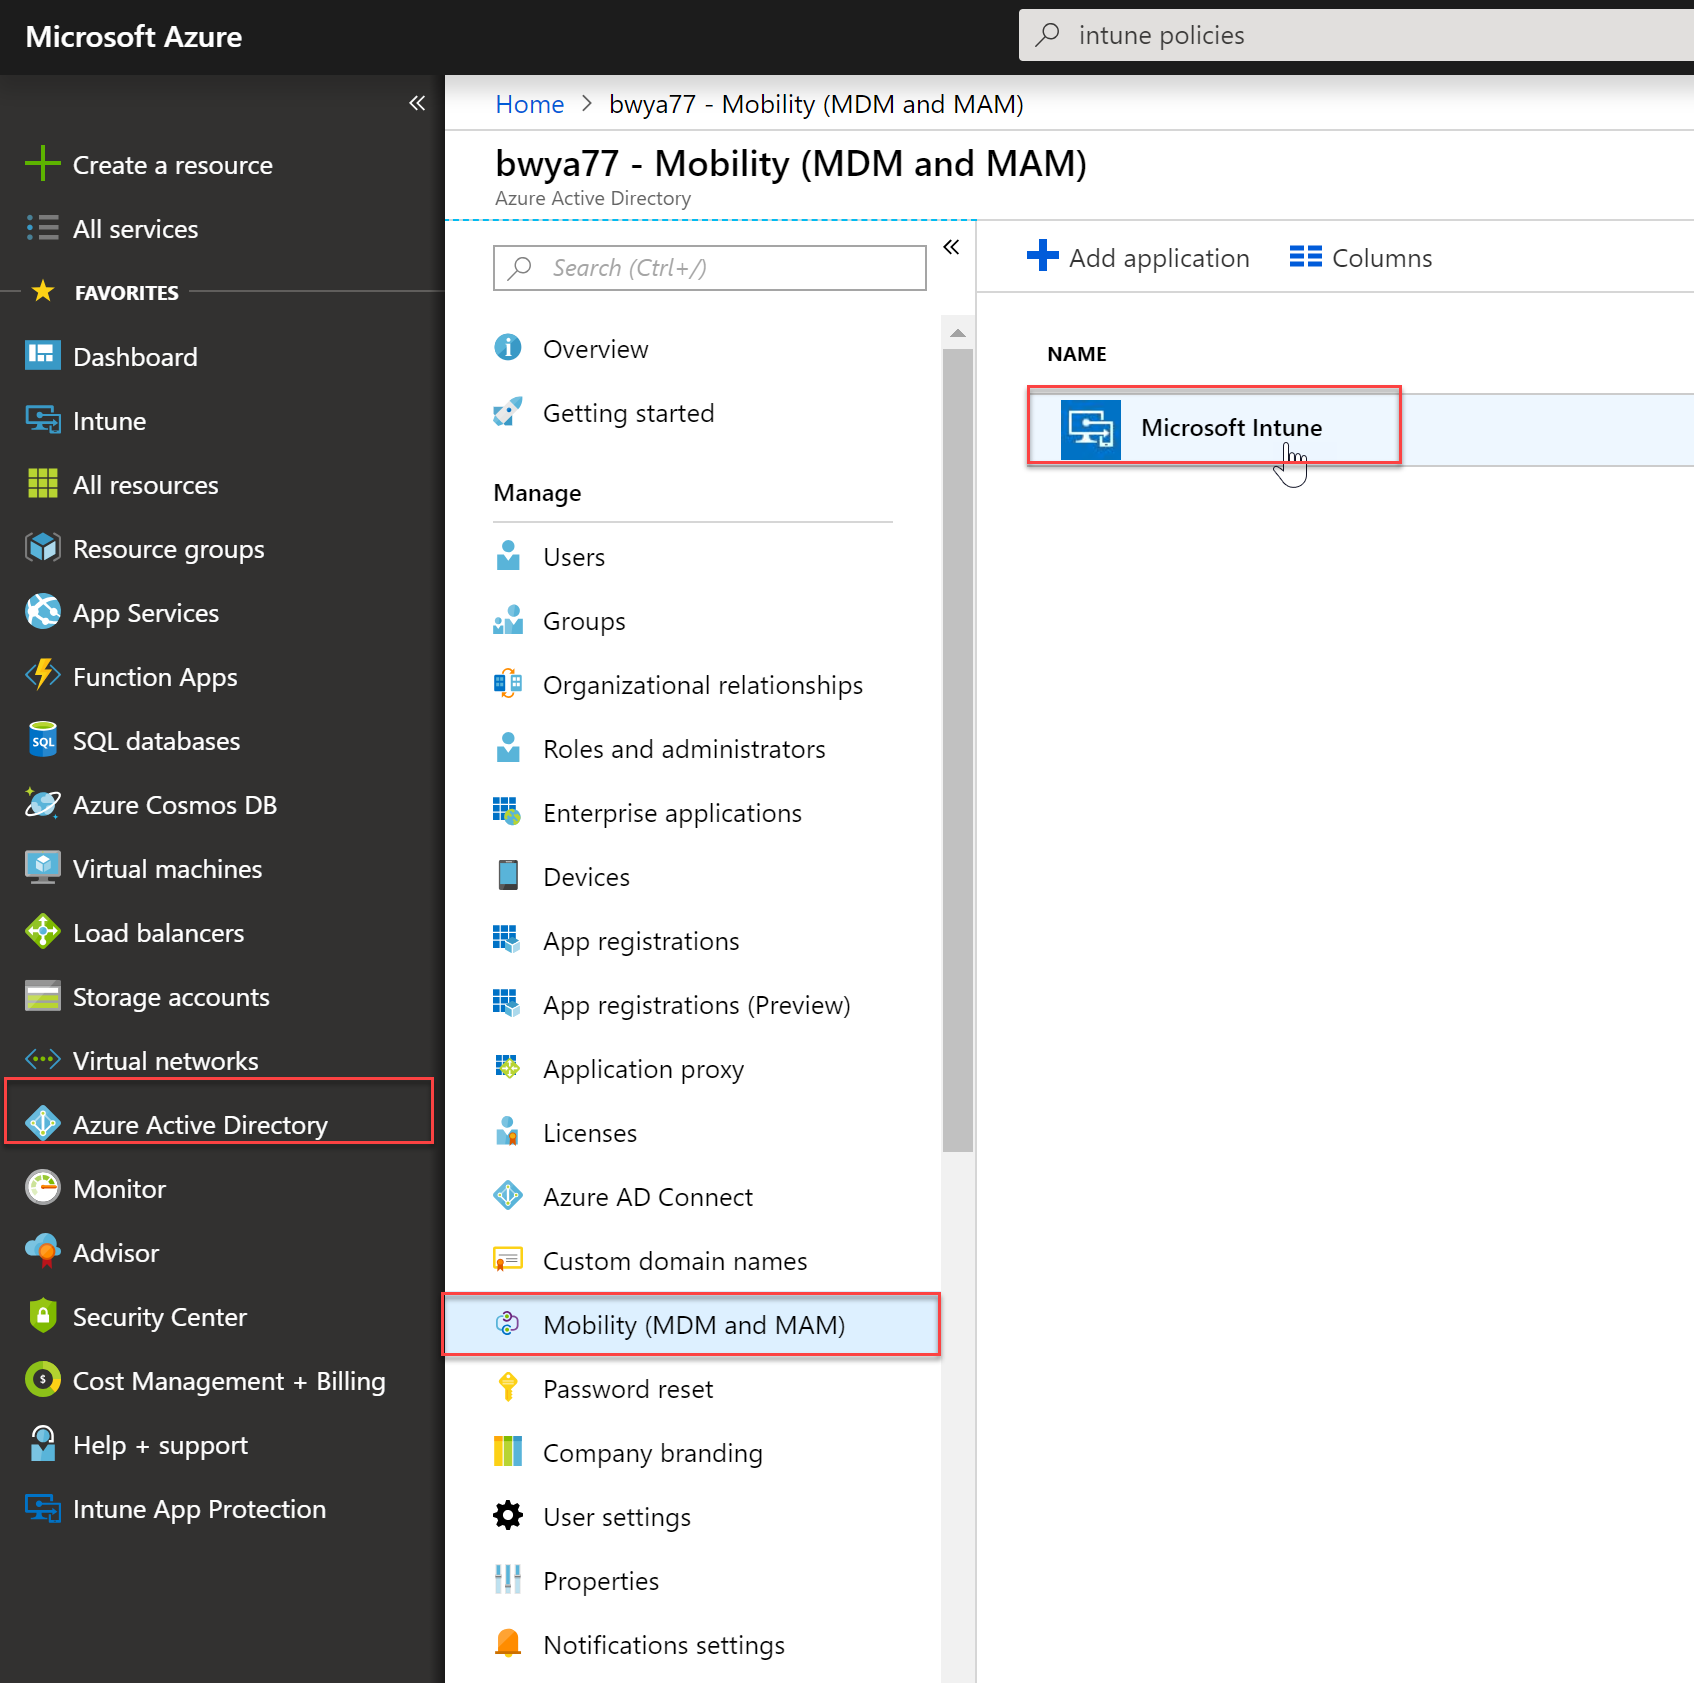
Enable Windows 10 automatic enrollment
Automatic enrollment lets users enroll their Windows 10 devices in Intune. To enroll, users add their work account to their personally owned devices or join corporate-owned devices to Azure Active Directory. In the background, the device registers and joins Azure Active Directory. Once registered, the device is managed with Intune.
- In the Azure Portal select Azure Active Directory and then click “Mobility (MDM and MAM) and select “Microsoft Intune”
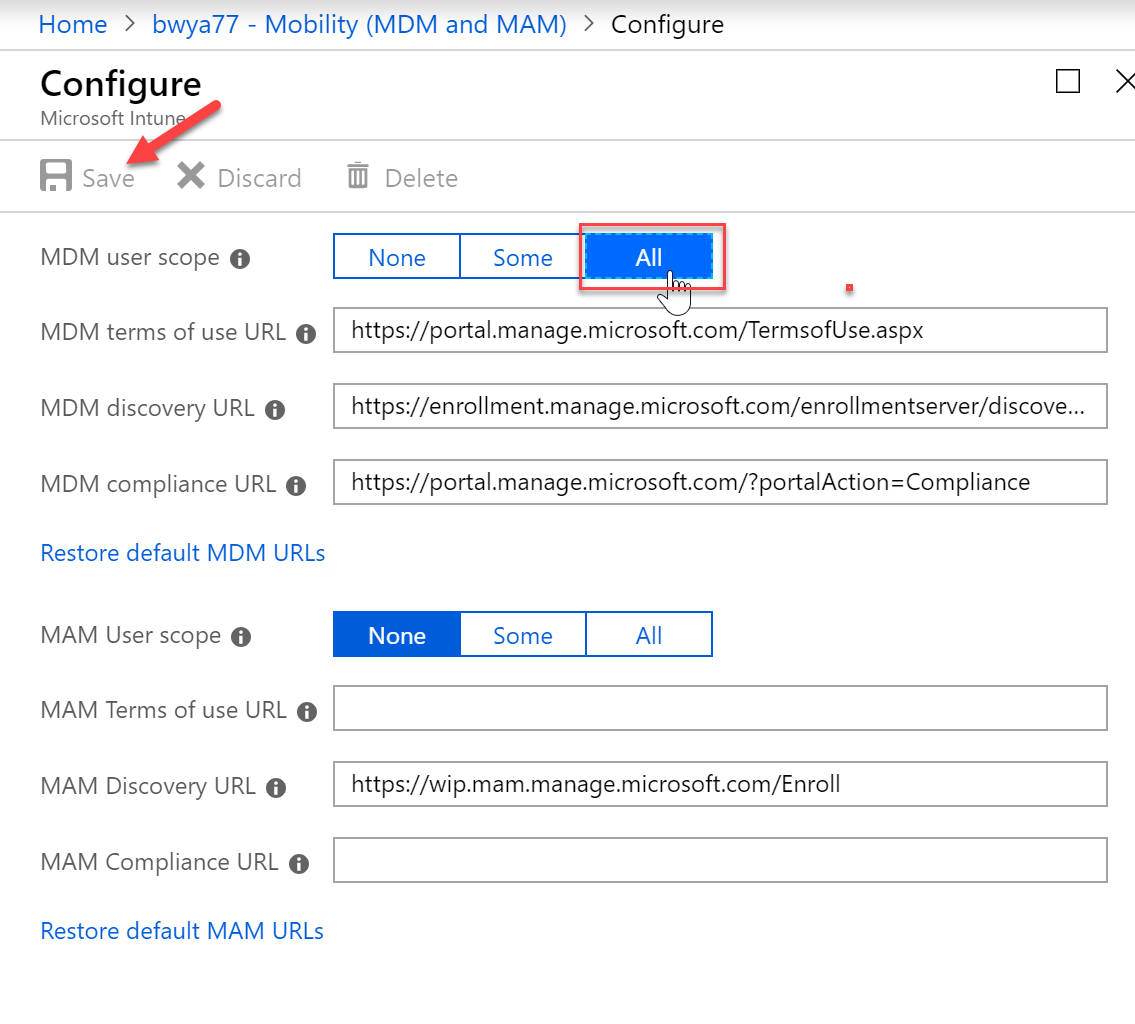
- Configure MDM User scope. Specify which users’ devices should be managed by Microsoft Intune. These Windows 10 devices can automatically enroll for management with Microsoft Intune.
- None – MDM automatic enrollment disabled
- Some – Select the Groups that can automatically enroll their Windows 10 devices
-
All – All users can automatically enroll their Windows 10 devices
Important
If both MAM user scope and automatic MDM enrollment (MDM user scope) are enabled for a group, only MAM is enabled. Only MAM is added for users in that group when they workplace join personal device. Devices are not automatically MDM enrolled.
Enroll Devices into Intune
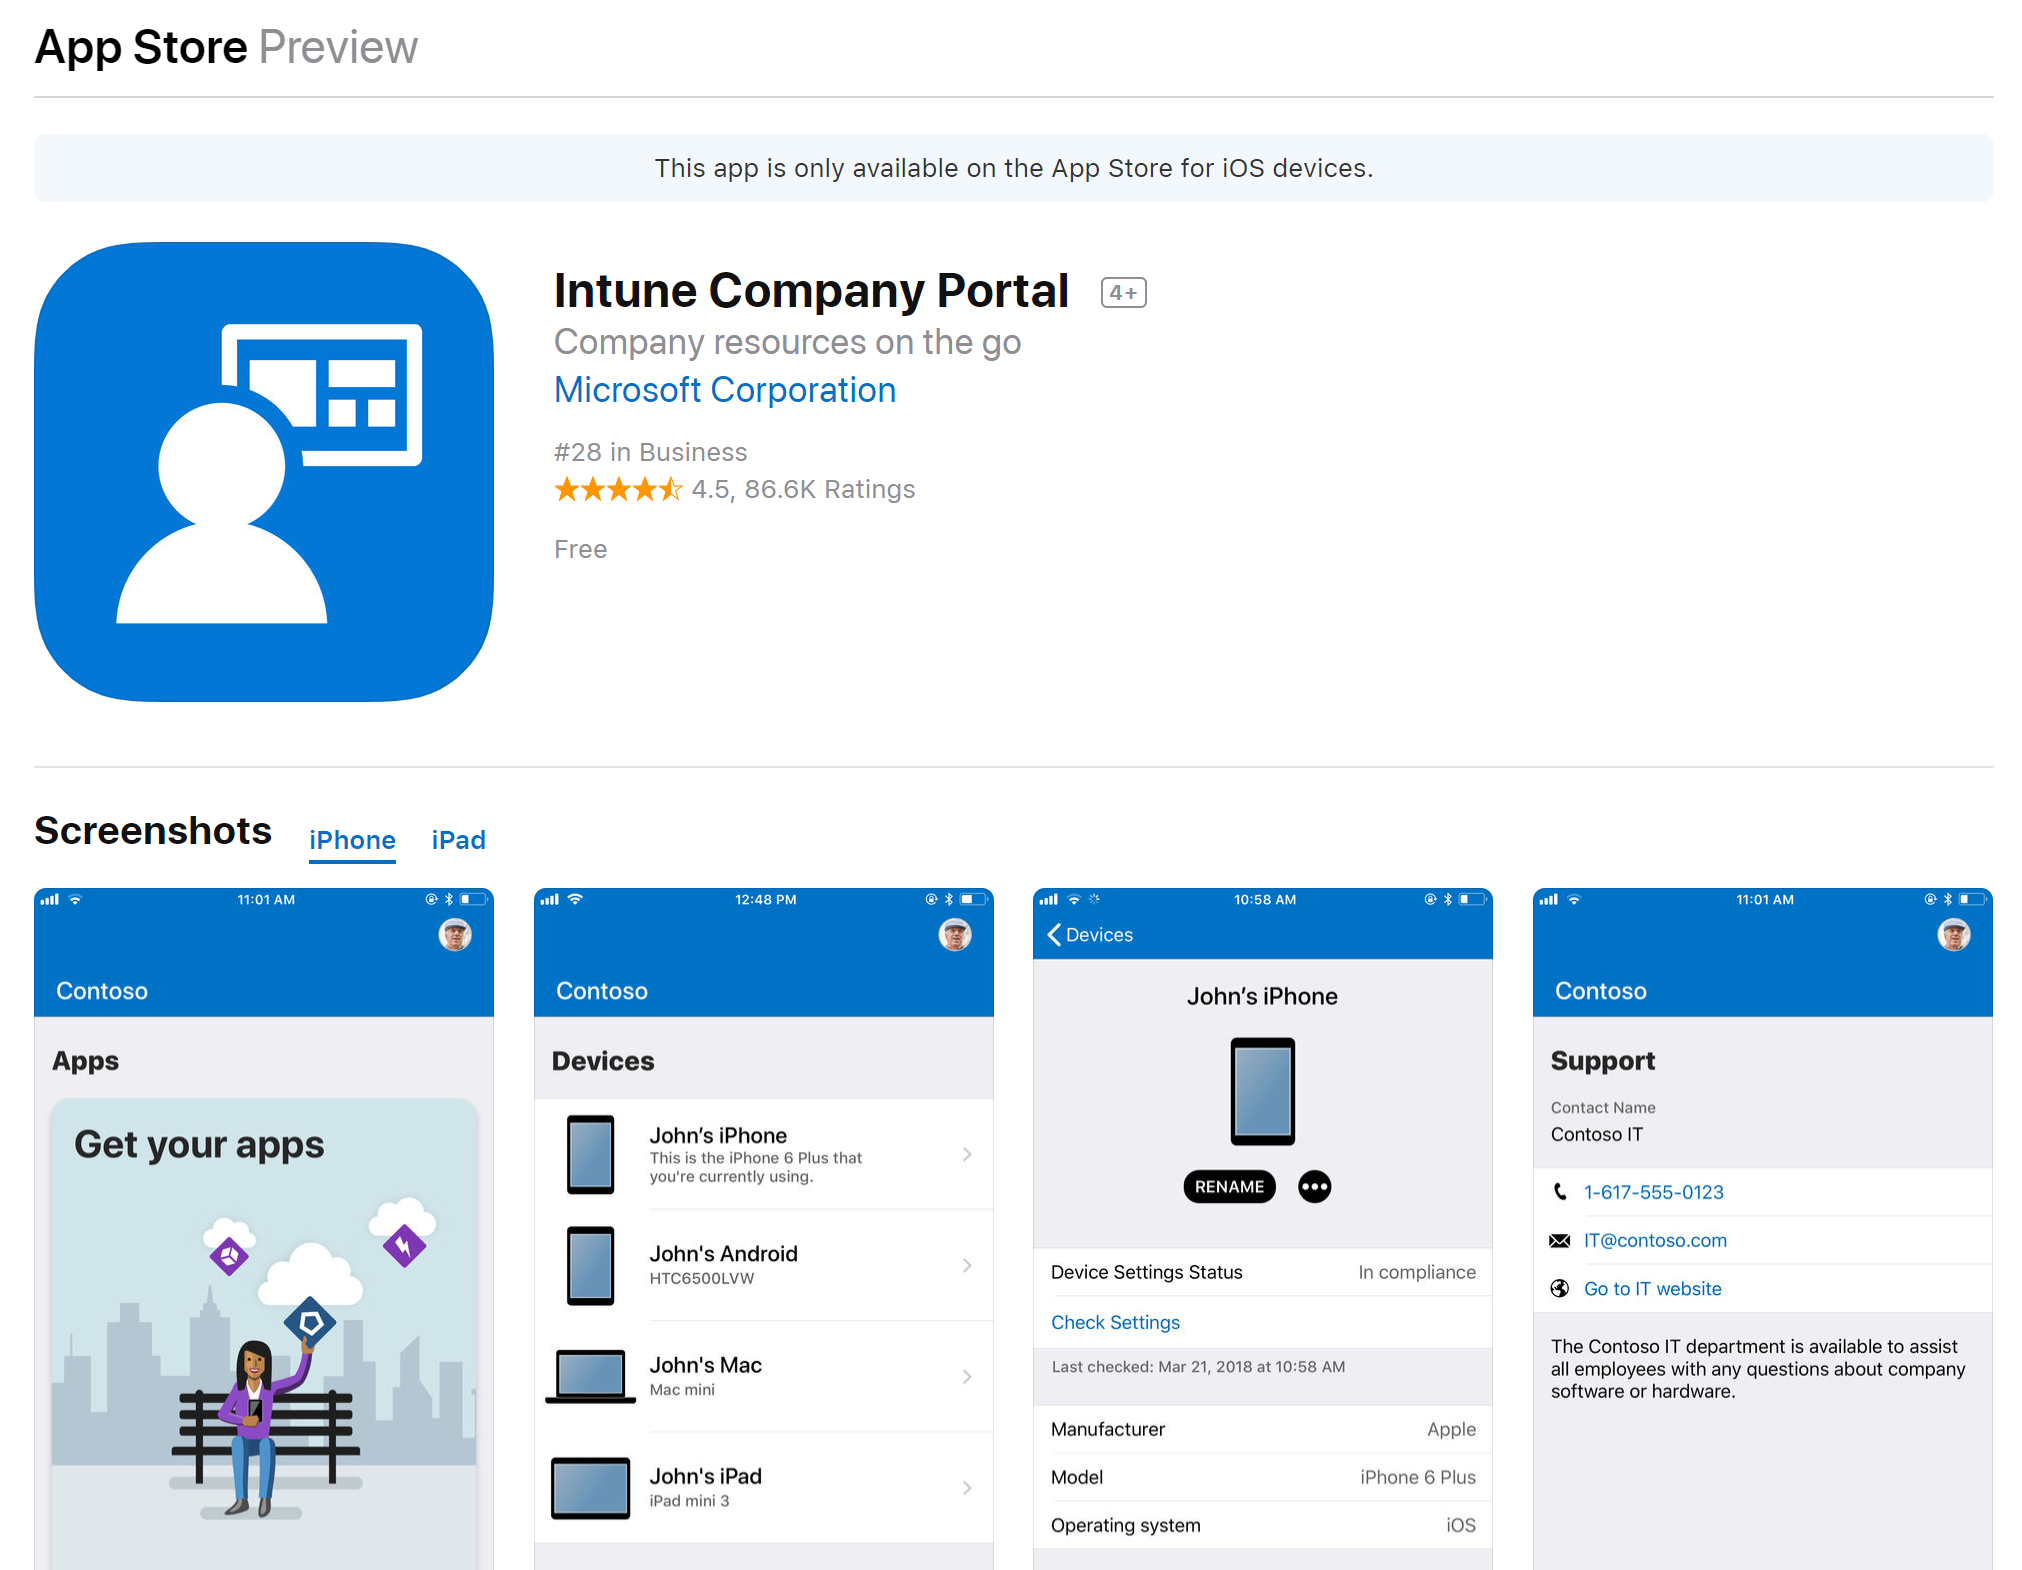
iOS
- Have your users download and install the Company Portal from the iOS App Store
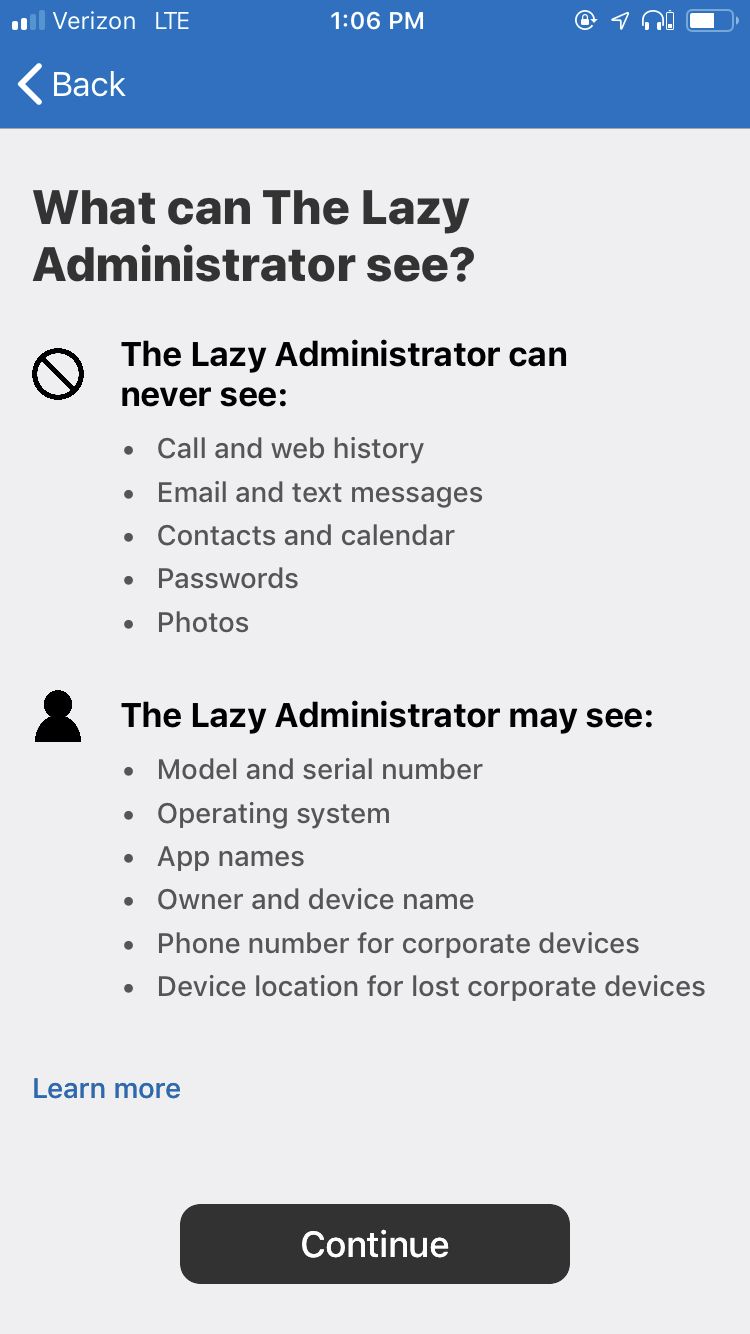
- Once they launch the application and sign in they can begin to Intune enrollment process

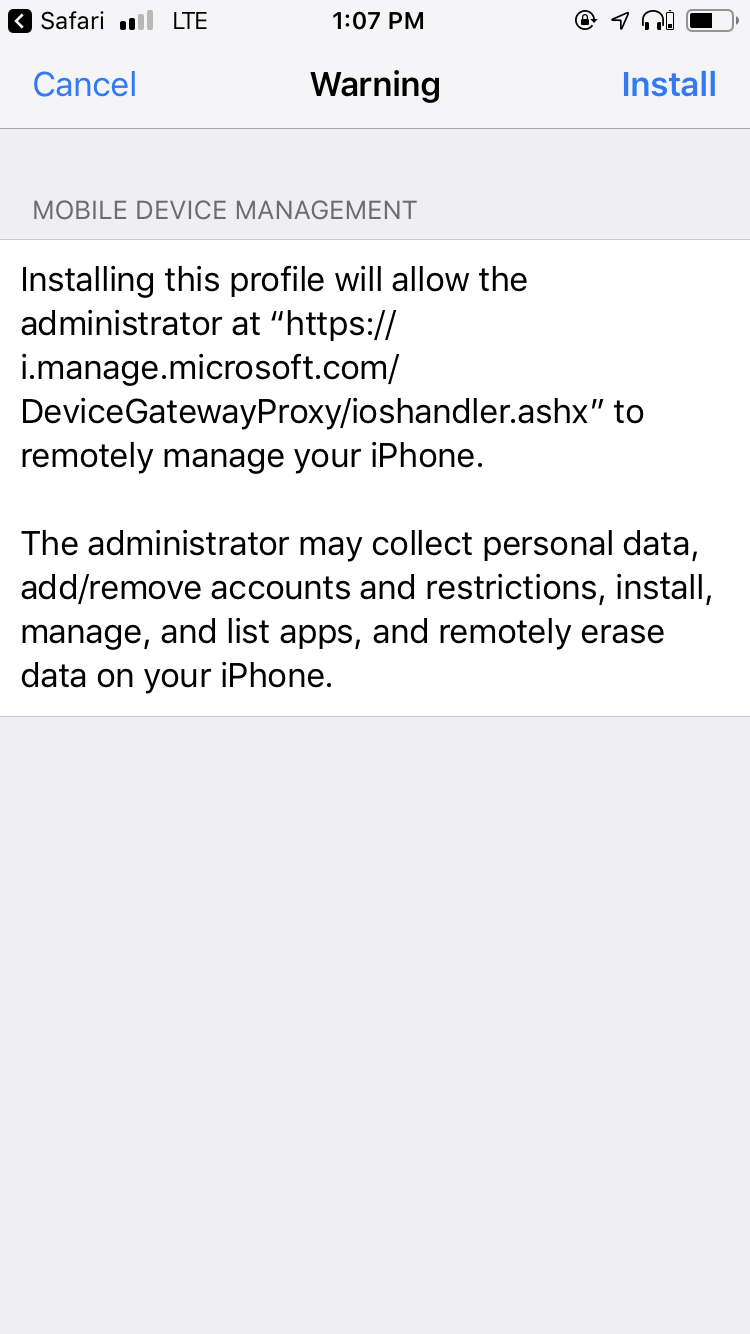
- The application will show the end user the permissions the IT Administrator will have on the device.
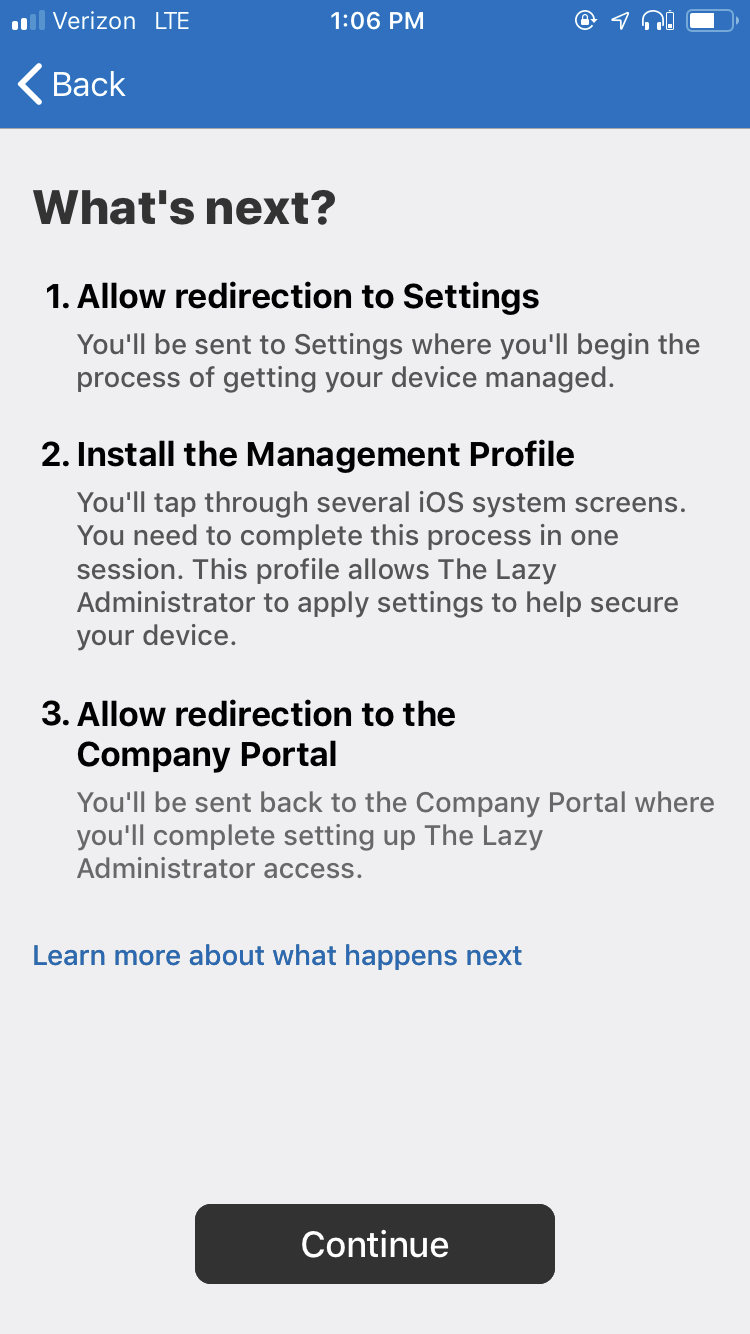
- They will then be shown the step by step instructions that the application will take to enroll the device
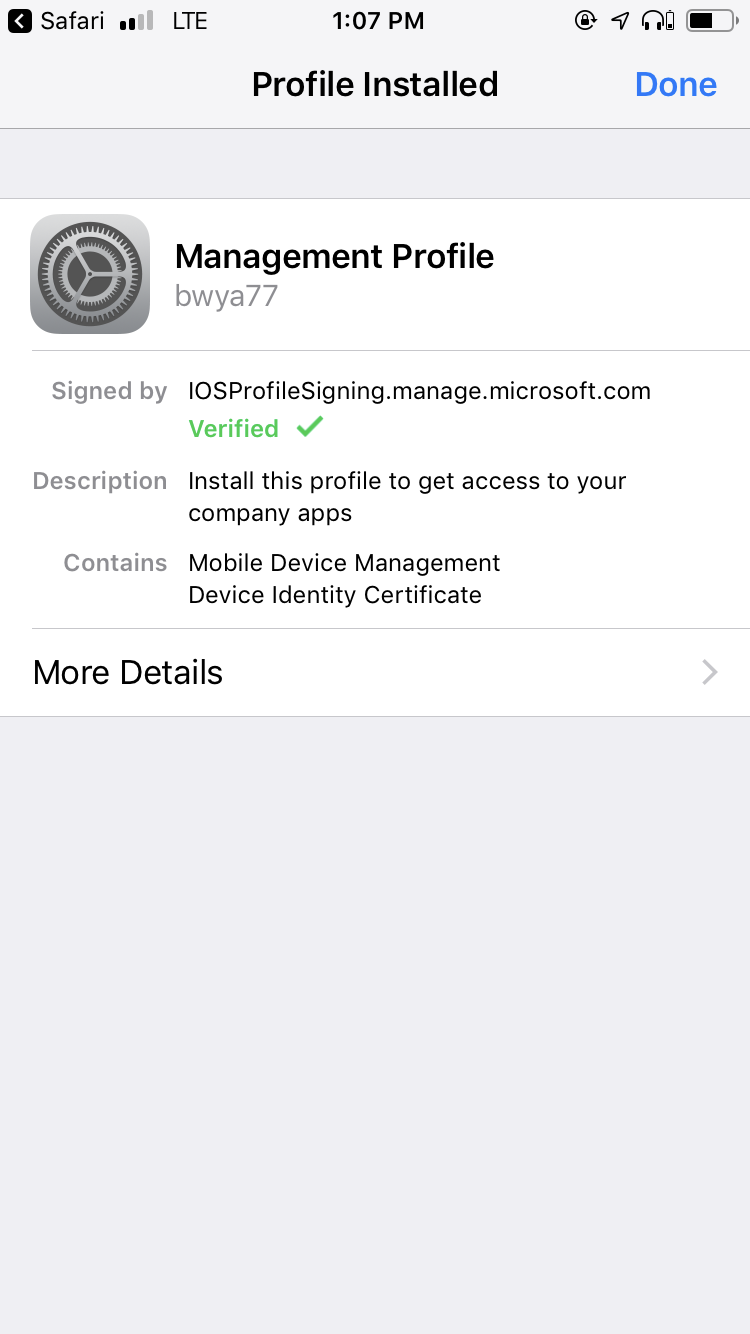
- An MDM iOS Profile will be installed on the device
- And finally, the user will select a category (set up earlier) to put their device under. This allows for a better administrator management experience

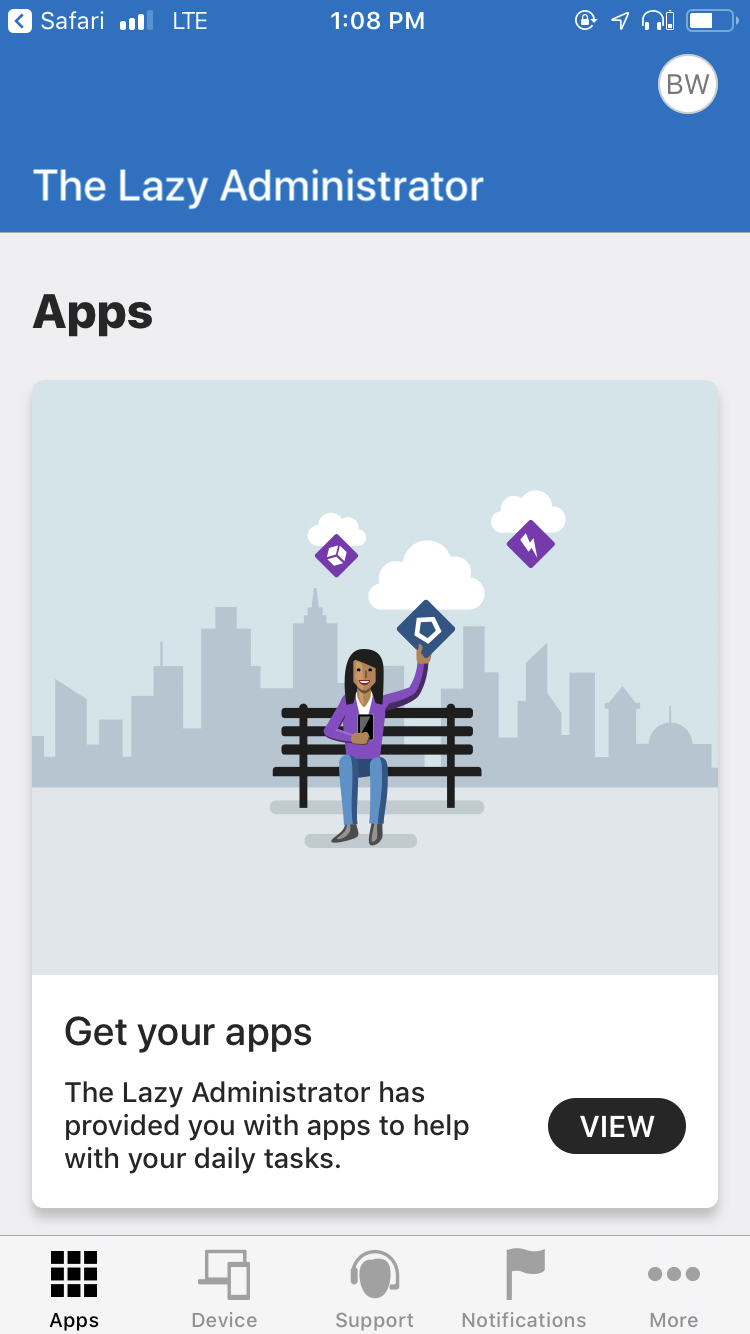
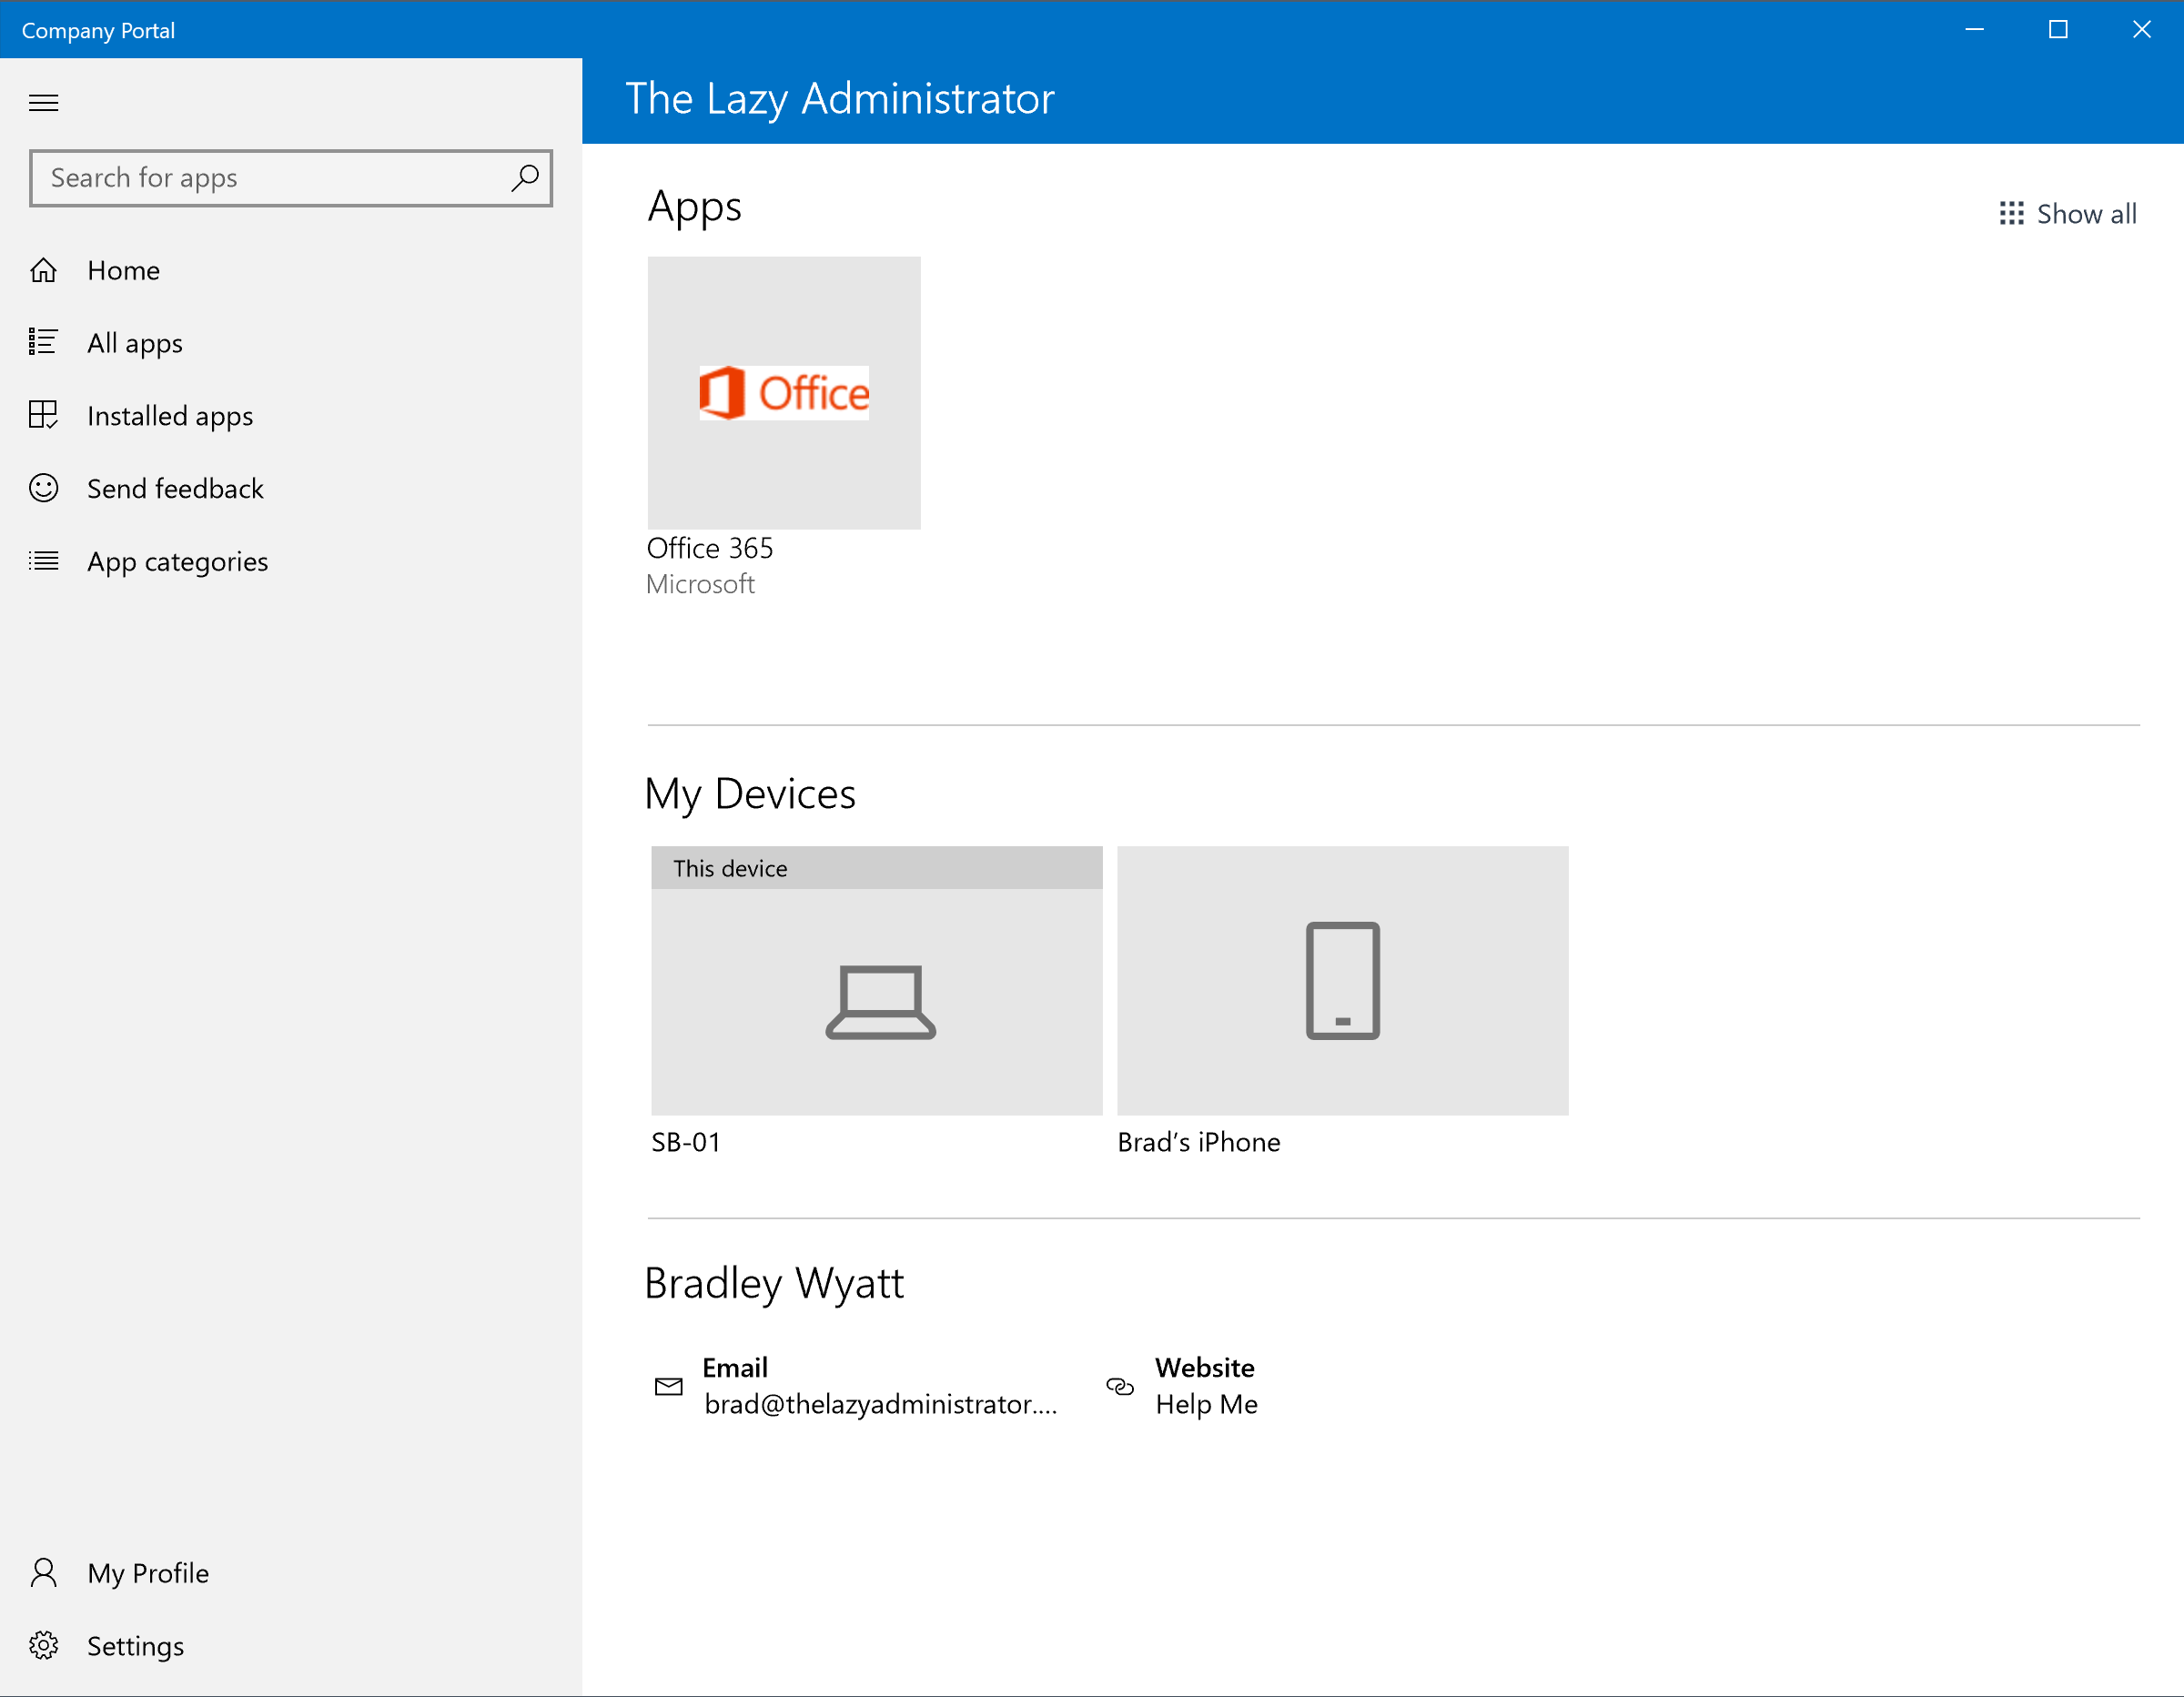
- The Company Portal will show the end users any available apps you have granted them, all of their Intune devices, support options we set up previously and notifications.
Windows
Windows users can install the Company Portal from the Windows store, use the web Company Portal, or use the Windows Settings app to enroll their Windows devices into Intune.
Online Portal
- Navigate to the online Company Portal at https://portal.manage.microsoft.com
- Once the user signs into the Company Portal they can add a device under Devices
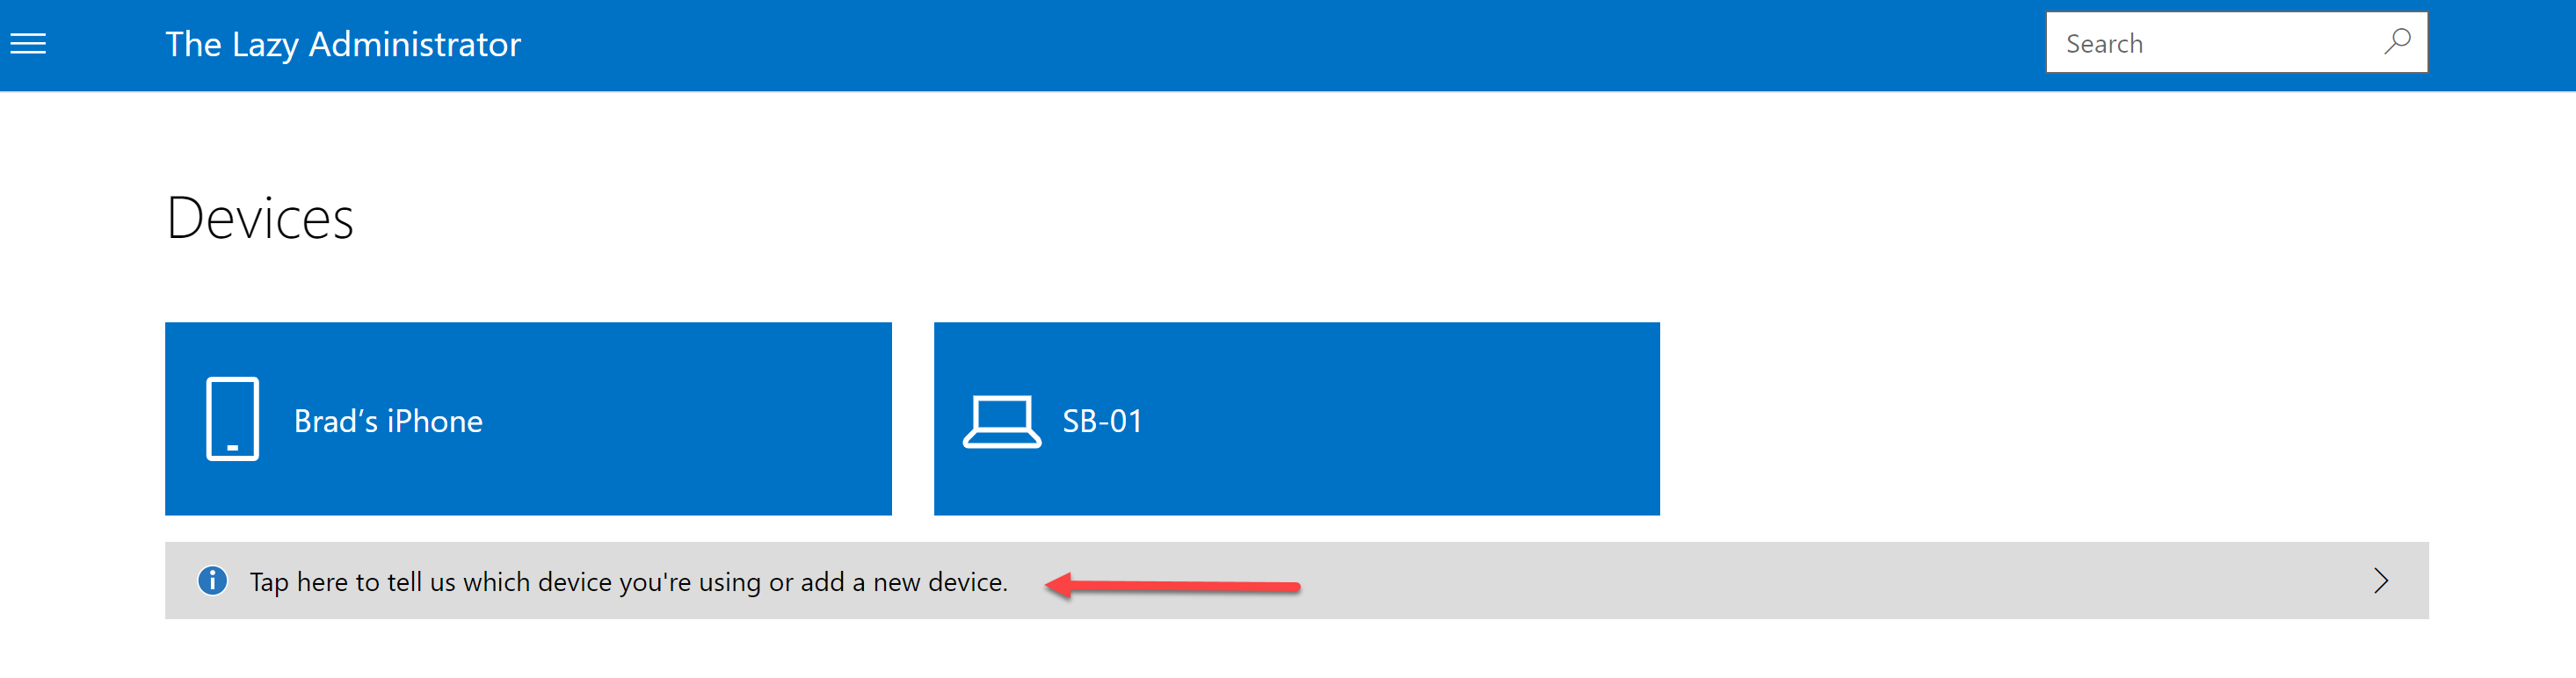
- Click “Add”
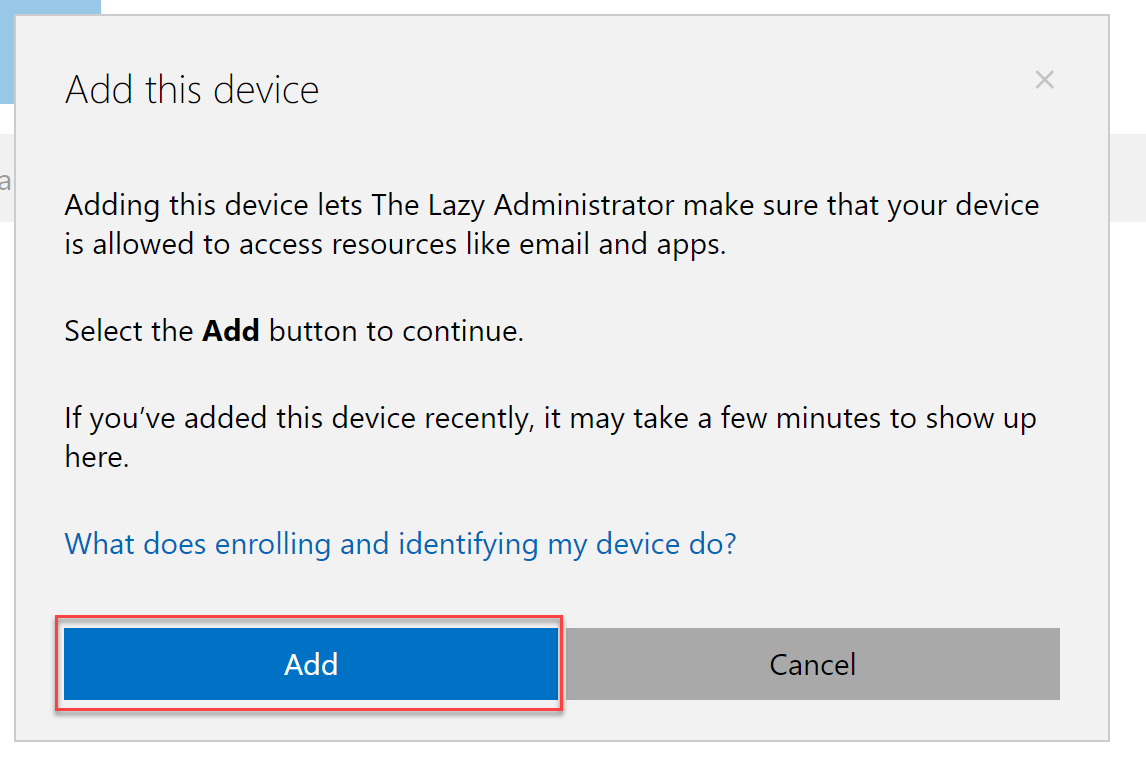
- Have them sign in and then press Next

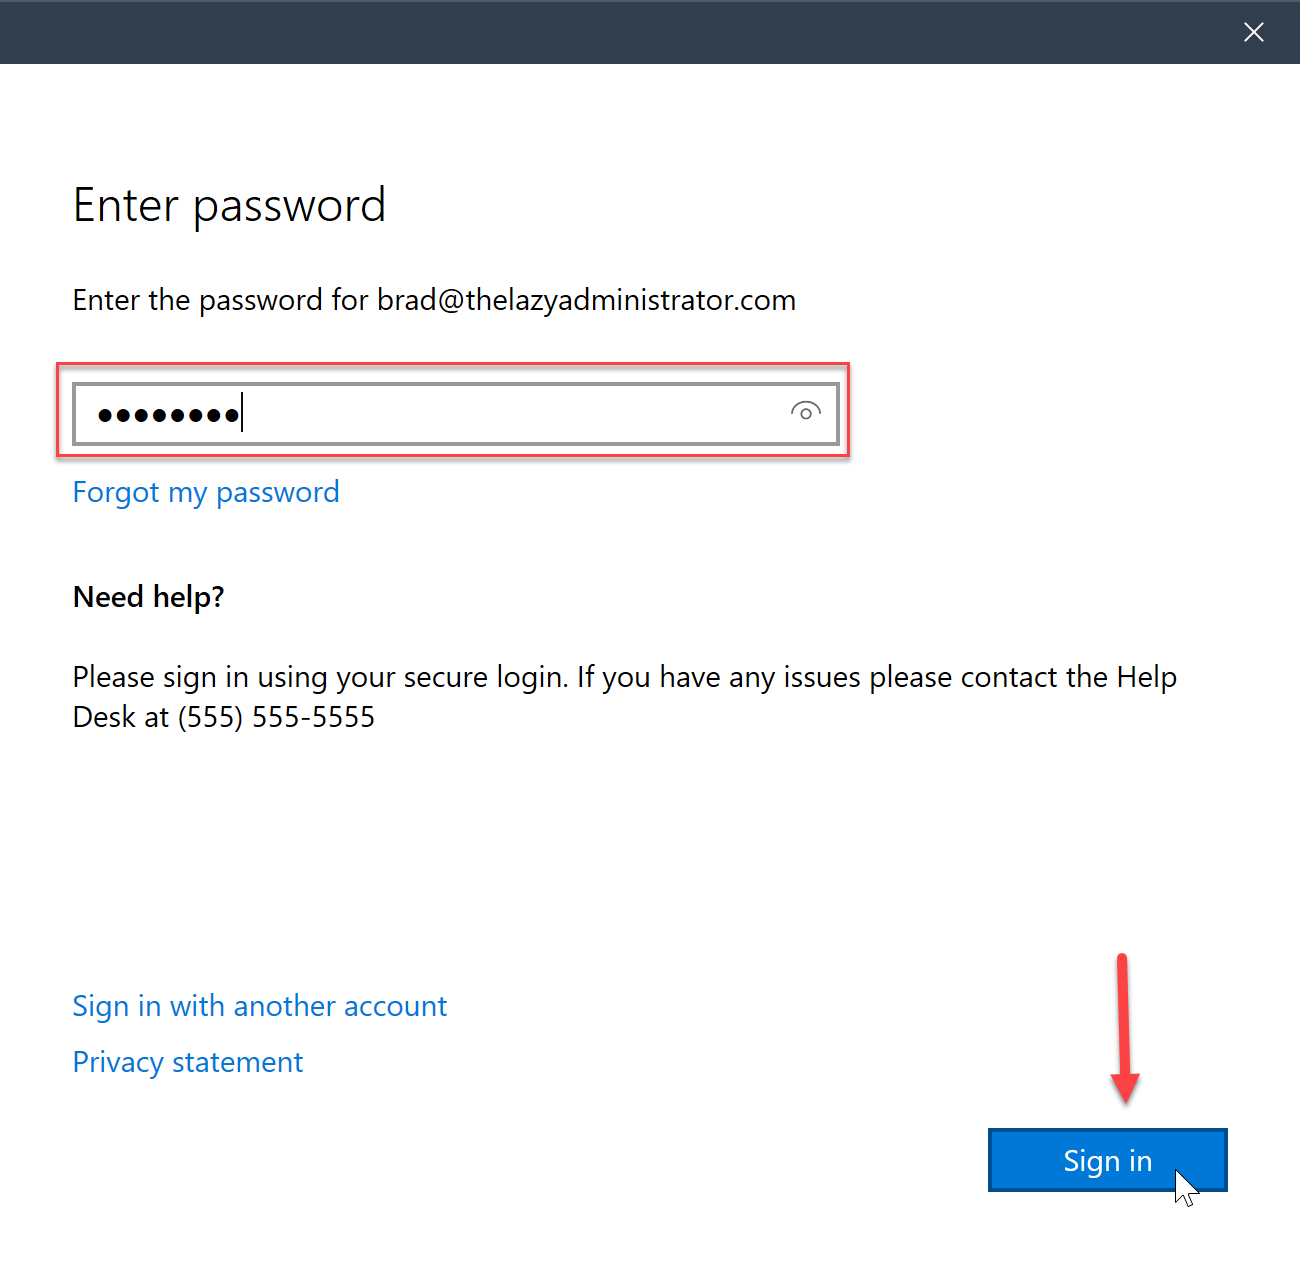
- The user will be prompted to enter their account password and then press “Sign In”
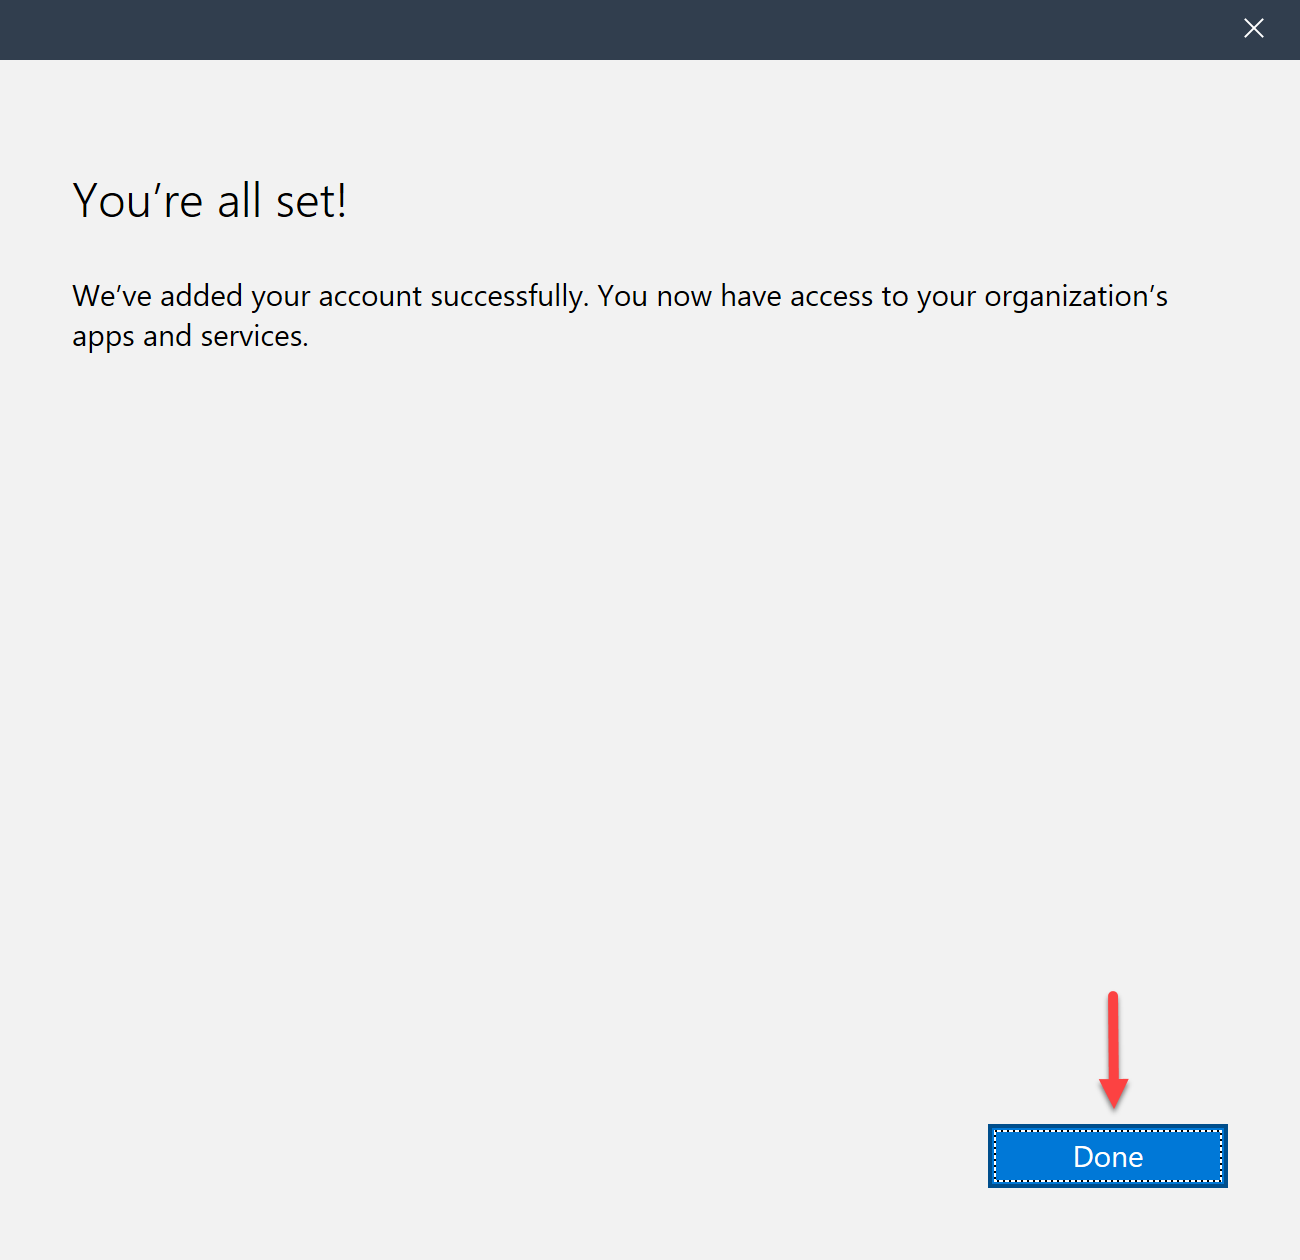
- Once complete they will be prompted with a successful message.
Microsoft Store App
- Have your users download and install the Company Portal application from the Microsoft Store
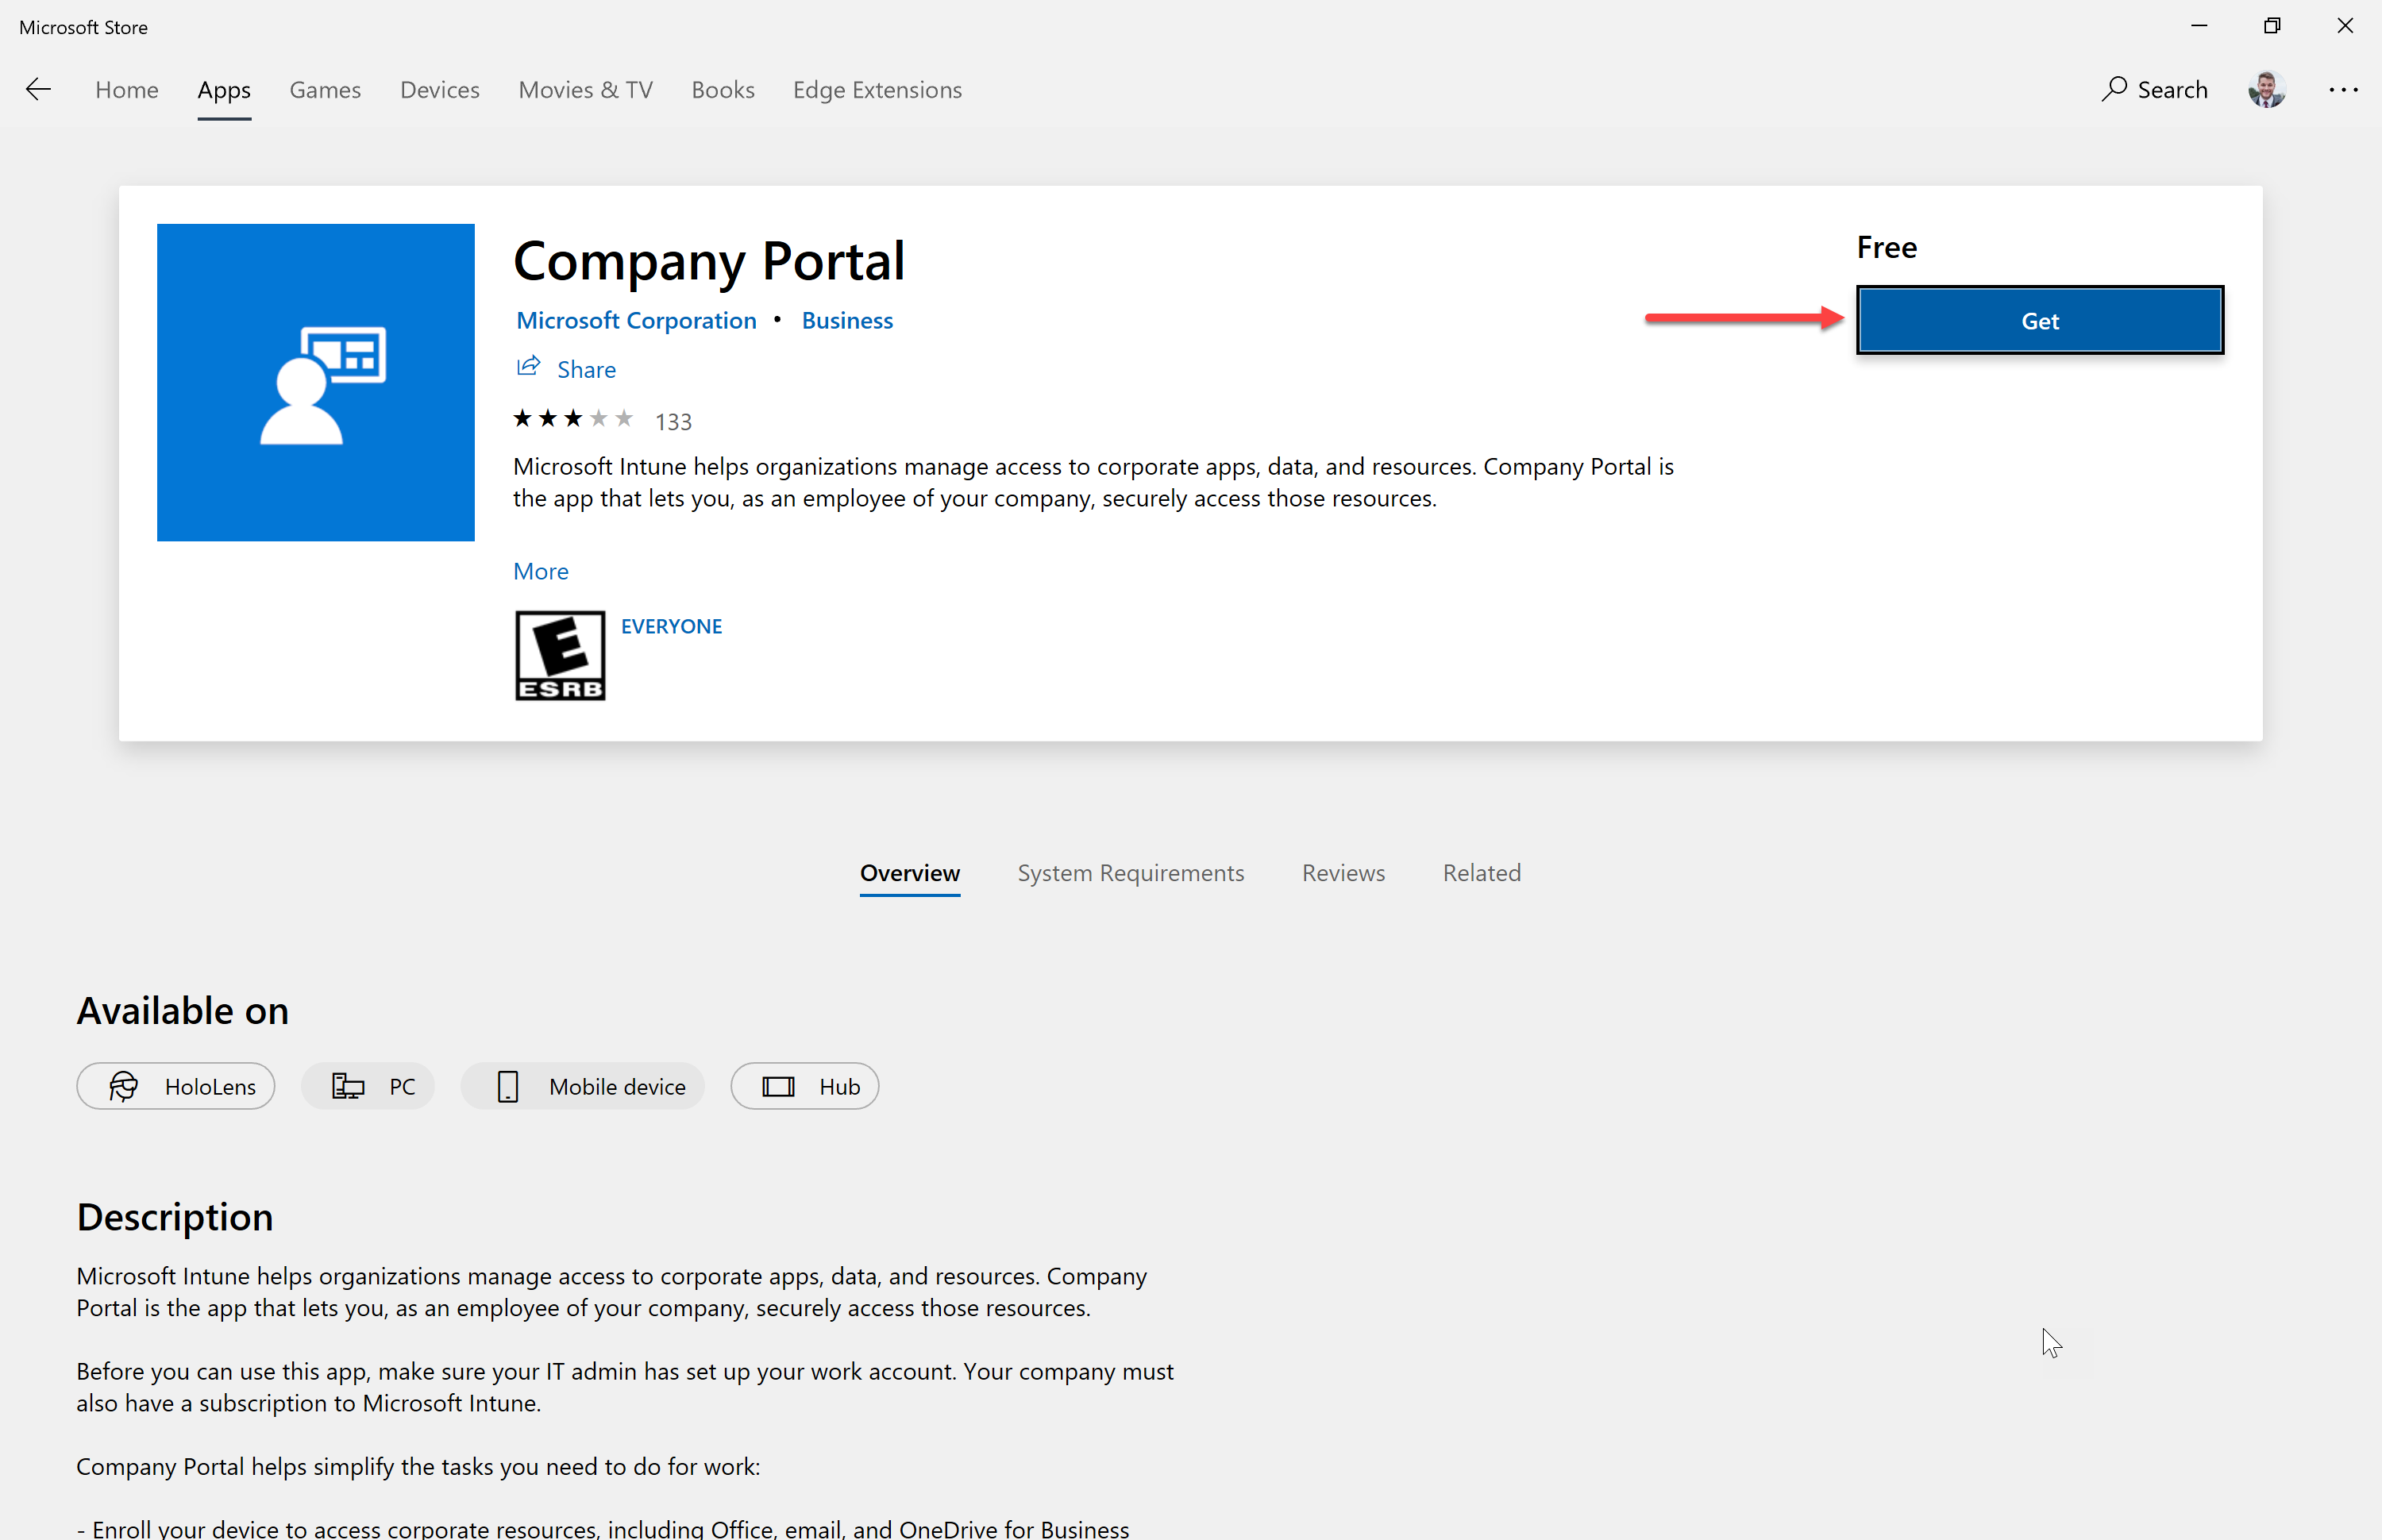
- They will be prompted to sign in
- They will be prompted for the password
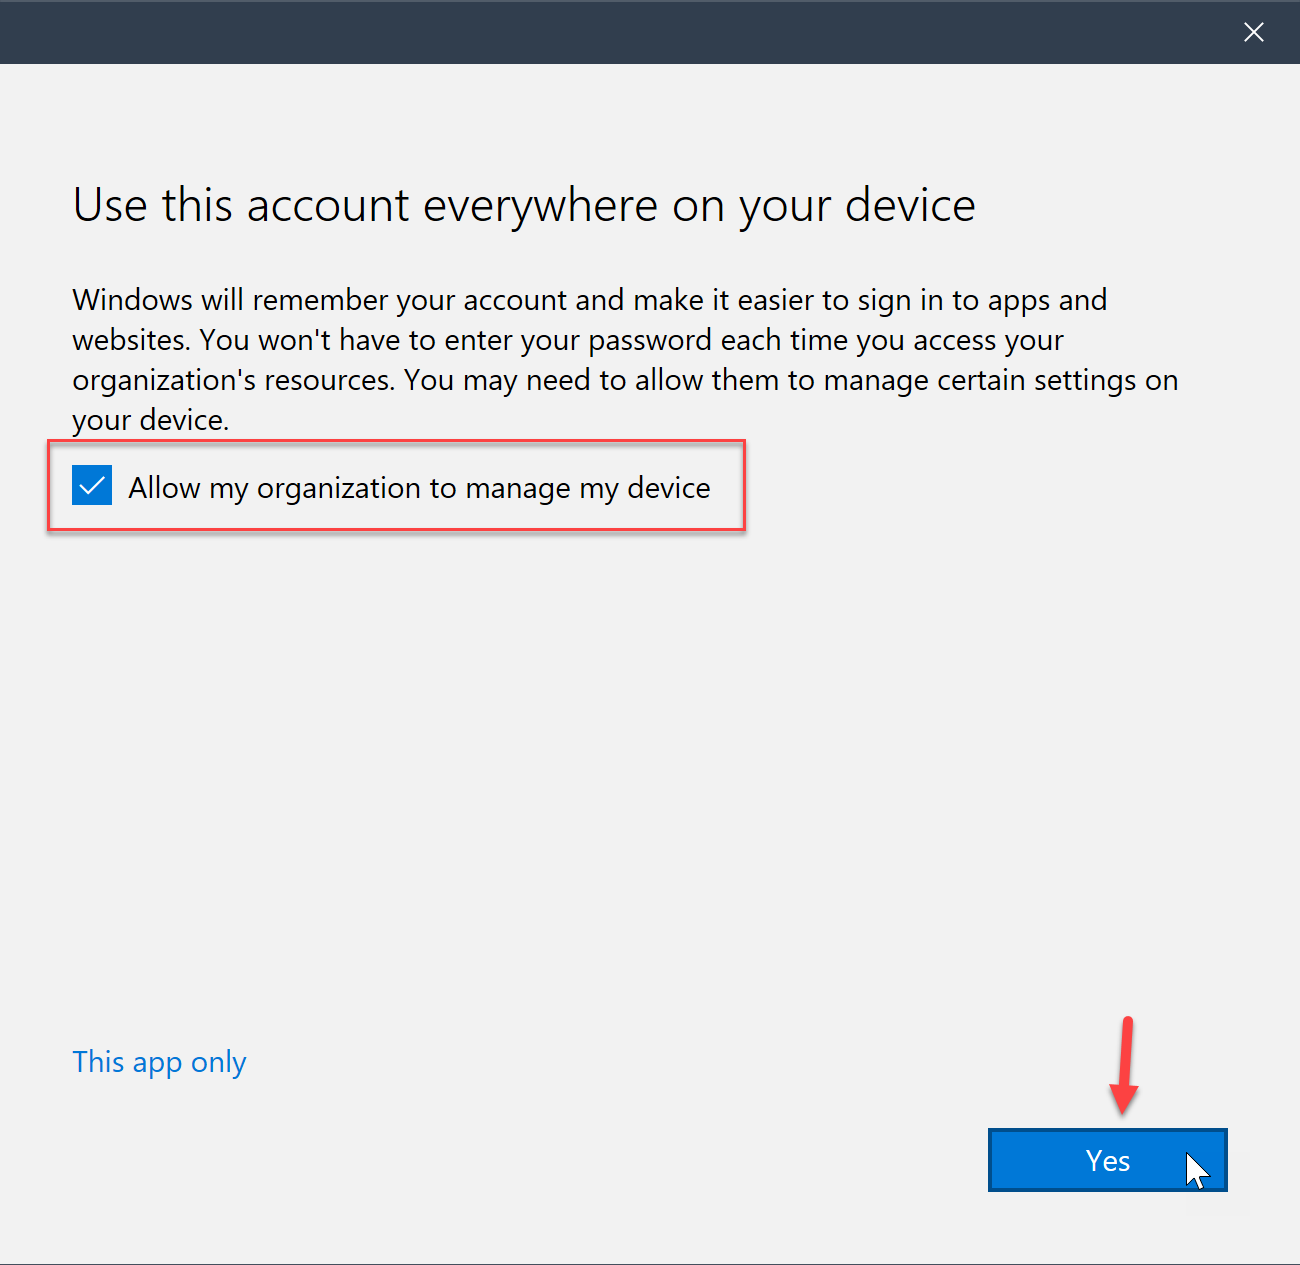
- Check “Allow my organization to manage my device” and then click Yes
- Finally, the Company Portal will prompt them to select a device category that we set up earlier
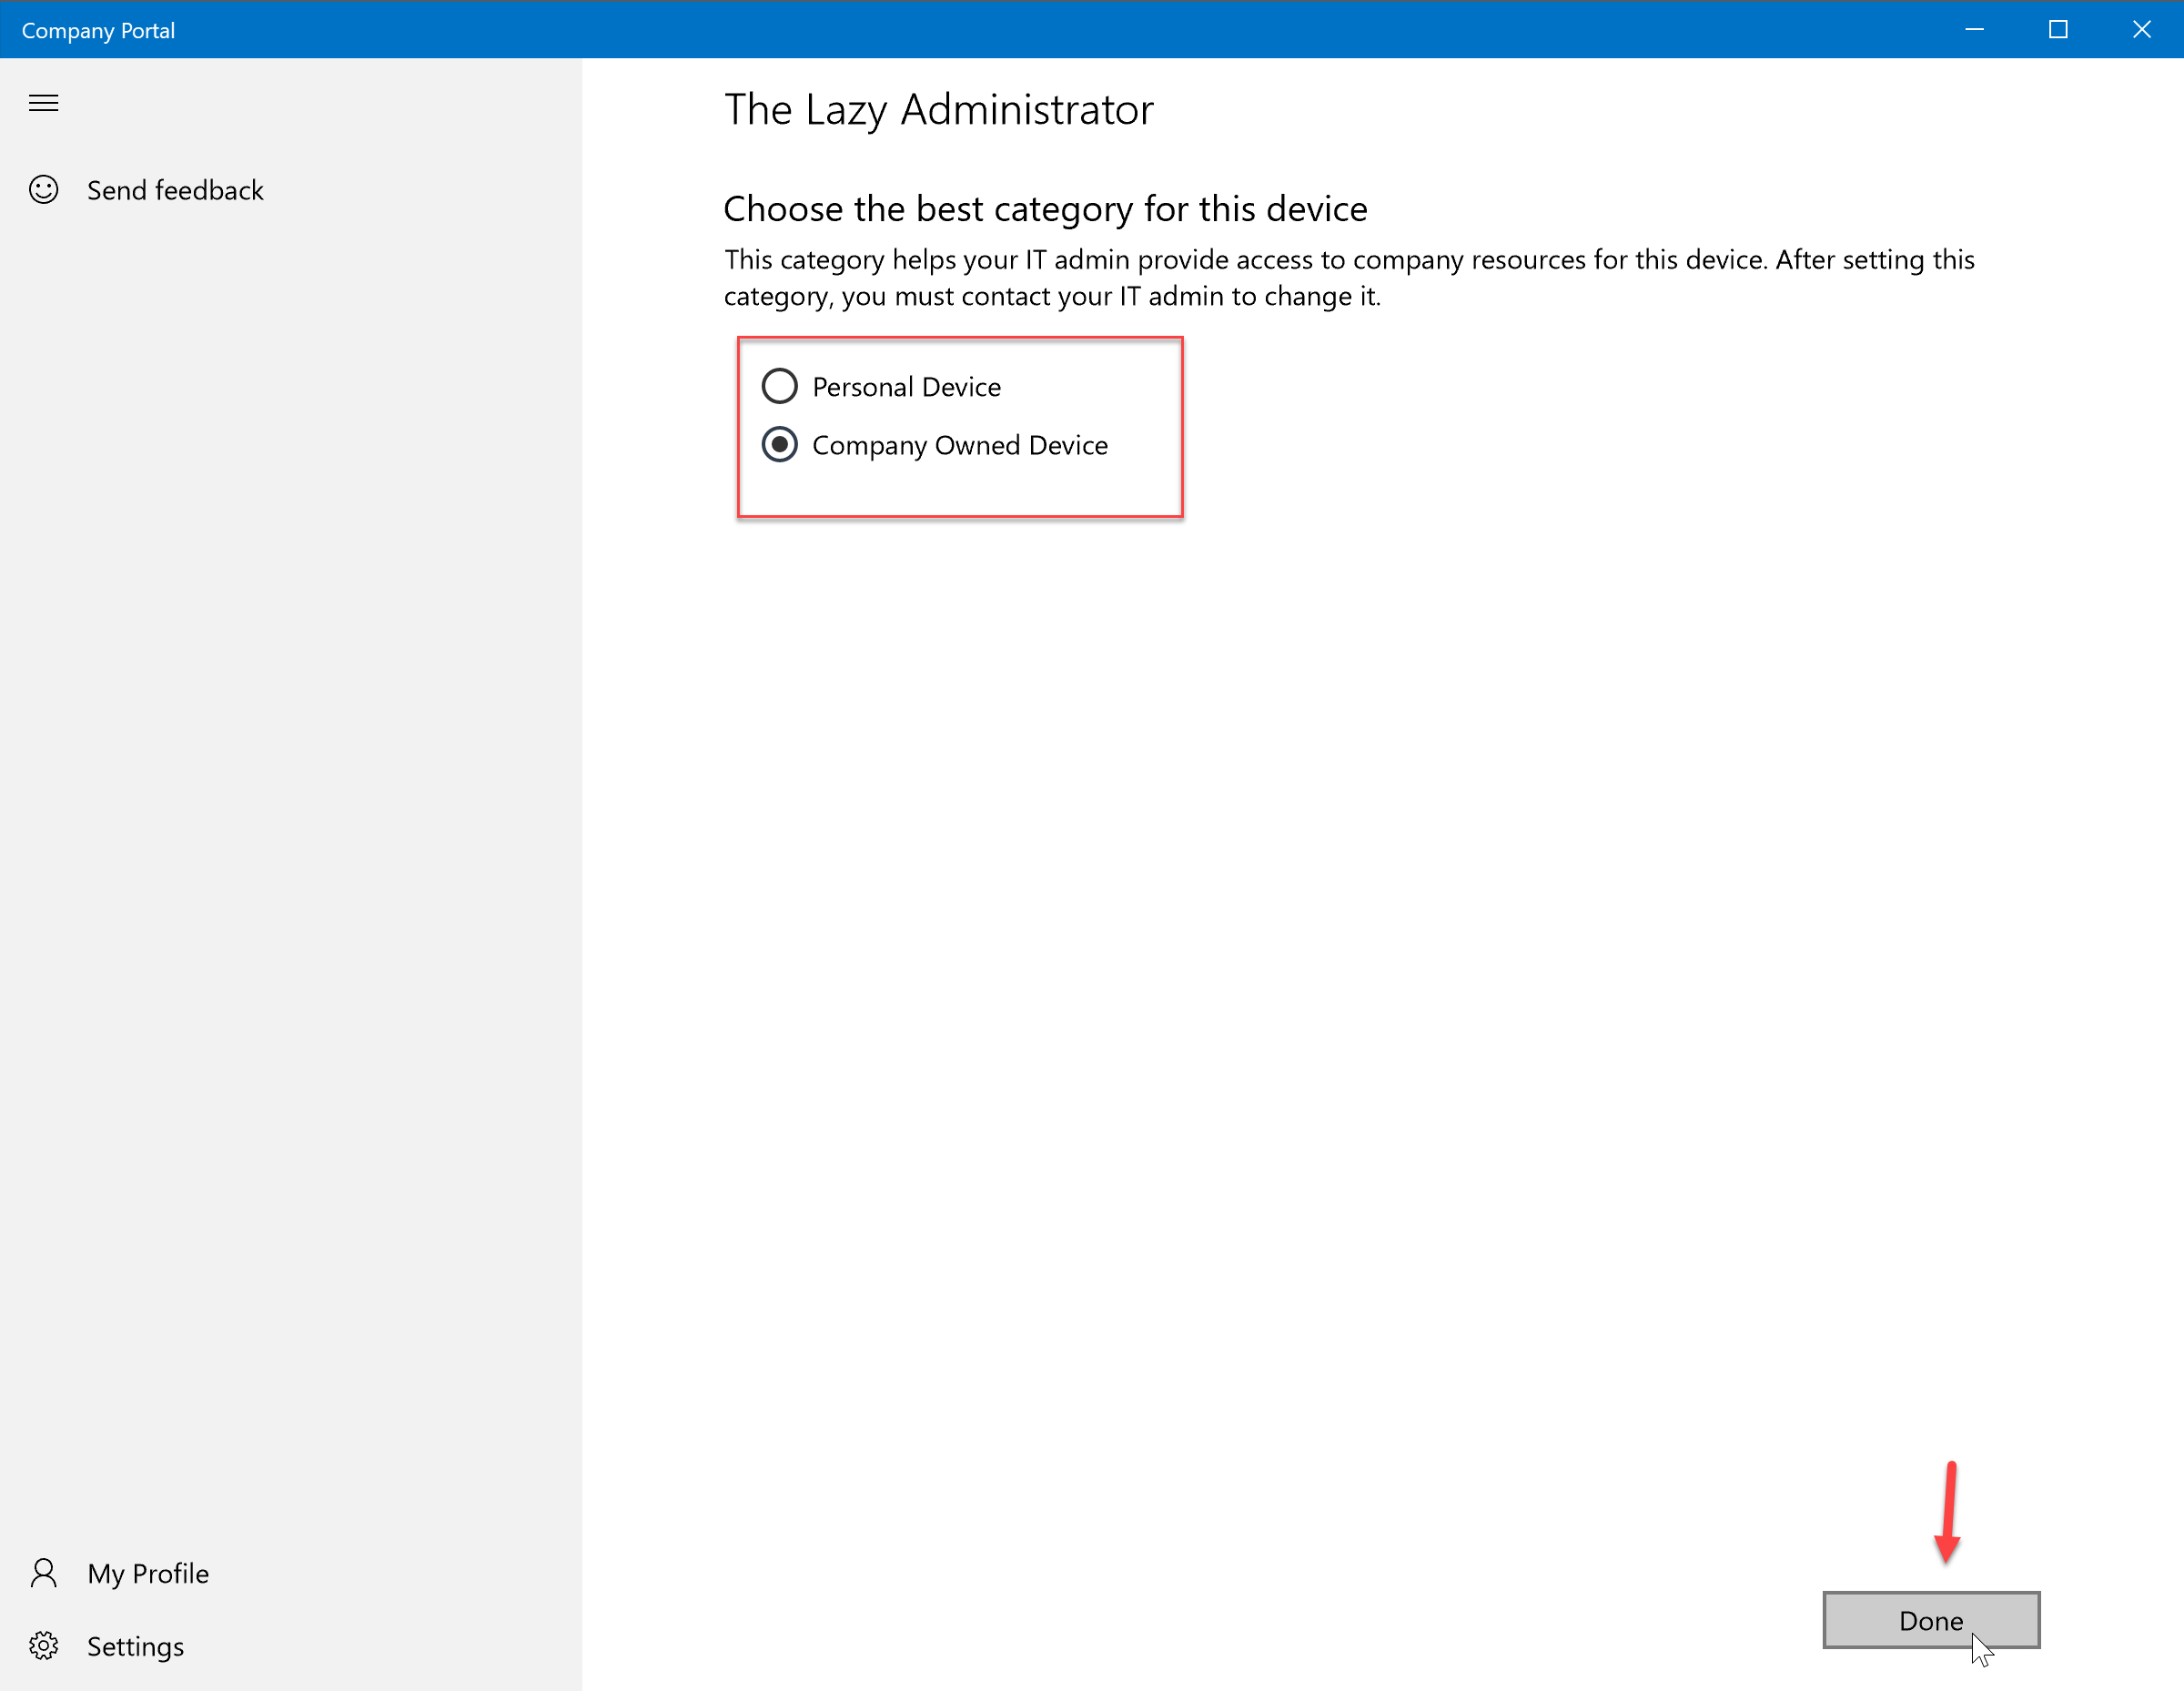
- The Company Portal will now show the newly enrolled device

Windows Settings App
- Open the Windows Settings application and select “Accounts”
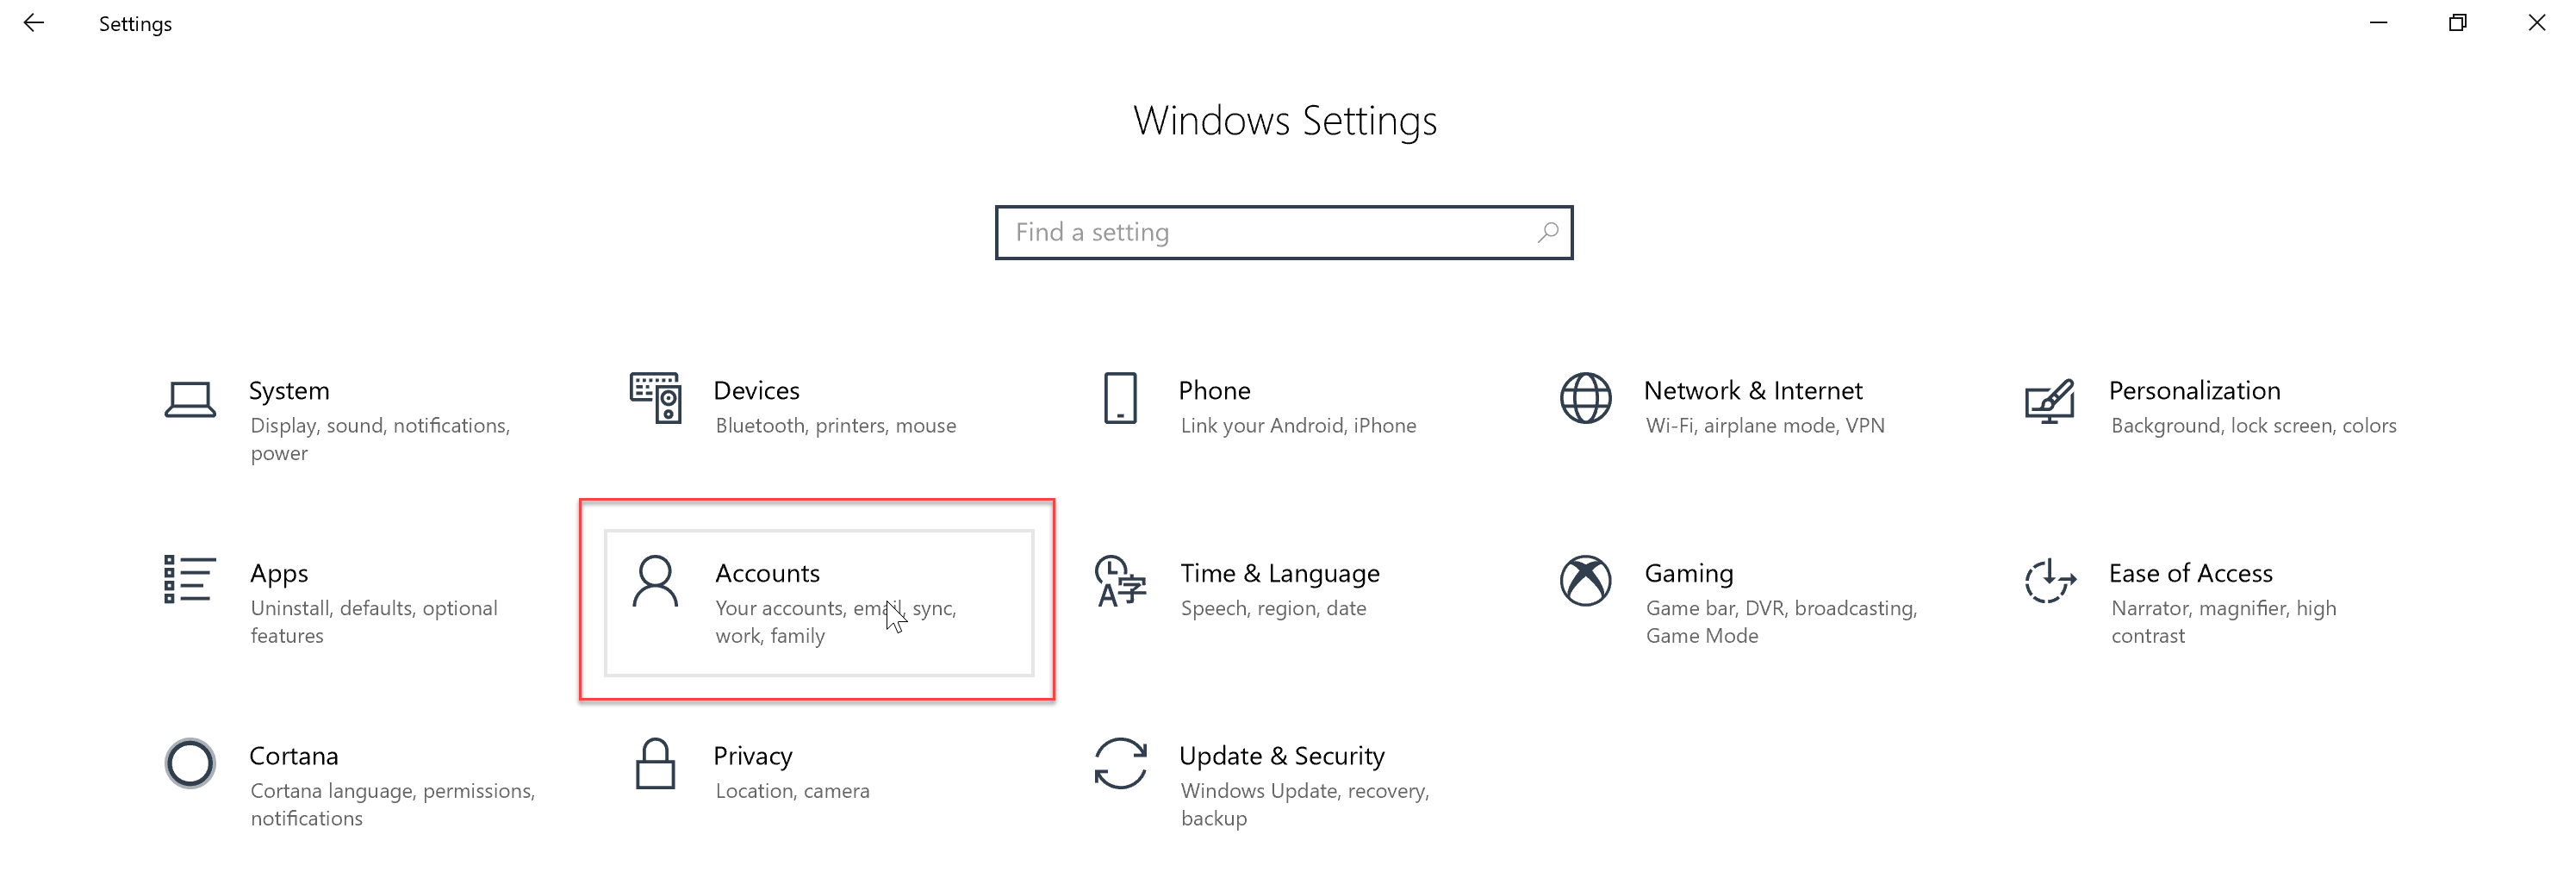
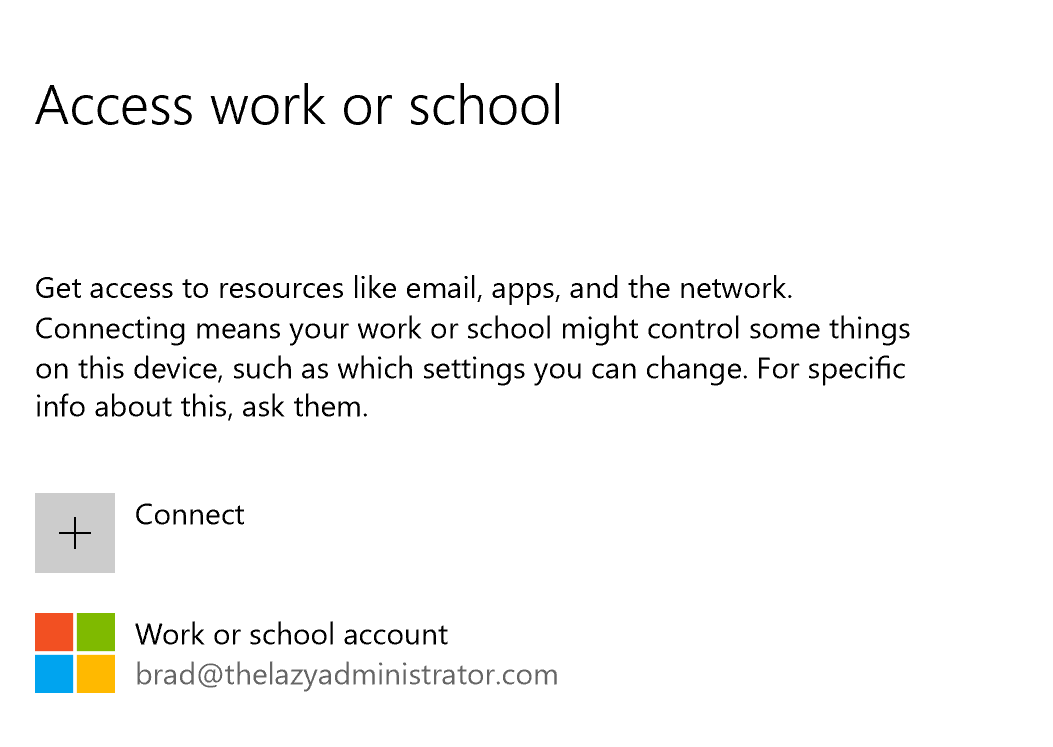
- Select “Access work or school” in the right hand pane, and then press “Connect”

- Sign in using your work account
- Enter your work account password and then press Sign In
- Once complete you will get a successful message
- Back in the Settings app you will now see your account
Deploy Client Apps to Managed Intune Devices
The Company Portal allows and administrator to push, install, uninstall, and make available, applications for end users. Applications can include Office 365 apps, web apps, Microsoft Store apps, iOS Apps and more. The Company Portal will only display applications that is relevant to the device they are on, if they are on an iPhone it will not display your published applications for Windows even if the device is in the same group.
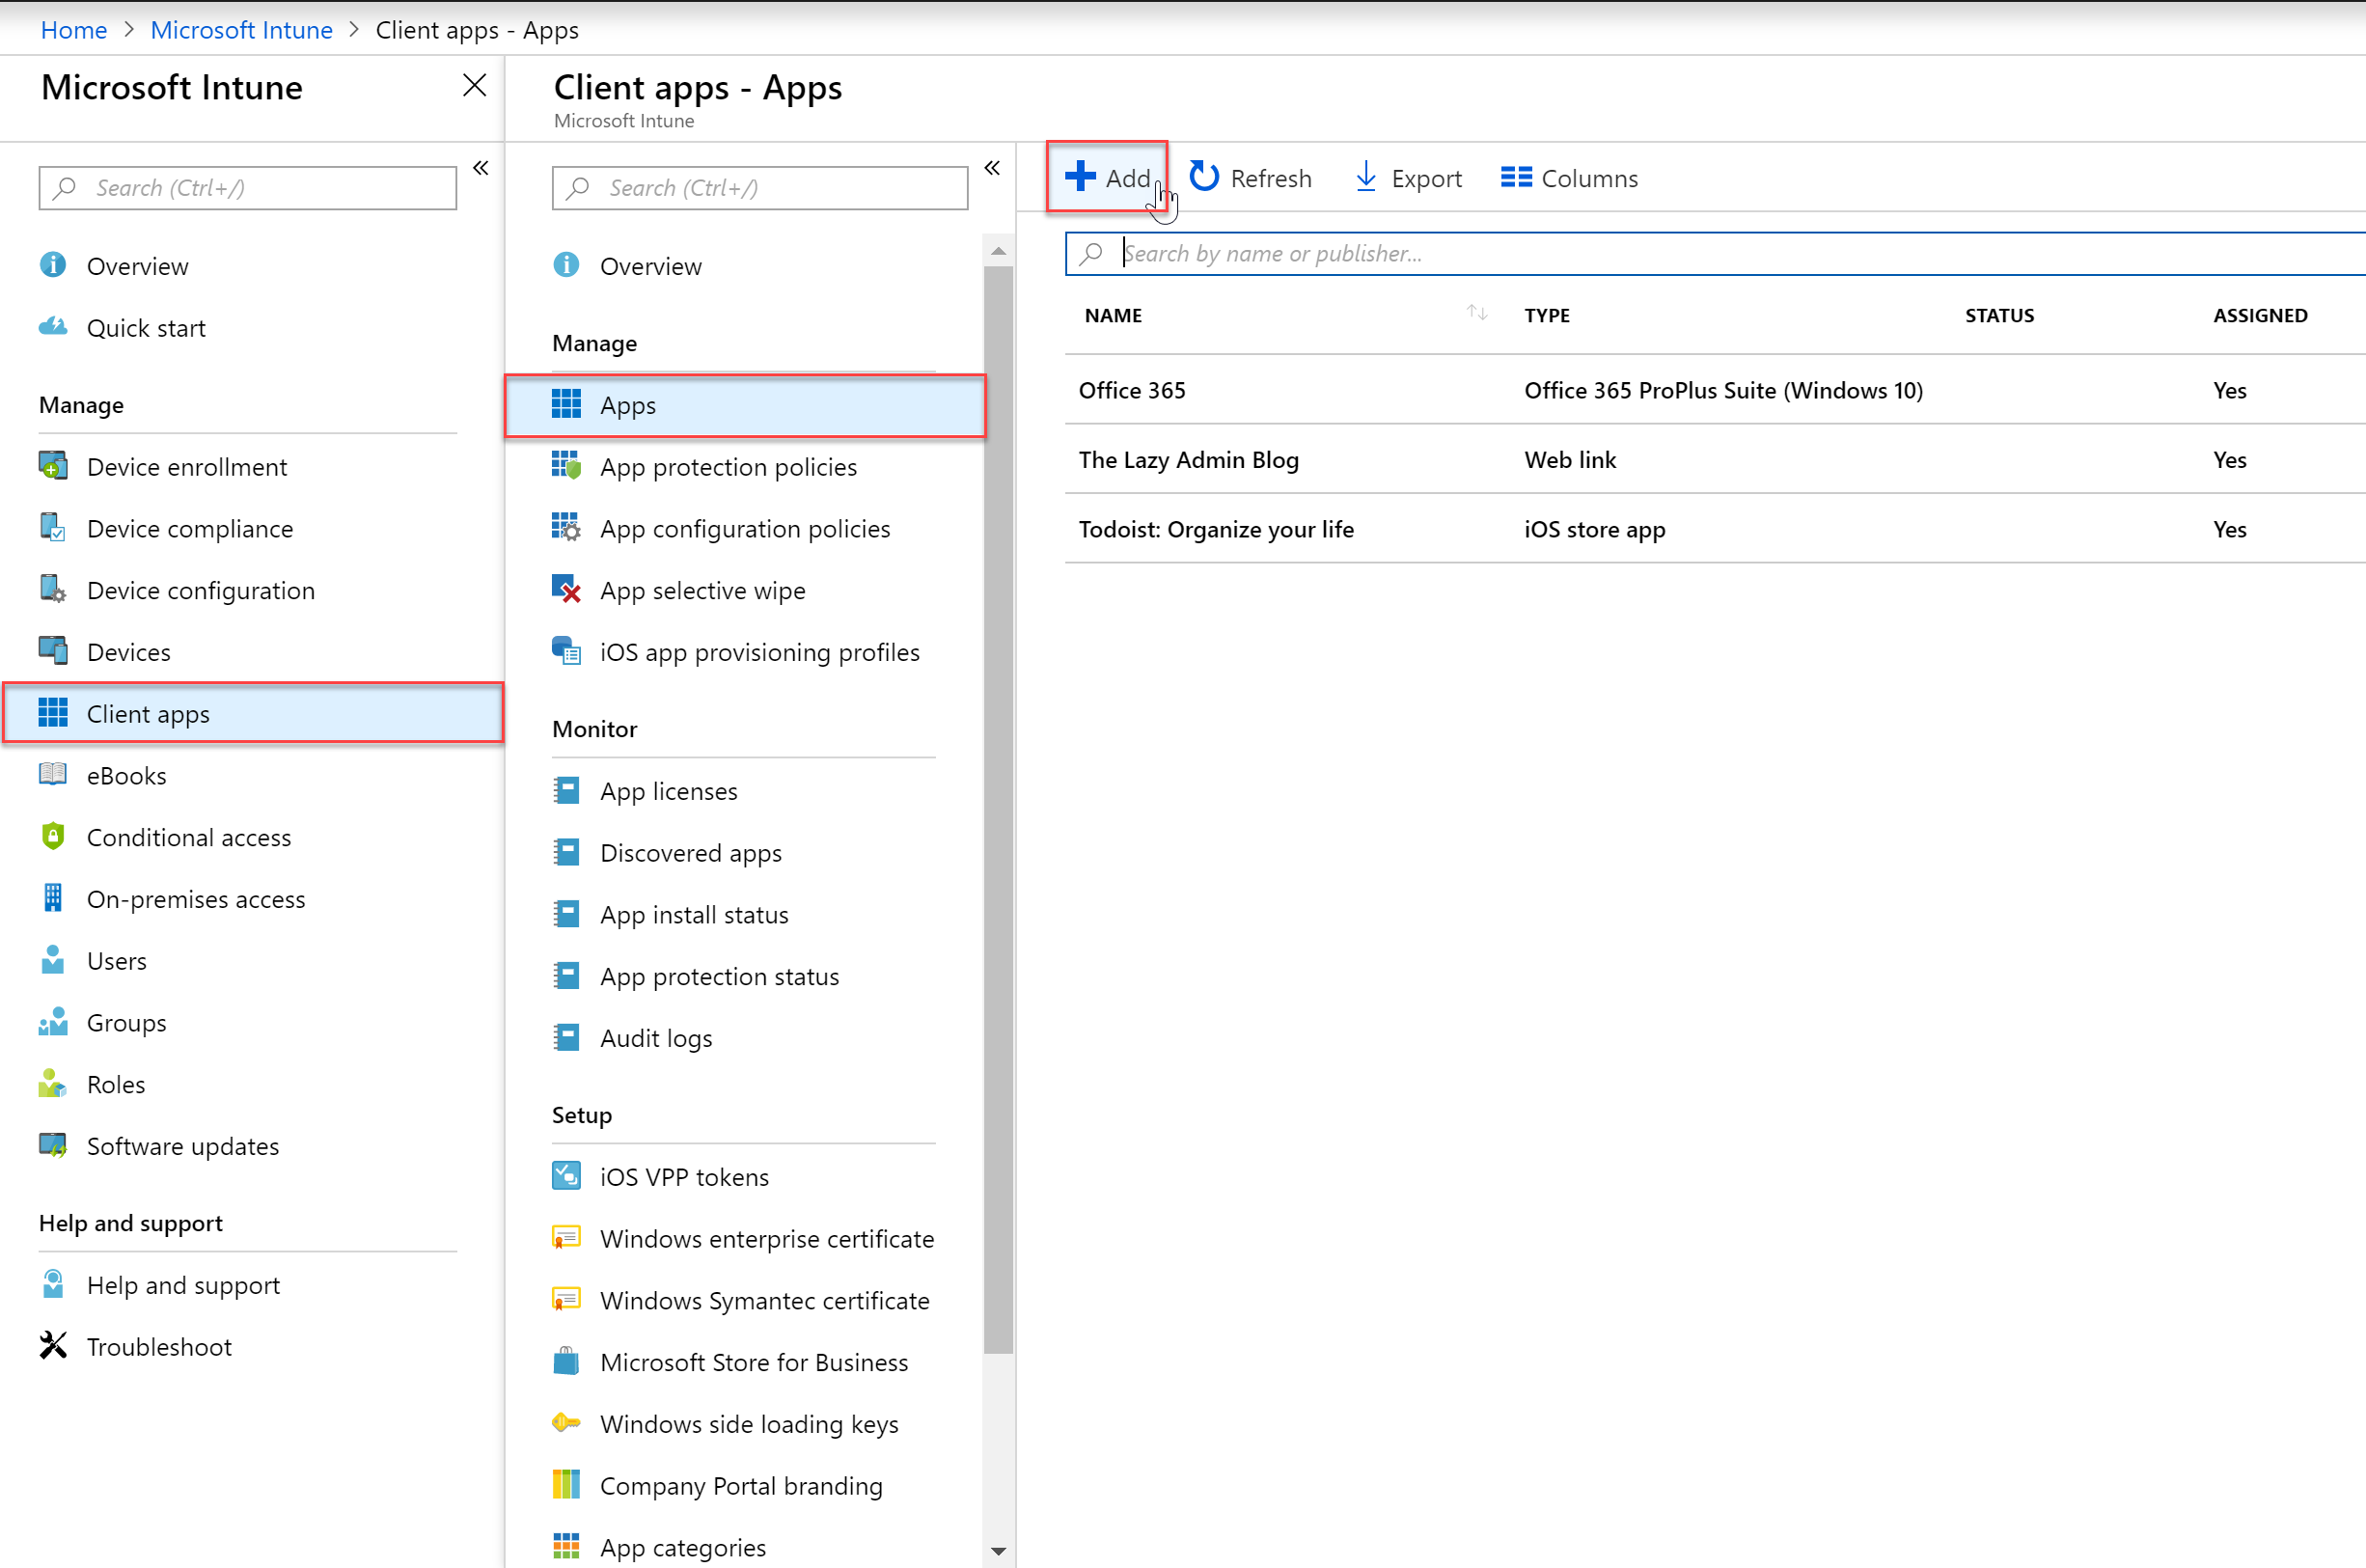
- Expand the Intune blade in the Azure portal and the go to “Client Apps”, “Apps” and then select “Add”
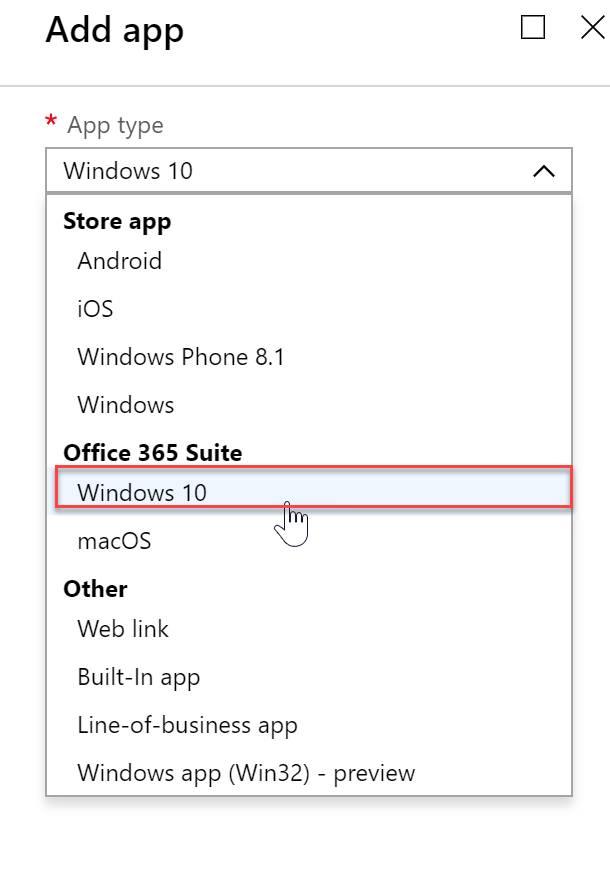
- For my example, I will be deploying Office 365 ProPlus to my devices so I will select Windows 10 under Office 365 Suite
- I will configure the app settings to fit my company needs
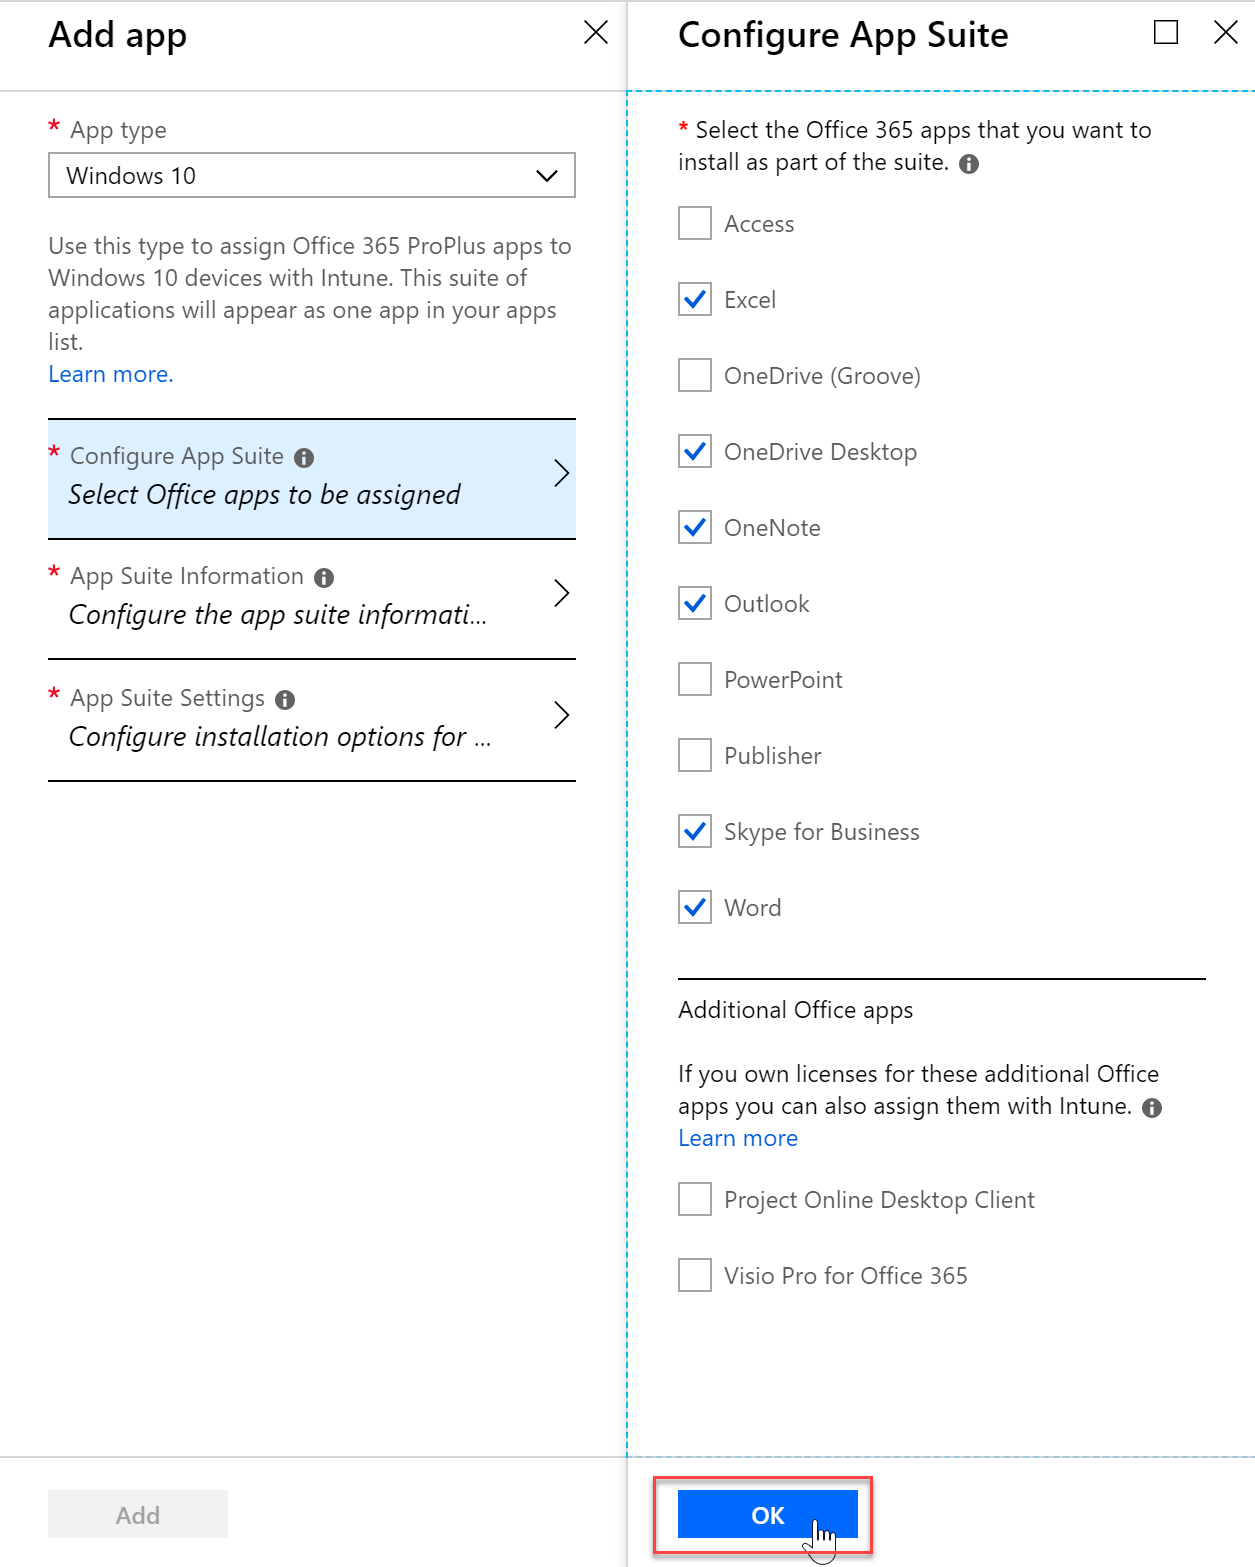
- I can even configure the update channel, EULA and more
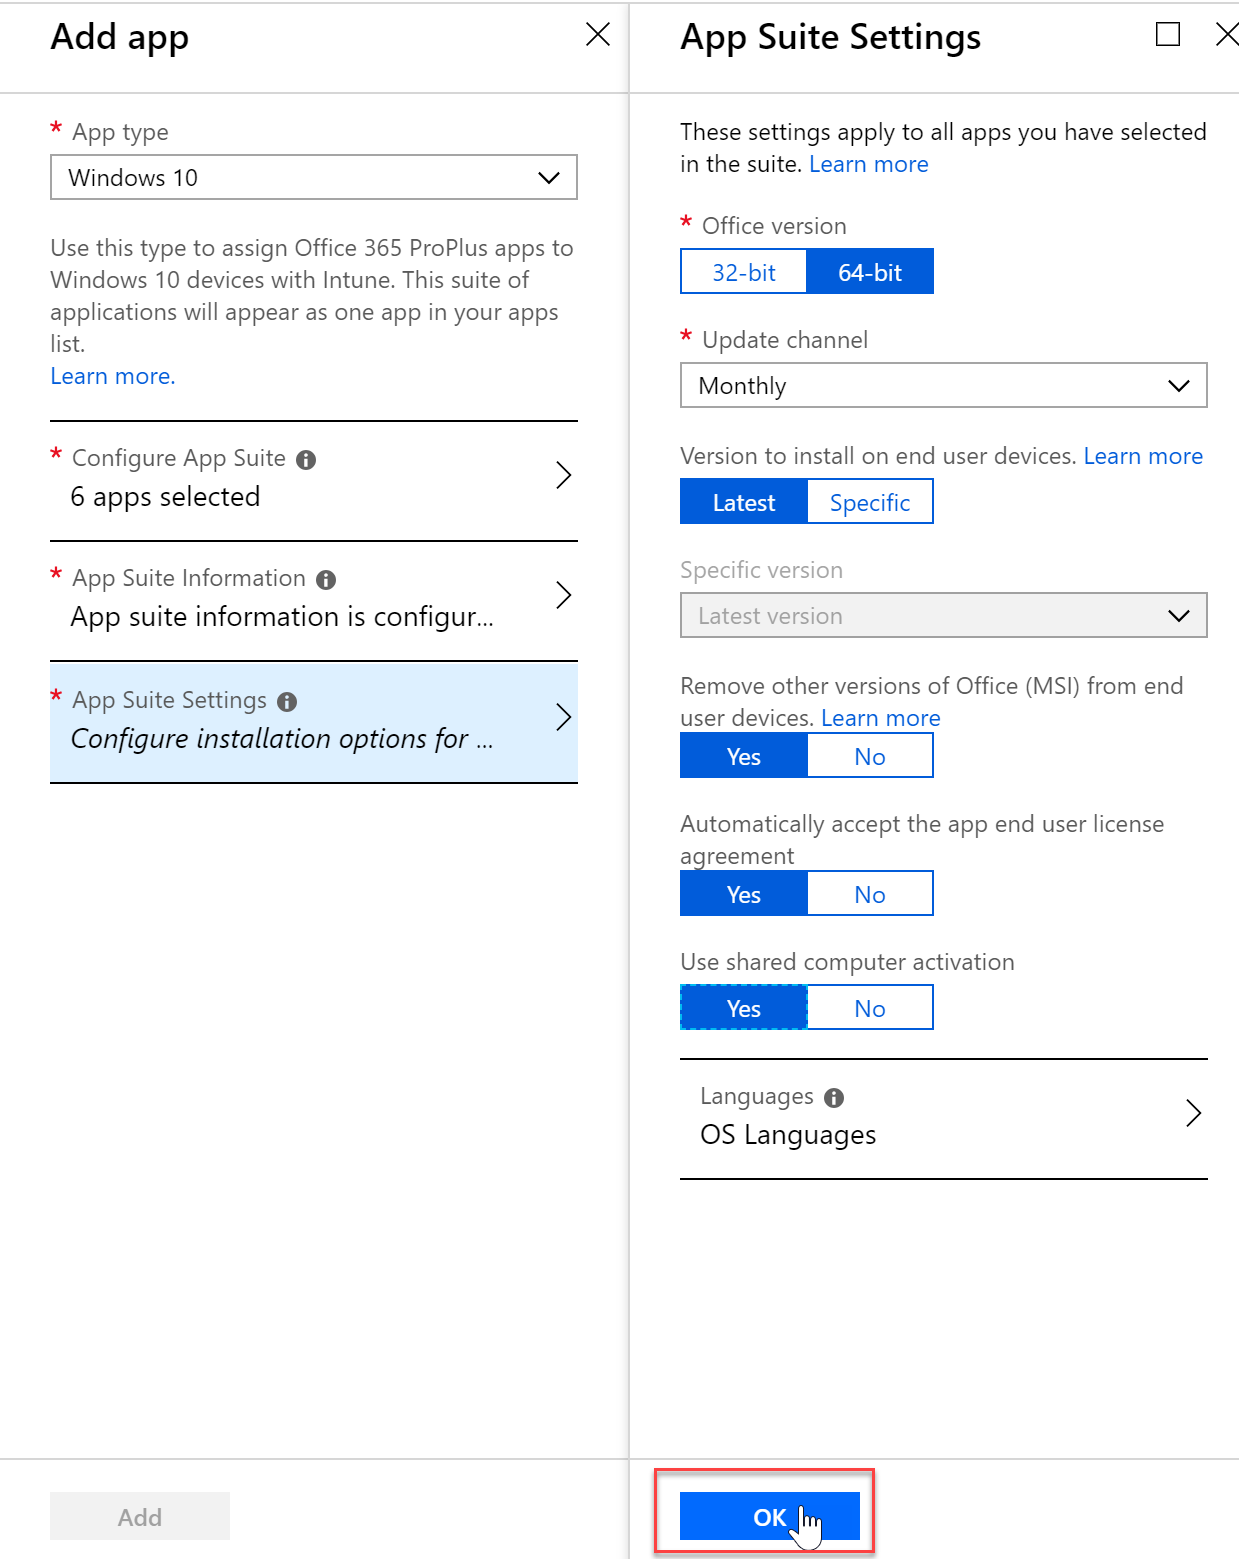
- I will make this application required for all users in my assignments setting

- After a little bit I can see that Office is installing on my end user machine in Task Manager

- If I had not made the app required and just made it available, end users could choose to install it from the Company Portal
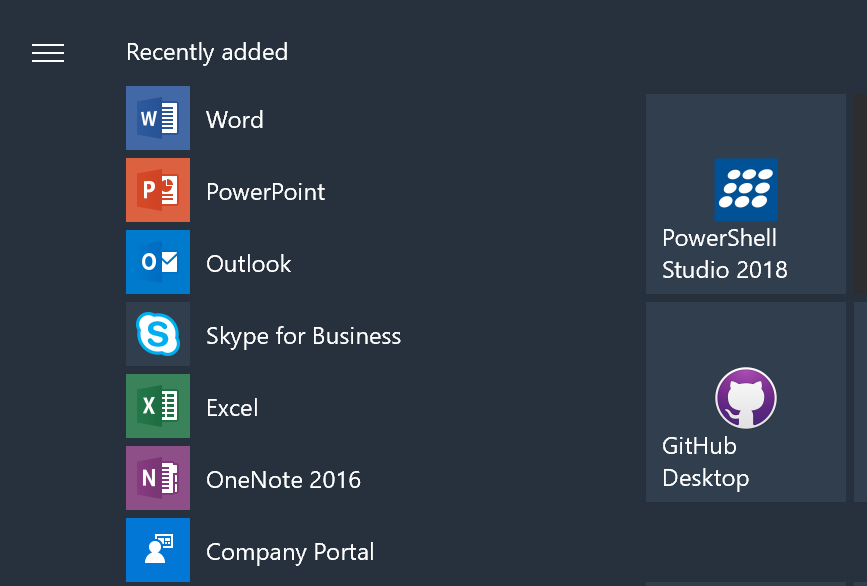
- Once the install is complete I can check the start menu to see all of my newly installed applications
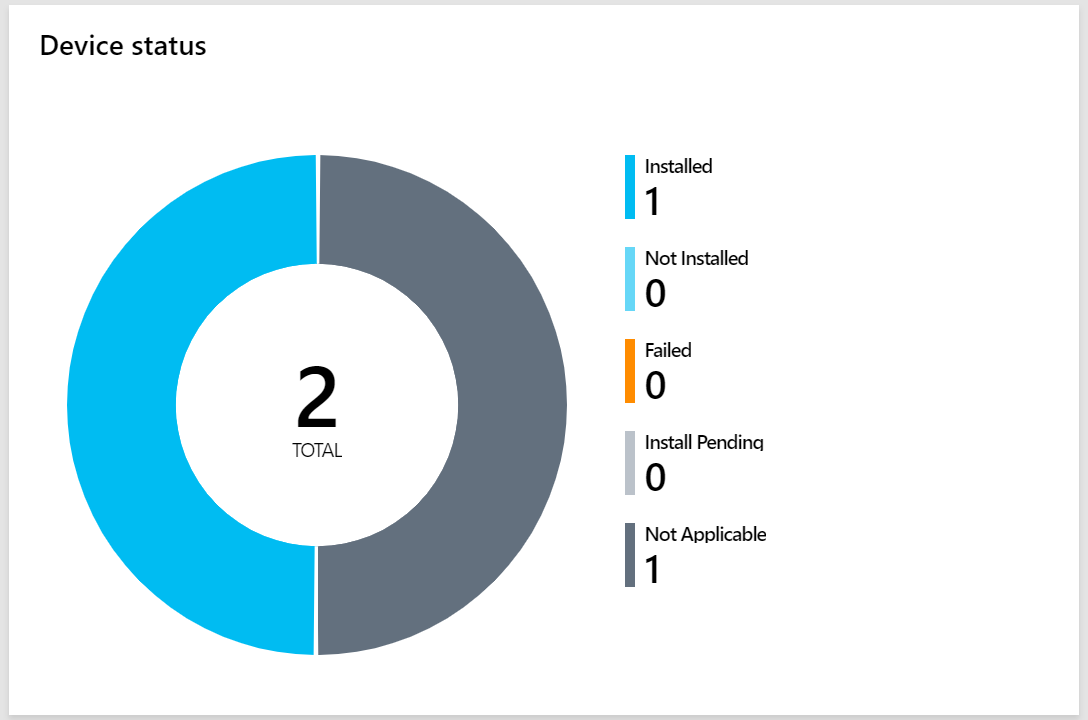
- In the Intune portal under my applications, I can see that I have Office 365 ProPlus successfully installed on 1 device, and not applicable on 1 device (iOS)

My name is Bradley Wyatt; I am a 6x Dual-Microsoft Most Valuable Professional (MVP) in Microsoft Azure and Microsoft 365. I have given talks at many different conferences, user groups, and companies throughout the United States, ranging from PowerShell to DevOps Security best practices, and I am the 2022 North American Outstanding Contribution to the Microsoft Community winner.
21 thoughts on “Configure and Deploy Intune MDM”
Great stuff man. Really solid, thorough work.
Great blog. Thank you.
Defenitly bookmarking this one! Good guide, very clear.
Great resource.
Very professional and details resource……!
Very great walkthrough! Nice work.
If I got 100 Azure AD registered devices (windows 10), cant they be enrolled to MDM automatically?
Enrolling devices as you do in the guide, will only Azure AD register the devices, right – and not Azure AD Join.
The legacy Intune portal is now defunct. Any chance of updating this article?
Yep! will try to update it soon, hard to keep up with MSFT 🙂
How do you get a new laptop to join without making the user an admin? windows 10 always sets the first account as admin.
have you looked into autopilot?
Would you have a guide on Autopilot?
Nice Job. Much simpler than Microsoft docs to just get the basics down.
This is some great information but one concern I have is with the following scenario:
We have users who are office employees only. They should only be accessing e-mail from within the corporate offices. Otherwise, access to E-mail, SharePoint Online and other services where company data is stored should be blocked. I cannot allow these users to enroll a personal device and start accessing e-mail.
The other set of users are the execs, IT and remote sales people. Some of these users brought their own phones into the company, the others had phones issued by IT. I believe I’ve configured this correctly but I need them to be able to enroll two devices: their phone and their laptop. Additional devices would require approval and we would need to have a policy/device restriction limit for those who might have 3 devices.
Lastly, I need to ensure that mail and SPO are accessed through Outlook for iOS and the SharePoint apps. I don’t want the users to download or have the ability to download Outlook for iOS on their own and configure it. I want the application to be provisioned so that if the device is marked as non-compliant, access to mail, SPO, onedrive, etc is blocked.
I know the first two should be possible but I’m not sure how to achieve the last part. I believe I need at least 3 conditional access policies to accommodate for everything that I want to do but there could be more.
Thanks for the super helpful post though! This helped me get going late last year.
very nice! thank you!
Great post!! Thank you!!
Very helpful information. I know this took a lot of work and I really appreciate you taking the time!
any chance we can get an updated guide since intune is gone now.
Very helpful information. and I really appreciate you taking the time!
your guide really helped me to get the basics of my intune setup down – thank you so much! Much easier to read & understand than msft docs.